Affiliate links on Android Authority may earn us a commission. Learn more.
Use Tasker to throttle your processor, root required - Android customization
I hope you are as excited as we are to continue with Tasker and root on our Android customization series. This week we are going the ultimate distance to save some battery life, let’s look at throttling your processor.
Before we begin
Disclaimer: Please take note that messing the frequencies of your processor is a bit of a risky move. While we plan to throttle down, it is possible to overclock your CPU as well, which can cause overheating, which may result in a permanent physical failure of your chipset. Basically, a lack of care can easily brick your device, be careful.
Disclaimer part 2: The process looks a little funny sometimes and will have different results for most Kernels (and ROMs) out there. In our case, our rooted stock Android is a quad core device, while Tasker appears to give controls for each core individually, the option for ‘Core 0’ actually controls all of the cores together. You will need to play around to see if your device will even work, never mind how it works.
Throttle your processor to save battery
I fully admit that more than half of you that arrive here will be more interested in overclocking than reducing the clock speed of your processor, I’ll say that the process is pretty much the same, but I will not promote overclocking (today,) you’re on your own.
There are actually two aspects we are about to take control of, the first will be how your processor operates, then we’ll dive into actual frequencies. Let’s explore before we dive in.

Most Kernels support a handful of CPU powering settings, Tasker will walk you through a half dozen or so, ranging from battery saver up to performance modes. Let me explain these in general terms, save the actual technical info for another day. Each setting controls how active the cores of your CPU are, and when they go to sleep – Performance mode generally keeps the cores up and active at all times while Battery Saver puts as many to sleep as possible and nearly refuses to wake them until it absolutely must.
Like I say, for those in the know, that was not entirely accurate, but I hope it was a good enough explanation for now.
The second part is the actual processor clock speeds. You may have seen that your device has something like a 2.3GHz processor, this number indicates, approximately, the number of operations your CPU can make in a second. This is an optimized number designed to get the most performance without overheating, all while balancing battery life.

Overclocking is the process of boosting the CPU to operate at higher speeds, thus using more battery and generating more heat. We aren’t going there today, instead we want to turn things down. The obvious trade-off is reduced device performance, but your battery life can significantly improve and, if your device ever gets a little warm to the touch, you could eliminate that too.
All of this said, in practice the settings are a little less permanent than they sound. For example, you’ll want to use this Task in conjunction with a Profile that activates only under certain circumstances. Perhaps you want to bump speeds up for a certain app, but throttle way low when the display is off.
That was a lot of theory, let’s fire up Tasker and take a look at things in action.
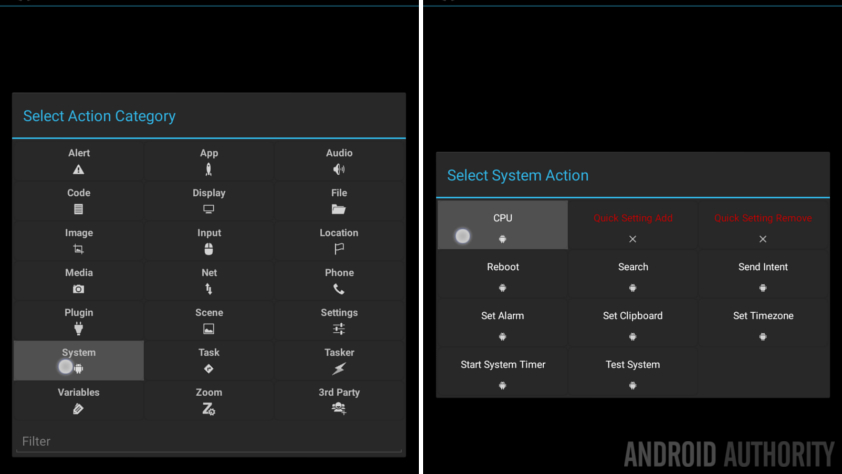
Create a new Task, and hit that “+” button to add your first action.

Select System.
Select CPU.
Now the fun begins. As mentioned, you’ll have to play around to optimize for your needs.
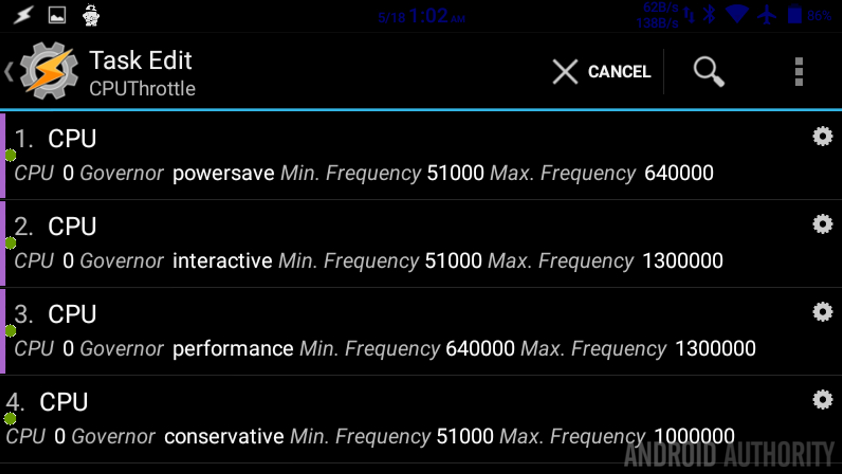
Under Governor, select how you want your CPU to operate, hit that help button for a detailed description of each, but why don’t I just say that you can put your processor to sleep almost entirely using powersave, you can keep it fully powered using performance and then you can play with the few in between.

Now that you have a power level in place, let’s set the frequency. Please note that you can choose which core you are acting upon. Core 0 is your first core so start with that. Your processor may require you to create a setting for each core, or, like my Nexus 7, setting for Core 0 appears to control all of the cores. That makes things easy.
Enough of that, you’ll need to set a min and max value for your processor. Tap the magnifying glass beside each and choose from the available values.
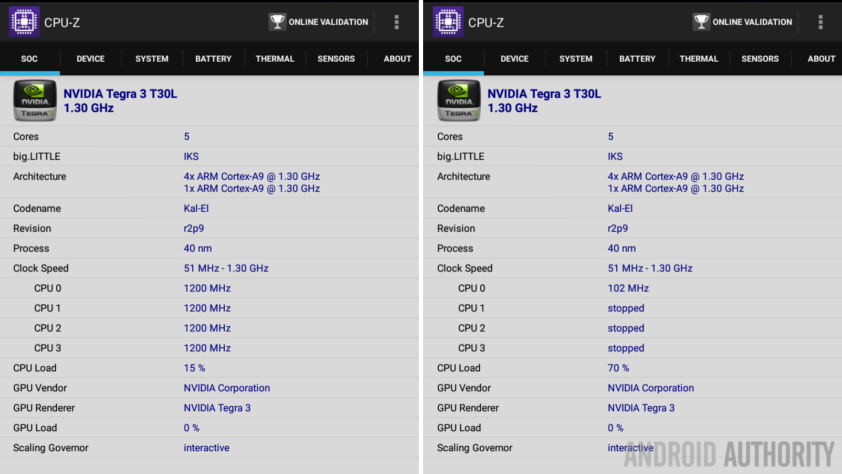
By default, your processor will likely be set to run between the minimum available number you see there, and the max number of your processor. Be sure to use an app like CPU-Z to first identify what the default range is, remember, you are safe to set below your manufacturer set max frequency, but don’t go over unless you’ve done your research on overheating first.
If you want to save some battery, try setting Min to the min value, but then set Max to half or 3/4 the max available value. Don’t be too restrictive here, remember, if you combine a small frequency with an aggressive sleep schedule for your cores, your device performance will suffer. Trust me, I went nuts just to see what would happen. With just one of my 4 cores running, and at the second lowest available frequency, I eventually just pulled the battery to restart the device and get back to default settings. One slow core cannot keep this device running.
On the flip side, if you are looking to boost performance a little, at the cost of battery life, set the min value to a mid-range level. This also introduces extra wear and tear on your processor, preventing it from getting some healthy sleep time, but hey, if it’s just for an app or two, that boost might just be what you need.

Tap that system Back button to save and exit.
I won’t walk you through it, but go ahead into your Profiles tab and create the triggers you want to use for these new processor settings. As I’ve mentioned above, higher performance when certain apps are running, and dramatically reduced performance when the display is off are good places to start.
I can’t say this enough, keep playing with the settings. Each device, each processor, will respond differently to these tweaks, and not all systems will even work.

What’s next
Tasker is one of those apps that can do so very much, as you’ve seen over the years it is able to control most any setting on your device, but let’s be fair, it’s not specifically designed to control things like your CPU frequency or other such items generally reserved for tweakers of kernels and ROMs. If your developer recommends a different tool for this project, please give it a look before trying Tasker.
Next week
Did you hear that IF by IFTTT has new tools for Android? We did, we haven’t really even read what they are yet, but we’re excited to explore them. Join us on our Android customization series for a look at the new features in IF by IFTTT. We will check them out before we start writing, if they are junk, I am sorry, we’ll skip them and do something else in stead. Until then, enjoy your week.
Have you seen great success or failure with CPU frequency adjustments on your Android phone or tablet? Did you use Tasker or another tool to accomplish your needs?
Need more Android customization projects?