Affiliate links on Android Authority may earn us a commission. Learn more.
What is Apple Time Machine and how to use it to back up your Mac
Published onJuly 11, 2022
As we store more and more data on our computers, the need for regular backups is essential in case of catastrophes. There are many backup options, including cloud storage, removable hard drives, NAS drives, and more, but without an automated backup system on your actual computer, getting the files over to the backup source relies on you remembering to do it. If you need an automated backup solution for your Mac computer, look no further than the built-in Apple Time Machine.
Read more: How to upload photos to iCloud to sync across devices
QUICK ANSWER
To set up Time Machine, go to System Preferences on your Mac and click Time Machine. Select your backup disk, decide whether or not to encrypt it, and follow the on-screen prompts. To restore from a Time Machine backup, open the Time Machine app in Applications and choose the backup you want to roll back to.
JUMP TO KEY SECTIONS
What is Apple Time Machine?

Apple Time Machine backs up the files on your Mac that weren’t part of the original macOS installation, such as apps, music, photos, and documents. Backups are performed hourly, daily, and weekly. It also saves hourly snapshots you can use to recover previous versions of files, even if your backup disk is not attached. They are stored on the same disk as the original files, and saved for up to 24 hours or until space is needed on the disk. Local snapshots are only created on disks using the Apple File System (APFS).
How to use Apple Time Machine to back up your Mac
Apple Time Machine can be used for removable backup drives, NAS drives, and (now discontinued) AirPort products.
First, go to Apple’s System Preferences and click Time Machine.
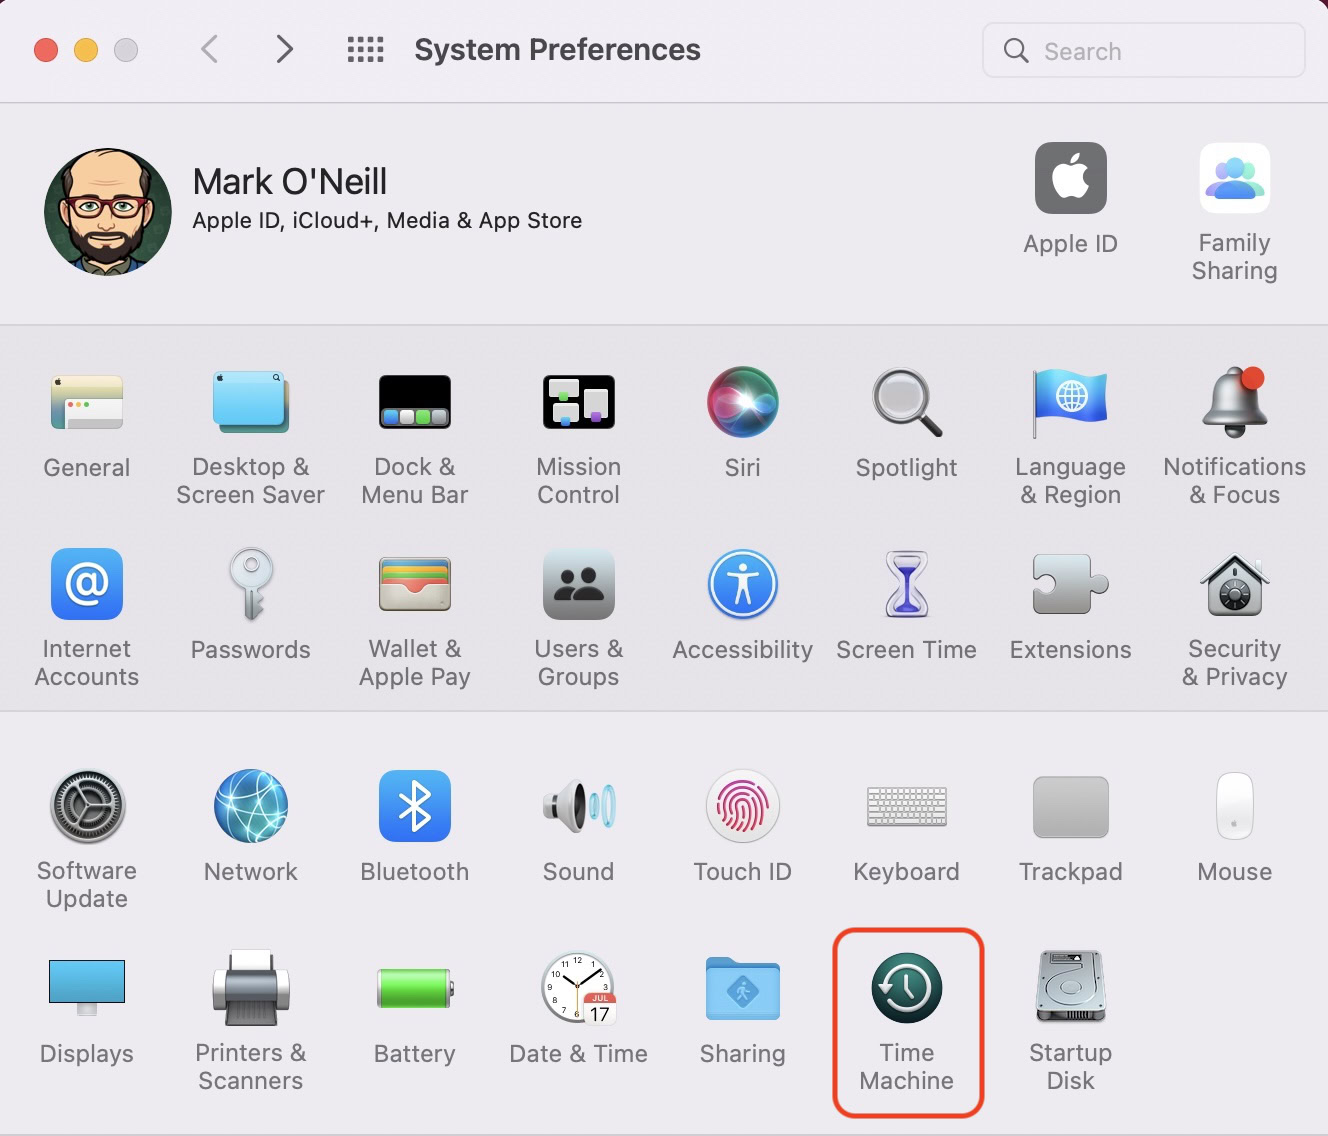
This opens up Apple Time Machine’s preferences and set-up pane.
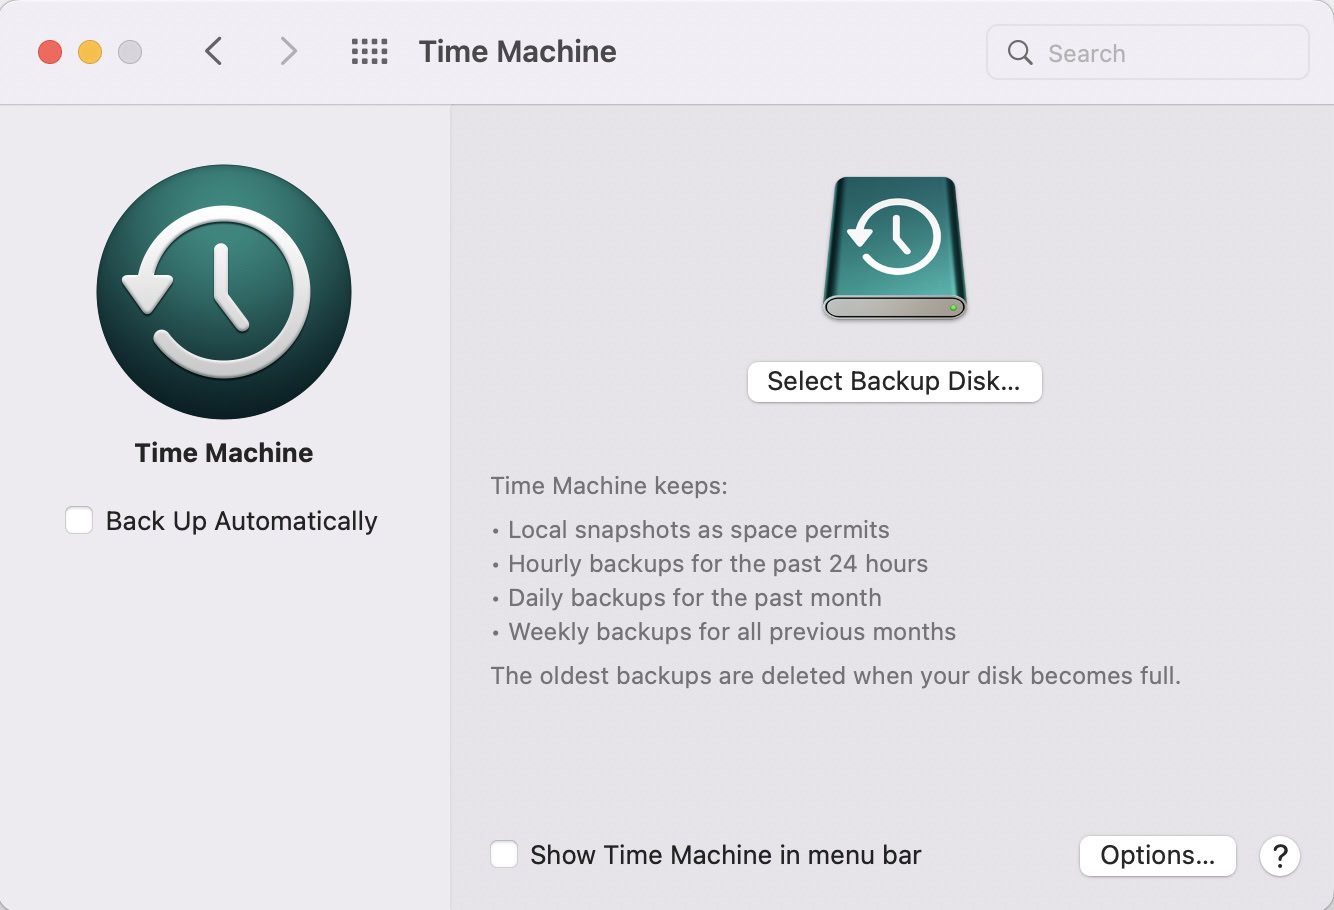
The first thing to do is click Options in the bottom right-hand corner. This is where you will see the total size of the backup, so you will have to figure out if you have a backup source big enough. If you don’t — or you don’t need everything backed up — you can add unnecessary files, apps, and folders to an exclusion list.
The exclusion list
As you add items to the exclusion list, the total backup size will gradually come down. Click the + icon and navigate to the file, folder, or app in question. You should also indicate whether backups should be done when you’re using battery power.
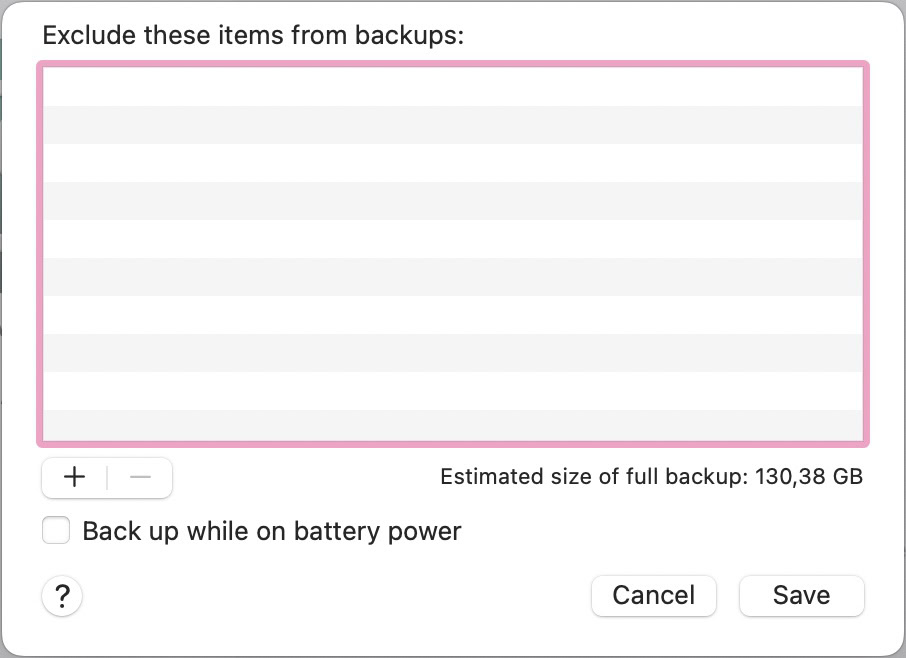
Once you’ve got the backup size down to the size you want it, and the excluded files have all been listed, click the Save button and exit that window. It’s now time to select the backup location. Click Select Backup Disk.
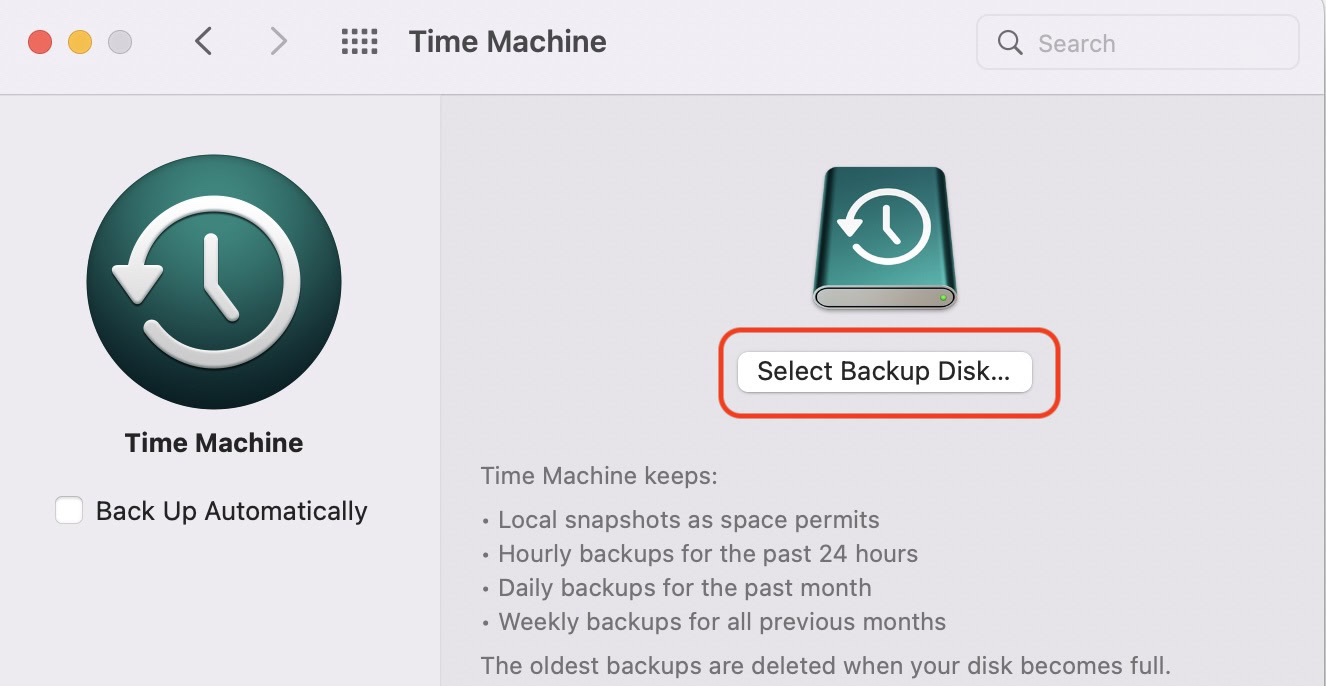
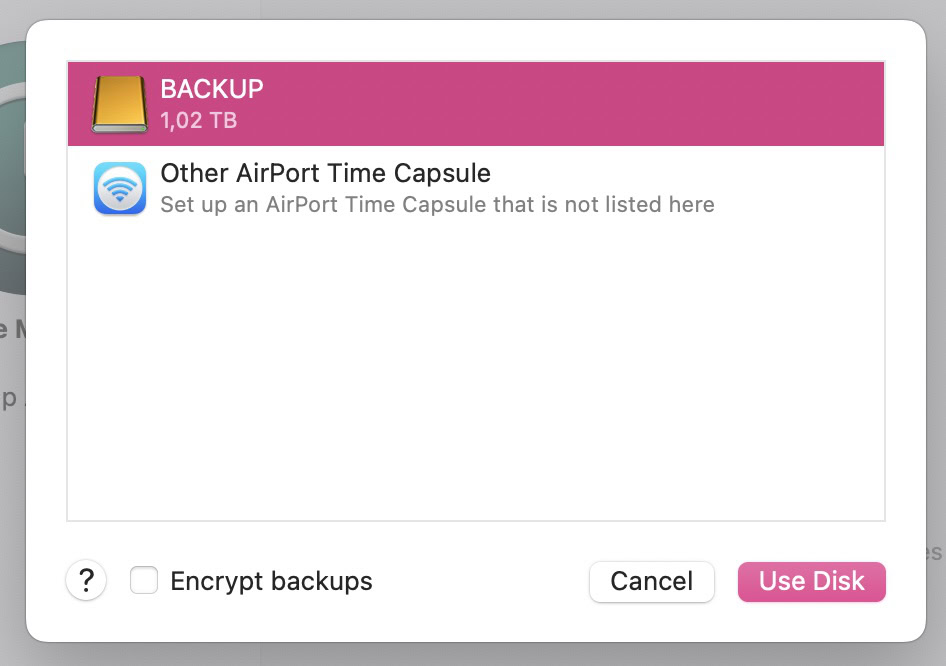
Make sure your backup source is plugged in, whether that is a removable drive, a NAS drive, or an AirPort product. Time Machine will then detect it. Select it. It is recommended that you then tick Encrypt backups.
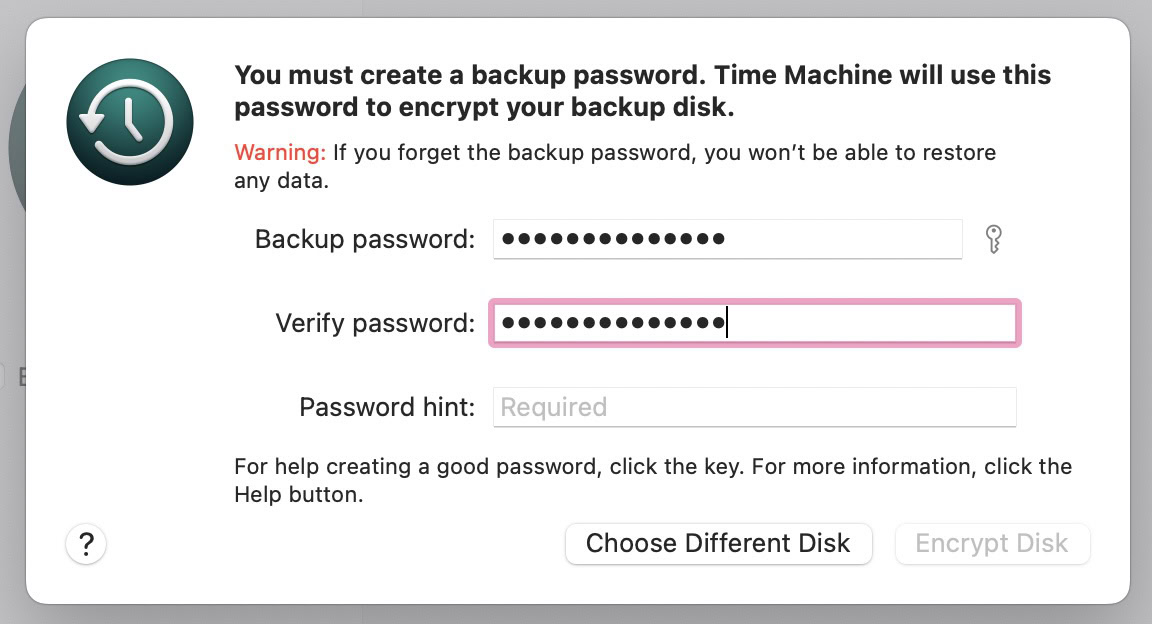
Type in your desired backup password and again to verify it. Remember that if you forget the password, your backups will not be accessible, so choose a password wisely. You must also add a Password hint. Make it helpful to you but not too helpful to anyone reading it. Then click Encrypt Disk.
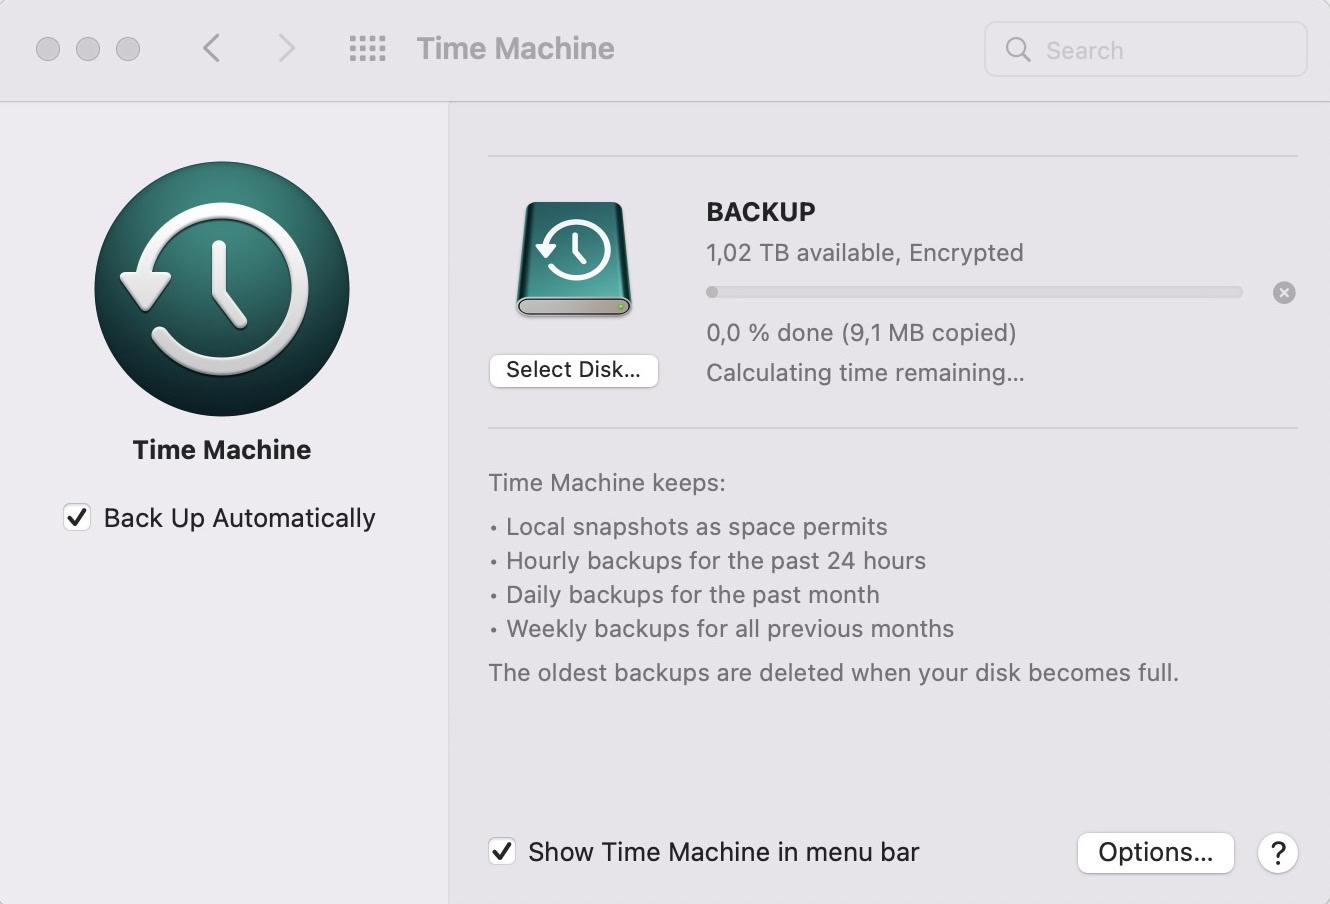
The first backup that Apple Time Machine ever does will obviously be the biggest one, and, therefore, the longest and the slowest. If you have over 100GB of data on your Mac — which is very possible these days — the initial backup is going to take many hours, if not an entire day. It will all depend on the speed of your Mac and your backup source.
Your machine will most definitely slow down to a crawl and even freeze once or twice, requiring a complete system reboot. The lesson here is to leave your computer well alone and let it do the backup.
Read more: How to backup Windows 11
FAQs
When Apple discontinued the AirPort product line, many people thought it was the end for Time Machine. But Apple is still supporting it. Saying that, there have been no substantial updates or improvements to Time Machine for quite some time. Apple may just feel though that none are needed.
Yes, see the article above for details.
No, Apple does not allow this.
The first Time Machine backup includes everything on your Mac. After that, it only finds and saves new and modified files. As your backup disk fills up, Time Machine deletes older backups to make room for new ones.
Since a Time Machine backup captures your Mac’s files and daily state, you can set up a new Mac with that day’s backup.