Affiliate links on Android Authority may earn us a commission. Learn more.
How to backup Windows 11
Published onMay 4, 2022
Backups can be rather helpful, especially if you work with important data and can’t afford to lose any of it. Windows 11 lets you back up your system and restore it as-is. You’ll need an external drive to do it, and the process takes some patience. However, it’s rather easy to do it yourself. Here’s how to backup Windows 11 and restore it.
Read more: The best external hard drives you can buy
QUICK ANSWER
To backup Windows 11, use the System Image Backup option in File History under the System and Security settings in Control Panel. You can restore the backup using the system image recovery in the Windows 11 installer repair options.
JUMP TO KEY SECTIONS
How to create a backup in Windows 11
For the backup here, we will use Windows 11’s built-in functionality. There are also a few third-party options, but none work as well as the native one.
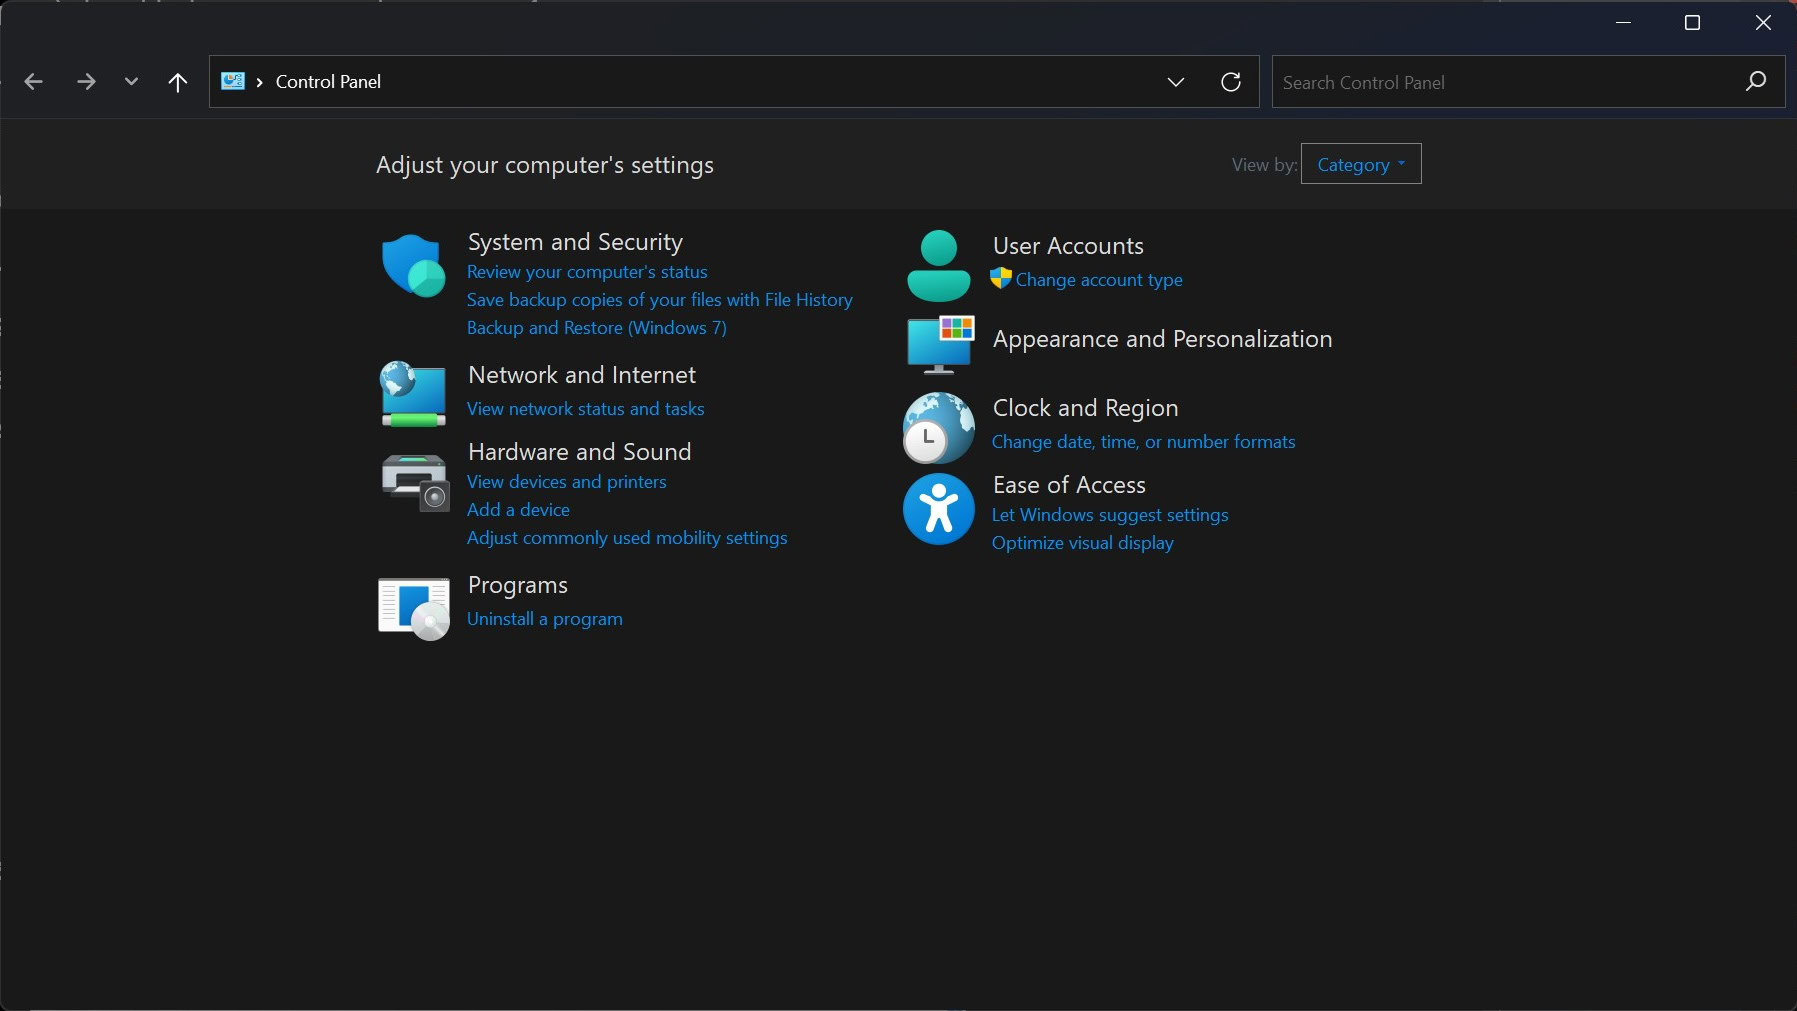
Open Control Panel by searching for it. In Control Panel, click System and Security.
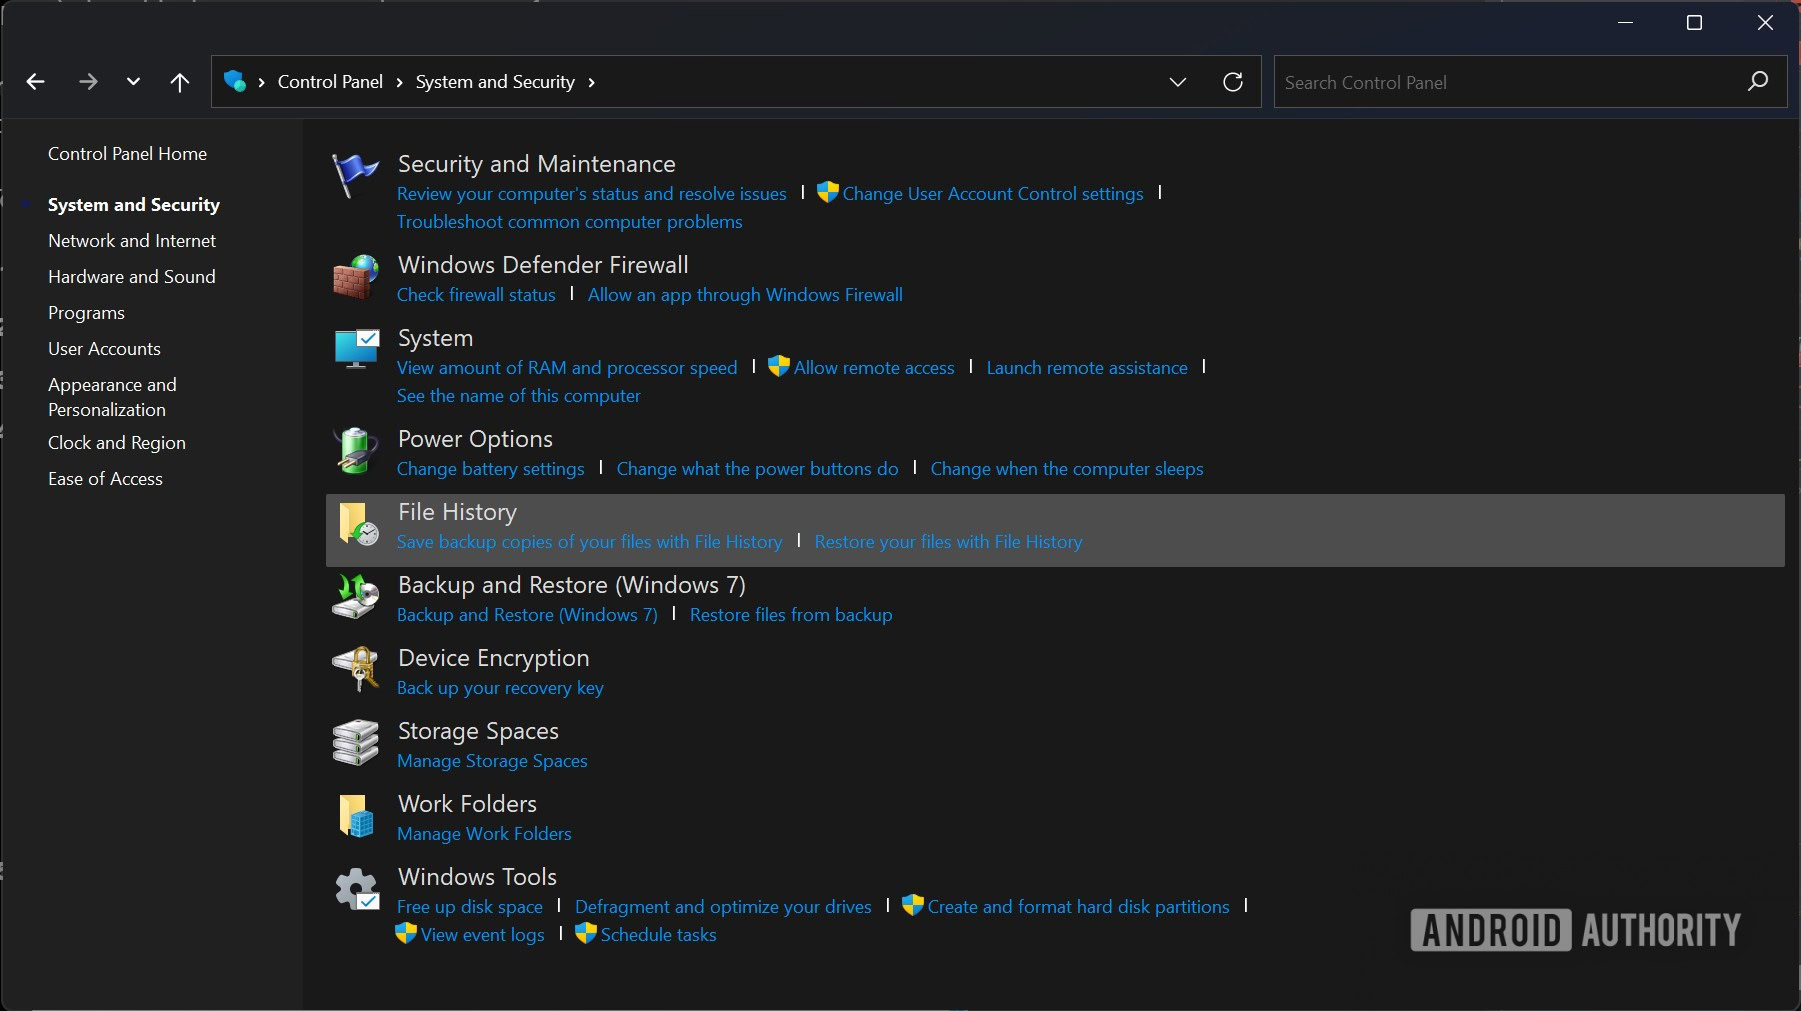
Locate and click the File History tab.
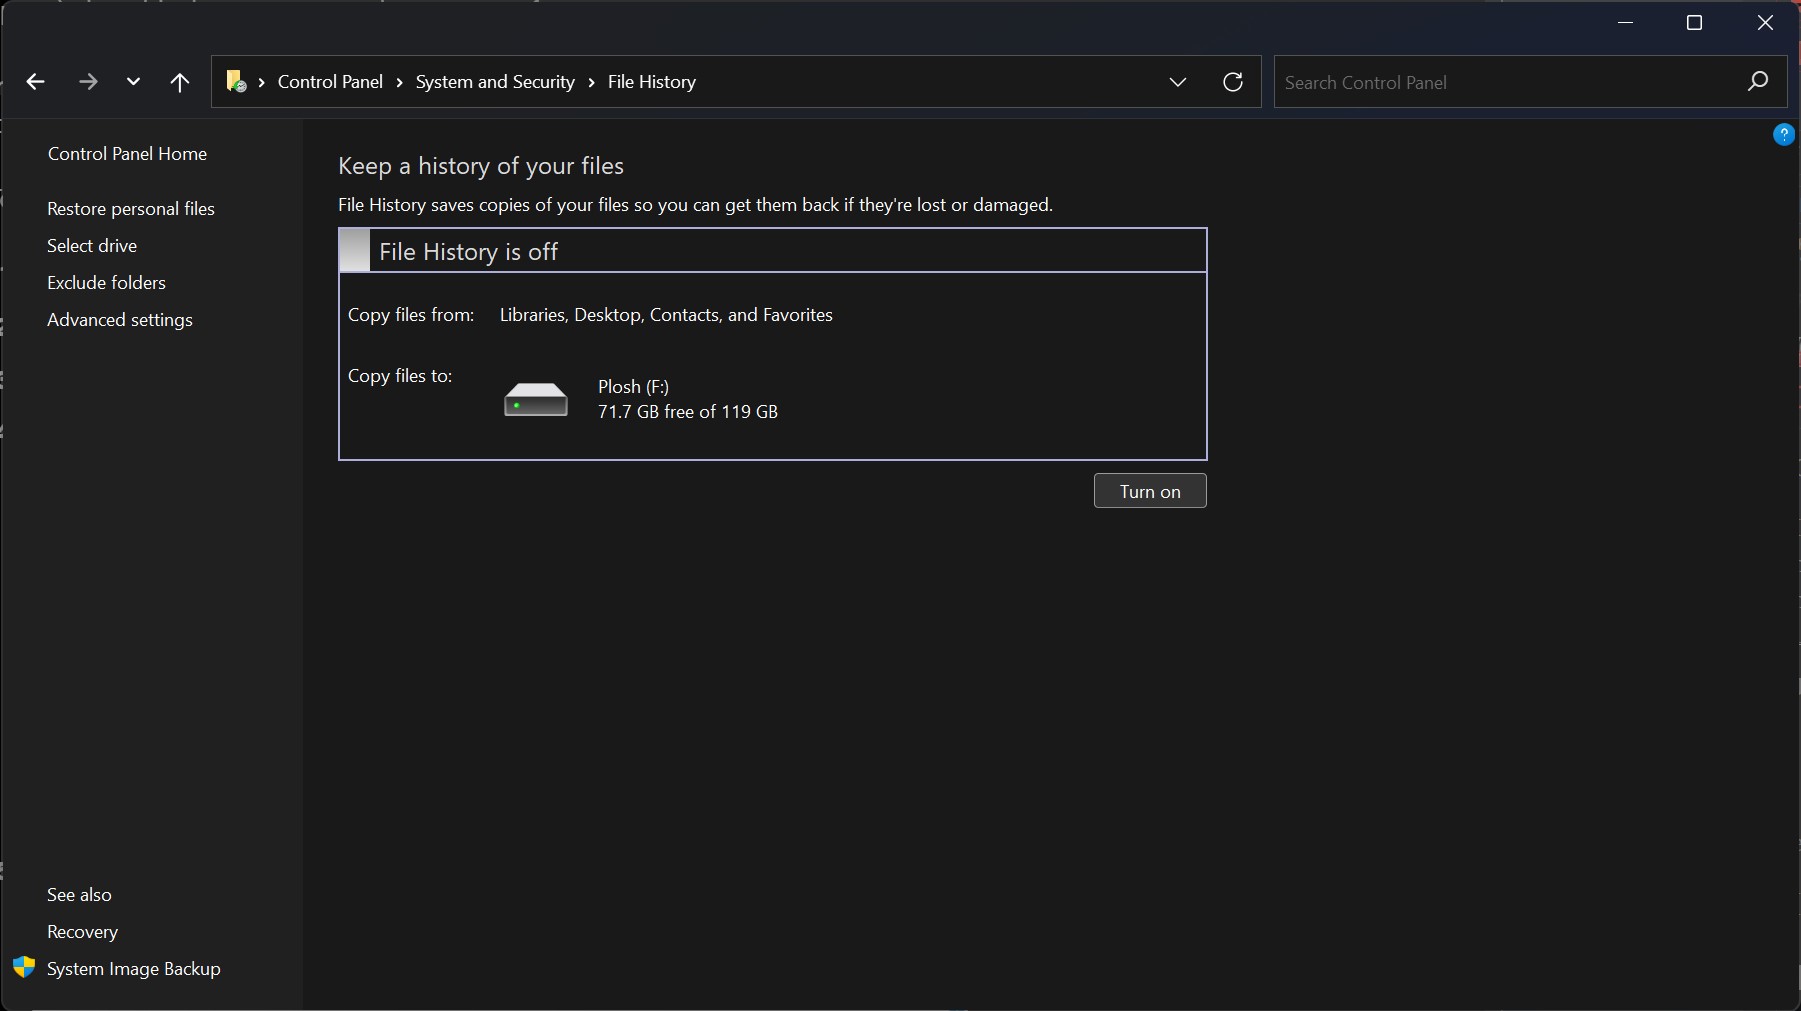
Click the System Image Backup option located at the bottom of the left pane.
A new window will open. In the left pane, click the Create a system image option.
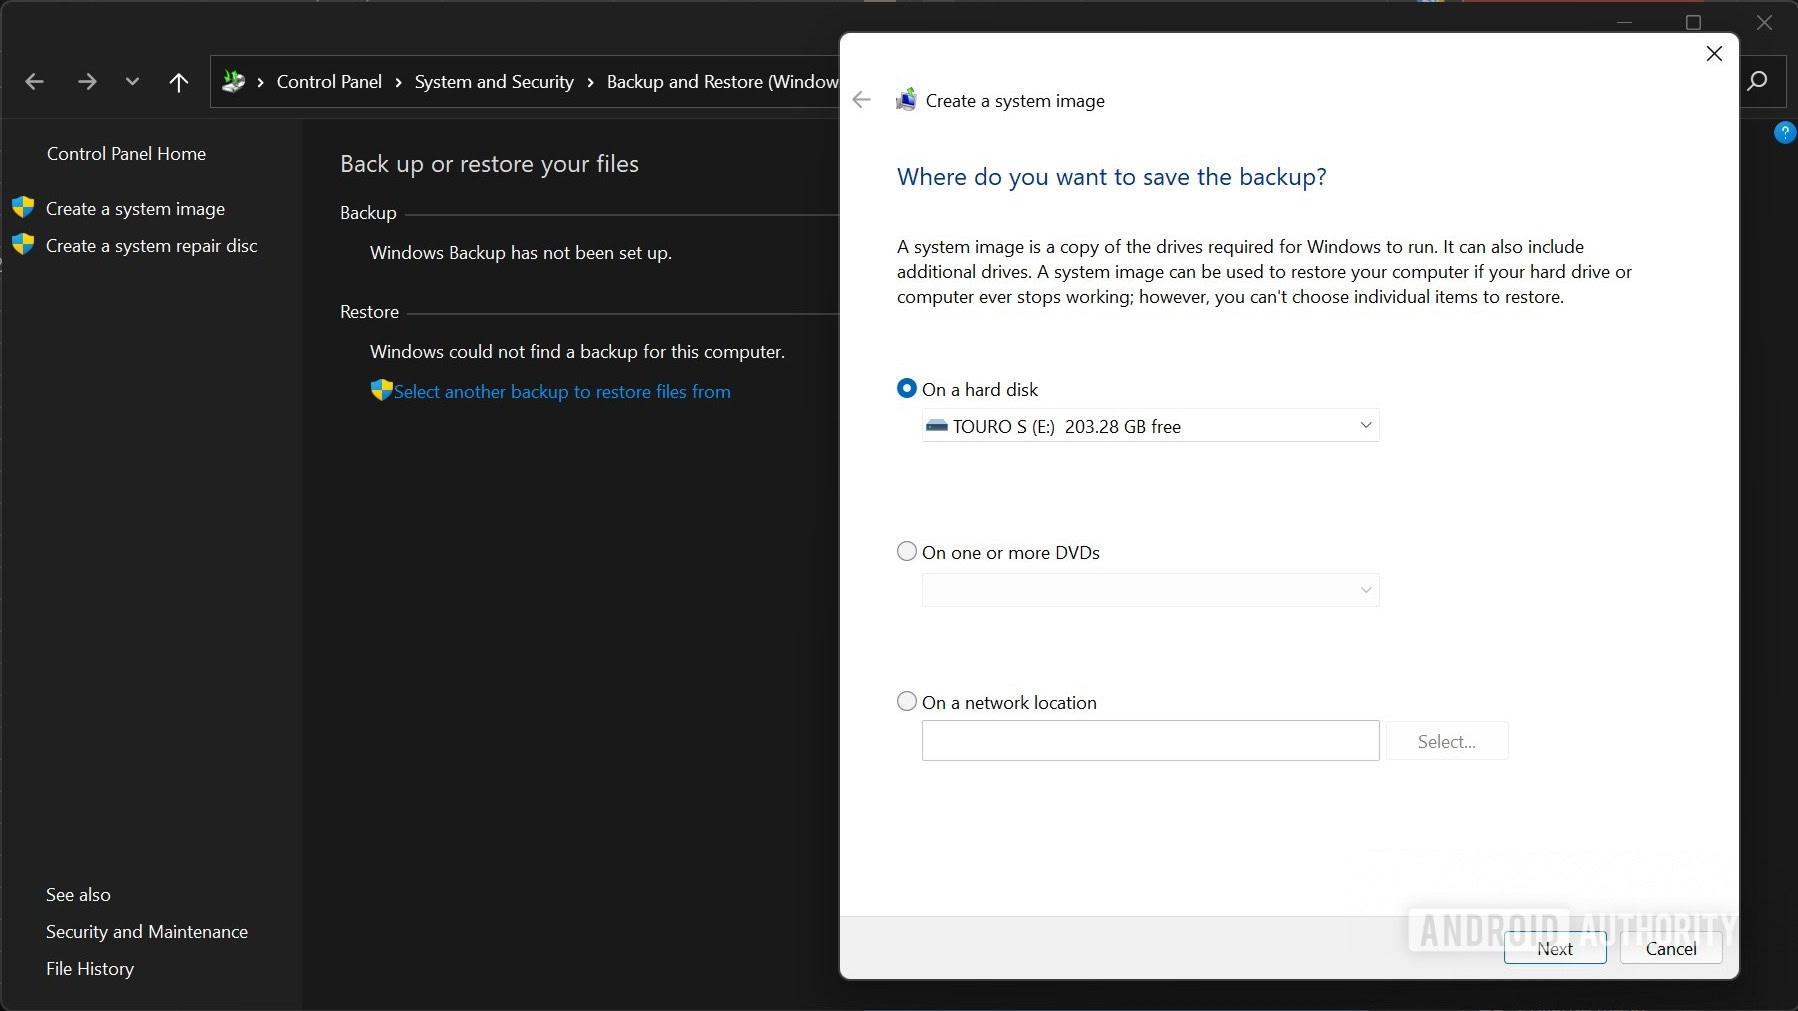
The system image creation window will pop up. Click the On a hard disk option. Click the drop-down menu right below it, and select the disk you would like to save the backup to. This should preferably be an external hard disk drive connected to your PC. Once selected, click Next.
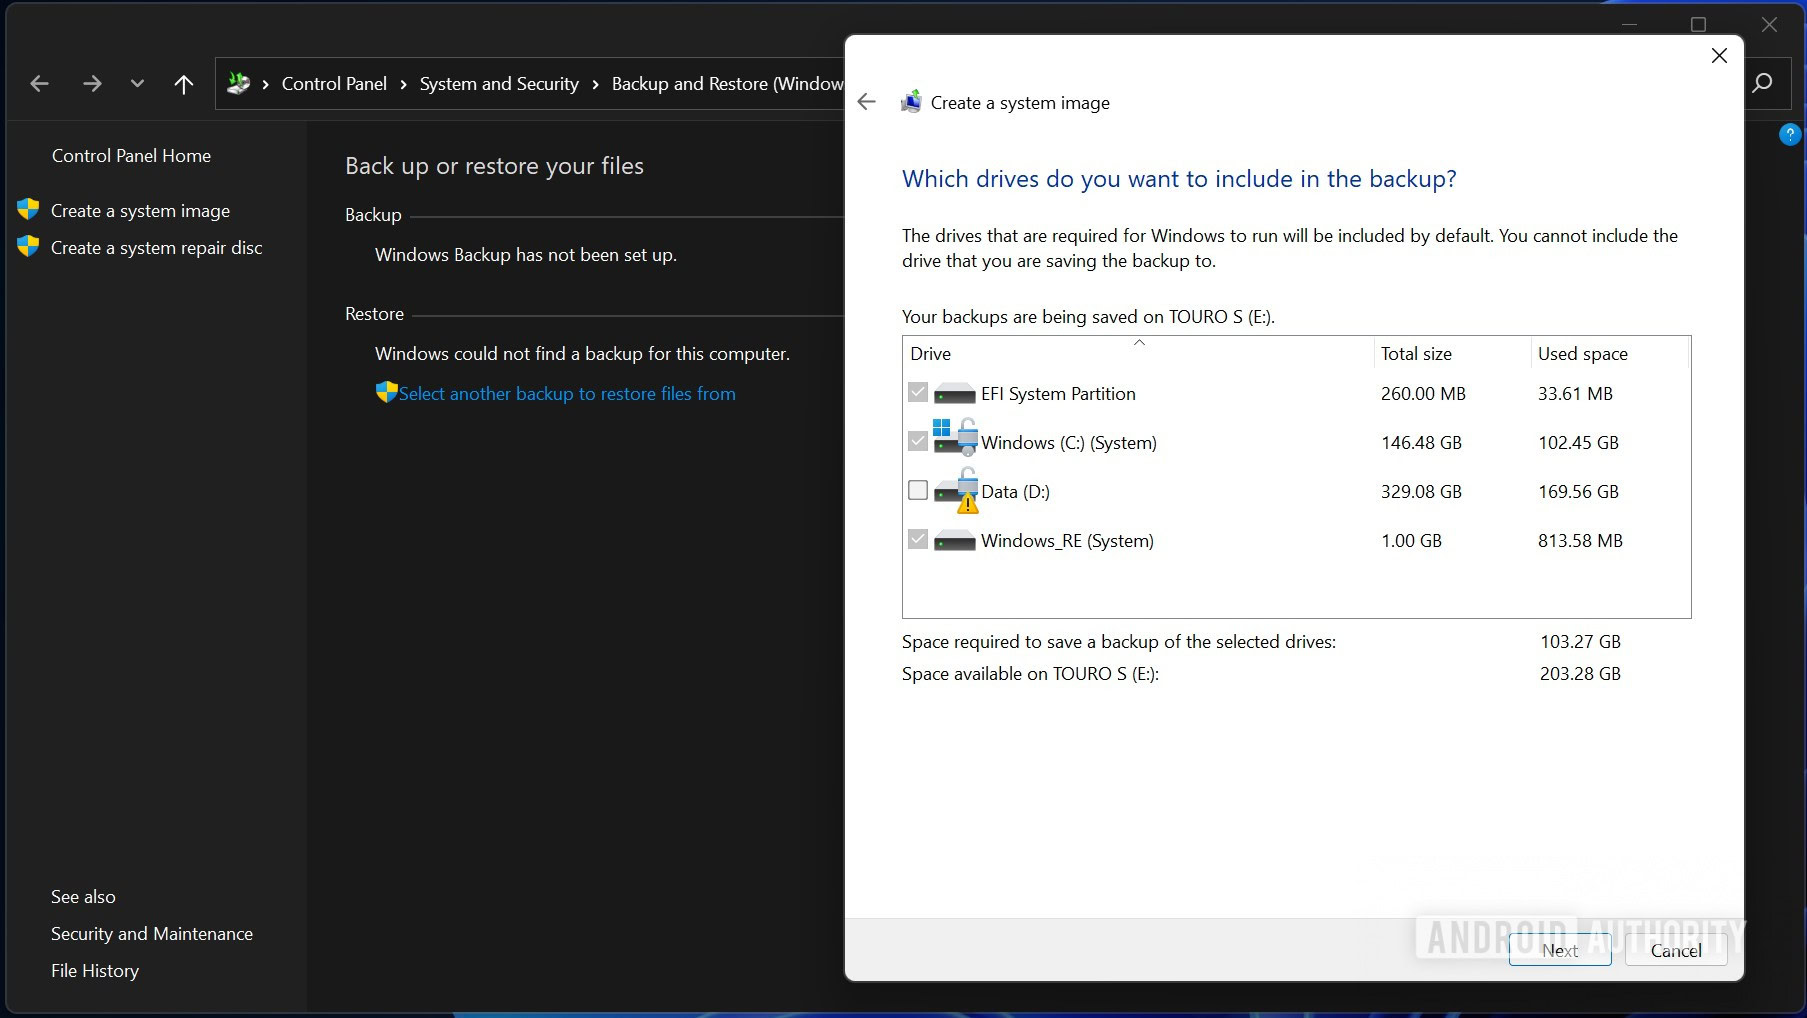
If you want to back up any other partitions or disks, select them by clicking the checkboxes. Click Next to continue. If you get an encryption warning, click OK.
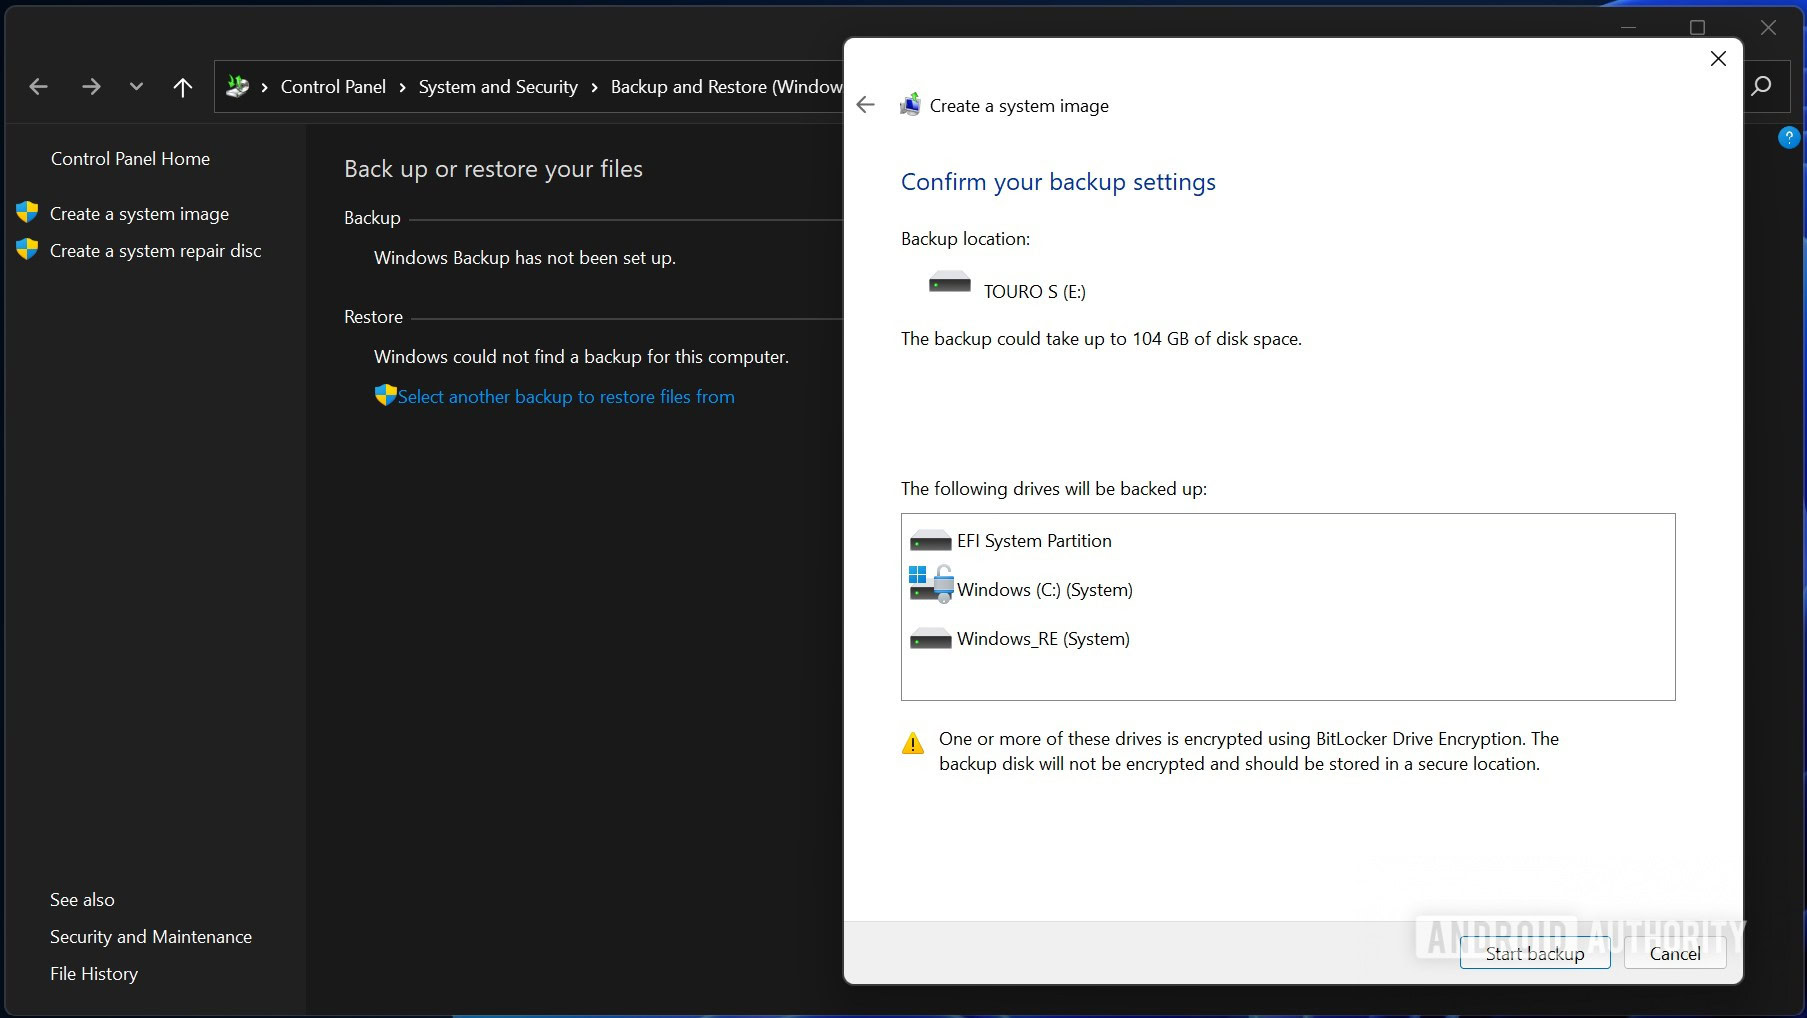
Click the Start backup button.
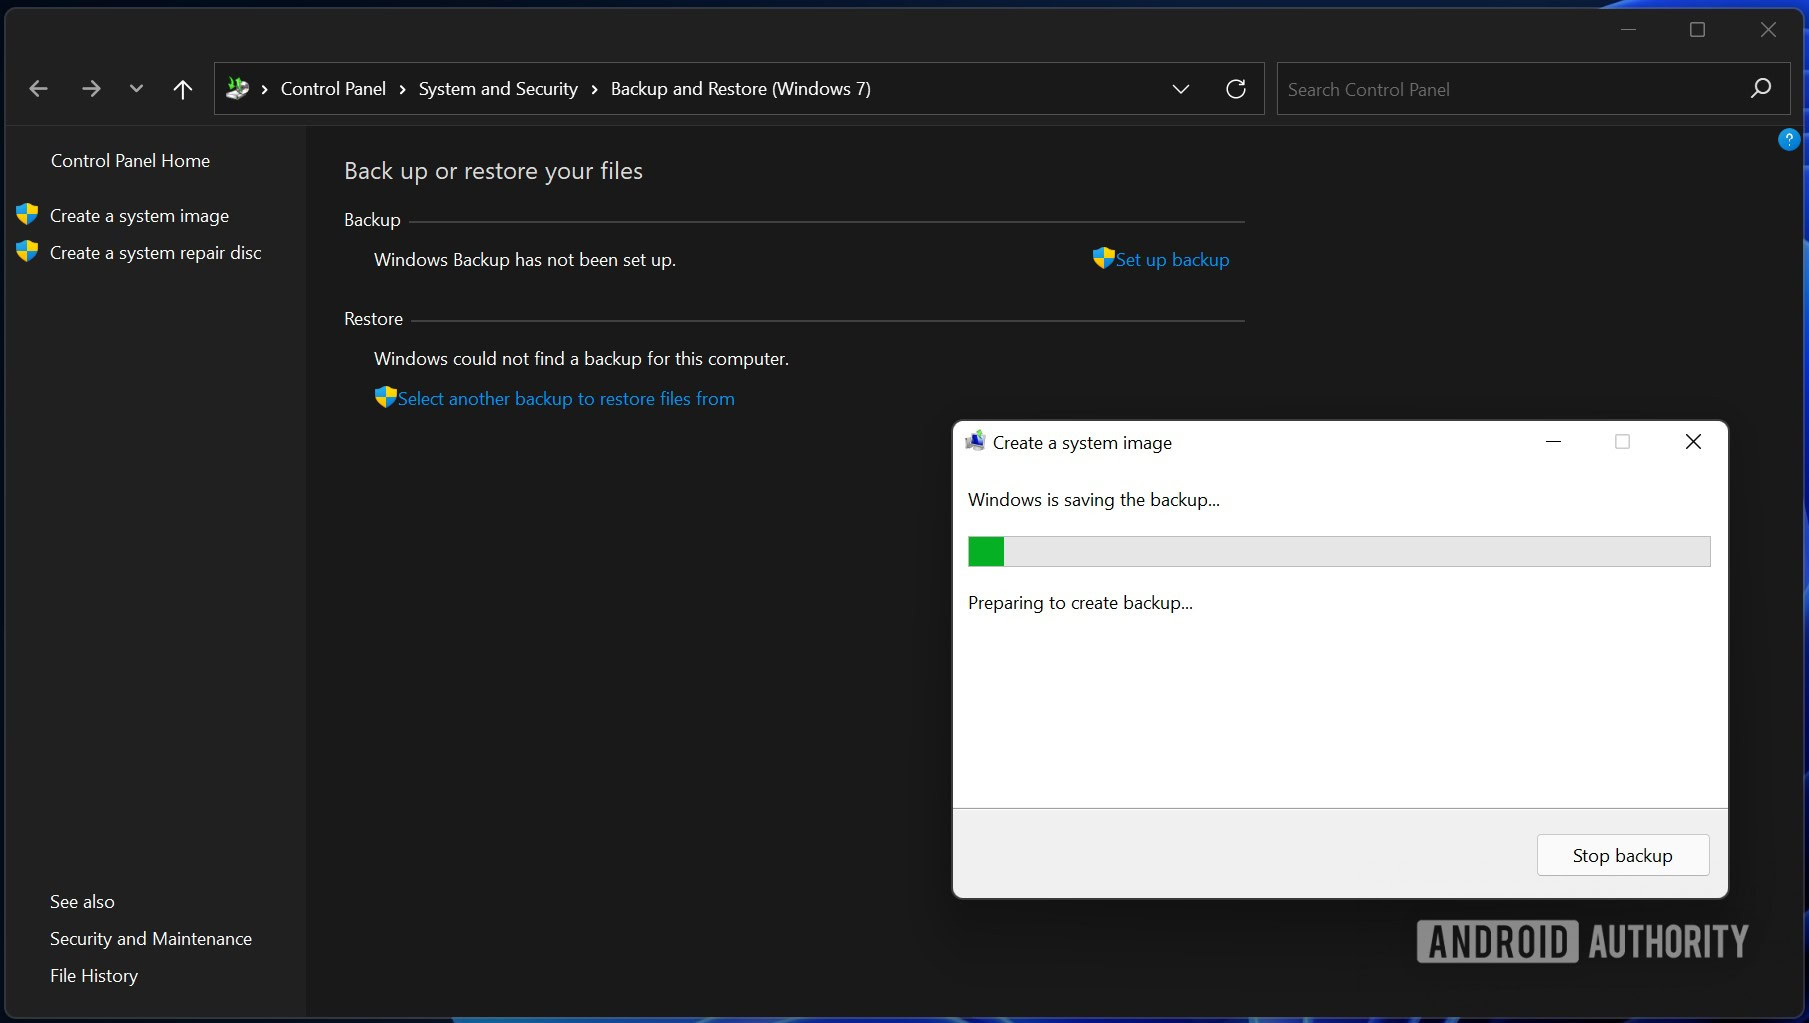
The backup will begin and take some time to finish. Once over, it will ask you if you want to create a System repair disc. Click No.
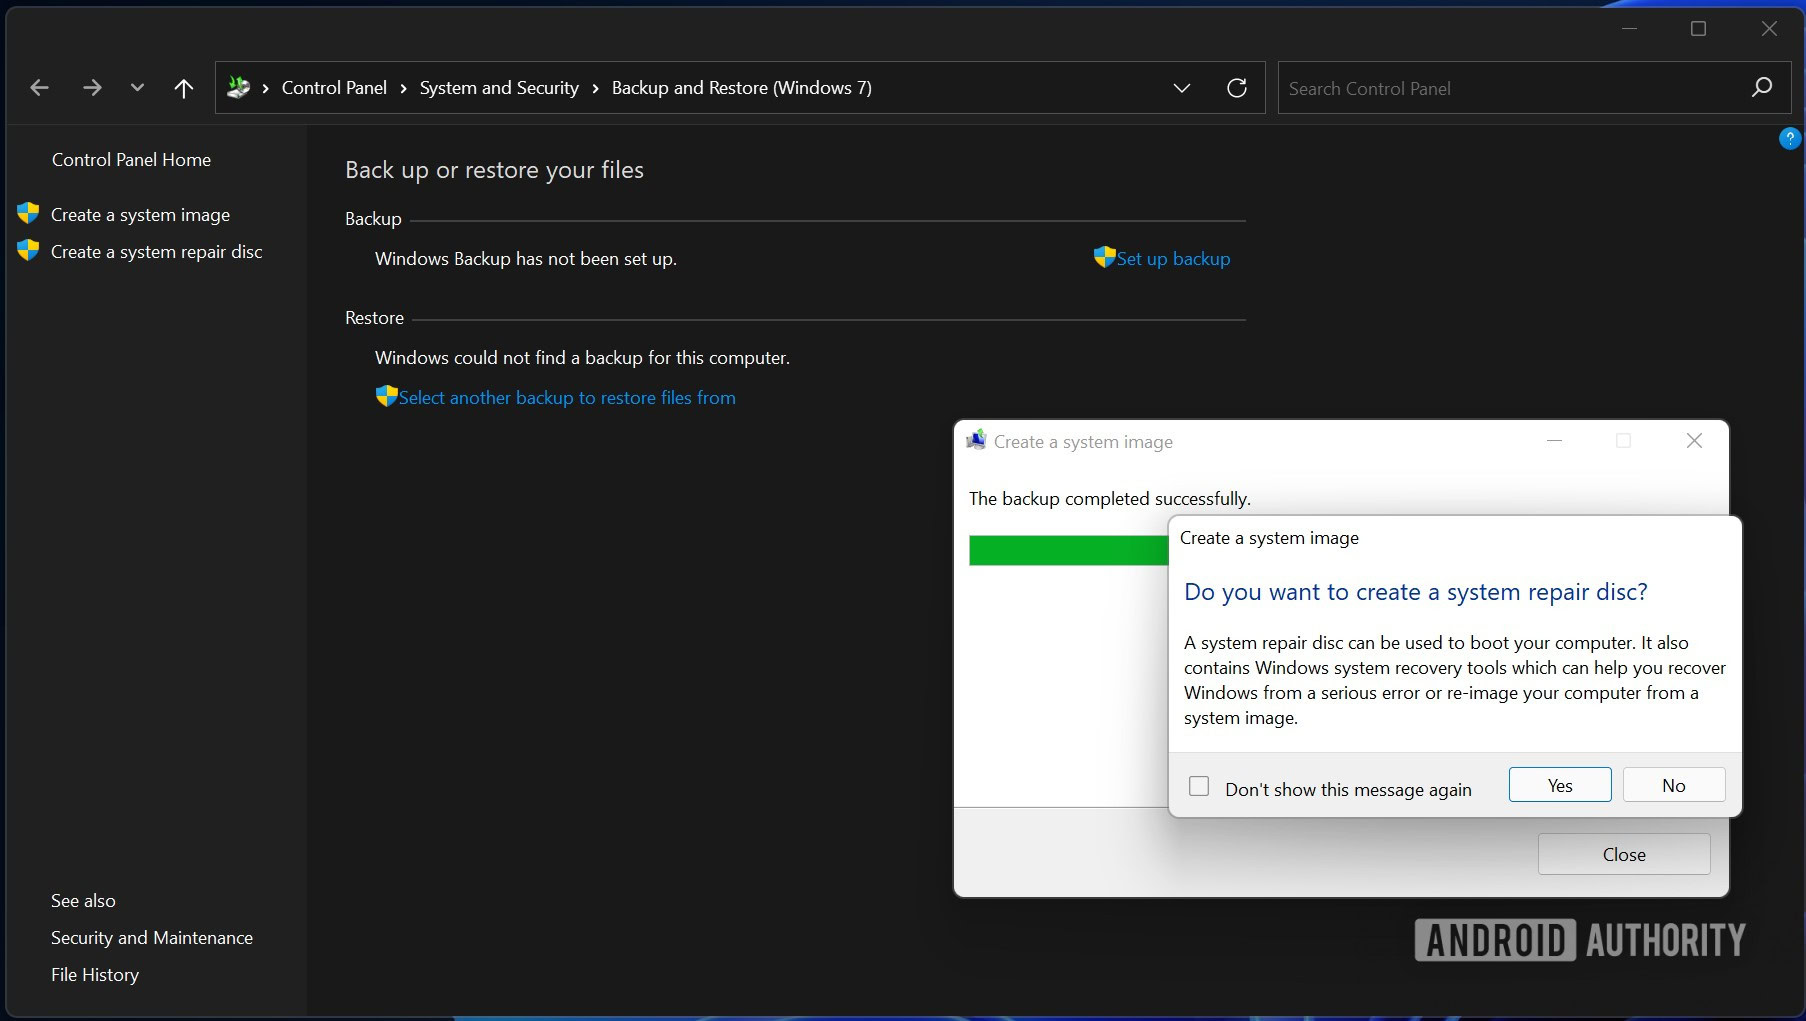
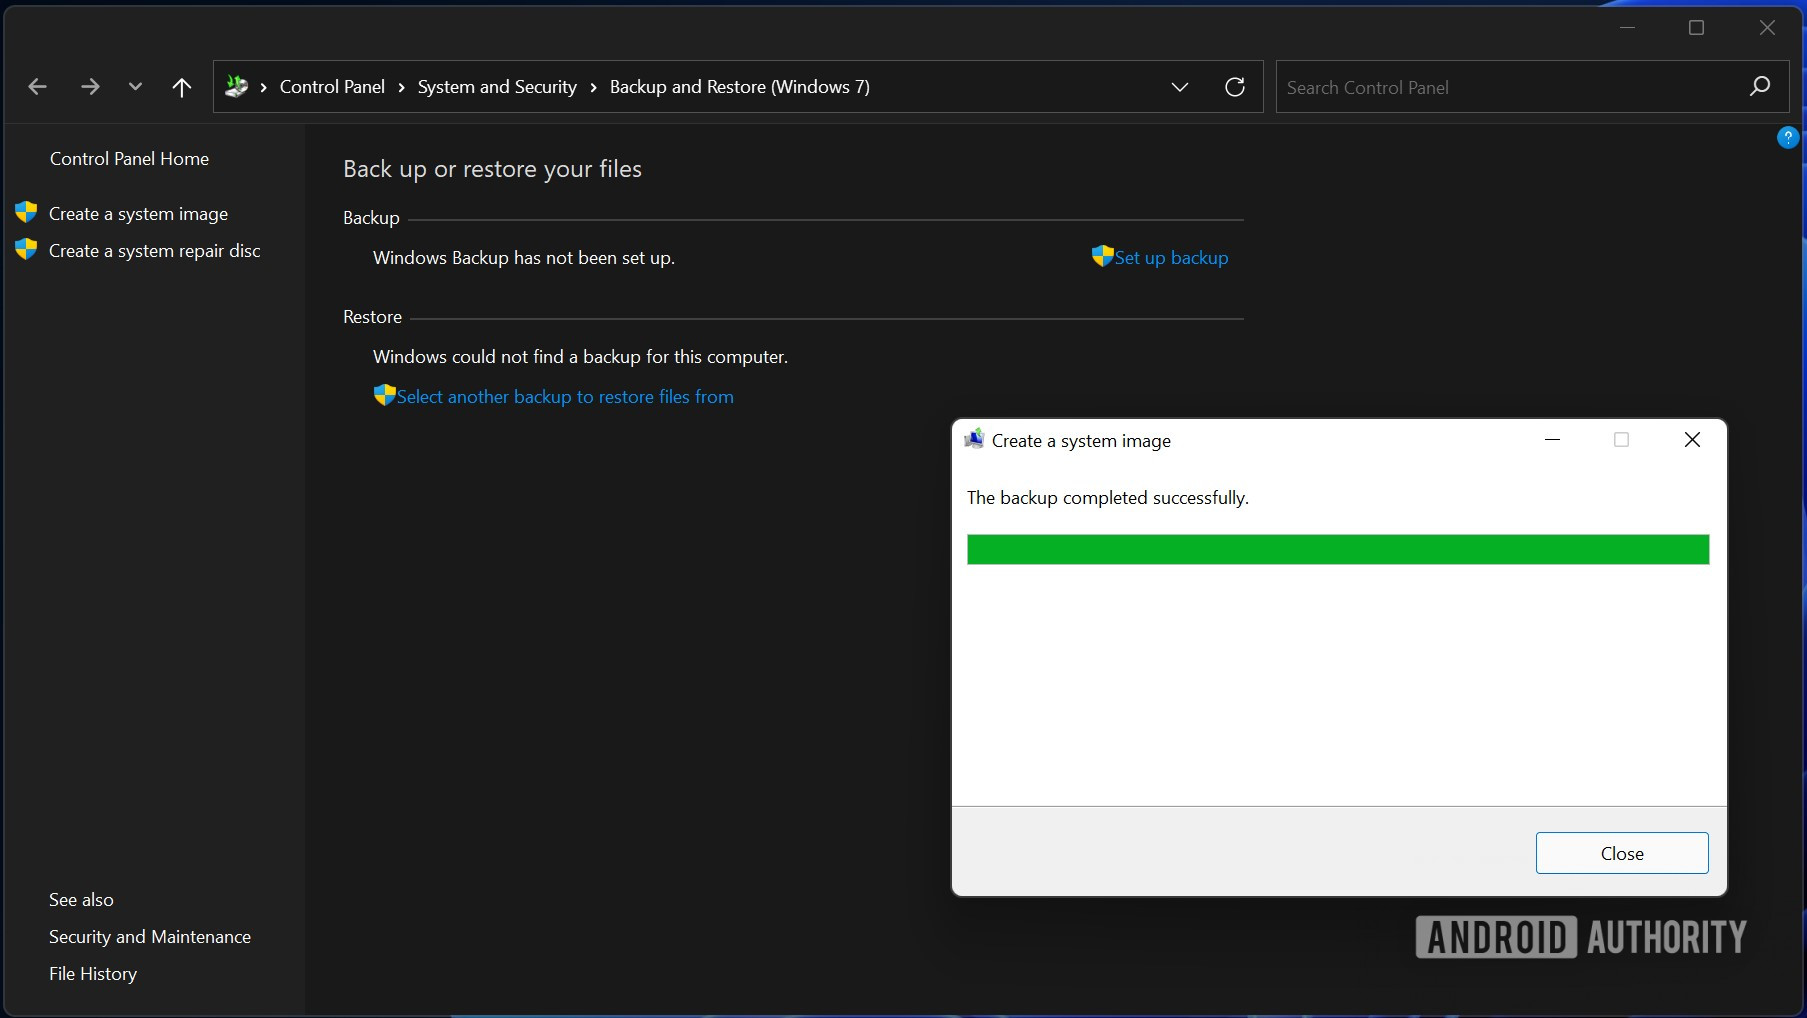
Click Close to close the system image dialog. Your Windows 11 backup is complete.
How to restore a backup on Windows 11
Restoring a Windows 11 backup is something you can do while operating the installing system afresh. Say your PC ran into some issues, and you need a reinstall? You can restore a Windows 11 backup using the troubleshooting settings.
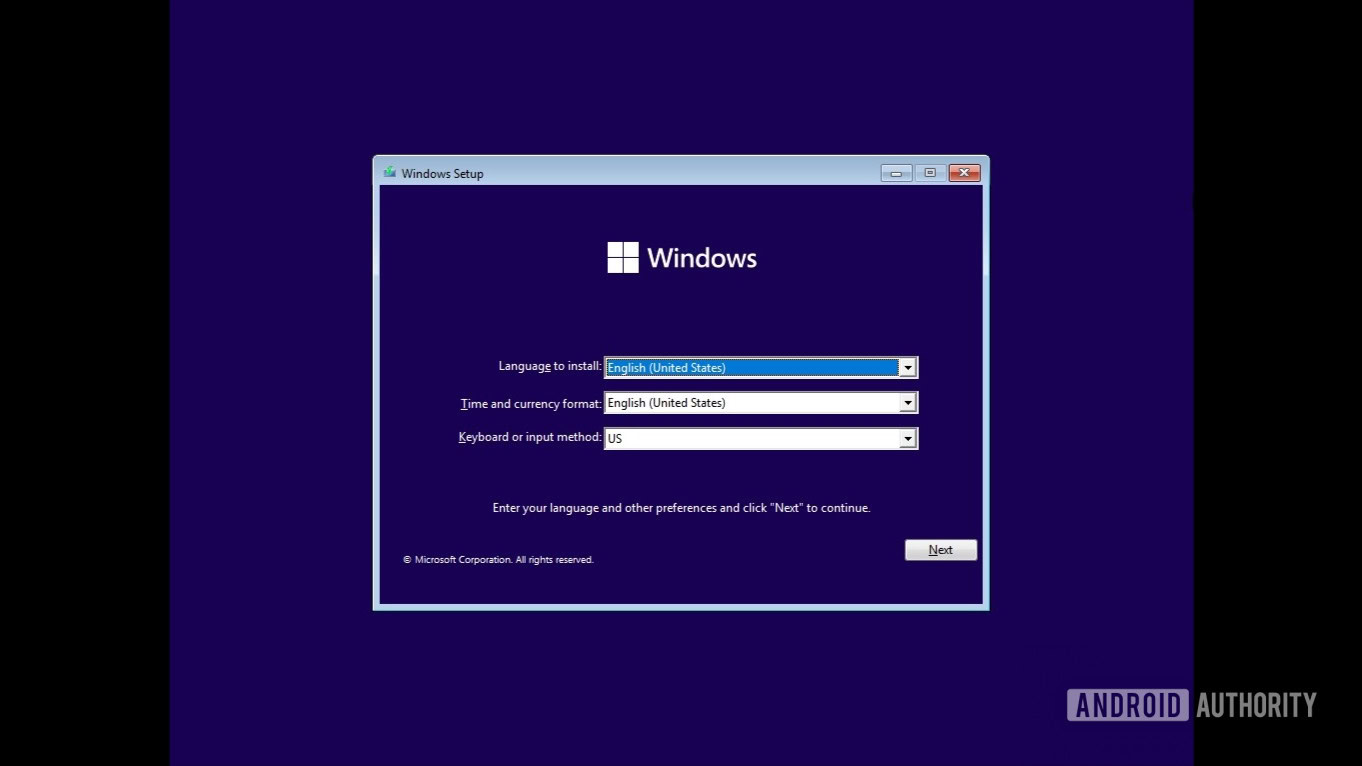
You will need a Windows 11 bootable USB or DVD, and the disk with the backup connected to your PC. Boot into the USB or DVD using the boot menu of your PC, which you can figure out by checking the manufacturer’s website. Once you’ve booted into it, you’ll see the Windows 11 installer. Select the language, time/currency, and keyboard layout of your choice, and click Next.
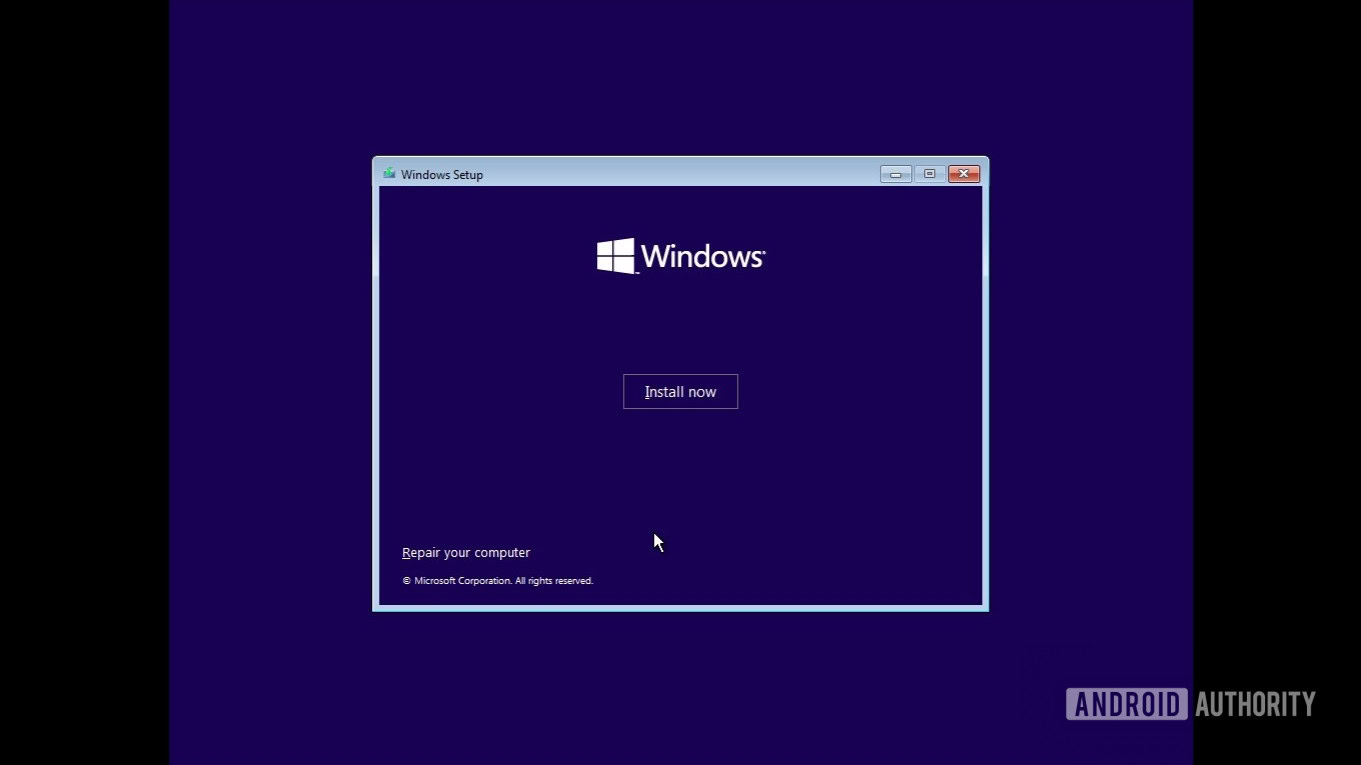
Click the Repair your computer button located at the bottom left of the window.
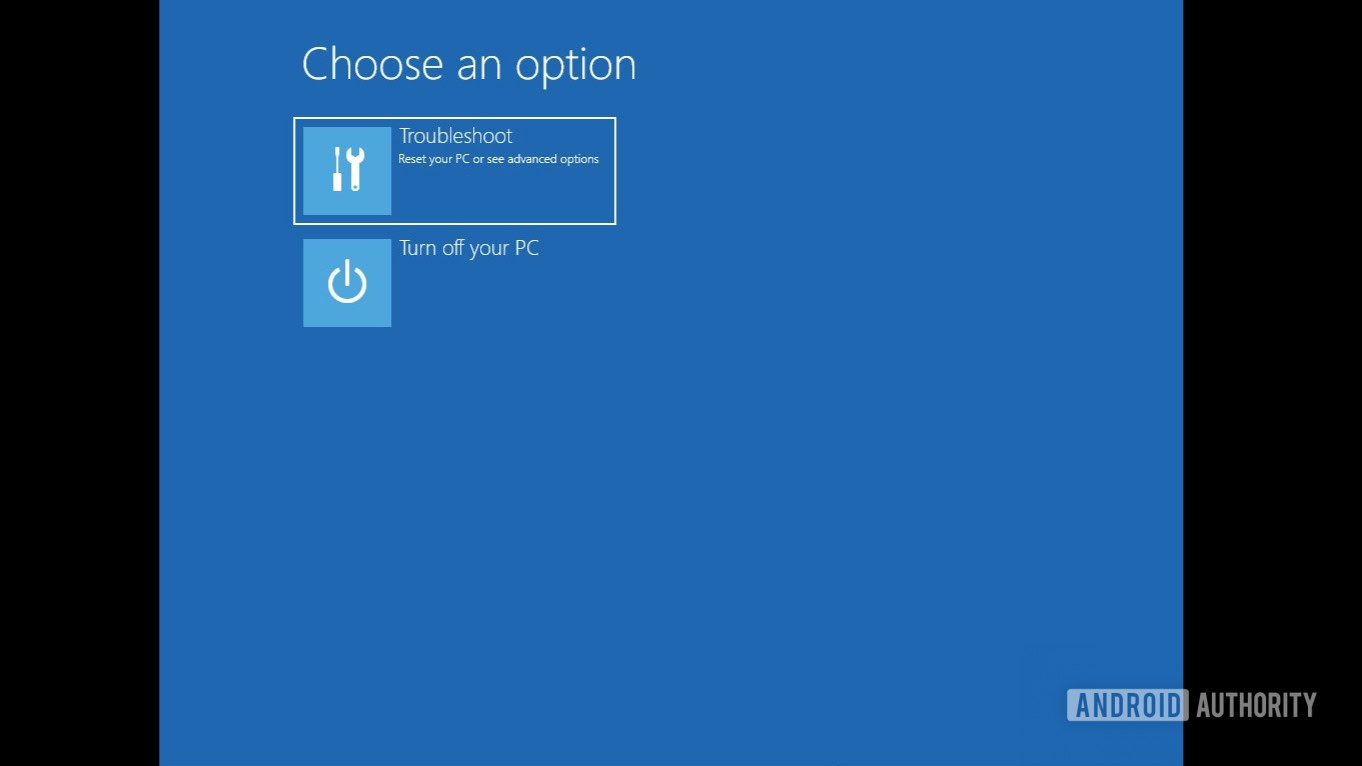
Click Troubleshoot.
Locate and click the System Image Recovery option.
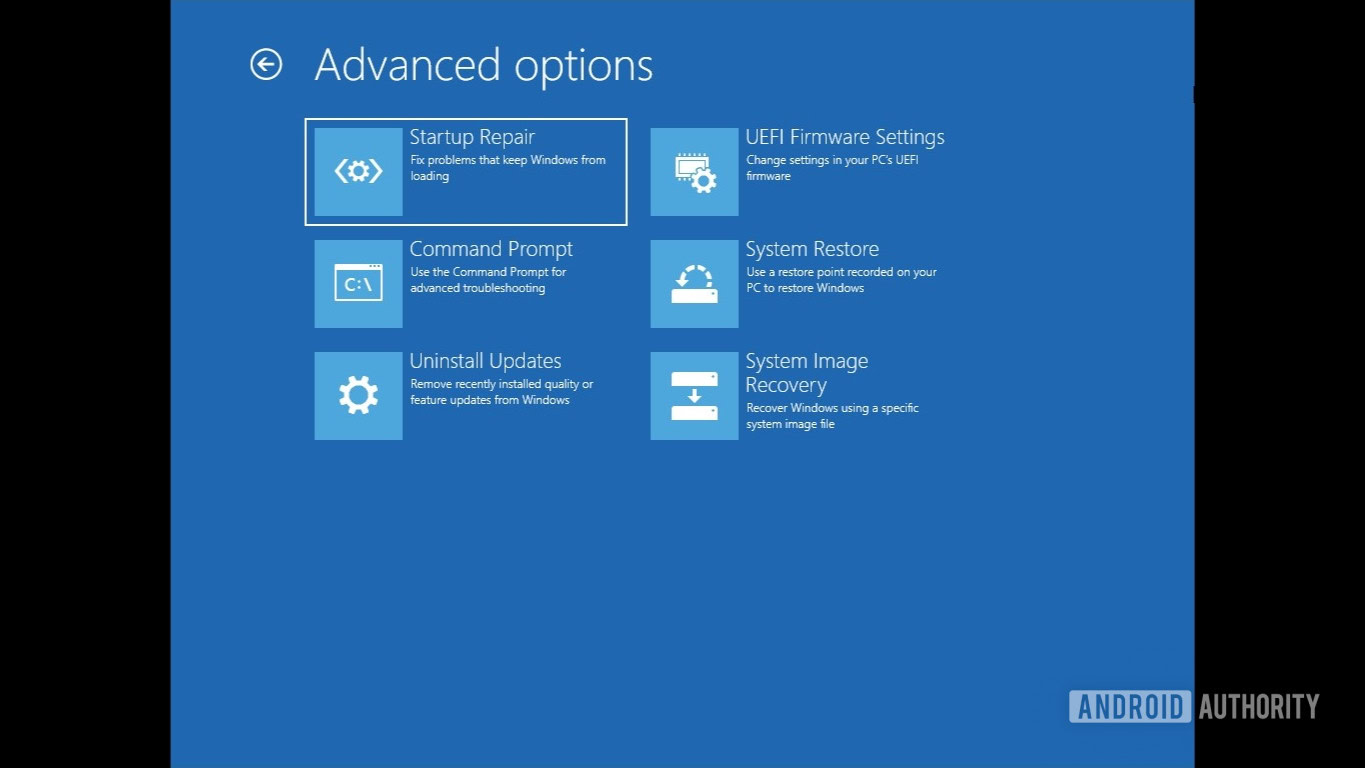
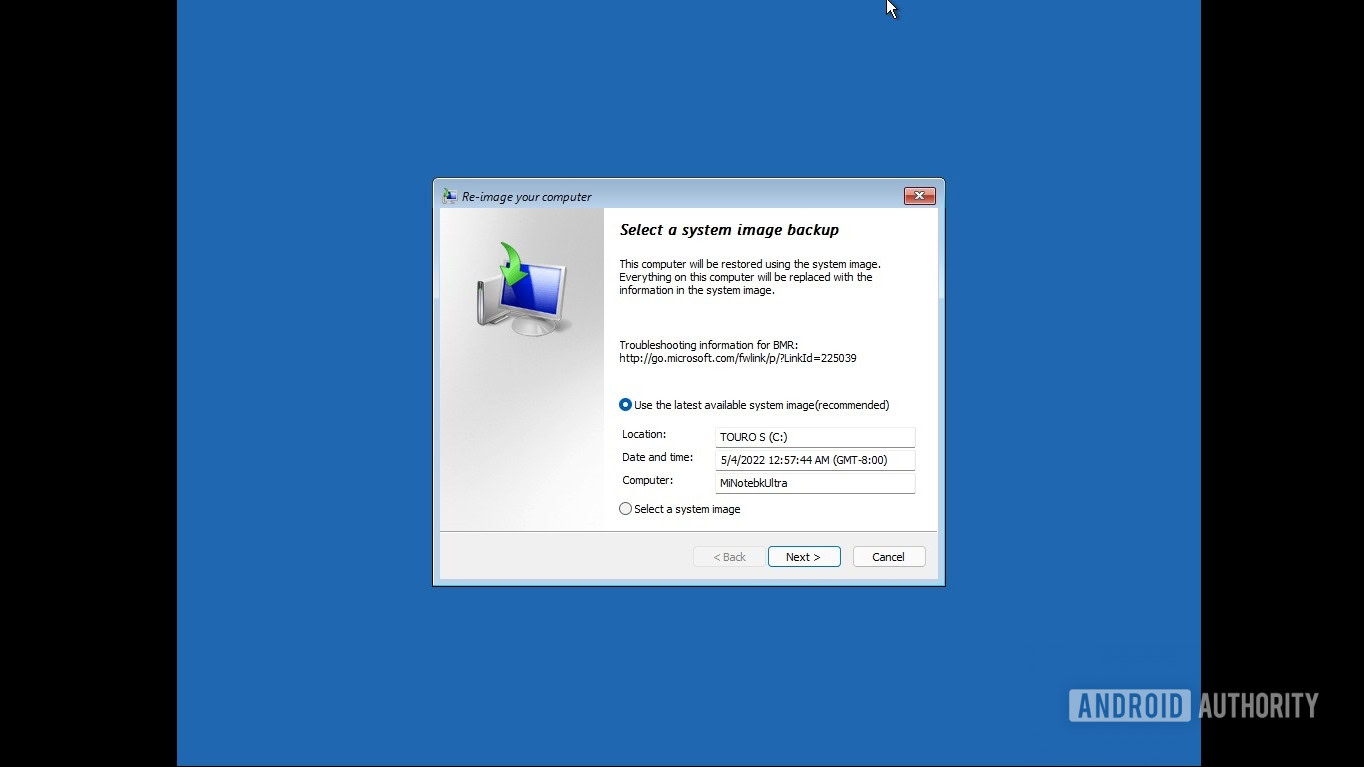
The system image restore tool will open up and automatically detect the backup folder. Click Next to proceed.
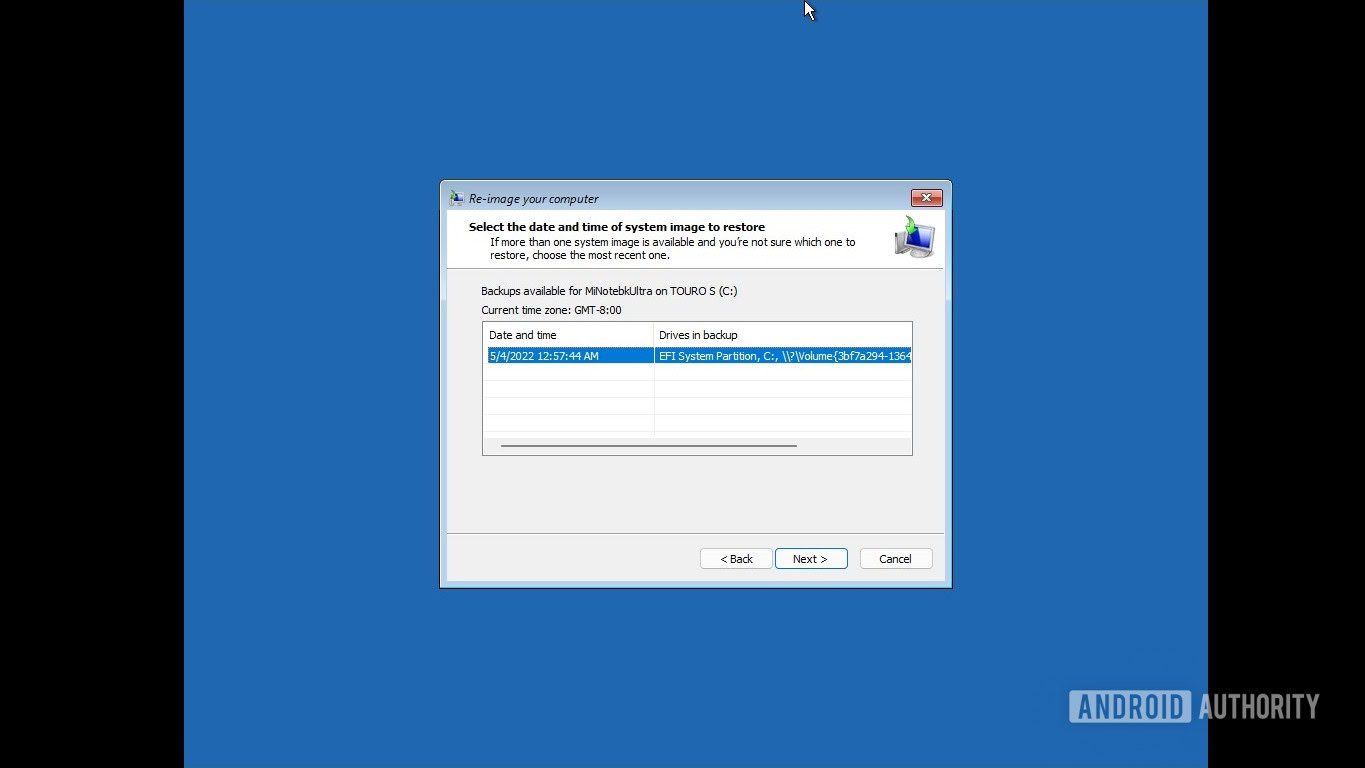
Next, you’ll get the option to pick the specific backup from the folder by date and time. If you have just one backup, only one option will be listed. Select the appropriate one by clicking it, and click Next.
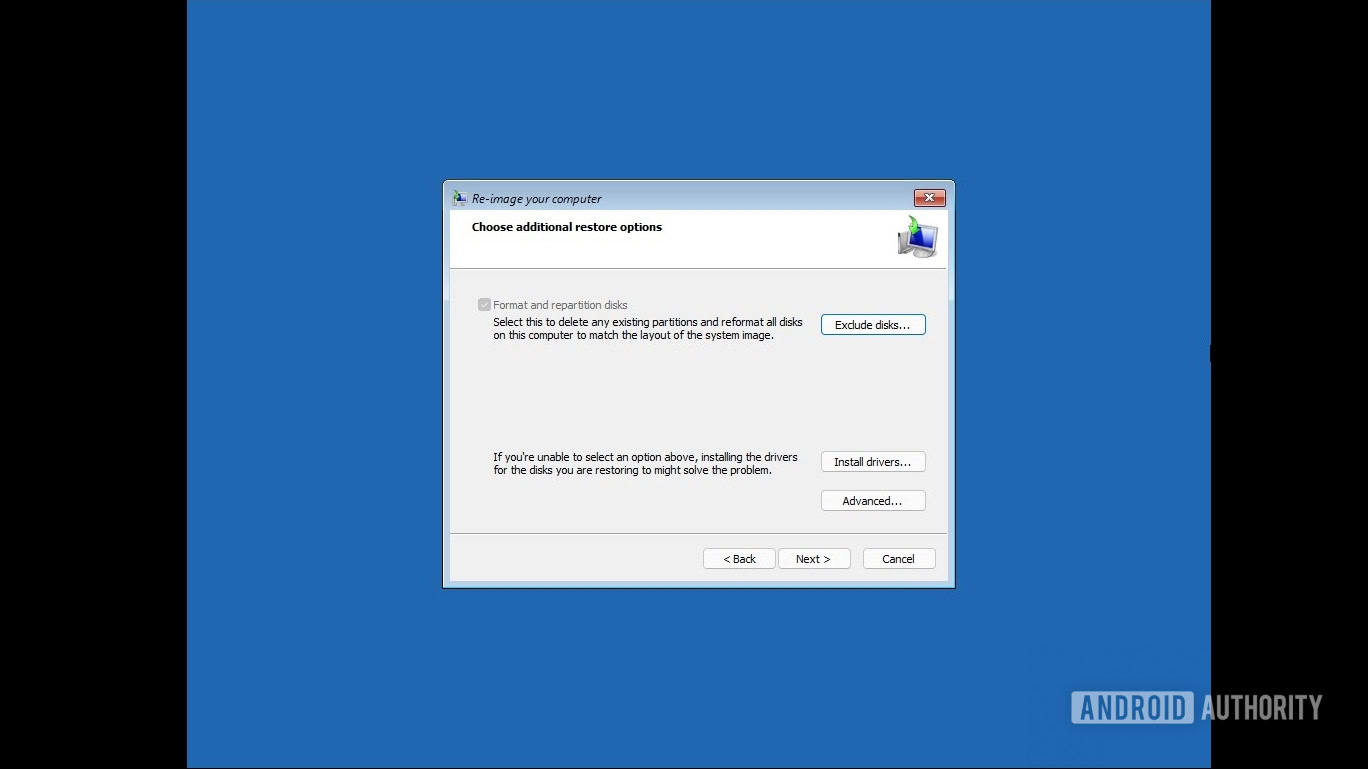
Choose any additional restore options as per your preference. Click Next.
You’ll get a final confirmation screen listing your options. Verify your settings and click Finish.
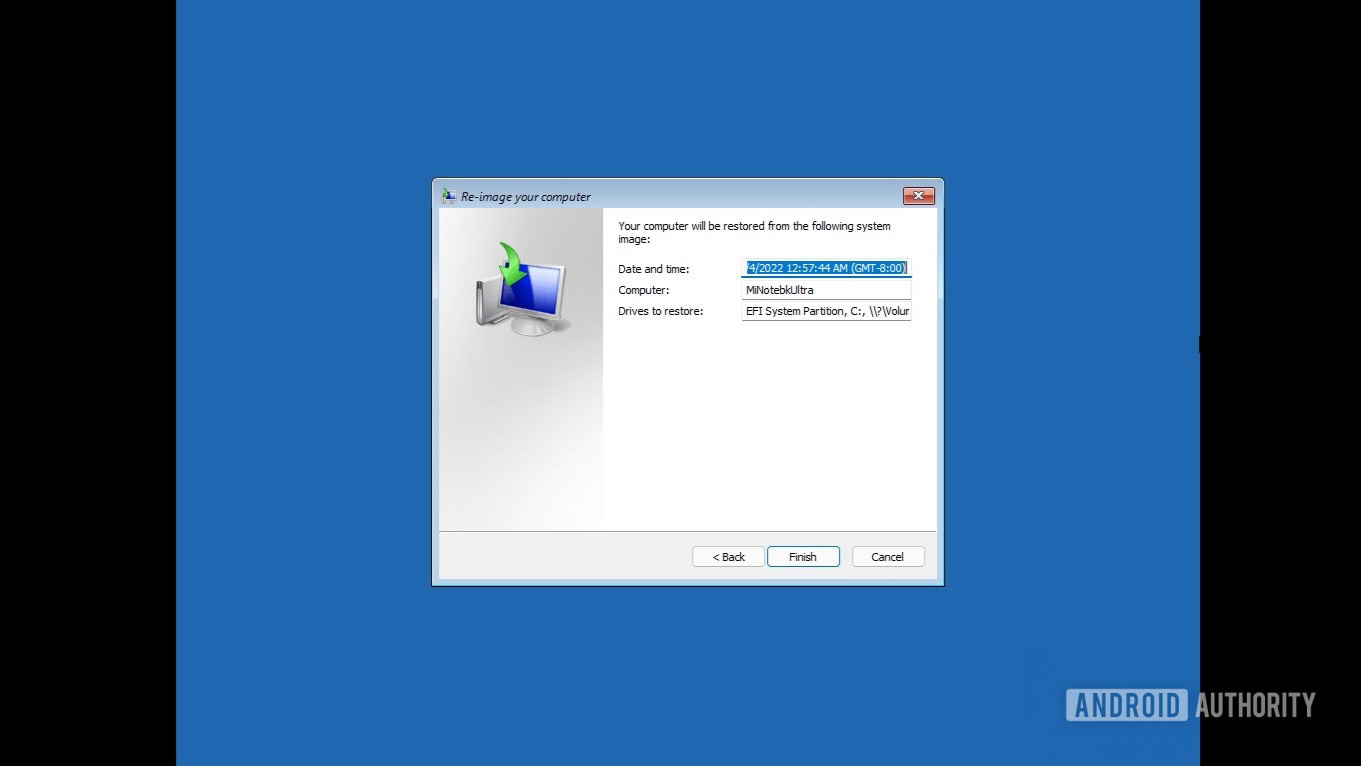
Click Yes on the final restore warning dialog box.
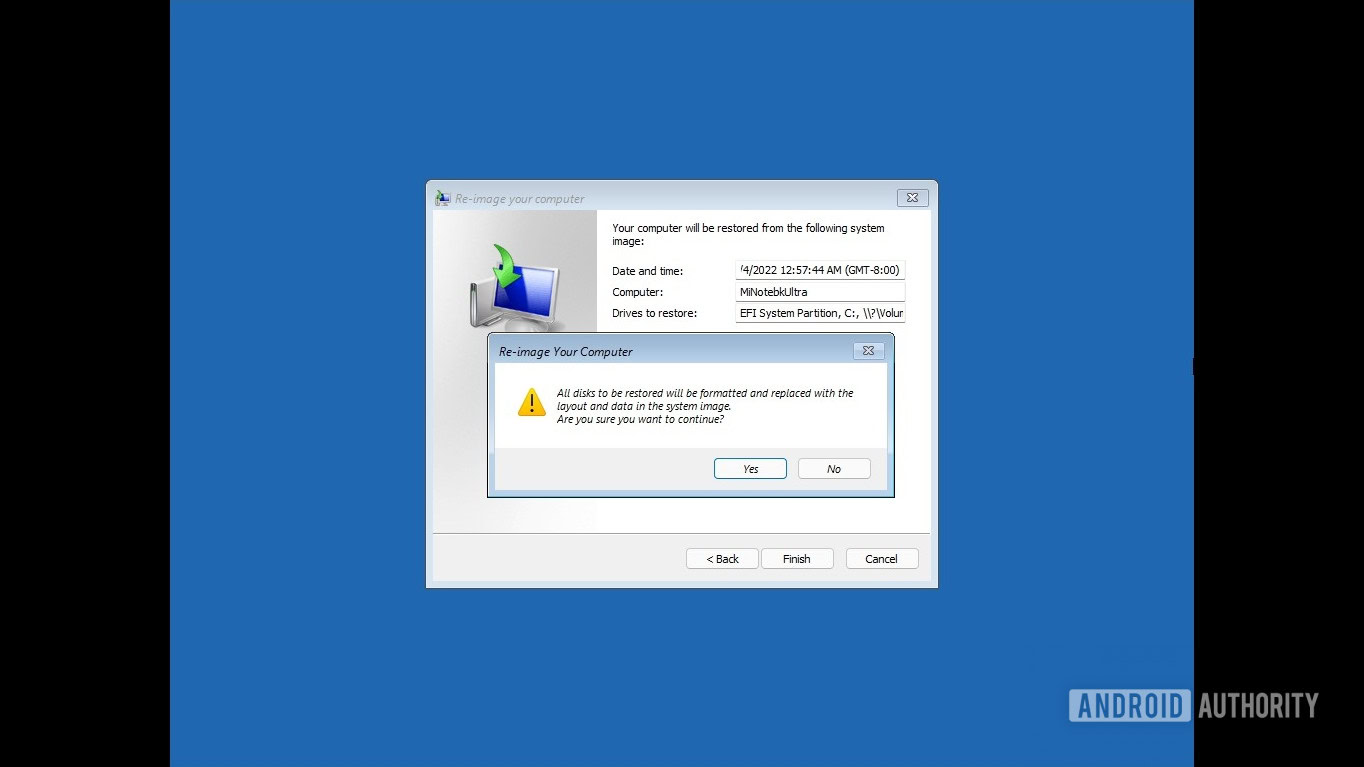
It will take some time, and the backup restore will finish. You can then boot into your PC with Windows 11 just as you backed it up.
Read more: How to install Windows 11