Affiliate links on Android Authority may earn us a commission. Learn more.
Boost your app downloads by shrinking your app size
Published onJanuary 25, 2018

Since the Android Marketplace launched in March 2012, average app size has quintupled. Some of this increase makes sense. Today, we expect richer content, better graphics, and more features from our mobile apps, and none of this comes for free! The memory available on your typical Android device has increased, so why shouldn’t apps make use of this extra space if it helps them deliver a better user experience?
If your app is going to reach as many users as possible, you need to pay attention to the size of your Android Package Kit (APK). A recent study published by a Strategy and Operations Analyst at Google showed APK size directly affects the number of people who end up installing your application after visiting its store page. According to these findings, for every 6 MB increase in the size of your APK, you can expect to see a 1 percent decrease in the installation conversion rate.
There are many reasons why the size of your APK might be holding your application back:
- The user notices the APK size on your app’s Google Play listing, and decides not to install it based on this information.
- The user is approaching their data limit and doesn’t want to incur additional costs.
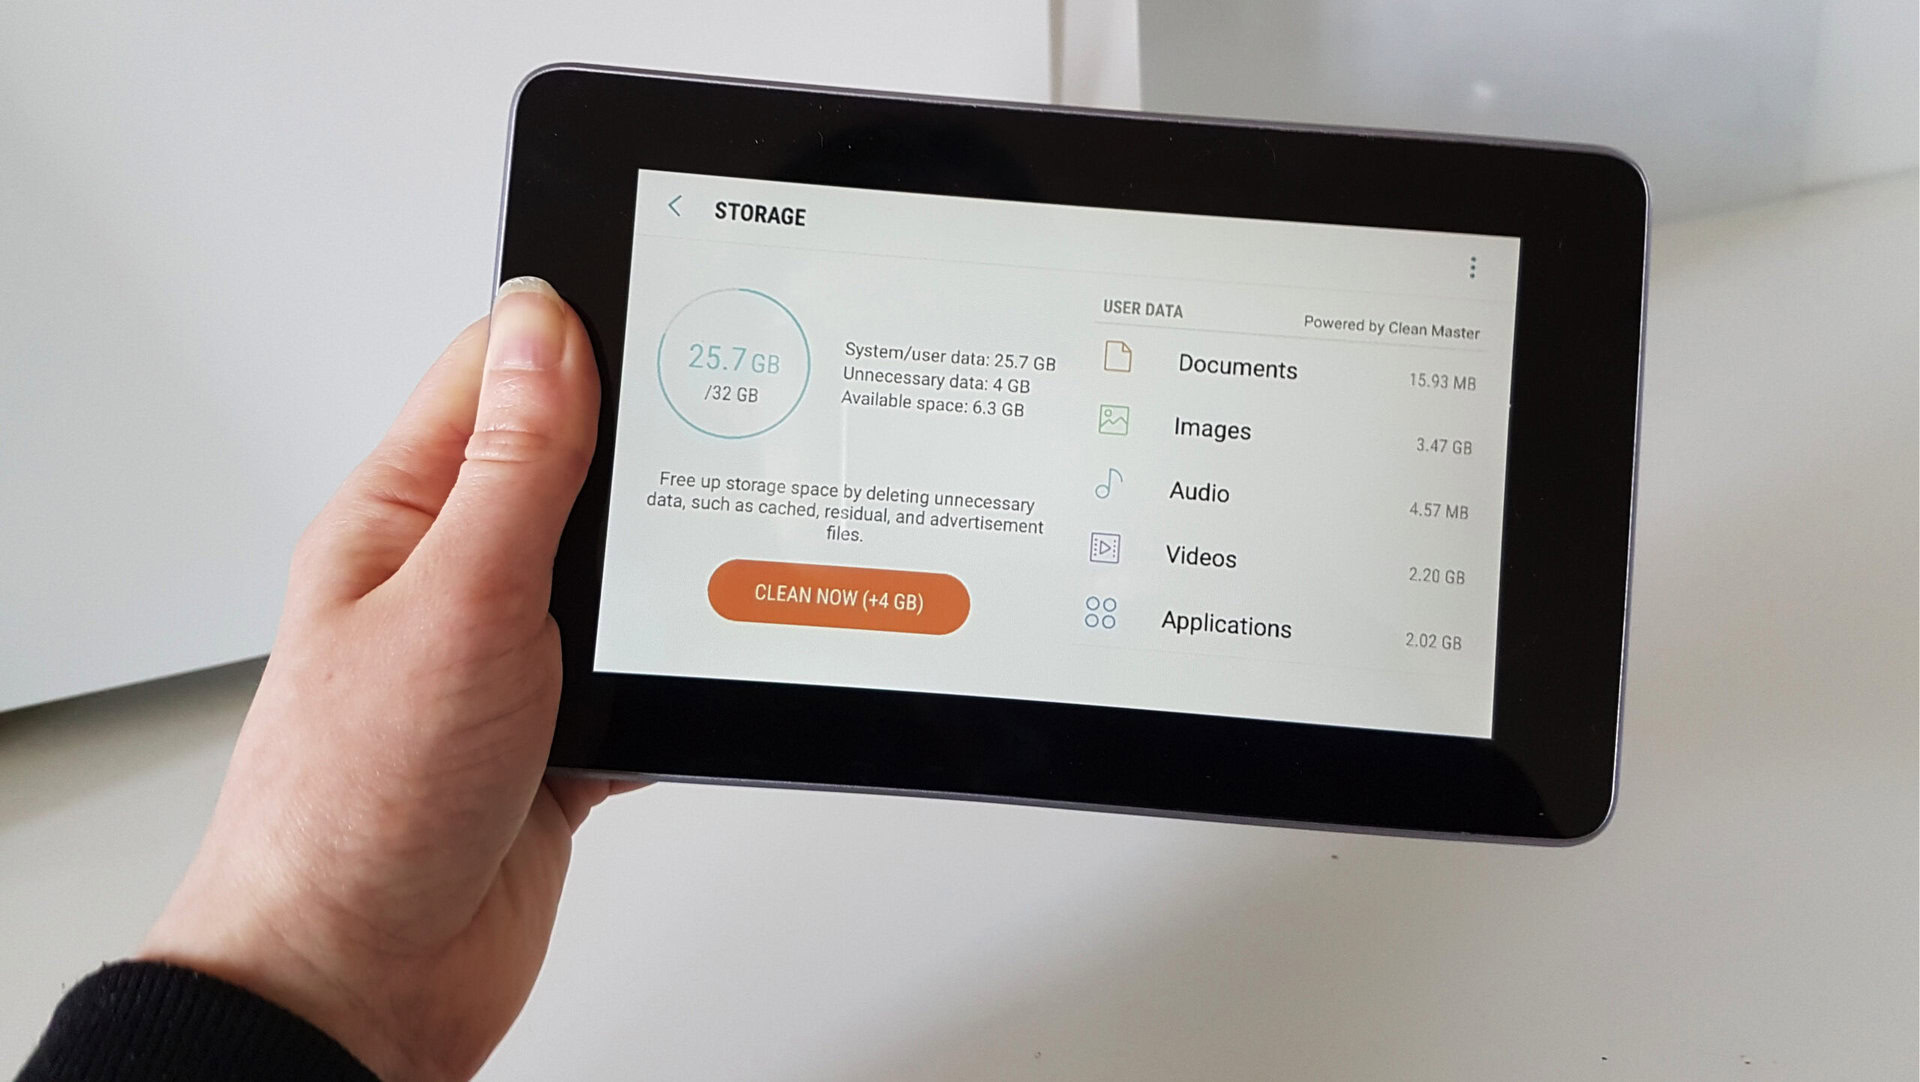
- The installation fails due to a lack of space on the target device. This is a problem particularly in markets where budget devices are more common, such as emerging markets.
- The installation fails due to network connectivity issues, which are more likely to occur during lengthy downloads.
In this article, I’m going to show you how to ensure people visiting your app’s Google Play page actually end up installing it by sharing tools, techniques, and new features to help create a much leaner APK.
Remove unused methods and classes with ProGuard
ProGuard is a tool which can identify and remove unused classes, fields, methods, and attributes from your application code and any libraries you may be using.
For the best result use the proguard-android-optimize.txt file, which has the same settings as the default proguard-android.txt file, but with optimizations that perform analysis inside and across methods.
Here’s how to enable ProGuard in your project’s module-level build.gradle file:
buildTypes {
       release {
           minifyEnabled true
                   proguardFiles getDefaultProguardFile('proguard-android-optimize.txt'), 'proguard-rules.pro'
       }
   }
}
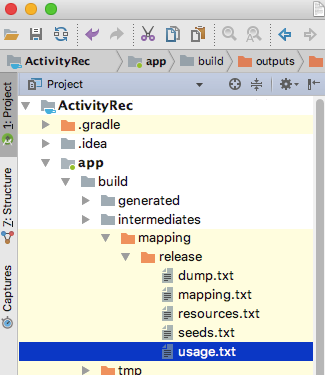
Every time you build your project, ProGuard will generate a app/build/outputs/mapping/release/usage.txt file that lists everything ProGuard has removed from your APK, so check it to make sure it hasn’t stripped away any code your project actually needs.

If ProGuard does remove necessary code, then open the build/intermediates/proguard-files/proguard-android-optimize.txt-3.0.1.txt file and use the -keep flag to specify the code that you want to hang onto:
-keep public class MyActivitySince ProGuard may remove code that your project does actually require, you should always test your project with ProGuard enabled, before publishing your final APK.
Remove all unreferenced resources
Sometimes unused resources can find their way into your project, particularly if you’re using libraries. Since unreferenced resources are just taking up unnecessary space, you should tell Gradle to search for, and remove these resources by enabling resource shrinking:
buildTypes {
        release {
            shrinkResources true
            minifyEnabled true
         proguardFiles getDefaultProguardFile('proguard-android.txt'), 'proguard-rules.pro'

      }
    }
Whenever you build your project, the Gradle Console will provide an overview of how many resources it’s managed to remove, but you can view a list of these resources in your project’s app/build/outputs/mapping/release/resources.txt file.
While resource shrinking can help reduce the size of your APK, it has its limitations. It cannot remove resources from the “values” folder, and it won’t remove unnecessary alternative resources.
For every 6MB increase in the size of your APK, you can expect to see a 1% decrease in the installation conversion rate.
You should use resource shrinking in combination with Lint, a static scanning tool which can identify resources that aren’t referenced in your code.s
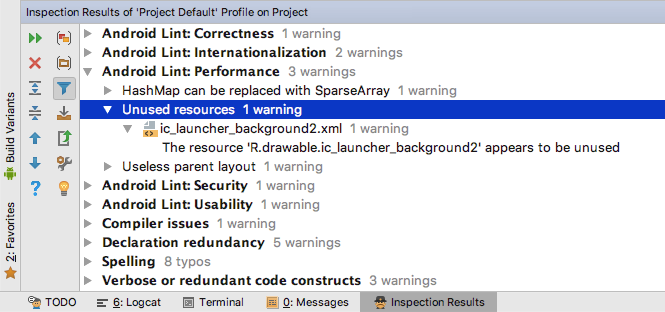
To run Lint, select Analyze — Inspect Code… from the Android Studio toolbar. If Lint detects any unused resources, then it’ll display the following message in a new Inspection Results window: “Unused resources — The resource R.drawable.ic_launcher_background2 appears to be unused.”

Lint can only detect unused resources, so you’ll still need to remove them manually.
Compress your drawables
Graphical assets are often the biggest contributor to APK size, so compressing your drawables can significantly reduce the size. If you’re working with JPEGs, you can try a compression tool such as packJPG. If your project contains PNGs you can use zopflipng, pngcrush, OptiPNG, TinyPNG or pngquant.
The Android Asset Packaging Tool (AAPT) optimizes the contents of your res/drawable folder automatically. If you compress your PNGs before passing them to AAPT, then it may actually end up inflating your PNGs.
If you compress your PNGs manually, make sure you disable the AAPT process for them like this:
android {
   aaptOptions {
       cruncherEnabled = false
   }
Switch to WebP
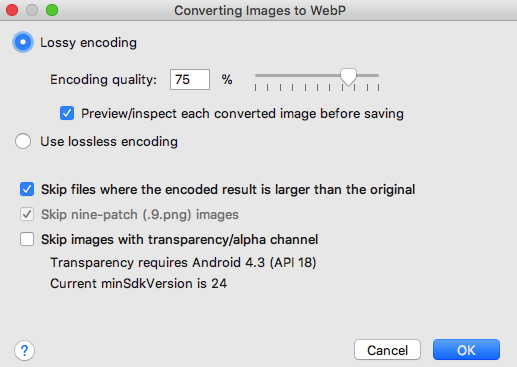
If your project’s minSdkVersion is 18 or higher, converting a PNG, JPEG or BMP to WebP format often provides better compression, as well as the same image quality.
- In Android Studio, control-click the image you want to convert, or a folder containing multiple images.
- Select Convert to WebP…
- In the next menu, choose between lossy or lossless encoding.
- Check the Skip images when the encoded result is larger than the original box.
- Click OK to perform the conversion.

If you switch to WebP, you’ll still need to provide your launcher icon as a PNG.
Modify images at runtime
If you need to use variations of the same image, try to supply a single “base” image that you customize at runtime wherever possible. You can apply a tint to an image using setTint() and rotate drawables using attributes like android:fromDegrees and android:pivotY.
Use vector graphics
On Android 5.0 and higher, you can draw assets at runtime by defining a VectorDrawable, which is an XML representation of a vector. These XML files contain path commands telling Android how to draw the lines and arcs that make up this graphic.
Unlike many image formats, vectors can scale without losing definition, so you only need to provide one asset per image. However, rendering VectorDrawable objects is an intensive process, and you should only use them for small, simple graphics.
Always do your research
On Android 5.0 and higher, you can draw assets at runtime by defining a VectorDrawable, which is an XML representation of a vector.
Before adding any library to your project, you should check its code size so you know exactly what impact it’s going to have on your final APK. You should also look critically at the features this library provides, as it may contain a significant amount of code, as well as resources your project doesn’t actually need. For best results, always choose a library that’s compact, optimized for mobile, and contains only the features that you’re actually going to use.
There’s no shortage of third-party libraries out there, so it’s always worth shopping around to find the smallest library that still meets your needs.
Remove unused library code
Libraries may contain strings for a range of languages, but if you project doesn’t explicitly support these languages then these strings are just adding unnecessary bulk to your final APK.
Open your build.gradle file and specify the languages that your application officially supports, then Gradle will automatically exclude all resources for languages your application doesn’t support, including strings from third party libraries:
android {
defaultConfig {

//Use resConfigs to specify the languages that your app officially supports//

   resConfigs "en"
Get specific with Google Play Services
Many projects use Google Play Services. Rather than adding the entire library to your project, you should only include the APIs you’re actually going to use. If you only require access to the Google Location APIs, then just use this:
implementation 'com.google.android.gms:play-services-location:11.8.0'Rather than this:
implementation 'com.google.android.gms:play-services:11.8.0'Consider creating multiple APKs
It’s pretty standard practice to publish a single APK containing alternate resources for different device configurations. Occasionally this strategy may require users to download a large number of assets they’ll never use. If your APK is packed with high-density graphics, you’re essentially asking users on low-density screens to waste precious storage space on images their device physically cannot display.
In this scenario, you may want to consider separating your single APK into multiple APKs which contain only the code and resources required for specific screen densities or Application Binary Interfaces (ABIs). When the user downloads your app from Google Play, they’ll receive an APK containing just the resources to target their particular device.
To generate APKs based on screen density, add the following to your build.gradle file:
android {
...
...
...

//Create a ‘splits’ block//

splits {

//Create a ‘density’ block//

    density {

      enable true

//Generate separate APKs for the following screen densities//

include "ldpi", "mdpi"
Even if you generate multiple APKs for specific screen densities, Gradle will always generate an APK containing the assets for all screen densities, so make sure you publish this universal APK to provide a fallback for devices that don’t match any of your density-specific APKs.
Different Android devices use different CPUs, which in turn support different instruction sets. Each combination of CPU and instruction set has an ABI, which defines how the application’s machine code interacts with the system.
Gradle bundles the binaries for all ABIs into a single APK by default, but you can also create APKs based on ABI. When you tell Gradle to generate ABI-specific APKs, it won’t automatically generate a universal APK, so you’ll need to include explicit instructions to create this universal APK:
android {
...

//Create a ‘splits’ block//

  splits {

//Create an ‘ABI’ block//

    abi {

//Build multiple APKs based on ABI//

      enable true

//Generate separate APKs for the following ABIs//

      include "arm64-v8a", "armeabi-v7a", "x86"

//Generate a universal APK//

      universalApk true

    }
  }
}
Google Play will not allow you to upload multiple APKs to the same listing, if those APKs have the same version information. If you create multiple APKs, you’ll need to assign each APK its own versionCode value.
Allow your app to be installed on external storage
Some users may choose to extend their device’s built-in memory by adding external storage (most commonly an SD card). Unless you request otherwise, Android will prevent the system from installing your app on external storage, so installation will fail if there isn’t adequate on-device storage, though plenty of external storage is available.
To give Android the option of installing your app on external storage, open your project’s Manifest, and add either of the following lines:
- android:installLocation=”preferExternal.” Your app prefers to be stored externally, but can also be installed on internal storage.
- android:installLocation=”auto.” Your app can be installed on internal or external storage, but the system will install your app on internal storage by default.
Even if your APK is installed on external storage, all private user data, databases, optimized .dex files, and extracted native code will still be saved to internal memory.
Consider offering your project as an Instant App
For users who are struggling with storage space, connectivity issues or restrictive data plans, instant apps may be the only viable way of experiencing what your application has to offer.
If you follow all the above techniques and best practices, you should be able to significantly reduce the size of your APK. No matter how slim your APK, the process of downloading and installing an app will always be the biggest barrier between your application and potential new users.
So why not give users a way to experience your application without installing your APK?
Android’s “Instant Apps” feature lets you separate your app’s most important functionality into stand-alone modules, and map each of these modules to a URL. The user can then load a module on demand by clicking its URL, which makes your app instantly accessible from any location that supports URLs, like emails, Google search results, forums, and YouTube comments.
Behind the scenes, Instant Apps are delivered via a lightweight Instant Apps APK which contains only the code and resources required to deliver this particular feature, and always comes in at 4MB or under.
For users struggling with storage space, connectivity issues, or restrictive data plans, instant apps may be the only viable way of experiencing what your application has to offer. Hopefully, their experience with your Instant App will motivate them to install the complete APK further down the line, once they’re able.
Wrapping up
To ensure users aren’t put off by the size of your app or aren’t able to install it because it takes up too much of the internal storage, it is important to reduce the size of your final APK file. The techniques above could bring some dramatic savings which hopefully will convert directly into downloads and a healthier installed base.
Do you have any additional tips for slimming down your Android apps? Let us know in the comments below!