Affiliate links on Android Authority may earn us a commission. Learn more.
Building multiple flavors of an Android app
August 4, 2016
Before we discuss how to build multiple flavors of an app, it’s important to understand why and when you might need multiple flavors. As an app developer, you can run into the “not so unique” situation where you (or your team) would like to release a given app using a new brand name, logo and/or theme, along with some minor feature differences. Assuming you intend to maintain the different apps, and release them on Google’s Play Store, this can turn into a major maintenance headache very quickly.
The naive way to do this might involve having a base/core project and separate projects for each version, which is far from ideal, and will lead to errors and projects not having the complete new changes.
Another way to achieve this can involve building the core of the project as a library, and then creating different projects that reference the library core. While this will theoretically work, it would be very difficult to achieve, since what you will be doing is actually trying to build an app as a library.
Thankfully, there is an easier and completely painless way to build and maintain multiple versions of an app as described above, and it is built into Android Studio and Gradle by default. This is called “flavors.” Using multiple flavors, a developer/team can easily build different versions of a single app, but easily customized to keep similarities and allow divergence as and when necessary. In this tutorial, we are going to design and build a single application with multiple flavors, that can each be pushed to the Play Store and deployed on the same device simultaneously.
In addition to flavors, there is another very important concept regarding building android apps, called “build types”. A build type applies settings relating to the build and packaging of the app, such as if it’s debuggable and the signing keys. The default build types are debug and release. In contrast, a flavor can specify features, device and API requirements (such as custom code, layout and drawables), and minimum and target API levels among others. The combination of build types and flavors forms a “Build Variant”. There is a build variant for every defined flavor/build type combination. Hence, if you have two flavors, called blueberry and raspberry, and two build types called debug and release, the Build Variants will be:
- blueberryDebug
- blueberryRelease
- raspberryDebug
- raspberryRelease
We are going to create a simple app with multiple flavors, and discuss the different options we have for customization. We will also show how to build a Build Variant, resulting in the final apk for upload to the Play Store. For a more in-depth and technical description of Build Variants, check out the Android Studio Build Variant user guide
Initialize Project
While we used Android Studio 2.1.2 with gradle version 2.10 for this tutorial, the methods described should hold true for previous (and future) versions.
You do not need any special setup when creating your app project. Create as normal. For this tutorial, we create a new Android Studio project, called MultipleFlavorSample. On successful creation, you should have a screen similar to that below.
Adding a new Flavor
Click on Build – Edit Flavors
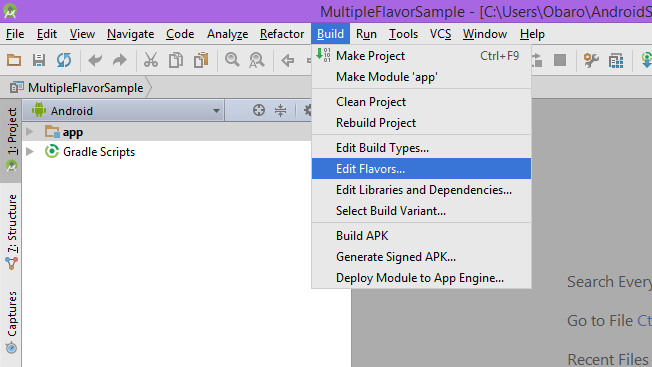
You can edit the flavor name, applicationID, and add a new signing config, among others. Click OK when you are done. A gradle sync should occur, and when it’s finished, you have successfully setup a new flavor for your app. Take special note of the applicationID. The applicationID is the app identifier on Google’s Play Store, and on android devices. No two apps can have the same applicationID on a single device, so, simply using different applicationIDs on your different flavors ensures that all flavors can be installed simultaneously on the same device. For more information about applicationID and package name, check out the Android Studio technical documentation.
On first look, it appears that nothing has changed. However, click on the build variants tab, or click on Build – Select Build Variant.
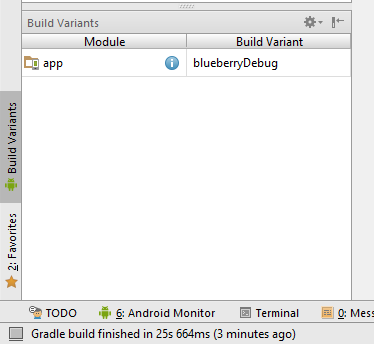
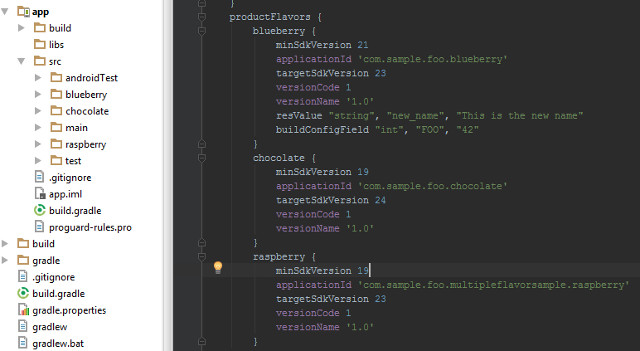
At this point, you have successfully setup your project to use a flavor. If you do not define a flavor, you can build a default flavorless app, however, when you define a single flavor, you will then be unable to build a flavorless app. You must then define new flavors for each configuration you require. You can define a flavor with no changes from the default. For our sample app, we have defined three flavors, blueberry, chocolate and raspberry. To see the definitions of each flavor, open your app build.gradle file.
productFlavors {
        blueberry {
            minSdkVersion 21
            applicationId 'com.sample.foo.blueberry'
            targetSdkVersion 23
            versionCode 1
            versionName '1.0'
        }
        chocolate {
            minSdkVersion 19
            applicationId 'com.sample.foo.chocolate'
            targetSdkVersion 24
            versionCode 1
            versionName '1.0'
        }
        raspberry {
            minSdkVersion 19
            applicationId 'com.sample.foo.multipleflavorsample.raspberry'
            targetSdkVersion 23
            versionCode 1
            versionName '1.0'
        }
    }
We have changed the applicationID, so all three flavors can exist on the same device at the same time, as well as modified the minimum and target SDK versions.
Now create your activity as normal. You can add flavors after developing your app, or before beginning development. It doesn’t really matter either way.
Note: If you check your folder structure, you can see that there is a main folder under src. This is (as its name implies) the folder that contains your main or core project files. Flavor specific files will go into each flavor specific folder. Each flavor folder structure should be identical to the main folder structure. An interesting consequence of this , is that each flavor can define it’s own AndroidManifest.xml file.
Separate flavor resources
For our demo app, we have created an activity_main.xml layout file. You can override this default (main) layout file, for a given flavor, by defining a layout file with the same name for the flavor. Simply specify the source set as shown below.
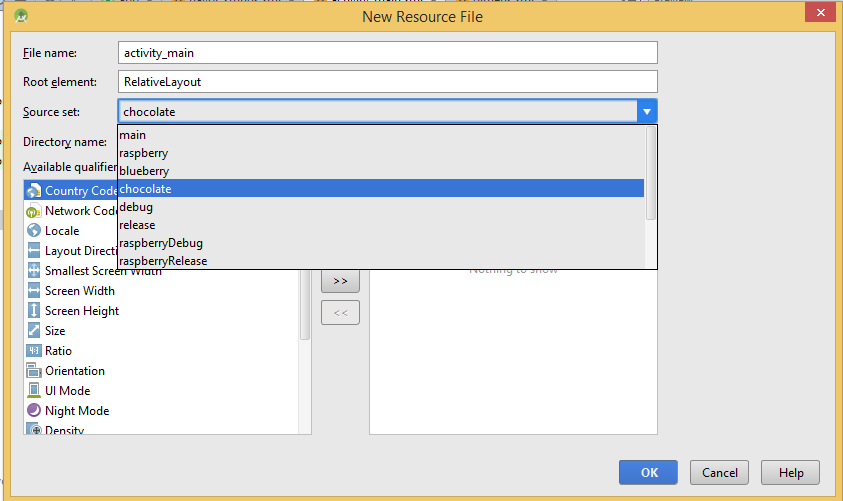
You can also specify the target flavor when creating icons.
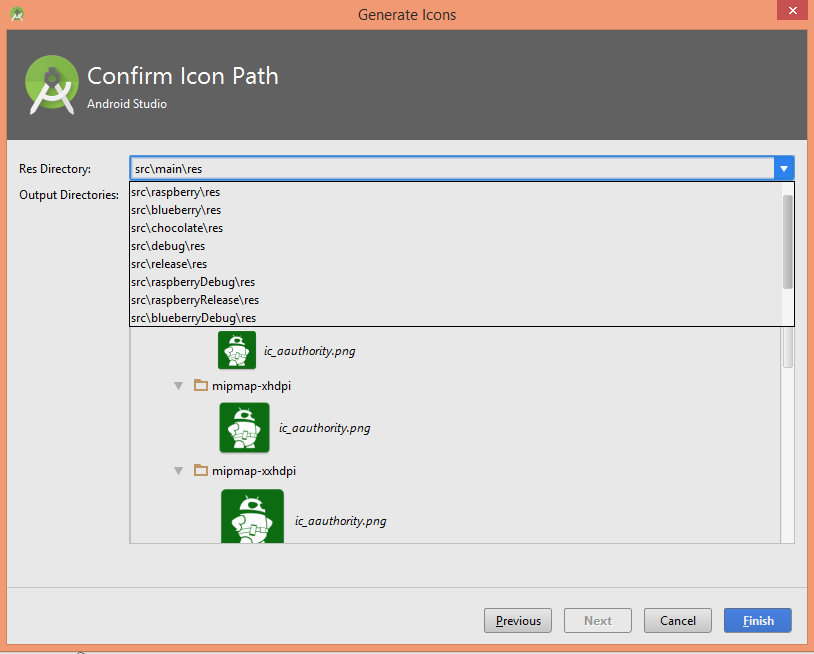
If you have created flavor specific resources, pay attention to the folder structure within the src directory. The main directory structure is as follows:
->main
->java
->/*Java class files*/
->res
->layout
->mipmap(s)
->values
Each flavor directory structure mimics exactly the main directory structure, with the base name (main) changed to the flavor name. Hence, blueberry sub folders will be:
->blueberry
->java
->/*blueberry specific Java class files, if any*/
->res
->layout
->mipmap(s)
->values
So, if you already have your drawables created elsewhere, you can simply create the appropriate folders for the flavor, and paste in there.
Separating values
Unlike layouts and drawables discussed above, value files are not replaced outright by similarly named flavor specific value files. Rather they are merged, and the replacement is done per value. If your main strings.xml defines the following
<resources>
    <string name="app_name">MultipleFlavorSample</string>
    <string name="flavor_name">Default Flavor</string>
</resources>
and blueberry strings.xml defines the following
<resources>
    <string name="flavor_name">Blueberry Flavor</string>
    <string name="blueberry_unique">Just for blueberry flavor</string>
</resources>
The gradle build system will merge both strings.xml when building a blueberry variant, and replace the main flavor_name with the blueberry variant, as well as add the blueberry_unique string.
An easy tip, to help with project and flavor maintenance, is to create a new values file, for resources that are unique to each flavor, such as flavor_strings.xml. All strings that are similar across flavors will remain in strings.xml, while strings that could be unique go to flavor_strings.xml. This way, when you create a new flavor, you simply copy flavor_strings from an existing flavor and can immediately see all the strings and values that need to be customized.
To build and run (or debug) any of the multiple flavors, Click the Build Variants tab, or select Build – Select Build Variant, and select the desired variant.
Flavor specific code files
While building multiple flavors, you might come across a situation where each flavor will require its own specific code file. While, ideally, this should be very rare, it could happen. Unlike layouts, you cannot simply define a flavor specific class with the same name as the main class. This is because, during compile, all code files are combined together. If you want to have flavor specific files, you will have to omit the file from main, and add it to each flavors source directory directly.
To ensure that all flavor code files maintain the same method contracts and methods, it is a good idea to define either an interface or abstract class in main, and ensure all flavor specific classes inherit from that.
Directing code flow per flavor
There is a special class created automatically for each Build Variant by gradle. This class is called BuildConfig, and it contains information and data relating to the Build Variant. The BuildConfig for the blueberryDebug variant for example is shown below.
/**
 * Automatically generated file. DO NOT MODIFY
 */
package com.sample.foo.multipleflavorsample;

public final class BuildConfig {
  public static final boolean DEBUG = Boolean.parseBoolean("true");
  public static final String APPLICATION_ID = "com.sample.foo.blueberry";
  public static final String BUILD_TYPE = "debug";
  public static final String FLAVOR = "blueberry";
  public static final int VERSION_CODE = 1;
  public static final String VERSION_NAME = "1.0";
  // Fields from product flavor: blueberry
  public static final int FOO = 42;
}
To direct code flow depending on a flavor, you can branch using the BuildConfig.Flavor value
if(BuildConfig.Flavor.equals("blueberry")) {
}
else if(BuildConfig.Flavor.equals("raspberry")) {
}
You can also define new BuildConfig variables in your app build.gradle file.
android {
    buildTypes {
        blueberry {
            buildConfigField "int", "FOO", "42"
            buildConfigField "String", "FOO_STRING", "\"foo\""
            buildConfigField "boolean", "LOG", "true"
        }

        raspberry {
            buildConfigField "int", "FOO", "52"
            buildConfigField "String", "FOO_STRING", "\"bar\""
            buildConfigField "boolean", "LOG", "false"
        }
    }
}
You can also add resource values directly to your build.gradle file, if you feel that’s more convenient. If you have only a few strings that change based on the flavor, you might prefer this method to reduce the number of files to worry about. As with all resources, any resource defined here is also available to use in your xml files.
android {
  buildTypes {
    blueberry {
      resValue "string", "app_name", "My App Name Debug"
    }
    raspberry {
      resValue "string", "app_name", "My App Name"
    }
  }
}
Don’t forget the comma in each buildConfigField and resValue line above. I may or may not be speaking from experience, but you would get an error without the comma. As with most things developing applications, syntax syntax syntax.
You must be careful to ensure that all flavors define the flavor specific resources and BuildConfig fields. However, it’s most likely that missing resources and buildConfigField values that you attempt to use will be caught during compile time.
Flavor specific app signing
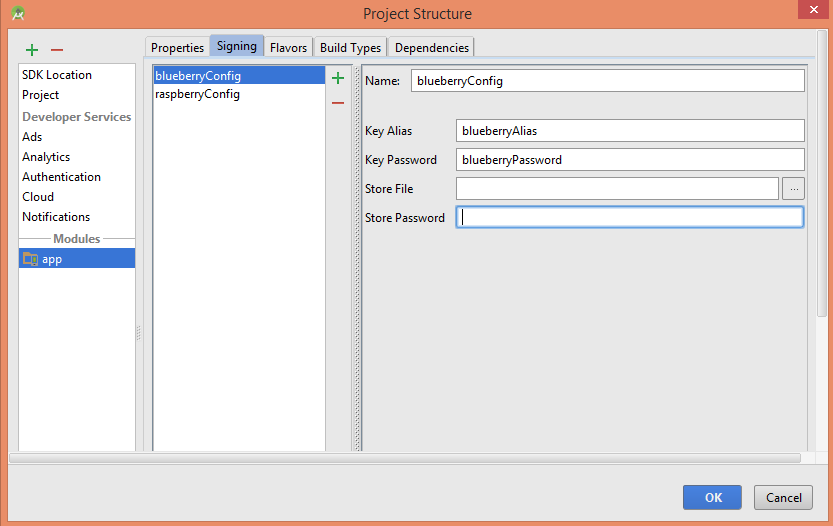
As discussed above, each app on an Android device is identified with its applicationID, and apps released to the Play Store must be signed with a key that cannot be changed throughout the lifetime of that app. Having a unique key for each flavor is simply a matter of defining signing configuration, and selecting the appropriate one for each flavor.
Build your multiple flavors
If your separate apps require minor customization and theme changes, but are really the same base app, multiple flavors is definitely the way to go. However, if both apps require a lot of custom code differences, you might want to rethink using multiple flavors strategy.
Also, take notice of the difference between flavors and build types. Use flavors for situations where you might need different versions of the same app in the Play Store, for example, free and pro, or for situations where you are customizing the same app for multiple clients. Use build types to differentiate between dev, debug and production builds. For example, debug builds might test against a local or privately controlled server, while release builds contact the release server.
As always, the complete source for the sample app built for this article is available on GitHub, and can be used by all. The sample shows all the different concepts discussed above among others. Happy coding.
Thank you for being part of our community. Read our Comment Policy before posting.