Affiliate links on Android Authority may earn us a commission. Learn more.
How to burn ISO to a USB on Windows
Published onJune 11, 2023
An ISO file, or optical disc image, is a way to create a copy of a large data set. It can be used for any extensive program, but the most common use of an ISO file is creating an operating system backup. ISO files can be extracted and used on other computers, and in the case of operating systems and PC software, users can also create bootable drives. We used to burn ISO files on CDs and DVDs, but USB drives are the preferred option now. Unfortunately, getting an ISO file on a USB drive isn’t as simple as copying it over. Instead, you’ll have to “burn” the file onto a USB drive. Here’s how to burn ISO to a USB on Windows.
QUICK ANSWER
To burn an ISO file to a USB drive, you can use third-party applications like the Rufus tool. It has a portable version that doesn't require a system installation, automatically recognizes the type of ISO file you are trying to burn, and is relatively quick. There are alternatives like UNetbootin if you are burning a Linux ISO, and Microsoft has its own Media Creation Tool for Windows 10 and 11.
How to burn ISO to USB?
You can use various third-party applications to quickly burn an ISO file to a USB drive, depending on what kind of ISO you’re trying to burn. To burn a Linux ISO, you can use the UNetbootin tool. And Windows has its own Media Creation Tool to burn a Windows ISO to a USB. We’ll use the Rufus tool since it makes the process straightforward, is relatively quick, and has a version that doesn’t need a system installation.
Burn ISO to USB using Rufus
Download the Rufus tool. We recommend using the portable version since it doesn’t require a system installation, but you can also download and install the standard version. Plus, the USB drive into your PC, launch the tool, and select your USB drive from the dropdown menu under Device.

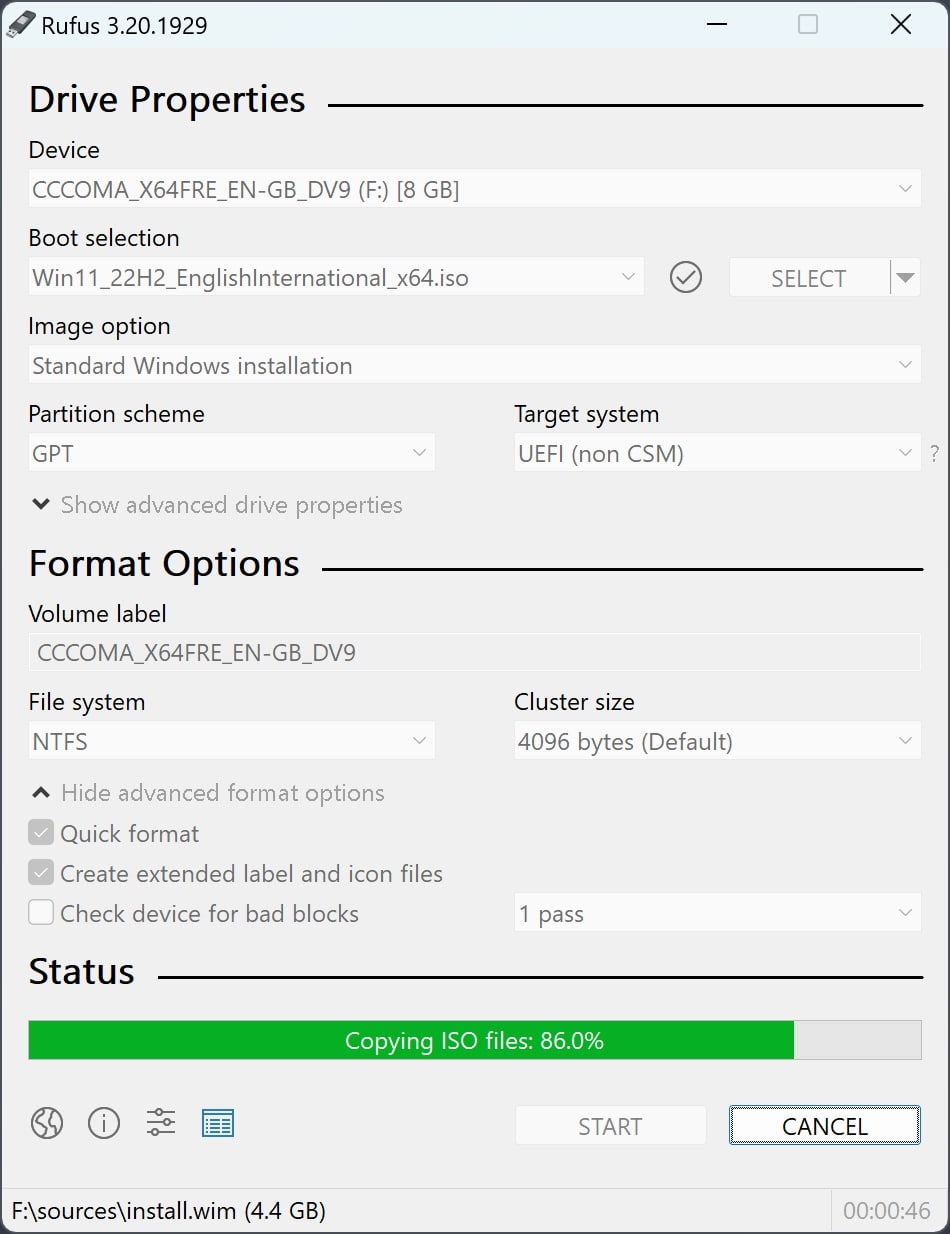
In the Boot selection dropdown, select Disk or ISO image and click SELECT. Find your ISO file in Windows Explorer and click Open. The tool will automatically recognize the kind of ISO file it is. If you see an “unsupported ISO” error, you will have to use another burning tool like UNetbootin.
Once the tool determines the type of ISO file, you might see additional options. For example, if you’re creating a Windows installation, you can select Standard Windows installation in the Image option dropdown. Let the tool autofill the Partition scheme, Target system, File system, and Cluster size options unless you’ve received specific instructions on what to choose.
Click Start to begin burning the ISO file to the USB drive. The tool will format the drive to the correct format before starting the process. Keep in mind that this will erase everything on the drive, so ensure you back up any files you might have stored. The time it takes for the process to complete depends on the file size. A Windows installation, which is around 5GB, could take up to 20 minutes. Look for the Ready message under Status. You can now close the tool and unplug the drive.

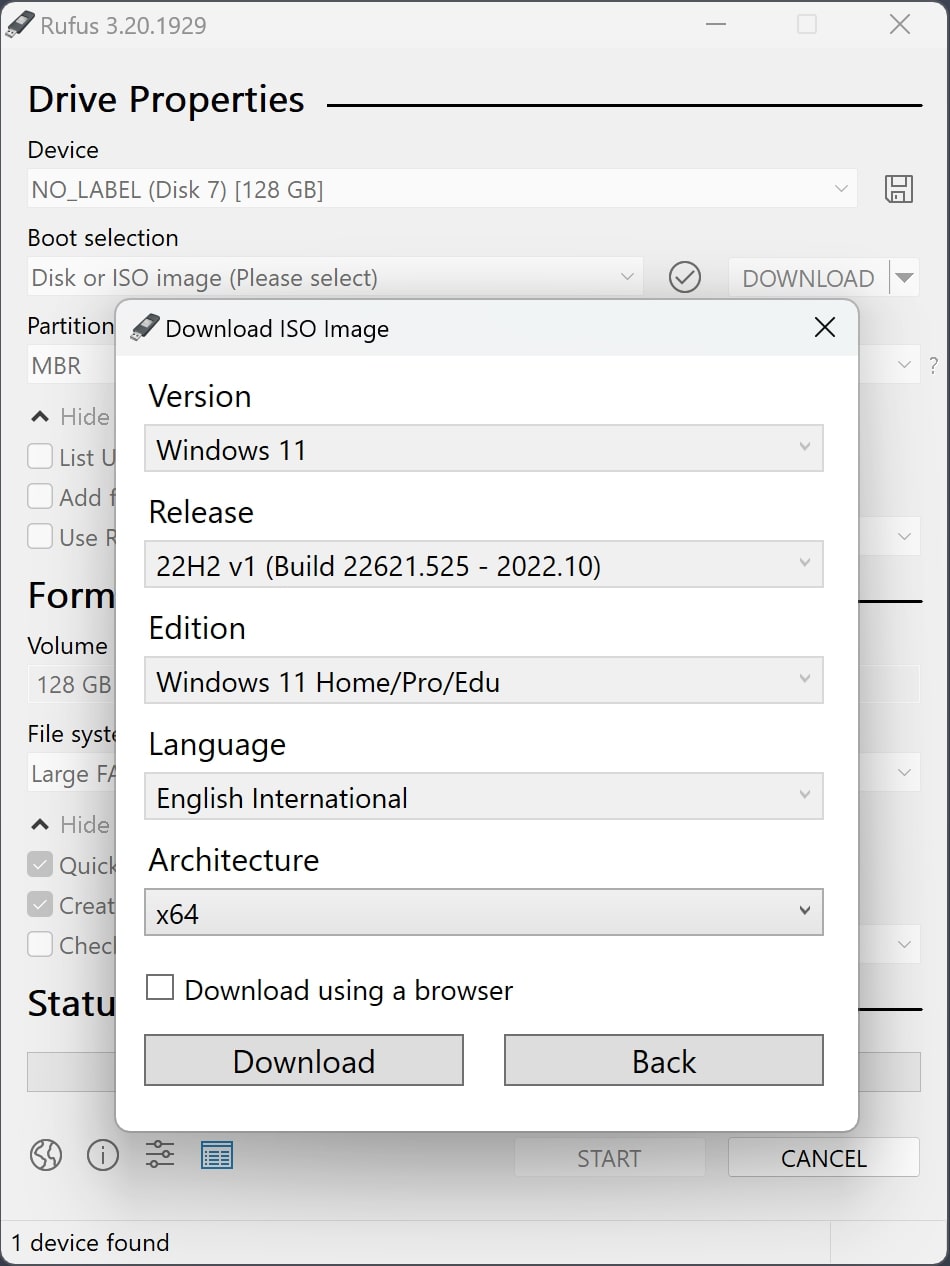
If you don’t already have a Windows ISO file, Rufus lets you download it directly through the tool. In the Boot selection section, click the downward arrow next to Select and choose Download. Click the button, select the version of Windows you want to download, choose the edition and language, and click Download. Once it completes the download, you can burn the ISO file to your USB drive.
How to burn a Windows ISO to USB using the Media Creation Tool
Download the Windows Media Creation Tool. You can use the tool to create an ISO file or directly download the Windows 11 ISO file on that page. Select USB flash drive in the Choose which media to use section. Select the flash drive from the list on the next page. After confirming your selection, the tool will burn the ISO file to the flash drive. If you’re facing issues with your Windows system, you can also create a bootable Windows USB on a Mac.