Affiliate links on Android Authority may earn us a commission. Learn more.
How to clear cache on Windows 11
Published onFebruary 21, 2022
Windows 11, like any other Windows version we have had in the past, can let a lot of unnecessary data build up over time, wasting storage. A great way to get rid of some of these unnecessary items is to clear the cache, which helps free up storage and improve the overall health of your Windows 11 PC.
Read more: How to install Windows 11
QUICK ANSWER
To clear the cache in Windows 11, you can use the built-in Disk Cleanup app or the settings app to clear location history, device search history, activity history, and temporary files. You can also use the third-party app CCleaner for a more thorough cleanup.
JUMP TO KEY SECTIONS
Clear the cache using the Disk Cleanup app
Windows 11 has a built-in app to help clear the cache, unnecessary files, and data. It’s called Disk Cleanup.
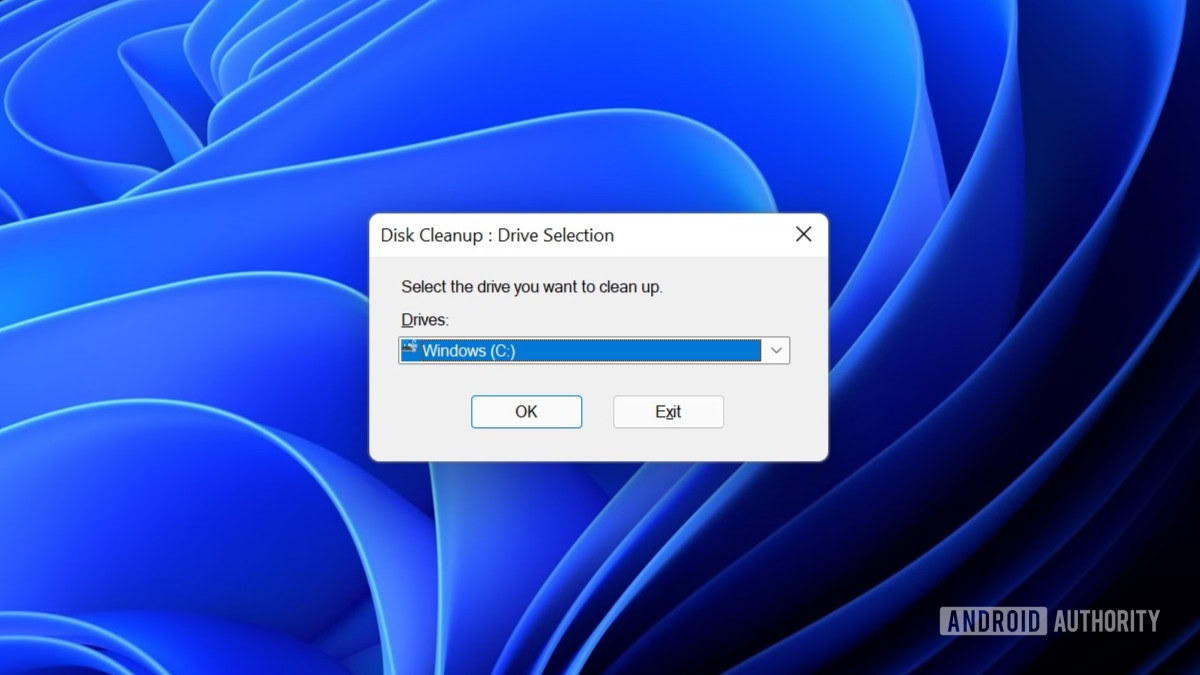
Open Windows Search and type in Disk Cleanup, and click the Disk Cleanup app when it appears. Alternatively, press Windows key + R simultaneously, type in cleanmgr.exe in the dialog box, and click OK.
Select C: and click OK on the Disk Cleanup disk selection pop-up. You can repeat the process with other partitions later.
Tick the boxes next to the file types you want to clean up.
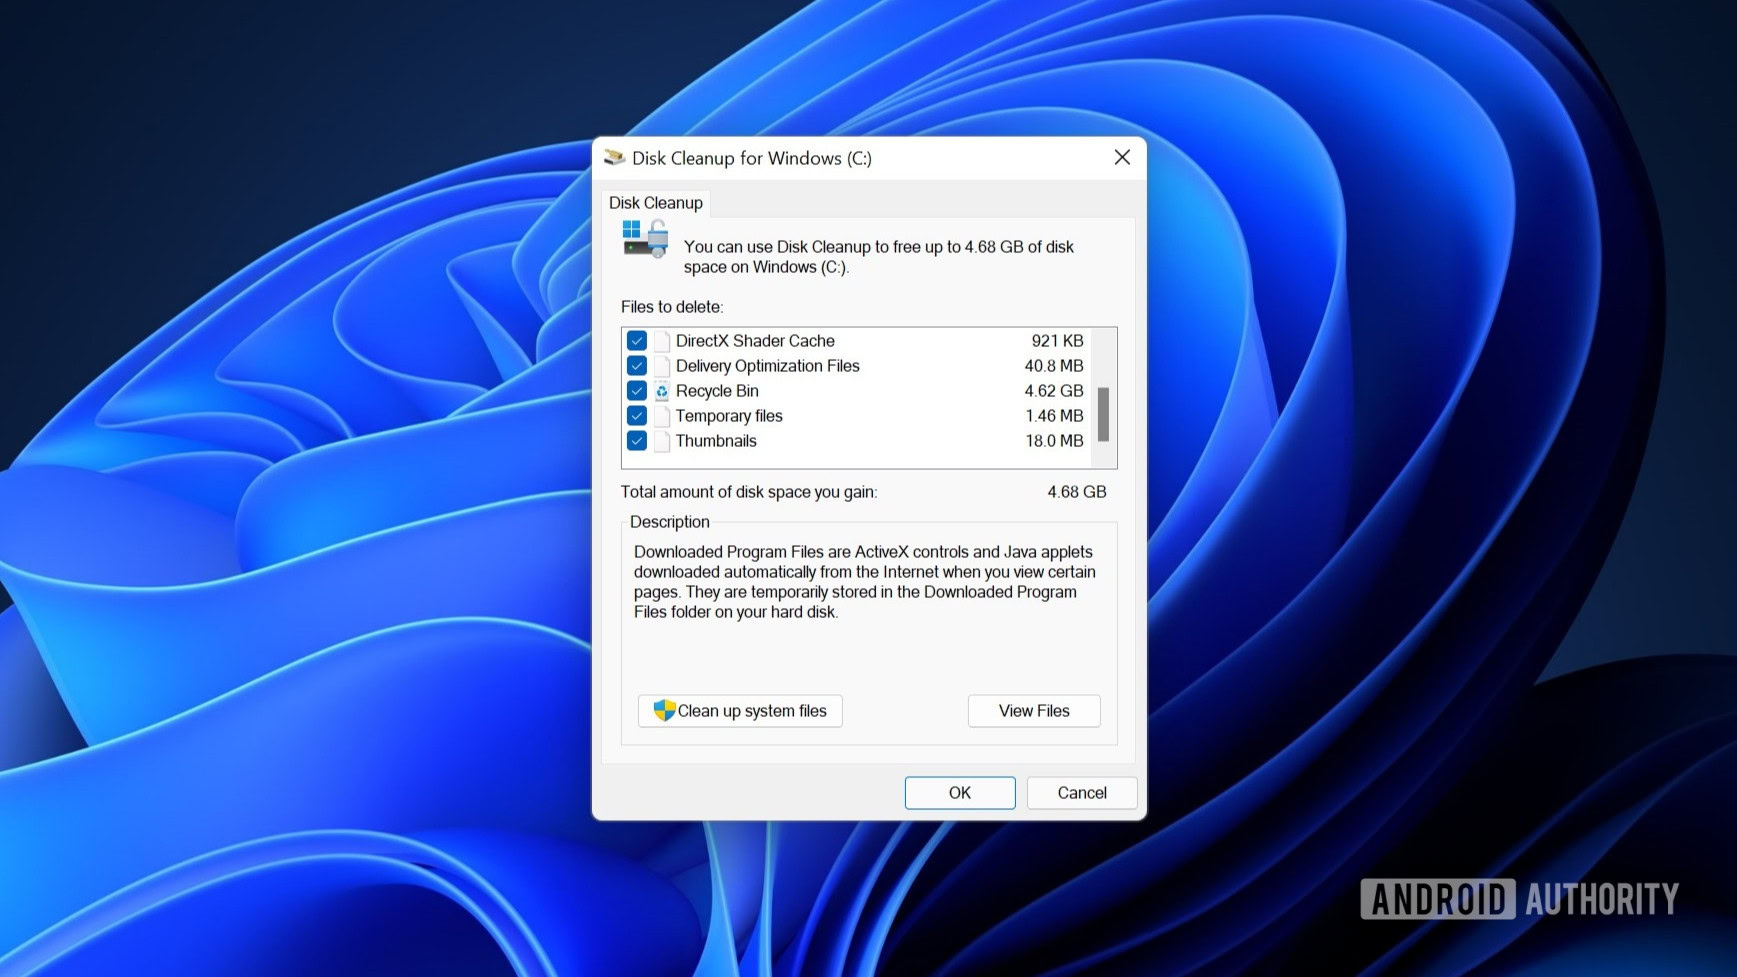
Click the Clean up system files button to get a more thorough cleanup. Once you have checked all the boxes, click OK. Disk Cleanup will take some time and clear the cache on your Windows 11.
Clear the cache using the settings menu
There isn’t a way to clear the cache using the settings menu, but you can clear a few types individually, like location history, device search history, and activity history.
Erase location history
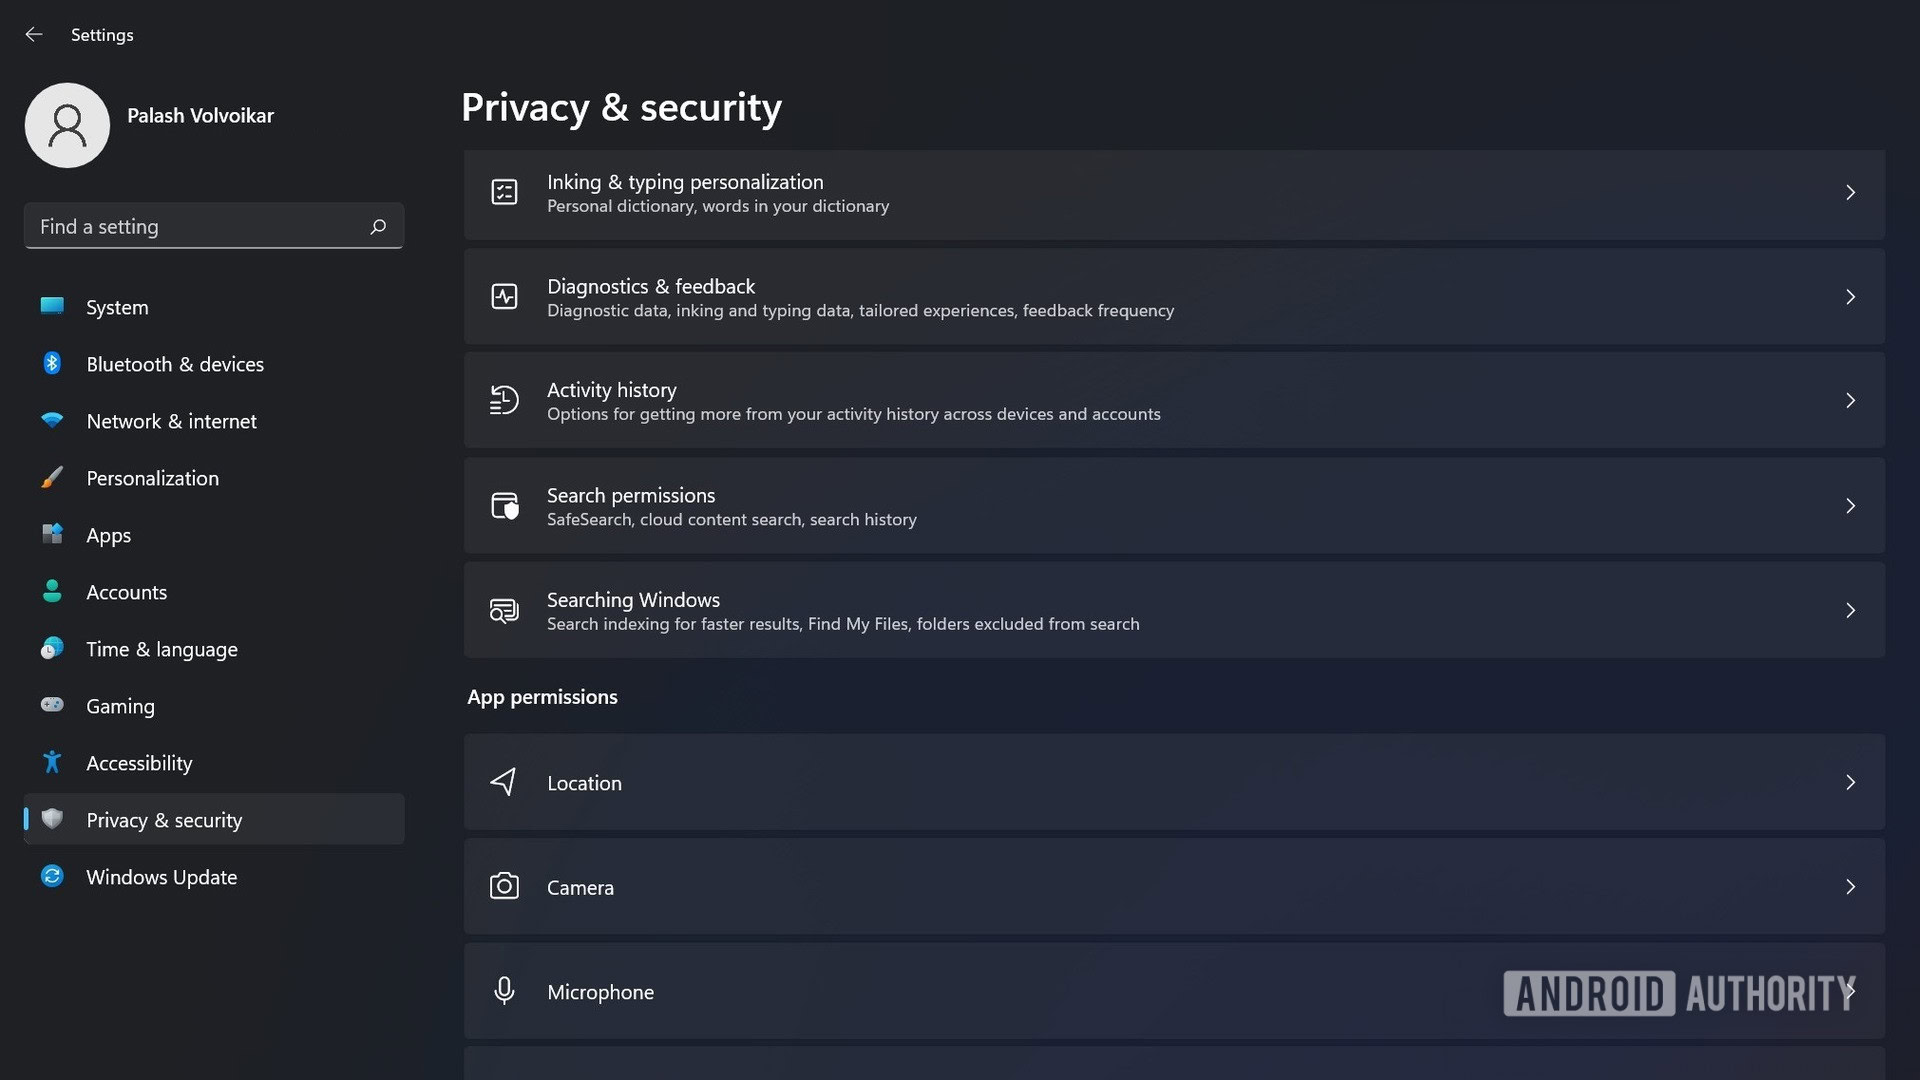
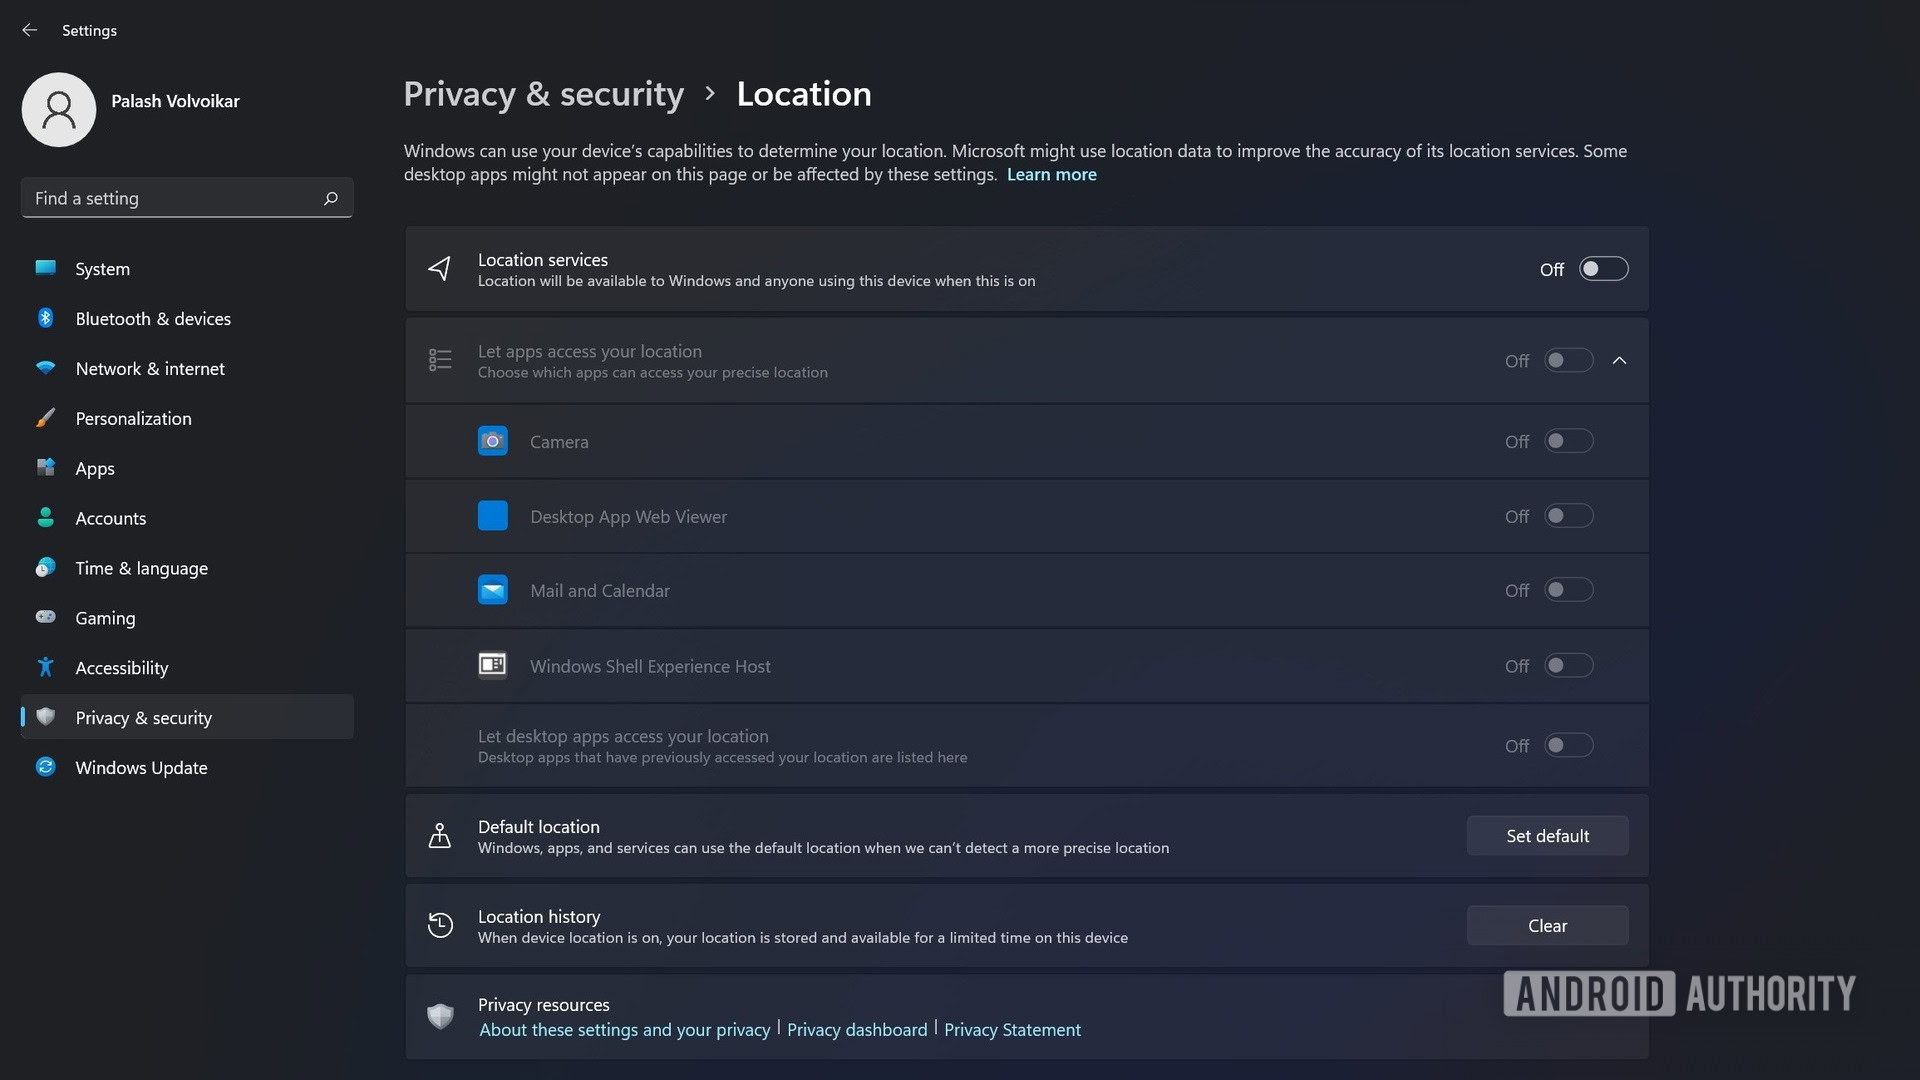
To clear location history, open Windows Settings. Click Privacy and Security in the left navigation pane. Scroll down and locate Location under App permissions, and click it.
Locate the Location history tab, and click the Clear button.
Erase device search history
Open Windows Settings. Click Privacy and Security in the left navigation pane. Scroll down, locate Search permissions under Windows permissions, and click it.
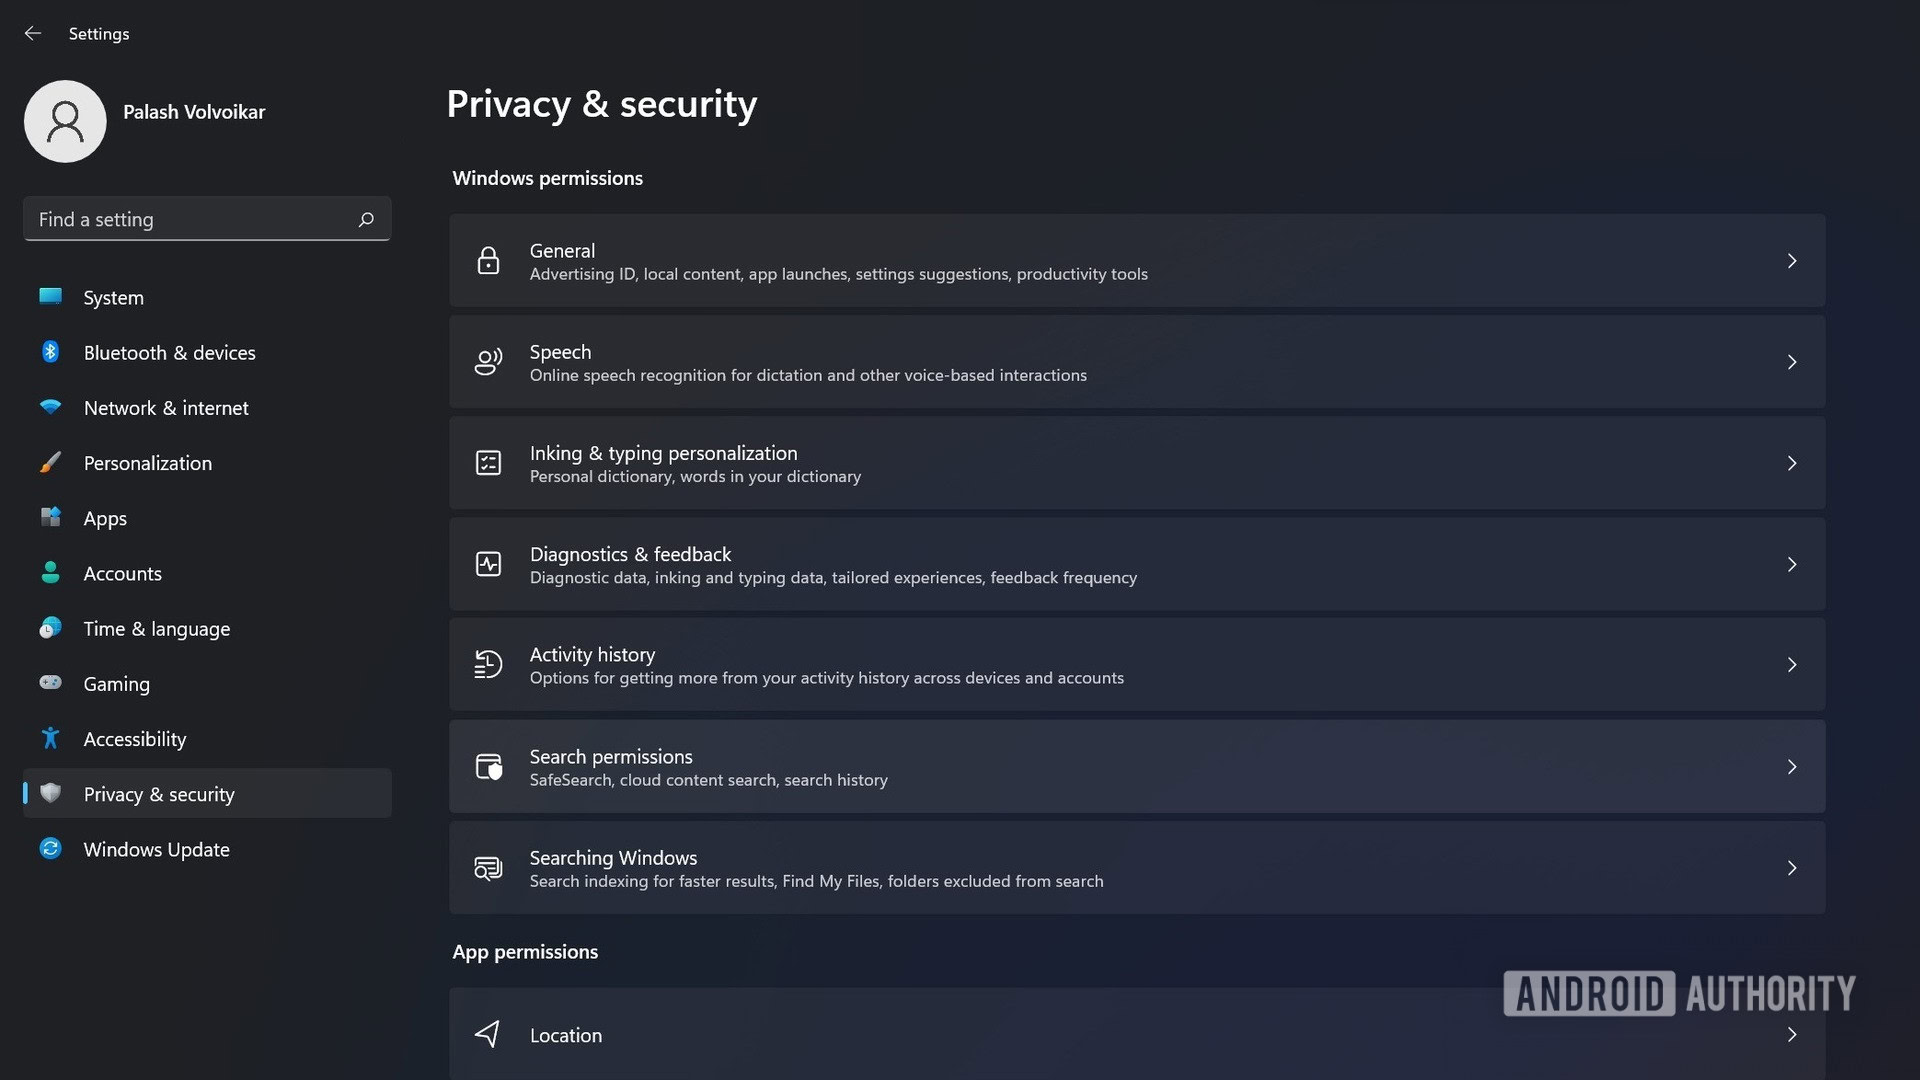
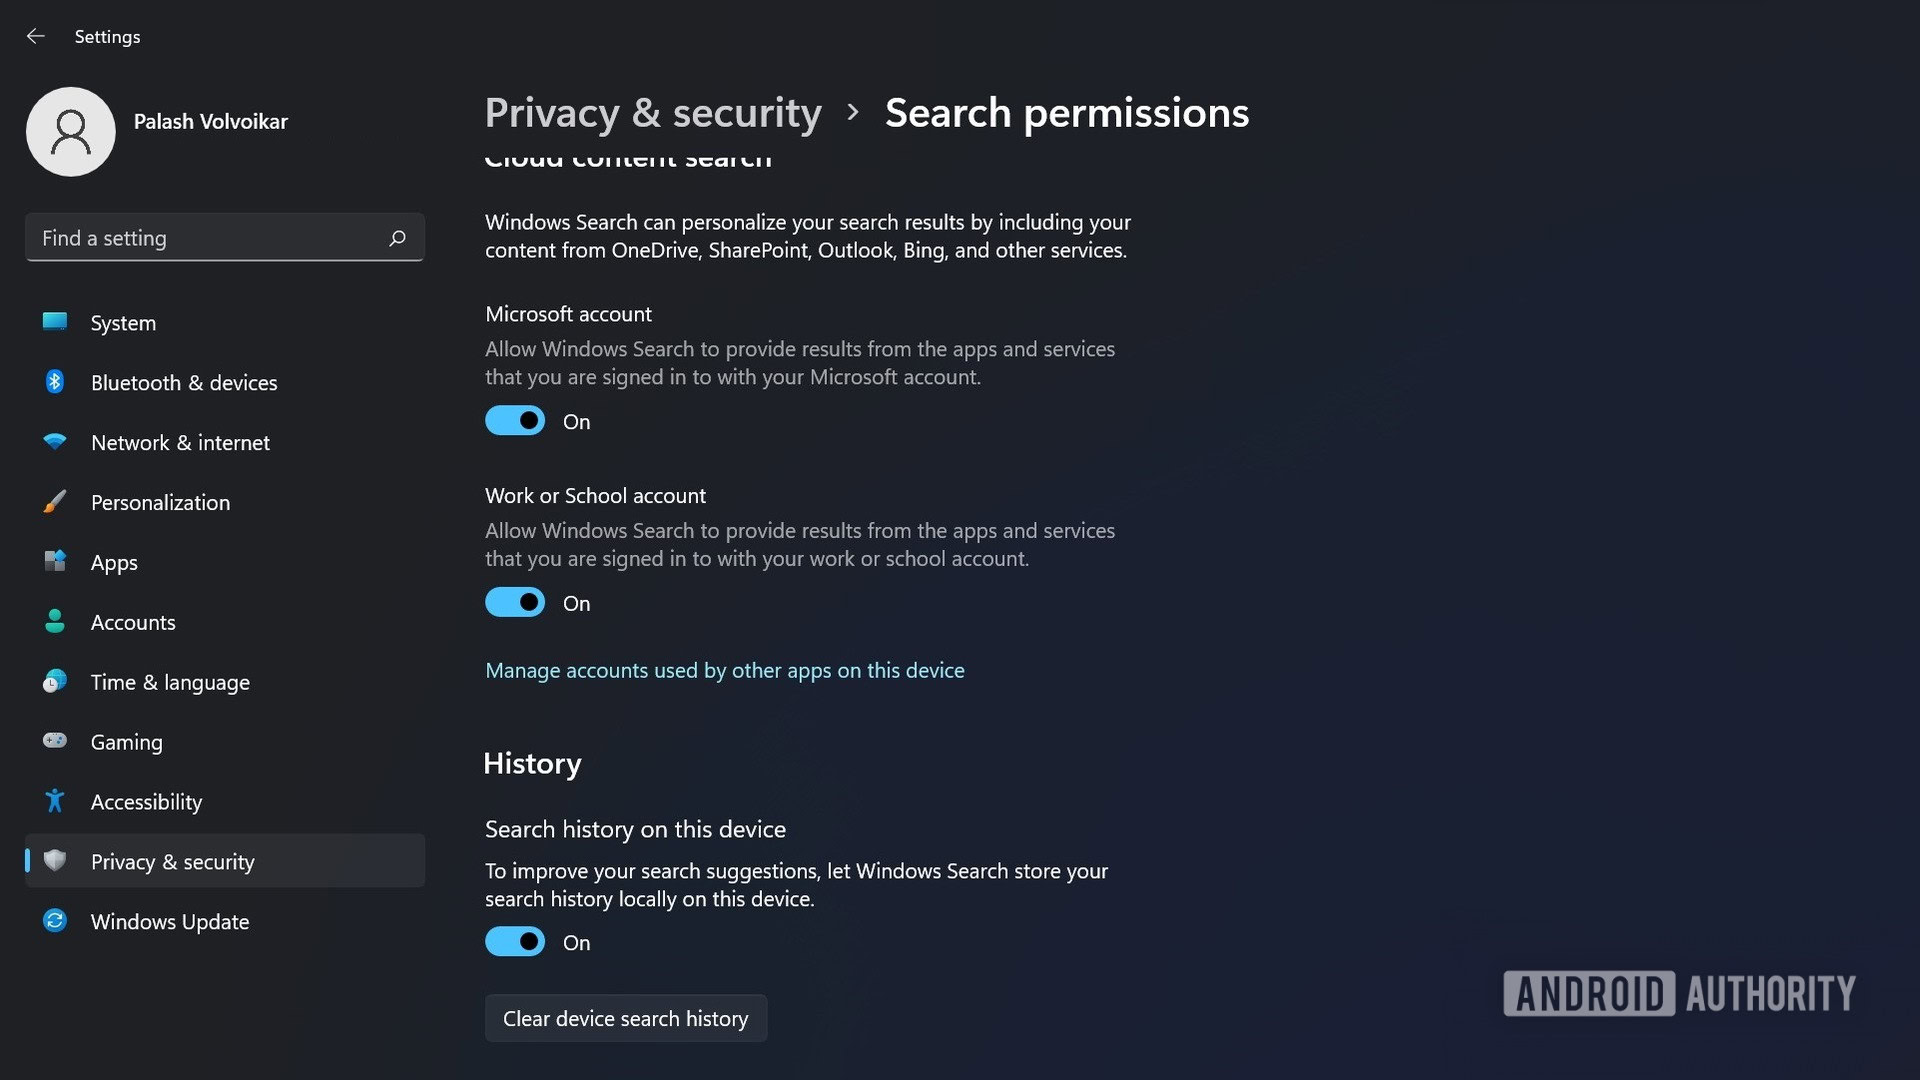
Locate the History section, and click the Clear device search history button.
Clear activity history
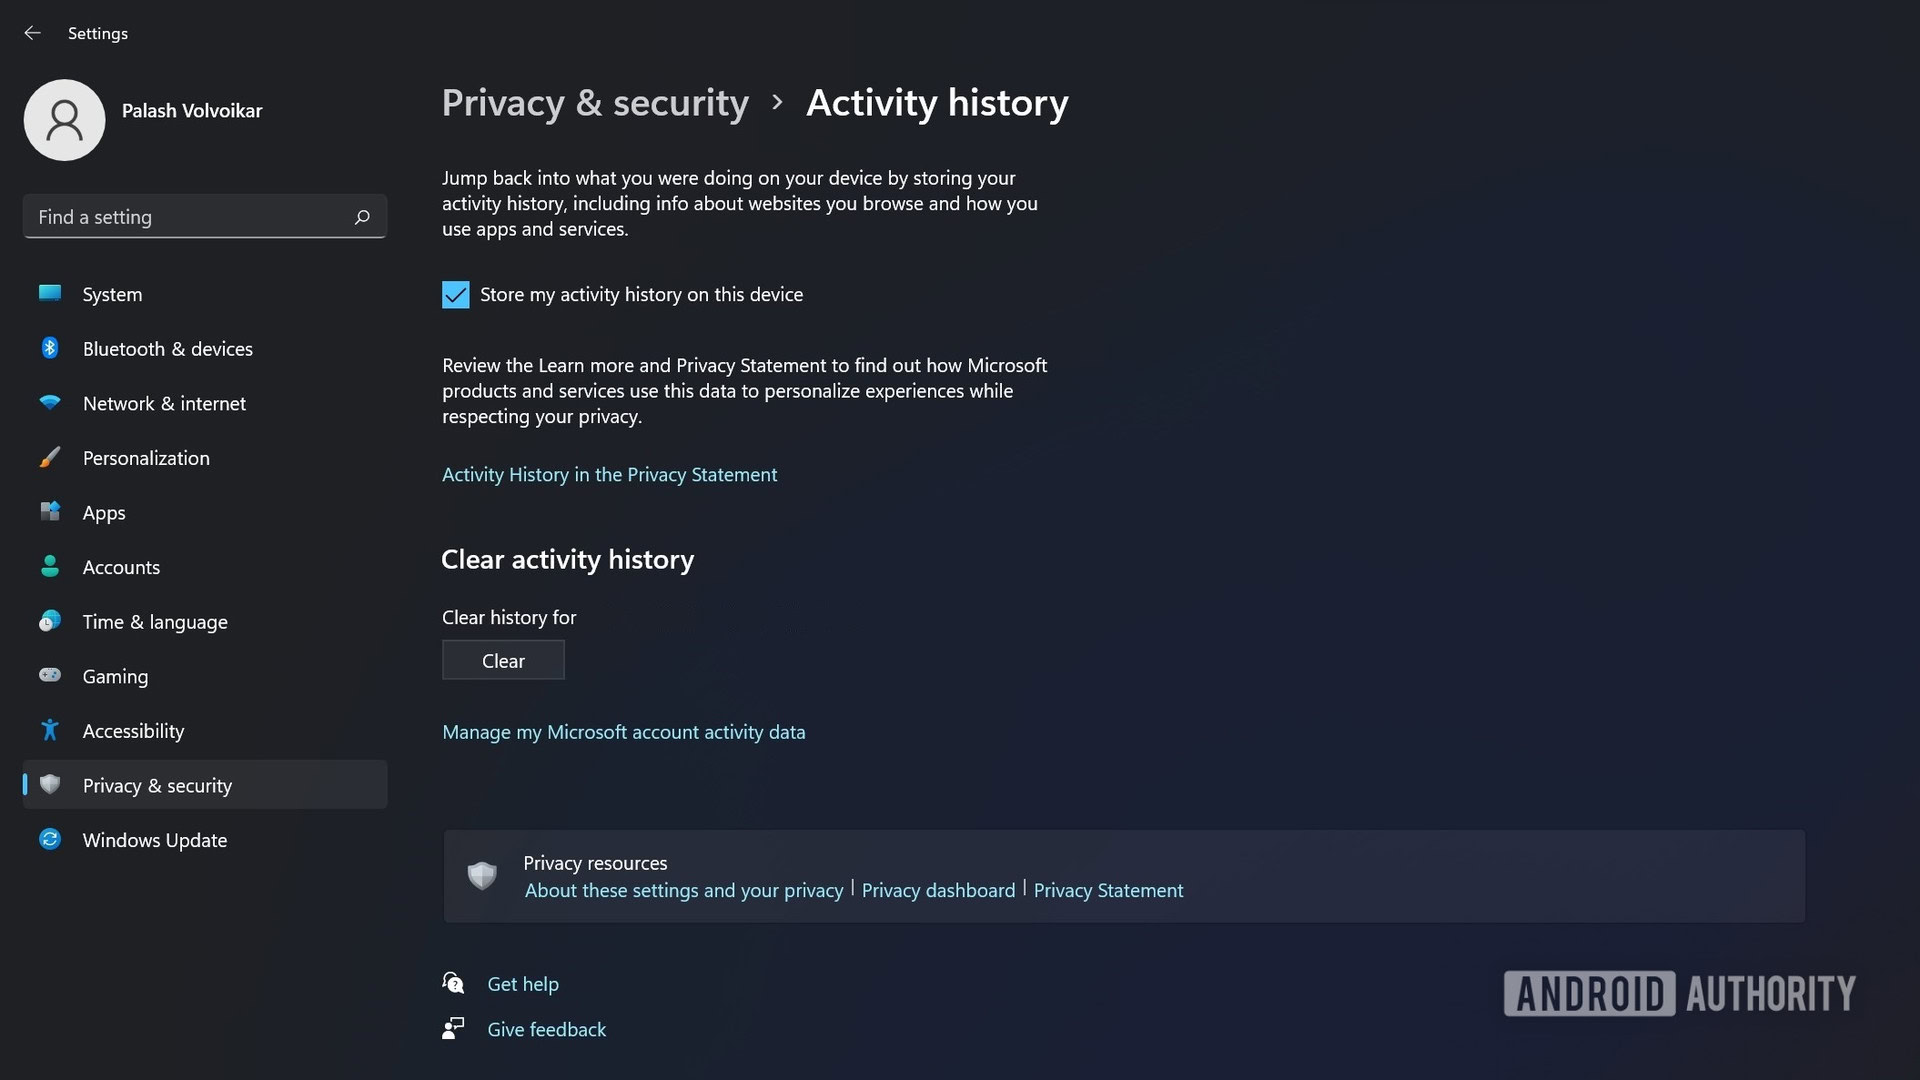
Open Windows Settings. Click Privacy and Security in the left navigation pane. Scroll down and locate Activity history under Windows permissions, and click it.

Locate the Clear activity history section, and click the Clear button underneath it.
Remove temporary files
If you want to clear temporary files, you can also do that through Windows settings.
Open Windows Settings, and click System in the left navigation pane. Click Storage in the right pane.
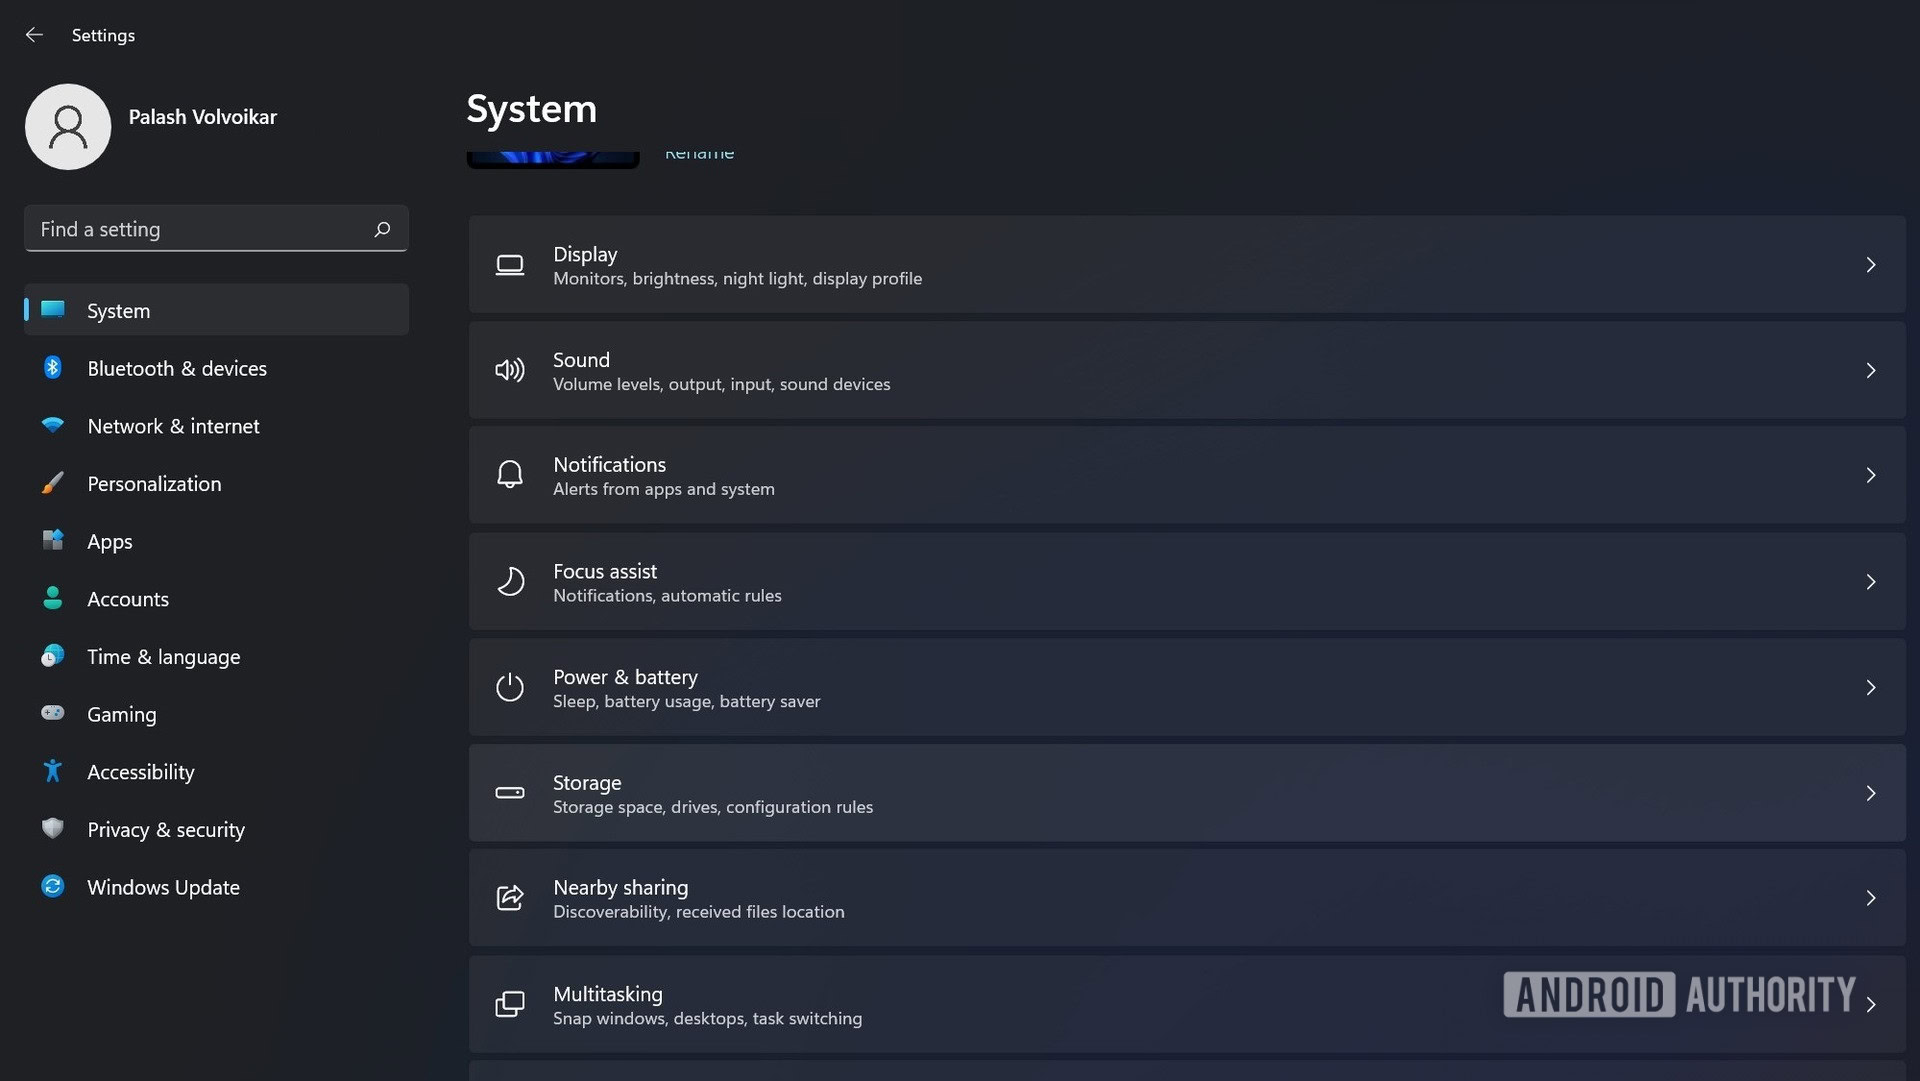
Select Show more categories, and then click Temporary files.
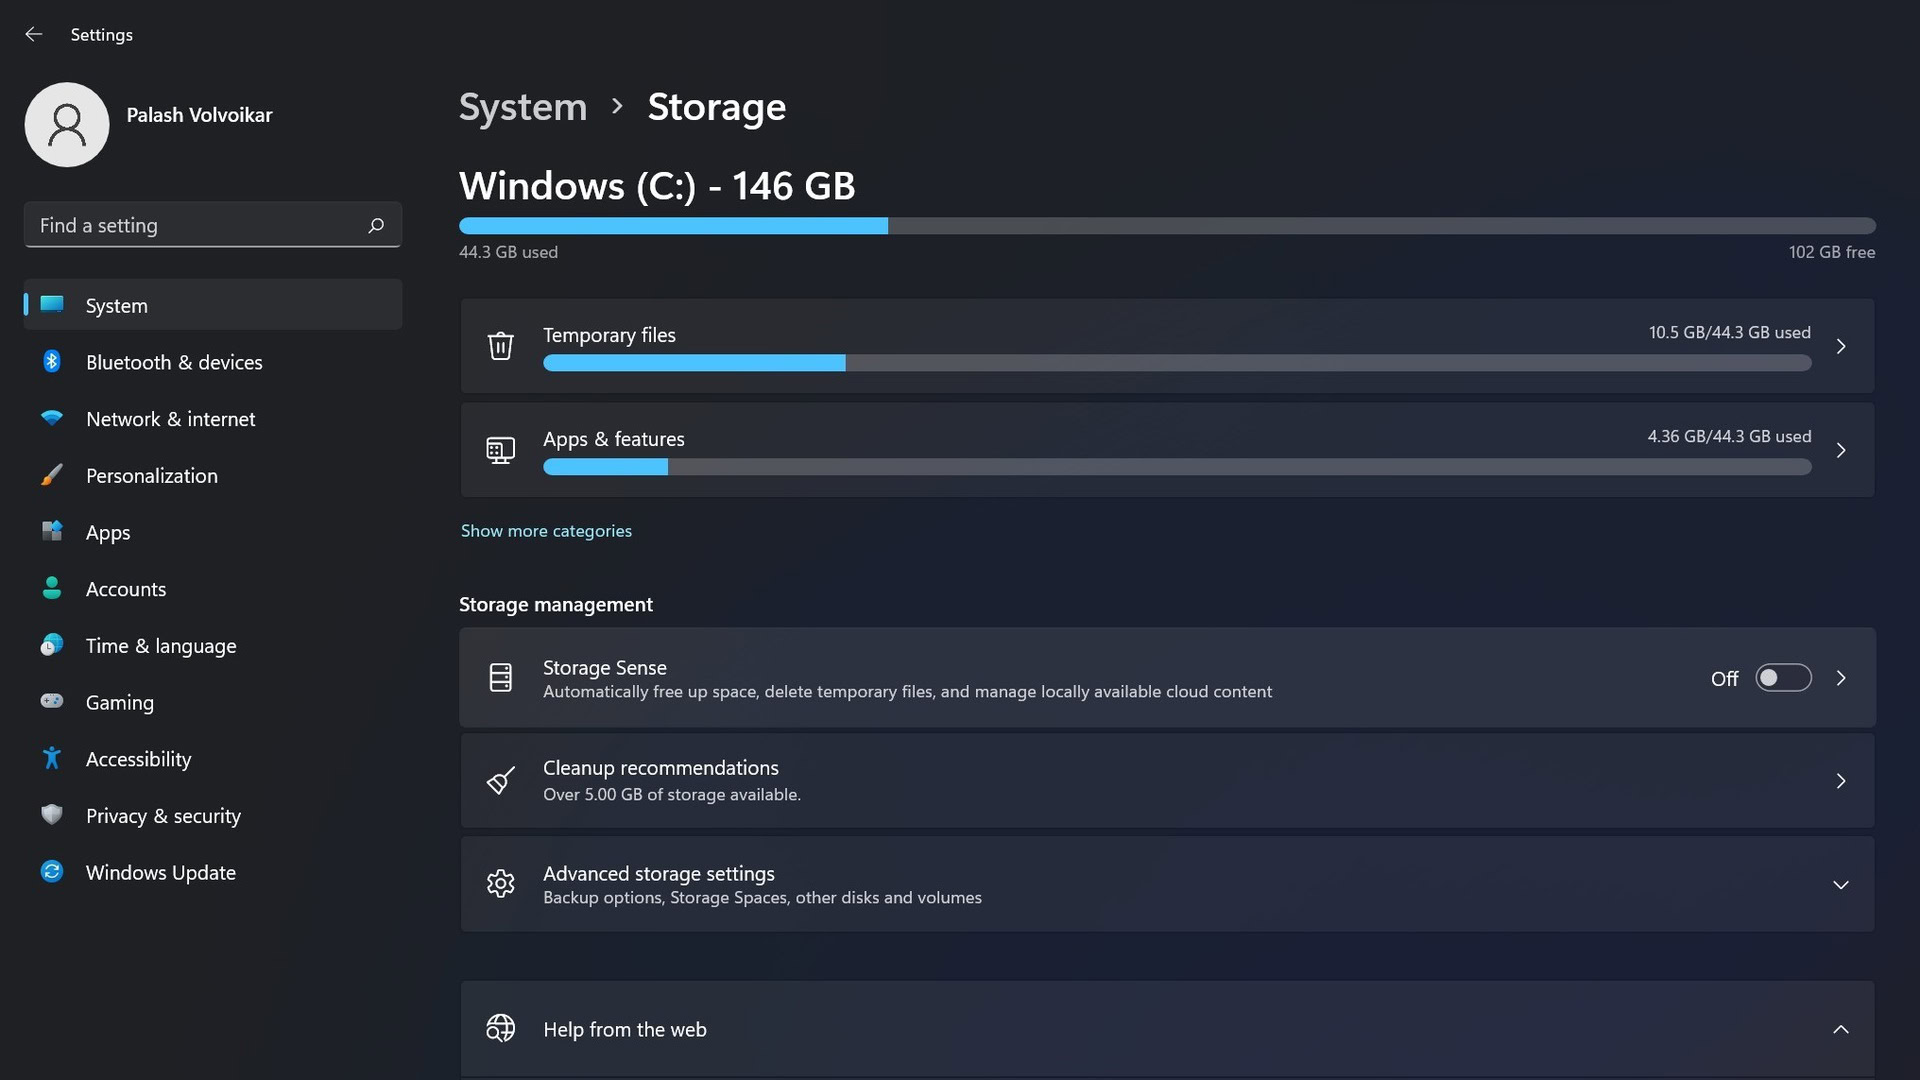
Check all the boxes of the file types you want to clear. We recommend you leave Downloads unchecked, as that will empty your entire Downloads folder if you select it.

Once you’ve made your selection, click the Remove files button located above the file list.
More here: How to customize the Windows 11 Start menu
Clear cache using CCleaner
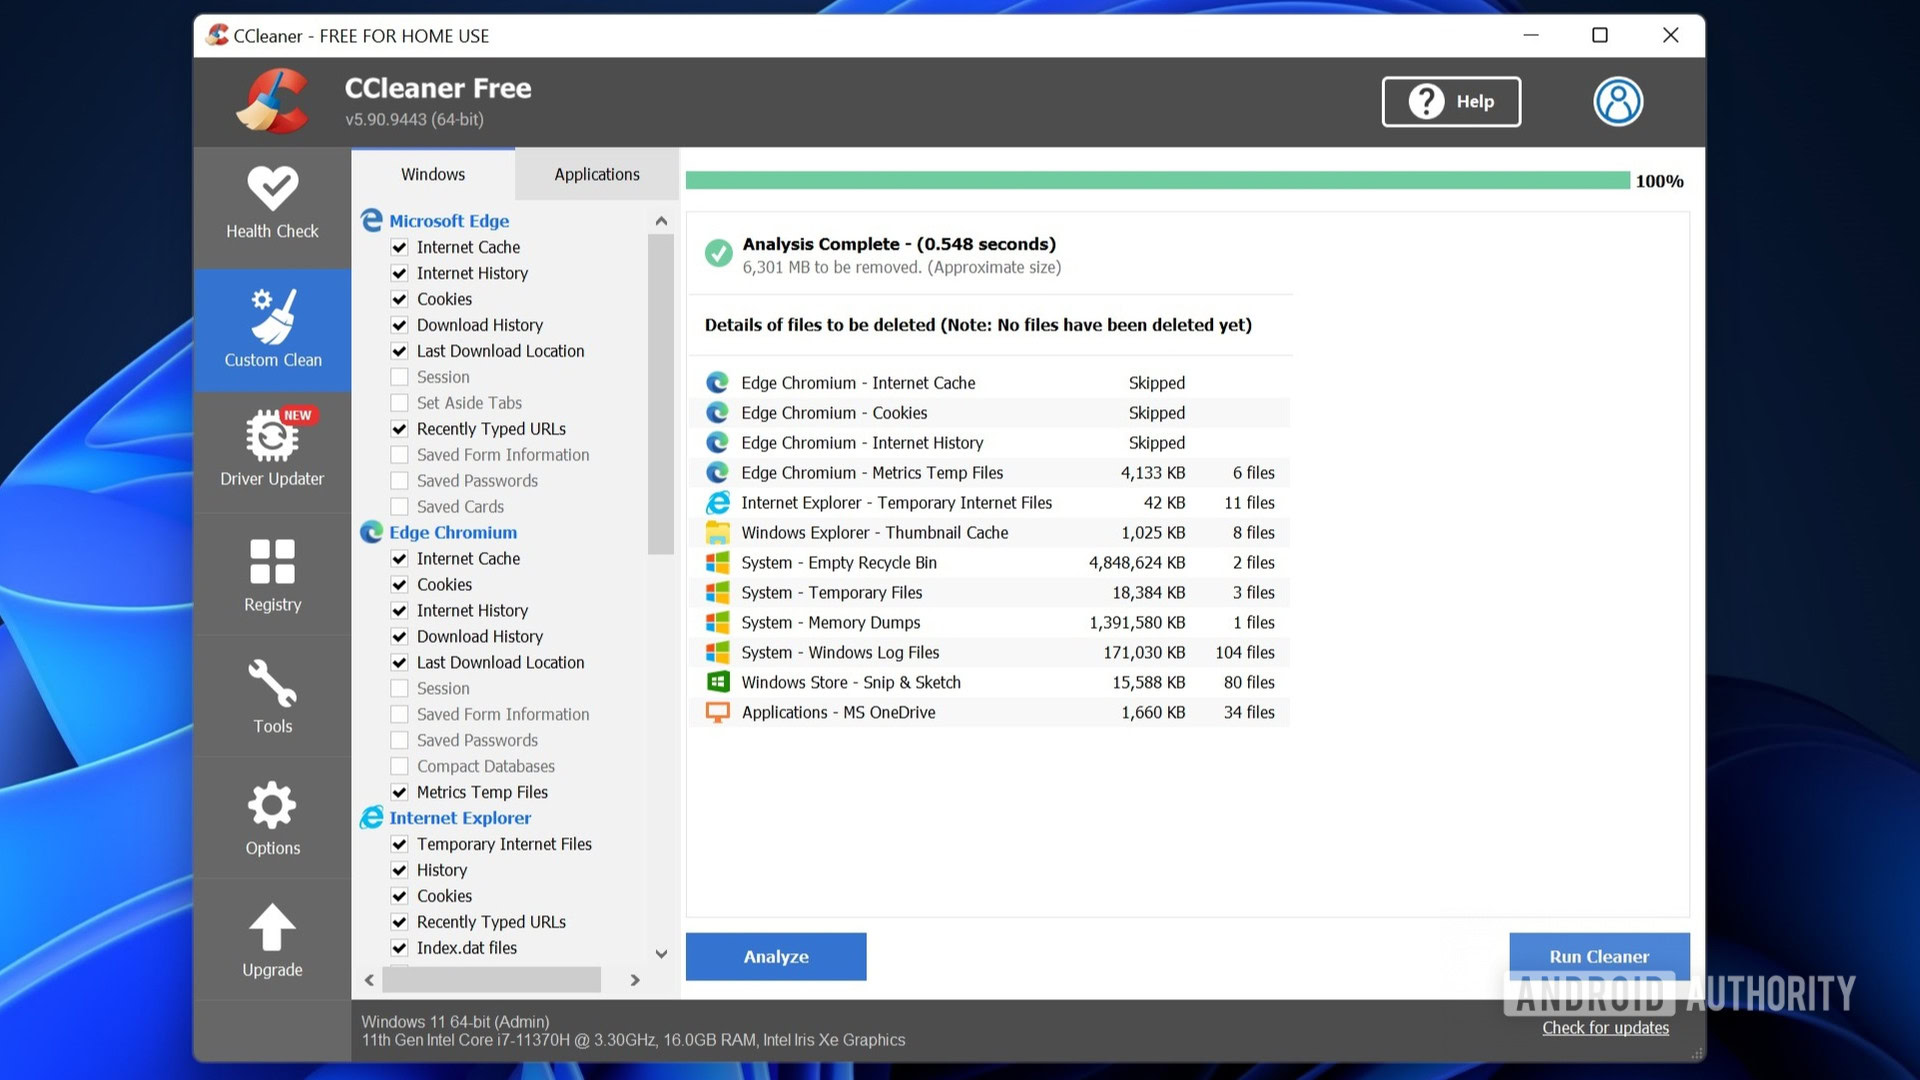
If the default options available in Windows 11 are not enough for you, you can download a third-party cleaning app like CCleaner to clear your cache. Use the Custom Clean feature found in the left pane, select the file types you want, and clean with the Run Cleaner button.
Read more: How to run Android apps on Windows 11