Affiliate links on Android Authority may earn us a commission. Learn more.
How to create and share an album on Google Photos
Published onJune 21, 2022
Creating albums on Google Photos is like creating playlists on Spotify. Albums consist of photos and videos that you group together for a specific reason. For example, if you took many pictures during the summer, you may have an album dedicated to that period. You can even share it with others and get them to add their photos to it. Knowing how to create and share Google Photos albums is a key skill that every smartphone user should utilize to organize their content.
READ MORE: How to download photos from Google Photos
THE SHORT ANSWER
To create an album on Google Photos (mobile), tap the Library tab > tap Create album. You can change its name, add photos, remove photos, share it, and make it collaborative.
KEY SECTIONS
How to create an album on the Google Photos app
First things first: what if you want to create an album from your phone?
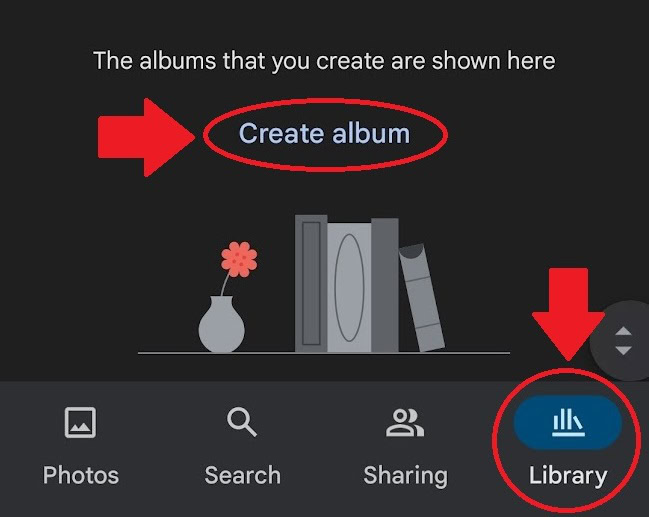
Open the Google Photos Android or iOS app and select the Library tab from the options at the bottom. Scroll down to the bottom, and then press Create album.
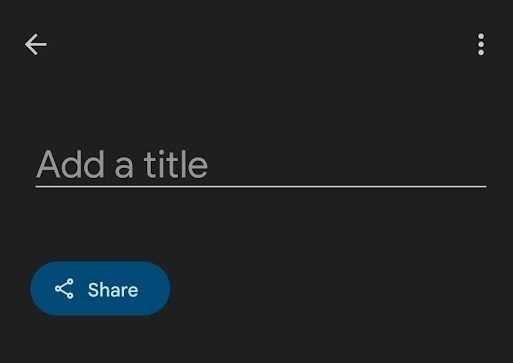
After creating your album, you can name it in the Add a title field.
Adding photos to your album
Press the Select photos button at the bottom of the screen to add photos and videos of your choice to the album. Your options will be limited to whatever content has been synced or uploaded to your Google Photos account already.
Remember, this is just a way to organize your existing photos on Google Photos.
How to create an album on the Google Photos website
Starting albums on the Google Photos website is just as easy as the app.
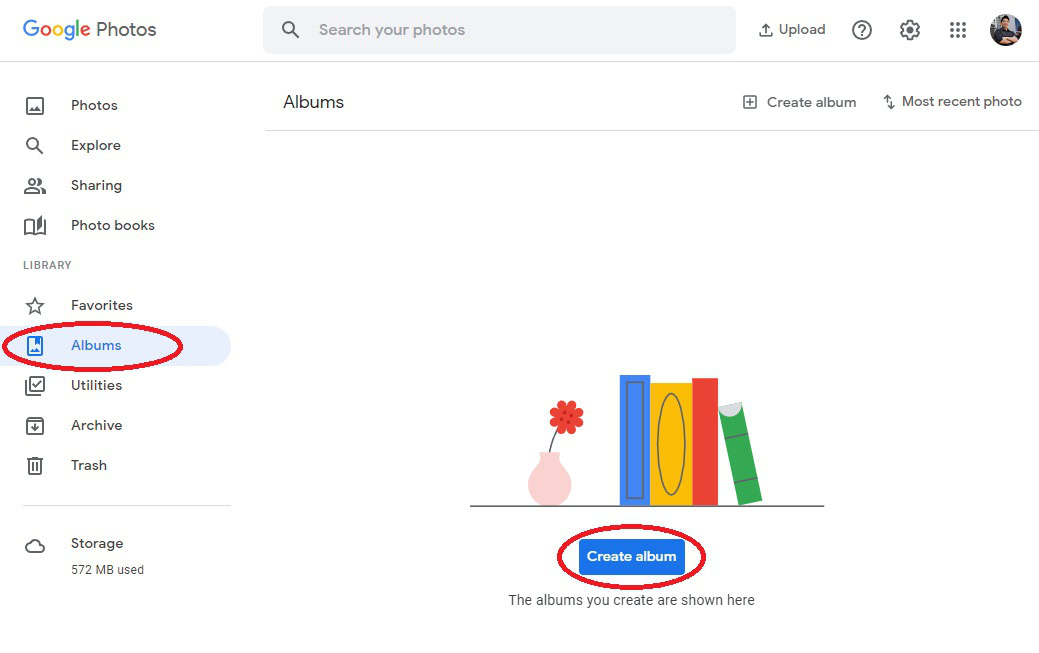
First, open a browser and go to the Google Photos website on your computer. Then, from the tabs on the left, select Albums.
In the Albums tab, you will find a button marked Create album. Click on this to proceed and start a brand new album.
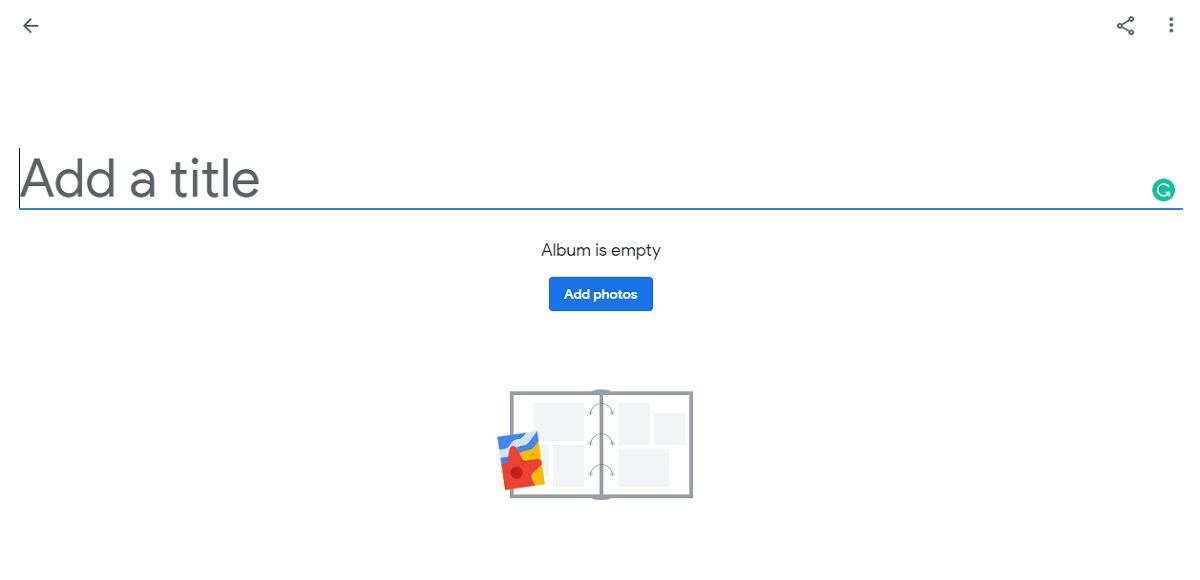
Once you have created your album, you can fill in the Add a title field with whatever you want to name the album.
Adding photos to your album
Click Add photos to start adding photos and videos to your album.
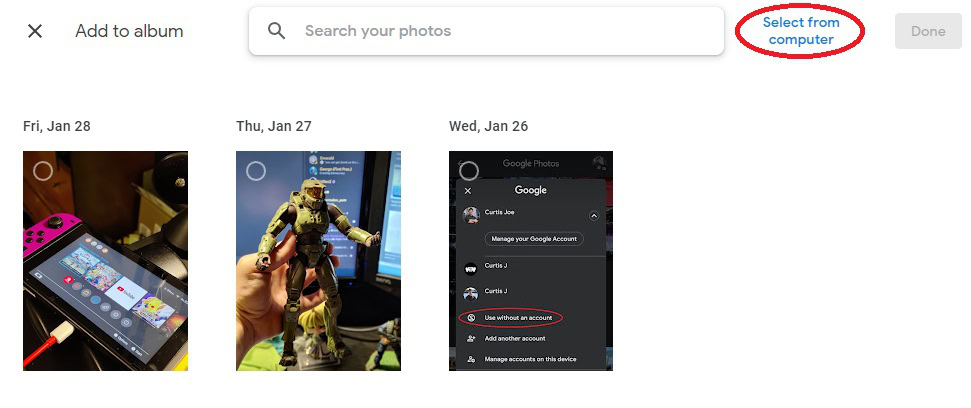
Additionally, because you are creating the album from your computer, you are given the option to upload images directly from your computer. To do this, after selecting Add photos, on the following screen, click Select from computer in the top right.
How to remove photos from a Google Photos album
Android and iOS
If you want to remove content from an album, open your Google Photos mobile app, navigate to the Library tab from the bottom, and select your album.

Next, identify whichever photo or video you want to remove and long-press (press and hold down on) it. If you wish to remove multiple pieces of content, you can select more after long-pressing the first one.
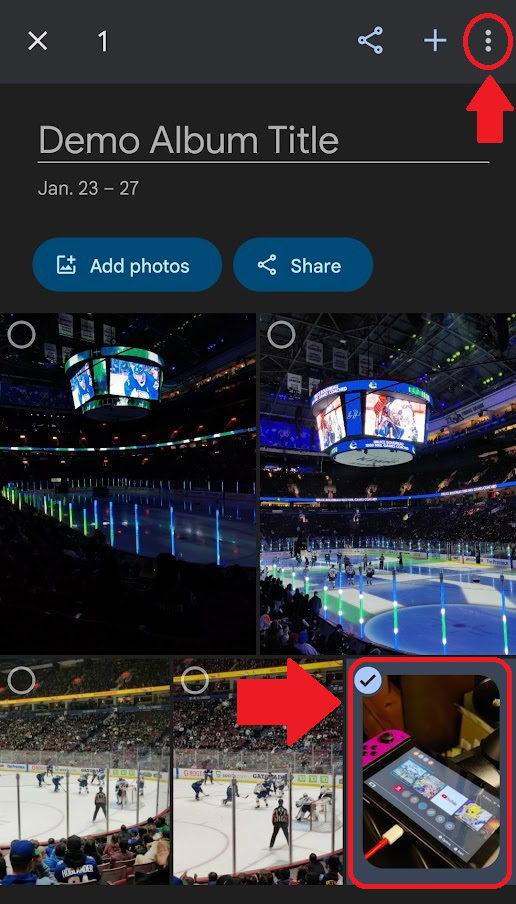
Press the ⋮ button in the top right and select Remove from album.
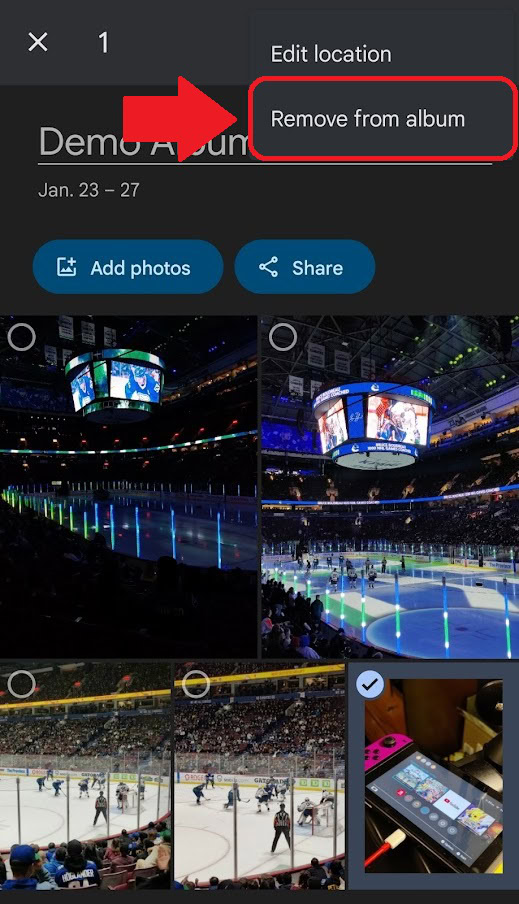
PC and Mac
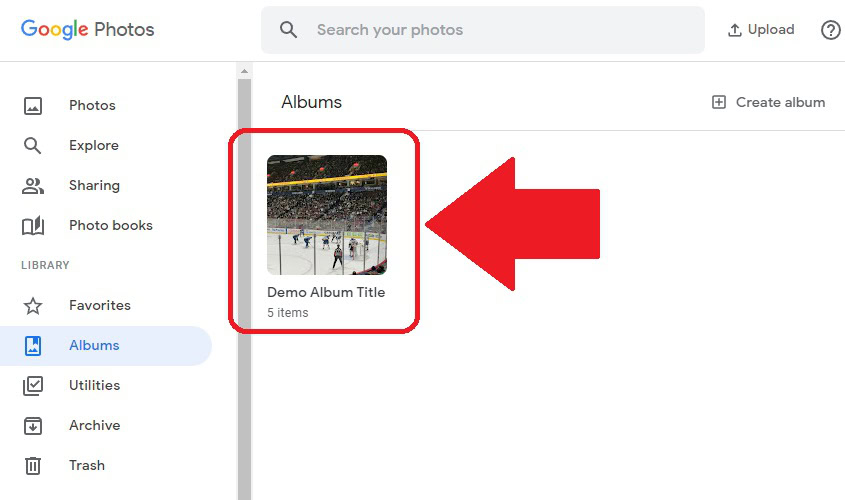
Go to the Google Photos website on your browser. Click the Albums tab on the left side under LIBRARY.
Find the album you wish to edit and open it.
Hover your mouse over whichever photo or video you want to remove. A small grey checkmark will appear above it in the top left corner of the image. Click that to select it.
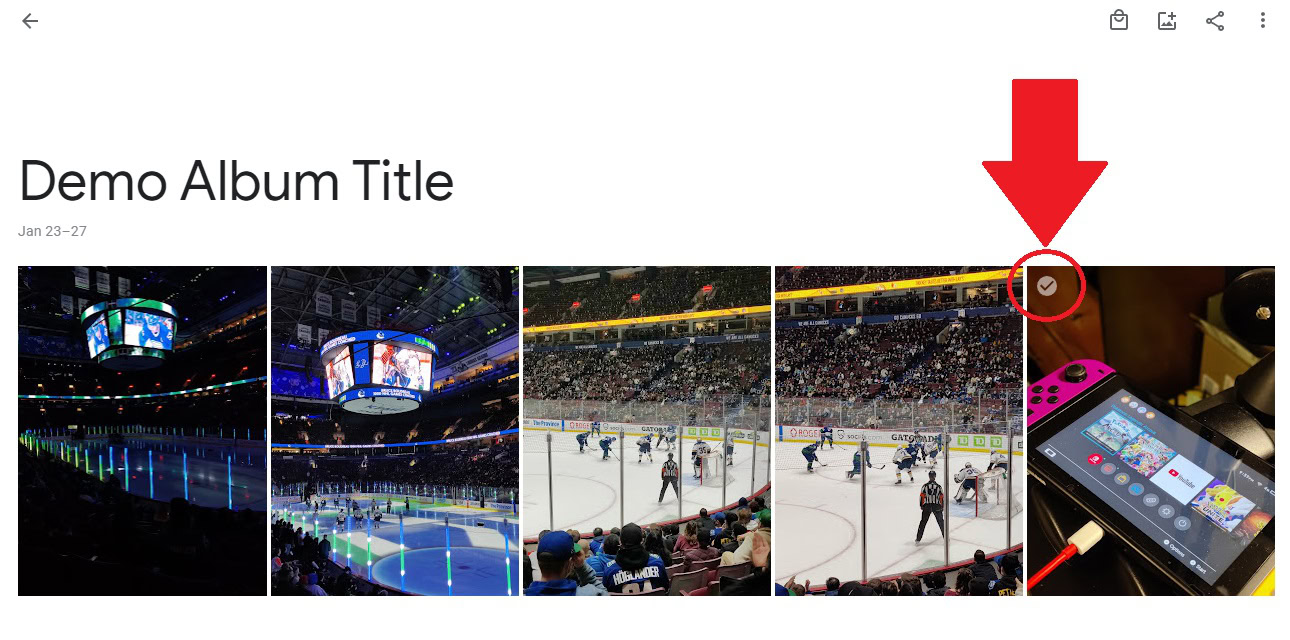
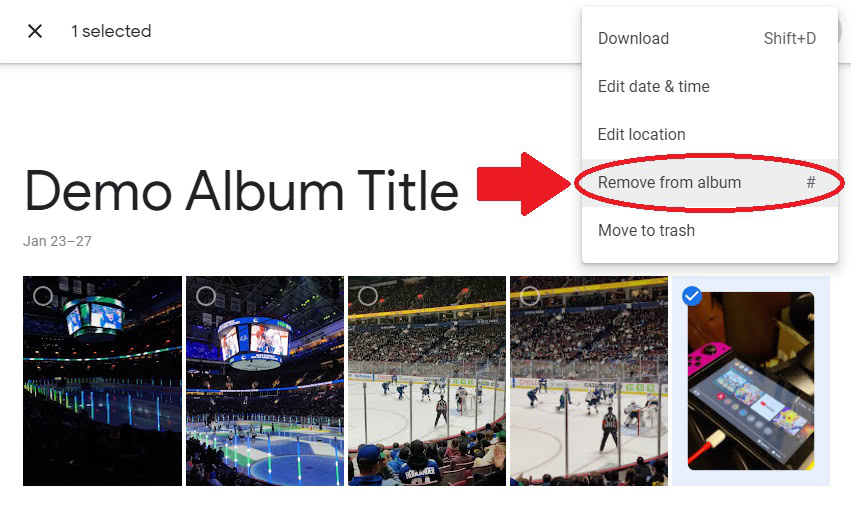
Finally, click the ⋮ button in the top right corner to open the More options dropdown. From within this menu, click Remove from album to remove the selected content from the album.
How to share a Google Photos album
Android and iOS
- Open your Google Photos mobile app on your Android or iOS device.
- Select the Library tab from the bottom bar.
- Select the album you wish to share.
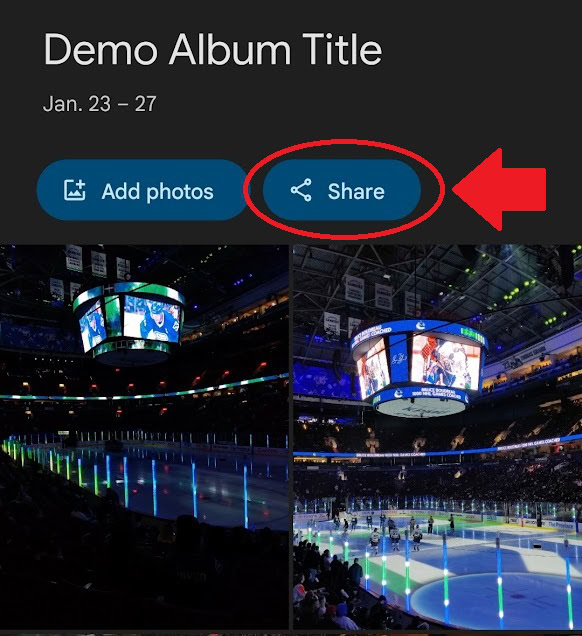
- Press the Share button located to the right of Add photos.
PC and Mac
- Open your browser and go to the Google Photos website.
- Select the Library tab from the leftmost options underneath LIBRARY.
- Select the album you wish to share.
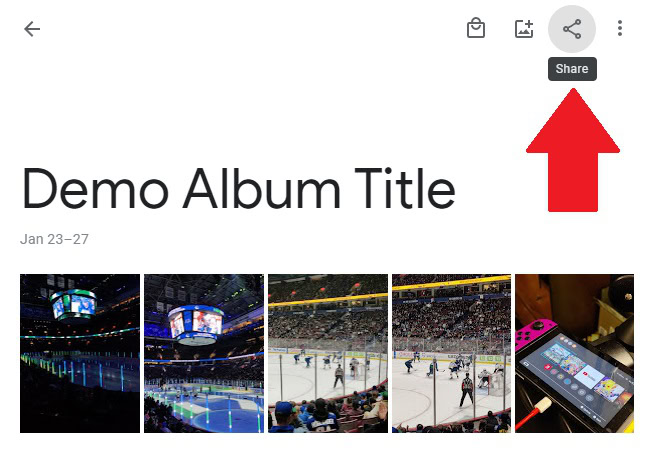
- Press the Share button located in the top right.
How to make an album collaborative on Google Photos
The first step to making a collaborative photo is to share it with someone. After creating a shared album, you can then turn it into a collaborative one.
Android and iOS
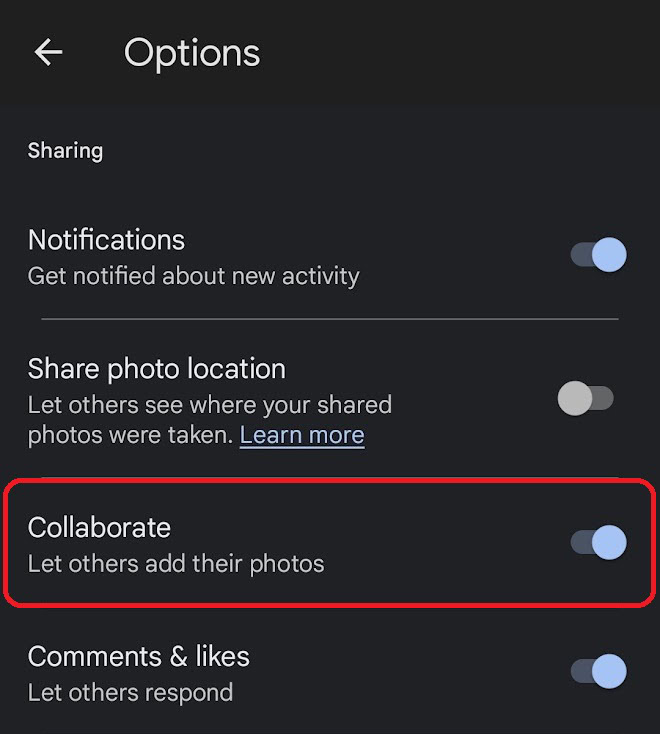
- Open the Google Photos mobile app on your Android or iOS device.
- Navigate to the Library tab from the bottom bar and select the album you wish to make collaborative.
- If you haven’t done so already, share the album with the people you want to collaborate on it with.
- When it has been shared, press the ⋮ button in the upper right corner of the album.
- From the dropdown menu, select Options.
- On the Options screen, there is an option marked Collaborate. Press that to turn on collaboration and allow others to add photos to the album.
PC and Mac
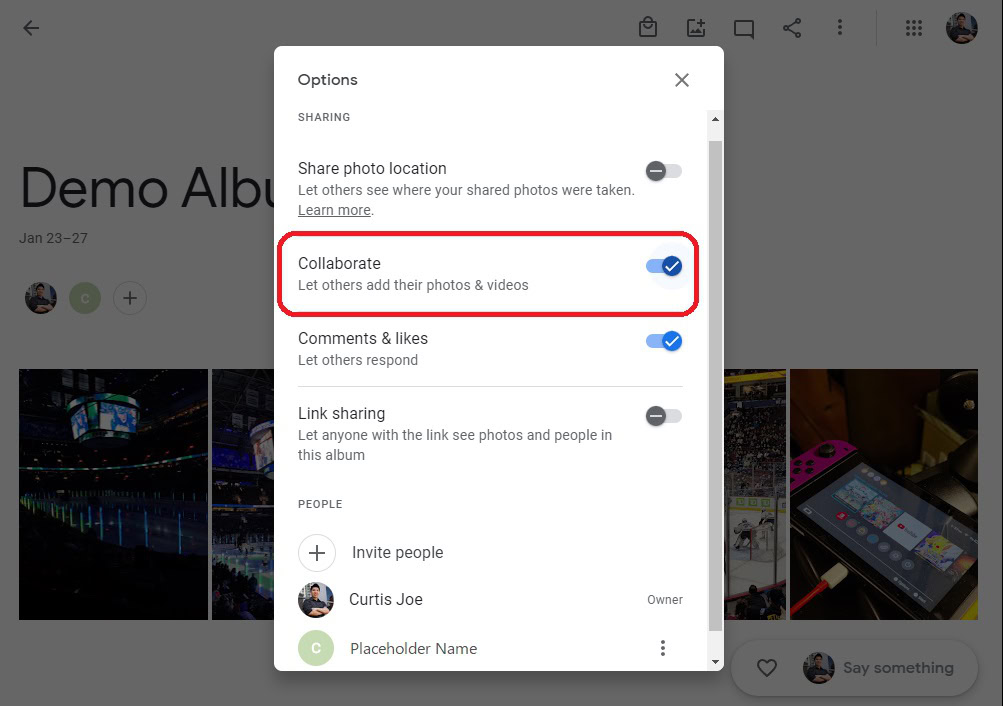
- Open your browser and go to the Google Photos website.
- Select the Library tab from the leftmost options underneath LIBRARY.
- Select the album you wish to make collaborative.
- If you haven’t done so already, share the album with the people you want to collaborate on it with.
- When it has been shared, press the ⋮ button in the upper right corner of the album.
- From the dropdown menu, select Options.
- On the Options screen, there is an option marked Collaborate. Press that to turn on collaboration and allow others to add photos to the album.
- Press the Share button located in the top right.
READ MORE: How to share photos on Google Photos
FAQs
If it is a shared album, you can select Hide from albums or Hide from Library to make it so that it doesn’t appear in your albums list. There isn’t a way to make your own unshared albums secret or private. However, you can set up a Locked Folder. In the Google Photos app, head over to Library > Utilities > Locked Folder > Set up Locked Folder. Items in the Locked Folder cannot show up in your normal Google Photos grid, memories, searches, or albums. They also “won’t be available to other apps on your device that have access to your photos and videos.”
Albums on Google Photos are organized according to the date of the most recent photo in the album.
Shared albums are albums that you have shared with other users.
Google Photo albums are tags. They are descriptors. When you move a photo to the bin and delete it, you will get this notice: This photo will be removed from your Google Account, synced devices, and places that you’ve shared it within Google Photos. If you delete a photo from your Google Photos library, it will also disappear from that virtual album. It does not matter if it is a shared album.