Affiliate links on Android Authority may earn us a commission. Learn more.
How to create more powerful Android notifications
Published onAugust 10, 2016
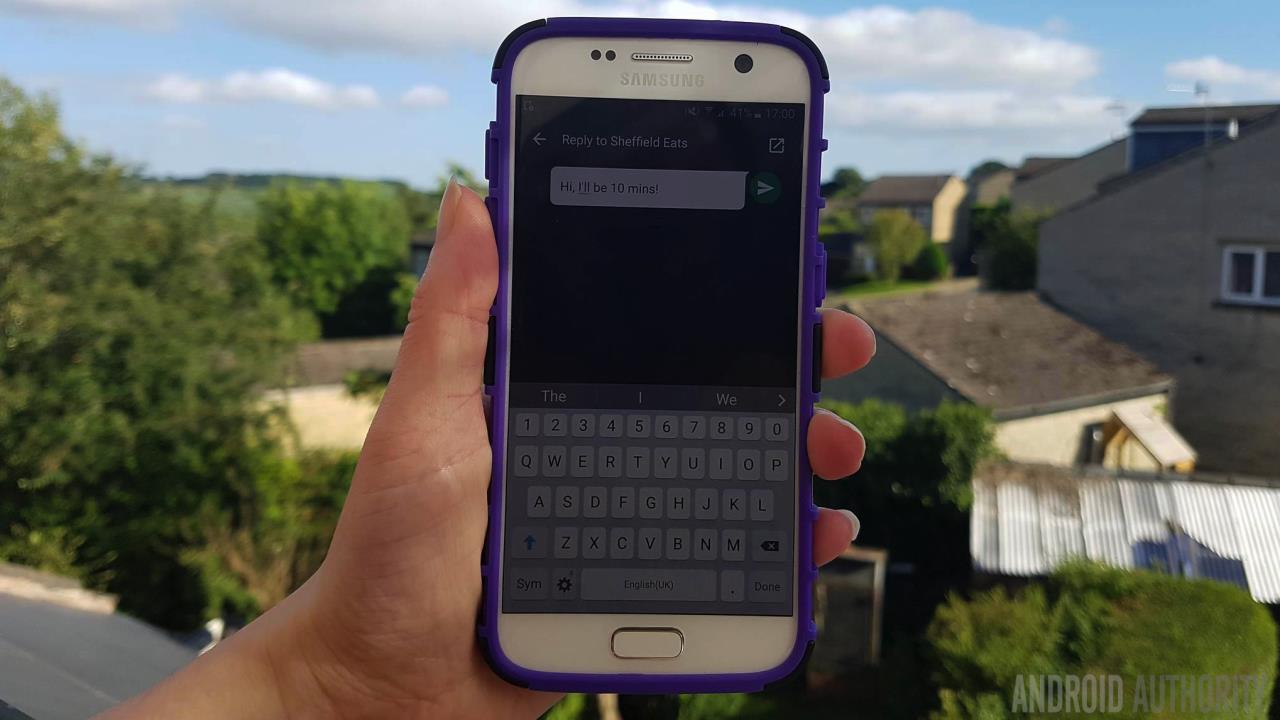
A typical notification provides some useful information to the user, who can then either dismiss it or act on it – usually by tapping the notification to launch the app associated with this notification. For example if you see a ‘You have a new message’ notification, then chances are that tapping it will launch an application where you can view the message you’ve just received.
Most of the time, this is all you need to worry about when you’re creating notifications – but what if you have something more specific in mind, such as a custom layout, or enhanced notifications that deliver extra functionality? Or maybe you’ve just finished testing your app and feel like its notifications are an area where you could improve the user experience.
Following my first tutorial on how to create a simple Android notification, in this article I’m going to look at ways to create more powerful notifications including custom layouts, expandable notifications, and other bits of additional functionality.
Let’s start with some of the new notification features that we’re all currently looking forward to in the up-and-coming release of Android Nougat.
Direct Reply Notifications
Android 7.0 introduces ‘direct reply,’ a new notification interaction that’s perfect for messaging apps – or any applications that have some kind of messaging functionality.
Direct reply allows the user to reply directly from a notification’s UI – they don’t even have to navigate away from whatever they’re currently doing! The user just has to tap the notification’s action button and then they can type their response into the text input field that appears in the notification’s UI.
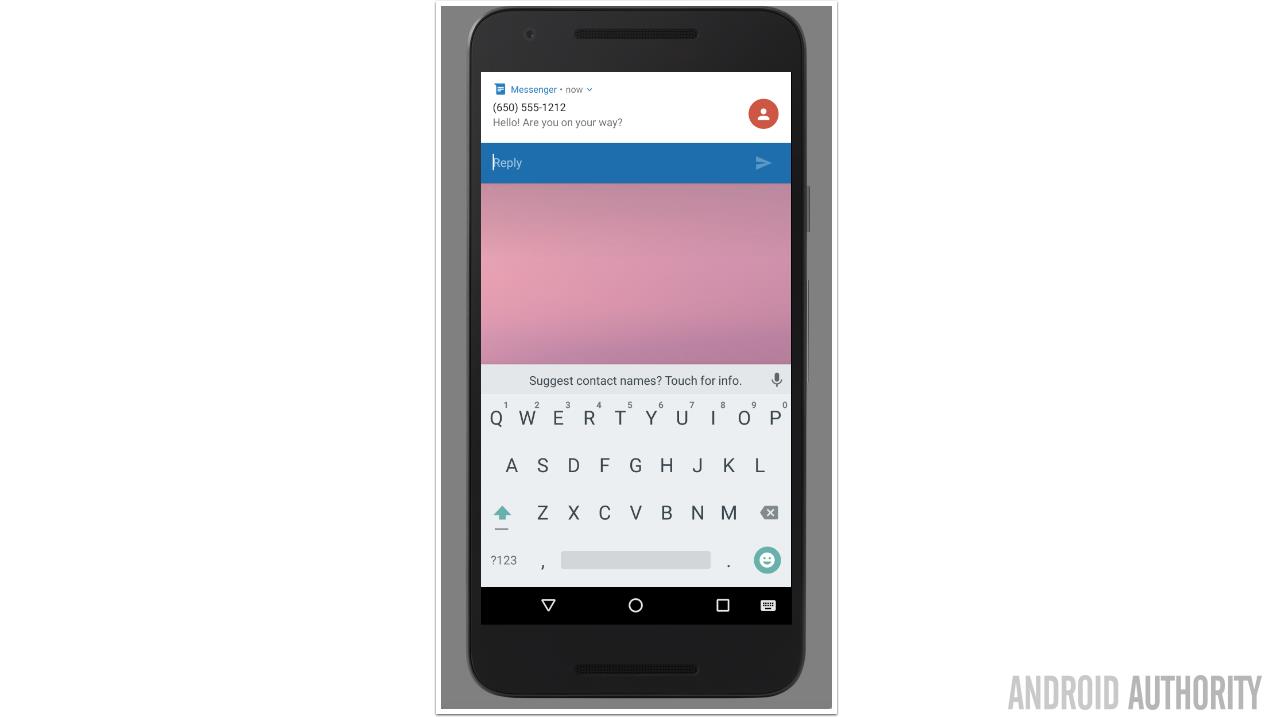
To add direct reply functionality to a notification, you need to create a RemoteInput instance that’s capable of receiving input from the user and passing it to your app. You also need to create an identification key that you’ll use to retrieve the user’s input (in this example, I’m using key_quick_reply).
RemoteInput remoteInput = new RemoteInput.Builder(KEY_QUICK_REPLY)
.setLabel(replyLabel)
.build();
Use the addRemoteInput method to attach your RemoteInput instance to the reply action:
NotificationCompat.Action action =
new NotificationCompat.Action.Builder(R.drawable.reply, replyLabel, pendingIntent)
.addRemoteInput(remoteInput)
.setAllowGeneratedReplies(true)
You can then build and issue the notification, as normal – just make sure you add the remote action to the notification builder, using AddAction.
To retrieve the user’s input, call the RemoteInput.getResultsFromIntent() method and use the identification key you created earlier:
Bundle remoteInput = RemoteInput.getResultsFromIntent(intent);

if (remoteInput != null) {
return remoteInput.getCharSequence(KEY_QUICK_REPLY).toString();
}
After you’ve processed the user’s input, don’t forget to update your notification to let the user know that their response has been heard loud and clear – you don’t want to leave the user wondering whether your notification has even registered their input!
Bundled Notifications
When your application issues multiple related notifications, it’s best practice to generate a single notification and then update that notification’s UI with information about each subsequent event. Typically, this takes the form of a headcount – so a “New message received” notification becomes “You’ve received 2 new messages,” “You’ve received 3 new messages,” and so on.
While this prevents your notifications from cluttering up the user’s device, a headcount alone probably isn’t going to give the user all the information they need. So you have 3 new messages – but from who? What are the subject lines? And how old are these messages, anyway? If the user wants answers to any of these questions, they’re going to have to launch your app.
Android 7.0 aims to improve this part of the user experience by bringing the ‘notification grouping’ feature, that you may have encountered in Android Wear, to Android smartphones and tablets.
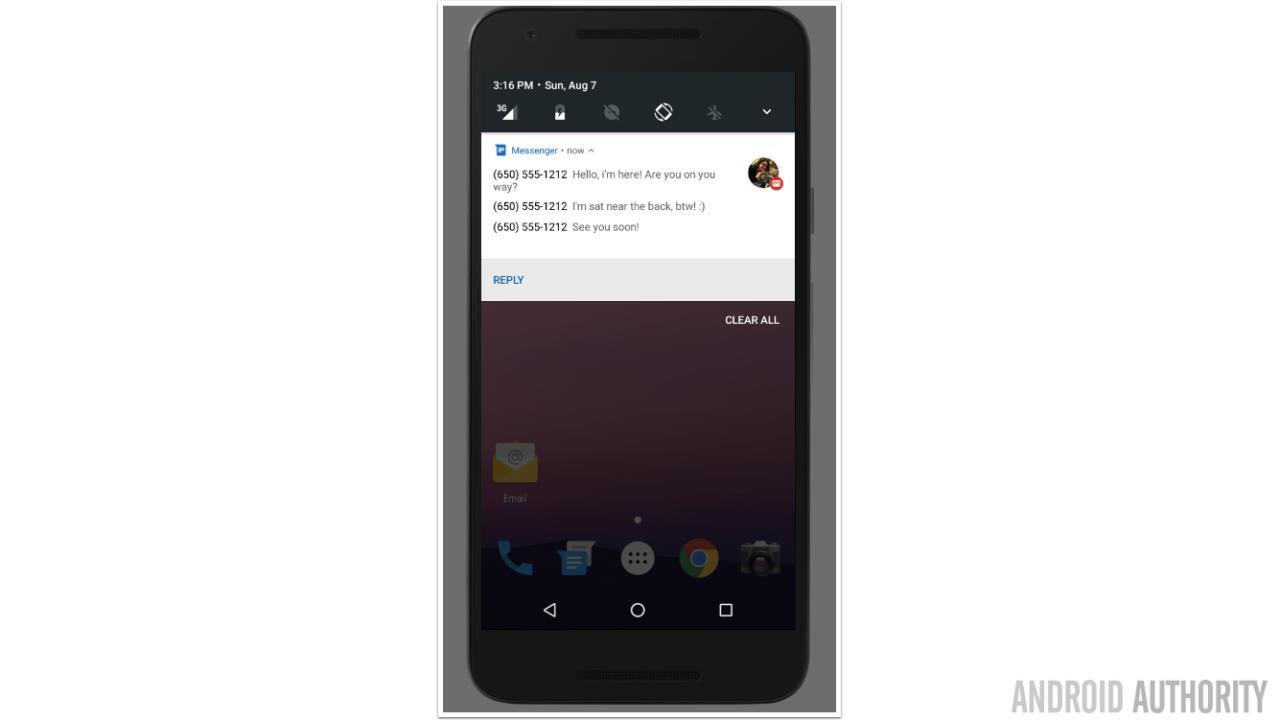
This feature groups related notifications under a single header. If it seems like your app might generate multiple, related notifications within a short space of time, then you may want to create notifications that the system can bundle together, if the opportunity arises.
Not only does this help you avoid clogging up the user’s notification bar, but it gives the user more flexibility in how they interact with your notifications. The user can either act on the entire bundle simultaneously, or they can drag to “unfurl” the bundle into its individual components. At this point, the user can see more information about each notification event, and can also interact with each event individually.
If you’re going to use bundled notifications in your app, then the first step is creating a parent “summary” notification. Bear in mind that the summary notification may be the only notification the user sees if they don’t unfurl the summary notification, or if they’re running anything earlier than Android 7.0.
You create a summary using setGroupSummary. At this point you should also assign it a group ID, as this is the key to letting the Android system know which notifications belong to this particular group.
NotificationCompat.Builder notificationOne = new NotificationCompat.Builder(context)
...
...
.setGroupSummary(true)
.setGroup(GROUP_KEY_MESSAGES)
Then, whenever you create a notification that belongs to this group, you can assign it the same ID, for example:
NotificationCompat.Builder notificationTwo = new NotificationCompat.Builder(context)
.setContentTitle("New SMS from " + sender1)
.setContentText(subject1)
.setSmallIcon(R.drawable.new_message)
.setGroup(GROUP_KEY_MESSAGES)
.build();
Custom View Notifications
If you have a specific creative vision in mind, or you want to use components that aren’t supported by the Notifications API, then you may want to create a custom notification layout.
Just be careful not to get carried away! While notifications that subtly tweak the standard layout can enhance the overall user experience, your custom layouts should always feel like a seamless part of the overall Android experience – particularly in this post-Material Design world where Android is all about providing a more cohesive user experience.
If you present the user with a custom notification that’s not what they were expecting at all, then interacting with your notification can suddenly feel like an effort, rather than something that comes naturally to them. Not exactly the frictionless user experience you should be aiming to deliver!
If you do decide to use custom notifications, then start by creating the layout resource file that you want to use in your notifications.
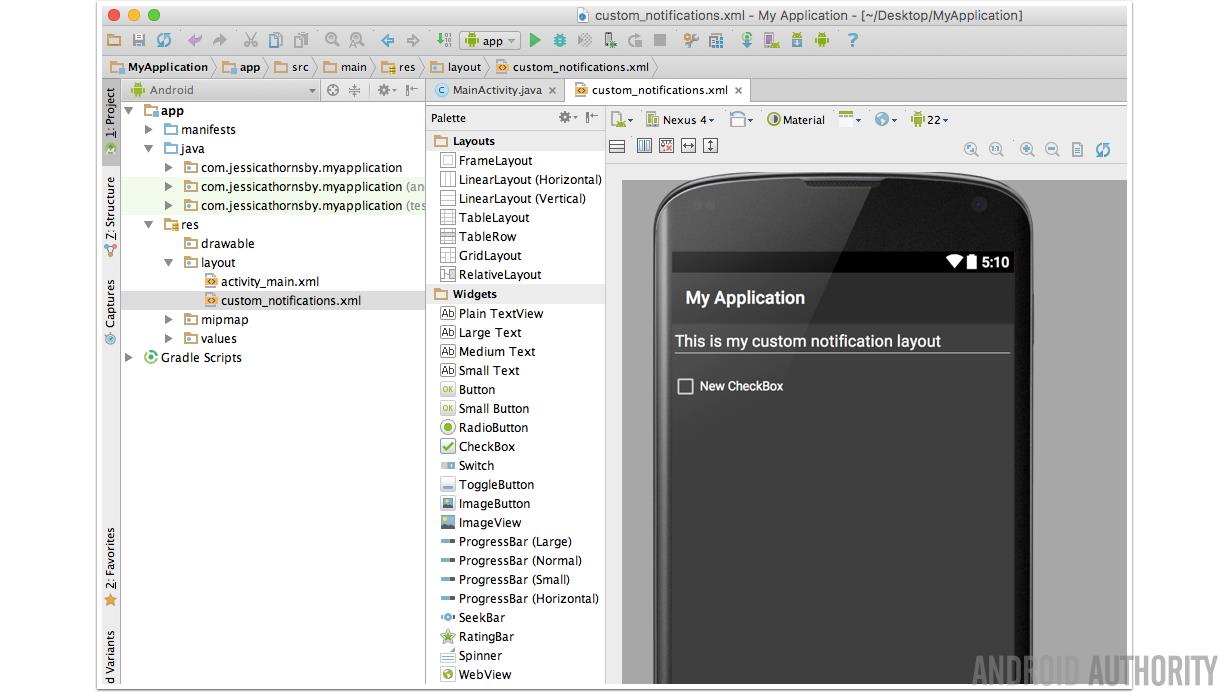
Then, you’ll need to create a Notifications.Builder object and attach all the properties you want to use in your notification:
Notification.Builder builder= new Notification.Builder(getApplicationContext());
.setSmallIcon(R.drawable.notification_icon);
Create an instance of the Remoteviews class and pass it your application’s package name, plus the name of your layout resource file:
RemoteViews remoteViews = new RemoteViews(context.getPackageName(), R.layout.custom_notification);Set whatever data and resources you want to use in your custom notification:
remoteViews.setImageViewResource(R.id.image_icon, iconResource);
remoteViews.setTextViewText(R.id.text_title, title);
Use the setContent() method to attach all the views from your notification’s layout file:
builder.setContent(remoteViews);Finally, build and issue your notification:
Notification notification = builder.build();
NotificationManager notificationManager = (NotificationManager) getSystemService(NOTIFICATION_SERVICE);
notificationManager.notify(NOTIFICATION_ID , notification);
Expanded Notifications
Android 4.1 introduced a new visual style for notifications, known as big view. This is an expanded view that appears when the user drags a notification open.
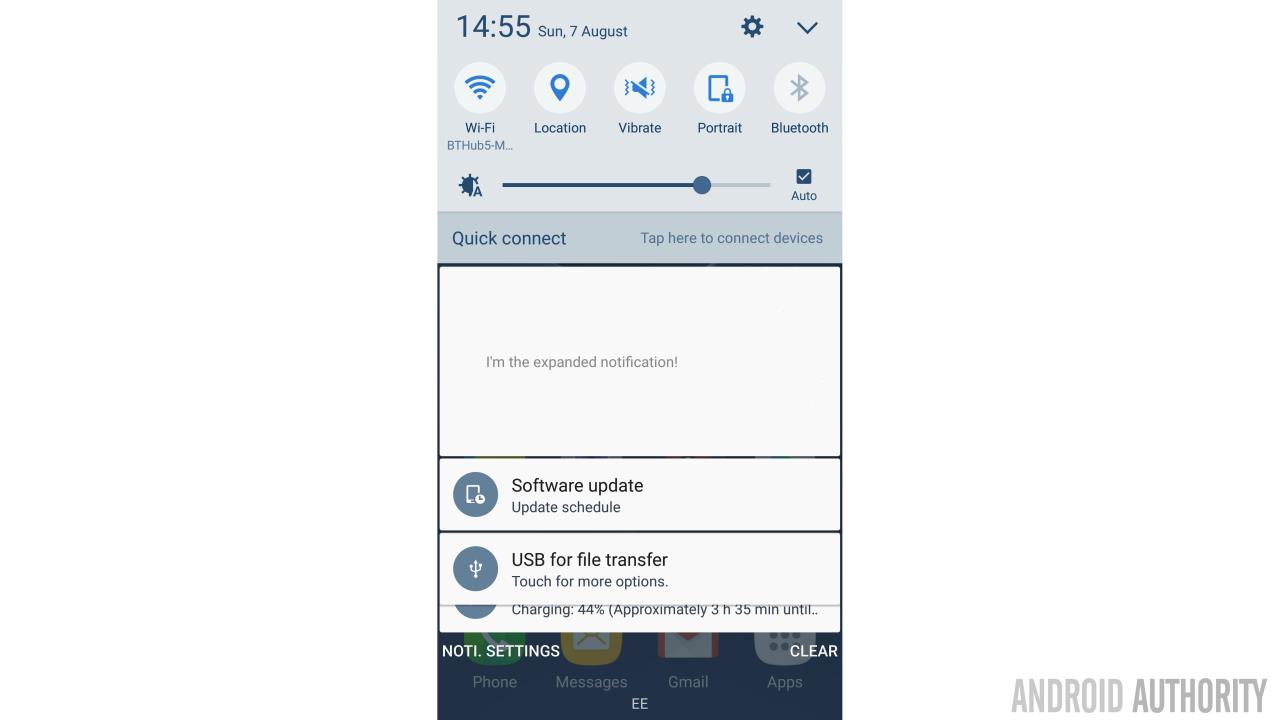
If you do decide to use expanded notifications, then just be aware that a notification’s ‘big view’ only appears when the notification is expanded. There’s no guarantee that the user will ever expand your notification (and expanded notifications aren’t even supported on devices running Ice Cream Sandwich or earlier) so your notification’s normal view needs to deliver all the information the user needs, in order to understand what they’re being notified about.
When you’re building notifications that contain both a normal view and a big view, it’s generally a good idea to start by building the notification’s normal view, as this is the first (and possibly only) version of the notification the user will see. Once you’ve perfected this part of your notification, you can move onto adding all the extra information you want to display in the all-singing, all-dancing expanded version.
Android provides three expanded layout templates that you can use in your projects: text, inbox, and image:
Big text style
This template displays additional text when the notification is expanded. This is handy if you’re creating text-heavy notifications, or notifications where the text is the main focus, for example you may want to use this template when you’re notifying the user about incoming SMS, instant messages or emails.
To create a big text style notification, use the following:
Notification bigTextStyleNotification = new NotificationCompat.Builder(this)
.setContentTitle(getString(R.string.notification))
.setStyle(new NotificationCompat.BigTextStyle()
.bigText("This text replaces the notification’s default text"))
...
// Add any other formatting options you want to use for this notification.//
...
...
.build();
Big picture style
This template includes a large image area, which is ideal when images are the main focus of your notification. For example, if you’re developing a chat app then users may appreciate a clear profile picture of the person who’s messaging them.
To create an expandable notification that uses the big picture style, add the following to your project:
Notification bigPictureStyleNotification = new NotificationCompat.Builder(this)
.setStyle(new Notification.BigPictureStyle()
.bigPicture(aBigImage))
...
...

//More formatting information//

.build();
Inbox style
This style allows you to generate notifications that contain a preview of up to 5 strings, where each string appears on a new line:
Notification inboxStyleNotification = new NotificationCompat.Builder(this)
.setContentTitle("You’ve received some new messages")
.setContentText(subject)
...
...
//More formatting information about this notification//
.addLine("First Message")
.addLine("Second Message")
.addLine("Third Message")
.setSummaryText("+2 more"))
.build();
Wrap-up
Now that you know how to go beyond the simple notification and use advanced features like Direct Reply, please let me about how you use notifications in your app. Do you use any other techniques when you’re creating Android notifications? What else could Google add to Android’s notification system?