Affiliate links on Android Authority may earn us a commission. Learn more.
How to code a simple Android widget
Published onMay 22, 2015

App widgets can be thought of as a small window or controller for an Android app that can be embedded in another application (like the homescreen). They can be very useful, allowing users to view or control an app without actually launching it. For example, skipping tracks with a music player widget, or viewing weather information. The great thing about widgets is that they can be updated automatically (after a time period), or in response to user action.
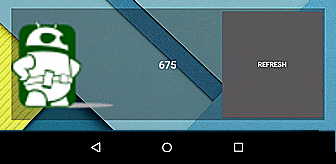
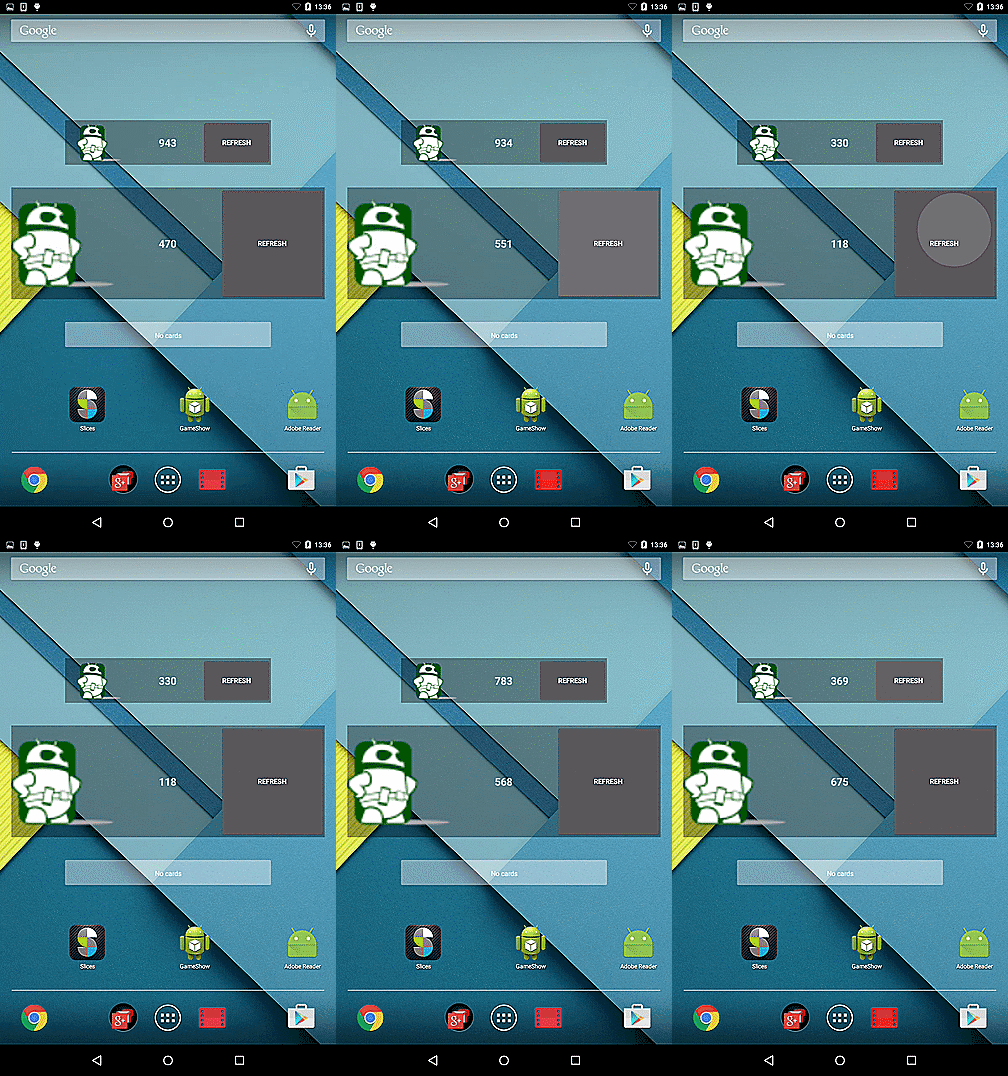
In this developer tutorial, we are going to create a simple Android widget, that updates automatically every 30 minutes, or in response to the user tapping the update button on the widget. Our widget generates and displays a random number on every update (whether automatic or due to user interaction).

To create a widget requires four steps:
- Design the widget layout. At the very least, you will need one layout file describing your widget layout. However, you can also provide additional layout files for
- The widget before it receives any data.
- The widget on a lockscreen (Android 4.0 and above).
- The widget on a lockscreen before it receives any data (Android 4.0 and above).
- Extend AppWidgetProvider. This class provides methods that are called during a widget lifecycle.
- Provide the AppWidgetProviderInfo metadata. Essential information about the widget, such as minimum width and height, update frequency, and more.
- Add the widget to your application manifest.
1. Design the Widget layout
The first thing we do is design our widget layout. While laying out an app widget is similar to laying out an activity and/or fragment, there is a very important factor to note. App Widget layouts are based on RemoteViews layouts. This means that not all View subclasses can be used in a widget. In fact, the only supported classes are FrameLayout, LinearLayout, RelativeLayout, GridLayout, AnalogClock, Button, Chronometer, ImageButton, ImageView, ProgressBar, TextView, ViewFlipper, ListView, GridView, StackView and AdapterViewFlipper. Subclasses and descendants of these are not even supported.
With this in mind, we design our widget layout, named simple_widget.xml
<LinearLayout xmlns:android="http://schemas.android.com/apk/res/android"
    android:orientation="horizontal"
    android:layout_width="match_parent"
    android:layout_height="match_parent"
    android:padding="@dimen/widget_margin"
    android:background="#55000000">

    <ImageView
        android:id="@+id/imageView"
        android:layout_width="0dp"
        android:layout_height="match_parent"
        android:layout_weight="1"
        android:src="@drawable/aa"/>

    <TextView
        android:id="@+id/textView"
        android:layout_width="0dp"
        android:layout_height="match_parent"
        android:layout_weight="1"
        android:gravity="center"
        android:text="000"
        android:textSize="@dimen/abc_text_size_large_material"
        android:textStyle="bold"/>

    <Button
        android:id="@+id/actionButton"
        android:layout_width="0dp"
        android:layout_height="match_parent"
        android:layout_weight="1"
        android:text="Refresh"/>

</LinearLayout>
Note android:padding in the above code snippet. From Android 4.0, app widgets automatically get a padding between the widget frame and the widget bounds. Pre-4.0 devices however do not provide the automatic padding for widgets. To build a widget that has margins for earlier versions, but no additional margins for 4.0 and above, create two dimension resources res/values/dimens.xml and res/values-v14/dimens.xml to provide different values for widget margin, and set your targetSdkVersion to 14.
res/values/dimens.xml
<resources>
    <dimen name="widget_margin">8dp</dimen>
</resources>
res/values-v14/dimes.xml
<resources>
    <dimen name="widget_margin">0dp</dimen>
</resources>
Extending AppWidgetProvider
Now extend AppWidgetProvider, by creating the class SimpleWidgetProvider. AppWidgetProvider has methods that are called when the app widget is updated, deleted, enabled and disabled among others. For our implementation, we only override onUpdate(), because it is the method called whenever the widget is added to a host.
public class SimpleWidgetProvider extends AppWidgetProvider {

    @Override
    public void onUpdate(Context context, AppWidgetManager appWidgetManager, int[] appWidgetIds) {
        final int count = appWidgetIds.length;

        for (int i = 0; i < count; i++) {
            int widgetId = appWidgetIds[i];
            String number = String.format("%03d", (new Random().nextInt(900) + 100));

            RemoteViews remoteViews = new RemoteViews(context.getPackageName(),
                    R.layout.simple_widget);
            remoteViews.setTextViewText(R.id.textView, number);

            Intent intent = new Intent(context, SimpleWidgetProvider.class);
            intent.setAction(AppWidgetManager.ACTION_APPWIDGET_UPDATE);
            intent.putExtra(AppWidgetManager.EXTRA_APPWIDGET_IDS, appWidgetIds);
            PendingIntent pendingIntent = PendingIntent.getBroadcast(context,
                    0, intent, PendingIntent.FLAG_UPDATE_CURRENT);
            remoteViews.setOnClickPendingIntent(R.id.actionButton, pendingIntent);
            appWidgetManager.updateAppWidget(widgetId, remoteViews);
        }
    }
}
In the onUpdate() method above, we iterate through all of our widgets (in case the user has placed multiple widgets), get a RemoteViews object, update the RemoteView’s textview with a new random number between 100 and 999, and then specify the action that should occur when the Button is tapped.
To request a manual update when the update button is clicked, we use a PendingIntent. The action for the Intent is set to AppWidgetManager.ACTION_APPWIDGET_UPDATE. This is the same action sent by the system when the widget needs to be updated automatically. We also indicate the widgets that should be updated (all of the app widgets) by calling
intent.putExtra(AppWidgetManager.EXTRA_APPWIDGET_IDS, appWidgetIds).To update the current widget only, you can call
intent.putExtra(AppWidgetManager.EXTRA_APPWIDGET_ID, widgetId);Finally, we request the AppWidgetManager object to update the app widget, giving it the current widgetId and the current RemoteViews object.
Providing AppWidgetProviderInfo metadata
This is an xml file that defines additional information, features and data related to the widget. Data such as minimum layout dimensions (width and height), if the widget should be available on the lock screen (Android 4.2 and above), how frequently the widget should be updated, among many others. We define an xml file, called simple_widget_info.xml, and saved in the res/xml folder.
<appwidget-provider xmlns:android="http://schemas.android.com/apk/res/android"
    android:minWidth="120dp"
    android:minHeight="60dp"
    android:updatePeriodMillis="1800000"
    android:initialLayout="@layout/simple_widget"
    android:resizeMode="horizontal|vertical"
    android:widgetCategory="home_screen|keyguard"
    android:previewImage="@drawable/preview">
</appwidget-provider>
Most of the attributes have pretty self explanatory names. minWidth and minHeight specify the minimum width and height the widget can have. updatePeriodMillis specifies the update frequency in milliseconds for the widget. Note that frequent updates will significantly affect users battery. Take note of the widgetCategory attribute. This specifies if your widget can be available on the lock screen as well as on the home screen. All widgets are available on the home screen by default, and if not specified. Android 4.2 included the keyguard option, indicating that the widget can be added to the lock screen.
If your widget is displayed on a lock screen, you might want to show different data, or a different layout. To detect if the widget is on a lock screen, you request the widget options using AppWidgetManager’s getWidgetOptions(int widgetId) method. This method returns a bundle, which can be queried for the AppWidgetManager.OPTION_APPWIDGET_HOST_CATEGORY int. This will either be a WIDGET_CATEGORY_HOME_SCREEN or WIDGET_CATEGORY_KEYGUARD.
The sample code below checks for the AppWidgetHost, and displays a different layout for each host type.
AppWidgetManager appWidgetManager;
int widgetId;
Bundle myOptions = appWidgetManager.getAppWidgetOptions (widgetId);

// Get the value of OPTION_APPWIDGET_HOST_CATEGORY
int category = myOptions.getInt(AppWidgetManager.OPTION_APPWIDGET_HOST_CATEGORY, -1);

// If the value is WIDGET_CATEGORY_KEYGUARD, it's a lockscreen widget
boolean isKeyguard = category == AppWidgetProviderInfo.WIDGET_CATEGORY_KEYGUARD;

int baseLayout = isKeyguard ? R.layout.keyguard_widget_layout : R.layout.widget_layout;
Declare Widget in the Application Manifest
The final step is to add the app widget to the application manifest. Within the <application> </application> element tags, add the following
<receiver android:name="SimpleWidgetProvider" >
            <intent-filter>
                <action android:name="android.appwidget.action.APPWIDGET_UPDATE" />
            </intent-filter>
            <meta-data android:name="android.appwidget.provider"
                android:resource="@xml/simple_widget_info" />
        </receiver>
Don’t forget to change the receiver android:name to your AppWidgetProvider implementation, an the meta-data android:resource to your AppWidgetProviderInfo xml file. At this point, you should be able to run your application, and place your widget on either the home screen or lock screen.

As usual, the complete code is available for modification and reuse to your hearts content on github.