Affiliate links on Android Authority may earn us a commission. Learn more.
How to downgrade your iOS device to an earlier version
Published onOctober 4, 2022
If you excitedly updated to a new version of iOS (say a public beta version), you may then discover that the new version is completely bonkers, and you would prefer to downgrade your iOS device to an earlier version. But is this even possible, and what are the pros and cons? Let’s break it down for you.
Read more: Now’s the right time to buy the iPhone 13
QUICK ANSWER
To downgrade your iOS device to a previous version, back up your phone to iCloud. Then connect your device to a Windows or Mac computer and go through the Device Restore process. Everything on the phone will be wiped and returned to the current version.
JUMP TO KEY SECTIONS
Some things to bear in mind

Before starting this process, there are some things you need to consider.
- The downgrading time window is usually very short. Usually, Apple stops “signing” older iOS versions within a few days of the new version coming out. Once they stop signing the older version, it becomes unsupported and, therefore, inaccessible. Therefore downgrading is only really worth it if you upgraded to a public iOS beta and found it too buggy for your tastes. The following downgrading method temporarily puts you back to the stable iOS version.
- If you upgrade iOS and then upgrade any apps, those app upgrades may not be compatible with the previous version you’re downgrading to. In that event, your iCloud backup containing those upgrades could fail since the previous iOS won’t recognize it and accept it. You could experience some, or a lot of, data loss.
- Apple will constantly nag you with screen alerts to upgrade again when the stable version of the new iOS is ready. So, if you’re really attached to a specific iOS version, you likely won’t be able to keep it indefinitely.
- If your device experiences any difficulties, such as slowing down, freezing, restarting, etc, you will be forced to re-upgrade your device in case an unsquashed bug is to blame.
Back up your iPhone or iPad to iCloud

If the above didn’t deter you, first start by backing up your iPhone (or iPad, if that’s your device) to iCloud. We have written an extensive tutorial on backing up to iCloud, as well as backing up to a computer. Please don’t skip this step, as the next stage will wipe your phone, and you will need to be able to get your data back.
Downgrade your iOS device to a previous version
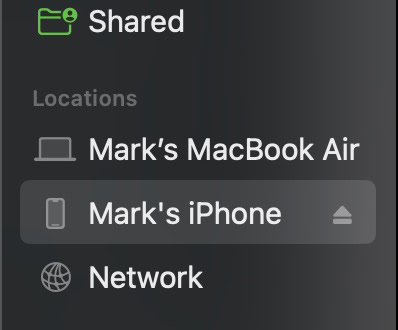
Now, attach the iOS device to either a Mac or a Windows computer using the device’s Lightning charging cable. On a Mac, then go to Finder, and on Windows, open iTunes. In both cases, click the device’s name in the left sidebar.

In the main part of the screen, click Restore iPhone. Obviously, if you have connected your iPad, that button will instead say Restore iPad.

It will ask you to confirm your decision. Keep the phone connected to the computer, as the phone is completely wiped, and the current iOS version (hopefully the one you want to downgrade to) is installed. This may take some time, so leave it to do its thing.
When it’s finished, you will then have to set up your phone again, but the iCloud backup you just made will make easy work of that.
Read more: The best iPhone 13 alternatives
FAQs
If you have a downgraded version of an app on another iOS device, you can theoretically sync it over using iCloud (after first deleting the updated version on the other device). But eventually, Apple will force you to upgrade due to bugs and other issues. If your iOS device starts freezing or restarting, you will also be forced to upgrade all your installed apps to fix the issues. There’s a reason why apps are upgraded in the first place — and that reason is usually bugs.
No, you can only downgrade to a version that has been “signed” by Apple. If they have “signed” it, then they support that version. Once they have unsigned it, it is no longer supported and can no longer be installed. This is for security reasons and to make iPhone jailbreaking more difficult.