Affiliate links on Android Authority may earn us a commission. Learn more.
An easy GameMaker Studio tutorial for beginners
Published onApril 1, 2021
If you want to develop games for Android, Android Studio is not the best choice of tool. While Android Studio is a powerful IDE and comes with many additional tools for development, it is primarily suited to productivity apps and tools and has a steep learning curve. It’s fortunate then that there are many other options available, such as the excellent GameMaker Studio 2. This post will serve as a GameMaker Studio tutorial to get you started, and an overview of the tool.
By the end, you’ll have built your first 2D platform game!
See also: How to make Android games – for complete beginners
What is GameMaker Studio?
Before we begin with the GameMaker Studio tutorial, what exactly is a GameMaker Studio?
Like Unity and Unreal, GameMaker Studio, is a game engine that incorporates a powerful IDE (integrated development environment) for easy development. Where GameMaker differs, however, is in its relative simplicity and target audience. This is a drag-and-drop tool with relatively less cording involved than many of its rivals. This makes GameMaker ideal not only for beginners but also artists and designers that want to build games without learning to code.
what exactly is a GameMaker Studio?
What exactly is a GameMaker Studio?
That said, for those that do want to add some custom logic, there is a “GameMaker Language” that affords slightly more flexibility.
With this ease of use does come a slightly more limited scope. GameMaker Studio 2 is a 2D game engine; so if you have dreams of building the next Doom, then you’ll need to look elsewhere. But don’t be mistaken: this is still a pro-level IDE that powers some highly successful titles. These include the linkes of Minit, Blazing Chrome, Hyper Light Drifter, and my personal favorite: Katana Zero.
Another caveat of GameMaker Studio is that it is not free, whereas the more powerful Unity and Unreal Engine are. Pricing is very reasonable, however, with the Creator License costing $39. This permits users to develop and publish games for Windows and MacOS. Console licenses are much more expensive however, costing $799 each, or $1,500 for all three. The licenses last for 12 months and are non-renewing, and there are other options such as a Developer license and Education license. There is also a 30-day trial so you can see if you get along with the workflow before you take the plunge.
This makes GameMaker ideal not only for beginners, but also artists and designers that want to build games without learning to code.
At the time of writing the engine is in version 2.3.1.542. However, it is most commonly known as “GameMaker Studio 2.”
Now, on with the GameMaker Studio tutorial!
How to use GameMaker Studio 2
To get started with GameMaker Studio 2, first create a new project. Next choose the “Drag and Drop” option, which we will be using for this GameMaker Studio tutorial.
Quick tip: if ever you’re looking for information or help online, make sure you search for “GameMaker Studio DND.” This short hand will ensure you get information relating to the drag and drop version, rather than GameMaker Language (GML).
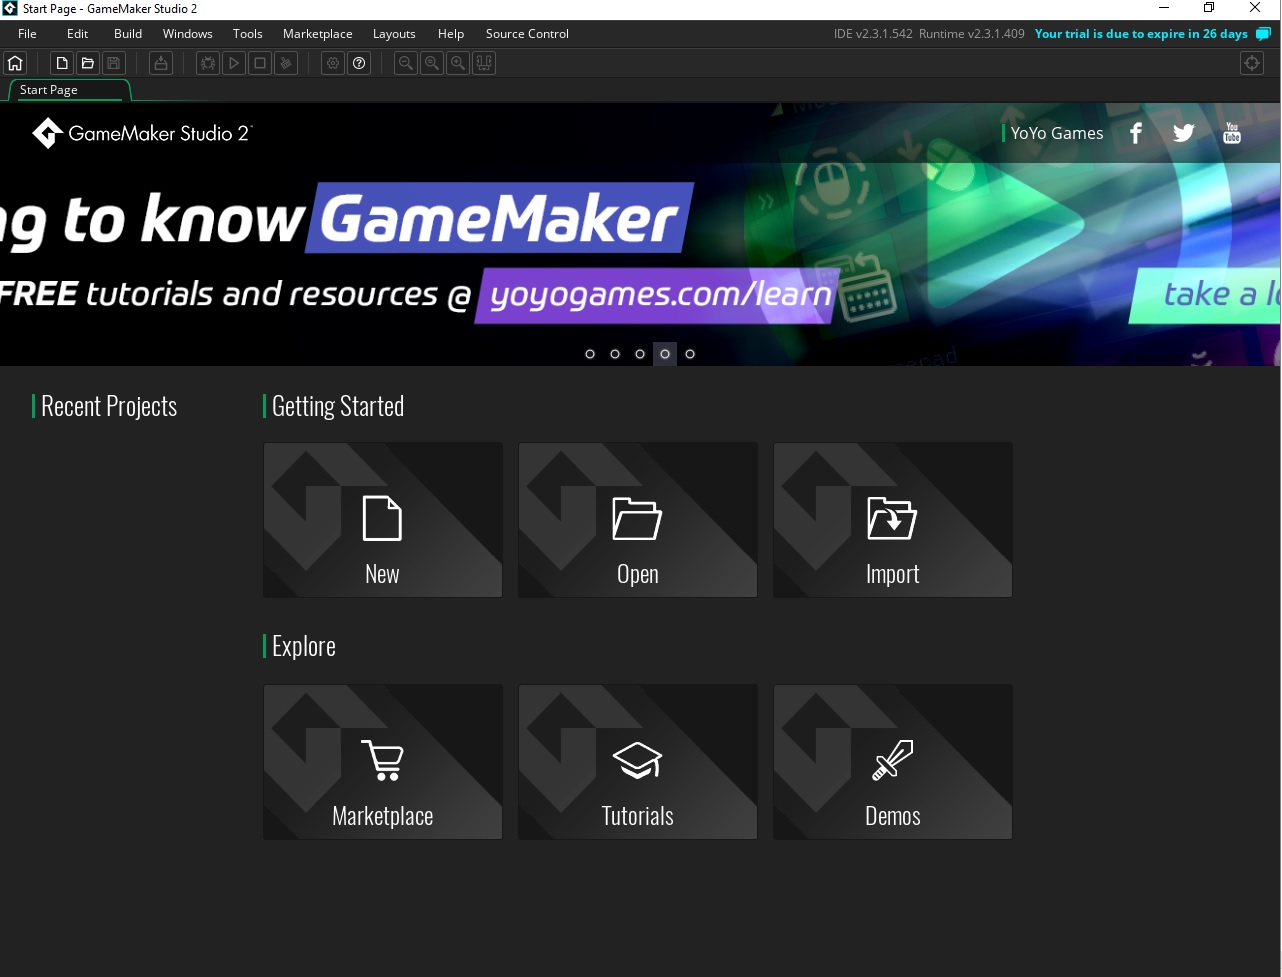
You’ll now be greeted with a Workspace on the left and an asset browser on the right. The asset browser lets you see all the elements in your project folder.
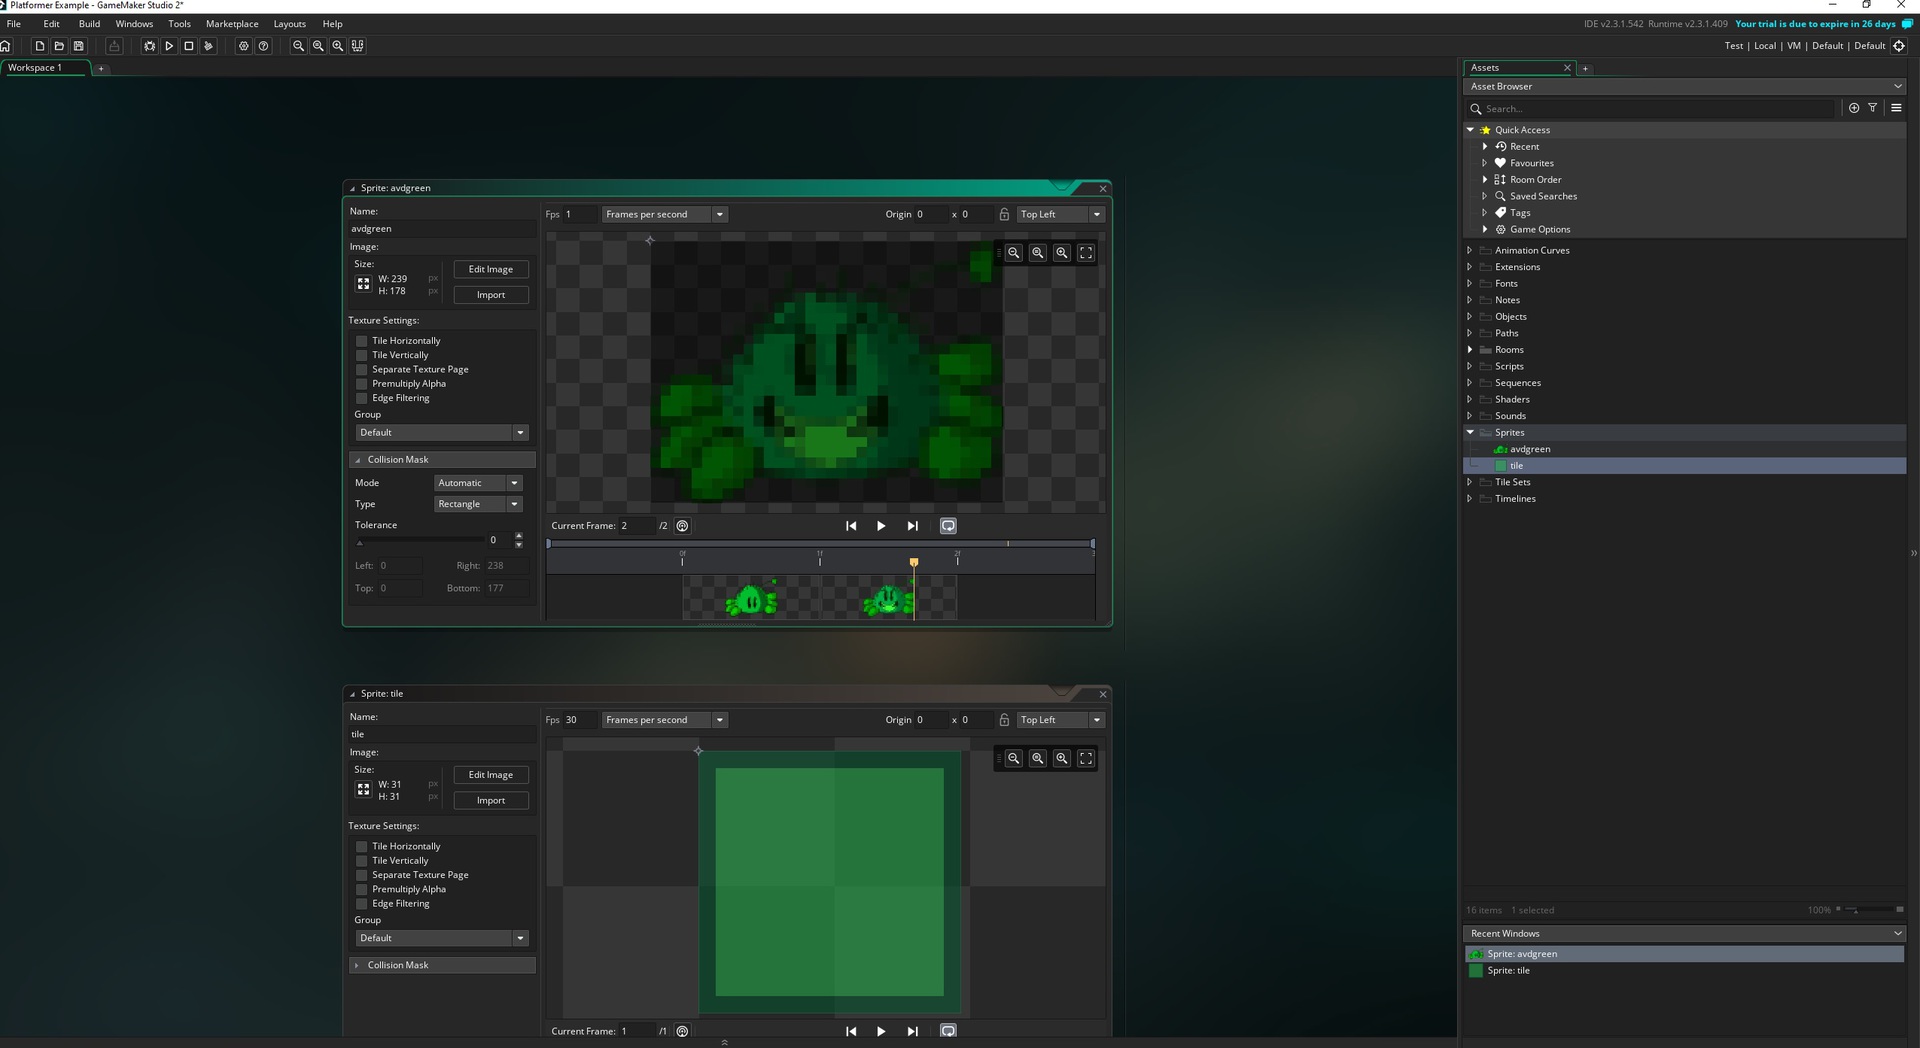
Every game needs sprites, so take yours and drop them into the Sprites folder. If you don’t have any sprites of your own, you should be able to download some from the web. I’m using sprites from an old greenscreen style game I made. This little chap is called “Bee Boo.”
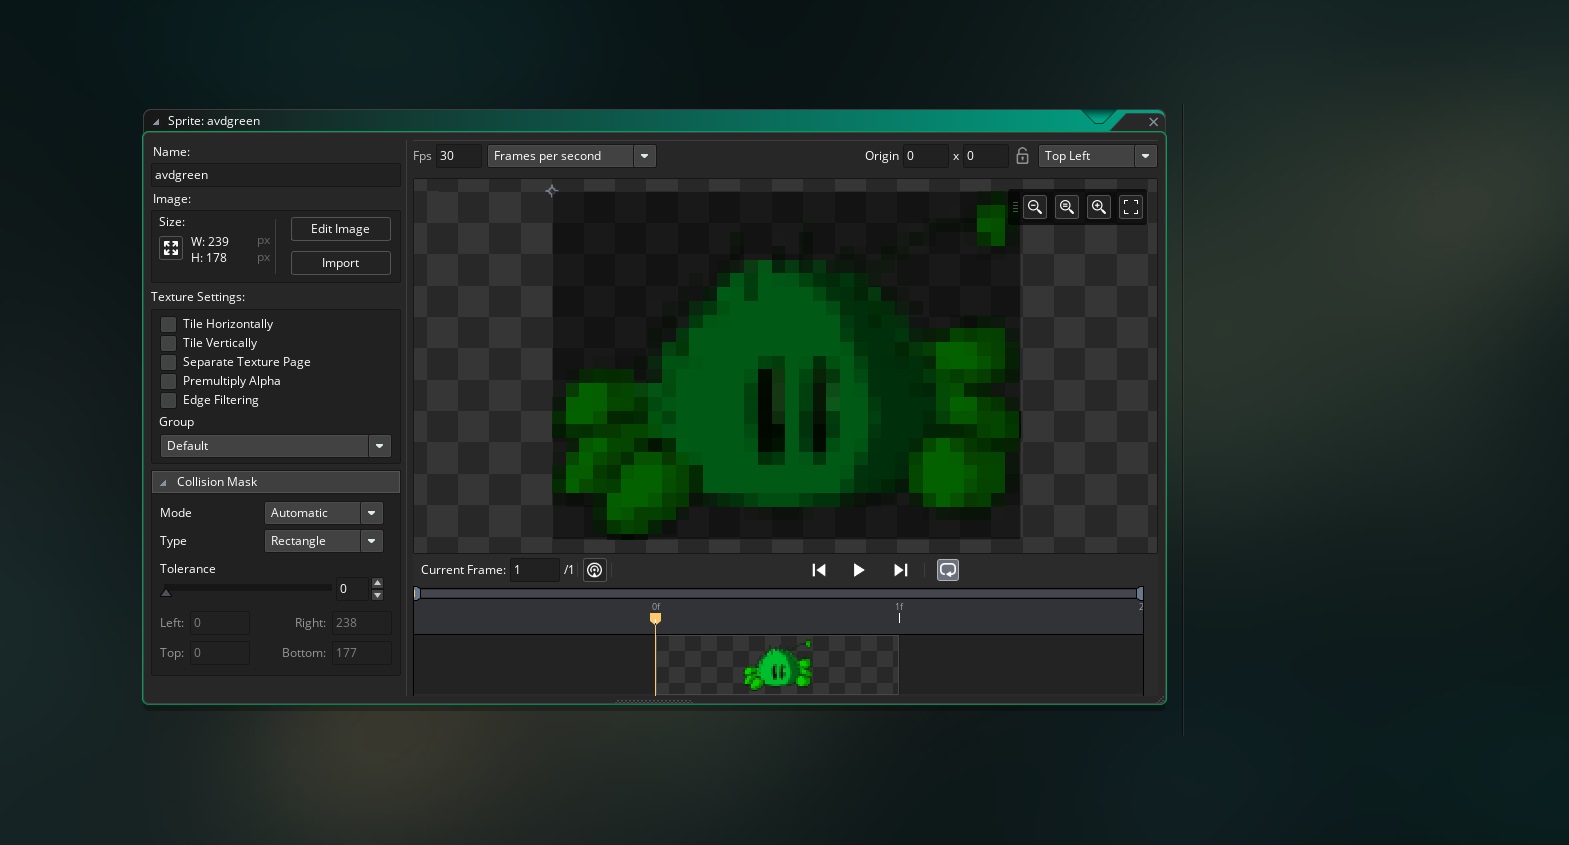
When you drop the sprite in, you should see it automatically open up in a separate window for closer inspection. Notice that it automatically has a collision box; the small grey outline surrounding the image. This defines the physical size of your sprite and facilitates interactions with the environment. If you need to change this, you can select the “Collision Mask” drop-down menu on the left, and then select “Manual” under mode. You’ll now be able to drag and resize the box as needed. Make sure that the original sprite is 32×32 pixels, or change the dimensions by clicking “edit sprite.” The collision box should generally be the same size and shape as the sprite.
When you build a game for real, you’ll probably want to use multiple sprites to create animations. For now, we can just use a static character that glides around the screen. If you do want to make an idle animation, however, you can simply drag another sprite next to the first one in the timeline and then set the FPS in the top left.
Creating a tile set
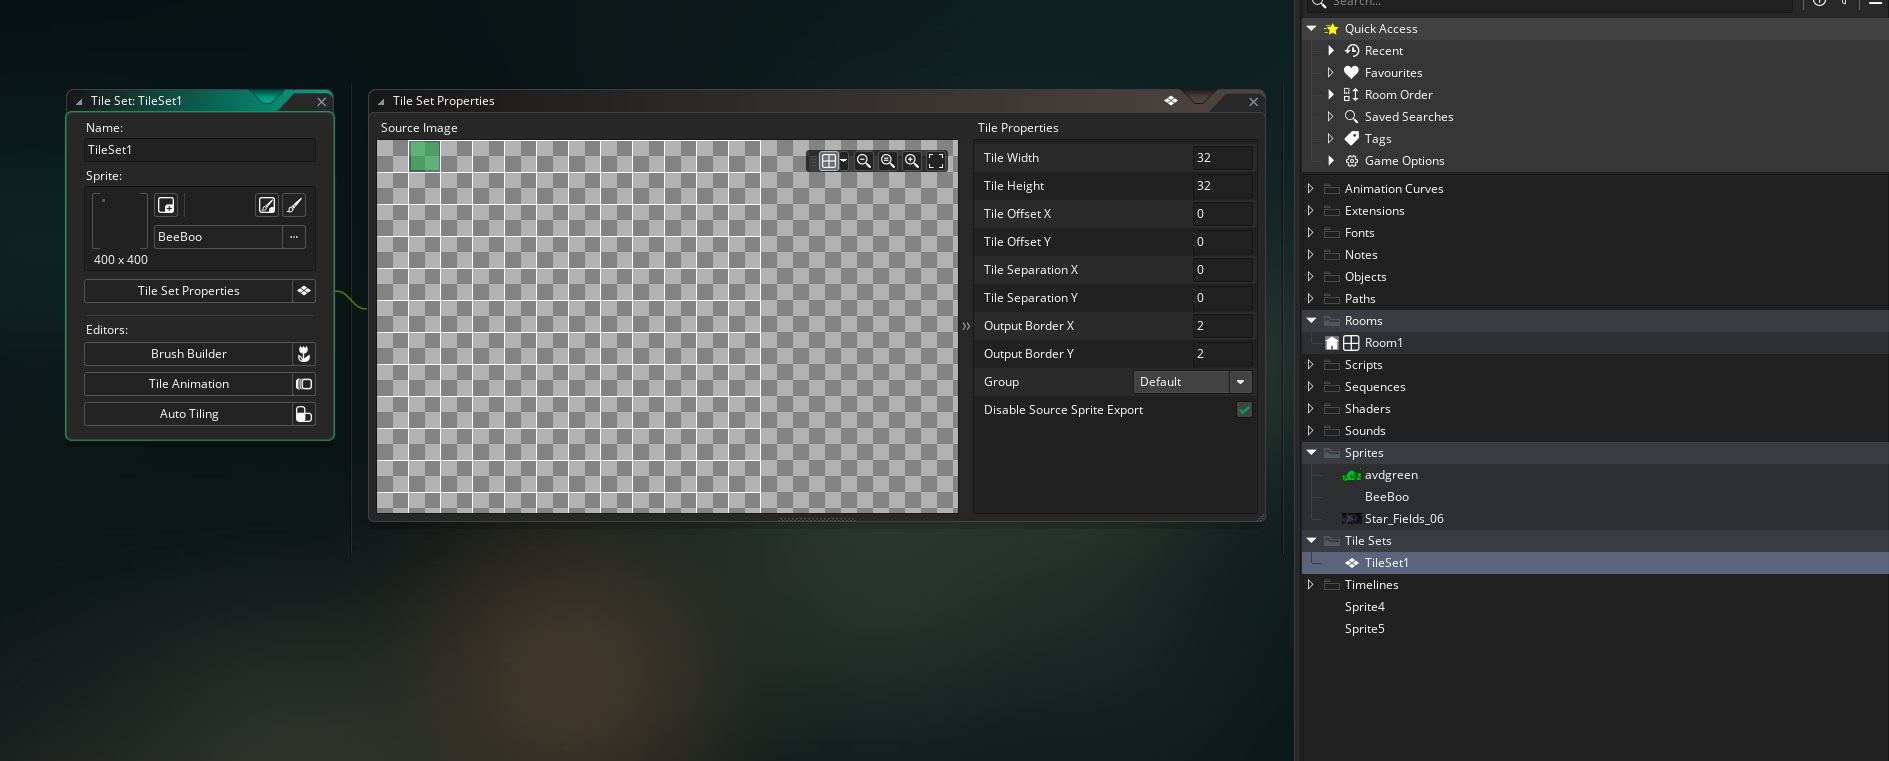
I’ve also dropped in a “tile set.” This is a selection of sprites that will be used to draw levels. In this case, I’m using green semi-transparent squares. The image itself is a large translucent PNG that has a 32×32 pixel square in it. That square is in the top left but is shunted 32 pixels to the right. This will make sense in a moment!
Create something similar of your own and then drop it into the Sprites folder.
Now right click on the “Tile Sets” folder and select “Create Tile Set.” When this opens up, you’ll need to select the sprite you just added. Now set the tile width and height to “32.”
What this does is to automatically divide the image into blocks of 32×32. The top left square is always the “empty” image. The following squares will take care of the tile as it appears from different angles. So if you have grass on top of your platforms and dirt on the sides, you’re covered! The smart thing is that there is an “Auto Tiling” option that will automatically make that judgement call for you.
For now though, I’m just using two tiles: an empty tile, and a plane square.
Creating a room
Now for the fun part of this GameMaker Studio tutorial: building a level… or “room.” Rooms are screens that can represent levels of a game or chunks of a level. This is the equivalent of a “scene” in Unity.
Click on the Rooms folder in your Asset Browser, and you’ll see that you already have an asset called “Room 1” in here. Open this up and you’ll see a grid and a Room Editor.
See also: How to create a simple 2D platformer in Unity – Party One
The first thing to do is to add a background. Simply click on the Background layer in the Room Editor window, then select a sprite underneath. This needs to come from your Sprites folder, so make sure to drop the image in there first. I’m using a pretty starfield.
Next, we need to add our tiles. You can do this by clicking on the tile layer icon in the Room Editor window – this looks like an isometric grid.
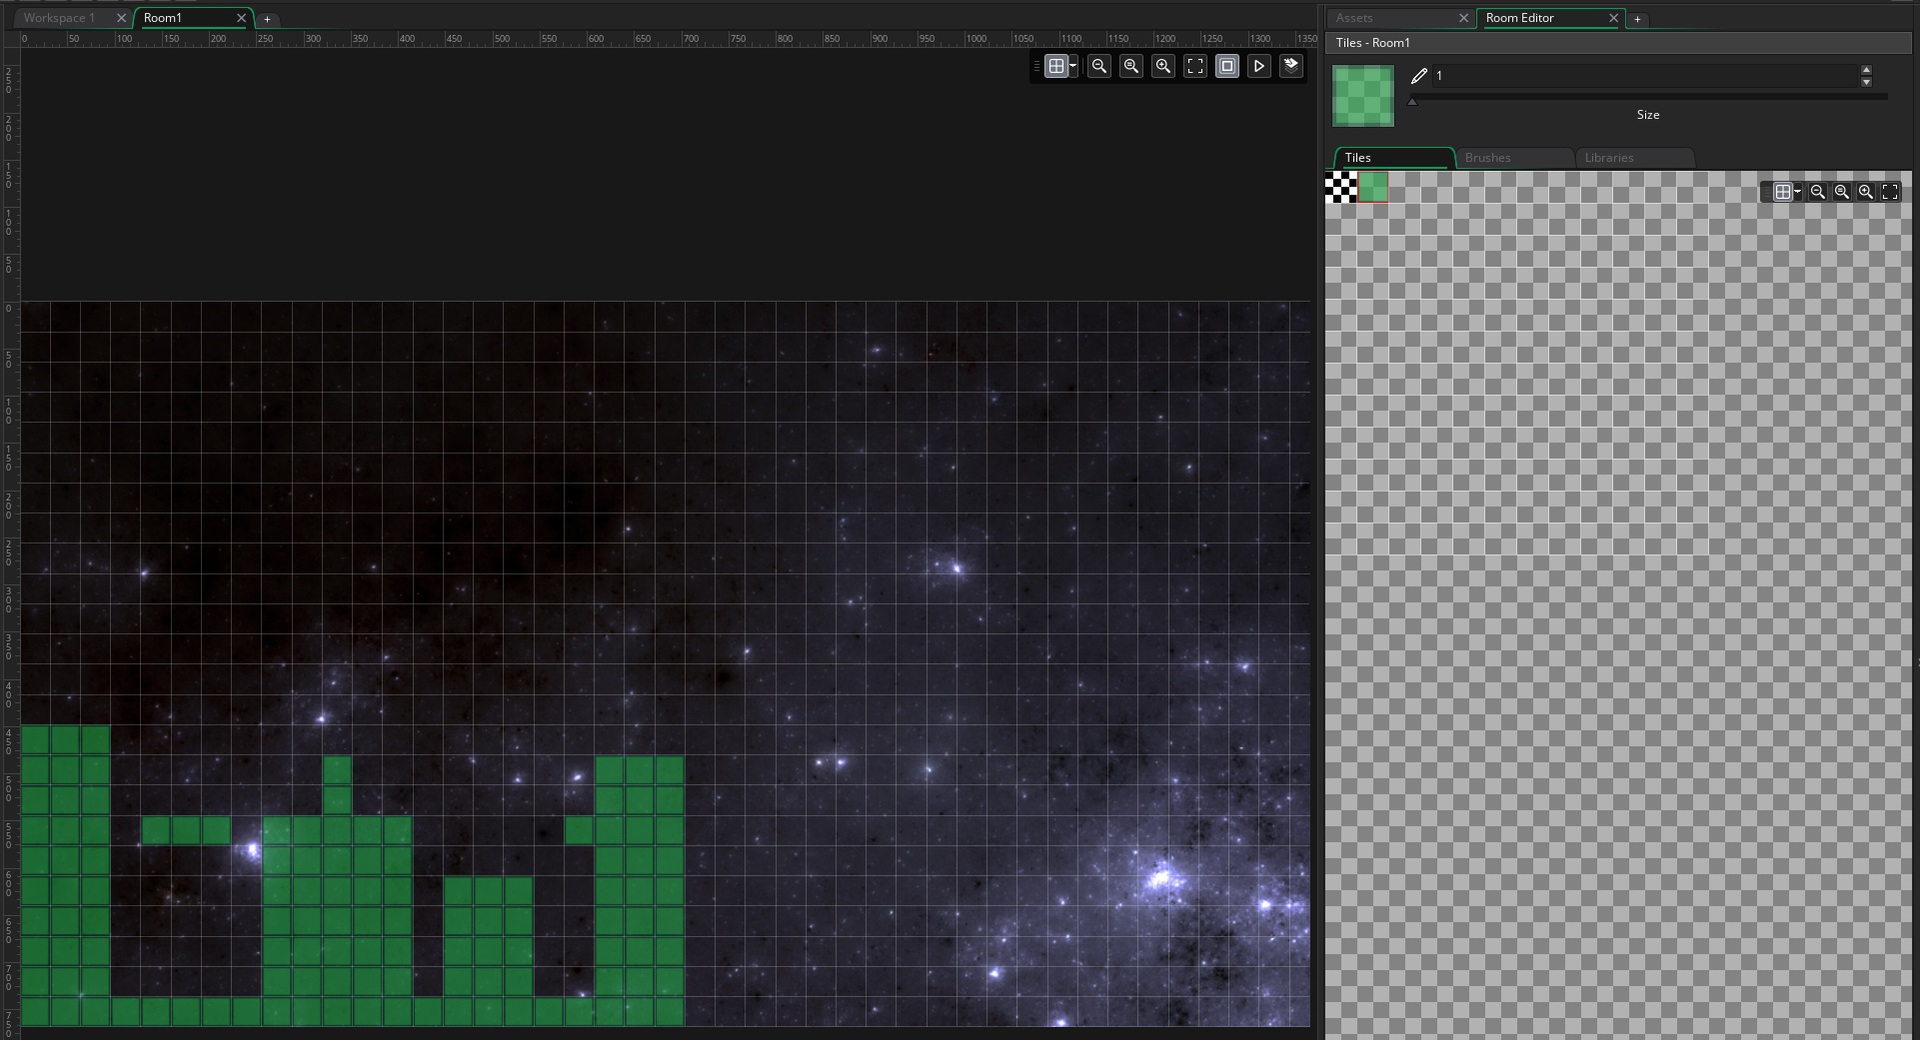
Now you’ll be able to choose a tile set to use. We’re going to use the one we just made. You can then simply draw onto your grid to create your level layout! By using the tile layer, you’ll also be creating less work for the GPU.
GameMaker Studio tutorial: building objects
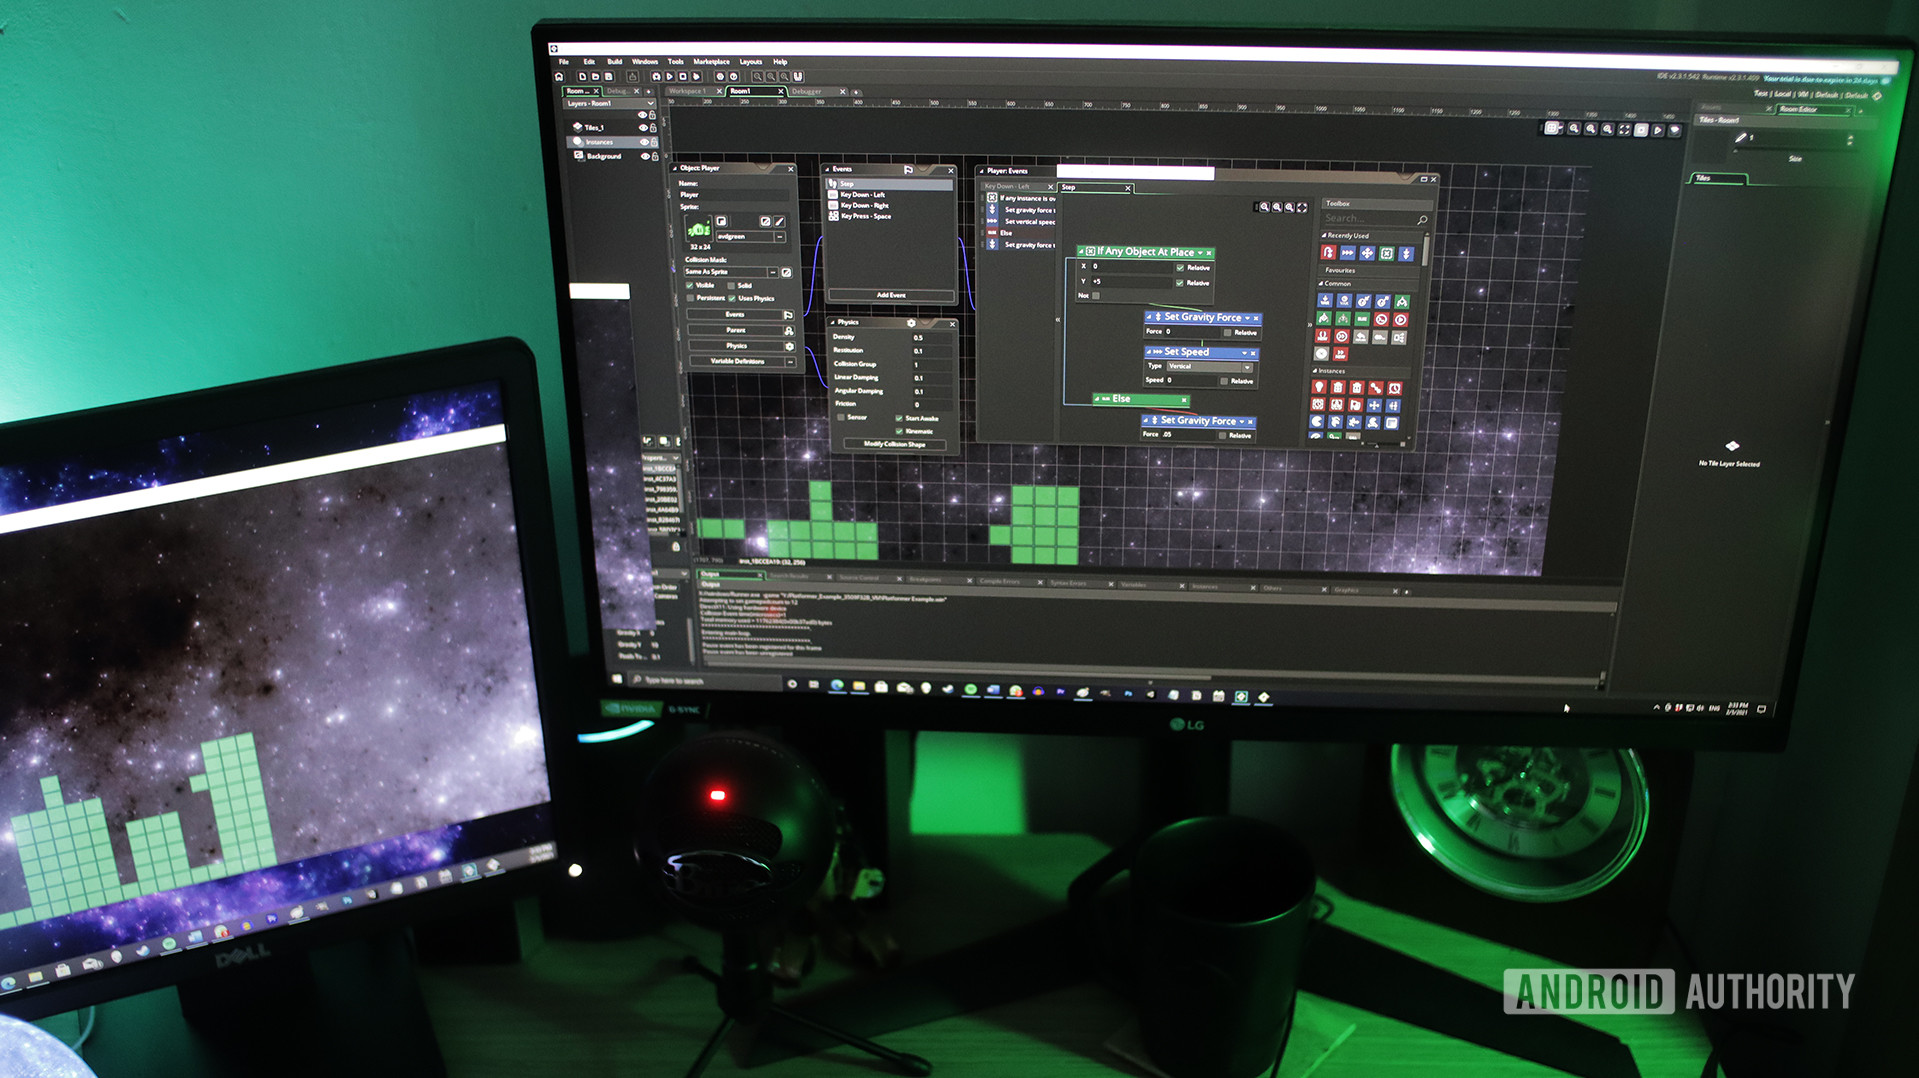
Once the level has been drawn, we need a character to explore it. To create the player, right click no the “Objects” folder in the Assets Browser and create a new object. Call this object “Player” and select the sprite you made earlier.
You’ll notice you have some more options now. Make sure you’ve unticked “uses physics” as this will make things more complicated.
We’re going to create another object, too. which will be a completely empty object with physics once again disabled. You can click the “New Sprite” button to create this empty image, then define the size of the empty image and its collision box. This should be set to 32×32.
Adding objects to the rom
It’s time to see our game in action!
Switch back to the Room tab and then select the “Instances” layer in the Room Editor window. An “instance” refers to an instance of an object that can interact with other objects in the Room. That means the player character you created is actually a “prefab” or a class that can have multiple identical copies called instances. This isn’t something you’ll need to worry about for a long time but it’s useful context!
Once you’re in the Instances layer, you can simply drag and drop your character into the scene wherever you want it. This will be your player’s starting position.
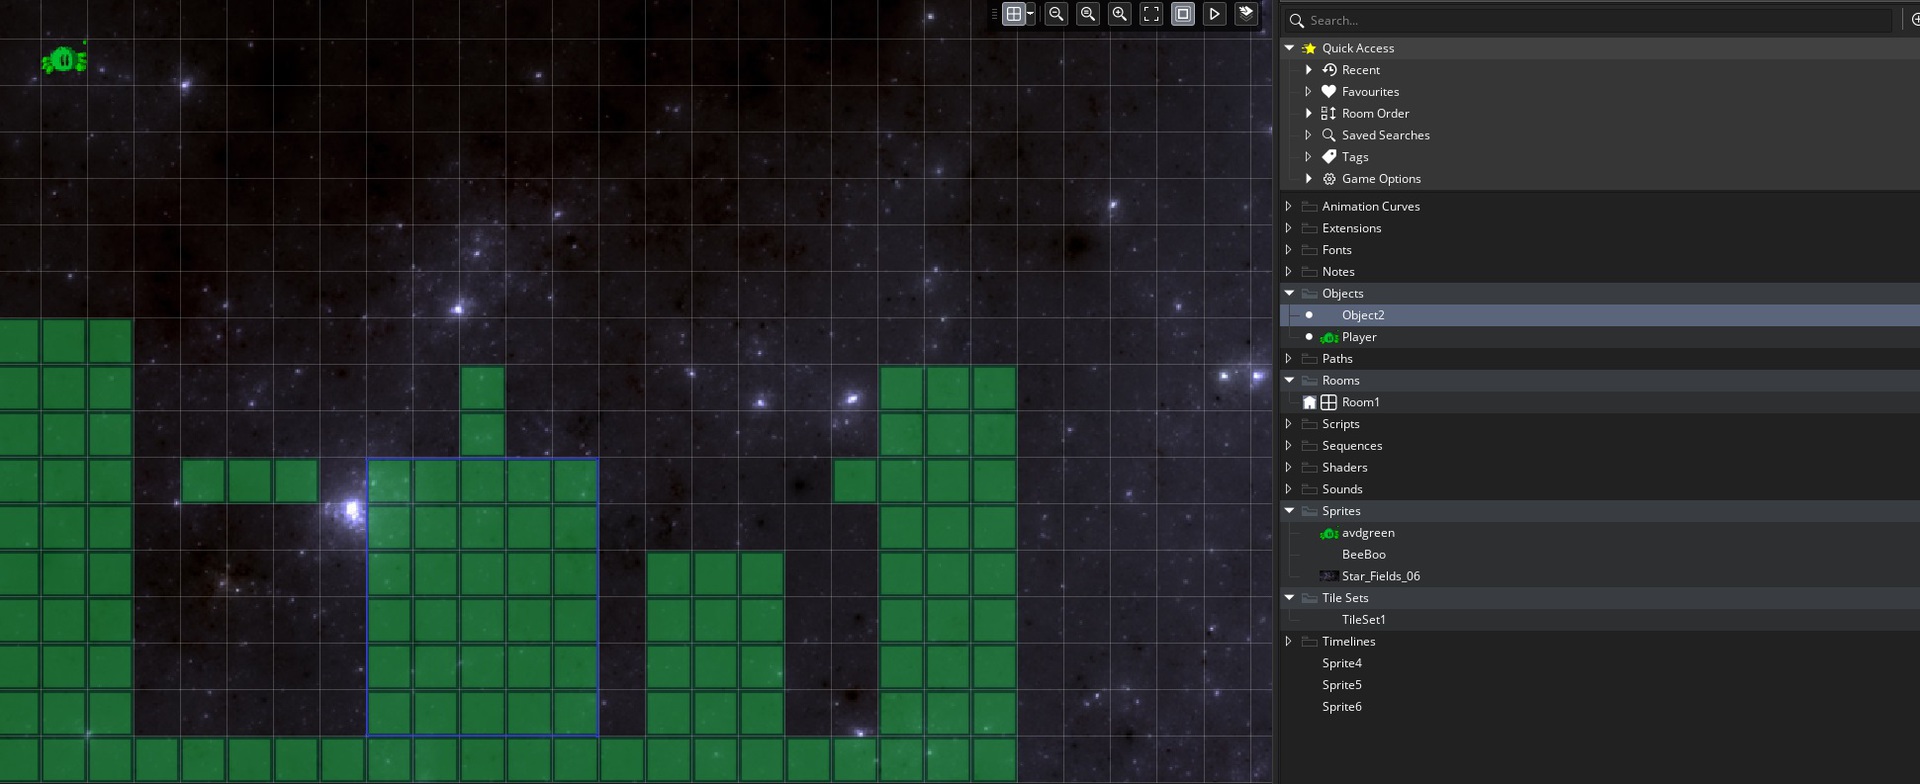
You’re also going to drag and drop your invisible ground layer a few times and resize it to perfectly match wherever you drew your tiles. You can resize these objects by simply grabbing an edge and pulling. This is necessary because the tiles themselves are in the Tile layer and don’t have any impact on our game objects. Of course, you could just use objects with sprites to draw your levels, but this is a more efficient method in terms of the GPU and speed of creating levels.
Adding gravity to the player character
If you click on the Play button at the top of the screen, you can test out what you’ve built. Right now, nothing happens; we’ve got a bit further to go before this GameMaker Studio tutorial is through!
To fix this, we need to add “events” to our player. So, double click on the Player in the Asset Browser and then choose Events > Add Event.
An event is simply an action or change that occurs within the room. The first event we’re going to add is called a “Step” event. Step is essentially one lap of the gameloop. Each time the game refreshes, this event is triggered. This then, is where we want our gravity to go!
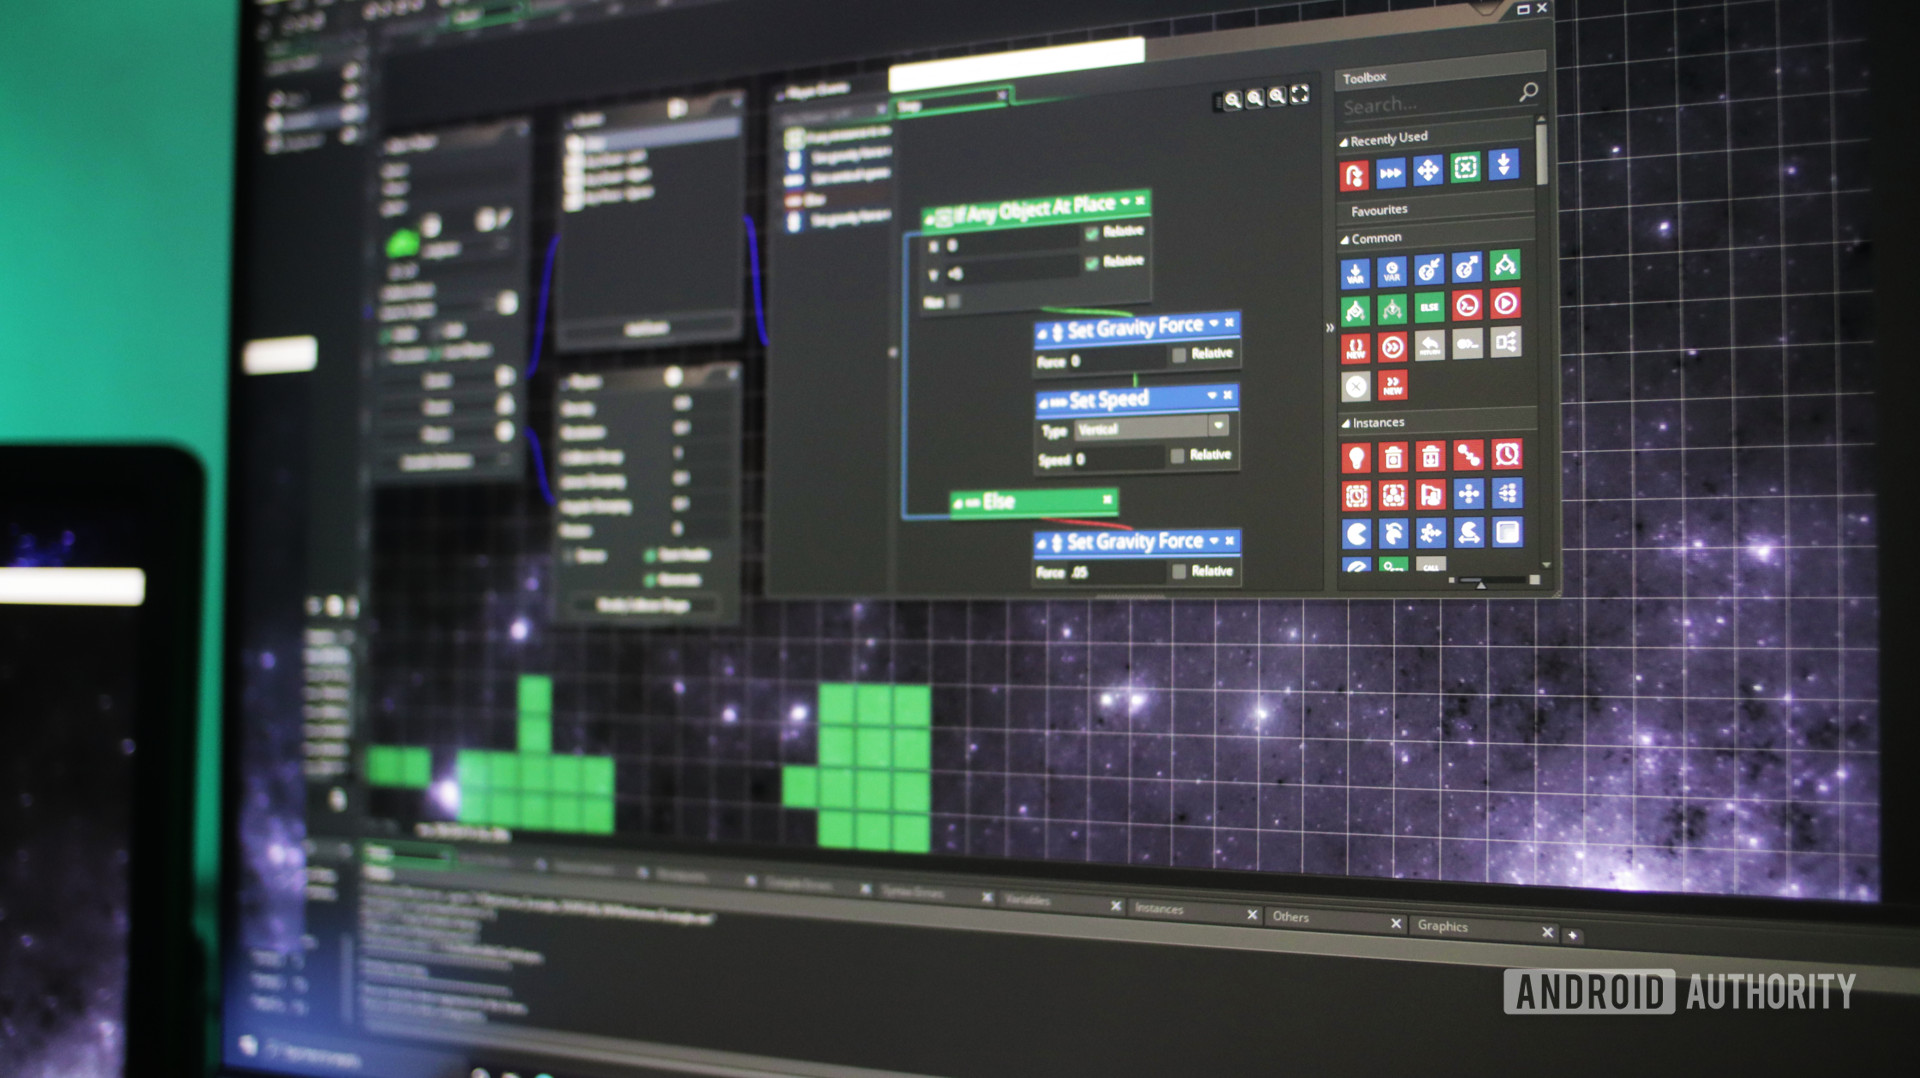
As we’re using Drag and Drop, we can add our game logic simply by choosing commands from a toolbox. Here’s what our logic is going to look like:
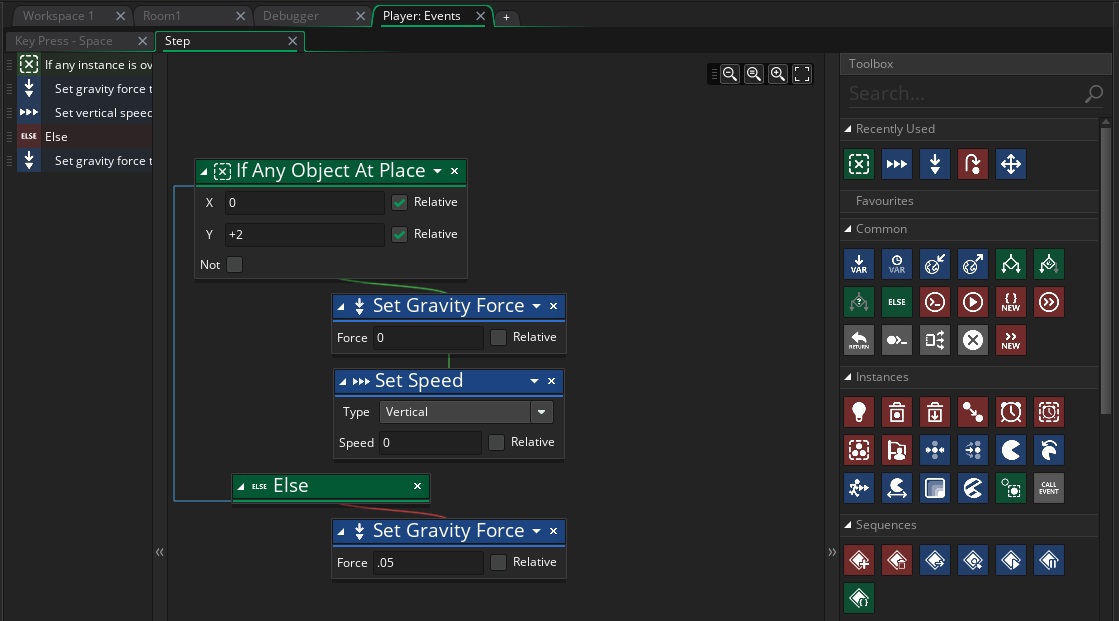
So, if there is an object at position Y + 2 (two beneath the player) then set the gravity to 0 and set the vertical speed to 0. Else (otherwise), set the gravity to 0.5.
Make sure to tick “relative” so that these positions are relative to the player object.
Build this flow chart yourself by dragging the elements from the right and placing them underneath or next-to the commands they follow on from logically.
Adding gravity force will automatically cause your player to fall. We turn the gravity off when we hit another object but we also need to set the vertical speed back to 0 to get rid of any lingering momentum. Otherwise the G-forces would prevent our player from being able to move!
Adding player controls
Now we need to add events to let our character move. We want to be able to walk left and right and jump up in the air.
Luckily, we have an event called “Key Down” that also lets us pick the key we want to listen for. This will trigger whenever the key is down, which also means the player will be able to simply hold left or right (rather than needing to tap the button).
The logic that goes here is pretty self-explanatory. We check to see if the pixels next to our player are clear. If they are, the player moves one step in that direction:
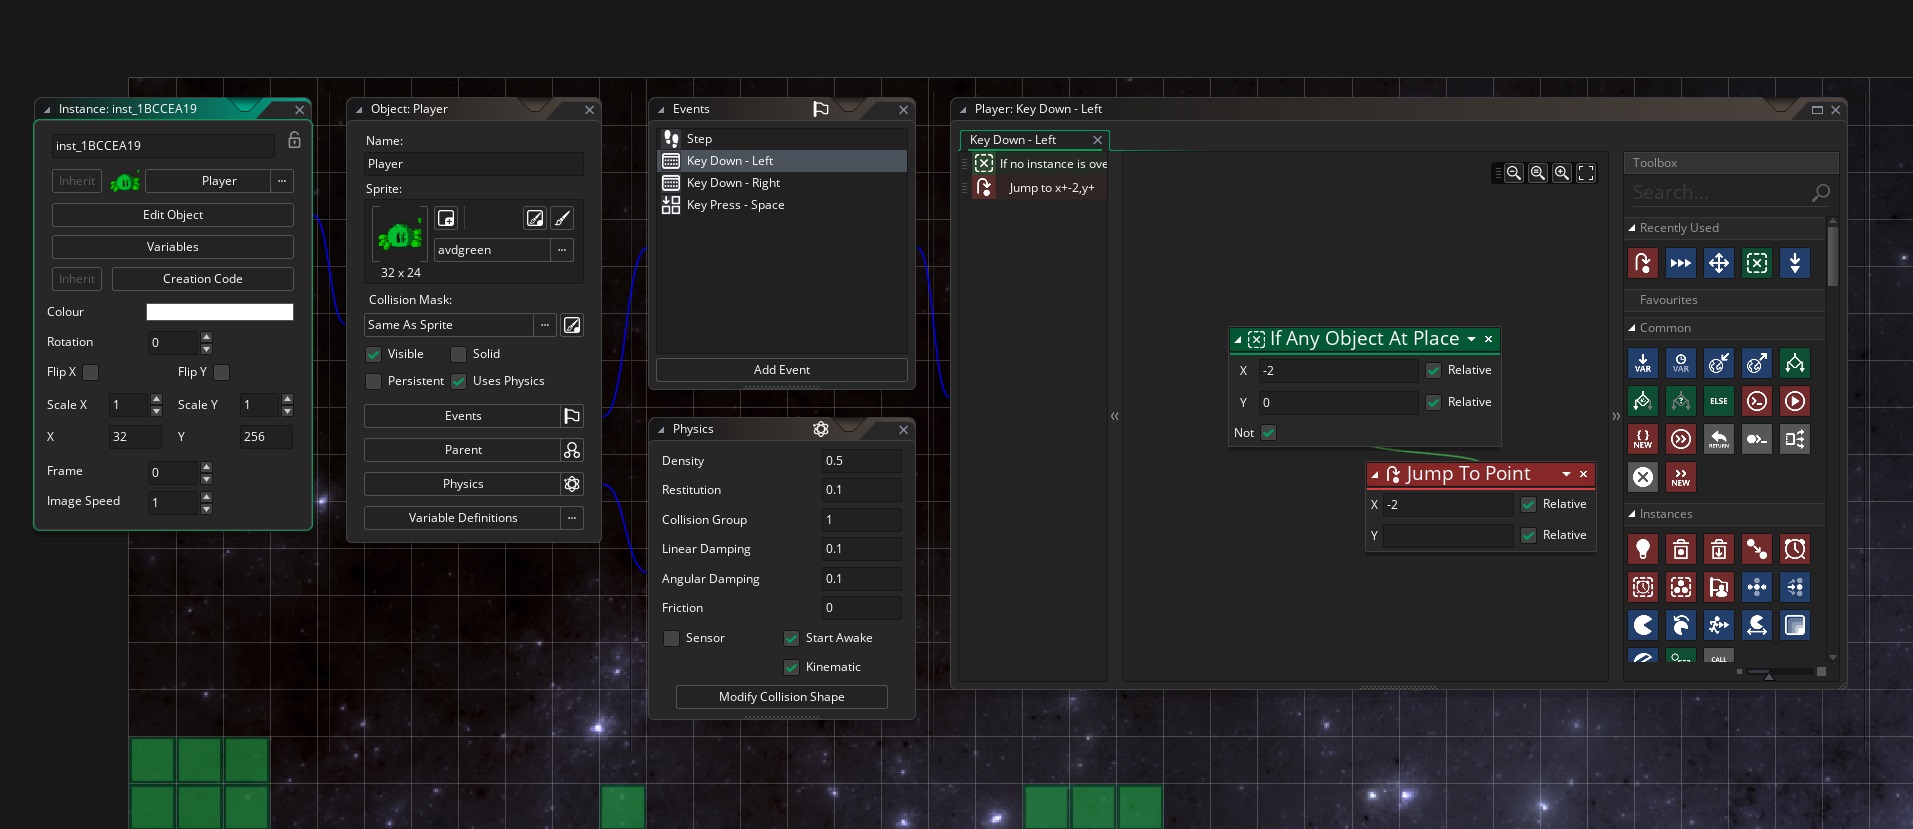
Do the same thing for the other direction.
Jump is slightly different. Here, we’re going to move the player slightly in the air so there is no collision, then apply vertical force and set the direction to “up.” This will give us a nice, natural jump movement. Again, we want to check that the player is on the ground before any of this happens, though:
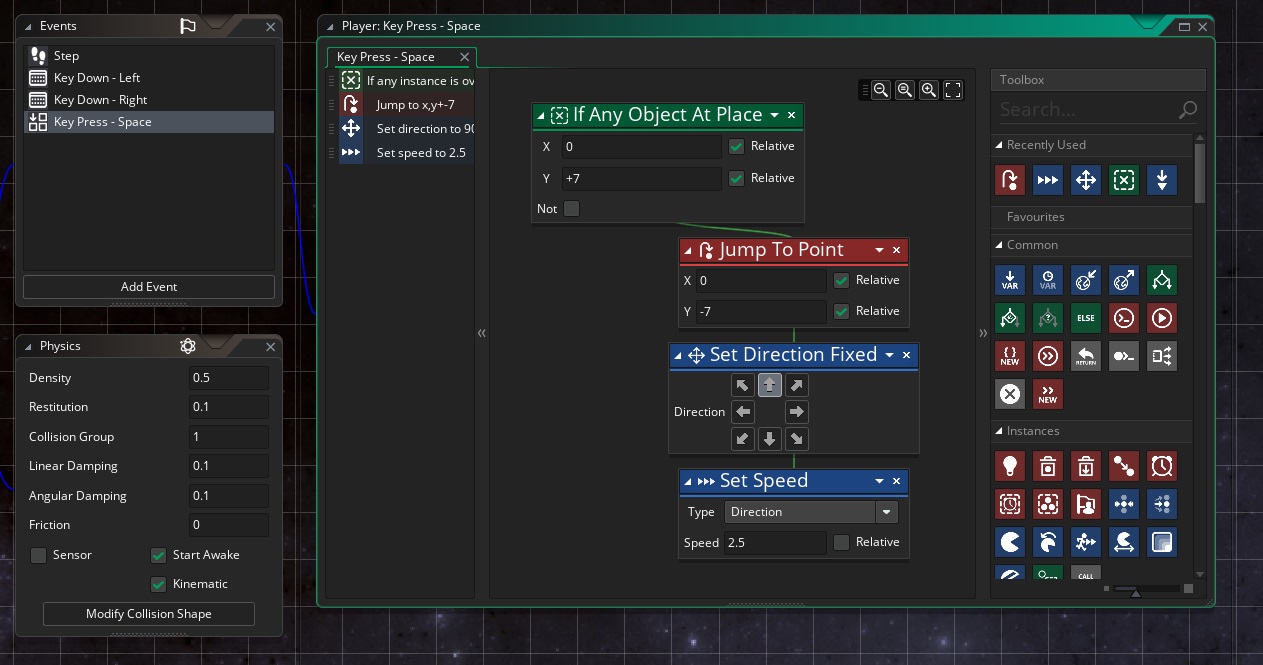
Now hit play and you should find that you can actually control the player, explore the level, and fall into pits. Not bad for about 10 minutes of set-up!
Closing comments
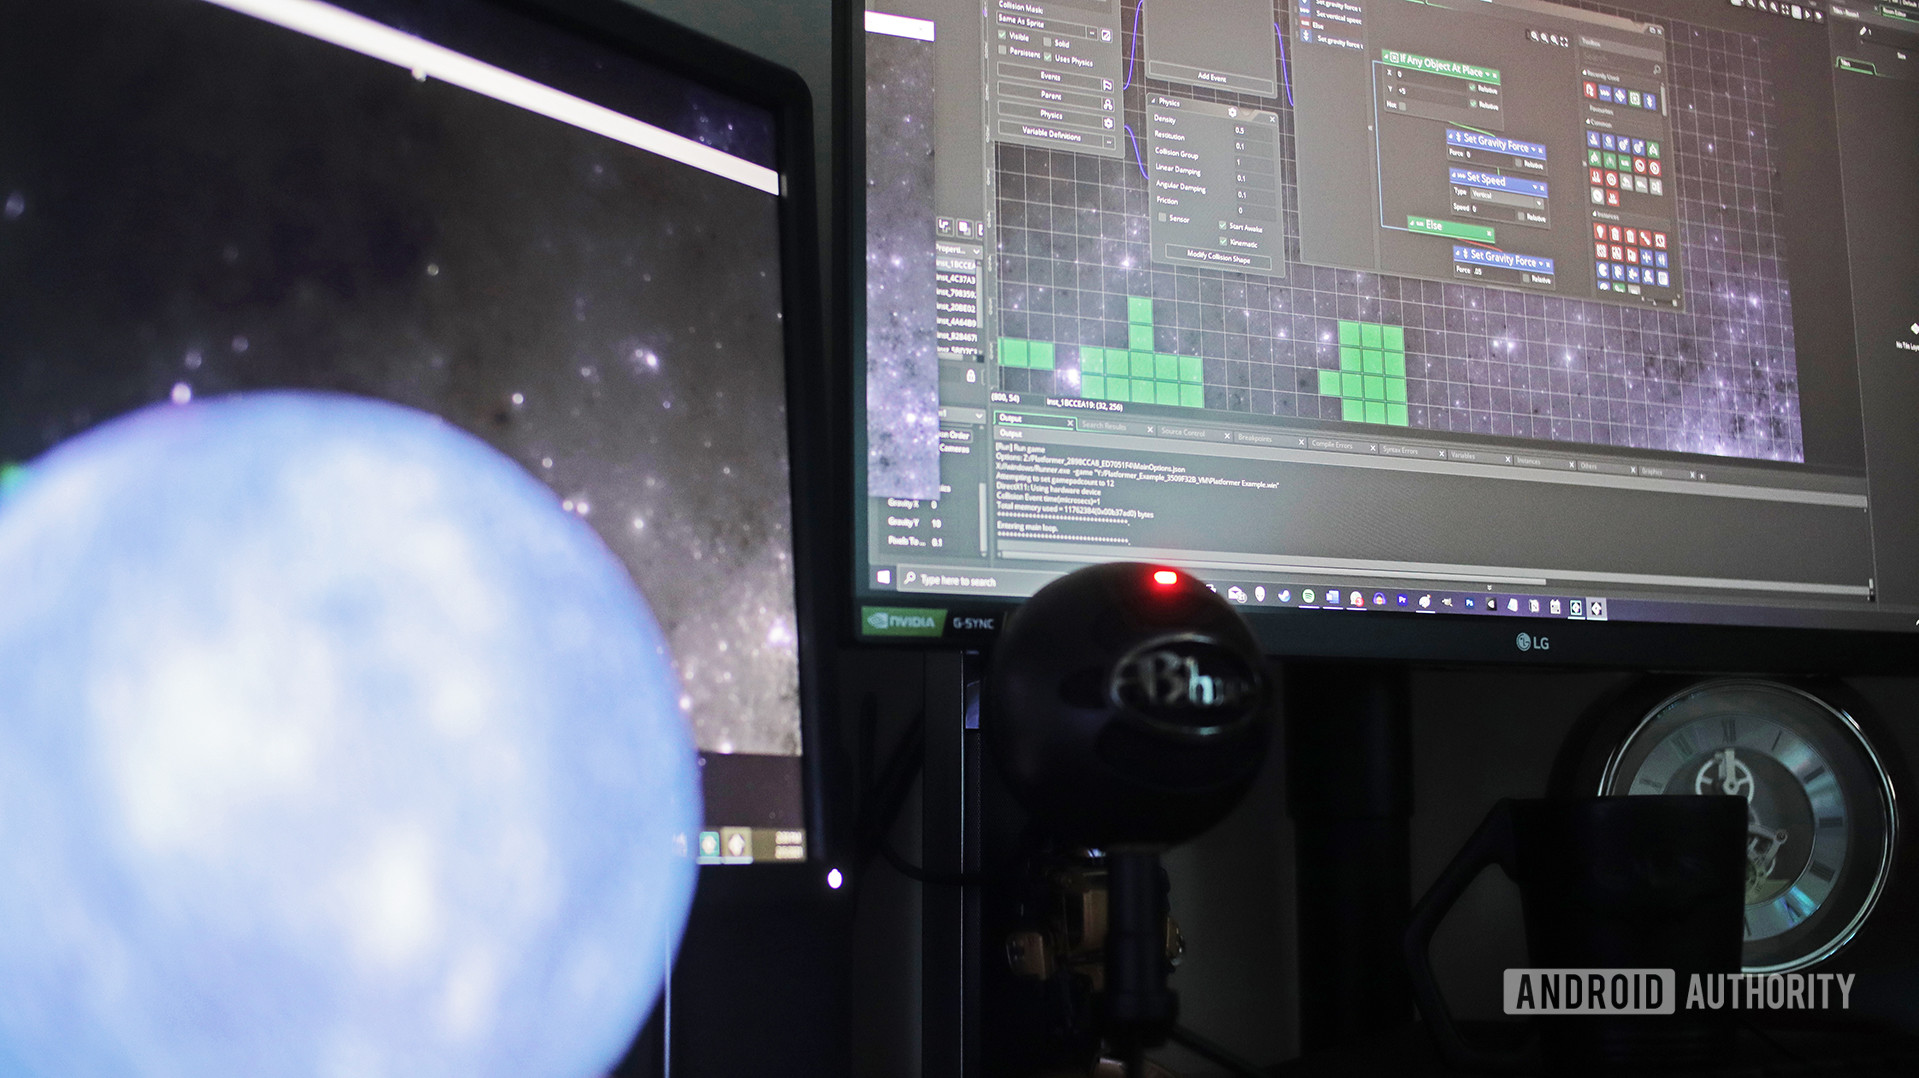
And, with that, this GameMaker Studio tutorial is over!
While this isn’t a “full game,” it’s enough to get a good feel for how GameMaker Studio works, and whether it clicks for you. This is a powerful tool if you want to get a 2D game running quickly, and that can only be a good thing for gaming on the Android platform. Let us know what you think of GameMaker Studio in the comments below, and if you would like to see a tutorial for GameMaker Language in future. Happy developing!
For more developer tutorials and news from Android Authority, sign up below!