Affiliate links on Android Authority may earn us a commission. Learn more.
How to get Location address in an Android app
Published onJuly 28, 2015

In previous tutorials, we have discussed how to get location data, as well as using location data to implement a simple device location tracking system using the ThingSpeak API. For this tutorial, we are going to use the Geocoder class to translate a given address into its latitude and longitude values (geocoding), and also translate a latitude and longitude value into an address (reverse geocoding).
Preparation
From Wikipedia, Geocoding uses a description of a location, such as a postal address or place name, to find geographic coordinates. Reverse geocoding, on the other hand, uses geographic coordinates to find a description of the location.
A geocoder is either a piece of software or a service that implements a geocoding process. The Android API contains a Geocoder class that can use either a location name or a location’s latitude and longitude values to get further details about an address (it can perform both forward and reverse geocoding). The returned address details include address name, country name, country code, postal code and more.
App Layout
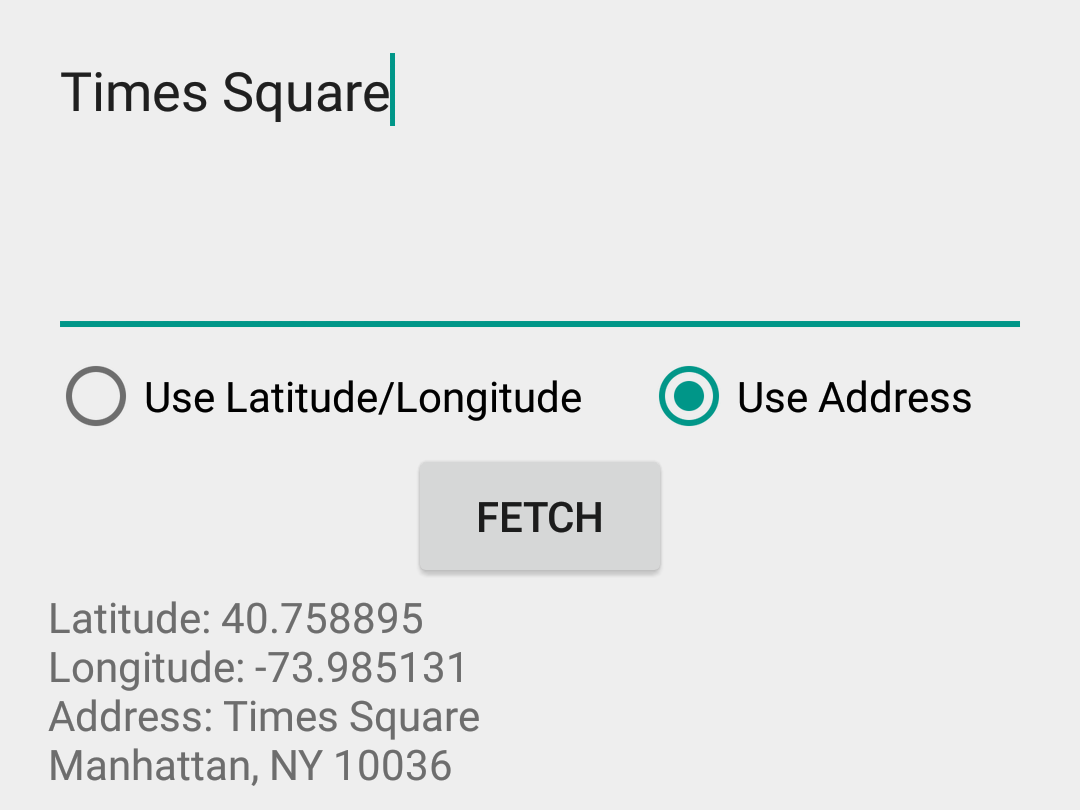
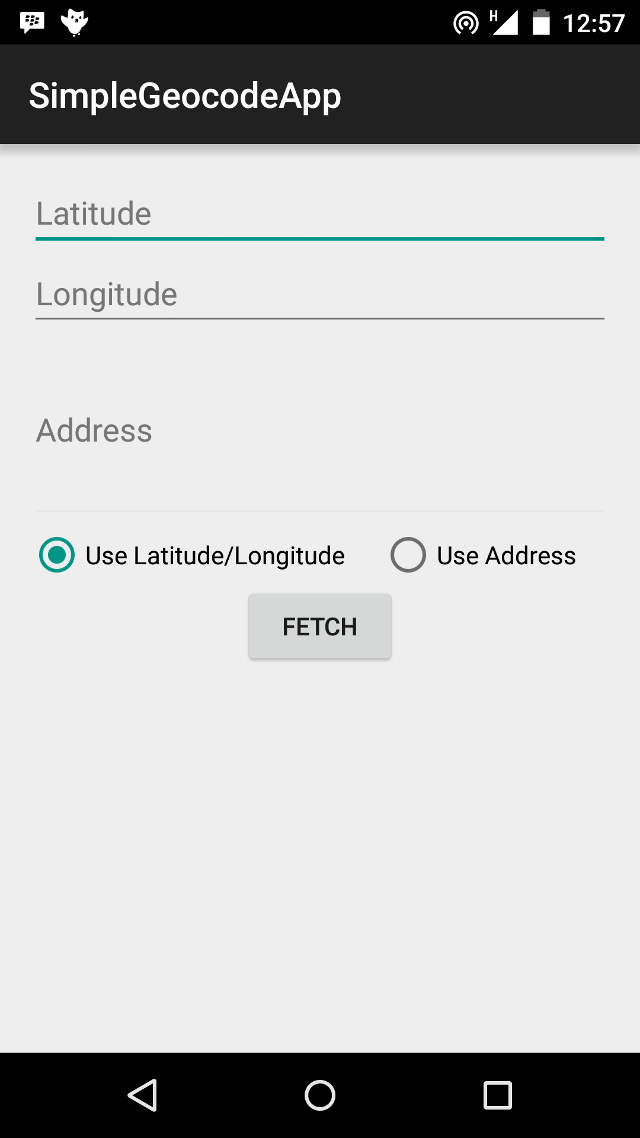
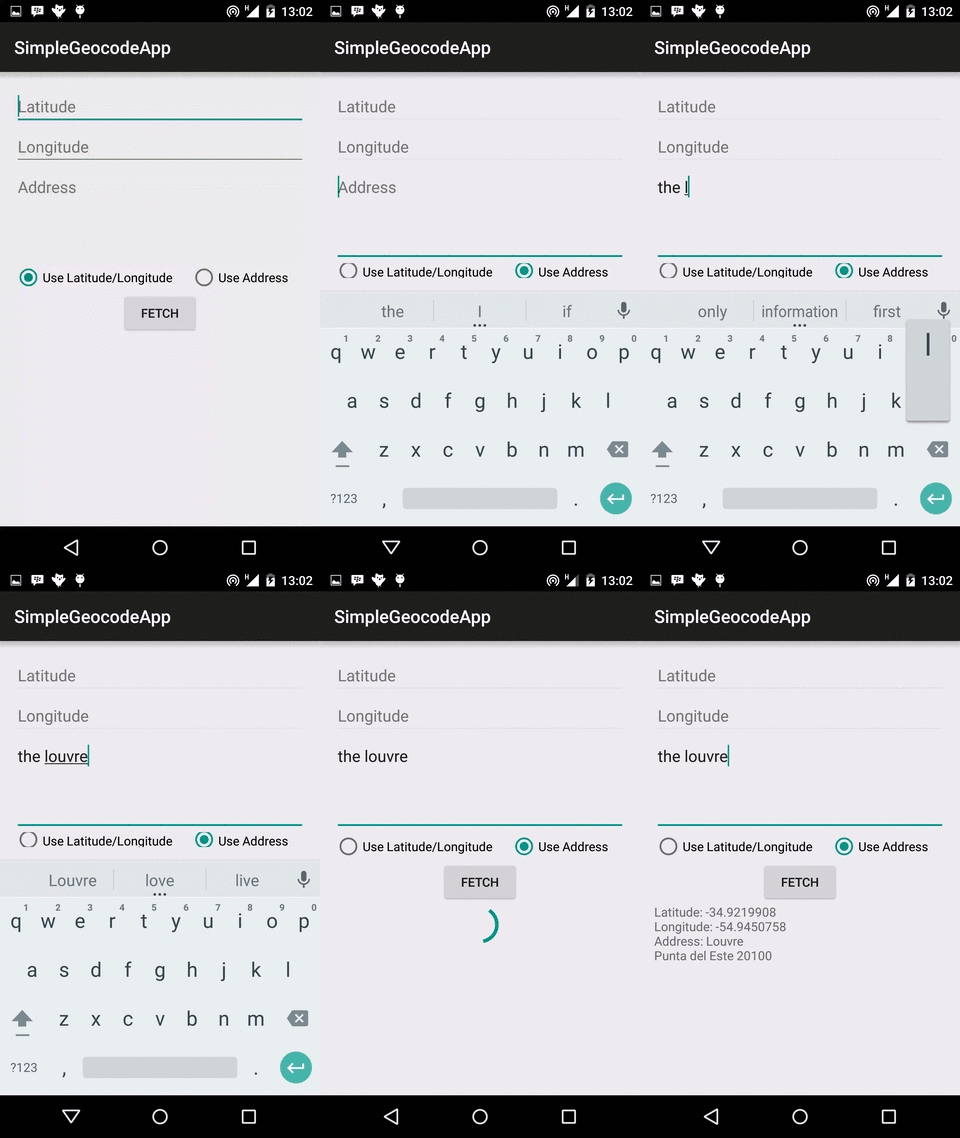
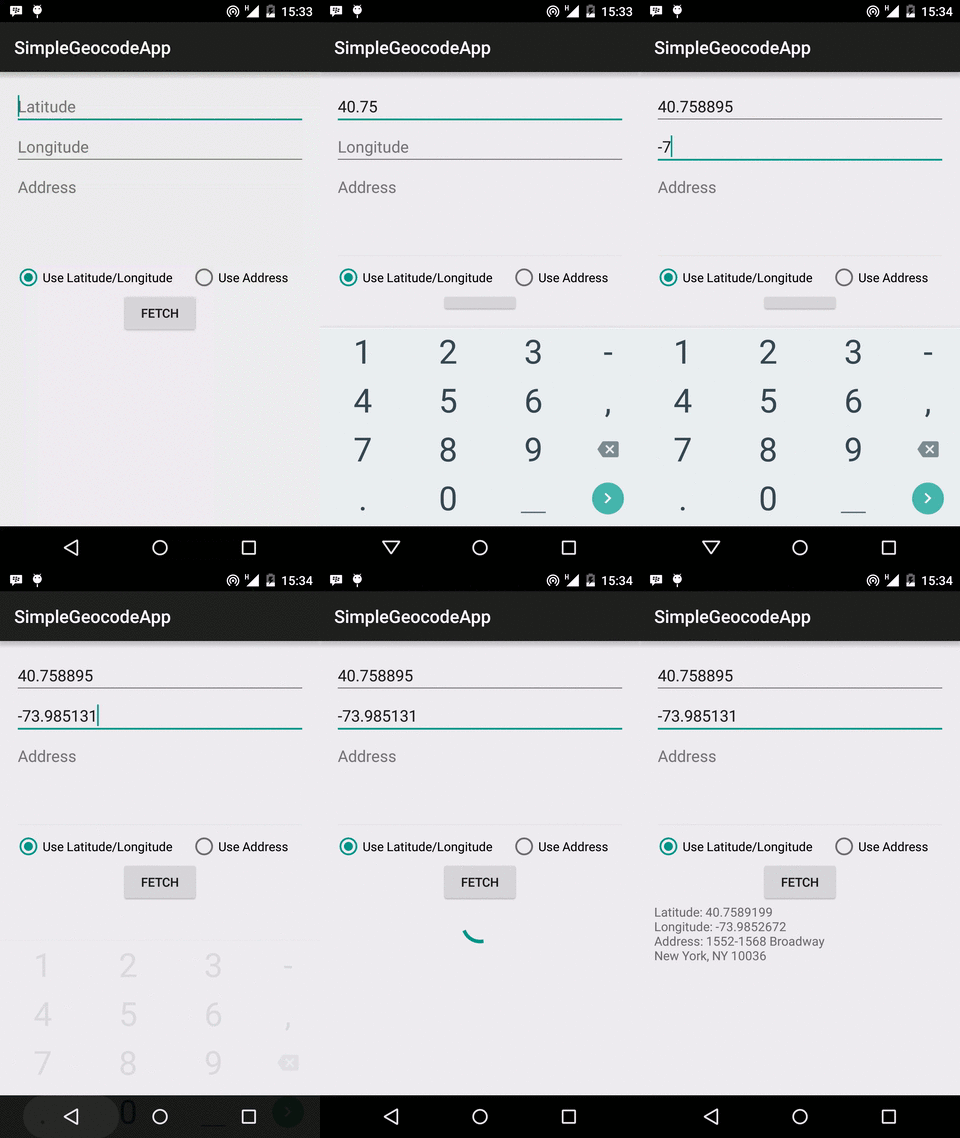
Our app is going to use both forward and reverse geocoding to get location address, and the app layout reflects this. The layout contains two EditTexts for Latitude and Longitude respectively, and an EditText for address name input. Beneath these, we have two RadioButtons, to select if we are fetching an address using the location’s latitude/longitude values, or using the address name. There is a Button, that begins the geocoding lookup when clicked, a ProgressBar, to show the user that the lookup task is running in the background, and a TextView to show the result received.

<?xml version="1.0" encoding="utf-8"?>
<RelativeLayout xmlns:android="http://schemas.android.com/apk/res/android"
    xmlns:tools="http://schemas.android.com/tools"
    android:layout_width="match_parent"
    android:layout_height="match_parent"
    android:paddingLeft="@dimen/activity_horizontal_margin"
    android:paddingRight="@dimen/activity_horizontal_margin"
    android:paddingTop="@dimen/activity_vertical_margin"
    android:paddingBottom="@dimen/activity_vertical_margin"
    android:orientation="vertical"
    tools:context=".FileActivity">

    <EditText
        android:id="@+id/latitudeEdit"
        android:layout_width="match_parent"
        android:layout_height="wrap_content"
        android:hint="@string/latitude"
        android:inputType="numberDecimal|numberSigned"/>

    <EditText
        android:id="@+id/longitudeEdit"
        android:layout_width="match_parent"
        android:layout_height="wrap_content"
        android:layout_below="@id/latitudeEdit"
        android:hint="@string/longitude"
        android:inputType="numberDecimal|numberSigned"/>

    <EditText
        android:id="@+id/addressEdit"
        android:layout_width="match_parent"
        android:layout_height="wrap_content"
        android:layout_below="@id/longitudeEdit"
        android:minLines="4"
        android:hint="@string/address"
        android:scrollHorizontally="false"
        android:scrollbars="vertical"
        android:enabled="false"/>

    <RadioGroup
        android:id="@+id/radioGroup"
        android:layout_width="match_parent"
        android:layout_height="wrap_content"
        android:layout_below="@id/addressEdit"
        android:layout_centerHorizontal="true"
        android:orientation="horizontal">

        <RadioButton
            android:id="@+id/radioLocation"
            android:layout_width="wrap_content"
            android:layout_height="wrap_content"
            android:layout_weight="1"
            android:text="@string/use_location"
            android:checked="true"
            android:onClick="onRadioButtonClicked"/>

        <RadioButton
            android:id="@+id/radioAddress"
            android:layout_width="wrap_content"
            android:layout_height="wrap_content"
            android:layout_weight="1"
            android:text="@string/use_address"
            android:onClick="onRadioButtonClicked"/>
    </RadioGroup>

    <Button
        android:id="@+id/actionButton"
        android:layout_width="wrap_content"
        android:layout_height="wrap_content"
        android:layout_below="@id/radioGroup"
        android:layout_centerHorizontal="true"
        android:text="@string/fetch"
        android:onClick="onButtonClicked"/>

    <TextView
        android:id="@+id/infoText"
        android:layout_width="match_parent"
        android:layout_height="wrap_content"
        android:layout_below="@id/actionButton"/>

    <ProgressBar
        android:id="@+id/progressBar"
        android:layout_width="wrap_content"
        android:layout_height="wrap_content"
        android:layout_below="@id/actionButton"
        android:layout_centerHorizontal="true"
        android:visibility="invisible"/>

</RelativeLayout>
Fetching the Address
Geocoder has two methods for fetching an Address, getFromLocation(), which uses latitude and longitude, and getFromLocationName(), which uses the location’s name. Both methods return a list of Address objects. An Address contains information like address name, country, latitude and longitude, whereas Location contains latitude, longitude, bearing and altitude among others. Remember that the Geocoder methods above block the thread they are executed in, and should never be called from the app’s UI thread.
To perform a long running task in the background, we can use an AsyncTask. However, the AsyncTask is not recommended for operations like the Geocoder lookup, because it can take a potentially long time to return. AsyncTask’s should be used for comparatively shorter operations. While we can (and did) use the AsyncTask, as per the Android developer recommendations and best practices, we would use an IntentService. An IntentService extends Service, and operations run in it can take as long as necessary. An IntentService holds no reference to the Activity it was started from, and so, the activity can be rebuilt (like when the device is rotated), without affecting the IntentService’s tasks, unlike the AsyncTask. (NB: We actually used an AsyncTask, and it worked just as well. As a bonus, the activity, using an AsyncTask is available in the github project as MainActivityWithAsyncTask)
Using the IntentService
We extend IntentService and define GeocodeAddressIntentService. An IntentService is started much like an Activity. We build an Intent, and start the service by calling Context.startService() method.
Before defining the class, we include our GeocodeAddressIntentService in the AppManifest. Don’t forget to also include the INTERNET permission. In my case, while developing/testing on a Nexus 5 Lollipop device, the network calls just silently failed prior to including the INTERNET permission. So, if you do not get any response, first confirm that you have requested the INTERNET permission.
<manifest xmlns:android="http://schemas.android.com/apk/res/android"
    package="com.sample.foo.simplegeocodeapp">

        <uses-permission android:name="android.permission.INTERNET"/>

    <application
        ...
        <service
            android:name=".GeocodeAddressIntentService"
            android:exported="false"/>
    </application>

</manifest>
To use our IntentService, we must implement the onHandleIntent(Intent) method. This is the entry point for IntentService’s, much like the onCreate() is the entry point for Activity’s. In the code snippet below, take notice of the ResultReceiver object. When your IntentService has completed it’s task, it should have a way to send the results back to the invoking Activity. That is where the ResultReceiver comes in, and we’ll discuss it’s implementation in a bit.
public class GeocodeAddressIntentService extends IntentService {

    protected ResultReceiver resultReceiver;
    private static final String TAG = "FetchAddyIntentService";

    public GeocodeAddressIntentService() {
        super("GeocodeAddressIntentService");
    }
    ...
    @Override
    protected void onHandleIntent(Intent intent) {
        Geocoder geocoder = new Geocoder(this, Locale.getDefault());
        List<Address> addresses = null;

        resultReceiver = intent.getParcelableExtra(Constants.RECEIVER);
        int fetchType = intent.getIntExtra(Constants.FETCH_TYPE_EXTRA, 0);
    ...
    }
}
The code snippet below contains the actual forward or reverse geocoding lookup calls. We determine if the search uses location name, or location latitude/longitude values, and call the appropriate method. If using location name, we call the Geocoder.getFromLocationName() method, and if using latitude/longitude, we call Geocoder.getFromLocation() method. You can specify a maximum number of addresses to be returned. In our sample, we request for a maximum of one (1) address. Note that an address name can refer to more than one location, spread across multiple countries. In a production app, you might want to fetch more than one, and have an algorithm determine which is the most likely required address.
if(fetchType == Constants.USE_ADDRESS_NAME) {
            String name = intent.getStringExtra(Constants.LOCATION_NAME_DATA_EXTRA);
            try {
                addresses = geocoder.getFromLocationName(name, 1);
            } catch (IOException e) {
                errorMessage = "Service not available";
                Log.e(TAG, errorMessage, e);
            }
        }
        else if(fetchType == Constants.USE_ADDRESS_LOCATION) {
            Location location = intent.getParcelableExtra(
                    Constants.LOCATION_DATA_EXTRA);

            try {
                addresses = geocoder.getFromLocation(
                        location.getLatitude(), location.getLongitude(), 1);
            } catch (IOException ioException) {
                errorMessage = "Service Not Available";
                Log.e(TAG, errorMessage, ioException);
            } catch (IllegalArgumentException illegalArgumentException) {
                errorMessage = "Invalid Latitude or Longitude Used";
                Log.e(TAG, errorMessage + ". " +
                        "Latitude = " + location.getLatitude() + ", Longitude = " +
                        location.getLongitude(), illegalArgumentException);
            }
        }
        else {
            errorMessage = "Unknown Type";
        }

        if (addresses == null || addresses.size()  == 0) {
            if (errorMessage.isEmpty()) {
                errorMessage = "Not Found";
            }
            deliverResultToReceiver(Constants.FAILURE_RESULT, errorMessage, null);
        } else {
            for(Address address : addresses) {
                String outputAddress = "";
                for(int i = 0; i < address.getMaxAddressLineIndex(); i++) {
                    outputAddress += " --- " + address.getAddressLine(i);
                }
            }
            Address address = addresses.get(0);
            ArrayList<String> addressFragments = new ArrayList<String>();

            for(int i = 0; i < address.getMaxAddressLineIndex(); i++) {
                addressFragments.add(address.getAddressLine(i));
            }
(R.string.address_found));
            deliverResultToReceiver(Constants.SUCCESS_RESULT,
                    TextUtils.join(System.getProperty("line.separator"),
                            addressFragments), address);
        }
deliverResultToReceiver is a simple method, that handles returning the results of the operation to the invoking Activity, through the ResultReceiver.
private void deliverResultToReceiver(int resultCode, String message, Address address) {
        Bundle bundle = new Bundle();
        bundle.putParcelable(Constants.RESULT_ADDRESS, address);
        bundle.putString(Constants.RESULT_DATA_KEY, message);
        resultReceiver.send(resultCode, bundle);
    }
We implemented the ResultReceiver as an inner class in the MainActivity.
class AddressResultReceiver extends ResultReceiver {
        public AddressResultReceiver(Handler handler) {
            super(handler);
        }

        @Override
        protected void onReceiveResult(int resultCode, final Bundle resultData) {
            if (resultCode == Constants.SUCCESS_RESULT) {
                final Address address = resultData.getParcelable(Constants.RESULT_ADDRESS);
                runOnUiThread(new Runnable() {
                    @Override
                    public void run() {
                        progressBar.setVisibility(View.INVISIBLE);
                        infoText.setText("Latitude: " + address.getLatitude() + "\n" +
                                "Longitude: " + address.getLongitude() + "\n" +
                                "Address: " + resultData.getString(Constants.RESULT_DATA_KEY));
                    }
                });
            }
            else {
                runOnUiThread(new Runnable() {
                    @Override
                    public void run() {
                        progressBar.setVisibility(View.INVISIBLE);
                        infoText.setText(resultData.getString(Constants.RESULT_DATA_KEY));
                    }
                });
            }
        }
Starting the IntentService is pretty similar to starting a new Activity. We build an Intent, put in the necessary Extras, and call Context.startService(Intent). The Extras we bundle in the Intent is dependent on if we are performing a forward or reverse lookup.
public void onButtonClicked(View view) {
        Intent intent = new Intent(this, GeocodeAddressIntentService.class);
        intent.putExtra(Constants.RECEIVER, mResultReceiver);
        intent.putExtra(Constants.FETCH_TYPE_EXTRA, fetchType);
        if(fetchType == Constants.USE_ADDRESS_NAME) {
            if(addressEdit.getText().length() == 0) {
                Toast.makeText(this, "Please enter an address name", Toast.LENGTH_LONG).show();
                return;
            }
            intent.putExtra(Constants.LOCATION_NAME_DATA_EXTRA, addressEdit.getText().toString());
        }
        else {
            if(latitudeEdit.getText().length() == 0 || longitudeEdit.getText().length() == 0) {
                Toast.makeText(this,
                        "Please enter latitude/longitude values",
                        Toast.LENGTH_LONG).show();
                return;
            }
            Location location = new Location("");
            location.setLatitude(Double.parseDouble(latitudeEdit.getText().toString()));
            location.setLongitude(Double.parseDouble(longitudeEdit.getText().toString()));
            intent.putExtra(Constants.LOCATION_DATA_EXTRA, location);
        }
        progressBar.setVisibility(View.VISIBLE);
        Log.e(TAG, "Starting Service");
        startService(intent);
    }
Conclusion
While it is all well and good tracking a user’s location, for your app to truly amaze, showing users an address name for a given location will almost always be more useful than the corresponding latitude and longitude values.
The complete source code is available on GitHub, and can be forked, downloaded, copied and used as desired.
If you followed our previous tutorials on using the ThingSpeak API to track a device’s location, and how to get and use an Android device’s location, try to integrate geocoding and get location address in both apps. Have fun coding, and share your challenges and successes in the comments below.