Affiliate links on Android Authority may earn us a commission. Learn more.
How to add a printer to any Mac
Published onSeptember 29, 2022
Printers are a necessary evil. A lot of businesses and government entities still require you to use physical documents. Plus, a lot of people own photo printers where they print off priceless memories. Printers can be finicky, though, and we suspect that’s why you’re here. We’ll do a rundown on how to add a printer to any Mac so you can get your documents or photos printed. For those that also have iPhones laying around, we have a guide on how to install a printer on an iPhone as well.
QUICK ANSWER
To add a printer to any Mac, click the Apple Logo in the top left corner and select System Preferences. From there, select Printers & Scanners. Hit the + button, find your printer, and click Add. Your printer should now function in all apps on your Mac.
JUMP TO KEY SECTIONS
How to connect a printer over Wi-Fi
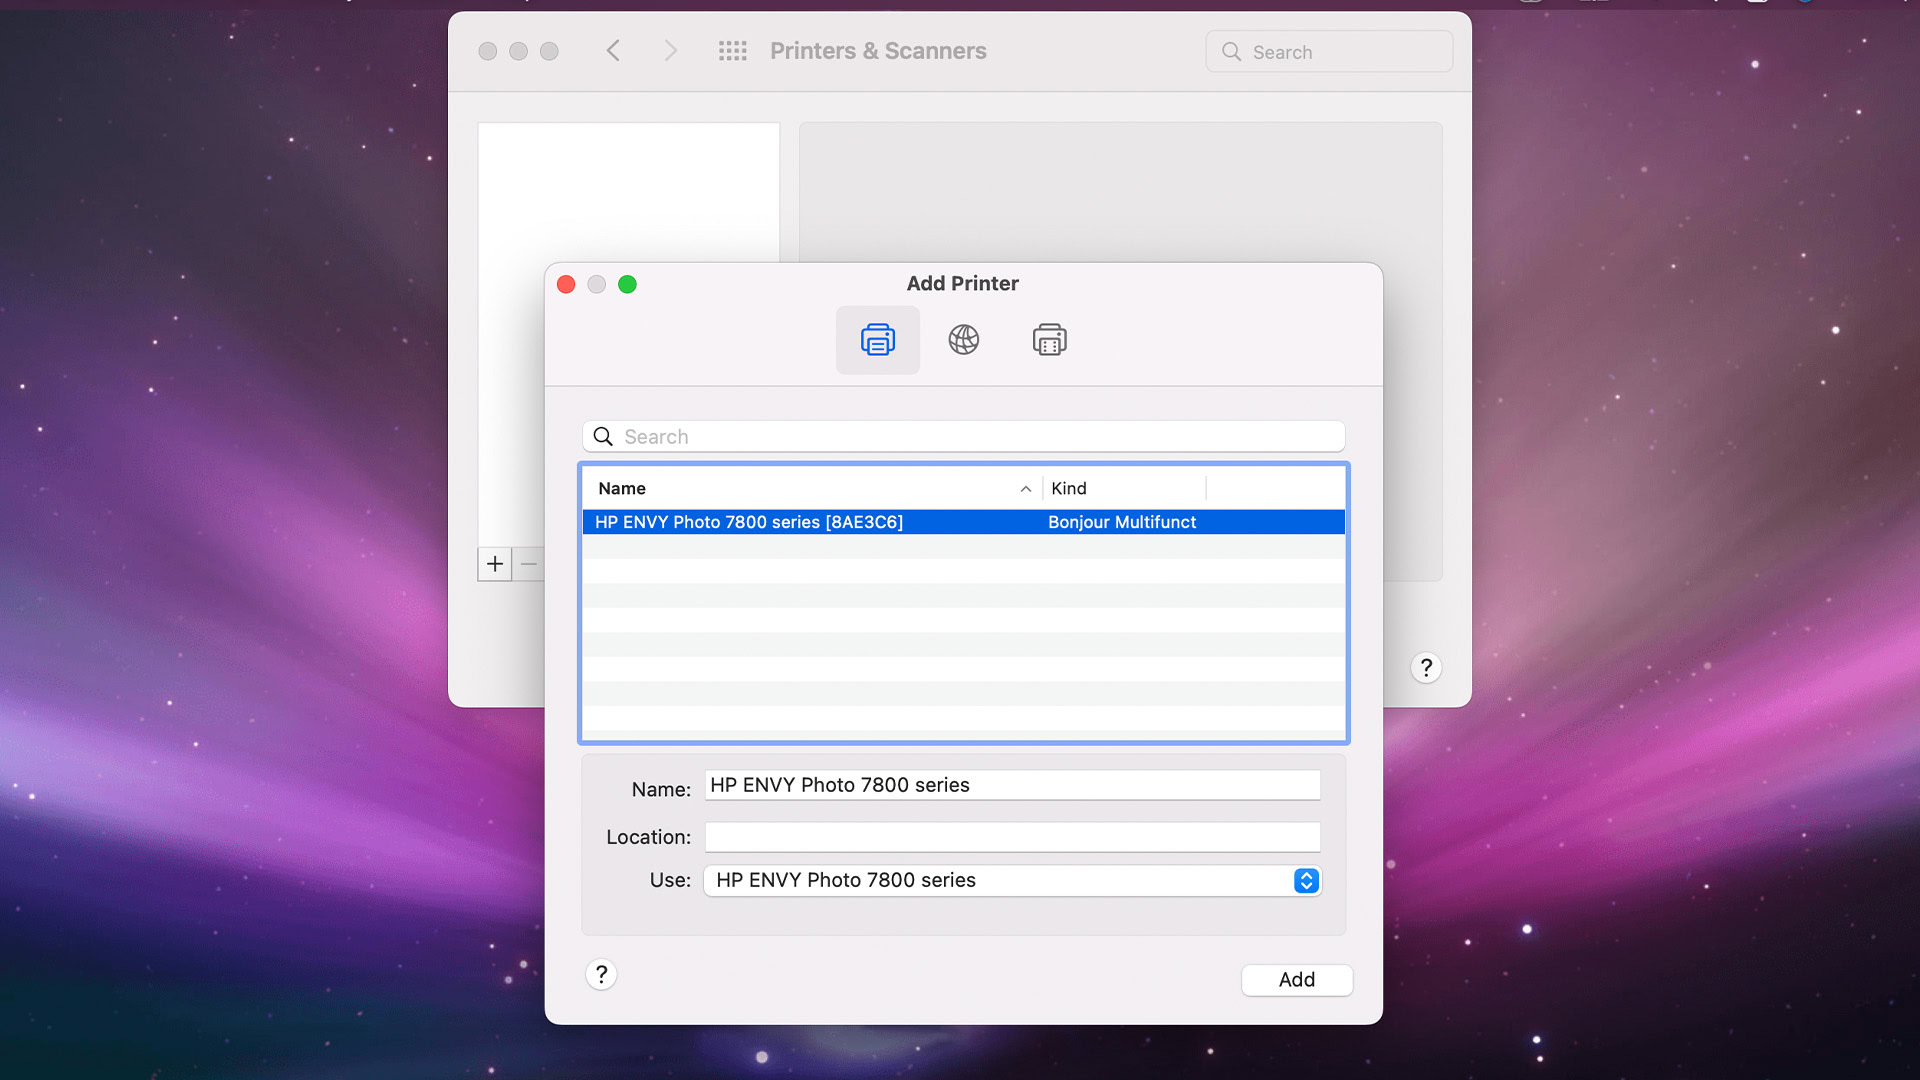
- Make sure your printer is turned on, set up as per the manufacturer’s instructions, and connected to your network.
- On your Mac, hit the Apple Logo in the top left corner.
- Select System Preferences. Then, select Printers & Scanners.
- On the next screen, under the blank white window on the left, hit the Plus button.
- Your printer should come up in the next window. Please select it and wait for your Mac to gather printer information.
- Once done, hit the Add button.
- The printer should now be connected to your Mac, and you should be able to print as needed.
Connect a printer over Bluetooth
- Again, make sure your printer is turned on, set up as per the manufacturer’s instructions, and ready to go.
- On your Mac, hit the Apple Logo in the top left corner and select System Preferences.
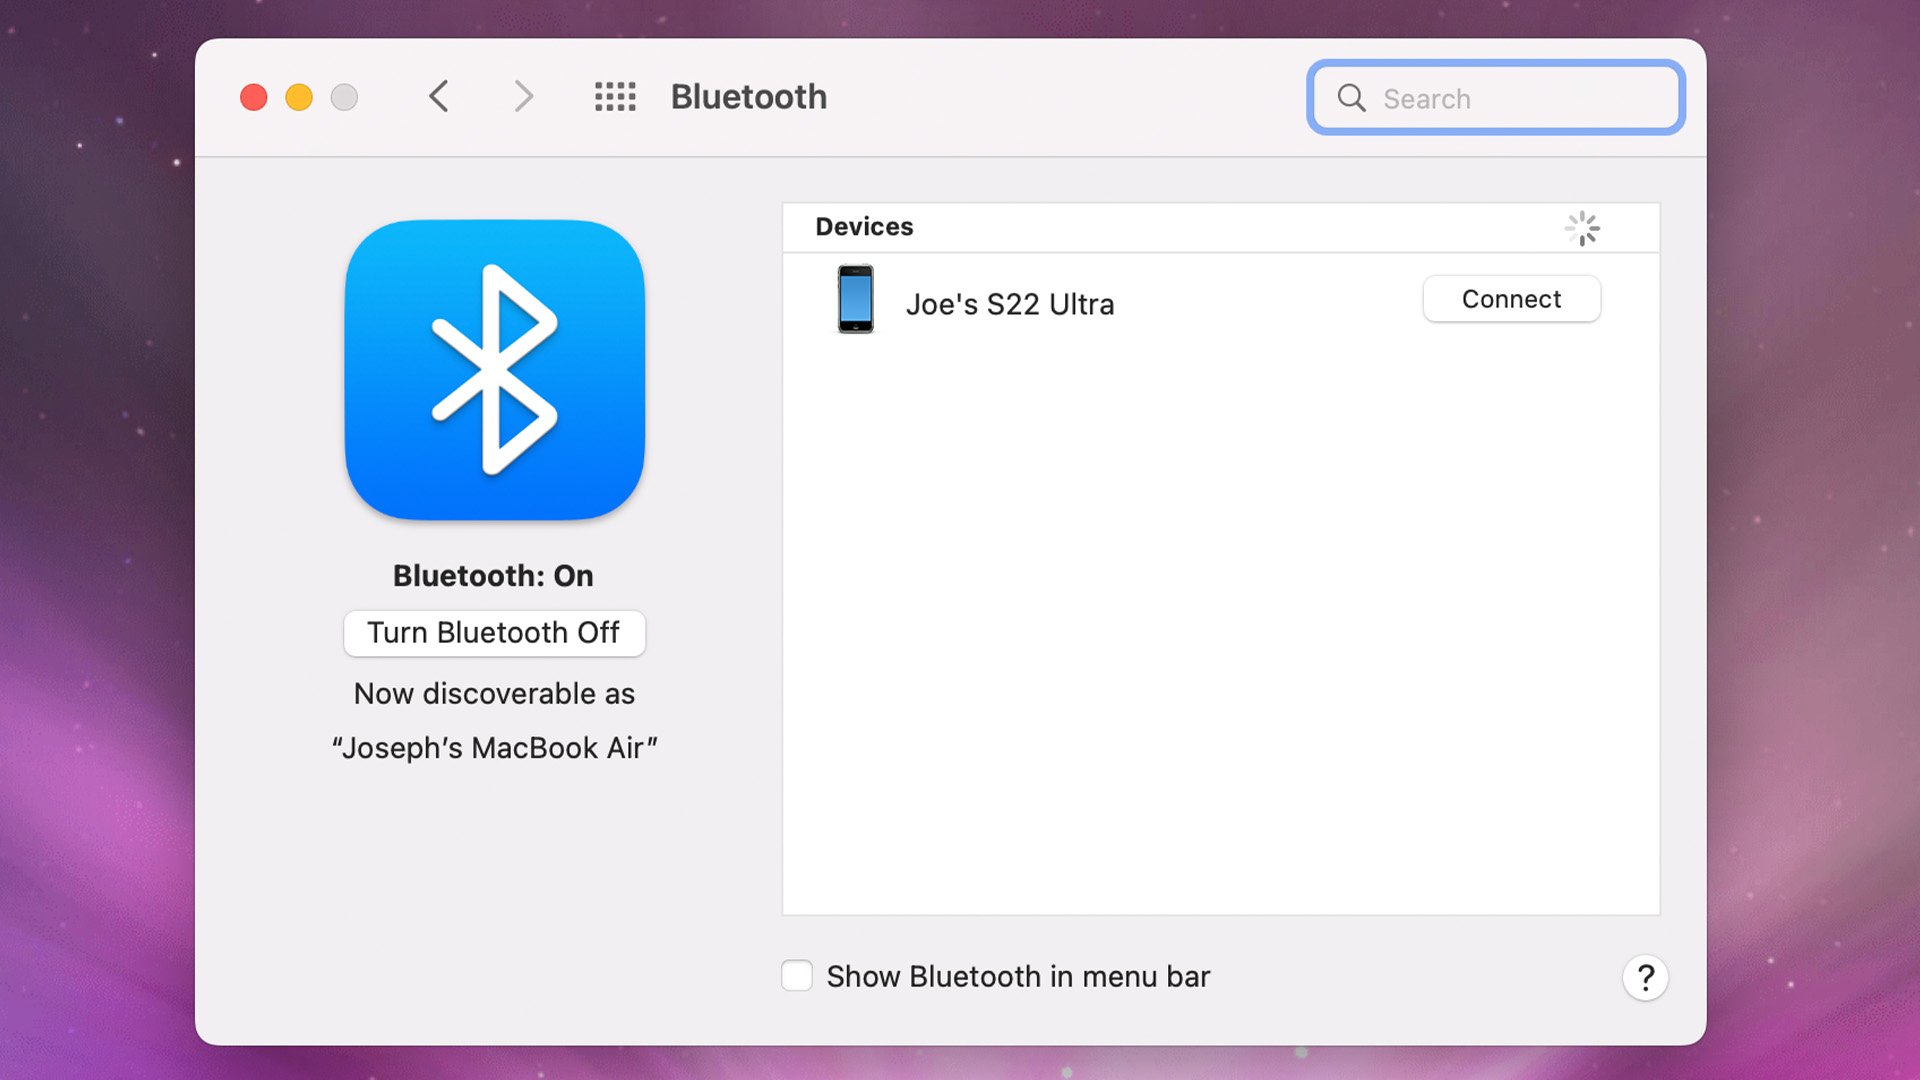
- Next, select Bluetooth. A window should open. Leave it alone for now.
- Now, go back to your printer and put it into pairing mode. Each Bluetooth-enabled printer is different, so you may need your owner’s manual to figure out how that works.
- Once your printer is in pairing mode, return to your Mac. Turn on Bluetooth in the window you opened earlier.
- Your printer should appear under the Devices list on the Bluetooth screen.
- Hit the Connect button (or Pair button on older Macs).
- Once successfully paired, your Mac should be able to print what you need.
Connect printer wirelessly with its IP address
This method is only useful if the Wi-Fi method doesn’t work. It requires a bit of know-how, so don’t get too frustrated if this takes you a second to figure out.
- Make sure your printer is set up as per the manufacturer’s instructions, connected to your network, and ready to go.
- Next is the hard part. You’ll need to log in with your router and find your printer’s IP address. Each router manufacturer does this differently, so this step might take you a second.
- Once you find the IP address of your printer, return to your Macbook.
- Hit the Apple Logo in the top left corner.
- Select System Preferences. Then, select Printers & Scanners.
- Hit the Plus button on the lefthand side of the window.
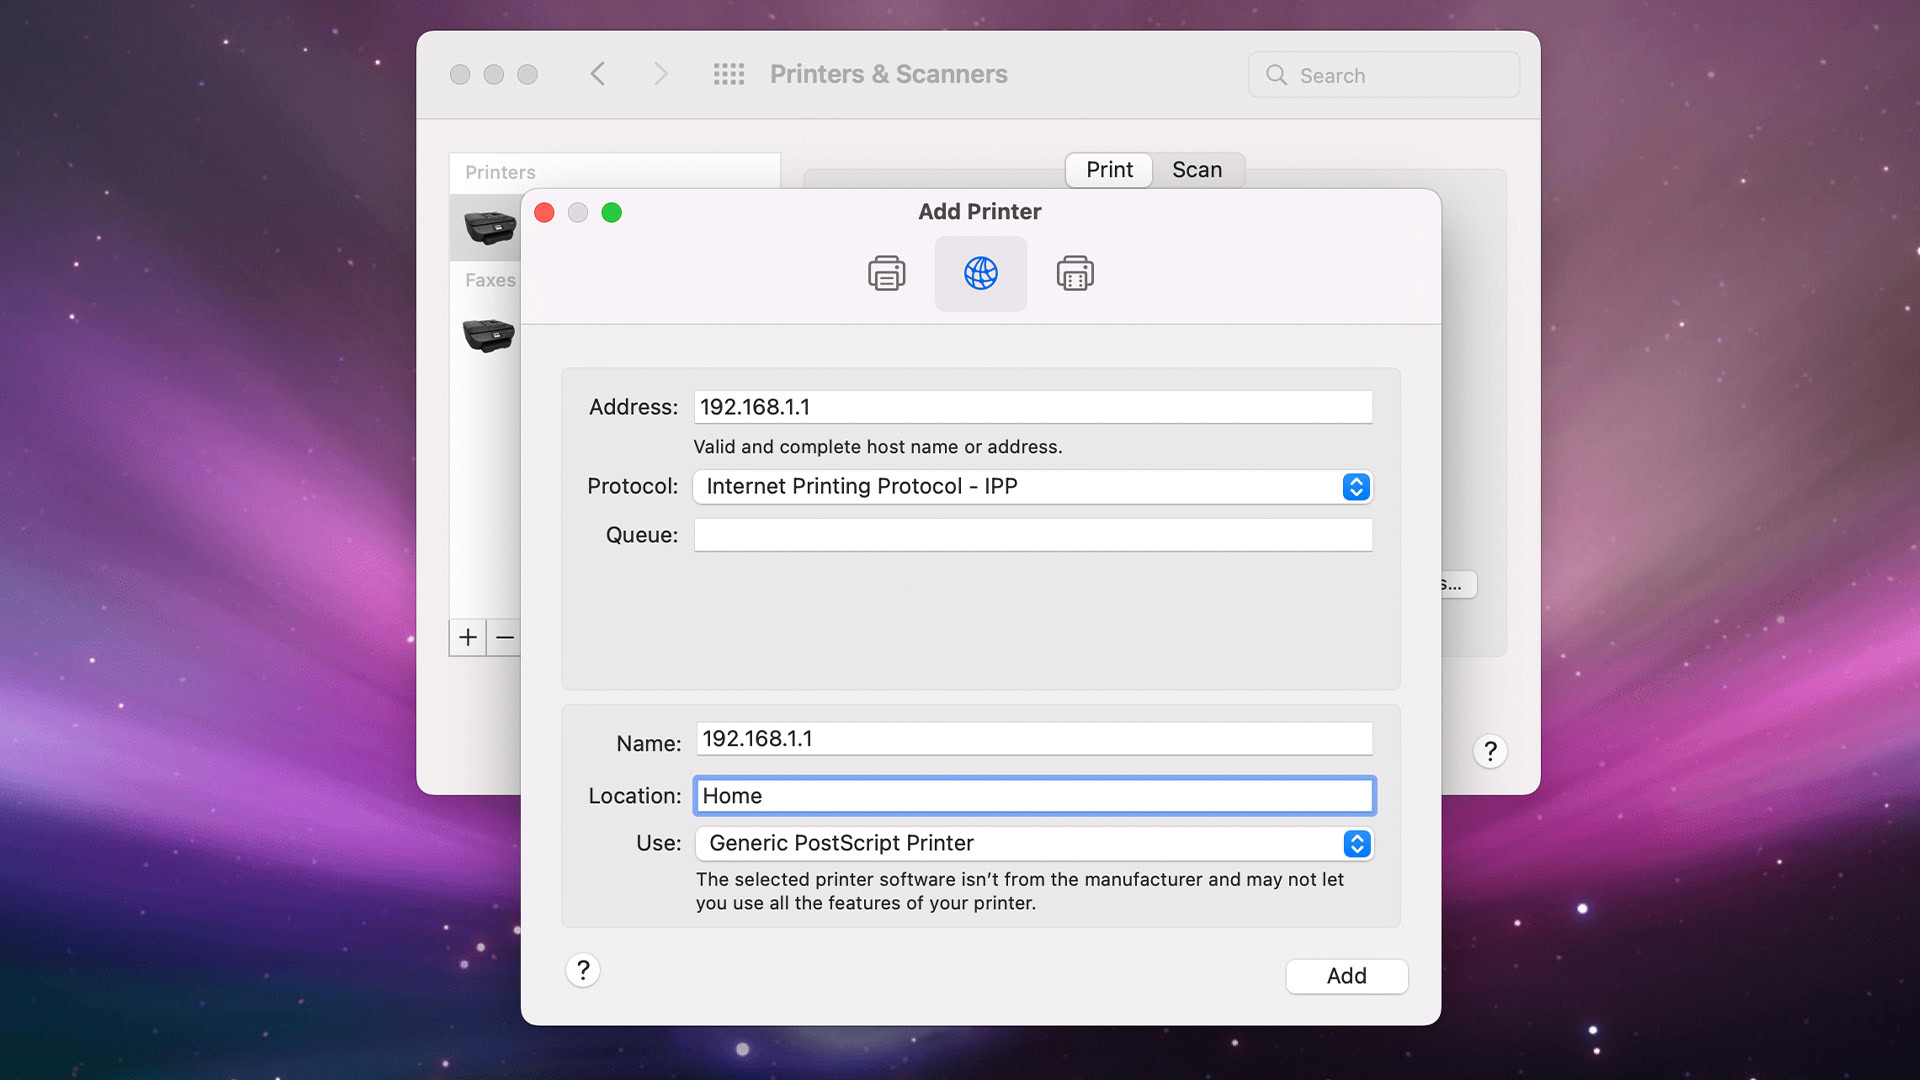
- On the next screen, click the IP tab at the top of the window. It looks like a globe.
- Enter your printer’s IP address in the first box and select the appropriate Protocol.
- Enter the name, location, and use boxes as necessary. Finally, hit Add.
- Note — If you don’t know the proper protocol, try first with the default option, which is IPP. If that doesn’t work, try each one until it works. There are only three.
Please note that your printer must be on and connected to your Mac either by Wi-Fi or by Bluetooth in order to print. Also, connecting to your printer may take a minute or two. If you can’t connect, try rebooting your printer and Mac. Then try again.
Connect a printer to a Mac with USB
- Note — Apple requires your software to be up to date in order to use this method. Make sure your Mac is up-to-date before continuing.
- Additionally, ensure your printer is on, set up as per the manufacturer’s instruction, and ready to go.
- Connect your Mac to your printer with a USB cable.
- From here, one of two things will happen. Your Mac may ask you to install the printer’s software. Follow the instructions (they vary per printer) and your printer should be good to go when you’re done.
- If your Mac doesn’t prompt you to install software, click the Apple Logo and go to System Preferences.
- Select Printers & Scanners.
- In the next window, hit the Plus button underneath the white section on the left side of the window.
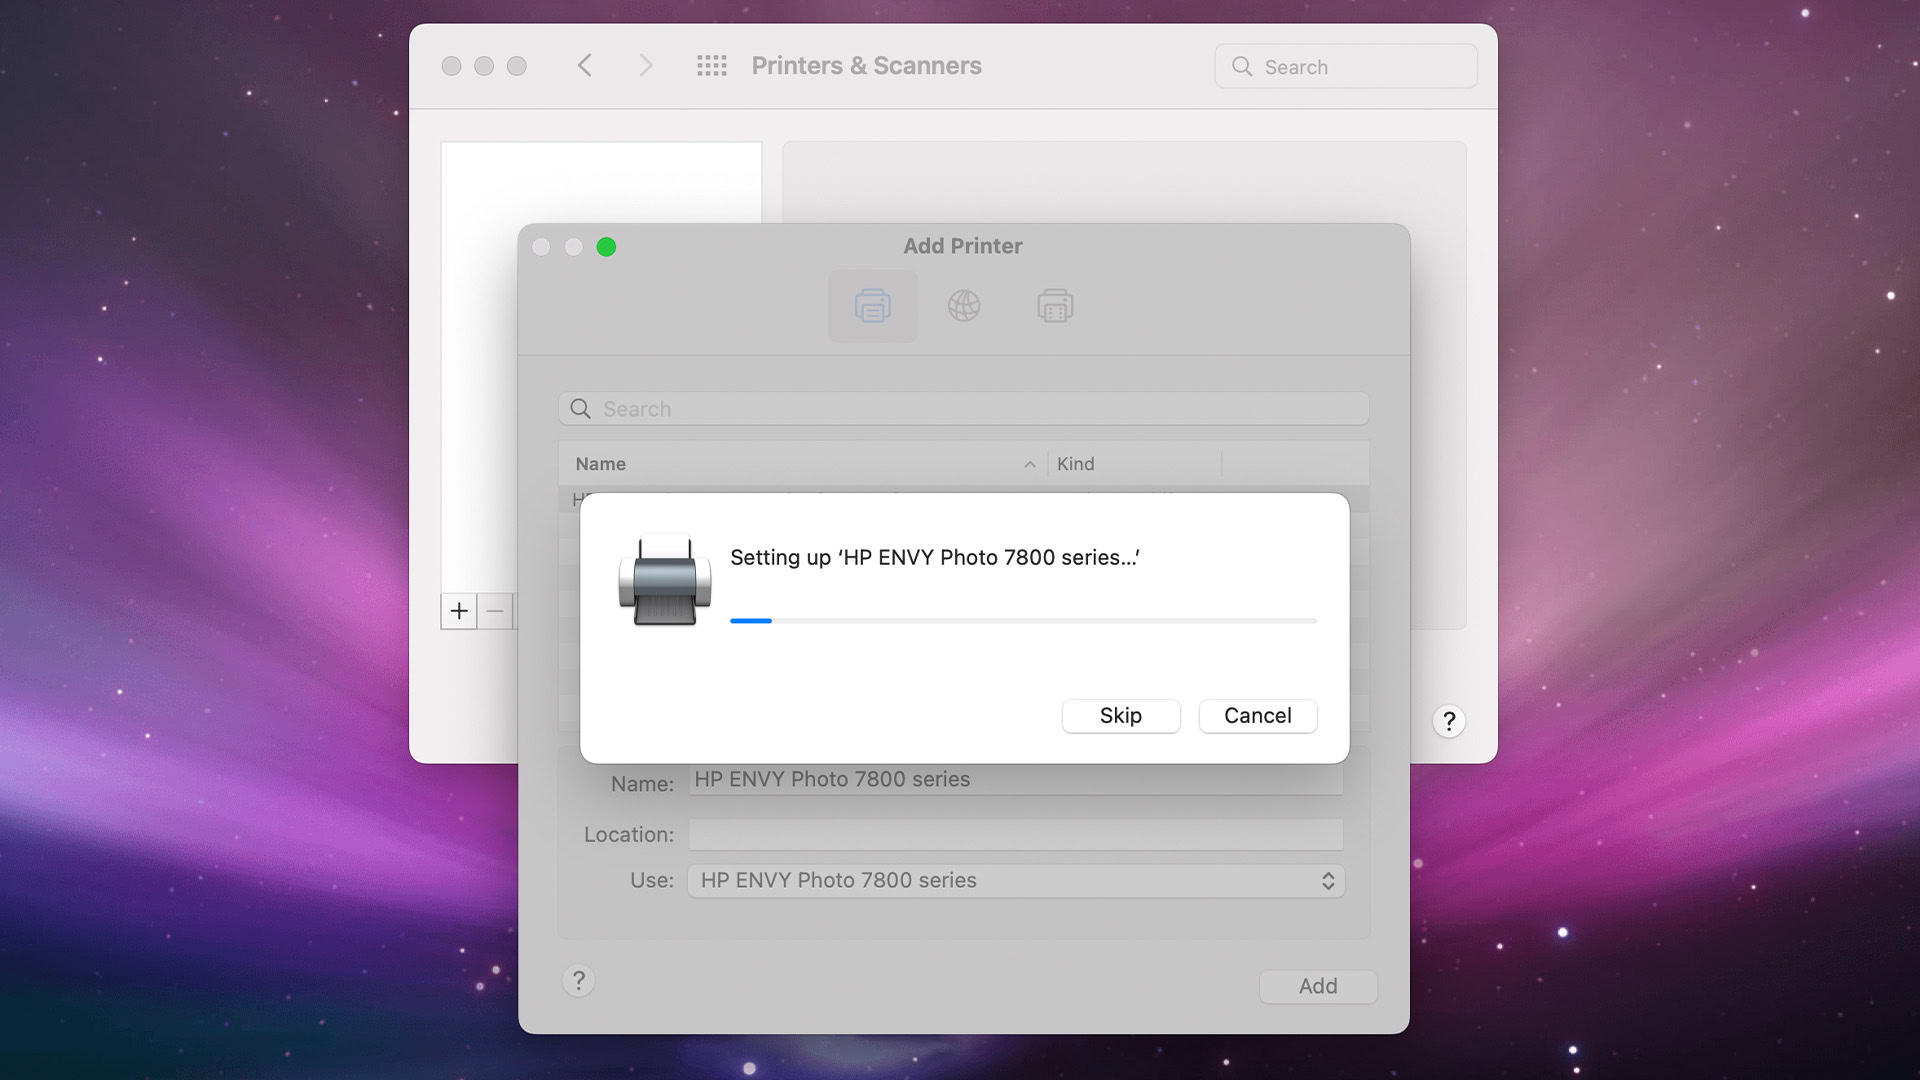
- On the next window, your printer should be listed. Click it, wait for your Mac to gather printer information, and click Add.
- Your printer should be connected and ready to go. Make sure your printer is connected via USB before attempting to print anything.
Connect a printer to a Mac with an ethernet cable
This method is virtually identical to the Wi-Fi method.
- Make sure your printer is set up as per the manufacturer’s instructions and ready to go.
- Connect your Mac to the printer with your ethernet cable.
- Click the Apple Logo, then hit System Preferences.
- On the next screen, select Printers & Scanners.
- Hit the Plus button under the white section on the left side of the window.
- Your printer should be listed on the next screen. Select it, wait for your Mac to gather printer information, and hit the Add button.
- Your printer should be ready to go. Make sure the ethernet cable is plugged in before attempting to print anything.
How to add a printer to Mac with Windows
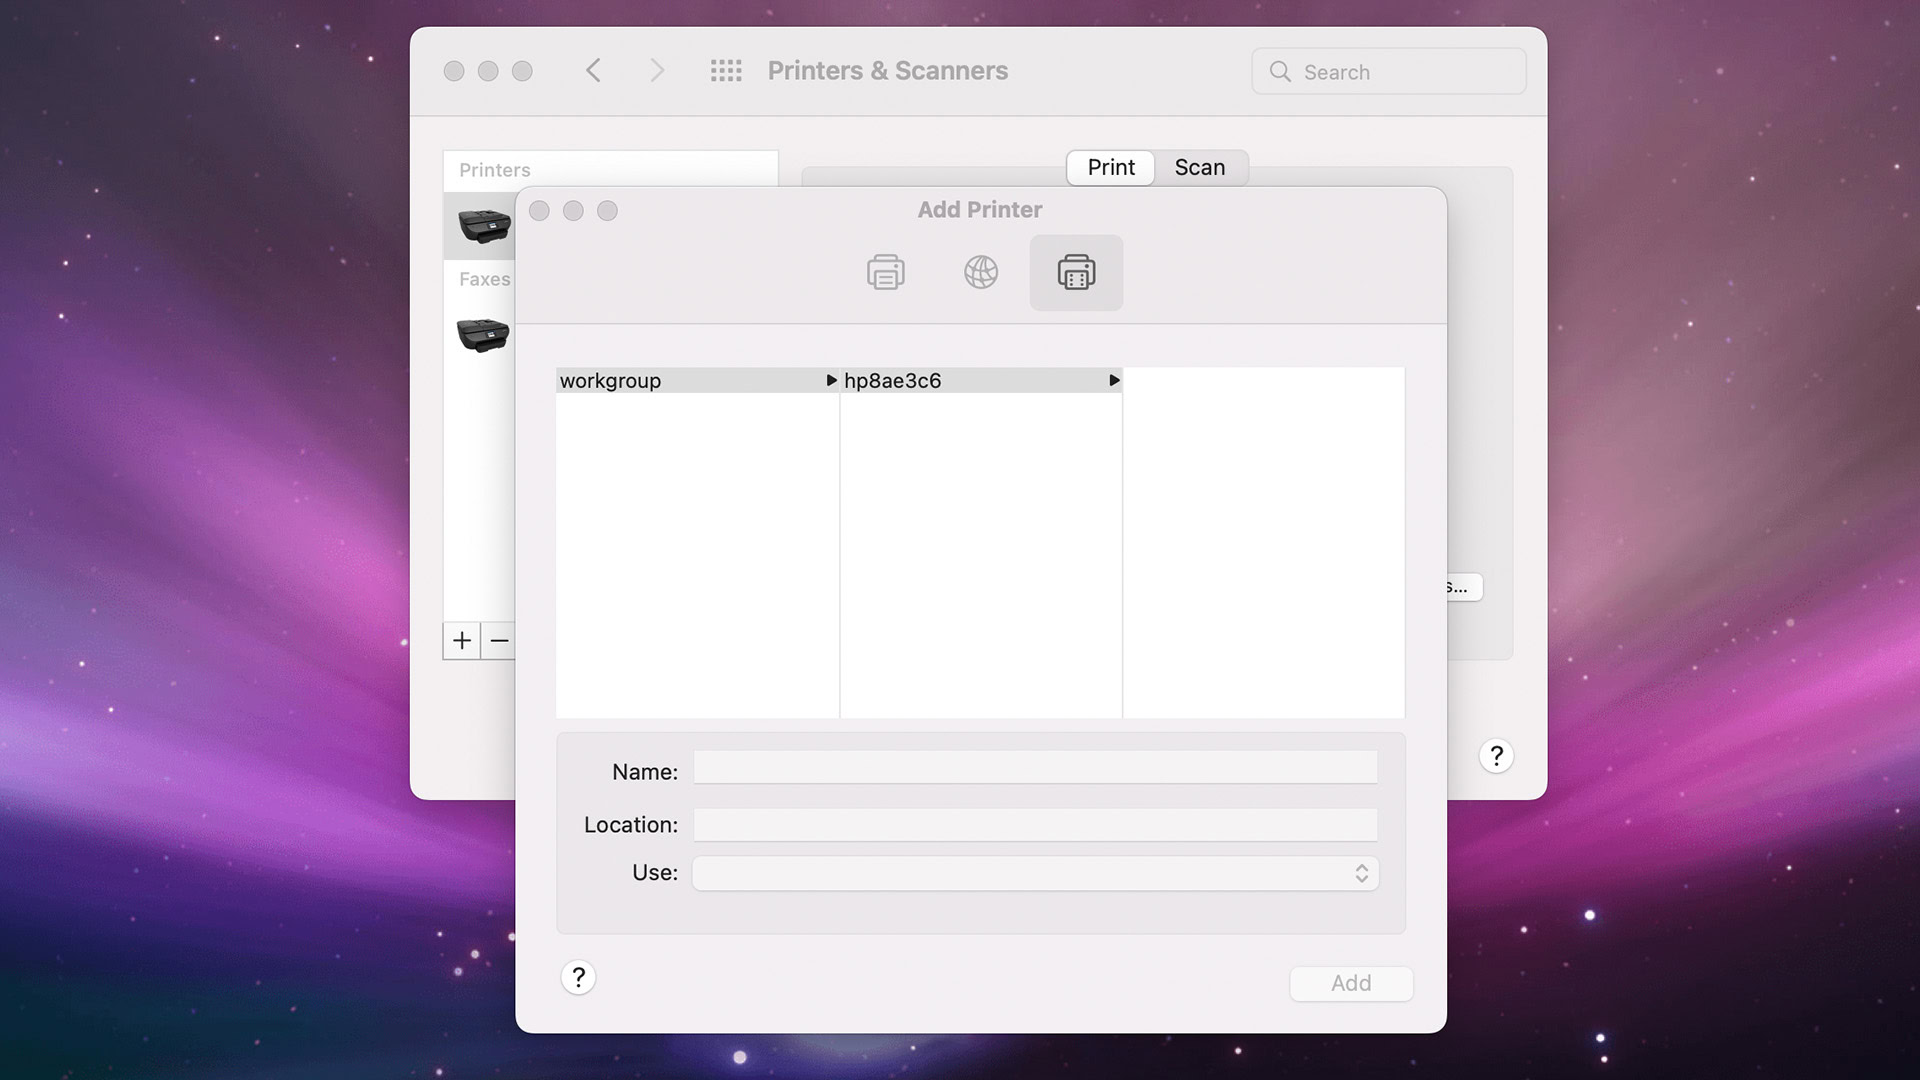
This is, by far, the most complicated setup. It requires both macOS and Windows knowledge along with a Windows computer with a printer already attached to it. We can only see this being needed in a work environment or some wonky home setup where your Windows PC is connected, but your Mac isn’t.
- First, the printer needs to be set up as per the manufacturer’s instructions and be ready to go.
- Secondly, the printer must be connected to a Windows PC. Additionally, the Windows PC must have the printer set to be shared with anyone on the same network as the PC. Click here for Microsoft’s tutorial on how to do that.
- Now that all of that is done, let’s get started.
- On your Mac, hit the Apple Logo, then System Preferences, and finally Printers & Scanners.
- Click the Plus button on the left side of the window. When the next window opens, click the Windows tab at the top.
- From here, it’s pretty straightforward. Click the workgroup, then click the print server.
- Enter the username and password if prompted. The username and password is determined by the Windows PC owner when they set up the printer to be shared.
- Select the printer and click Add.
- Note — If this doesn’t work, there are three main spots to check. You should recheck the printer, the Windows PC, and your Mac to ensure proper setup.
FAQ
The vast majority of the time, there is a sticker somewhere on the back of your printer with that information. If it’s not there, most printers have a network screen that you can view after connecting it to the network. It’ll tell you the MAC address there.
Yes. Click the Apple Logo, then System Preferences, and finally Printers & Scanners. Click the Open Print Queue button. At the top of the screen, click Window, then Show Completed Jobs. A new window opens. From there, simply select the job you want, and it’ll reprint.
Simply go to File and then select print. A print preview pops up where you can choose to print or not.