Affiliate links on Android Authority may earn us a commission. Learn more.
How to add sensor support to your apps (and how your phone's sensors work)
Published onNovember 1, 2017
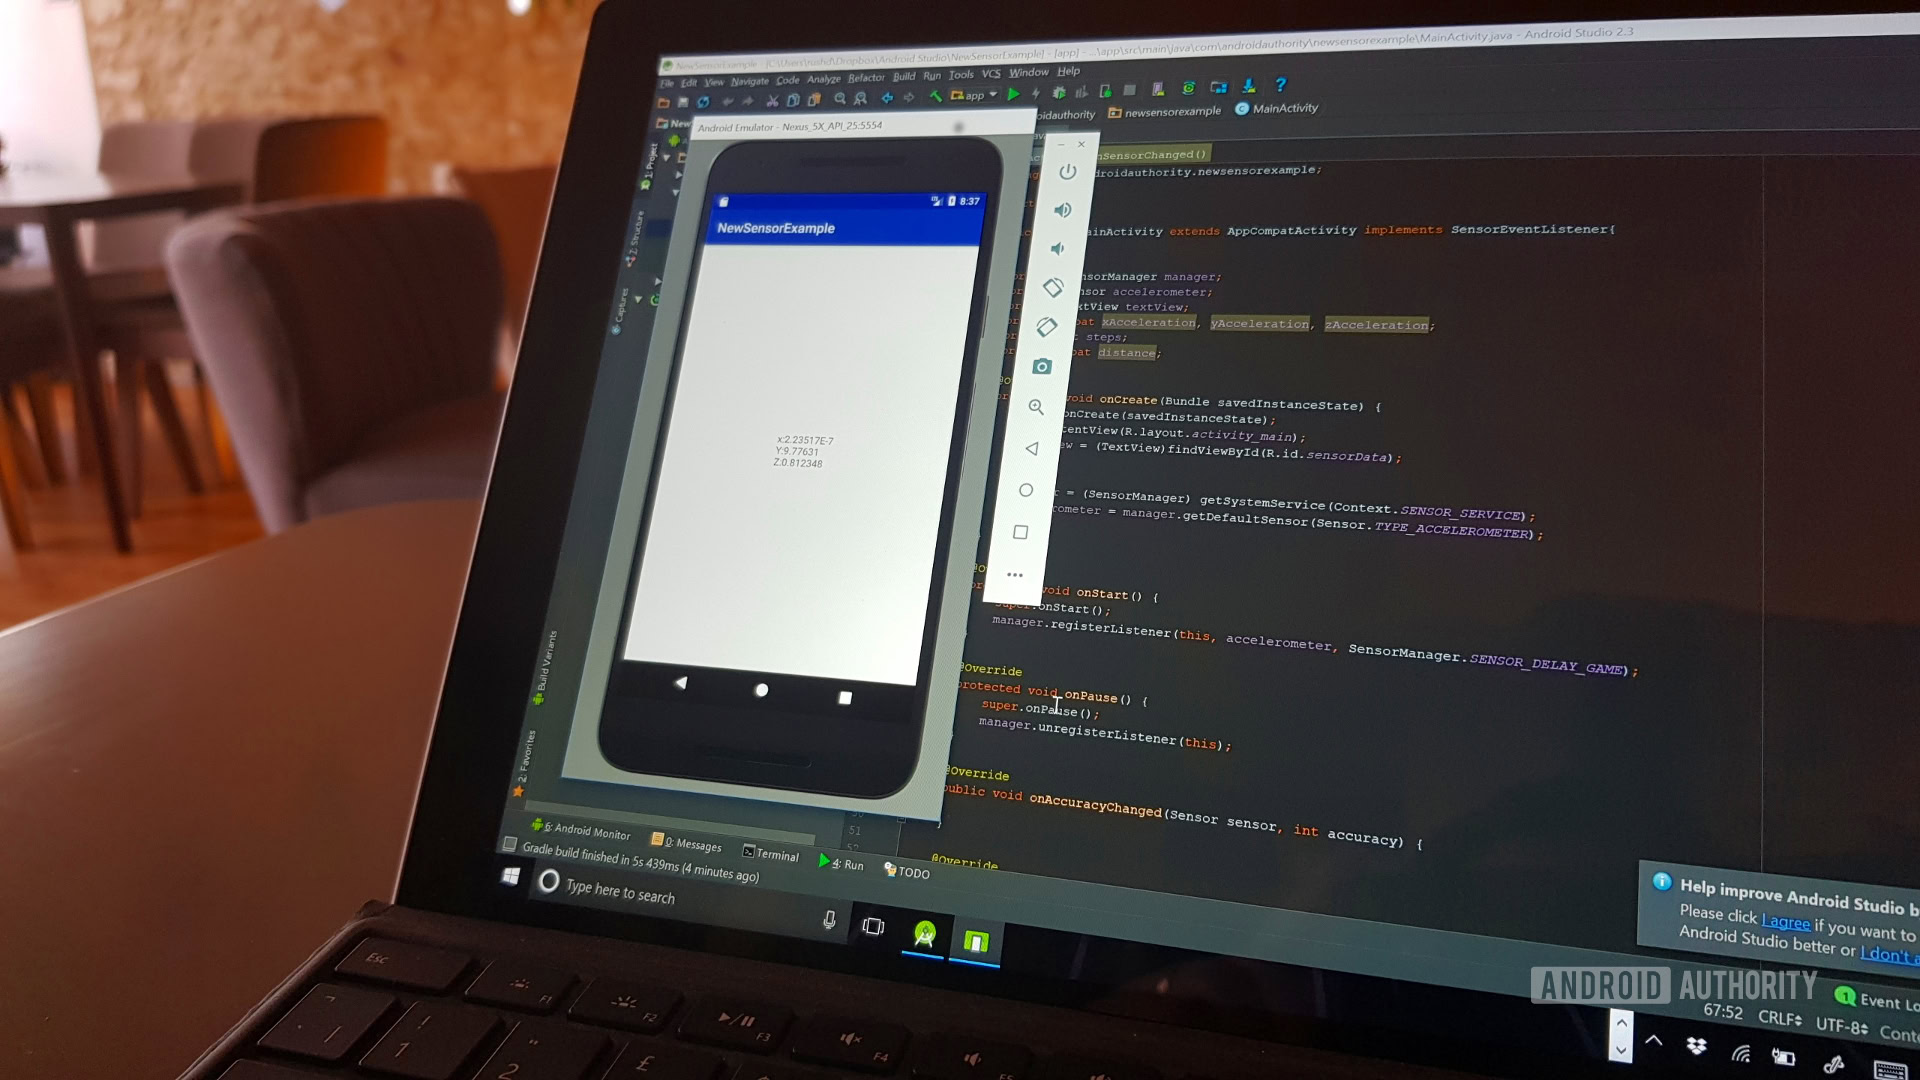
The sensors in your smart device are a big part of what make it, well, smart.
Sensors allow our devices to understand context— they tell phones where they are in space and how we’re using them.
This opens up a ton of potential new functionality for apps, whether that means using tilt controls or it means changing settings based on ambient brightness, noise or other elements. In the future sensors will play even more vital roles in supporting augmented reality and virtual reality applications.
Sensors are what make applications like AR possible and may be instrumental in new ‘inside out’ VR tracking in future. Crazier still, the theory of embodied cognition suggests that the successful development of artificial intelligence may be entirely dependent on these kinds of sensors.
Sensors allow our devices to understand context. They help them know where they are in space and it gives them some clue as to how we’re using them.
As a developer, you should be asking how you’re going to make use of these sensors in your app. This will show you how to get started. It’s up to you to put them to awesome use.
Using the sensor manager
In order to access the sensors on our devices, we need to use something called SensorManager. Setting this up will be the first and most complex part of the job but it’s really not that bad.
Start a new Android Studio project and select Empty Activity as your starting point. Head over to the activity_main.xml file and add an ID to the TextView here like so:
android:id= "@+id/sensorData"This will let us refer to that TextView in our code and that in turn means we can update it with information from our sensors.
Now, in MainActivity.java you’re going to change the line:
public class MainActivity extends AppCompatActivitySo that it reads:
public class MainActivity extends AppCompatActivity implements SensorEventListenerThis means borrowing some of the methods from SensorEventListener, so we can listen for these inputs.
While implementing SensorEventListener, we’ll need to override a few methods from that class. These are:
@Override
 public void onAccuracyChanged(Sensor sensor, int accuracy) {
}
And:
@Override
 public void onSensorChanged(SensorEvent event) {
     if(event.sensor.getType() == Sensor.TYPE_ACCELEROMETER) {
     }
}
We’ll also need a few new variables, so define these:
private SensorManager manager;
private Sensor accelerometer;
private TextView textView;
private float xAcceleration,yAcceleration,zAcceleration;
We’re going to use those floats to show the data we get from the accelerometer.
For those new to coding: if you see some words underlined in red, that means you need to import the relevant classes. You can do this by selecting the text and pressing Alt + Return.
First, find the TextView ready to fill with our data. Put this in your onCreate:
textView = (TextView)findViewById(R.id.sensorData);Now we need to create our SensorManager and define our Sensor:
manager = (SensorManager) getSystemService(Context.SENSOR_SERVICE);
accelerometer = manager.getDefaultSensor(Sensor.TYPE_ACCELEROMETER);
To use the sensor manager though, we first need to ‘register’ it. Once we’re done with it, it will need to be unregistered it in order to free up resources. We’ll do this in the onStart and onPause methods of our activity:
@Override
 protected void onStart() {
     super.onStart();
     manager.registerListener(this, accelerometer, SensorManager.SENSOR_DELAY_UI);
 }

@Override
 protected void onPause() {
     super.onPause();
     manager.unregisterListener(this);
 }
SENSOR_DELAY_UI is basically referring to the ‘refresh rate’ of our sensor. It’s a little slower than the other options and good for handling UI changes. For real world use, you might choose another option, such as SENSOR_DELAY_GAME. This is the recommended refresh rate for games, which is a common use of the accelerometer.
With that, we’re now ready to receive data from our sensors. We do this with the onSensorChanged method. This updates whenever the data changes, but with a slight delay, which we set when we registered the listener. Note that even when your device is completely flat on the table, it will probably still pick up some movement.
Add the following code to the onSensorChanged method:
if(event.sensor.getType() == Sensor.TYPE_ACCELEROMETER) {
    xAcceleration = event.values[0];
    yAcceleration = event.values[1];
    zAcceleration = event.values[2];
    textView.setText("x:"+xAcceleration+"\nY:"+yAcceleration+"\nZ:"+zAcceleration);
}
Remember that ‘\n’ begins a new line, so all we’re doing here is showing three floats for each axis on our TextView with a new line for each one. We can get data from each of the three axes by using event values 1-through-3.
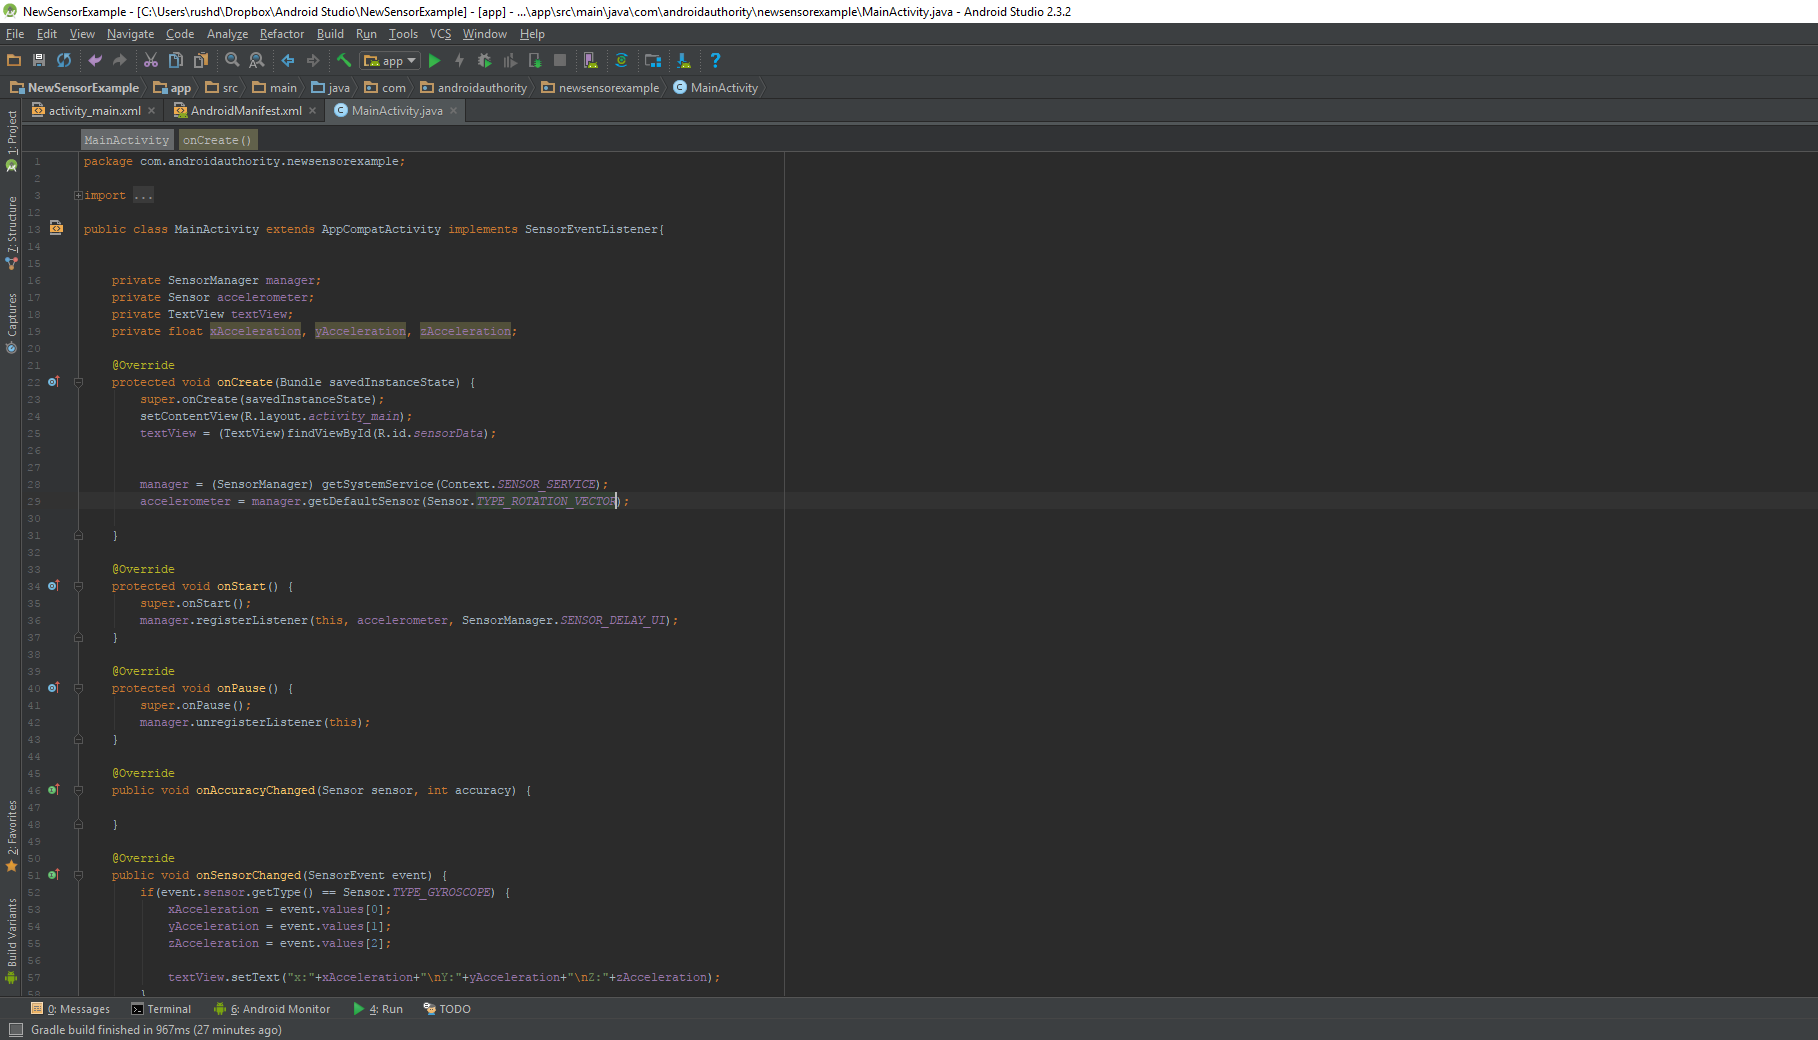
Plug in your phone or set up your emulator and hit play. The data from the accelerometer should output to the screen.
Using different sensors
Now you have your sensor manager set up, listening in to the other sensors on your device is easy. Just replace the two occurrences of TYPE_ACCELEROMETER with TYPE_GYROSCOPE or TYPE_ROTATION_VECTOR and you’ll be able to access the relevant information. (You may also want to rename your sensor object.
As an example, let’s try the STEP_COUNTER. Just make the change, then add an integer called steps and then change your onSensorChanged liked so:
@Override
public void onSensorChanged(SensorEvent event) {
 if(event.sensor.getType() == Sensor.TYPE_STEP_COUNTER) {
     steps++;
     textView.setText("Steps:"+steps);
 } else if(event.sensor.getType() == Sensor.TYPE_STEP_COUNTER) {
     xAcceleration = event.values[0];
     yAcceleration = event.values[1];
     zAcceleration = event.values[2];
     textView.setText("x:"+xAcceleration+"\nY:"+yAcceleration+"\nZ:"+zAcceleration);
 }
}
I left the old code there so that we can easily select a different sensor in the future. Note that you can listen for multiple different sensors at once.
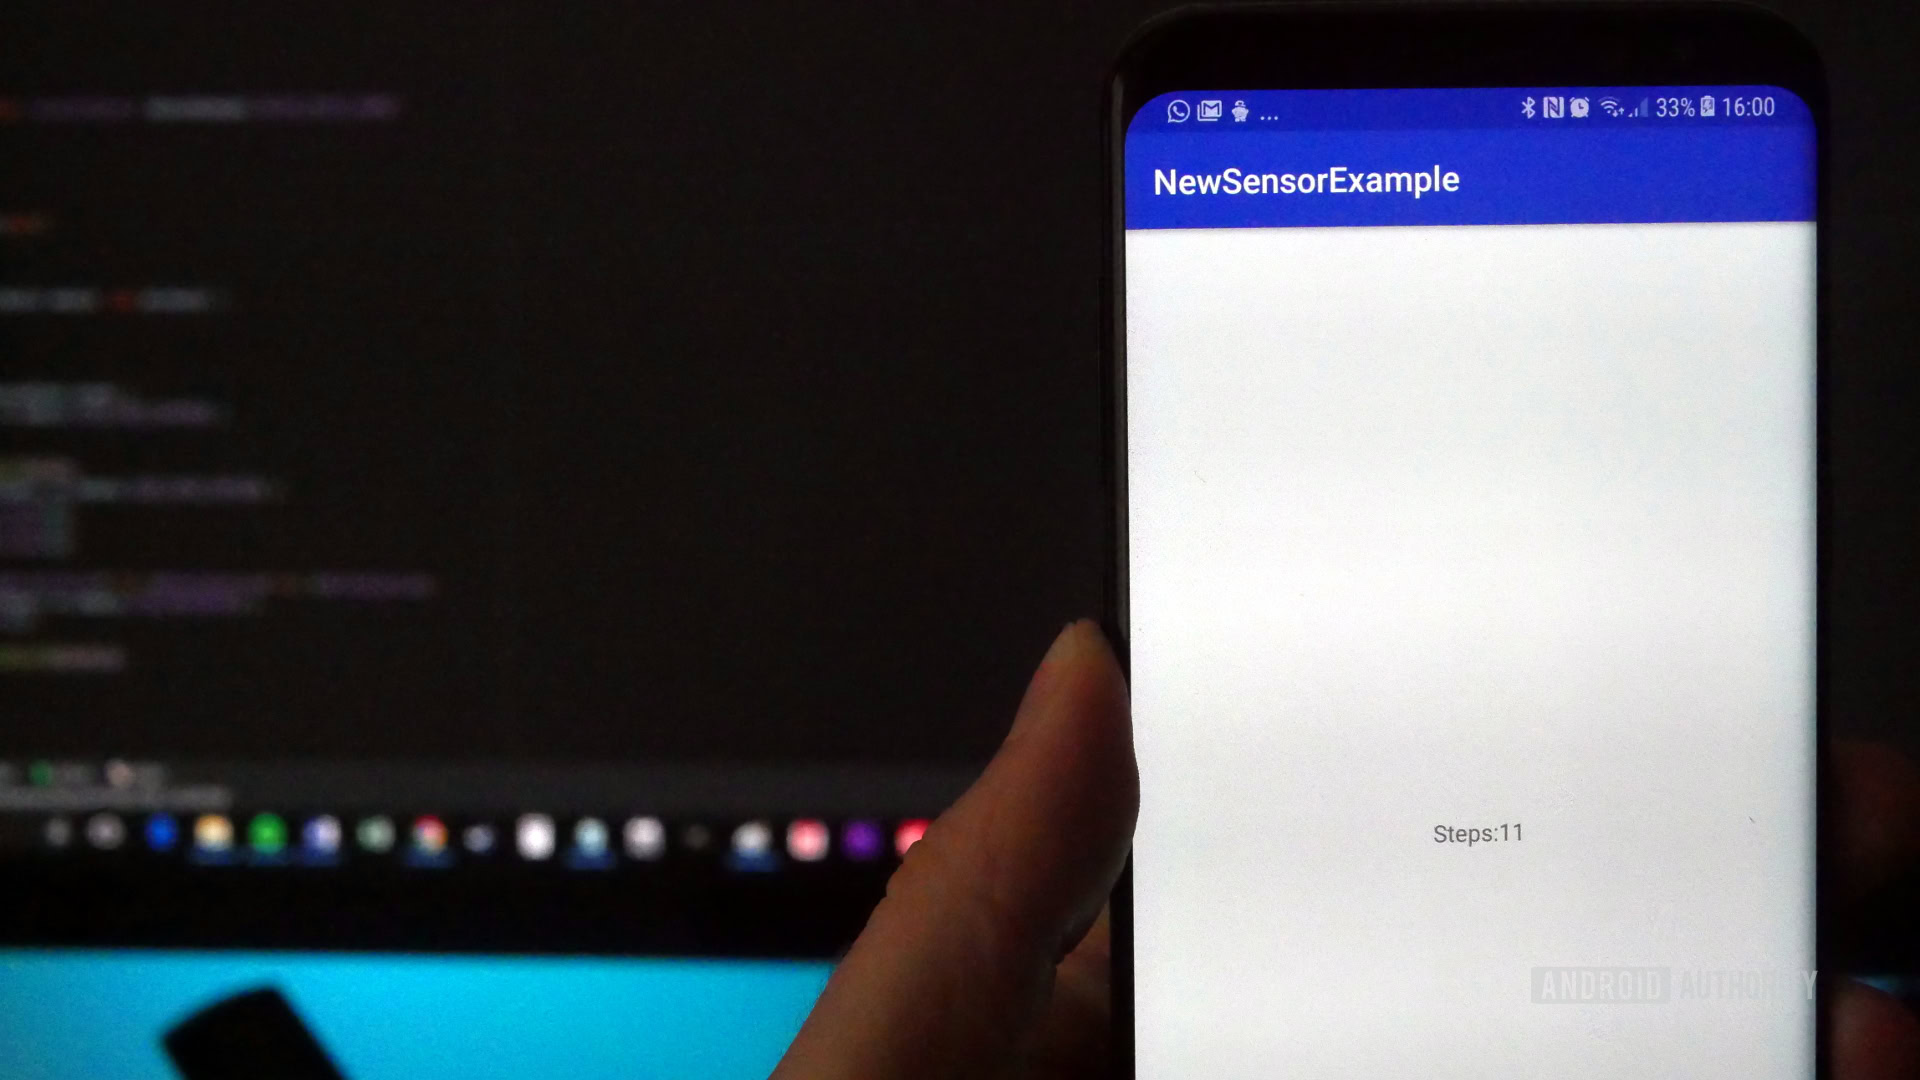
If you hold the device as you go for a walk, it should count the number of steps taken until you close the app. I tested it, but couldn’t bring myself to walk more than 11 steps.
You can find the full range of sensor types and a bit about each one on the Android Developers site.
A few key ones to keep in mind (and a bit about how they each work):
Accelerometer: The accelerometer measures force applied to your device on three axes in m/s2. Accelerometers work thanks to the piezoelectric effect, which uses microscopic crystals which become stressed under accelerative force. This creates a small voltage which can be interpreted to gauge the force. Capacitance accelerometers meanwhile sense changes between microstructures that are located in close proximity. As the acceleration moves the structures, this capacitance changes and this too can be read by the device.
Gyroscope: This measures the rate of rotation around the three axes. Note this is the rate of rotation – not the angle. In other words, it’s how fast and how far you are turning it. A gyroscopic sensor can work via a spinning wheel which moves in accordance with the movements of the device. In smaller devices like smartphones, the same process is achieved using a small amount of silicone inside a sealed chamber.
Temperature: This of course measures the temperature of the device in C. Temperature sensors work using a thermocouple or ‘RTD’ (resistance temperature detector). A thermocouple utilizes two different metals which generate electrical voltage which correlates with changes in temperature. RTDs meanwhile alter their electrical resistance as the heat changes and alters their structure.
Accelerometers work thanks to the piezoelectric effect, which utilizes microscopic crystals that become stressed under accelerative force.
Heartrate: These days, many devices include a heart rate monitor, allowing you to measure your BPM for health tracking purposes. Heart rate monitors in smartphones look for color changes in blood vessels that indicate oxygenation. You can find more information on this in one of my older articles.
Proximity: This measures how close an object is to your device, the main use being to dim the screen when a user holds the phone up to their face. Proximity sensors work by sending out a signal of some sort and then waiting to see how long it takes for that signal to be bounced off of a surface and returned. Some proximity sensors achieve this with soundwaves (like your parking sensor), but in the case of your phone, it’s achieved with an infrared LED and a light detector.

Light: The light sensor is often used in order to alter screen brightness to save battery life and ensure good viewing in direct sunlight. They use materials which alter their conductive properties in response to light (photo-conductors or photo-resistors) or materials with arrangements of electrodes that become excited and generate a current when basked in light. The latter is also how solar panels work!
Note that some of these sensors are ‘hardware’ sensors, while others are ‘software’ sensors. A software sensor is the result of an algorithm applied to data from multiple different hardware sensor types. For example, if you use the step counter, this actually uses data that is acquired from the accelerometer and gyroscope etc. to estimate your steps. There is no physical ‘step counter’ hardware.
Doing something useful with sensors
Now that you have access to your sensors, what do you want to do with them? The most obvious option would be to use motion controls for your input in a game. That’s done by grabbing data that from the sensors and then using that to reposition a sprite. To do that, we want to create a custom view where we can draw bitmaps and move them around. First we need to create a new class.
Find MainActivity.java on the left and right click here to choose New > Java Class. Call your new class ‘GameView’ and where it says superclass, type ‘View’ and select the first one that comes up. A new Java Class is just a new script and by choosing to extend View (by selecting it as the superclass), we’re saying that our new class is going to behave as a type of view.
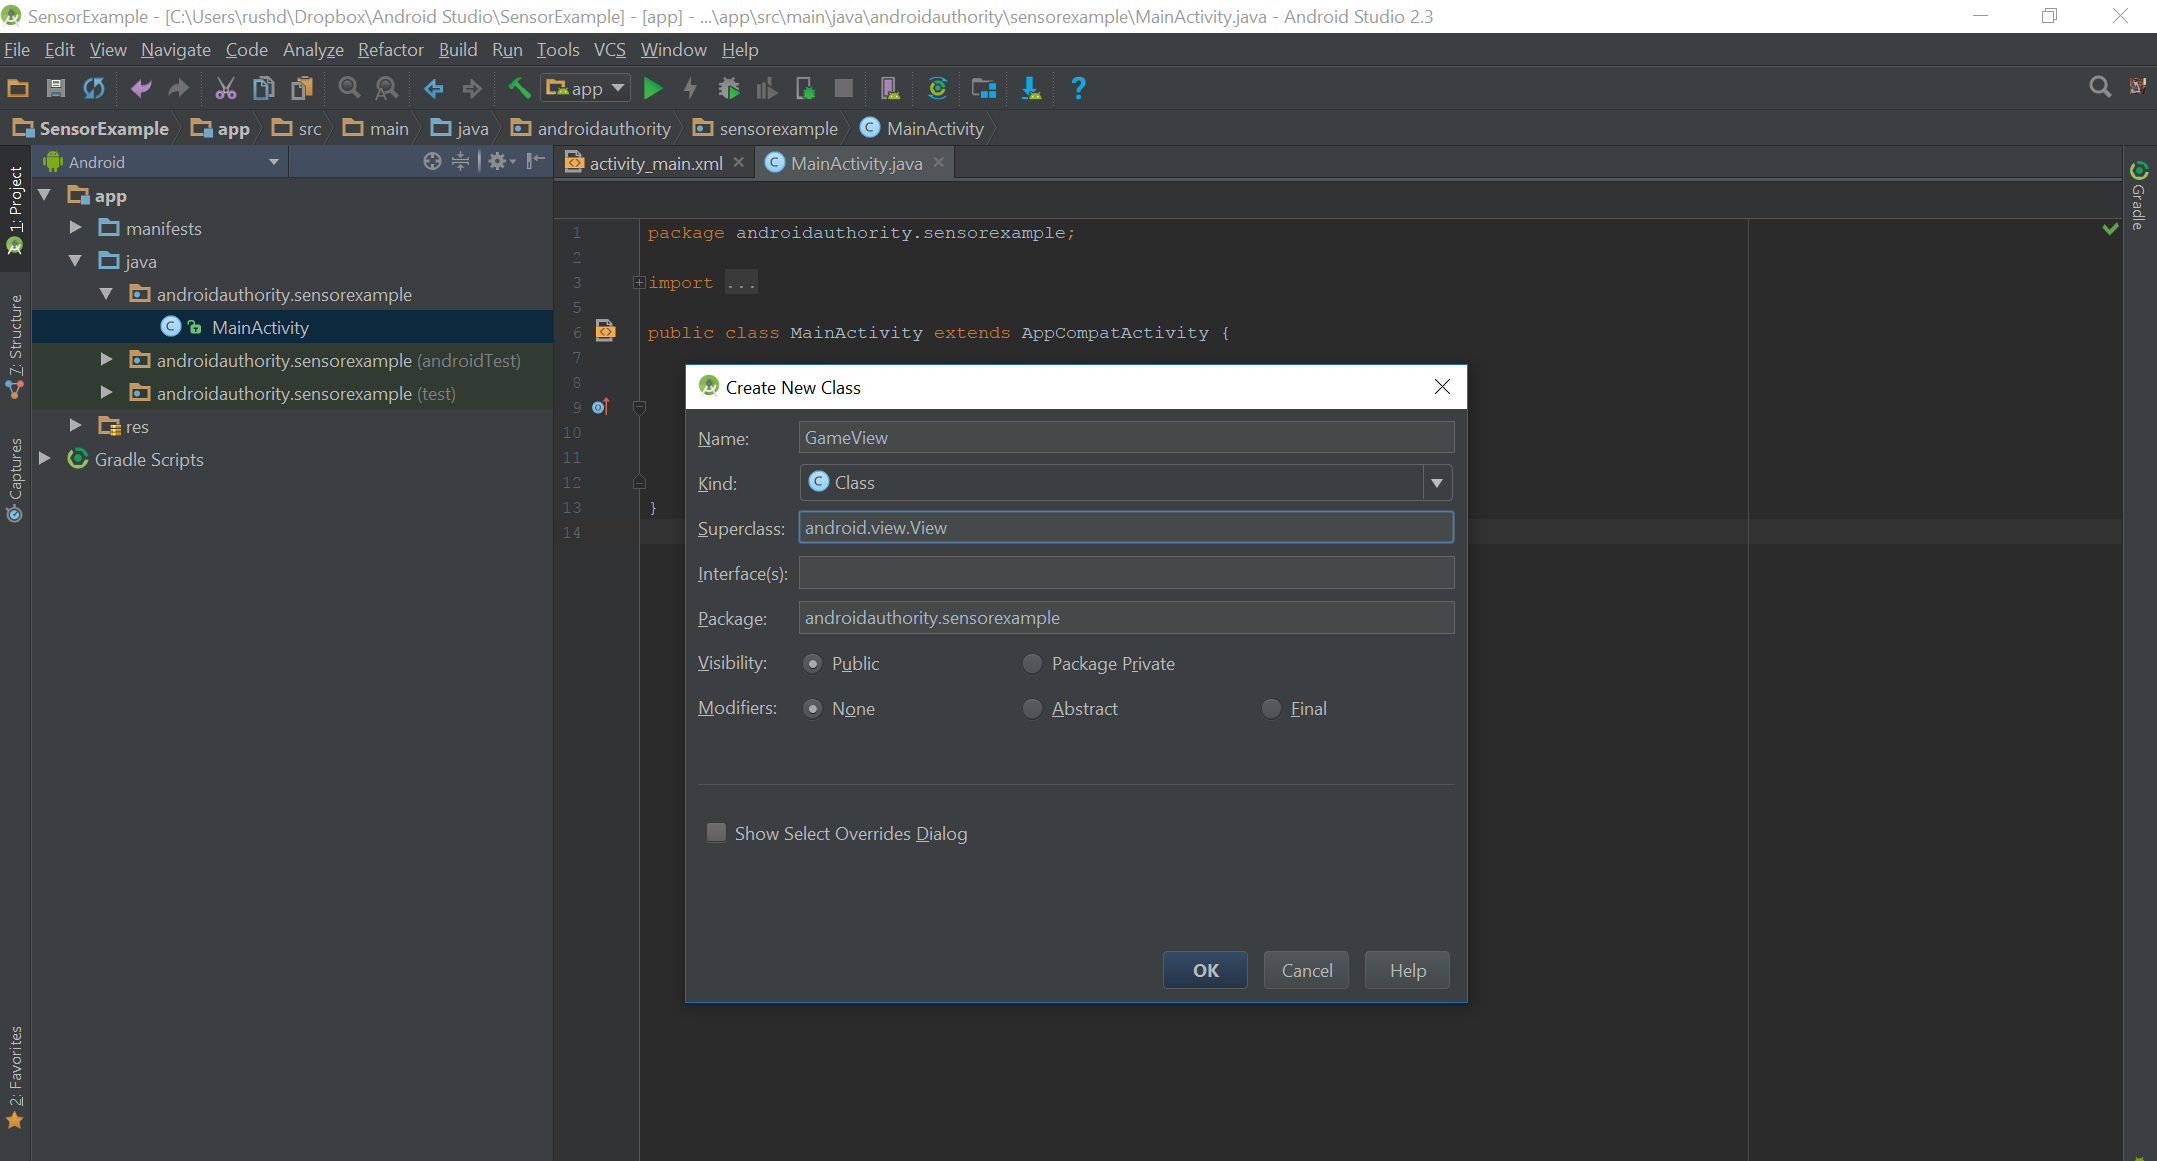
Every class needs a constructor (which lets us build objects from it – instances of our new view), so add the following method:
public GameView(Context context) {
 super(context);
}
If you struggle with any of these concepts, check out our other development posts on object oriented programming.
Now we need some variables, so add these to your GameView class:
private float x;
private float y;
private Bitmap ball;
Add a ball bitmap of any kind to your resources folder and call it ball.png. Load that image in your constructor like so:
ball = BitmapFactory.decodeResource(getResources(), R.drawable.ball);Finally, override the onDraw method that we get when we extend view. In here, draw the bitmap onto the canvas:
@Override
 protected void onDraw(Canvas canvas) {
     canvas.drawBitmap(ball, x, y, null);
     invalidate();
}
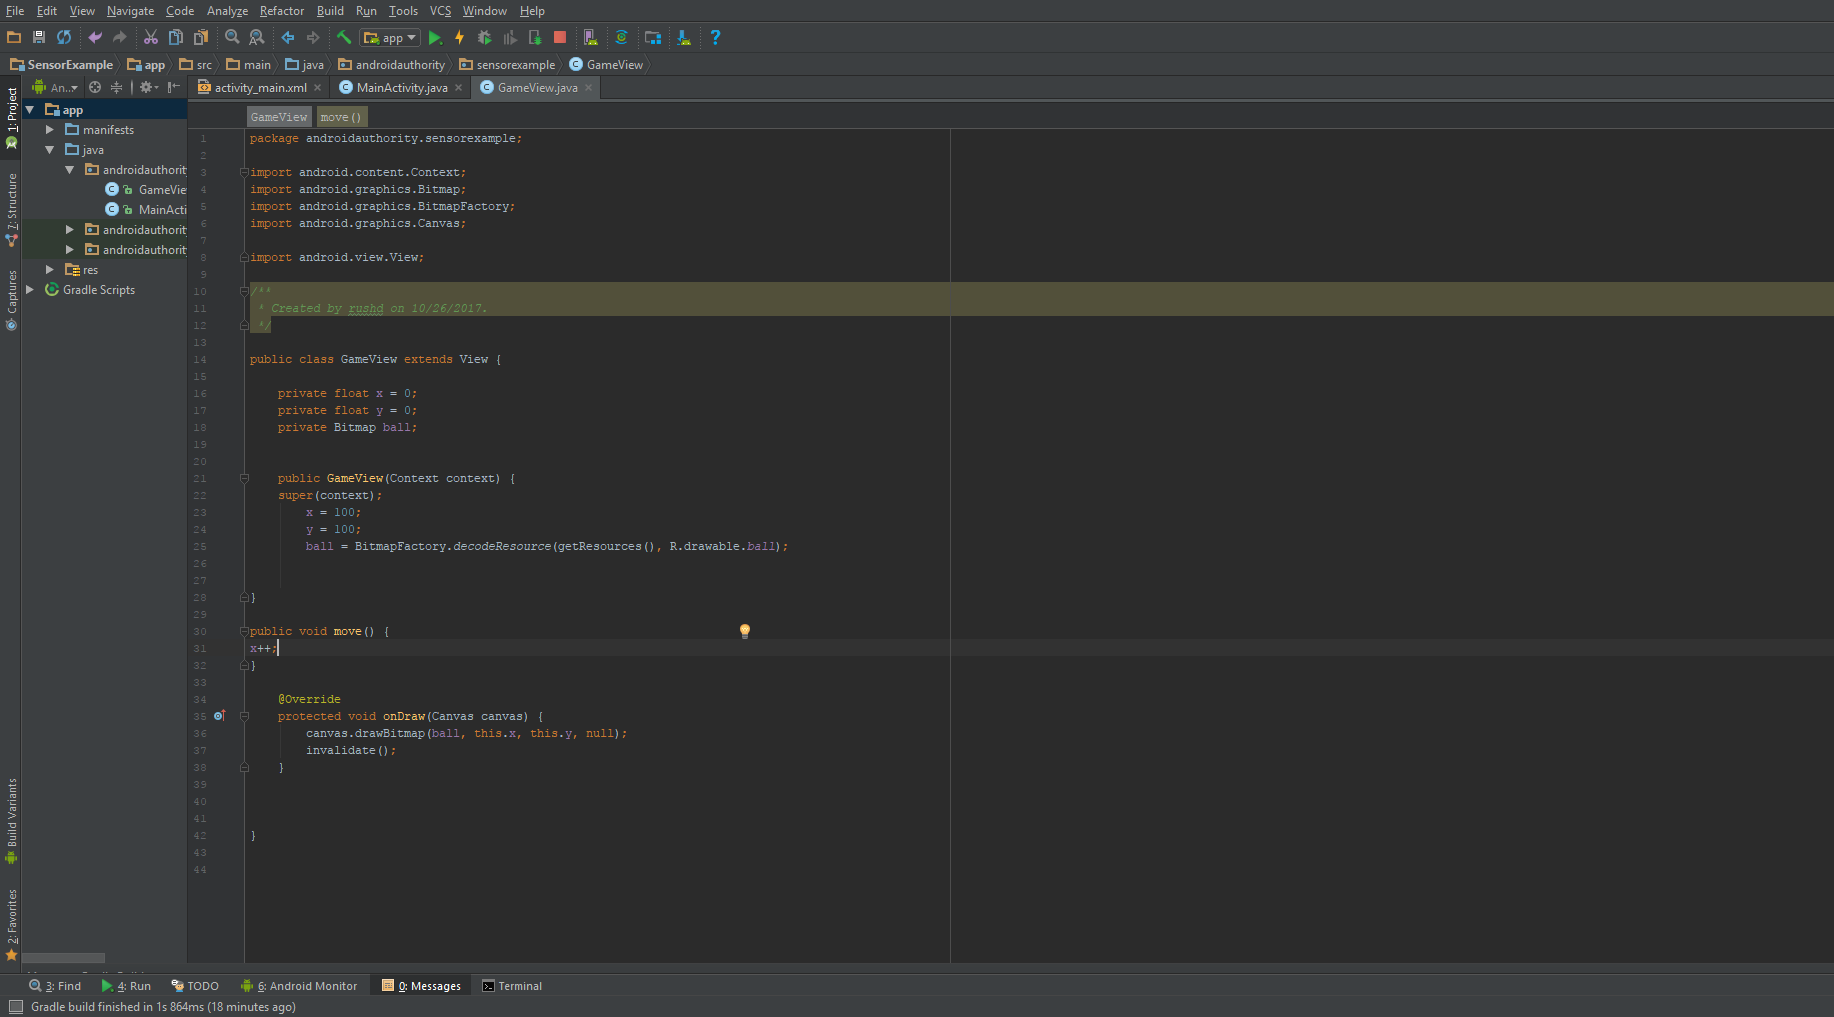
Try running this code and you should now be presented with a ball on the screen. Because our x and y variables are 0, it should be on the top left.
Now, if we make a new public method like so:
public void move() {
 x++;
}
We could then access that method from our MainActivity.java and make the ball sprite move left as we shake the device back and forth:
@Override
public void onSensorChanged(SensorEvent event) {
    if(event.sensor.getType() == Sensor.TYPE_ACCELEROMETER)  {
        if (event.values[0] > 1) {
            gameView.move();
        }
    }
}
GameView.Move is being called only when the device is shaken with enough force because event.values[0] needs to be bigger than 1.
We could use this to make a game that has you shake the device madly to win a race for instance, like those old Olympics games on the SEGA Genesis!
Tilt controls
I know what you’re thinking: that’s not what you need to be able to do! Instead, you wanted to control a sprite like this by tilting the app from side to side.
To do this, you’ll be using TYPE_ROTATION_VECTOR, as unfortunately TYPE_ORIENTATION has been deprecated. This is a software sensor extrapolated from data generated by the gyroscope, magnetometer and accelerometer together. It combines this to provide us with a quaternion (nemesis of Superion).
Our job is to get a useful angle from this, which we do like so:
float[] rotationMatrix = new float[16];
SensorManager.getRotationMatrixFromVector(
 rotationMatrix, event.values);

float[] remappedRotationMatrix = new float[16];
SensorManager.remapCoordinateSystem(rotationMatrix,
 SensorManager.AXIS_X,
 SensorManager.AXIS_Z,
 remappedRotationMatrix);

float[] orientations = new float[3];
SensorManager.getOrientation(remappedRotationMatrix, orientations);

for(int i = 0; i < 3; i++) {
    orientations[i] = (float)(Math.toDegrees(orientations[i]));
}

if(orientations[2] > 45) {
    gameView.moveRight();
} else if(orientations[2] < -45) {
    gameView.moveLeft();
} else if(Math.abs(orientations[2]) < 10) {

}
This code will cause the ball to move left and right when you tilt the screen 45 degrees in either direction. Remember to change the update delay, as mentioned earlier. You may also want to fix the orientation of your app so that it doesn’t keep switching between horizontal and portrait. Hopefully you’ve already guessed what moveRight and moveLeft do so you can populate those yourself.
Once you’ve done it once (AKA copied and pasted it once), you’ll never have to do it again.
The math here itself is pretty unpleasant and in all honesty I found it by referring to another article. But once you’ve done it once (AKA copied and pasted it once), you’ll never have to do it again. You could put this whole SensorManager code into a class and just forget about it forever!
Now we’ve got the basics of a fun game starting to come to life! Check out my article on creating a 2D game for another approach to moving sprites around.
Closing comments
That’s a pretty detailed look at sensors, though there’s a lot more to learn here. What you learn will depend on how you want to use your sensors and which ones interest you specifically. In the case of our game, you’d want to use a better algorithm to affect things like momentum and velocity. Or perhaps you’re interested in using a different sensor entirely, like ambient pressure sensors!
The first step is to decide what you want to achieve with sensor input. To that end, all I’ll say is: be creative. There are more ways to use sensors than just controlling games!