Affiliate links on Android Authority may earn us a commission. Learn more.
Archiving emails in Outlook: Here's what you need to know
Published onJune 23, 2023
Archiving your emails in Microsoft Outlook can be a handy exercise. It’s a happy medium between having your inbox overflowing with thousands of old messages and deleting emails that you might need to refer back to one day. Microsoft offers this facility, so we’ll explain how to archive emails in Outlook.
The archive process can be done manually or automatically, and in bulk or on a message-by-message basis. We’ll cover everything you need to know, including how to retrieve archived emails.
QUICK ANSWER
To archive an email in Outlook, left-click on it to select it, then under the Home menu at the top of the app, select Archive. Alternatively, you can right-click on a message and select Archive from the pop-up menu.
JUMP TO KEY SECTIONS
How to archive one or multiple emails in Outlook
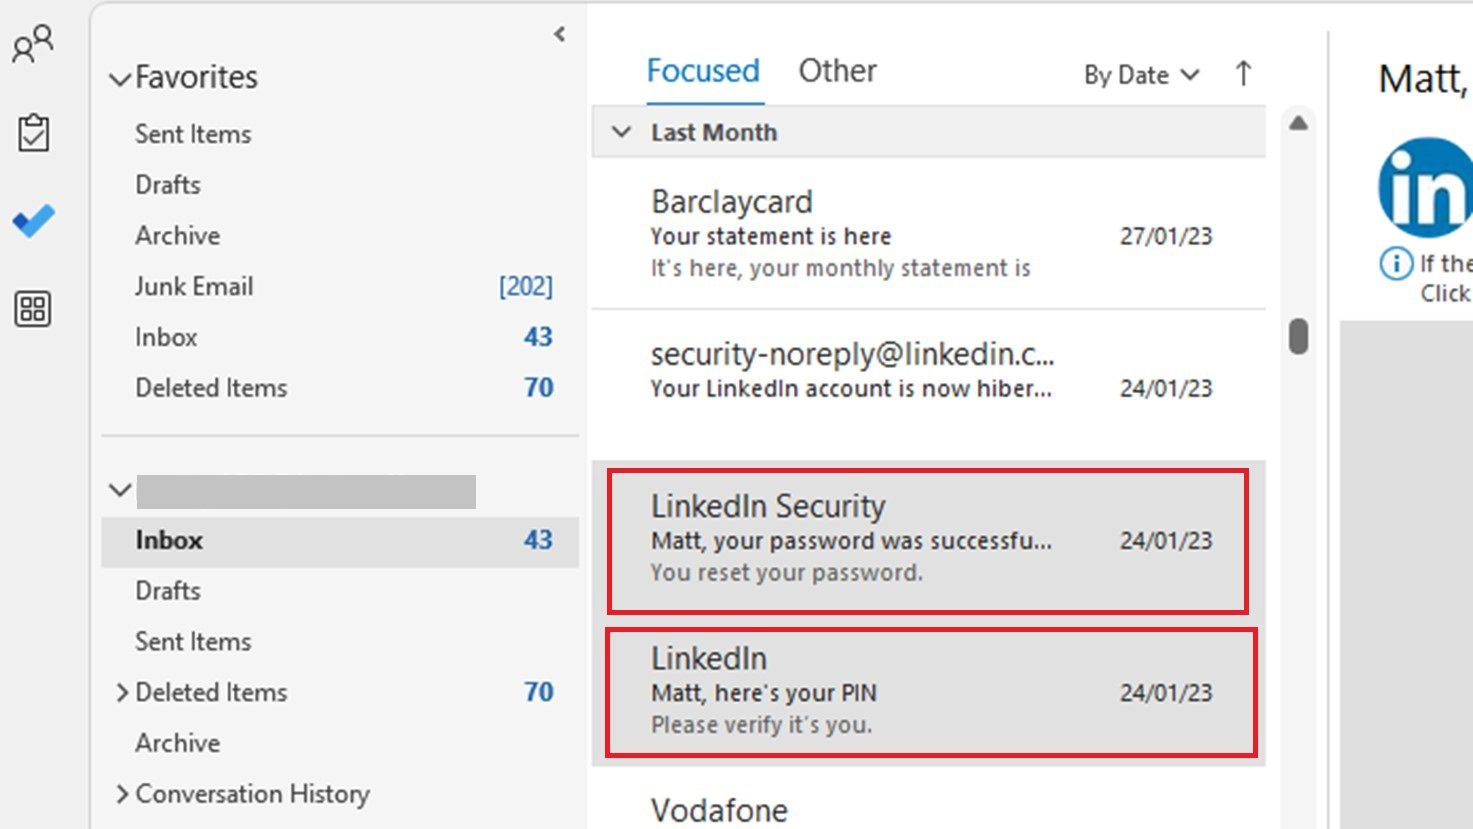
Open the Outlook app on your desktop and find the email that you want to archive.
Left-click on the email to select it. If you want to archive multiple emails, select the first one, then while holding the Ctrl key, left-click each of the other emails you want to archive until they are all selected.
With the emails selected, there are two ways you can archive them.
- On the Home menu along the top of the Outlook app, click on Archive; or
- Right-click on one of the highlighted emails. From the pop-up menu, select Archive.
Either way, the emails will disappear from your inbox. They will now be visible in the Archive folder on the left side of the app.
How to archive all emails in Outlook
Wading through every email and archiving them individually might not be a practical use of your time. So let’s look at how to archive all emails in Outlook.
Start by clicking on the File menu at the top of the Outlook window. This takes you to a screen showing your account information.
Halfway down the page, you’ll see the Tools option. Click it to get a drop-down menu, and select Clean up old items.
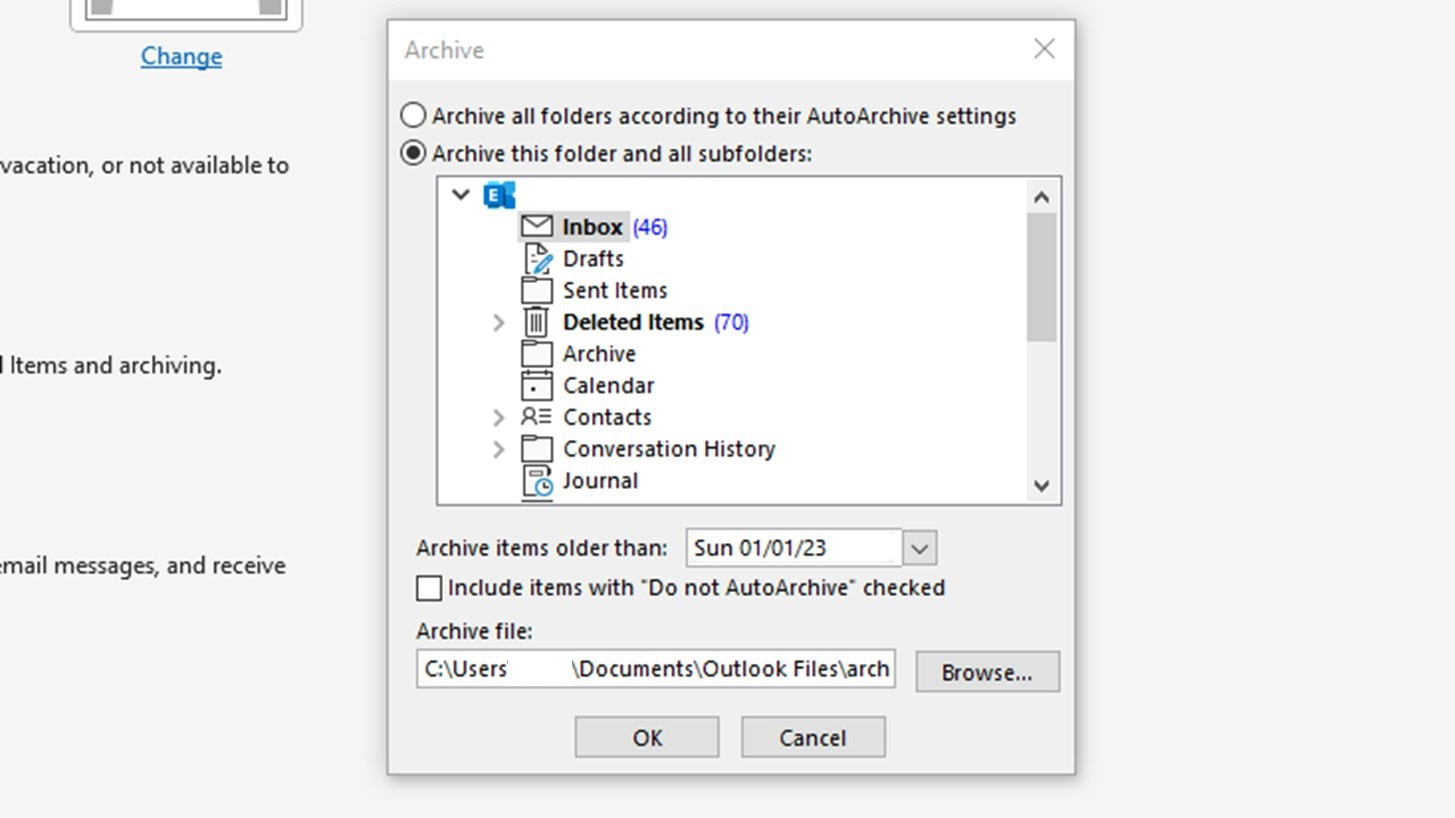
You’ll be presented with a pop-up window in which you can decide what you want to archive. You can select Archive this folder and all subfolders and then select one of your folders, which could be your inbox if you’re looking to archive everything.
There is also a setting to Archive items older than: and a date box. If you set this to the current date, all emails you received prior to the day you are performing the task will be archived.
You can also decide the file location on your PC where the archive file will be stored. It will default to \Documents\Outlook Files\archive.pst, but you can either change it manually or click on Browse… to find a new file location. When you’ve made your choices, click OK.
Unlike archiving individual emails, this process won’t move your emails from their folder to the archive folder on Outlook. Instead, it archives all of the emails into a .pst file that is stored on your computer, while the original emails remain in Outlook. You can then delete them should you wish to free up the space.
How to automatically archive emails in Outlook
An even easier approach is to automatically archive emails in Outlook. Here’s how you do it.
As with the guidance above, start by clicking on the File menu at the top of the Outlook window. On that menu, select Options from the left side of the window.
Go to Advanced on the left side of the options menu, and on this sub-menu, you’ll see an AutoArchive section. Click on AutoArchive Settings…
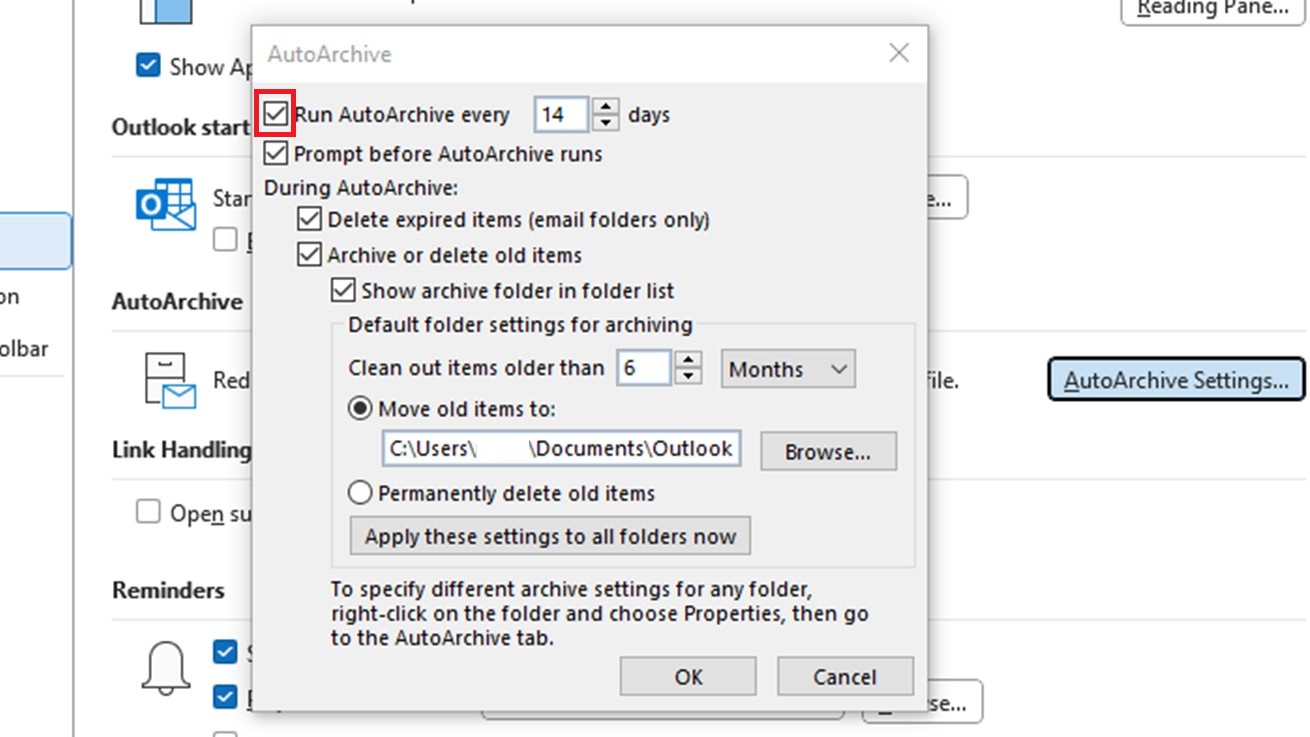
Tick the box next to Run AutoArchive every [X] days, then adjust the number of days to suit your needs. Ticking this box will un-gray the other options.
You now have various settings that you can adjust depending on whether you want to archive old items, show the archive folder in the folder list, and so on. If you leave the other settings as they appear by default then items older than six months will be automatically archived every 14 days. They will be moved to a file on your PC at the location specified in the Move old items to: input box.
Adjust these settings as you see fit, then hit OK.
To change the AutoArchive settings for individual folders, right-click on the folder and select Properties. Go to the AutoArchive tab and adjust the settings.
Where do archived emails go in Outlook and how to find them
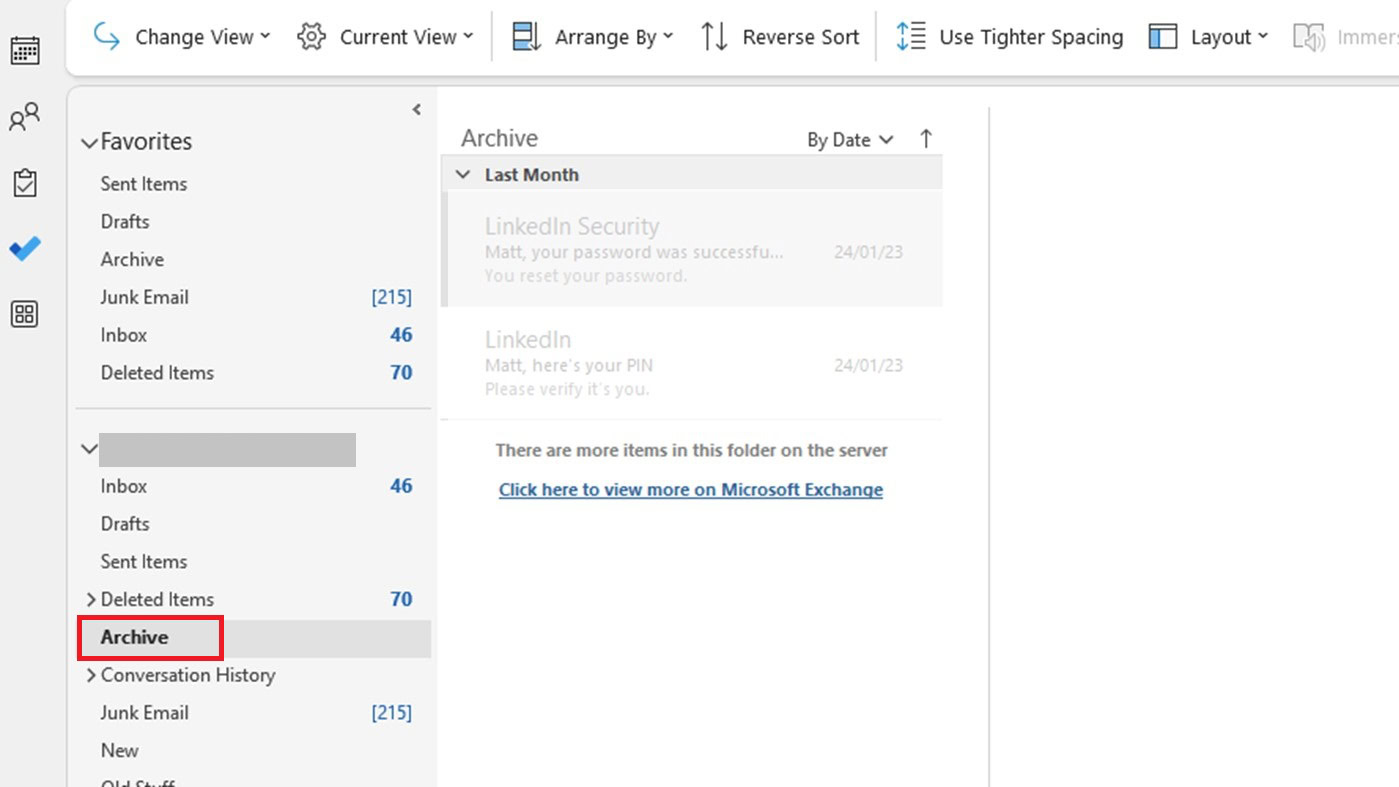
Depending on the archive options you’ve selected, archived emails may go to the Archive folder. It is located among the folders on the left side of your Outlook window. You just need to click on it to see them.
If you have archived files to a file on your PC, there are a couple of other steps to retrieve them.
Go to the File menu again. Select Open and Export.
You’ll see a few options. Click on Open Outlook Data File.
This is likely to open the folder on your PC to which your archived files are saved. Highlight the archive file and press Open.
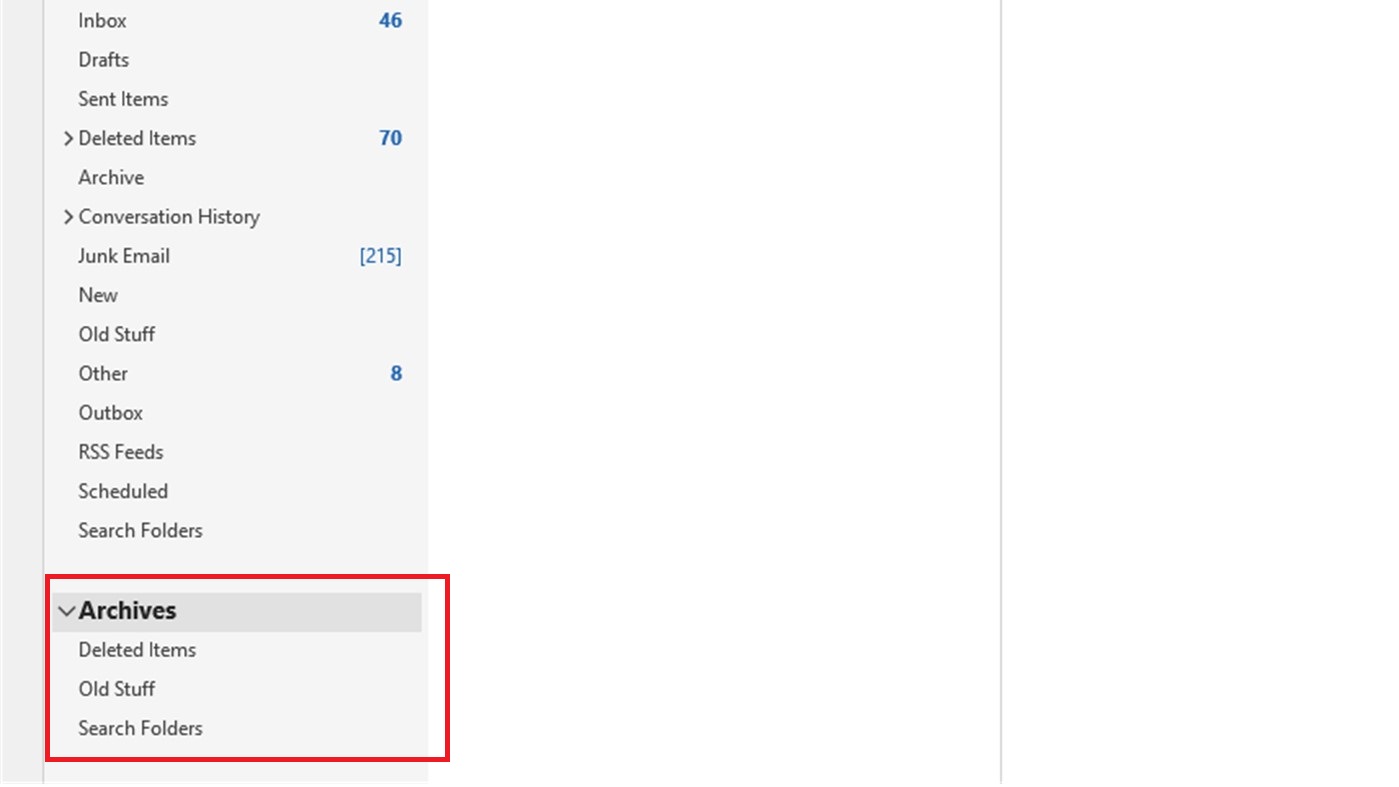
You’ll be returned to the main pane of Outlook, but on your folder list, you’ll see a new section called Archives. By clicking on the dropdown arrow next to the name, you’ll see the folders available in the archive. You can now browse these folders containing your achieved emails.
FAQs
Yes, you can quickly access your archived emails. See the final section above.
You never know when you might need to refer back to an old email so it might be more prudent to archive emails than delete them. This is especially true with AutoArchive. But if you know for a fact that you’ll never need an email again, you could delete it to free up space.
We’ve got a complete guide to archiving and unarchiving emails in Gmail that will explain everything.