Affiliate links on Android Authority may earn us a commission. Learn more.
How to cast your Meta Quest 3 to a TV or PC
Published onJanuary 28, 2025
Some VR games, like Beat Saber, are best as a shared experience. That’s where casting your Meta Quest 3 to an external display such as your TV or PC monitor comes in. Luckily, it’s pretty easy to do, so keep reading and we’ll explain how.
QUICK ANSWER
To cast from a Quest 3 to a TV:
- Make sure your Quest, TV, and phone with the Meta Quest app are all connected to the same Wi-Fi network. Your Quest and the app should be logged into the same Meta account.
- Put on your Quest, and select Camera from the bottom menu bar. You may need to hit the Meta (Moebius) button first.
- Choose Cast, and pick your TV to start casting.
- When you're done, go back to Camera > Cast and select Stop Casting.
JUMP TO KEY SECTIONS

You can cast live footage from your Quest 3 to any TV that supports Google Cast. You don’t actually need a Chromecast — many TVs have the underlying technology built in. Roku media streamers also support Google Cast.
In any scenario, you’ll want to make sure you have a fast Wi-Fi network. Casting live video is demanding, all the more so if there’s a lot of fast-moving action as in something like Beat Saber, Pavlov, or Superhot VR.
To start casting to a TV:
- Make sure your Quest, TV, and phone with the Meta Quest app are all connected to the same Wi-Fi network. Your Quest and the app should be logged into the same Meta account.
- When you reach your home environment, put on your Quest and select Camera from the bottom menu bar. You may need to hit the Meta (Moebius) button on your controllers first.
- Choose Cast, and pick your TV to start casting.
- When you’re done, go back to Camera > Cast and select Stop Casting.
If your Quest can’t see your TV, it could be because the latter is connected to a different network ID (SSID) than your phone, say if your home uses separate SSIDs for its 2.4 and 5GHz bands. Use your TV’s settings to check that it’s connected to the same SSID.

If you don’t have a TV, or it’s simply preferable for something like Twitch streaming, you can always cast to a PC. The process is quite different, though.
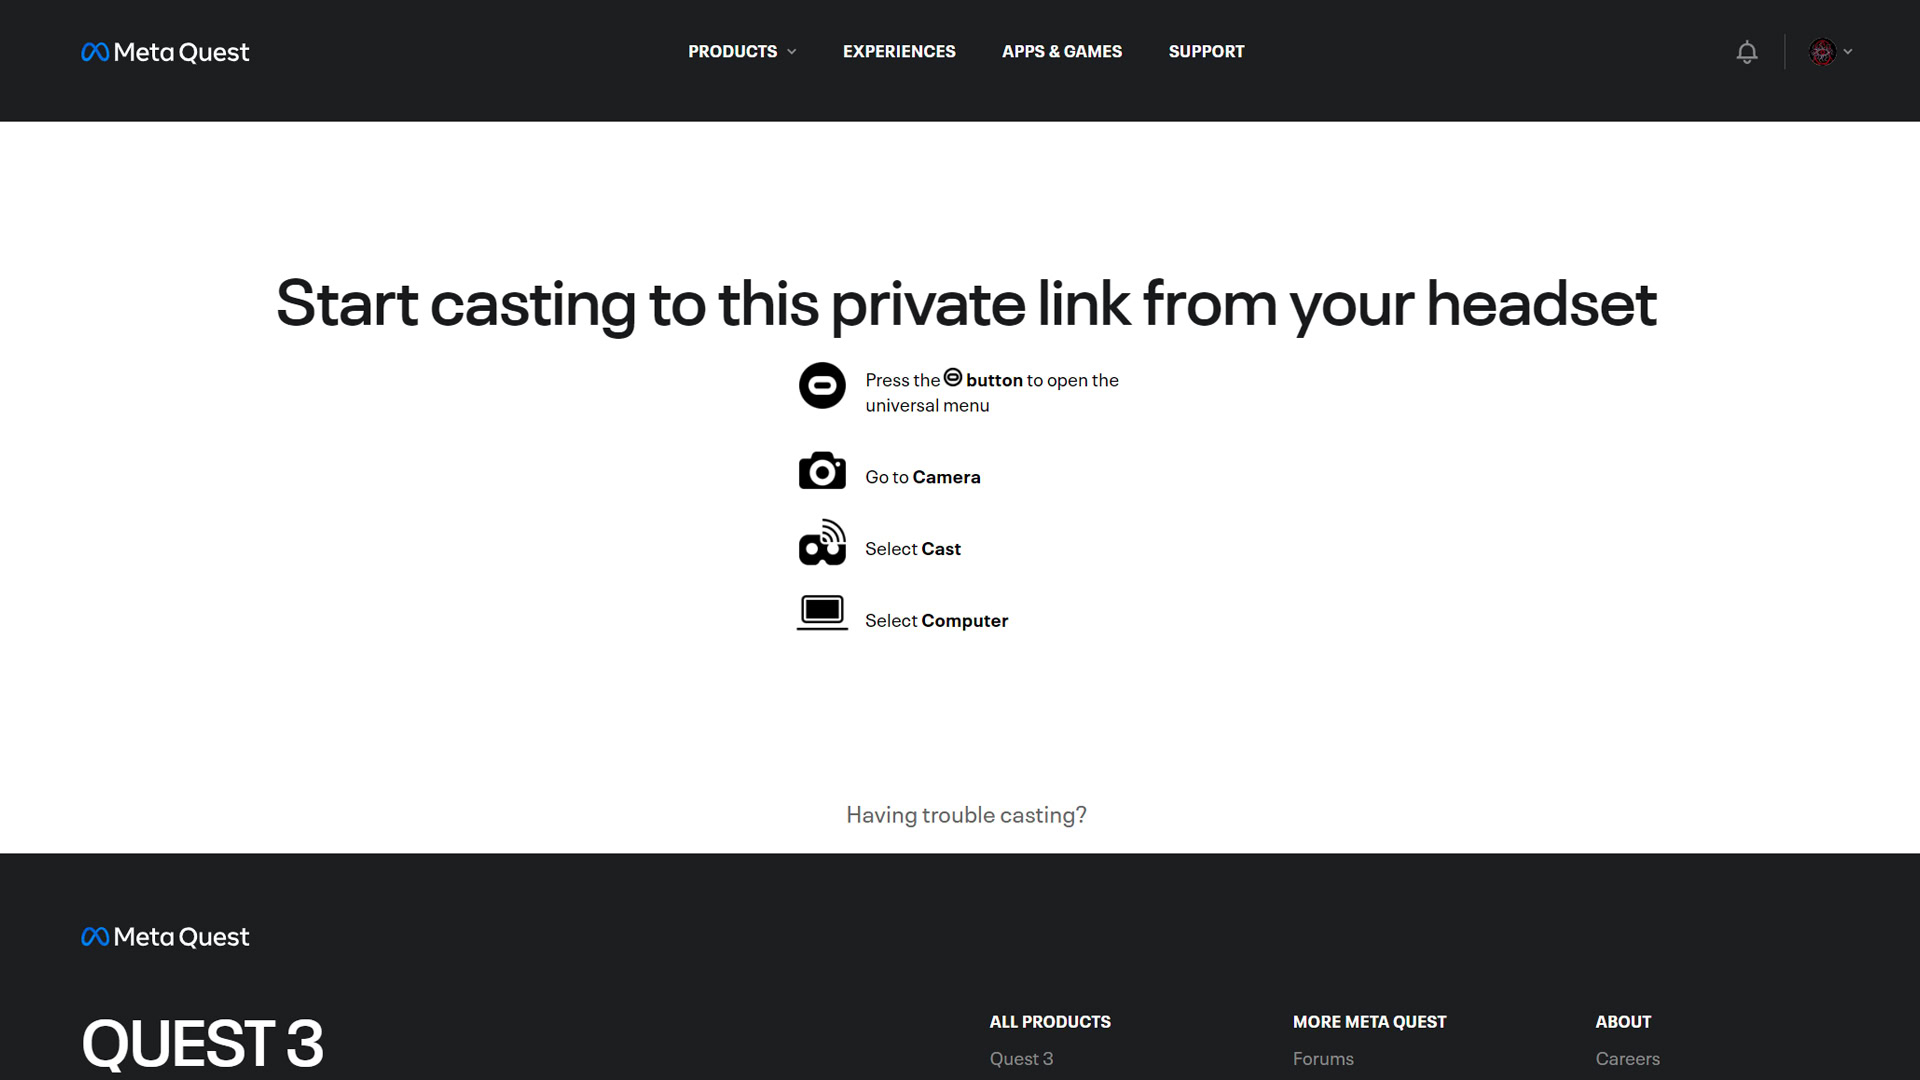
- On your PC, open oculus.com/casting in Google Chrome or Microsoft Edge and log into your Meta account. You may be able to use a browser like Firefox or Opera, but Meta’s tech wasn’t designed around them.
- Put on your Quest 3 and press the Meta (Moebius) button on your controllers to open the universal menu.
- Select Camera > Cast > Computer to begin sharing.
- To stop casting, use Camera > Casting > Stop Casting on your Quest.
As with casting to a TV, make sure your Quest and computer are on the same Wi-Fi network. If your Quest can’t see your PC, it could be that it’s connected to a separate network ID (SSID). You’ll want strong Wi-Fi bandwidth as well to ensure casting appears smooth.
FAQs
Meta only supports casting to TVs that support Google Cast (a.k.a. Chromecast). That’s most modern sets, but if Google Cast support is missing for some reason, you may be able to get around that with specialized TV apps or a Chromecast with Google TV. Roku devices also support Google Cast.
No. Apple TVs offer a technology similar to Google Cast called AirPlay, but there’s no support for that on Meta devices.
There are a variety of possible explanations. It could be that your TV doesn’t support Google Cast, or that your devices are connected to separate Wi-Fi network IDs (SSIDs). Your phone, TV, and Quest should all be on the same SSID.
If you’ve ruled those things out, the issue might be a poor Wi-Fi connection. Check that your router is out in the open, unobstructed and that the trio of your router, phone, and Quest are as close to each other as they can realistically get. Avoid oversaturating your Wi-Fi, as well — casting is probably a bad idea if someone else in your home is watching a 4K video or downloading a 100GB game on Steam.