Affiliate links on Android Authority may earn us a commission. Learn more.
How to see your computer's specifications
Published onFebruary 17, 2023
Whether you’re looking to run games, VR, or just a productivity app like Photoshop, there are plenty of reasons you might need to double-check the specs on a Windows PC. Here’s how to check each component without tearing down your machine.
How to find your computer’s specifications on Windows
Processor and RAM

These are actually some of the easiest things to check, presumably because they’re fundamental to whether or not apps will run.
- In Windows 11, open Explorer.
- In the left-hand sidebar, right-click on This PC.
- Click Properties.
- If it’s not already, open the Device specifications drop-down. You’ll see both Processor and Installed RAM as categories.
As you can tell from the screenshot above, another way to get to this view is by going to Settings > System > About.
Graphics card

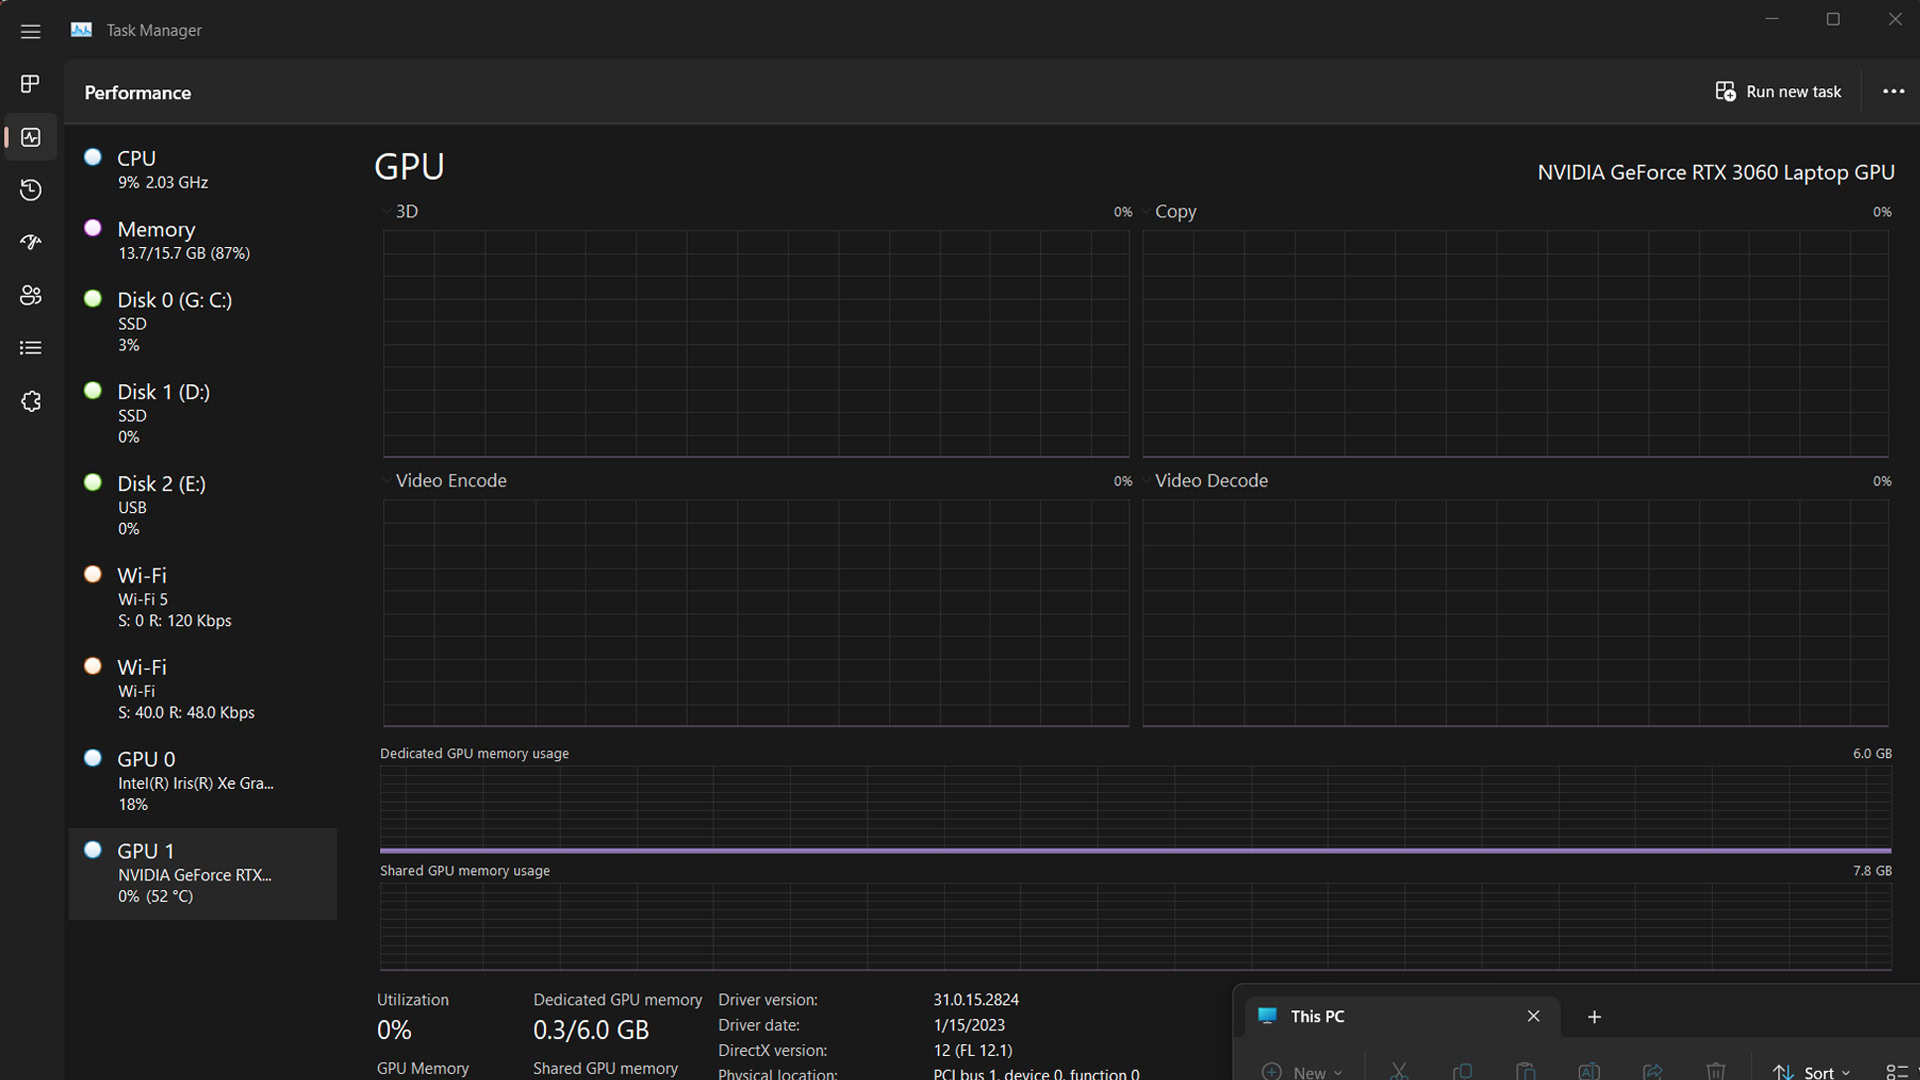
There are a few ways of checking this, but the preferred method is Task Manager, since it can show you whether a PC has multiple graphics chips — a Razer Blade 17, for instance, uses Intel Iris Xe rendering for less demanding tasks, but a dedicated NVIDIA GPU when pushing things to the limit.
- Hit Control-Alt-Delete on your keyboard, and select Task Manager.
- In the left-hand icon sidebar, click Performance (the square with an ECG).
- In the category list, scroll down and select one of the items marked GPU.
- You’ll see the GPU’s name in the upper-right corner, and specs like memory toward the bottom. If you want to know how much onboard RAM a dedicated GPU has, look for Dedicated GPU memory.
Data storage

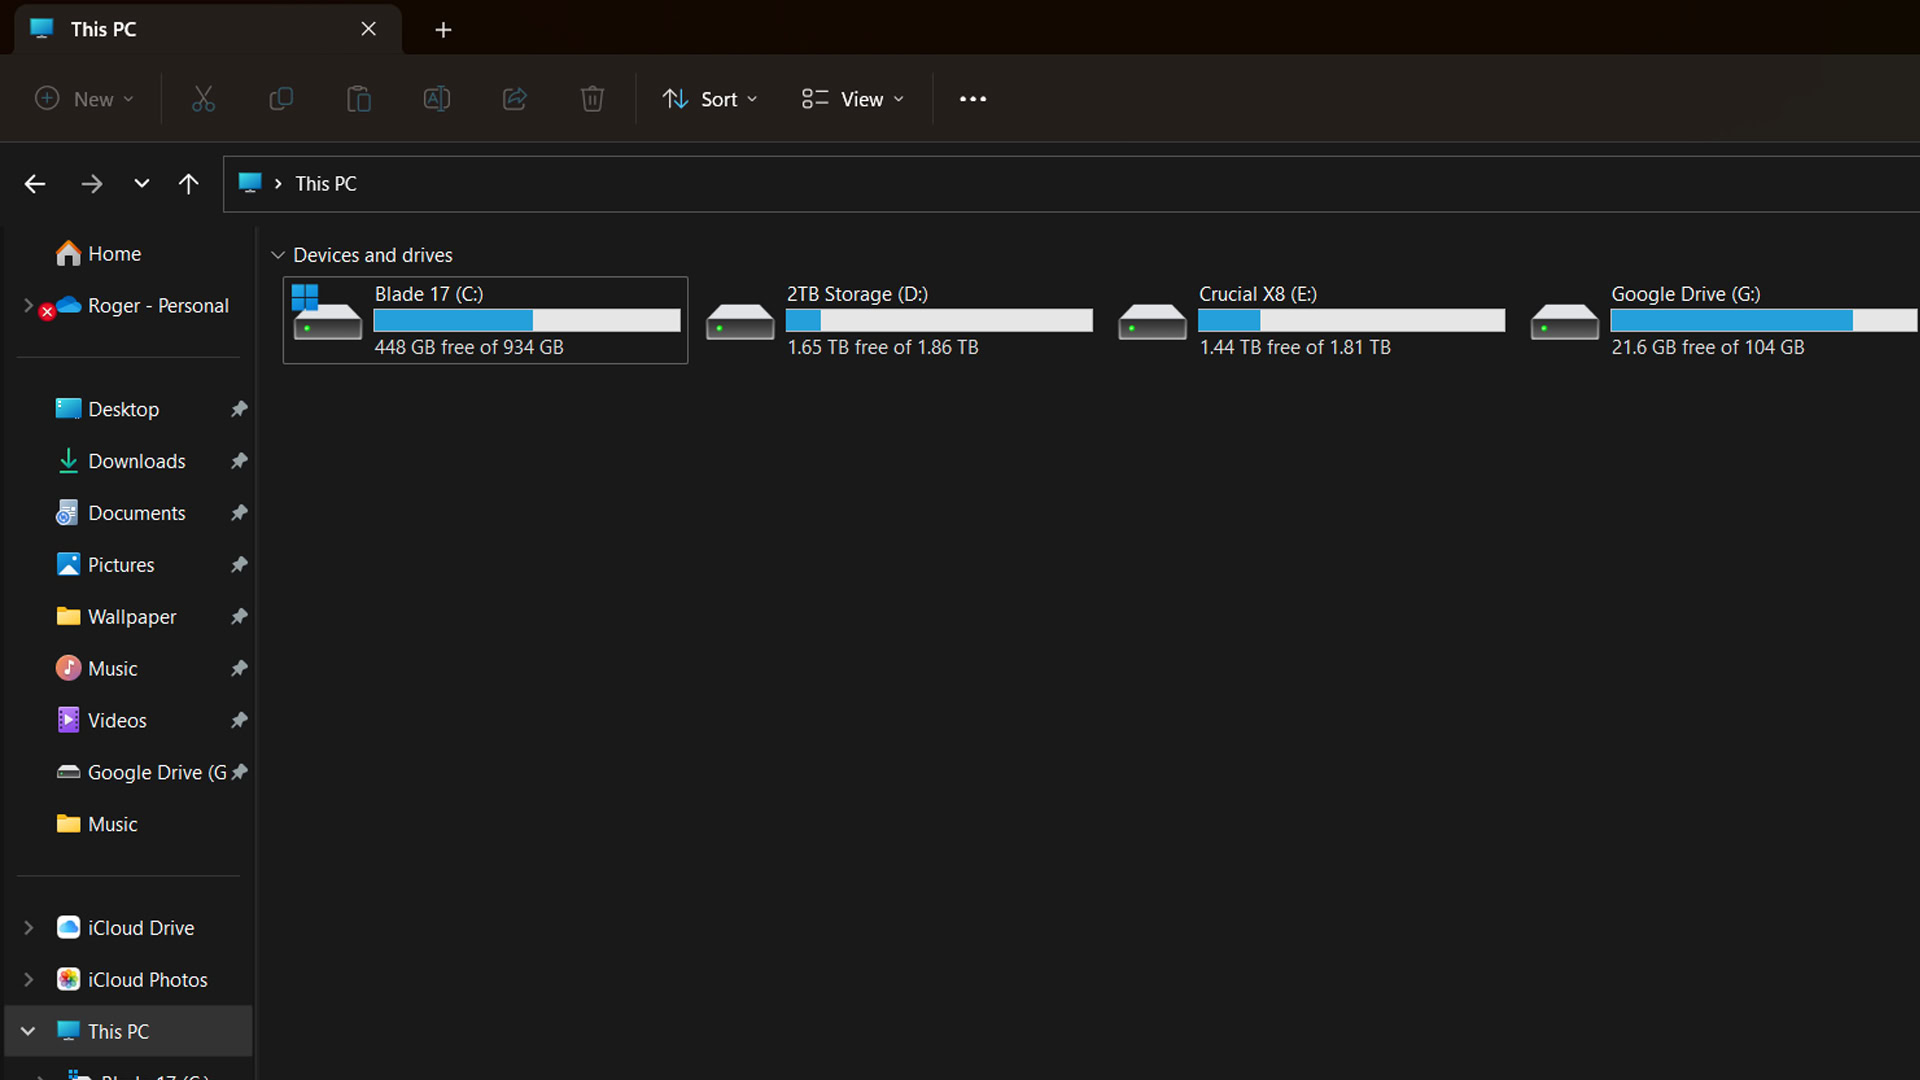
When you want to check how much space is available, that’s dead simple, at least in Windows 11 — open Explorer and click on This PC. You should see a list of all your connected drives, each with data on used versus maximum capacity. In some cases, you may even see cloud services like Google Drive.
If you want to see the brand and model of a drive, go to Task Manager > Performance using the same steps you would to check a graphics card. Instead of clicking on a GPU, click on each Disk listing to see details. You can also get a sense of read/write speeds this way, but you’ll need a dedicated benchmark tool if you’re not running storage-intensive tasks in the background.
Motherboard

Locating this info is less intuitive, since it’s usually unimportant until you’re trying to troubleshoot something or get a sense of upgrade possibilities. But it’s not hard at all.
- Click on the Start button (a Windows icon) in the taskbar.
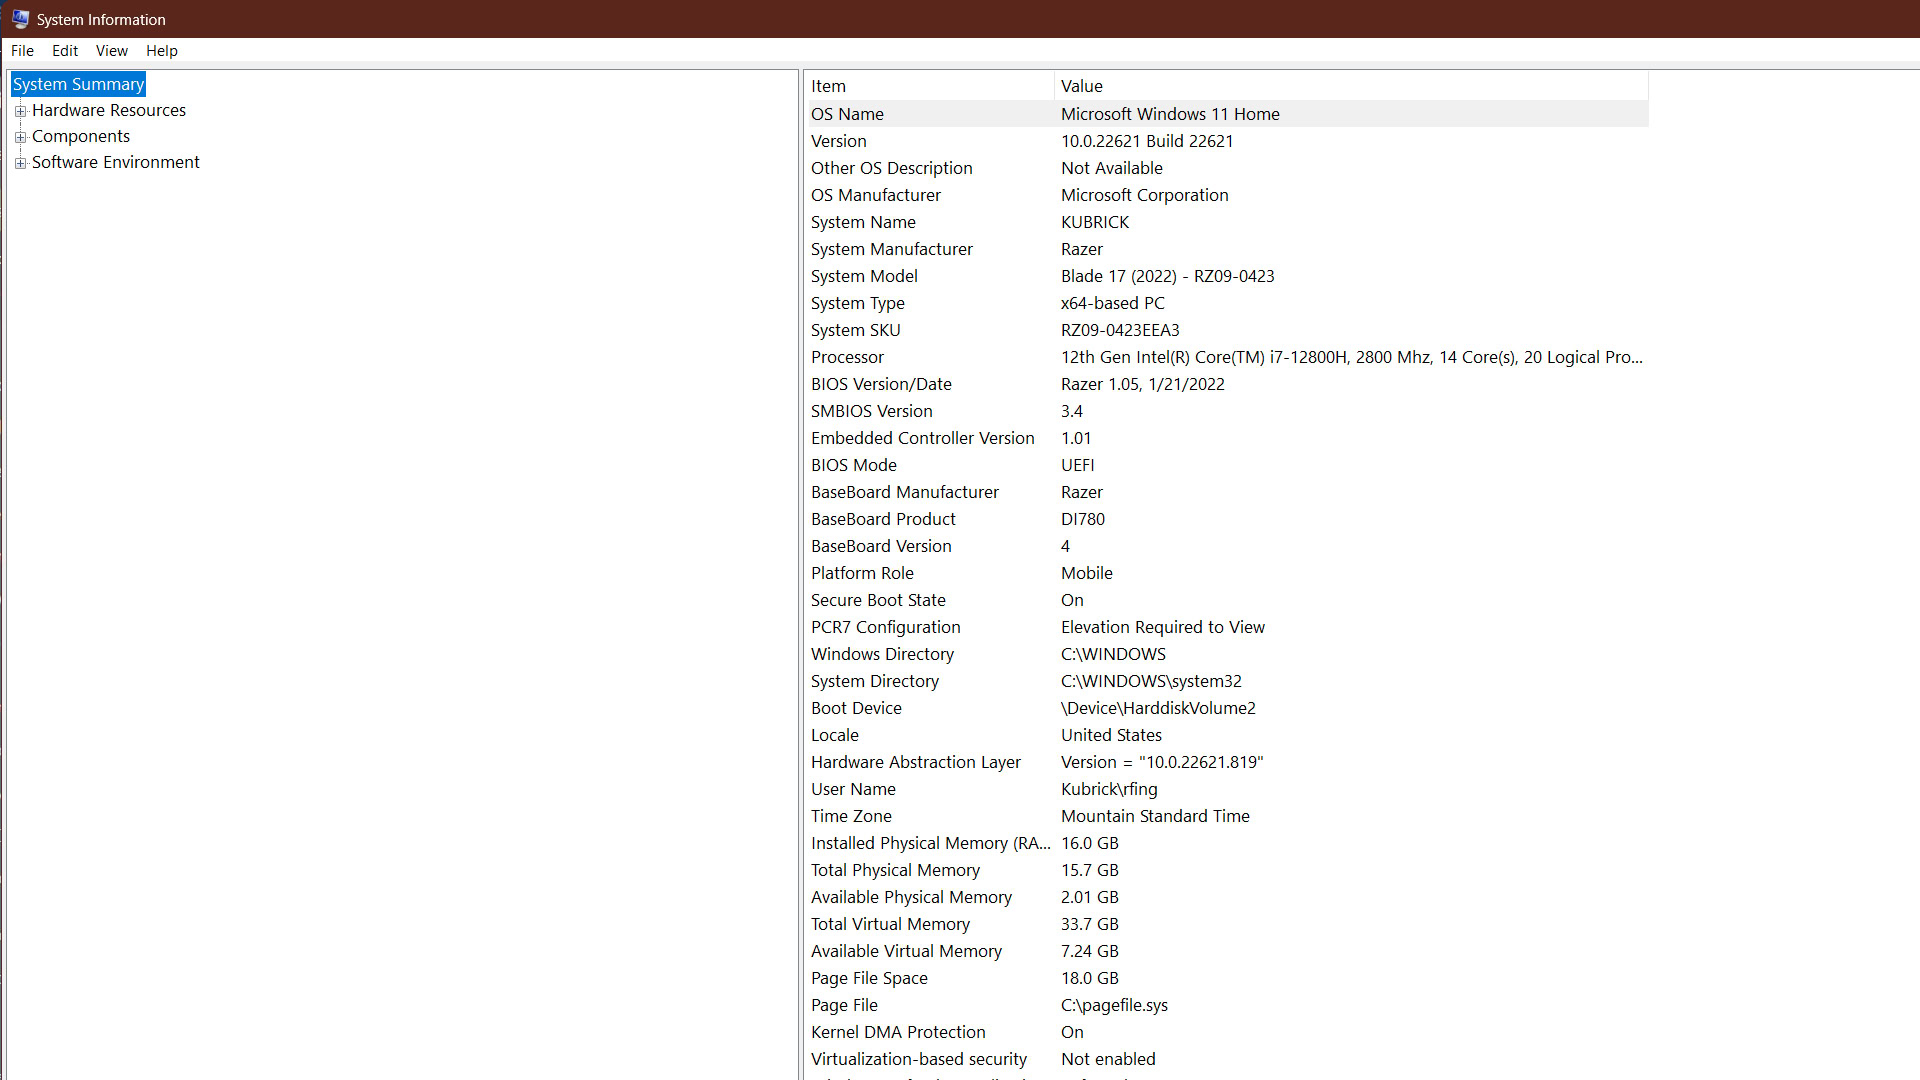
- In the search bar, type “System Information,” and click on its namesake app when it appears in results.
- In the System Summary view, look for the baseboard manufacturer, product, and version numbers.
As you can see, a lot of other specs are visible in System Information as well, but this app is needlessly detailed for the average person.
Power supply

Though identifying the power supply on a desktop PC is vital to knowing whether you can install a new CPU or GPU, there’s no convenient way to do this. If you own a prebuilt system, such as a Dell or HP, you may be able to glean this info from a product’s manual or website. Search using your computer’s brand and model number.
If that info is missing, or you have a custom PC, there’s probably no choice but to open up your desktop’s case.
- Power down your PC completely, first in Windows, then by turning off the power switch (not the regular power button) on your case. This switch is directly connected to your power supply.
- Unplug the PC.
- Making sure you’re electrically grounded, open one side of the case.
- The power supply should be a large brick located near the base of a PC, precisely because that’s a good place to locate something heavy. Check labeling for the brand, model number, and wattage — the wattage rating is a ceiling on how much all your PC components can consume.