Affiliate links on Android Authority may earn us a commission. Learn more.
How to create and download clips on Twitch
Published onJanuary 20, 2023
Twitch clips are the easiest way to save noteworthy moments during a stream—and anyone can make them! If something happens during a stream that you think will be meme-worthy, you can clip it on any device and save it for later. Let’s go over how to create and edit clips on Twitch.
READ MORE: What is Twitch Turbo and how does it differ from Twitch Prime?
THE SHORT ANSWER
To clip on Twitch, open the Twitch stream you want to clip > click Clip (alt+x) from the media controls on top of the stream. In the new tab, use the blue box to customize your clip, then give it a name and publish it.
KEY SECTIONS
How to make and edit Twitch clips (desktop)
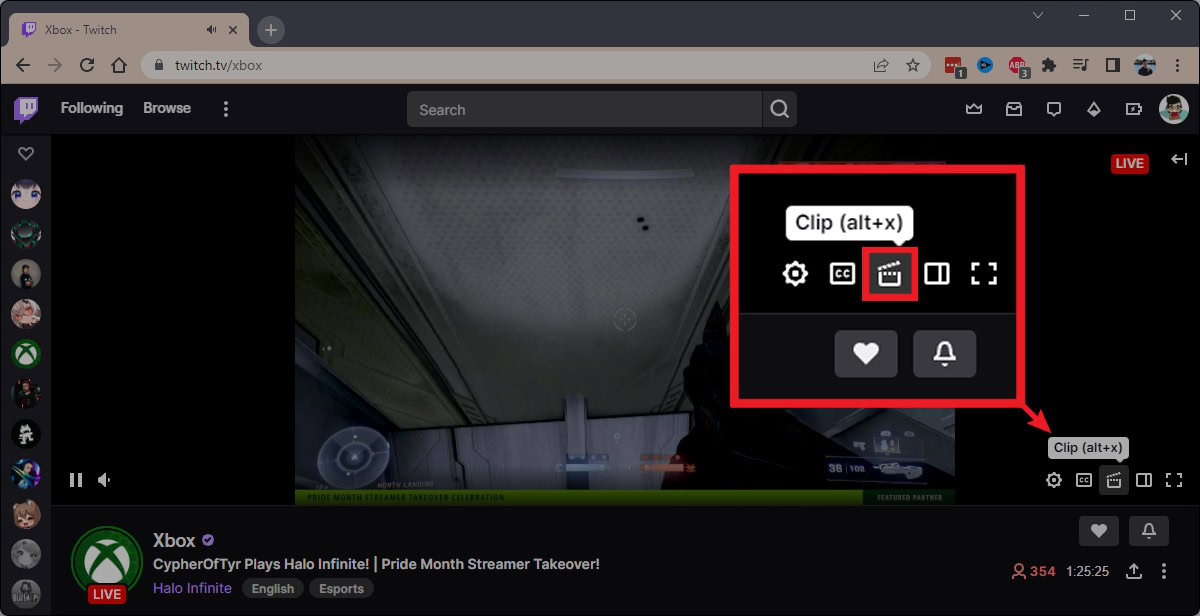
Start watching the streamer you want to clip on twitch.tv from your desktop browser. When you are ready to clip, move your cursor over the playback area and click the Clip (alt+x) button in the media controls along the bottom.
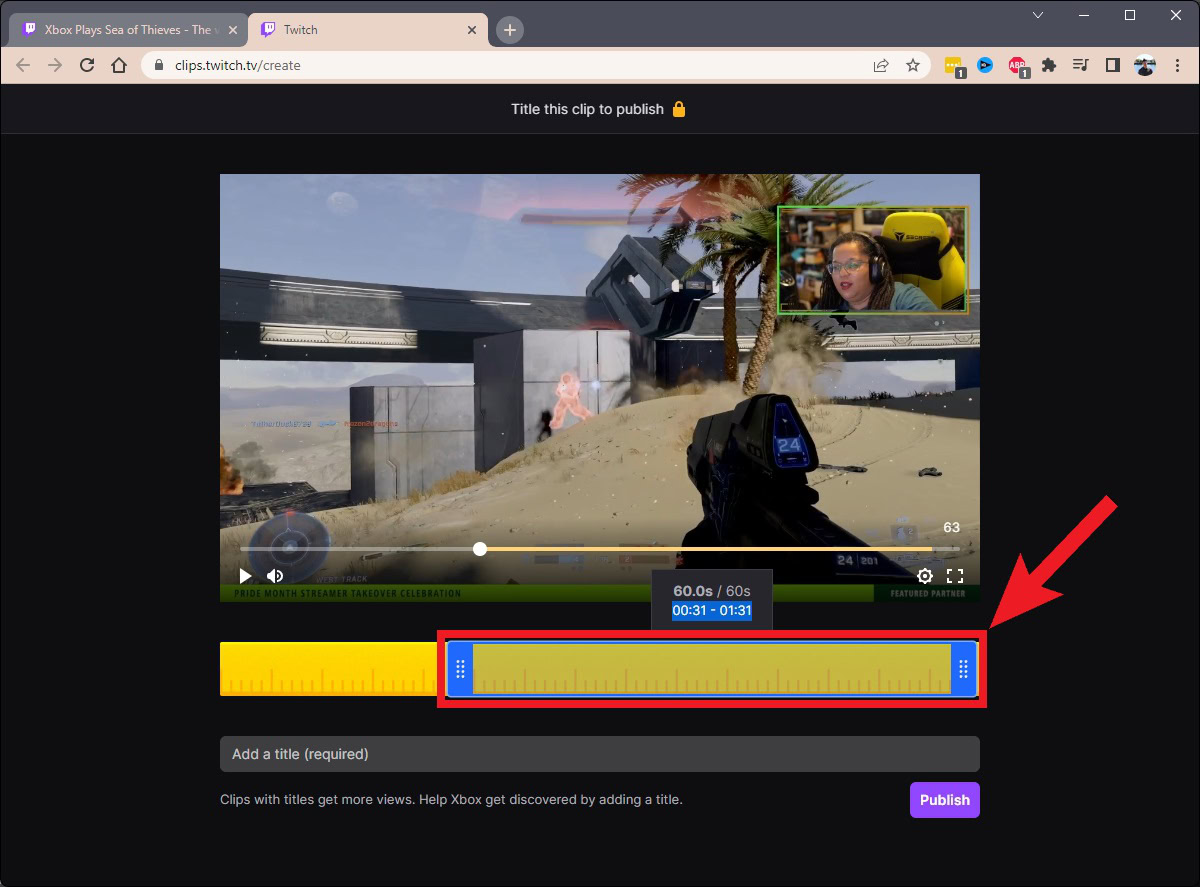
Clicking the Clip button allows you to see the last 90-ish seconds of the stream in a new tab. From the available material, use the blue box within the yellow timestamp bar to customize the length and duration of the clip.
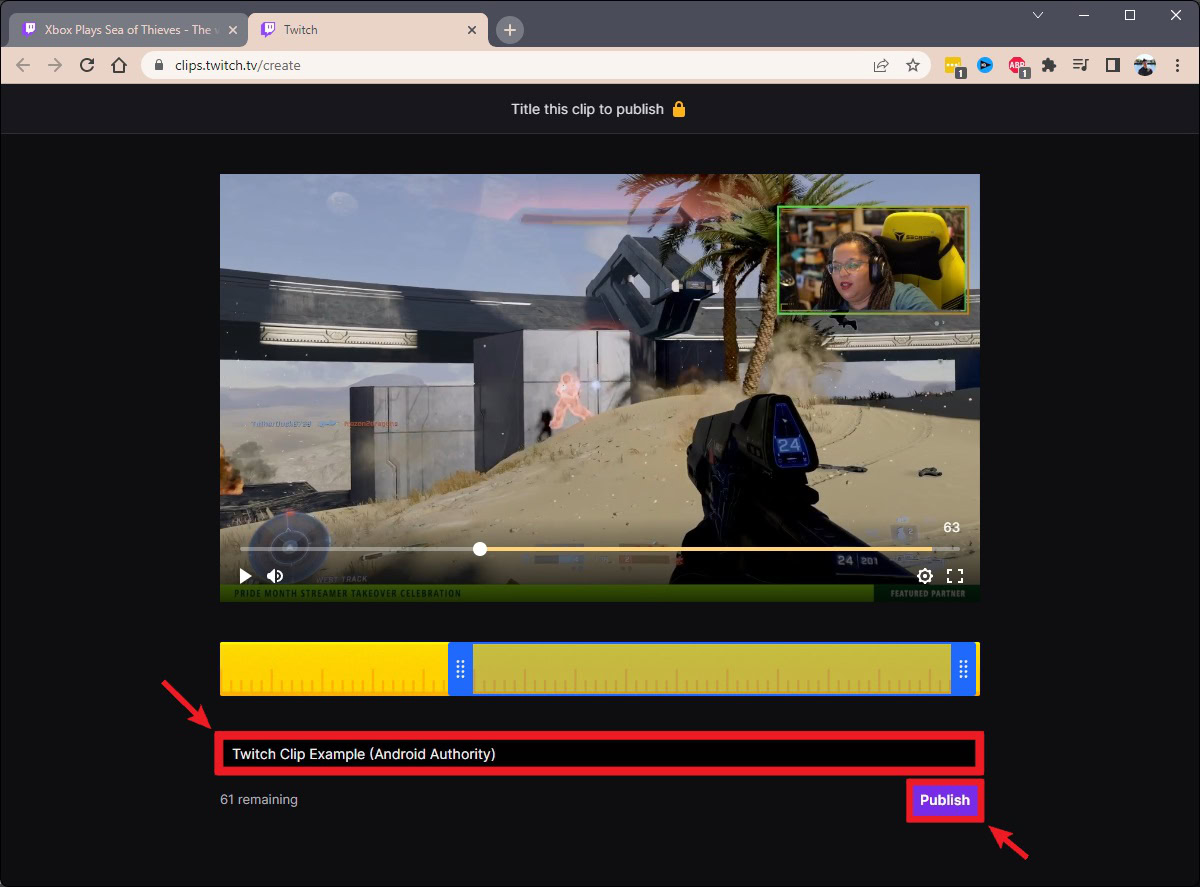
In the Add a title (required) field, give your Twitch clip a name. Then, when ready, click Publish.
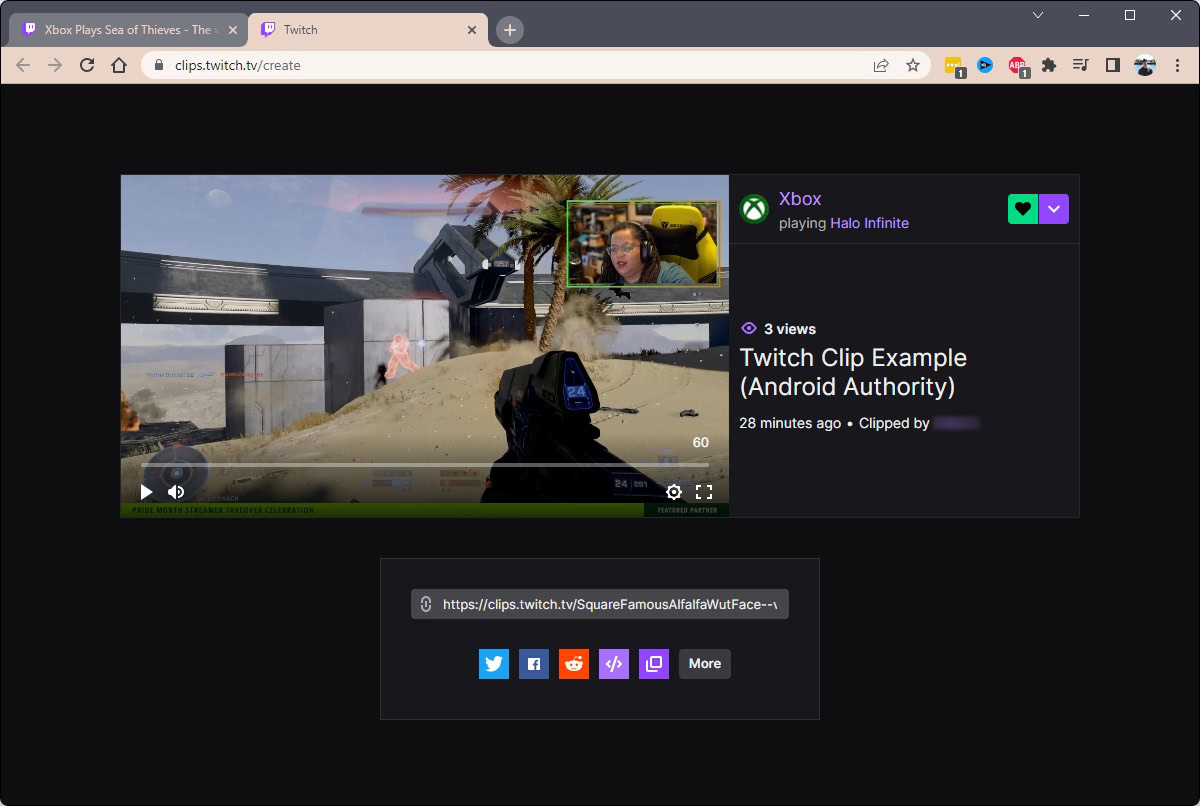
Your Twitch clip is now ready. Once the upload process has finished, use the options below to share your Twitch clip. You can copy a link to it, share it directly to social media, and more.
How to make and edit Twitch clips (mobile app)
Open the Twitch mobile app and start watching the streamer you want to clip. If you tap the playback area, you will see the Clip button in the media controls in the top-right.
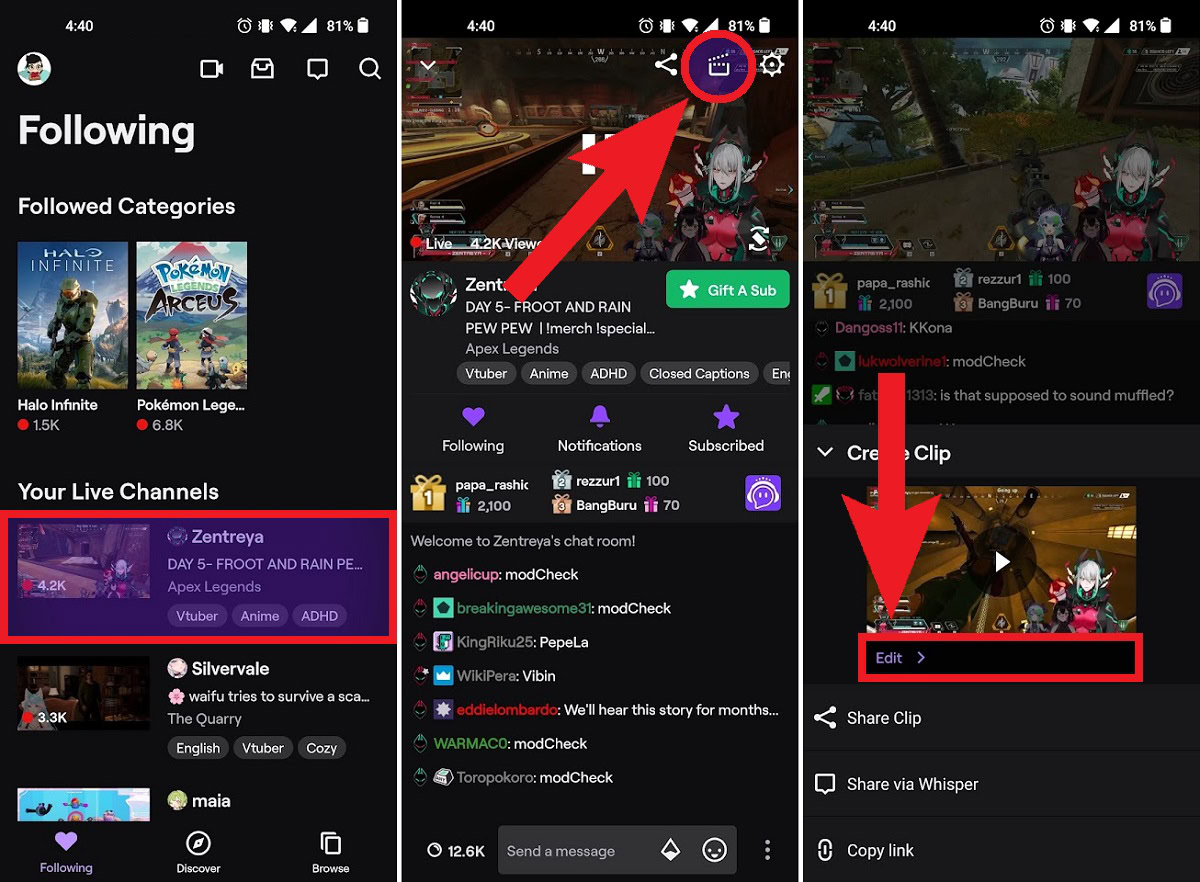
Tap the Clip button, then press Edit.
TIPS AND TRICKS
Editing your clip from within the Twitch mobile app is a bit different, but it is easy. Tap the Trim Clip button to customize the length and duration of the clip.
When you're satisfied with the length of the clip, give it a name in the Add a title field, then press PUBLISH.
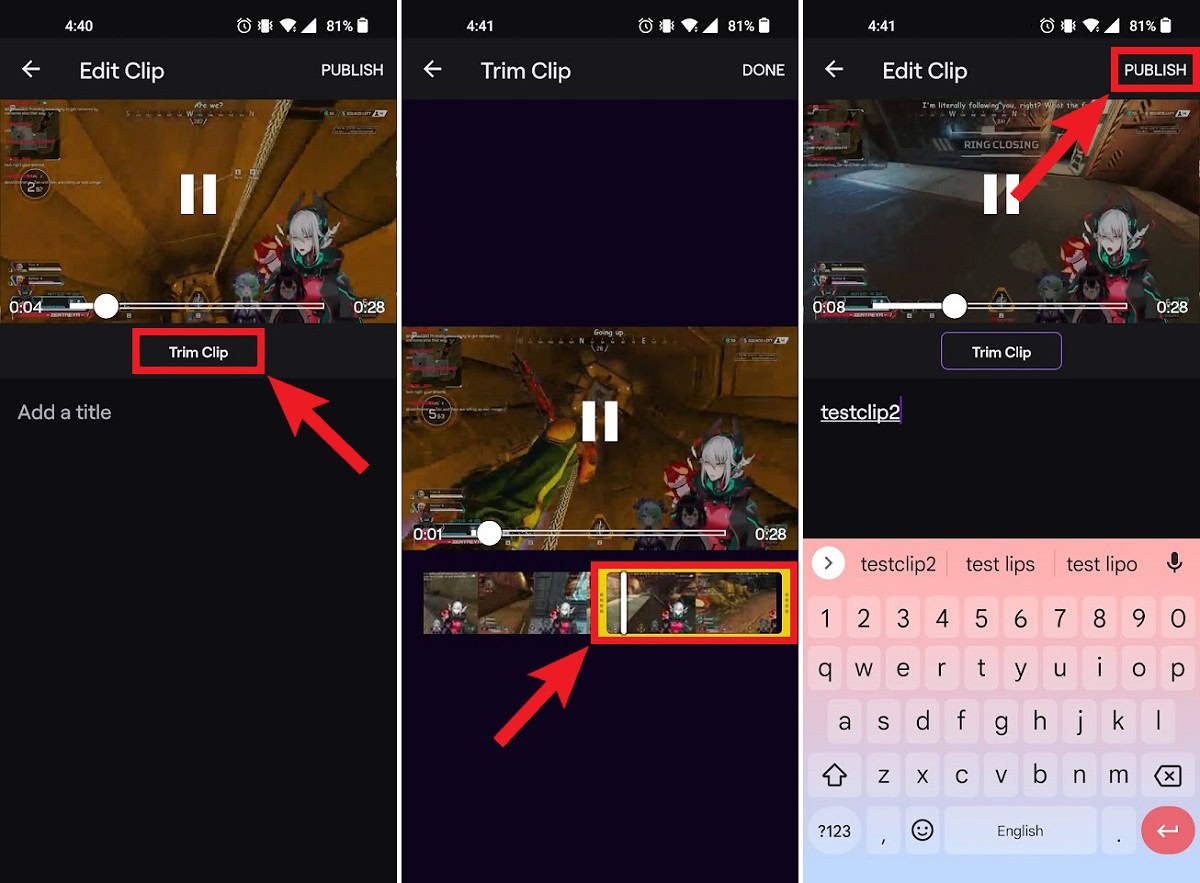
How to download Twitch clips
Right now, if you want to view your Twitch clips, this is only possible on desktop—unless you want to use Twitch in your mobile browser in desktop mode. On mobile, you can only see Twitch clips published on your channel, from your streams.
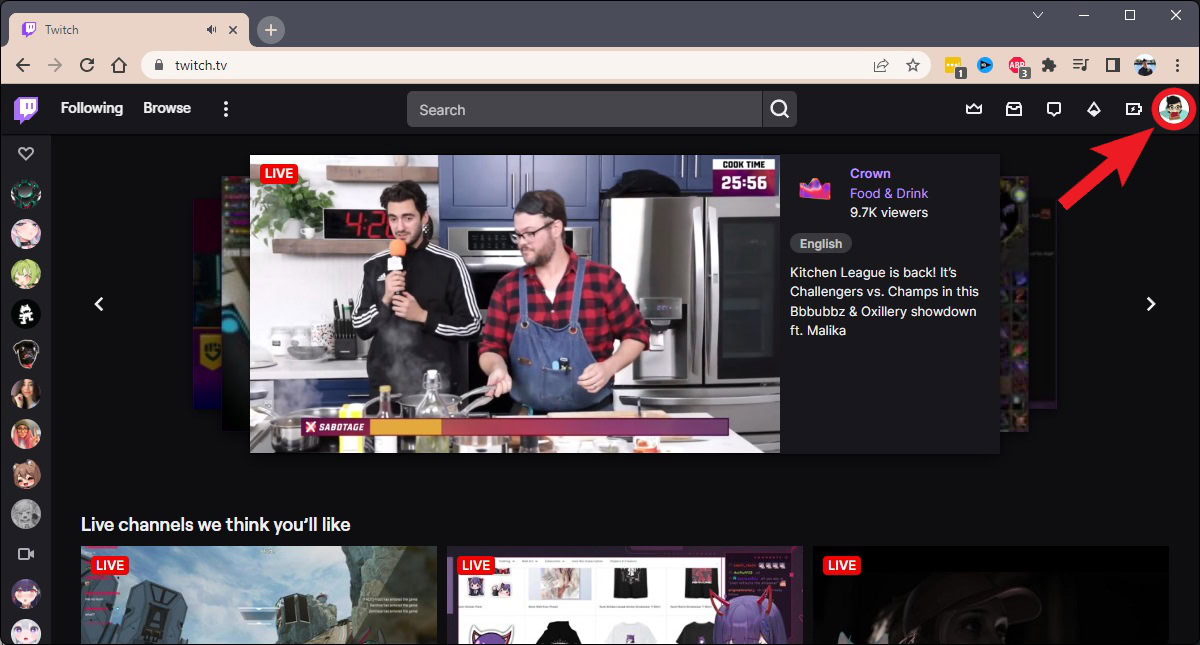
Go to twitch.tv in your browser and click your profile picture in the top-right.
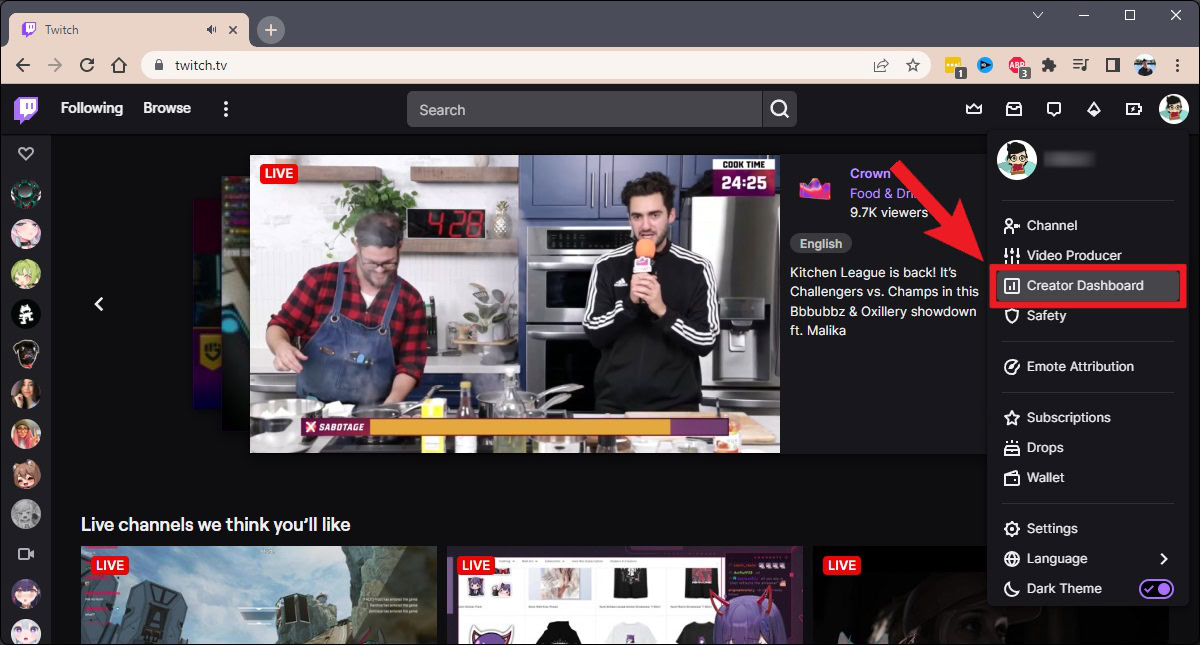
Click Creator Dashboard in the dropdown menu.
Along the lefthand side of the following page, you will see the CREATOR DASHBOARD options. Click the Content arrow.
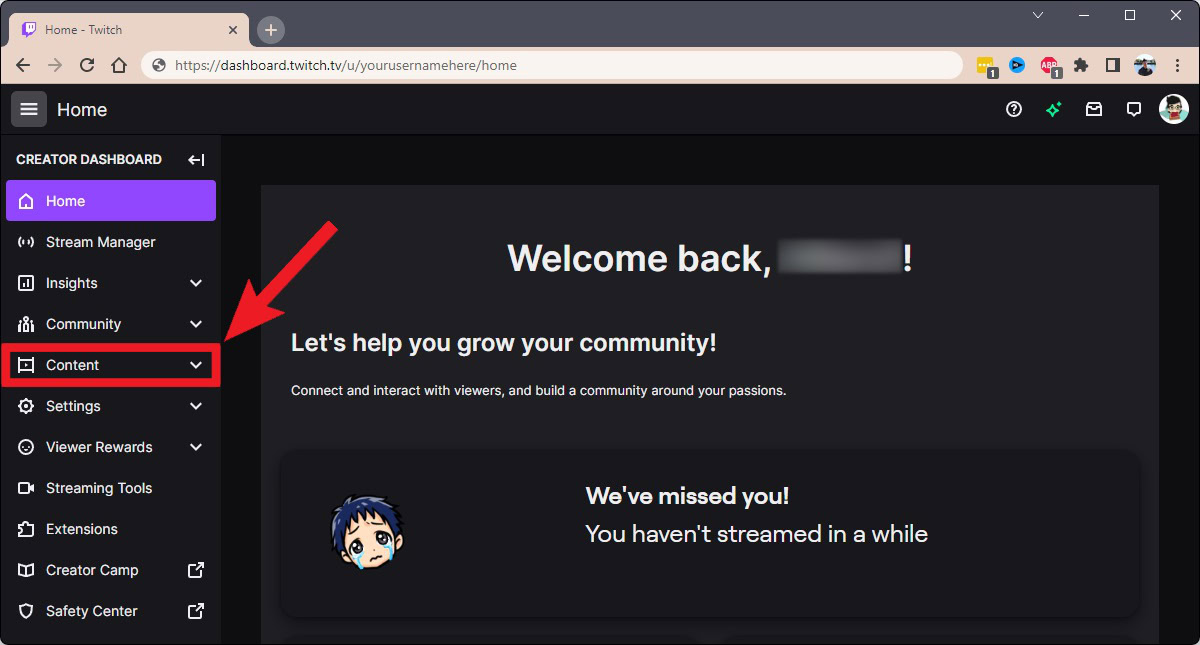
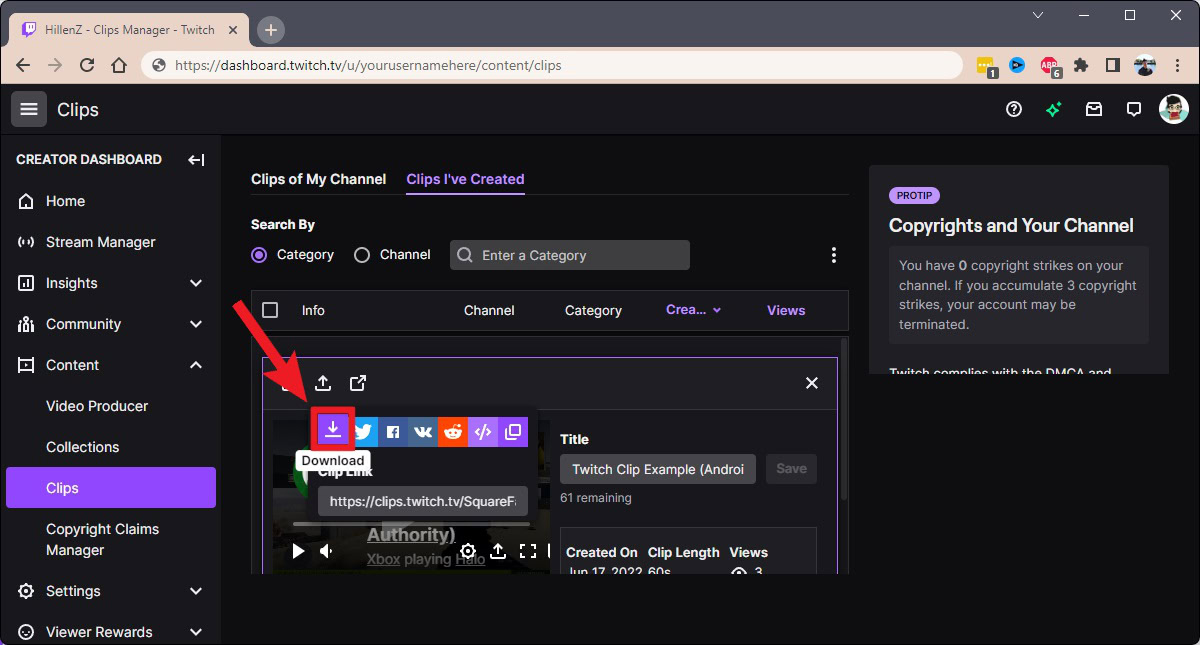
Underneath Content, from the extended menu, click Clips.
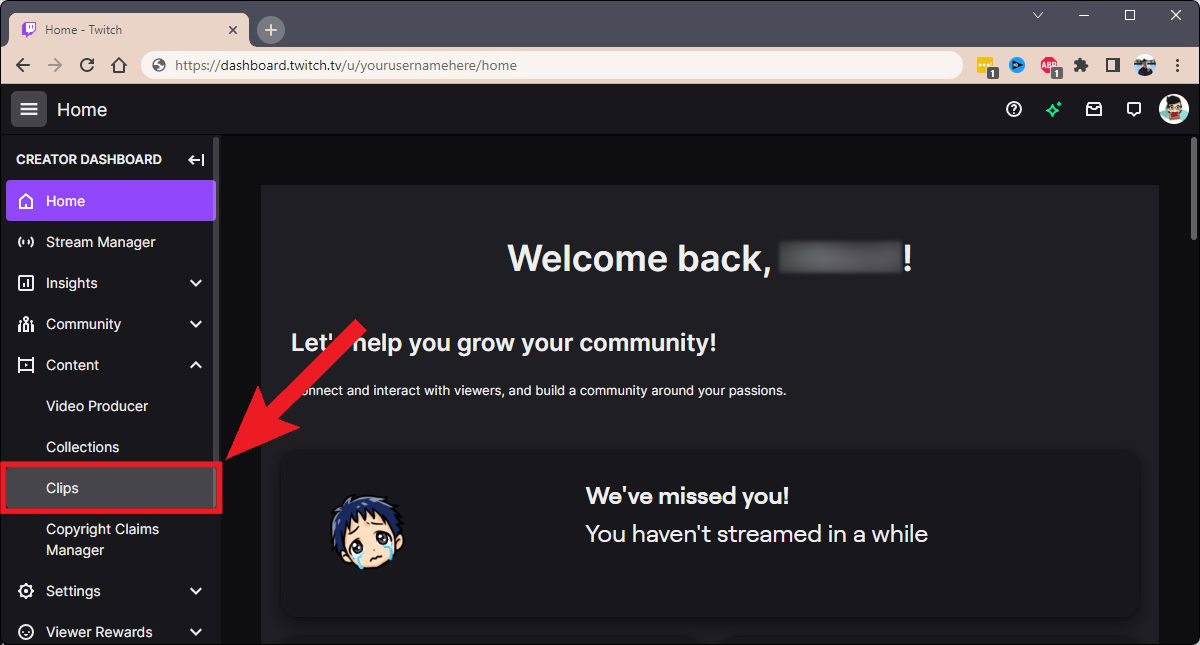
Find the clip you want to download. Click on it.
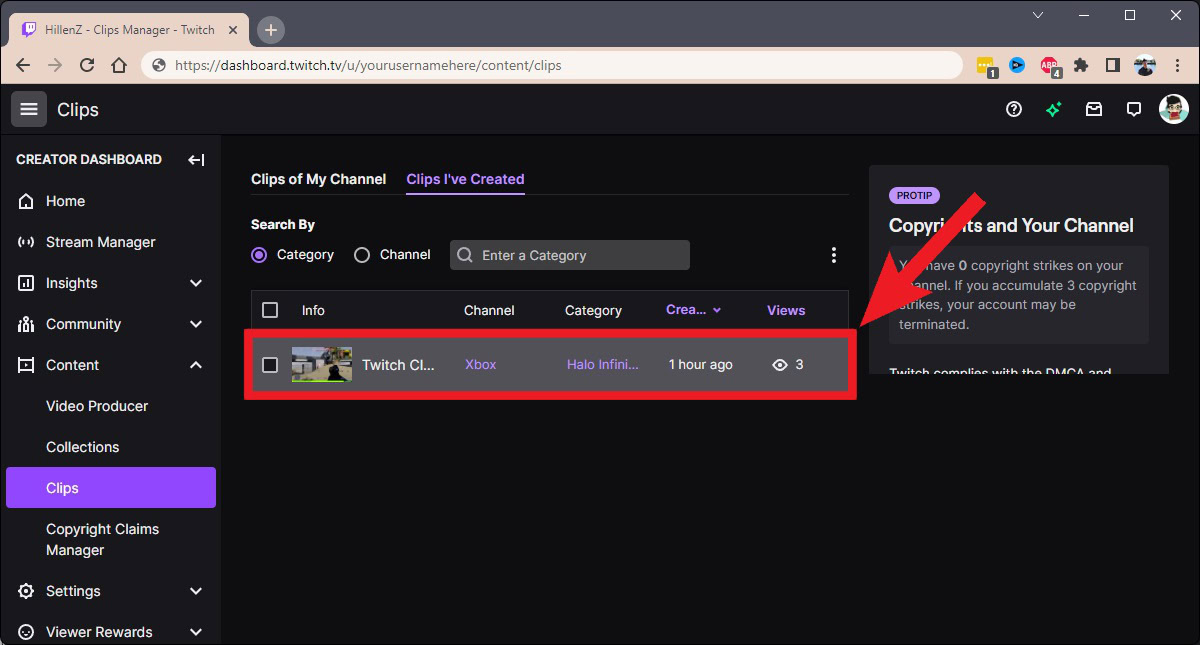
From the options that appear below your clip, click Share.
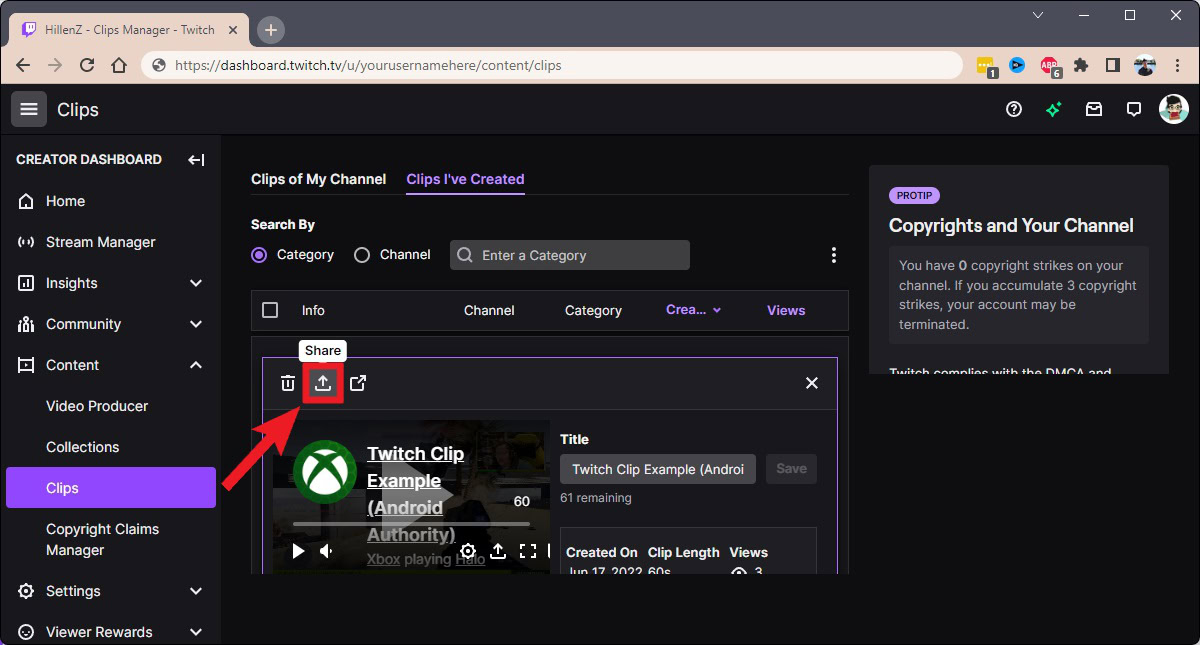
In the Share menu for that clip, click Download to download that Twitch clip.
FAQs
Yes. To delete Twitch clips, go to twitch.tv > click your profile picture in the top-right > Creator Dashboard > Content > Clips. Click on the clip you want to delete, then click the trash can icon.
Twitch clips can be between 5 and 60 seconds long. When you click the Clip button, you’re redirected to a new tab where you can see the last 90-ish seconds of the stream before you clicked the button.
You can upload any kind of video to your Twitch account through the Video Producer menu. However, you can only do this if you are a Twitch Affiliate or Partner.
If you’re talking about clips that you made from others’ streams, this is currently impossible. You can only see your own streams’ clips on your account profile.
Absolutely. If you’re a Twitch streamer, you can moderate all of the Twitch clips made of you during your streams, and take down any of the ones you don’t want floating around on the platform. However, if that clip has been downloaded and shared on another platform, there isn’t much you can do about that.