Affiliate links on Android Authority may earn us a commission. Learn more.
How to convert PNG images to JPG
Published onSeptember 7, 2023
While PNG images are seemingly omnipresent on the web, they may not gel with a lot of other purposes when you download them, such as device wallpaper or image editing. Whatever your reason, here’s how to convert a PNG image to the more common JPG format on all major platforms.
JUMP TO KEY SECTIONS
How to convert PNG images to JPG on Windows

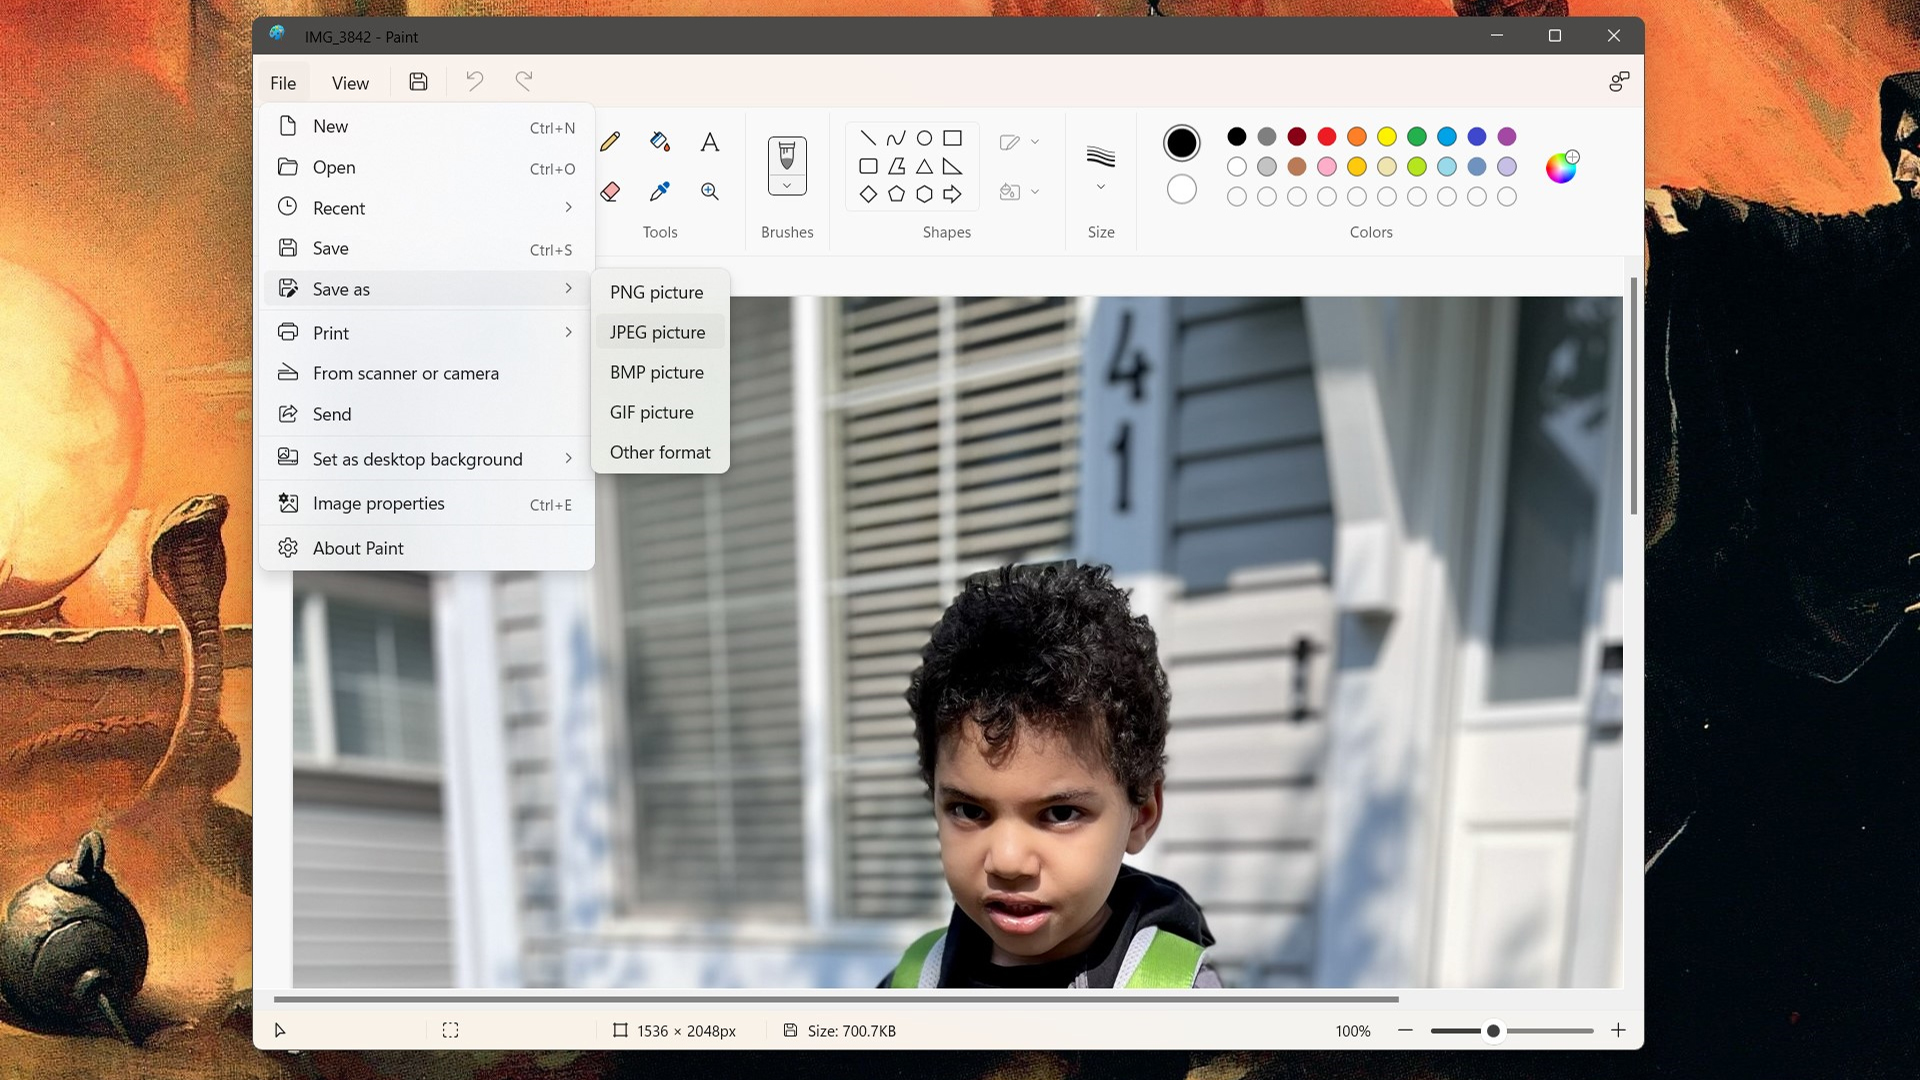
The easiest way to convert a PNG in Windows 11 is actually the Paint app.
- Find the PNG you want to convert and right-click on it.
- In the pop-up menu, hover over Open with, then click Paint. If you don’t see Paint, find it by clicking Choose another app.
- Once the PNG is open in Paint, open the File menu, hover over Save as, then click JPEG picture.
- Within the Save As dialog, use the Save as type drop-down menu and choose JPEG. If you like, you can also rename the JPEG copy, and choose a different folder to save it to.
- Click Save.
How to convert PNG images to JPG on a Mac
Conversion is about as simple in macOS.
- Open the PNG file using the Preview app.
- Click File, then Export.
- Click the Format pop-up menu and choose JPEG. You can adjust the quality of the export, but this should usually be set to maximum unless you have bandwidth concerns.
- Choose a filename and destination for the converted file.
- Click Save.
If you want to convert multiple PNGs at once, open several in the same window, then select them in that window’s sidebar before using the rest of the steps above.
How to convert PNG images to JPG on Android
Various Android apps promise to do this, but you don’t need a dedicated conversion tool or image editor. Instead, visit Adobe’s PNG to JPG website, upload your PNG, and you’ll get a converted JPG image in a few moments.
The only catch is that PNG files must be less than 2GB, but realistically, even an 8K PNG should be well below that size.
How to convert PNG images to JPG on an iPhone or iPad
In addition to Adobe’s PNG to JPG website, you can use a trick in Apple’s native Photos app.
- Open the image in Photos.
- Tap Edit and make one or more changes. These can be minor or major tweaks, and if you don’t know what to do, just tap the Auto (magic wand) button. You can always undo or redo edits using the arrow buttons.
- Tap Done. When you go to share an image with other people or an app, it should be a JPG.