Affiliate links on Android Authority may earn us a commission. Learn more.
How to create a 3D shooter for Android with Unity - Part one
Published onAugust 25, 2016
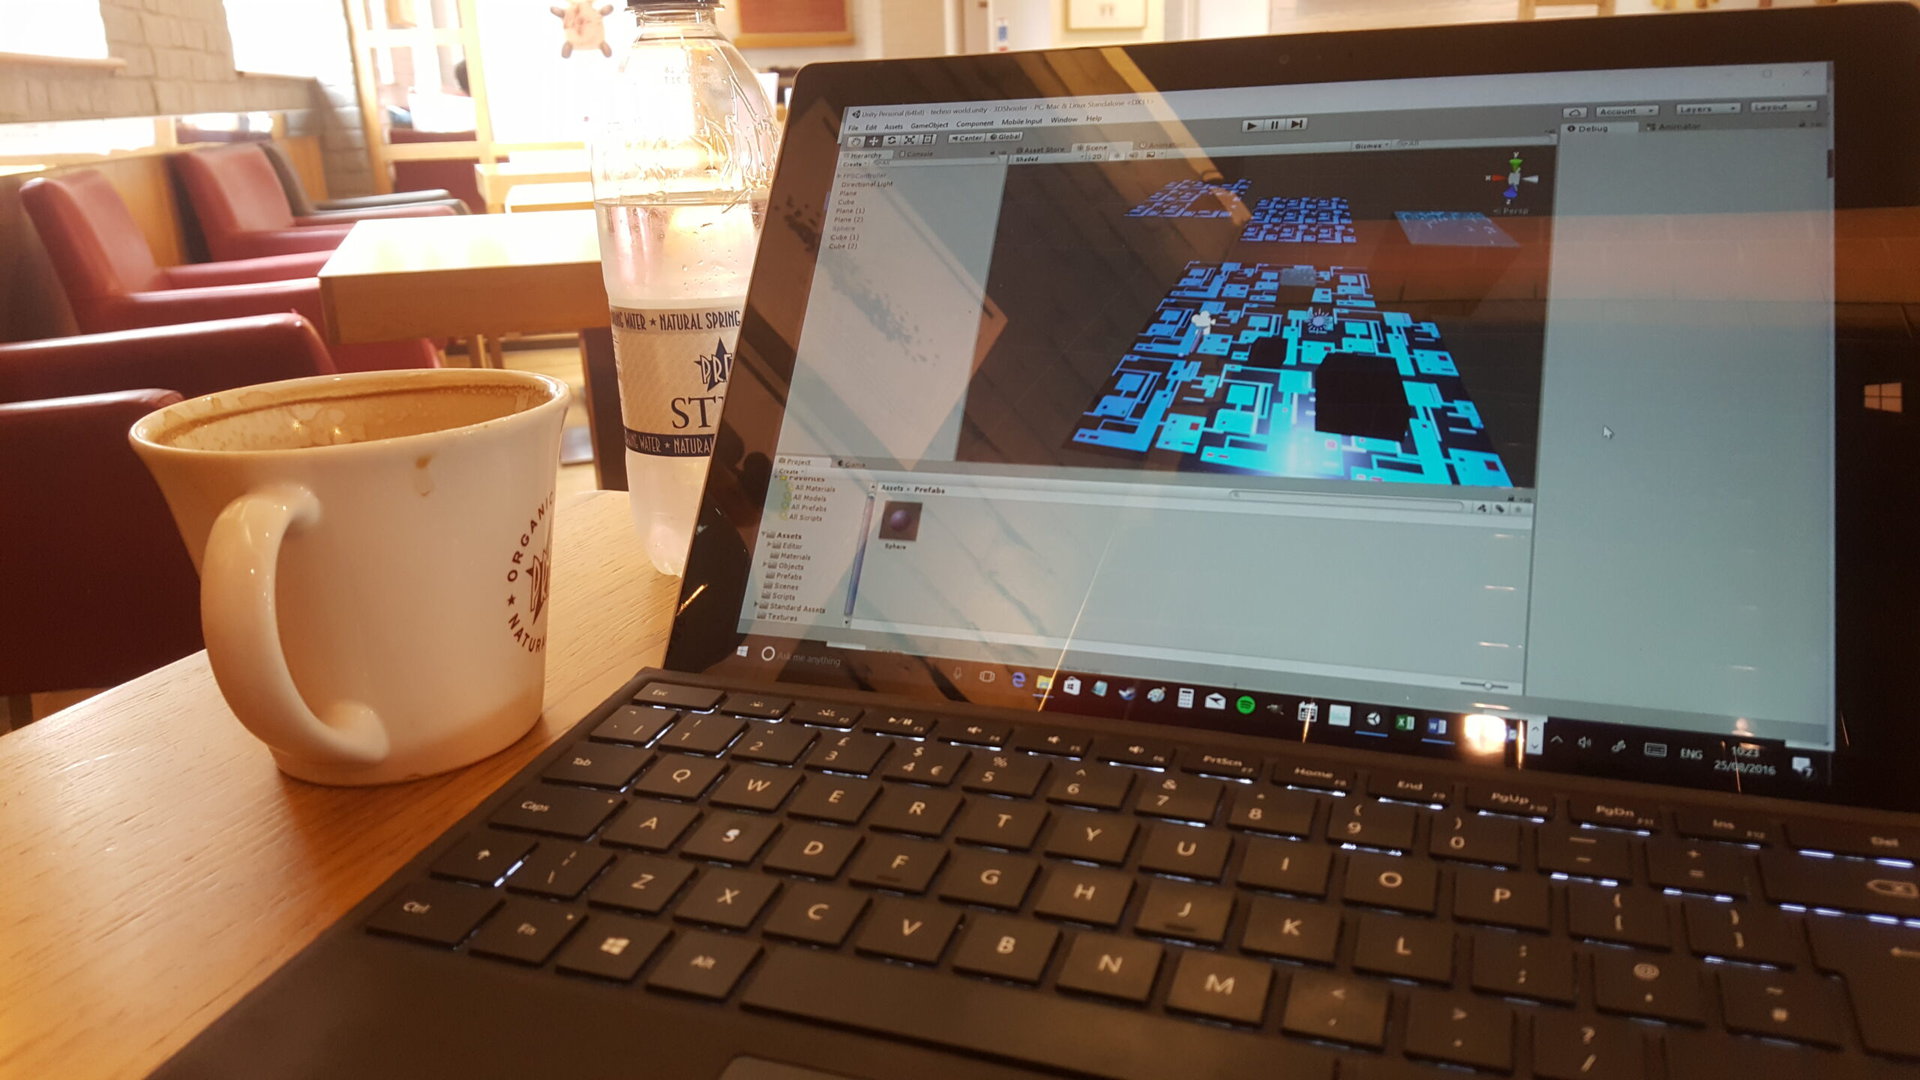
Unity is one of the most powerful tools that developers have available for making games and a huge number of the best-selling apps in the Play Store owe their existence to it. We’ve covered the engine before with both a general overview and a guide to making 2D platformers. We also touched on it briefly when discussing how to make games for the Gear VR.
But long before Unity was being used to make platformers and VR apps, it was being used to make 3D shooters; usually of the FPS persuasion. 3D action was Unity’s original purpose and it’s still what it really excels at. And it’s much easier to get to grips with than you might expect. Let’s take a look at how you can use Unity to make your own 3D shooter for Android in just a few easy steps.
Getting started
Before we get started, note that I will assume you have some basic familiarity with Unity seeing as we’ve covered it in the past. If you don’t, then I recommend just glancing over those previous posts first.
What will likely surprise you if you’re new to this, is just how easy it is to create a 3D world and drop a character into it
Secondly, note that this project will be a two-part series. This first part is going to deal with the basics and setting up. The next part will focus on honing the game to make it a little more presentable and more specifically optimizing it for Android. There are certain challenges to keep in mind when designing a 3D shooter for mobile. You’ll also be able to get the whole project from Git at the end of part 2 if you just want to lift the code and assets for your own game.
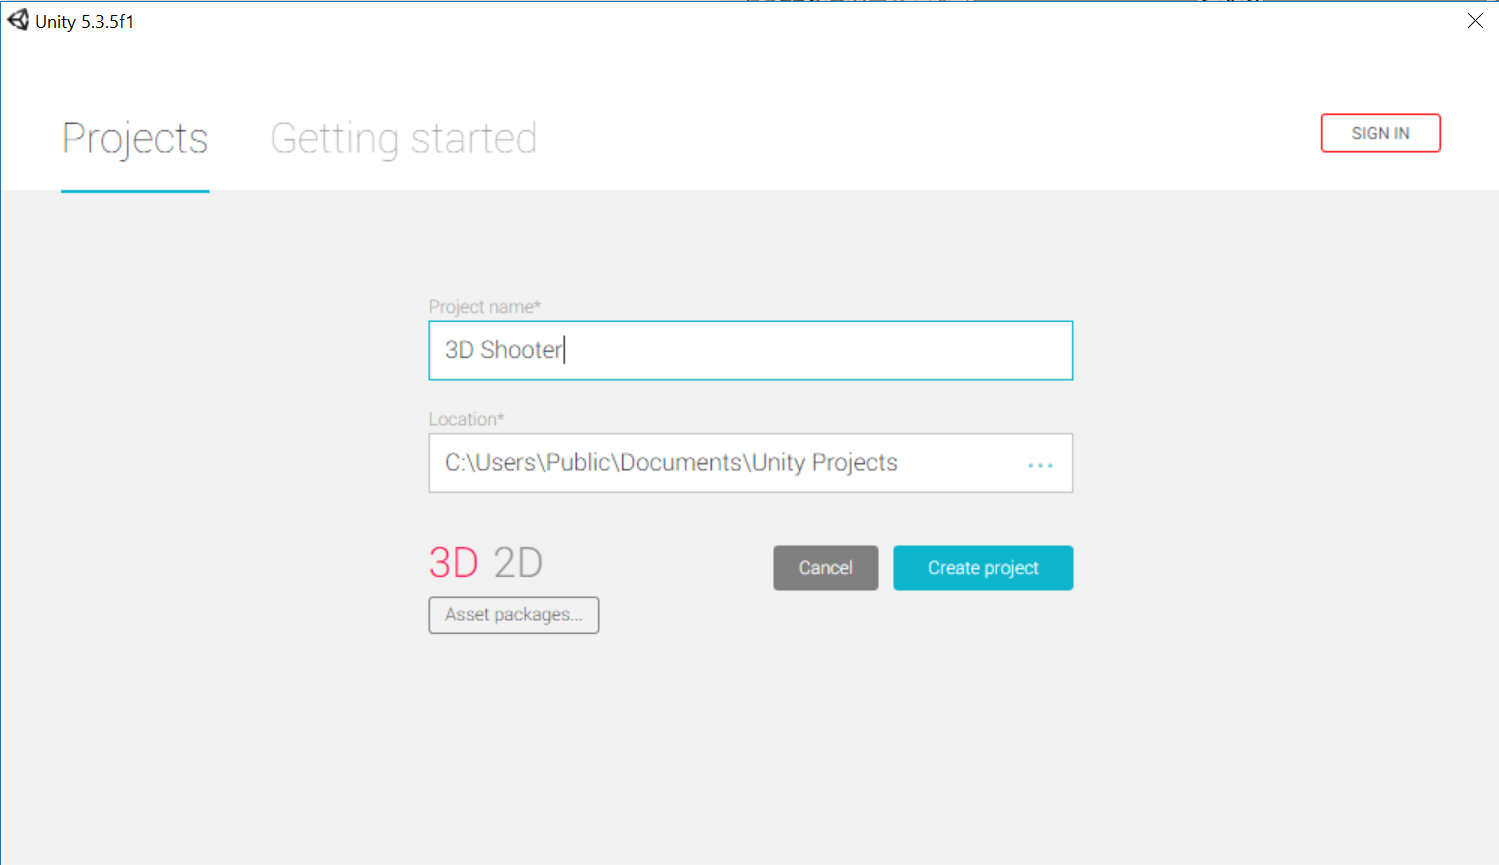
With that in mind, let’s get to work. And things start simple – just start a new project and make sure that you select 3D rather than 2D this time.
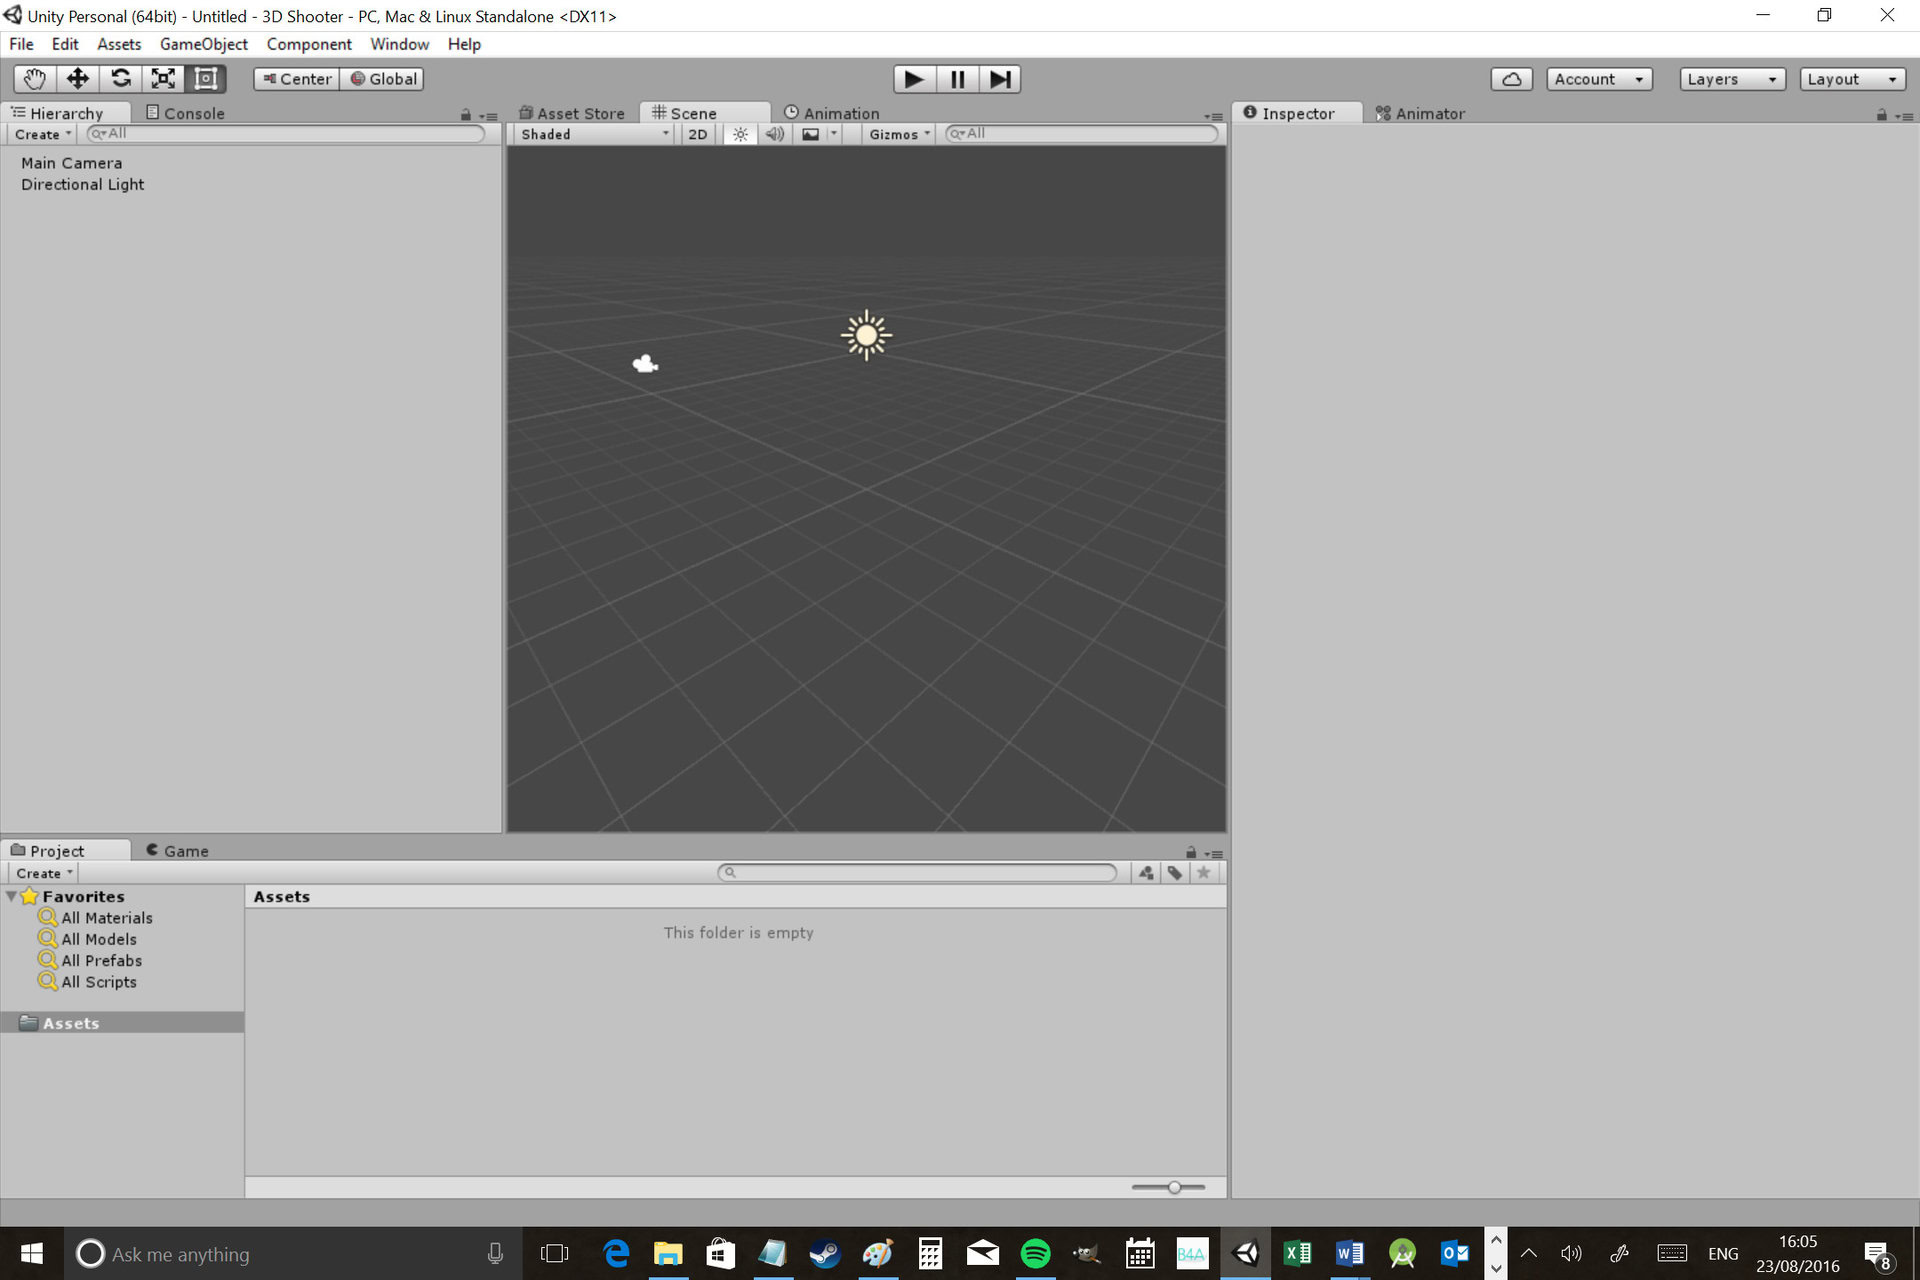
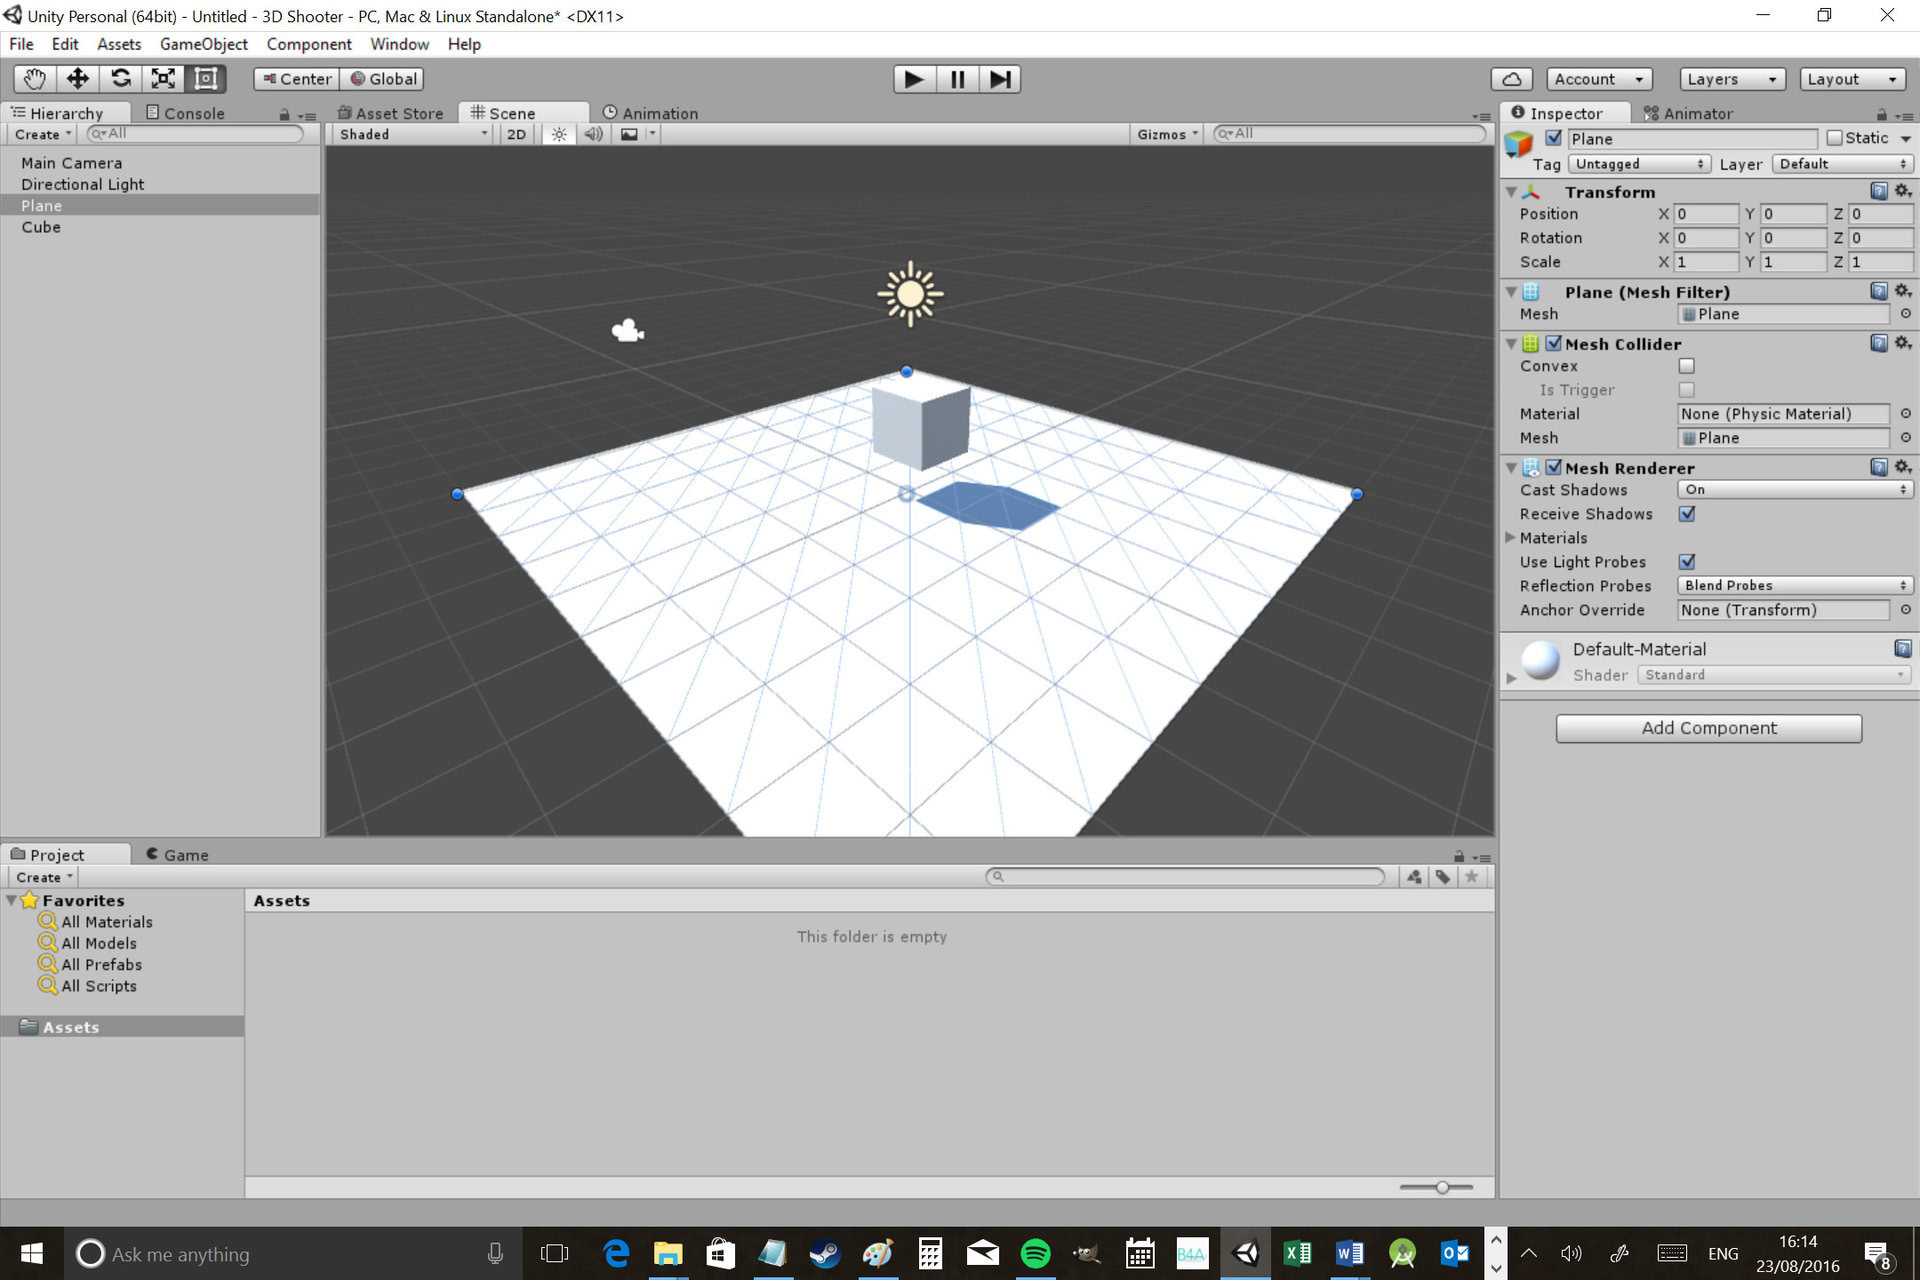
For your efforts, you’ll be greeted with this:
Creating the Game World
What will likely surprise you if you’re new to this, is just how easy it is to create a 3D world and drop a character into it. In a couple of paragraphs, you’ll have a 3D world you can walk around in!
The first thing we’re going to do now is create some floor. Doing this is fairly simple, we just go to GameObject > 3DObject > Plane in the top menu. This will insert a flat mesh into your scene (your level, which you can see in the Scene window) and that will be the floor. Now repeat those steps but this time go GameObject > 3DObject > Cube. This will plop a cube into your game world. This will probably be clipping through your ground at first though, so drag it upward with the mouse to position it above the floor. You can do this simply by selecting it in your scene view and then dragging it upward. The following buttons along the top left of that window let you switch between dragging objects, scaling objects, rotating the view etc.

You’ll also notice you have the option to add spheres, capsules and other objects this way and for the most part, these options do what you’d expect! Let’s not run before we can walk though, a simple box will do nicely for now.
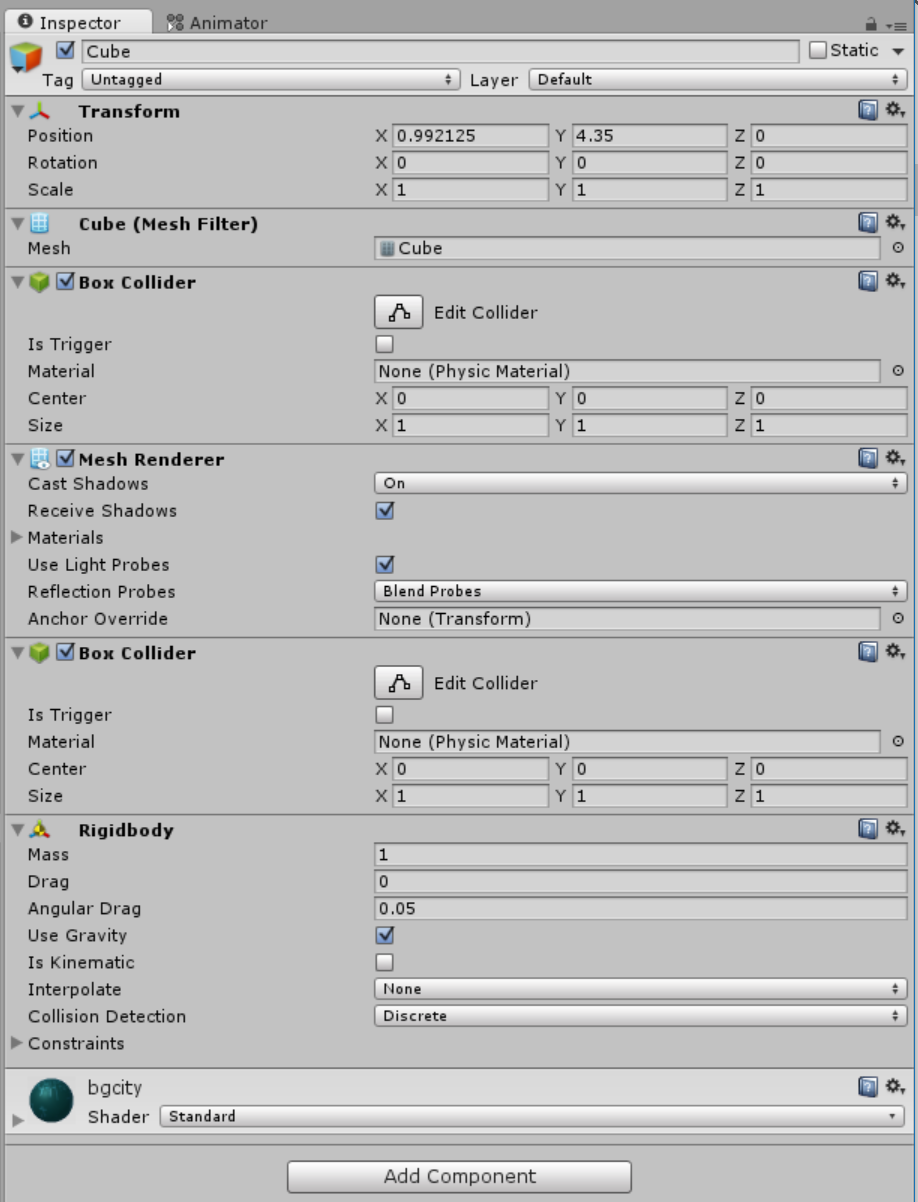
Next we’re going to add some physics to this object. To do that, we want to add a collider first (which basically makes things into solid objects by giving them collision detection) and ‘RigidBody’. RigidBody is basically a script that gives any item in your game simple physics, like gravity and friction. This is one of the most useful things in Unity, as coding that yourself would take a huge amount of work.
To add the collider, just select your cube object in the scene view or in the hierarchy on the left. Then, in the inspector window on the right, choose Add Component > Physics > Box Collider. The same steps will let you add your RigidBody component, only this time you’re going to go to Add Component > Physics > RigidBody.
If you’ve dragged your box up above the terrain like we said, then you’re ready to run your ‘game’ for the first time. Just click the play icon at the top and you should be greeted with the site of your box dropping onto the floor and resting there. Note that you can drag and rotate the camera in the scene view to get a better view of the action.
”[RigidBody
is one of the most useful things in Unity, as coding that yourself would take a huge amount of work” qposition=”center” qcolor=”color3″ qstyle1=”bold” qstyle2=”” qcap=”normal” qsize=”medium”]
Right now, everything in your game world is going to be very bland a white. To fix that, let’s add some textures and our skybox.
Go ahead and save your game first with Ctrl + S. This will automatically bring up the option to name your scene/level. You can call this ‘Level 1’ or anything else you like.
Making the world pretty
If you just want to get your game working, then you can skip this step to insert your player character right away. However, I think it’s more fun to make the world look interesting and then step into it for the first time.
So first, let’s add a texture to our floor and our box. You can use any PNG you like to do this and there are plenty of sites online where you can download textures that are free to use.
And once again, this is surprisingly simple. All you need to do is to find a texture you like and then drag and drop it into Unity. First, go to the project window at the bottom of the screen and then select Assets from the menu on the left. You’re going to right click next to the Materials folder and make a new folder called ‘Textures’. While we’re at it, let’s also make a new folder called ‘Scenes’ and drop our first level into there. Absolute scenes…
Now open up your Textures folder (Assets > Textures) and drag and drop any PNG files you want into here so that they’re a part of your project. You can now very simply drag them out from your textures folder and onto the relevant game objects – in this case our cube and our plane.
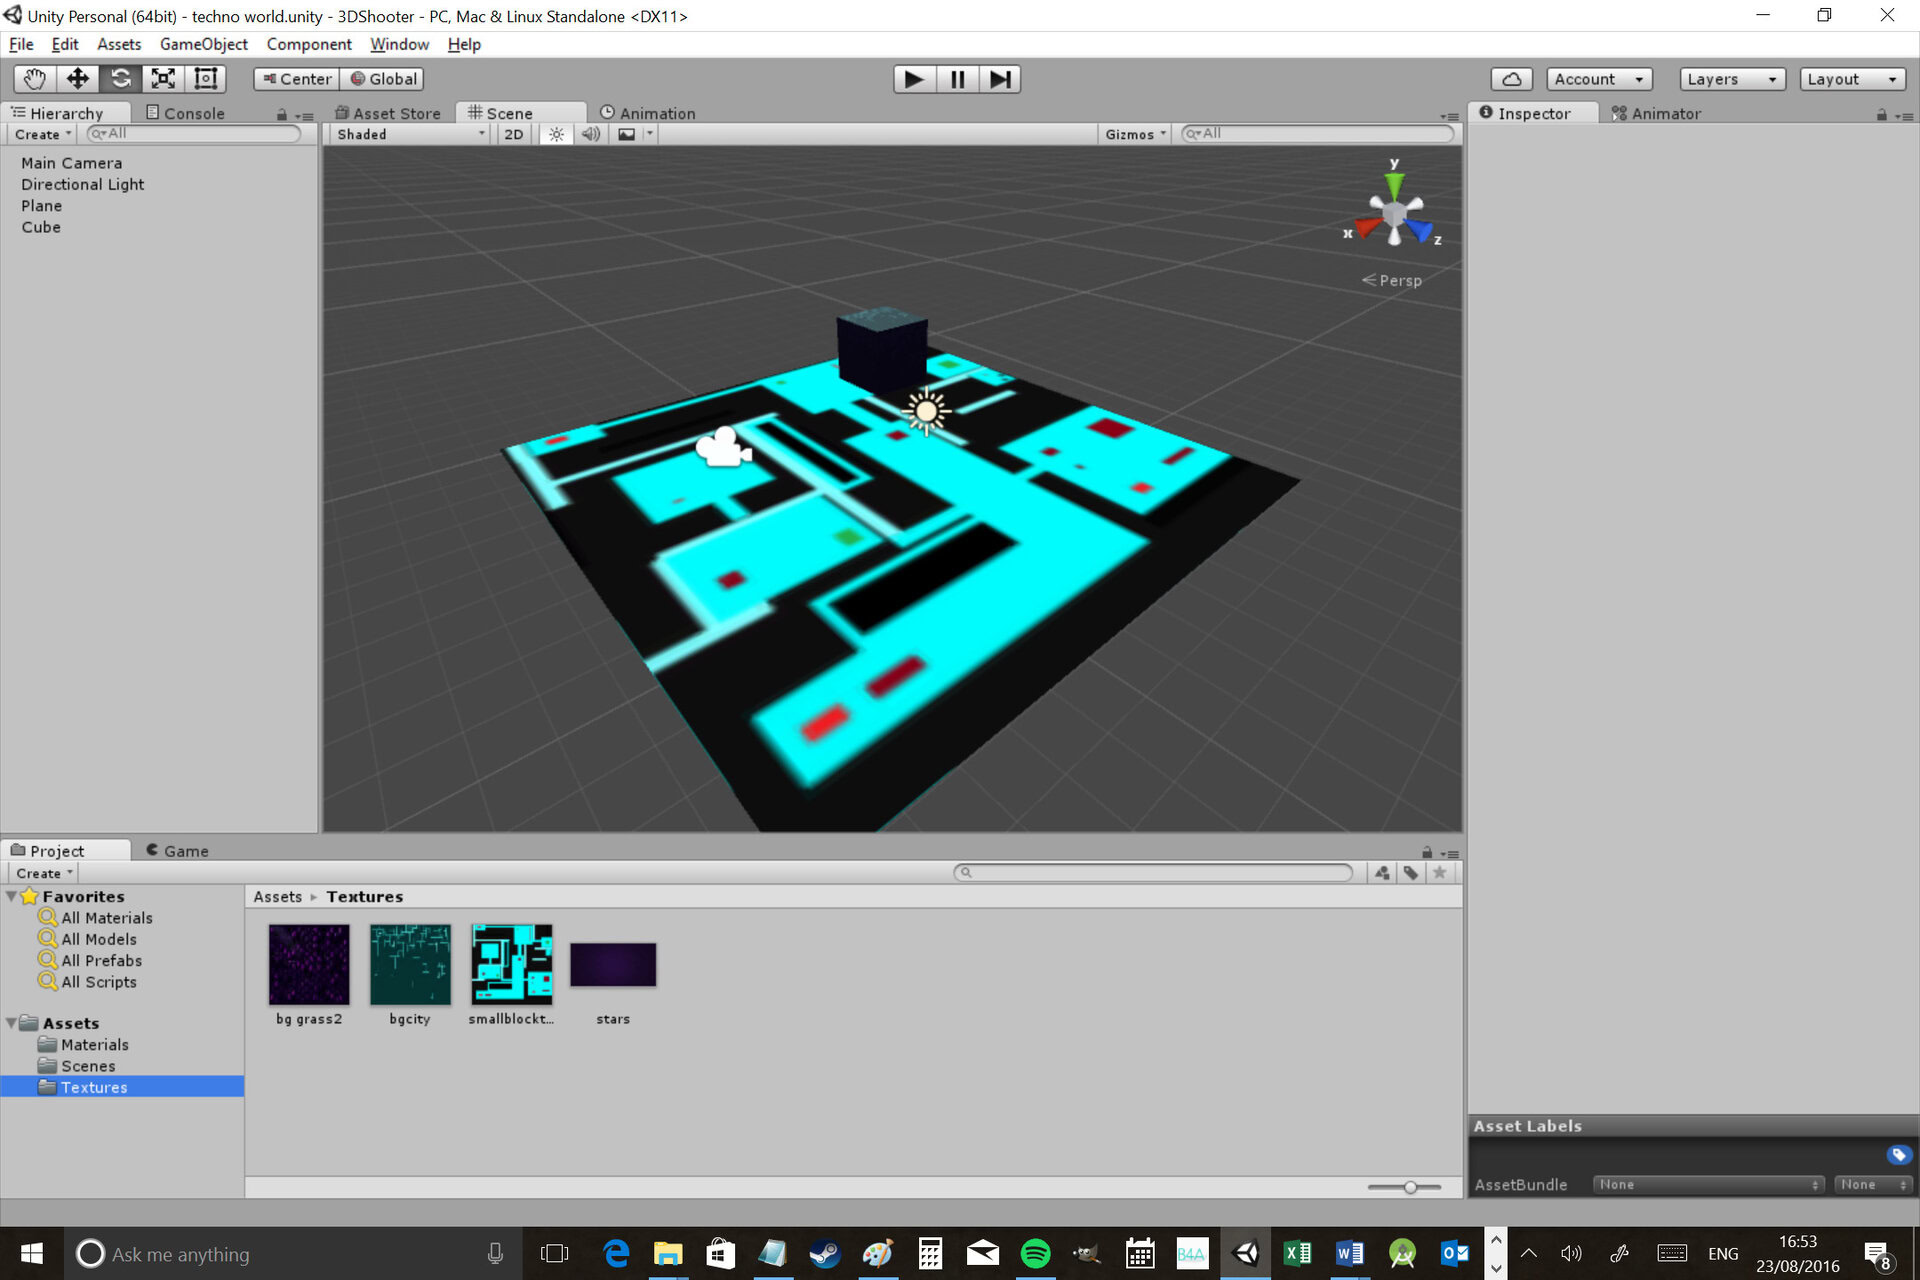
I’m using two textures I originally made for a 2D platformer, so they don’t look ideal… Apart from anything else, the floor texture is massively stretched across the ground and looks super low res.
We can smarten this up a little though if we head over to Assets > Materials which will have been automatically populated by the materials we’ve applied to our game objects. If you select one of your textures here, then you can make various changes to it. In this case, I want to change the ‘metallic’ slider and I’m also going to change the tiling to 3 on both axes (meaning that it will repeat three times across the surface).
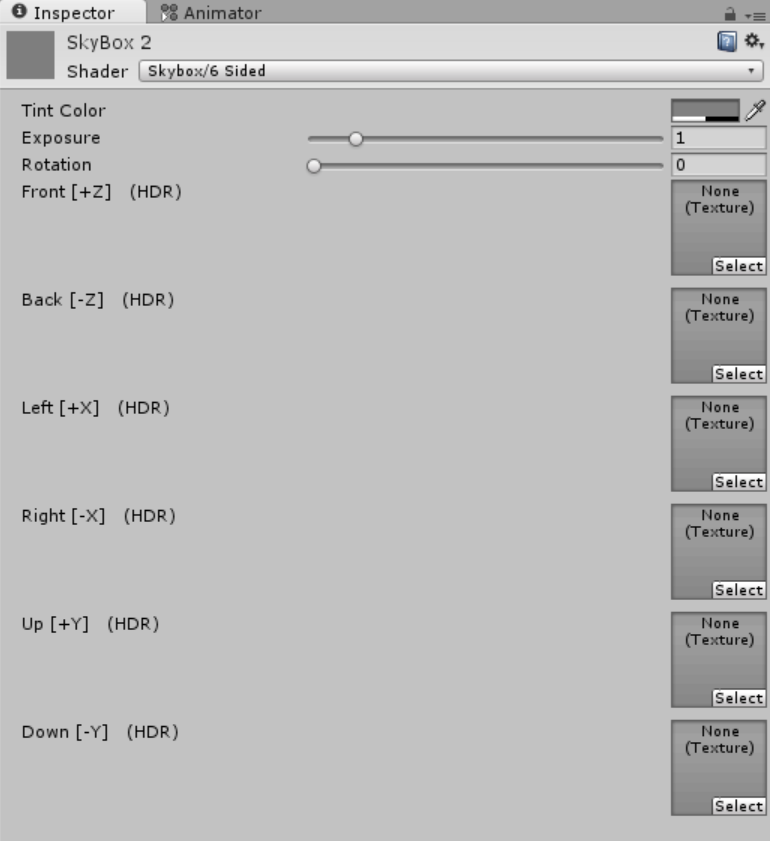
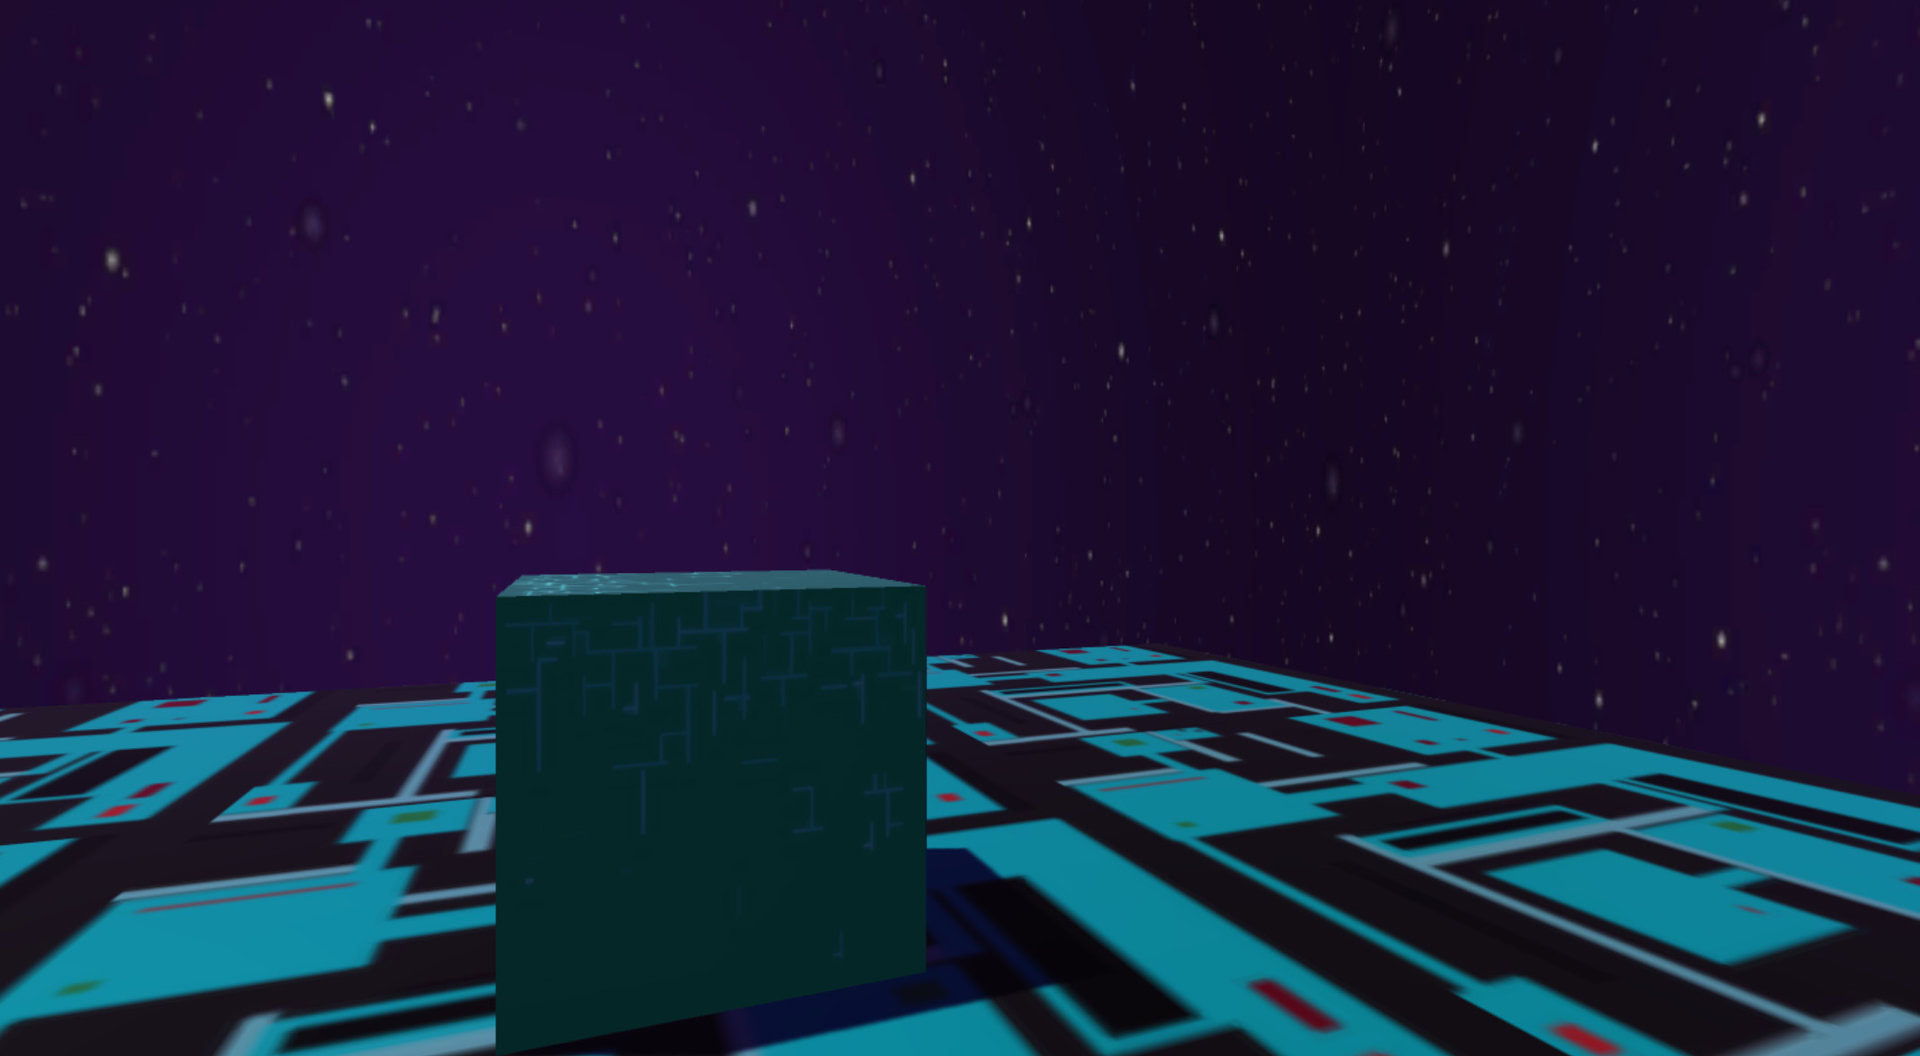
Now we want to add a ‘skybox’. This is basically going to fill our sky and to do that, we need to make a new material by right clicking in our Materials folder and selecting Create > Material. If you check the options on the right, you’ll find a drop down menu by ‘Shader’. Select Skybox > 6 Sided and then drag your chosen sprite into each of the texture boxes to fill up the inside of your giant hexagon. If you don’t have a texture you want to use, you can also select a ‘procedural’ skybox, which will let you make one by just selecting some settings.
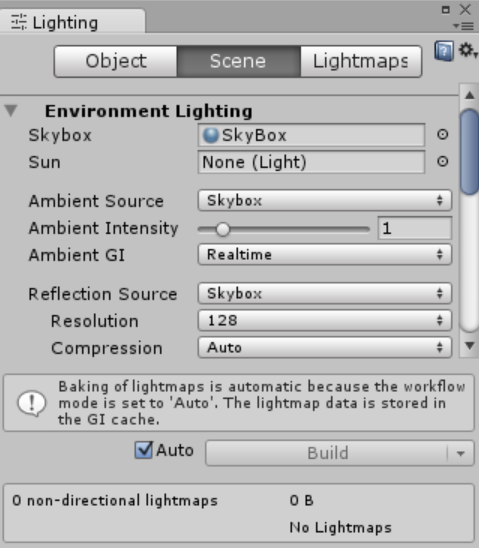
Now use the top menu and select Window > Lighting > Skybox. You’ll see the option to add a skybox here and to do that, you just drag and drop your new material into there. Now when you press play you should witness the same thing, except your world will be textured to your whim.
Adding your player
Most games aren’t much fun unless you can actually move around or interact with the world in some way and so we’re going to need to drop an actual player into our environment.
Once more, Unity makes this easy for us. All we need to do is add another readymade script, this time called ‘FPSController’. First though, we need to import it. To do that, right click on your Assets folder and select Import Package > Characters. You’ll be greeted by a brief loading window and then shown a list of assets that fall under that heading. Click ‘Import’ and they’ll all be added to your project after another brief loading period.
Now you have a new folder in your Assets, just like the two you made. This one is called ‘Standard Assets’ and it includes a few other things such as ‘Characters’ and ‘PhysicsMaterials’.

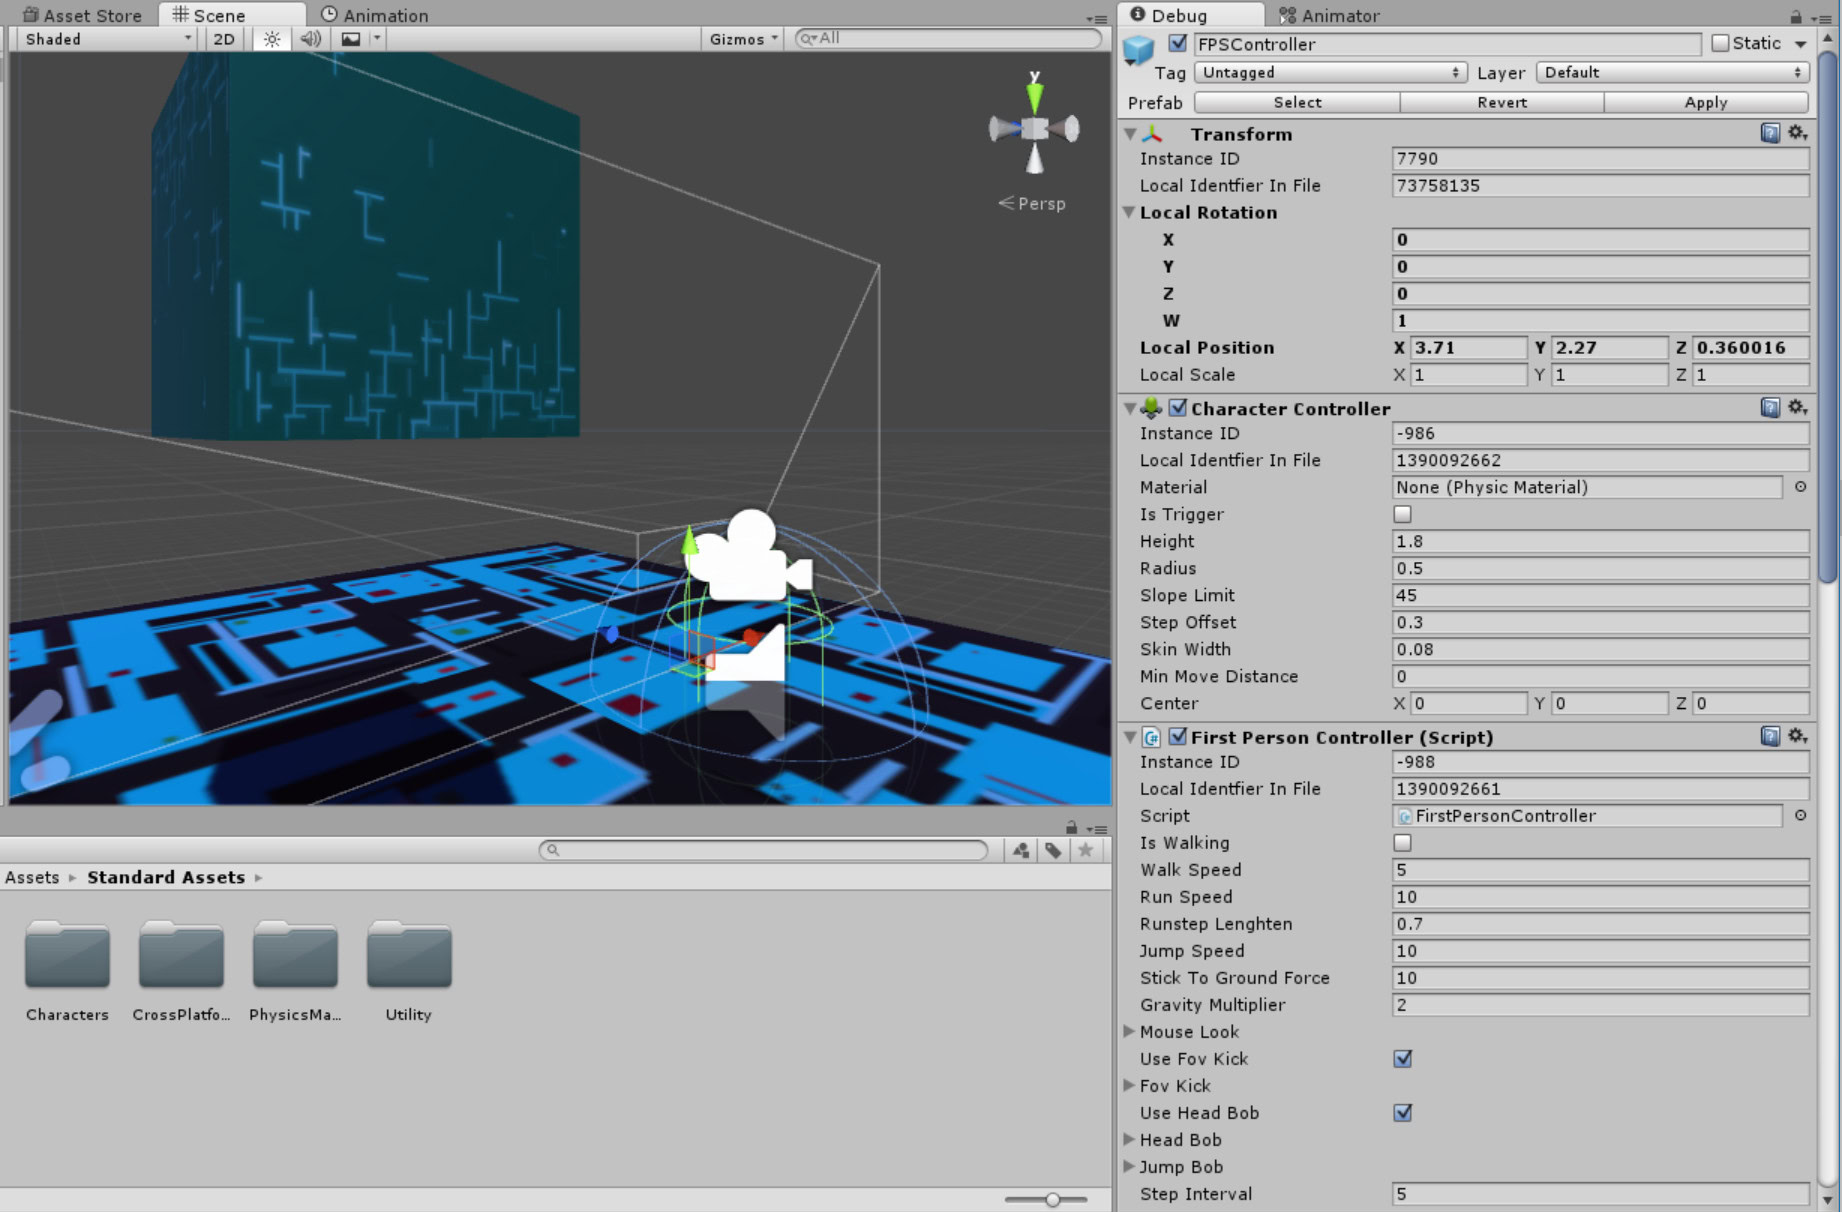
Don’t worry about that. Instead, just open up Standard Assets > Characters > FirstPersonCharacter > Prefabs. In here, you’ll find that ‘FPSController’ and all you need to do is add this anywhere to your scene. Remember to delete the MainCamera object from your hierarchy though, as otherwise you’ll have two conflicting cameras. Just like RigidBody, the FPSController is a pre-made script that saves us a ton of time coding inputs, physics and behaviors. And it even comes with ready-made assets for things like sound effects. If you dig around, you can find a bunch of other scripts like this too for different play styles!
Click play and you’ll be able to move your player around with WASD and look about with the mouse.
And that’s it! It’s really that easy to make your game behave like a game. Click play and you’ll be able to move your player around with WASD and look about with the mouse. Sound effects are ready to go and you can jump by pressing space. Try pushing the 3D box around and jumping on them. Fun!
If you want to, you can add some more planes with different textures and you can dot different objects around in order to create some basic platforming challenges.
Pew pew
But it’s not a 3D shooter unless there’s a gun, right?
To add our gun, we could always just use a sprite but that would look pretty shoddy. Instead then, we want to use a 3D model. You can find a bunch of free 3D models to use here (just make sure you check the license before you use the models in a game you intend to sell). Search for ‘gun’ and you should find a few things you can use.
Now make a new folder in your Assets directory and call it ‘Objects’. Drop your gun’s 3D file in here and then drag and drop it into your Scene view roughly on top of the character controller. Make it the right size and position it so that it is pointing in the same direction as your player, just in front of them. Now head to the Hierarchy window and drag the gun object on top of the character controller. You should now see the gun appear underneath the player controller in the hierarchy. More technically, this means the gun has become a ‘child’ of the player controller, meaning that its position will remain relative to us as we move around the level.
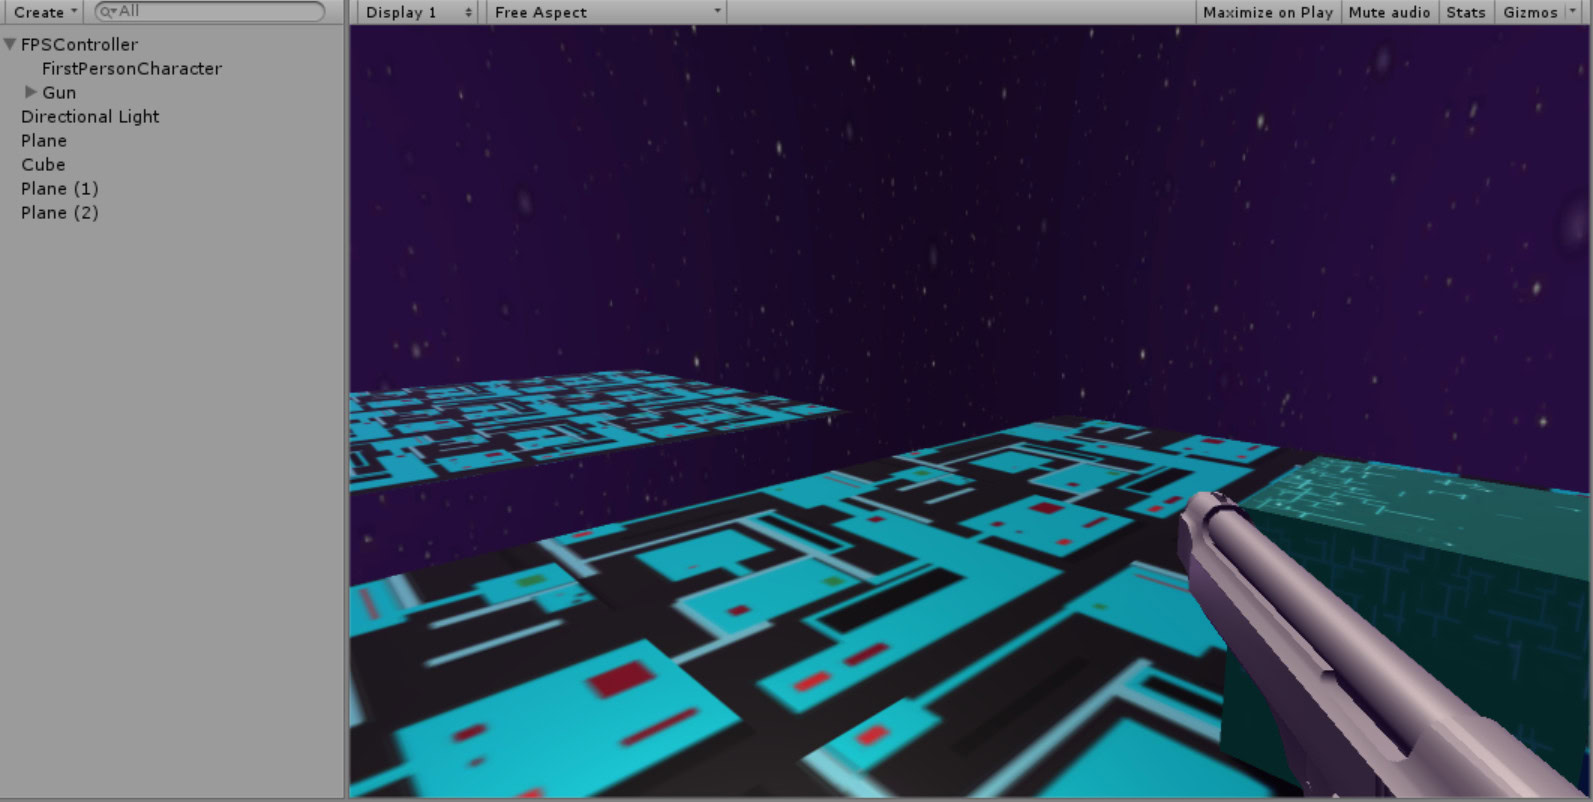
Press play and you should now have a gun poking out underneath you, just like any other FPS. Except not quite because right now the gun doesn’t actually shoot. Let’s rectify that, shall we?
There are several ways you can make your gun fire but the method I’m going to be using is to instantiate an object at the point of the gun that will fly forward at the angle we’re facing. In other words, I’m going to make the gun generate bullets. First then, we need to create our bullet. To do this, just create a new sphere 3D object as you did for the cubes earlier. Give it a sphere collider and RigidBody but untick the ‘Use Gravity’ option in the inspector (so it doesn’t drop to the ground when it flies out the gun). We need it to be solid because later on we’ll want to be able to shoot stuff and see an effect…
Now, create a new subfolder in Assets. This time, call it ‘Scripts’. Right click anywhere in that new folder and select Create > C# Script. Name this script ‘Forward’: it’s going to be what makes our bullet move!
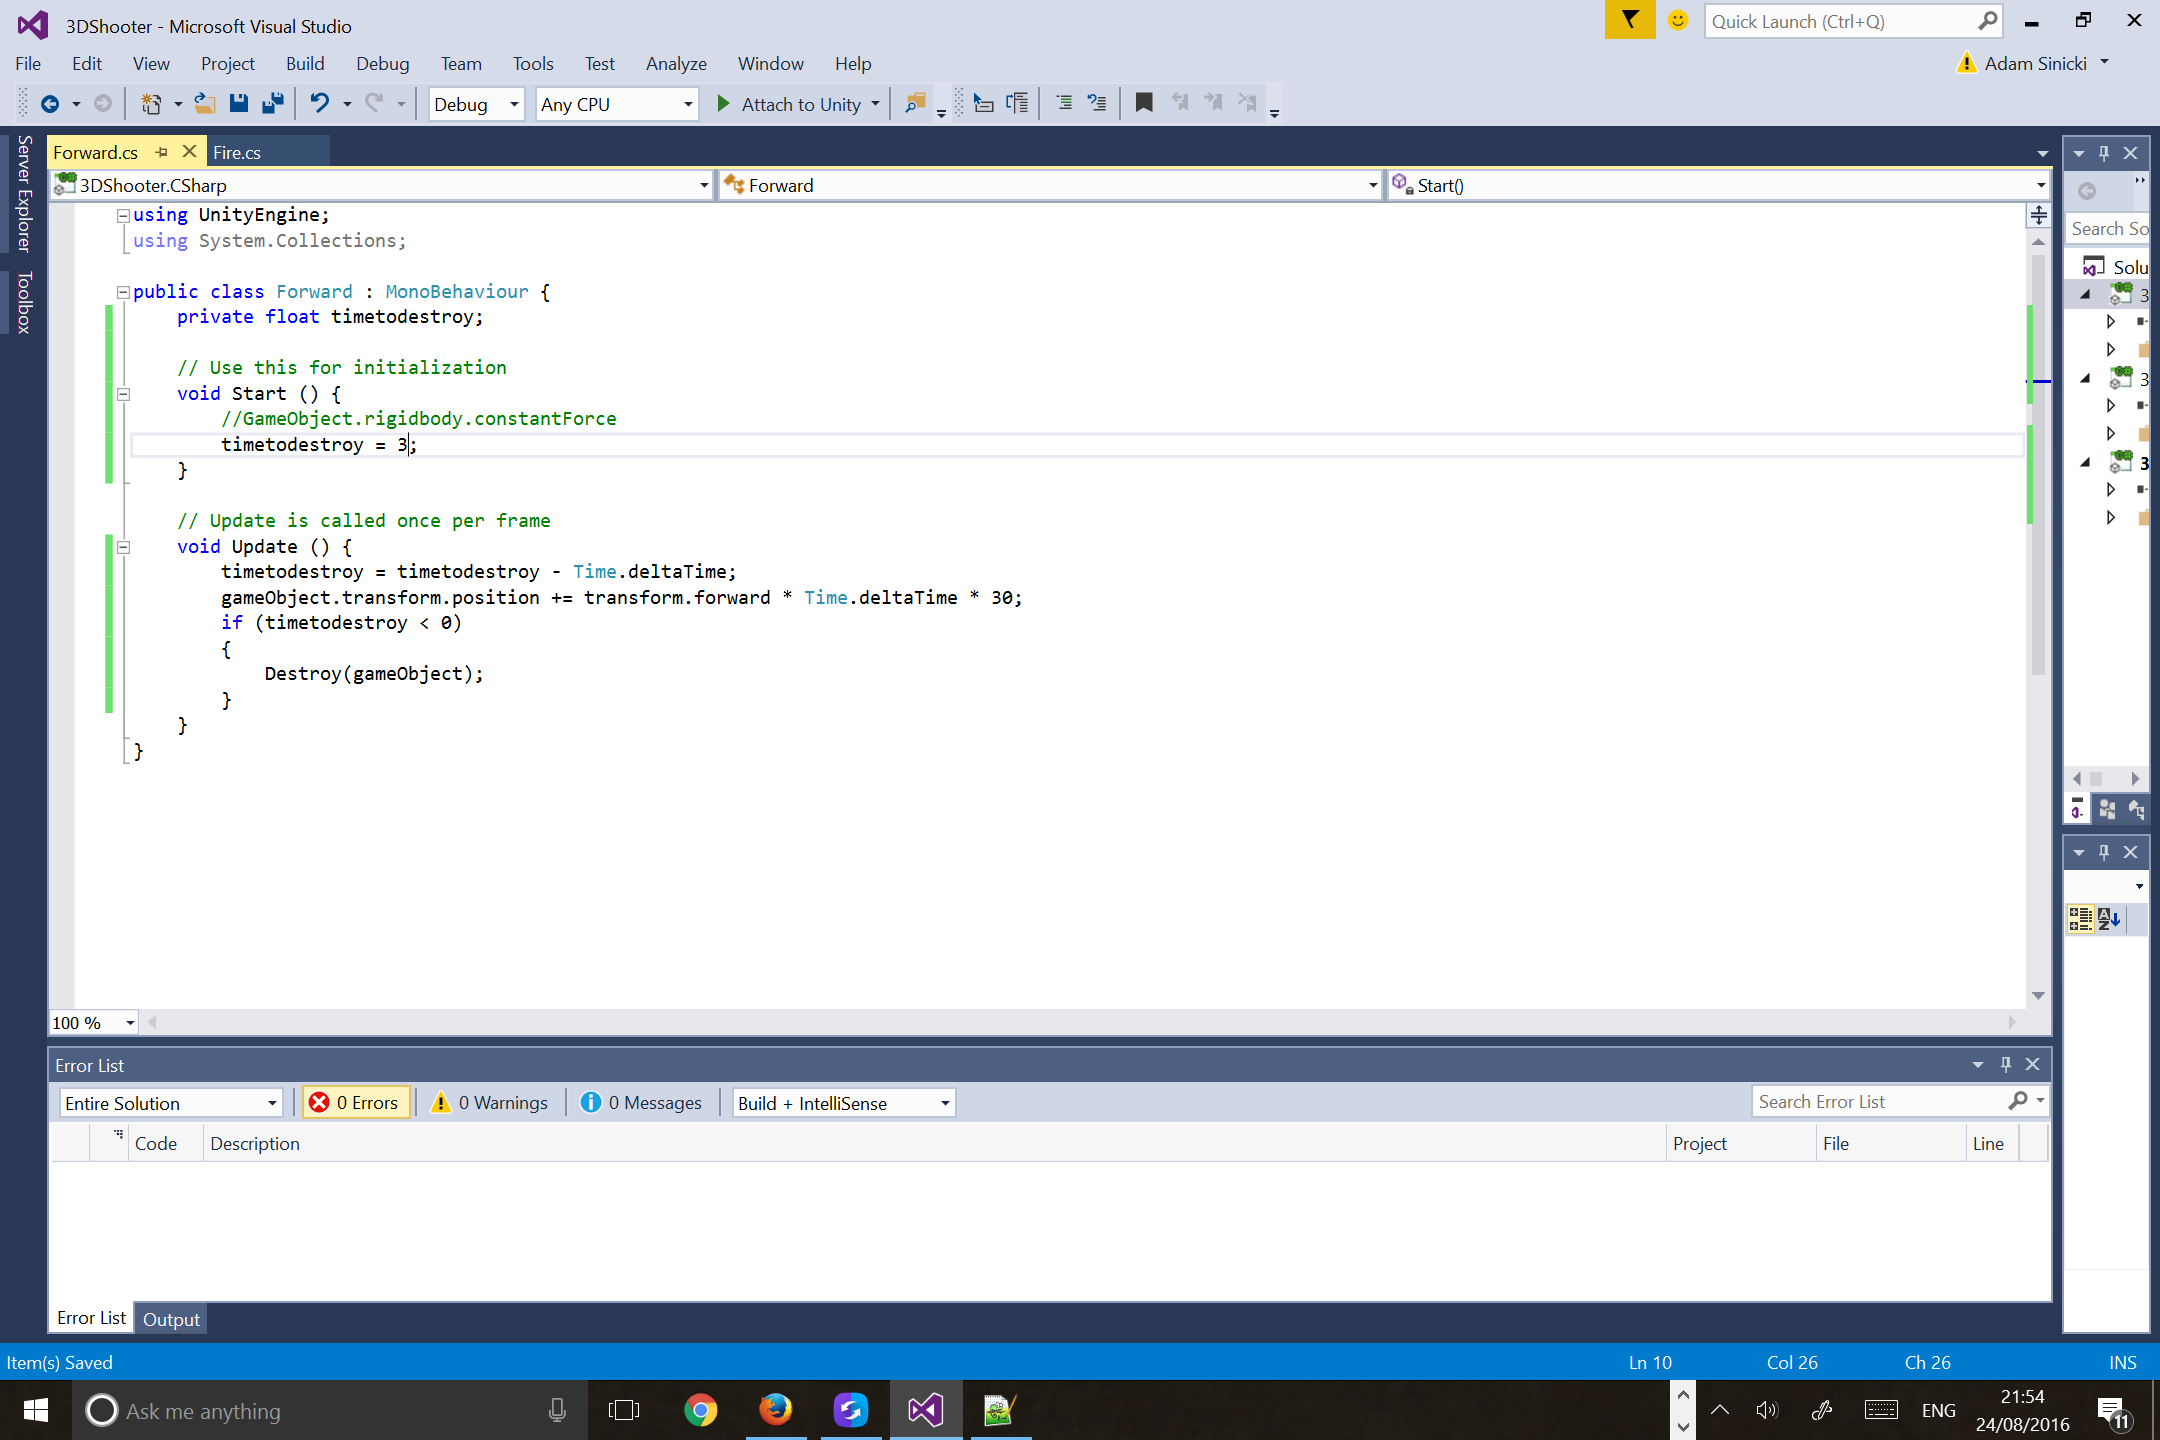
Double click on that script and you’ll open Visual Studio, where you can write the code. Without getting into too much detail, this is the code we’re going to add:
 public class Forward : MonoBehaviour {
    private float timetodestroy;

    // Use this for initialization
    void Start () {
        //GameObject.rigidbody.constantForce
        timetodestroy = 3;
    }

    // Update is called once per frame
    void Update () {
        timetodestroy = timetodestroy - Time.deltaTime;
        gameObject.transform.position += transform.forward * Time.deltaTime * 30;
        if (timetodestroy < 0)
        {
            Destroy(gameObject);
        }
    }
}
What this does, is to make the object this script is attached to fly forward. (Transform means position, so we’re basically telling the transform to move forward relative to its angle at the speed of ‘30’.) The timetodestroy is a float variable (a number with a floating decimal point) which decreases on each update and we destroy the gameObject once that reaches zero. gameObject with a small ‘g’ always refers to the object that the script is attached to. We want to destroy our bullet like this so that we don’t have thousands of bullets flying off into the distance for infinity, which could cause slow-down.
You can now head back to Unity and drag your script onto your 3D Sphere object in the inspector (with the sphere selected) where it says ‘Add Component’. You can also do this by click Add Component > Scripts > Forward.
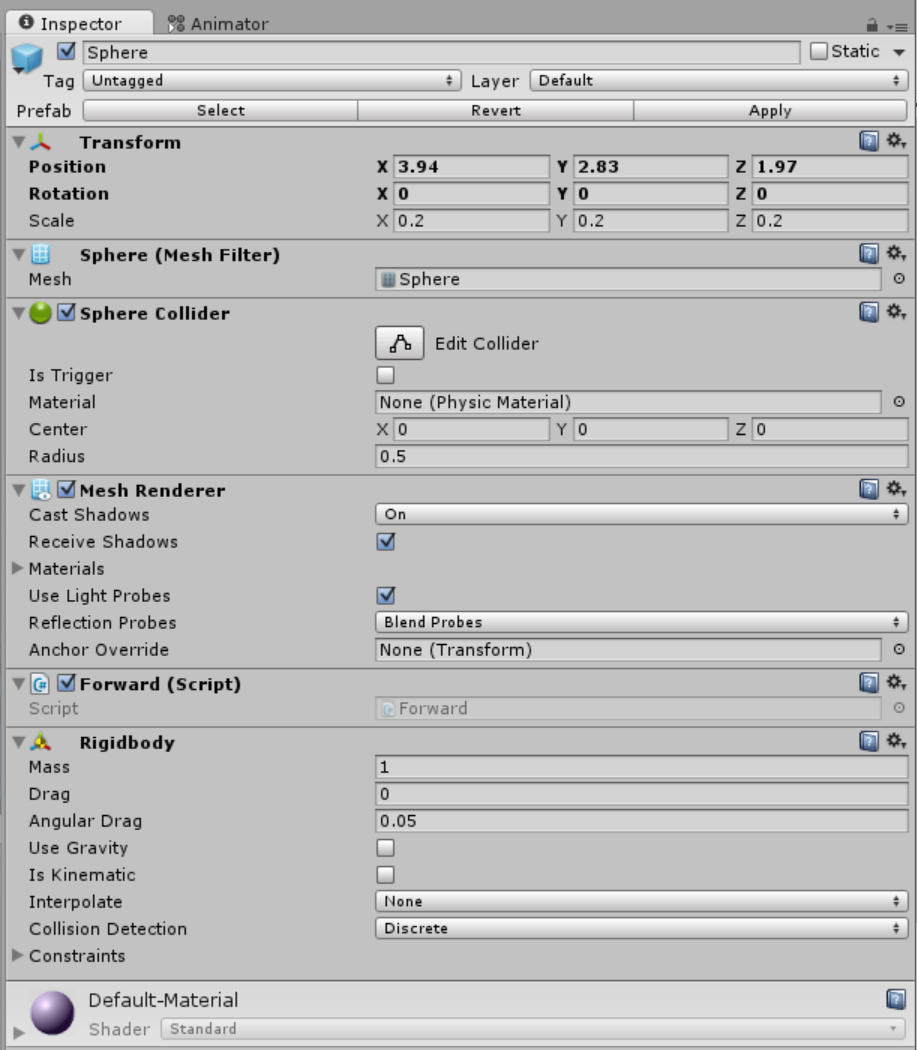
Now we’re adding another new subfolder to Assets called ‘Prefabs’. Prefabs are objects with various different properties and scripts etc. that you might want to use lots of times. It allows us to refer to them in the code (as you’ll see in a moment) and it also means we can add lots of the same object without rewriting the same code over and over again!
Now delete the sphere from the scene (either in the hierarchy or the scene view) so that it only exists in the Prefabs folder. Then head back to your Scripts folder and make another new C# script just like last time. Call this one ‘Fire’ and then add this code:
public class Fire : MonoBehaviour {
    public GameObject blast;

    // Use this for initialization
    void Start () {

    }

    // Update is called once per frame
    void Update () {
        if (Input.GetKeyDown(KeyCode.Mouse0))
        {
            Instantiate(blast, gameObject.transform.position, gameObject.transform.rotation);
        }
    }
}
All this is saying is that a new GameObject will be instantiated (created) at the precise position of the gameObject when we press ‘Alt’. GameObject with the capital G refers to any other game object we have specified in the code; this time it will be an object called ‘Blast’. Blast will be our bullet and we’re going to add this code to the gun model. So when the player hits the left mouse button, the bullet will appear right in the center of the gun model gun and then start travelling forward automatically from there. Because the Blast GameObject is ‘Public’, this means we can see it and change it in the inspector window.
So to get everything working, we need to add the Fire script to our gun model by using ‘Add Component’ again. Then we need to define our Public GameObject, which we will do by dragging the sphere prefab onto the box that says ‘Blast’.

If you found this section a little tricky, then I recommend heading over to the 2D Platformer post and reading through that, as I go into a little more detail regarding scripts and variables there. Otherwise, if everything has gone to plan, you should now be able to shoot little bullets out of your gun and watch them fly off into the distance. Try making some larger boxes and shooting them over to test it!
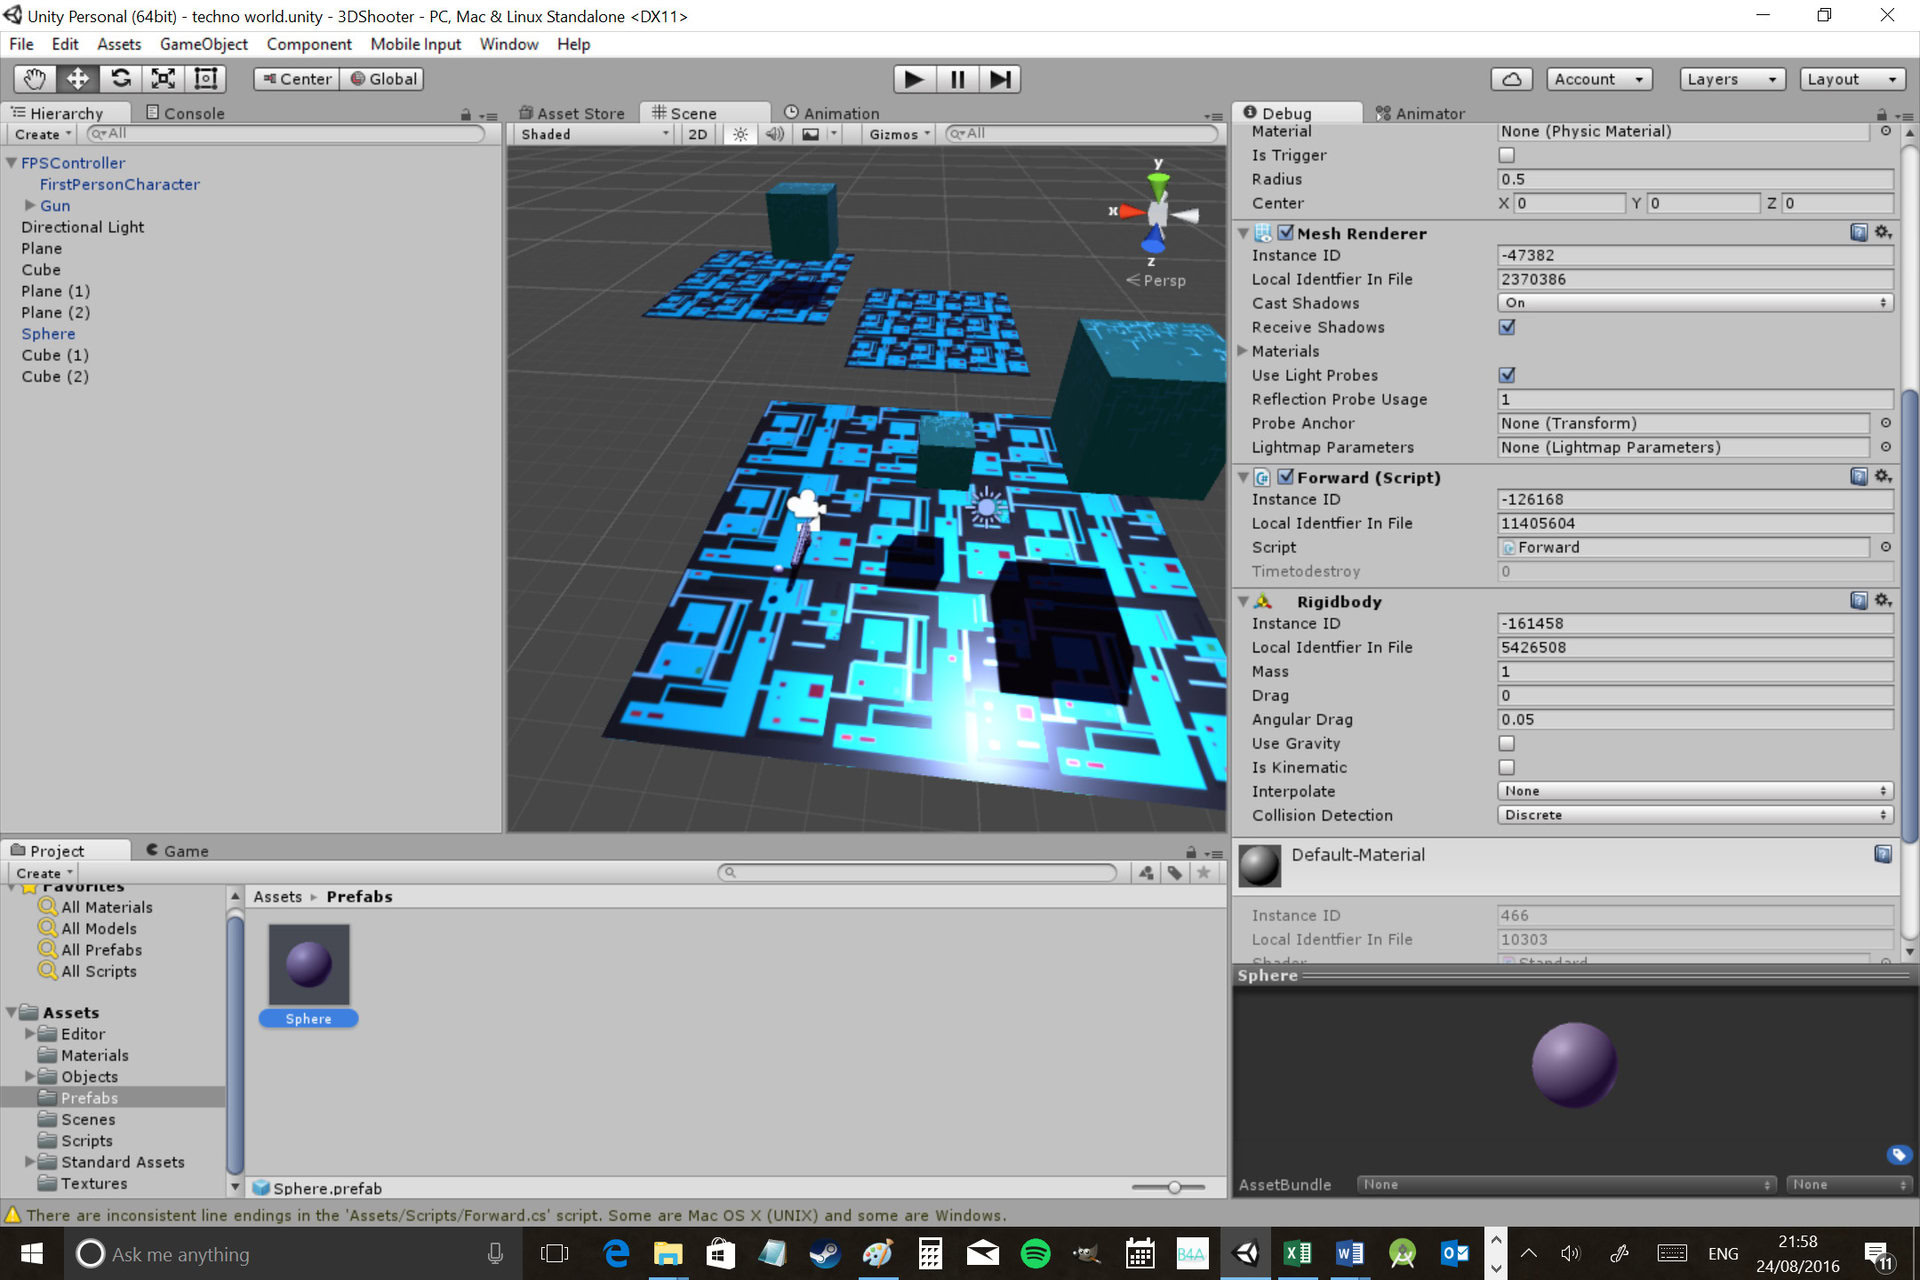
There are other ways to handle shooting and one popular choice would be to use a raycast. Seeing as we don’t have any enemies yet though, I thought this would be a more visual way to handle firing – and it creates a lot of gameplay options.
Next time…
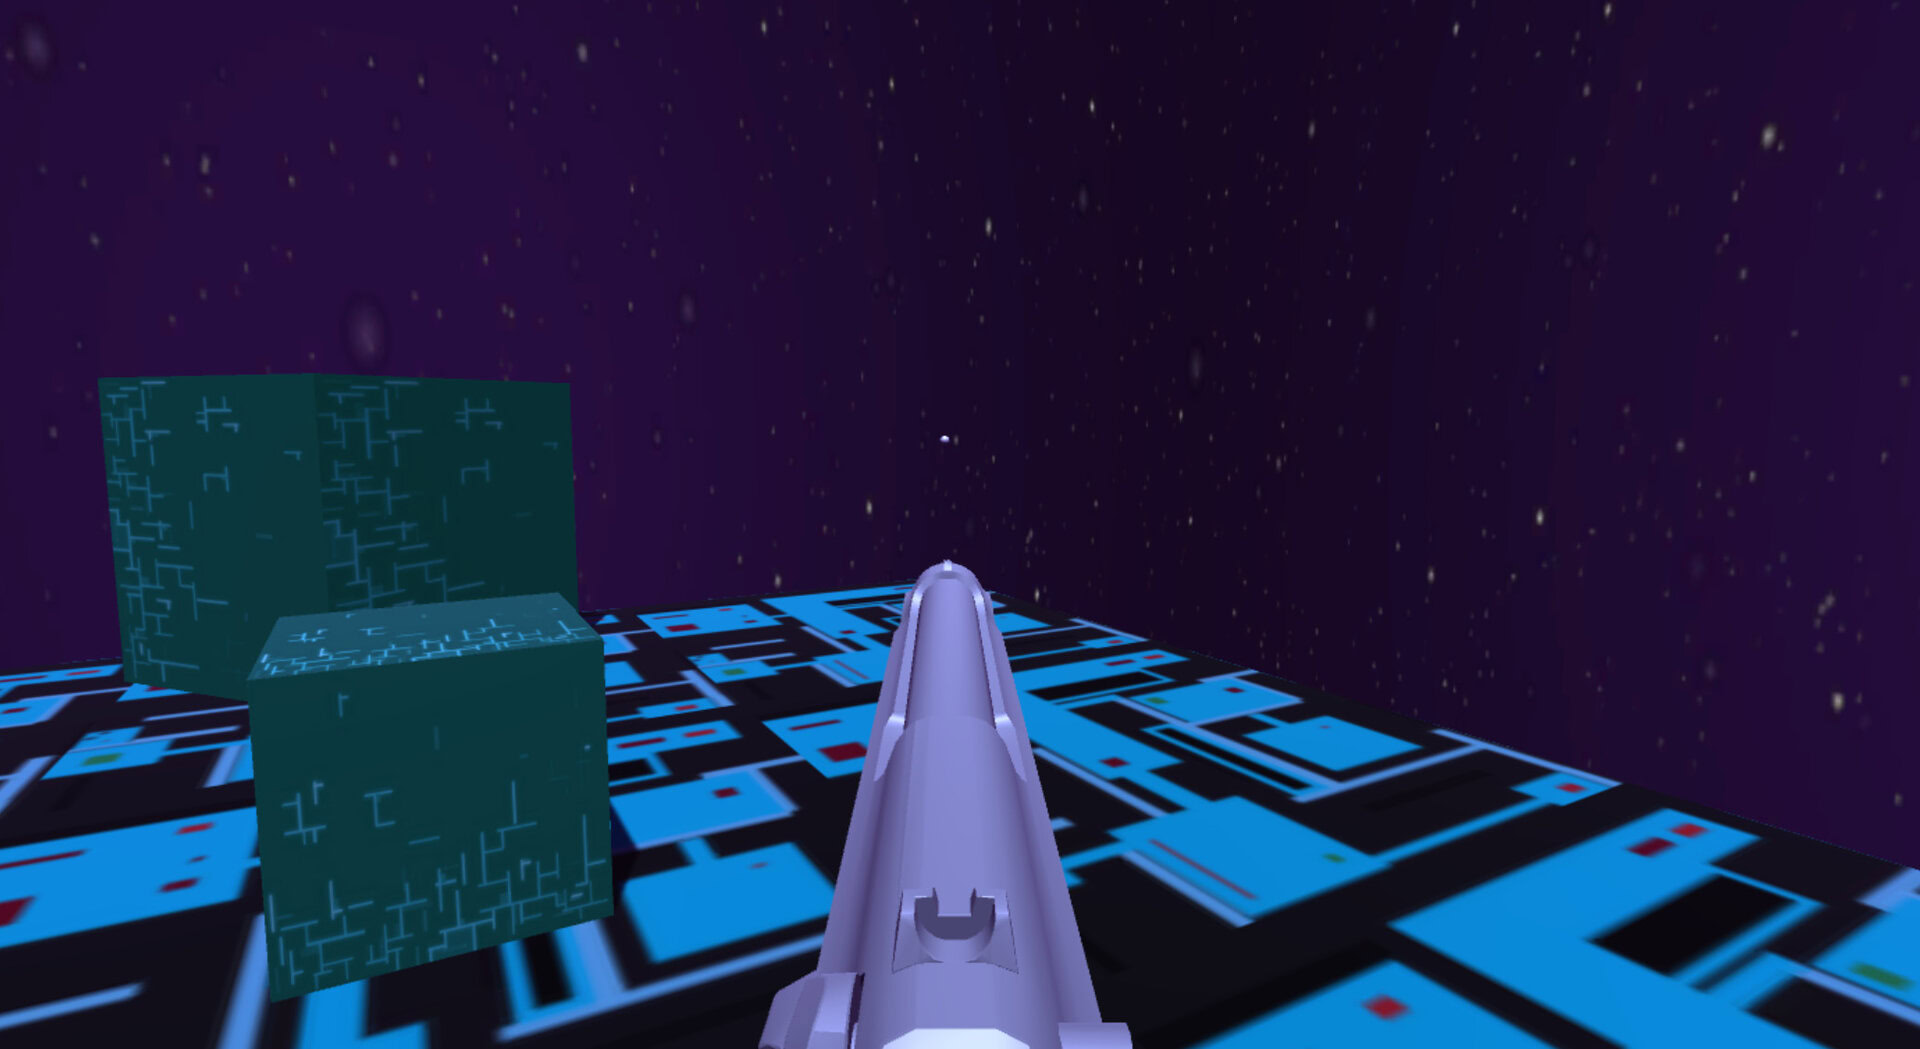
Now we have a man who can walk around and shoot things in a 3D, cyberpunk-esque environment. Next time, we’ll give the gun a sound effect, the ability to aim up and down and some animation. Then we’ll introduce some bad guys so that we actually have something to shoot. We’ll also add another level and look at how to make different types of terrain.
After that, we’ll be looking at how you can optimize your game for mobile devices by using the right kinds of textures and adding touch controls. Finally, we’ll wrap it all up in an APK so that you can try it out yourself! It’s a lot to handle but I’m confident we can do it! For now, why not play around with more 3D objects and see if you can make something of a level out of it?
The great thing about Unity is that it makes the coding easy, so you can just focus on being creative.
Or why not get inventive? If you make a prefab of your cube, you could make a game where the character can materialize cubes for platforming. The great thing about Unity is that it makes the coding easy, so you can just focus on being creative.