Affiliate links on Android Authority may earn us a commission. Learn more.
How to create, edit, or delete a rule in Outlook
Published onFebruary 17, 2023
Automation of actions is becoming more and more common these days. However, before all of that came the ability to program your email inbox to perform automatic actions based on incoming messages. In Outlook, these are called rules. Let’s review how to create a rule in Outlook.
Read more: How to empty the trash in Gmail
QUICK ANSWER
To create a rule in Outlook, go to Settings > View all Outlook settings > Rules > Add new rule. Specify your rule's name, condition, and action, then click Save.
JUMP TO KEY SECTIONS
What are rules in Outlook?
Rules allow you to automate actions, such as automatic response emails and automatic folder placement, when things take place on your account. Say, for example, that you want all emails from your friend Geoffrey to go straight to the “Geoffrey’s Emails” folder. To make this happen, you would need to create a rule that does that.
Now, rule creation works differently on the two primary Outlook platforms: the website and the desktop app. Let’s review how to create, edit, and delete rules on all Outlook versions.
How to create rules in Outlook (Website)
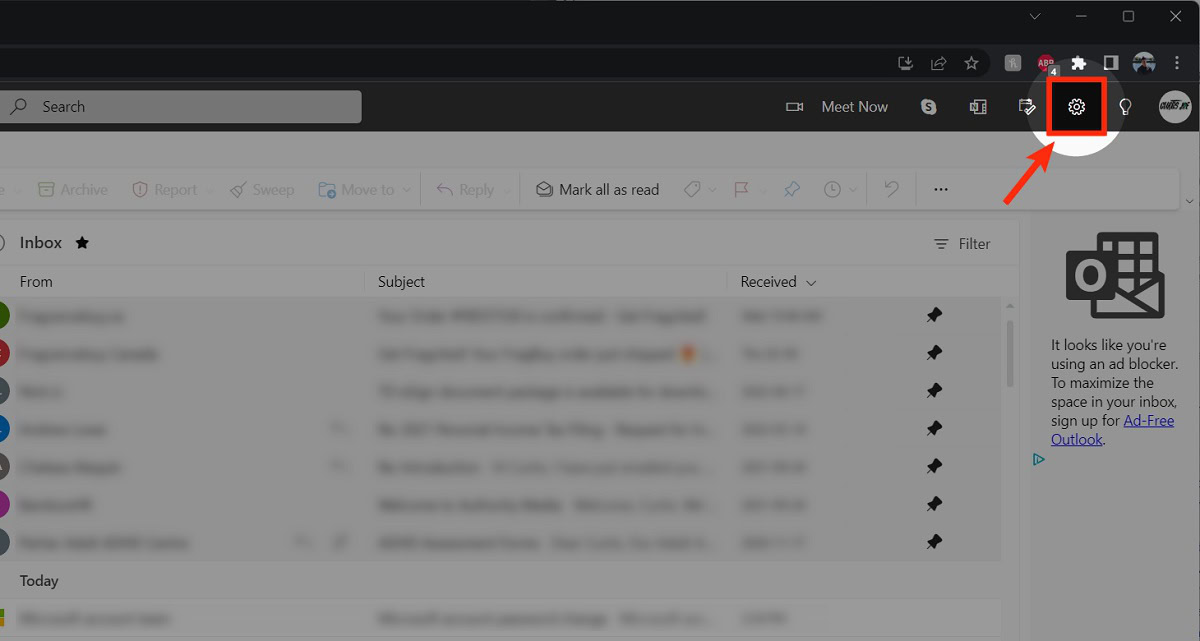
Go to outlook.live.com in a browser and log into your account. After that, click the gear-shaped Settings icon in the top right.
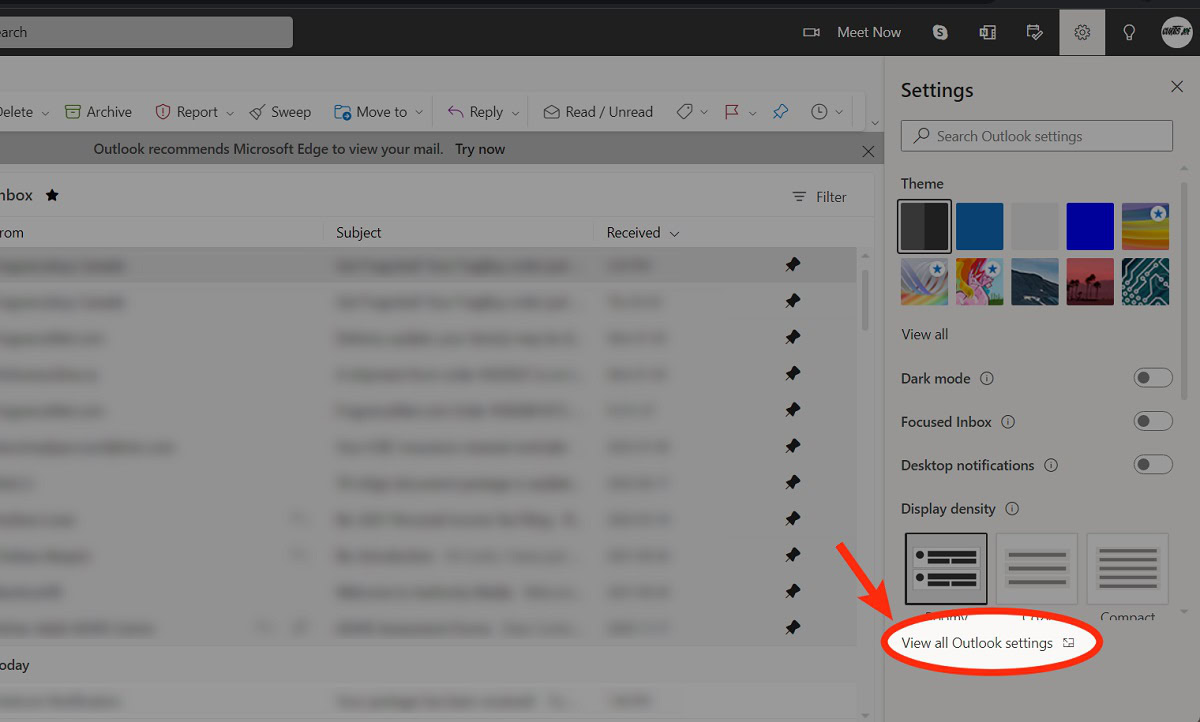
From the side panel, click View all Outlook settings.
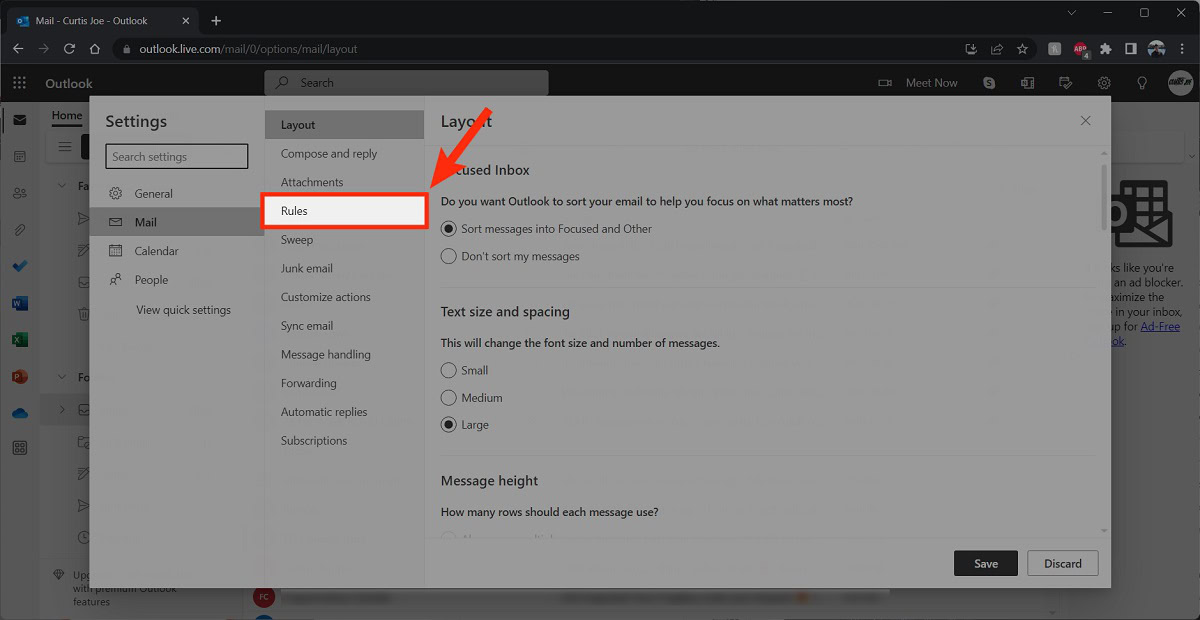
In the Settings menu, go to the Rules tab within Mail.
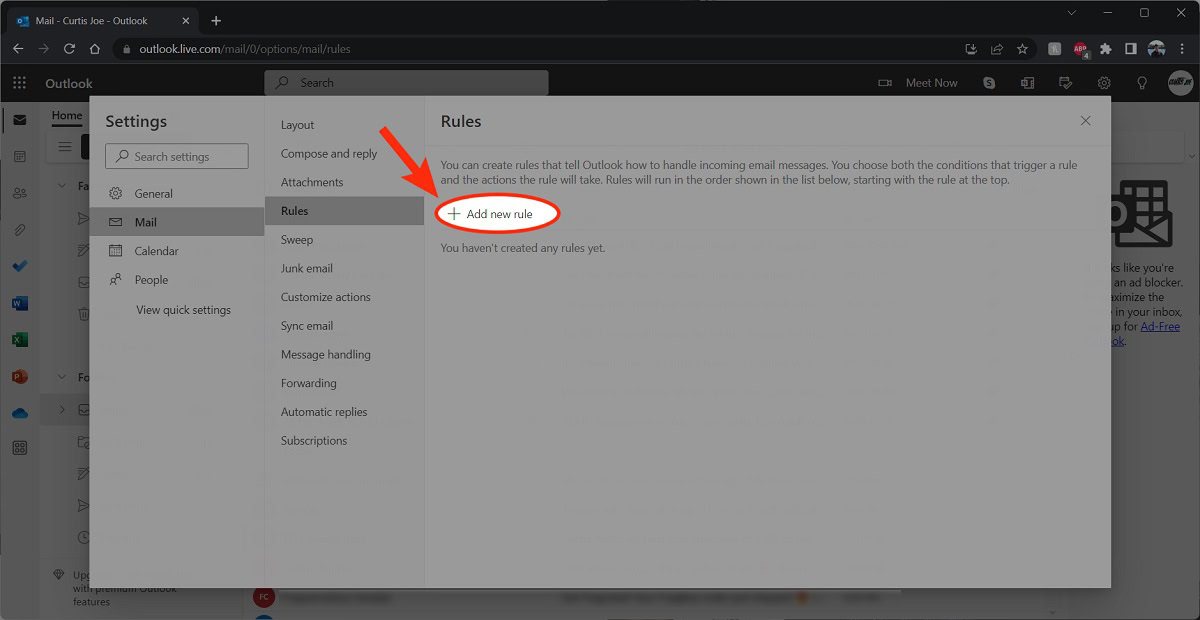
Click + Add new rule.
Give your rule a name in the first field.
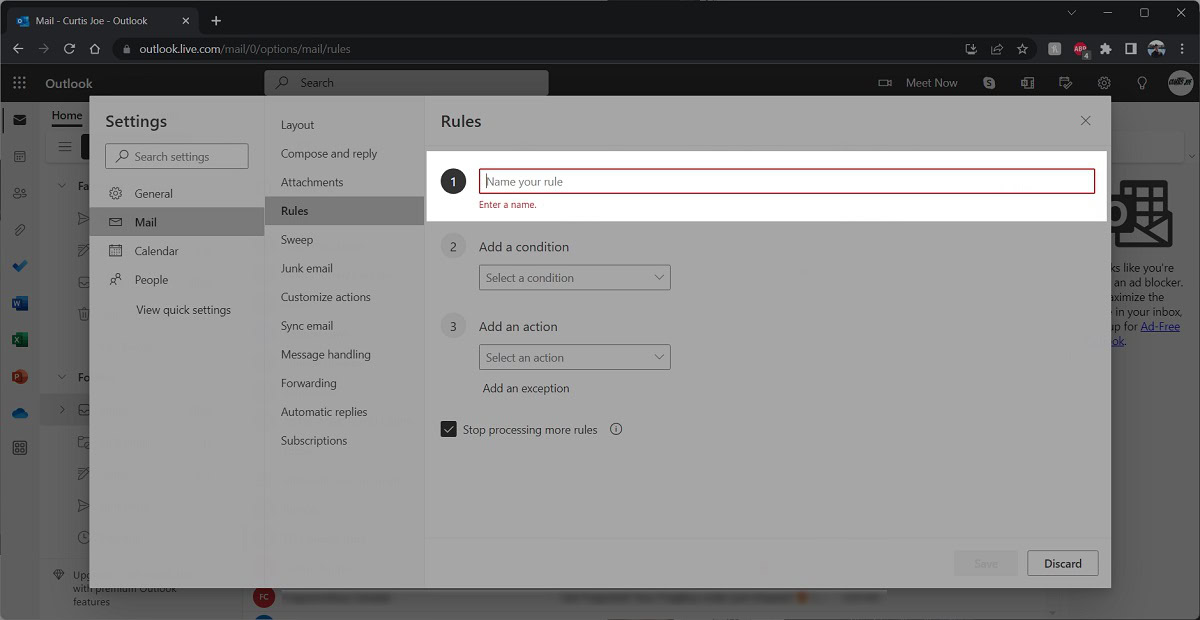
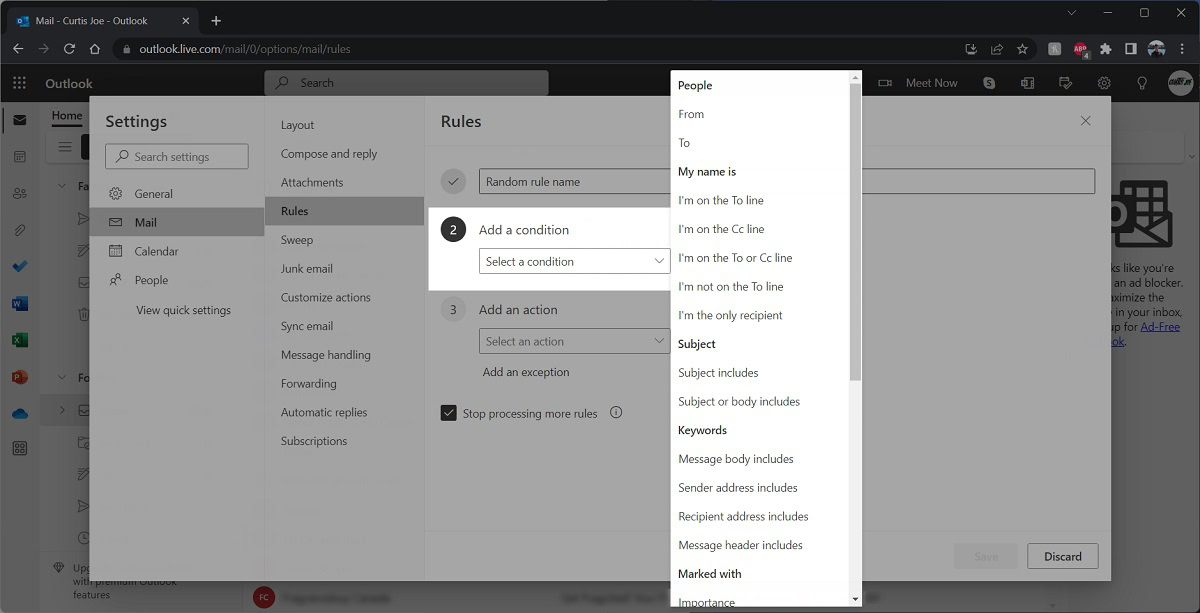
Specify the conditions for your rule to apply in the second field. For example, if you want all messages from a particular address to go directly to a specific folder, you would select People > From, then that person’s email.
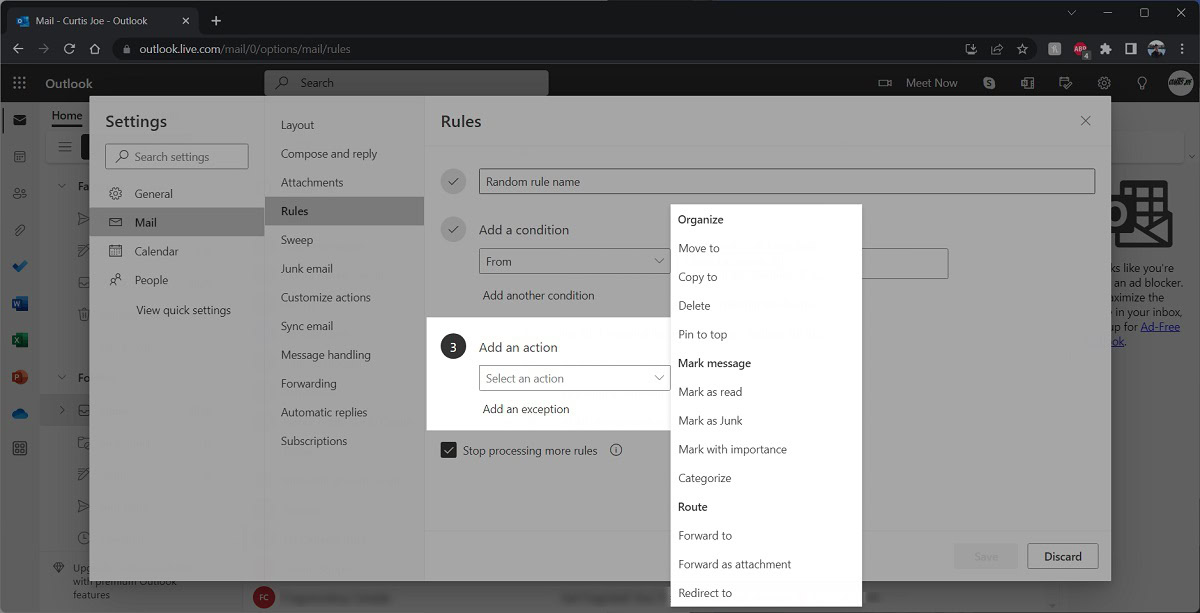
In the third field, specify the action for your rule. This is what your rule will actually do when it comes into contact with an email with the conditions specified in the previous field.
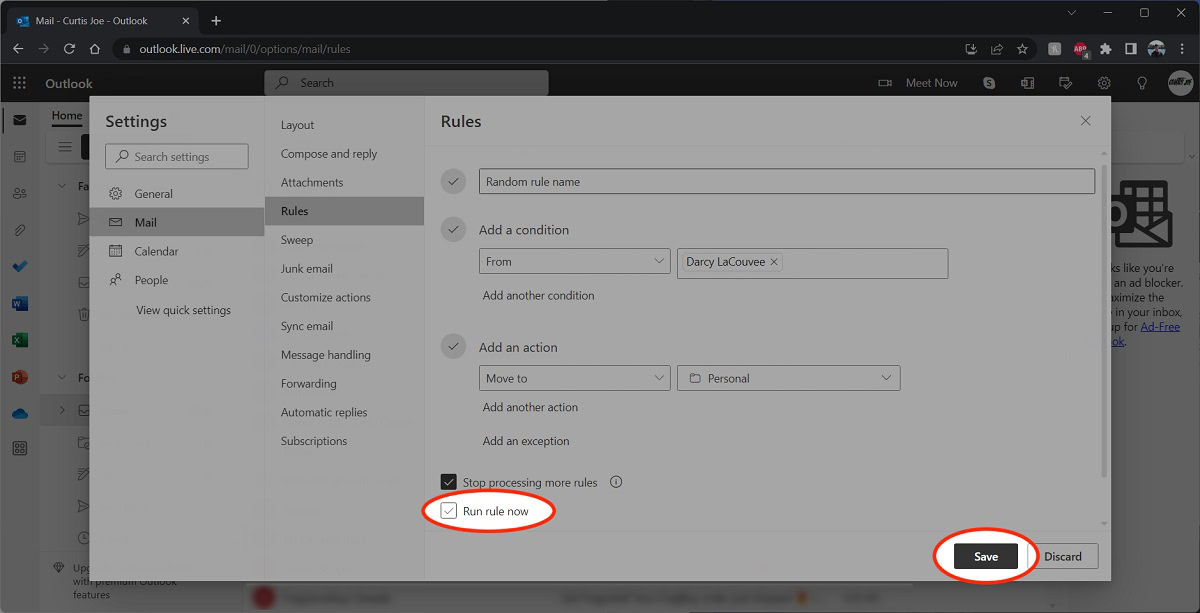
When finished, select Run rule now if you wish to activate your rule immediately, then Save.
How to create rules in Outlook (Desktop app)
The desktop app further complicated the rule creation process as there are two different methods. You can create a rule from your inbox or you can create it from templates.
From your inbox
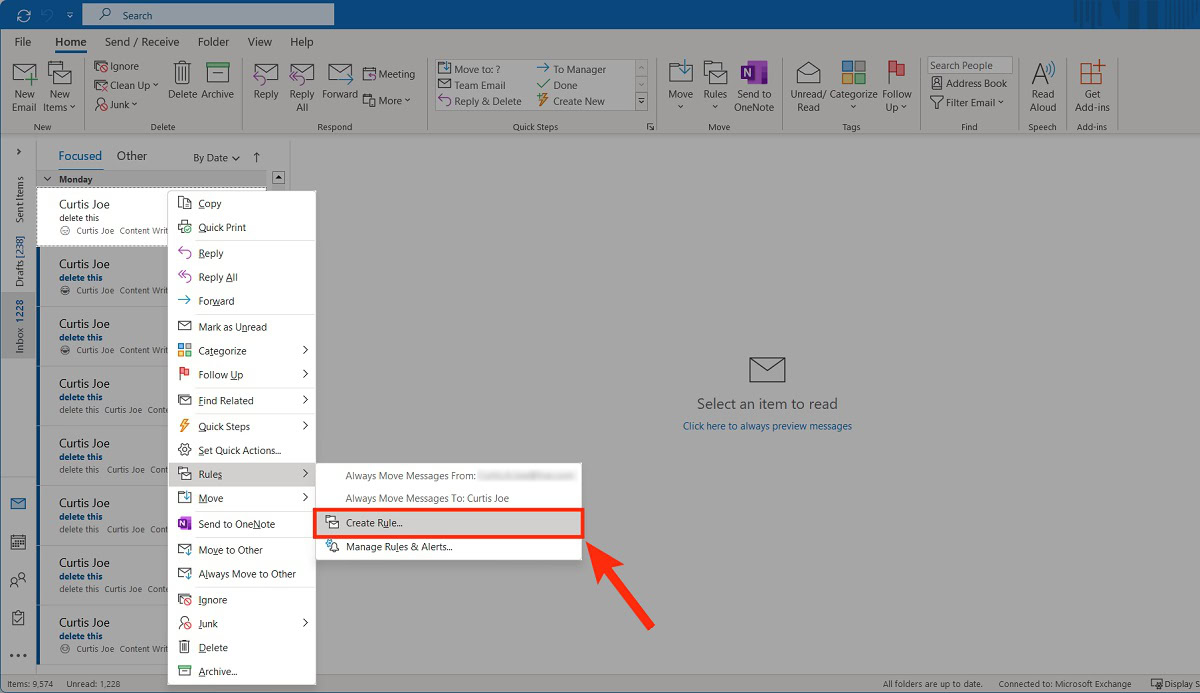
Right-click an email in your inbox. Hover your cursor over Rules, then, from the extended menu, select Create Rule….
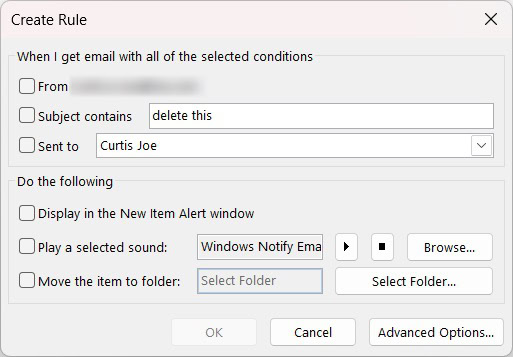
Customize your rule, then click OK.
From templates
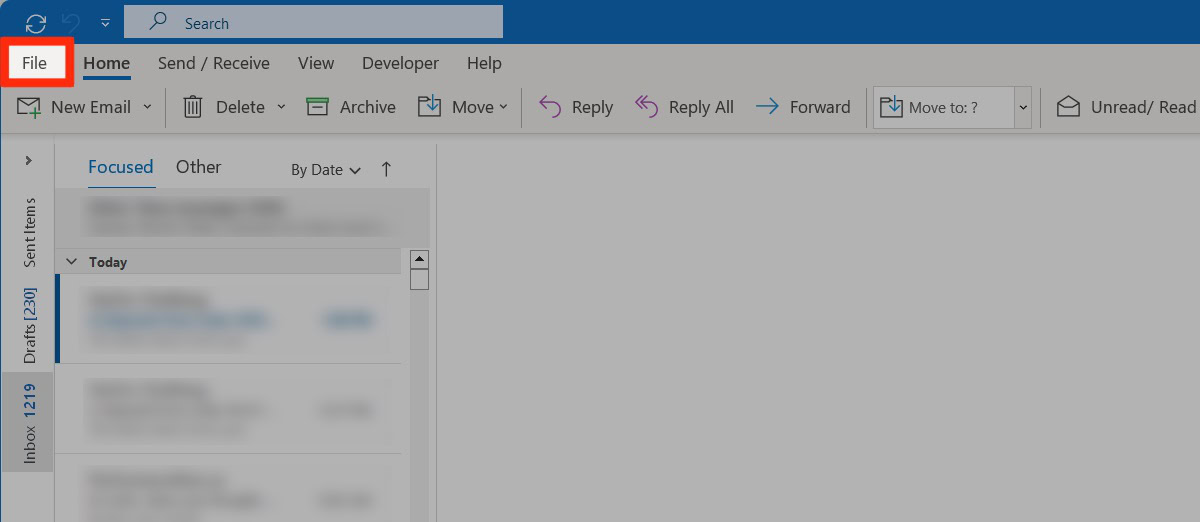
To create your rule from a template, go to the File tab in the outlook desktop app.
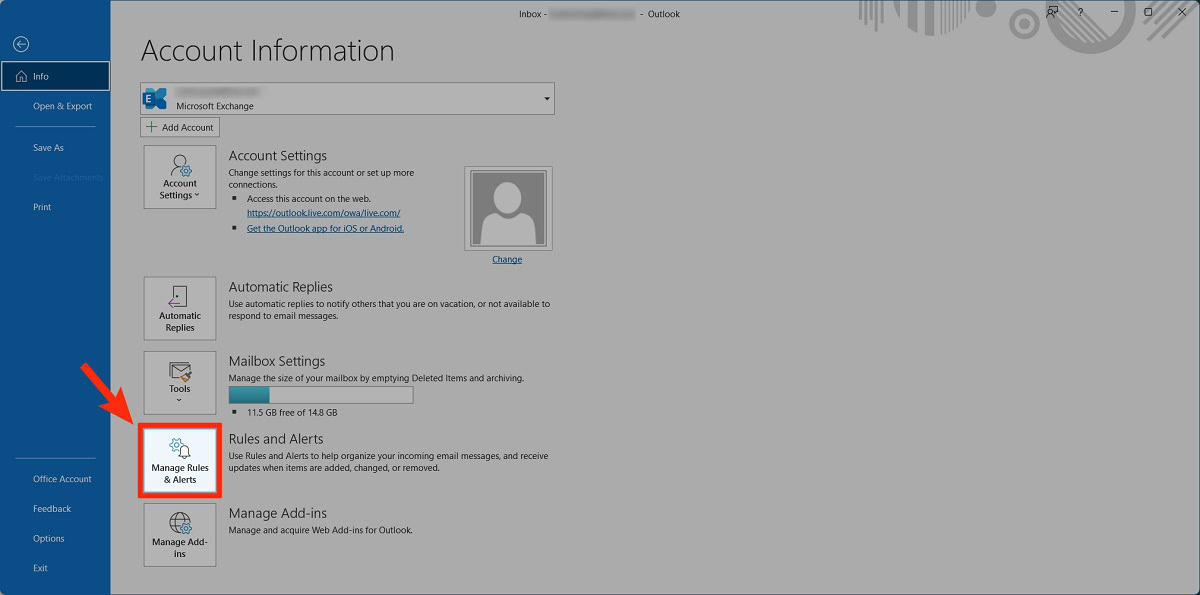
Click Manage Rules & Alerts.
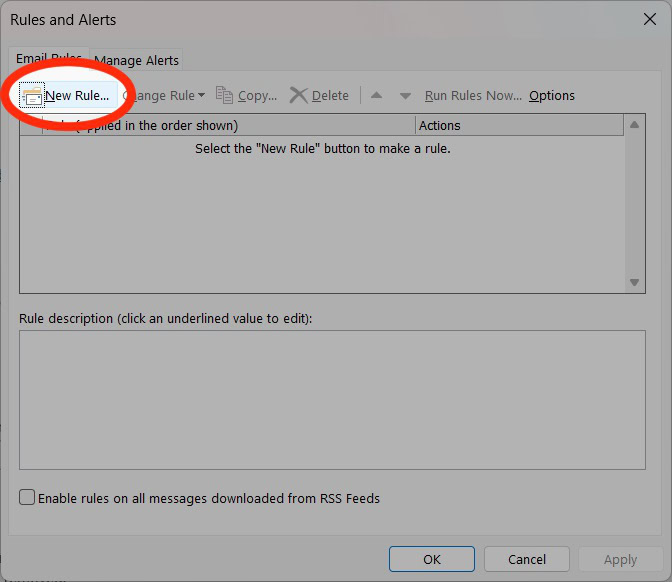
In Rules and Alerts, click New Rule….
- Select a template. Edit the rule description. Click Next.
- Select the conditions. Edit the rule description. Click Next.
- Select the actions. Edit the rule description. Click Next.
- Select any exceptions. Edit the rule description. Click Next.
- Finish setting up the rule, then click Finish.
How to edit a rule in Outlook
Website
Go to outlook.live.com in a browser and log into your account. After that, click the gear-shaped Settings icon in the top right.

From the side panel, click View all Outlook settings.

In the Settings menu, go to the Rules tab within Mail.

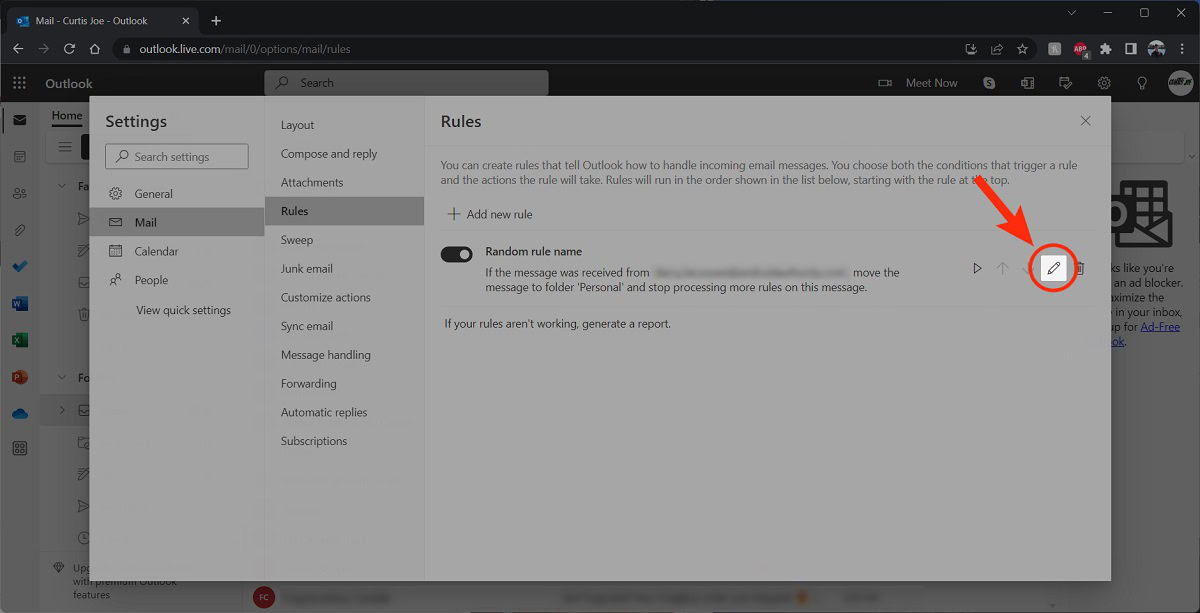
Hover your cursor over the rule you wish to edit; options will appear on the right. Click the Edit button that looks like a pencil.
Desktop app
To edit a rule, click the File tab in the Outlook desktop app.

Click Manage Rules & Alerts.

- Click on the checkbox next to your rule.
- Click Change Rule.
- Select Edit Rule Settings….
How to delete a rule in Outlook
Website
Go to outlook.live.com in a browser and log into your account. After that, click the gear-shaped Settings icon in the top right.

From the side panel, click View all Outlook settings.

In the Settings menu, go to the Rules tab within Mail.

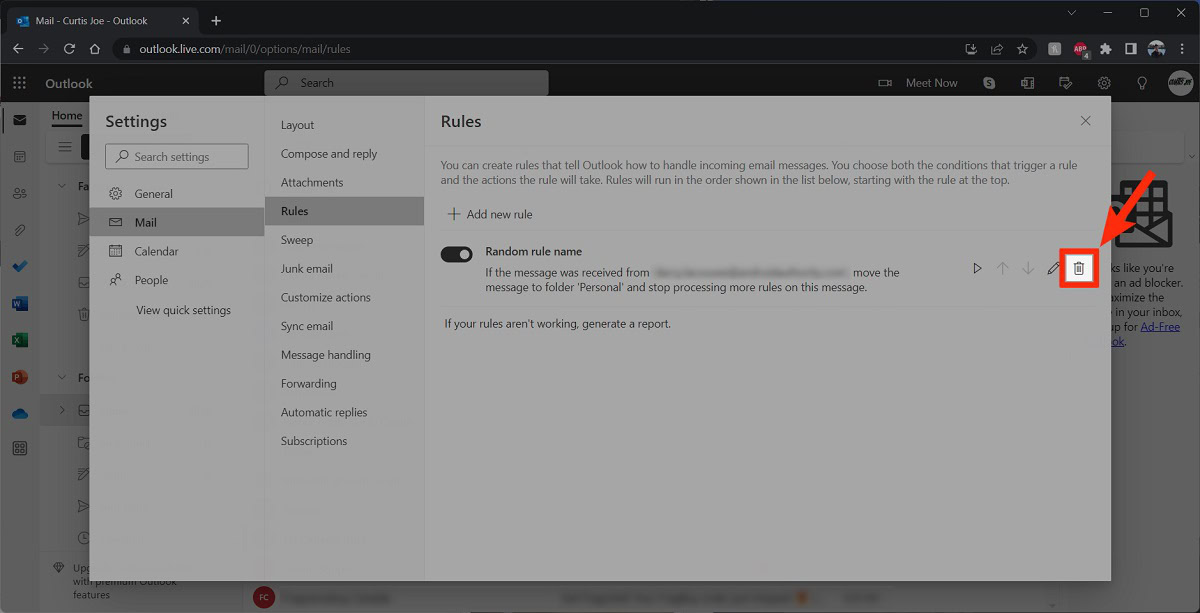
Hover your cursor over the rule you wish to edit; options will appear on the right. Click the Delete button that looks like a garbage can.
Desktop app
To delete a rule, go to the File tab in the Outlook desktop app.

Click Manage Rules & Alerts.

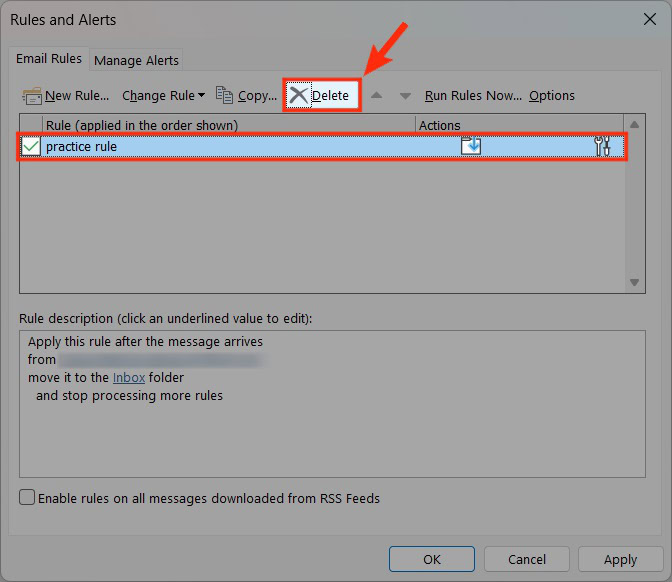
- Click on the checkbox next to your rule.
- Click Delete.
Read more: How to set an out-of-office reply in Outlook