Affiliate links on Android Authority may earn us a commission. Learn more.
How to edit a PDF on a Mac without using Adobe
Published onMarch 10, 2023
We’ve previously covered a lot on the subject of editing a PDF. We’ve covered editing a PDF on Android, on a Chromebook, and an iPhone or iPad, Today, we’re going to cover how to edit a PDF on a Mac. Having already covered combining pages, cropping pages, and extracting images, we will now move on to other things you can do with a PDF.
QUICK ANSWER
If you want to edit a PDF on a Mac, open the file using Preview. Preview is a very robust and free PDF editor prebuilt into every Mac computer, and you can do things like rearranging and deleting pages, adding signatures and annotations, adding and copying text, and much more.
How to edit a PDF on a Mac
The Mac has a built-in PDF editor in the form of Preview. You will find that pretty much all PDF editing functions on a Mac can be accomplished using Preview, with only a select few more obscure editing features having to be outsourced to other apps. Preview is a good robust app, but it does eventually hit its limitations.
We will use an Internal Revenue Service PDF form to demonstrate how you can edit a PDF on a Mac.
Adding text
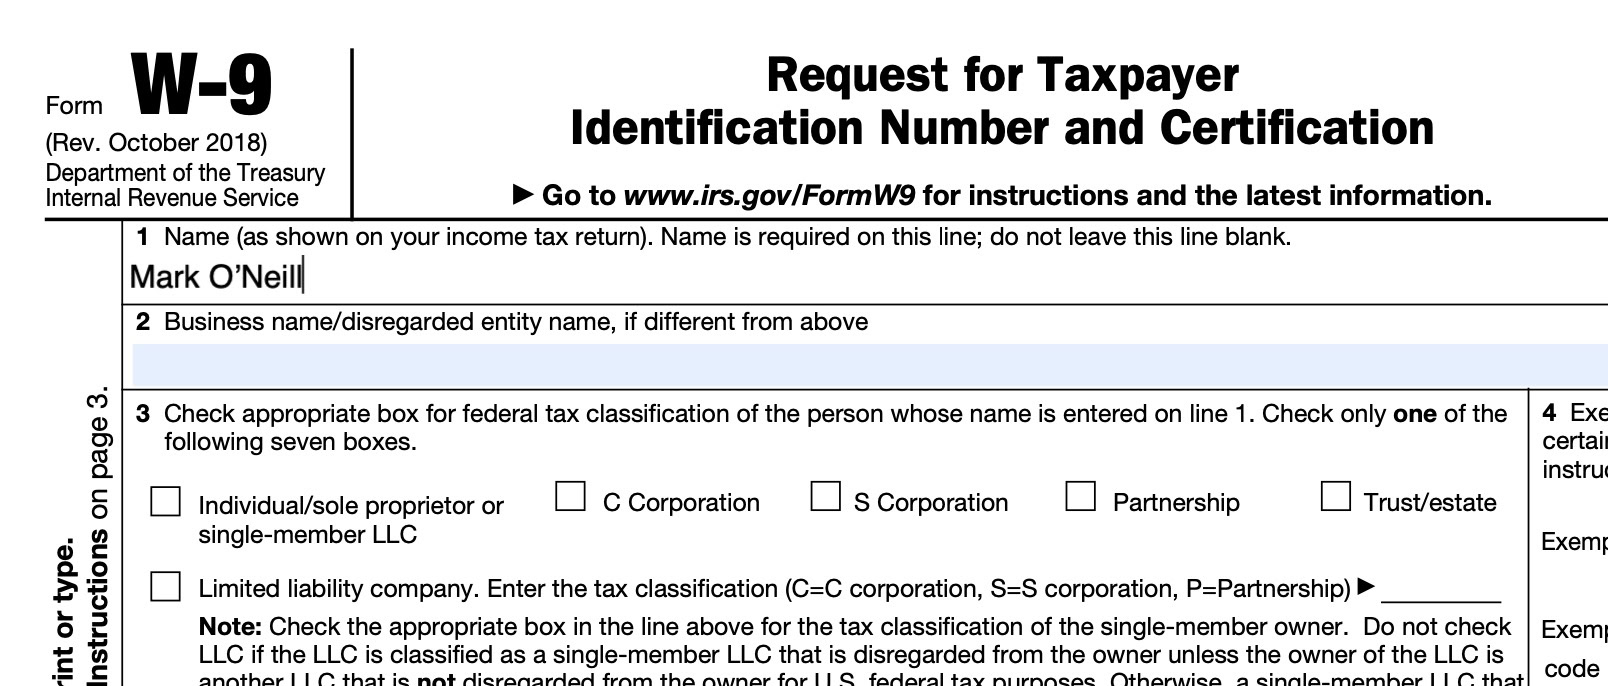
If the PDF you want to add text to has editable text fields, then it’s a simple matter of clicking inside that field and starting to type. You will know if a field is editable by mousing your cursor over it — if the field turns blue, then you can type directly into the PDF. Just remember to go to File > Save on a regular basis to save all your editing changes.
If it is a PDF which does not have editable fields, then you would have to copy and paste the text from the PDF into a Pages document or Google Docs document, and then add your additions.
In the PDF in Preview, go to Tools > Text Selection. Then use the cursor to highlight the text.
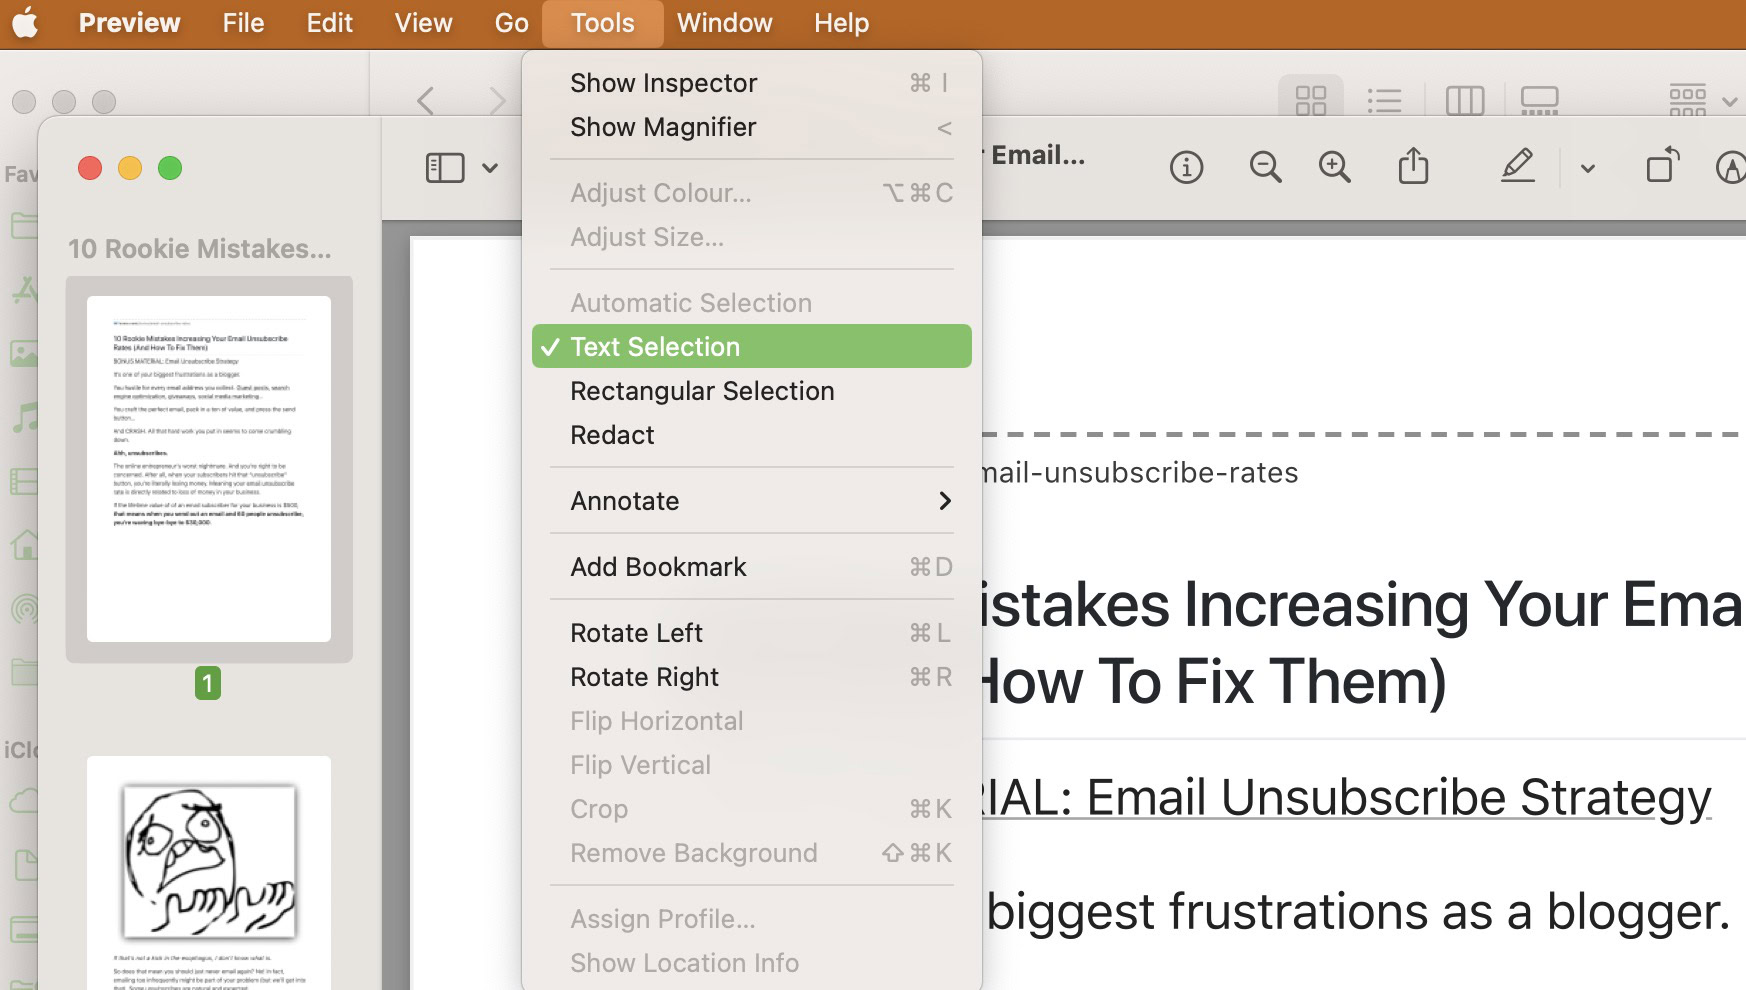
Copy and paste the text into a new document. Add the text that you need, and then export the edited file as a new PDF.
Note you may have formatting issues doing this. It depends what you’re copying and pasting over. Only text is usually fine, but things tend to start going a bit wonky when images and boxes get involved.
Copying text

As we said in the last section, copying text from a PDF on a Mac is as simple as opening the PDF in Preview. Then go to Tools > Text Selection. Then highlight the text with your cursor, and CMD + C to copy it. Easy as pie.
If you encounter formatting issues, open the PDF in your browser and use a plugin such as Copy as Plain Text to wipe the formatting (here’s a Firefox version.)
Drawing, adding shapes, and annotating text
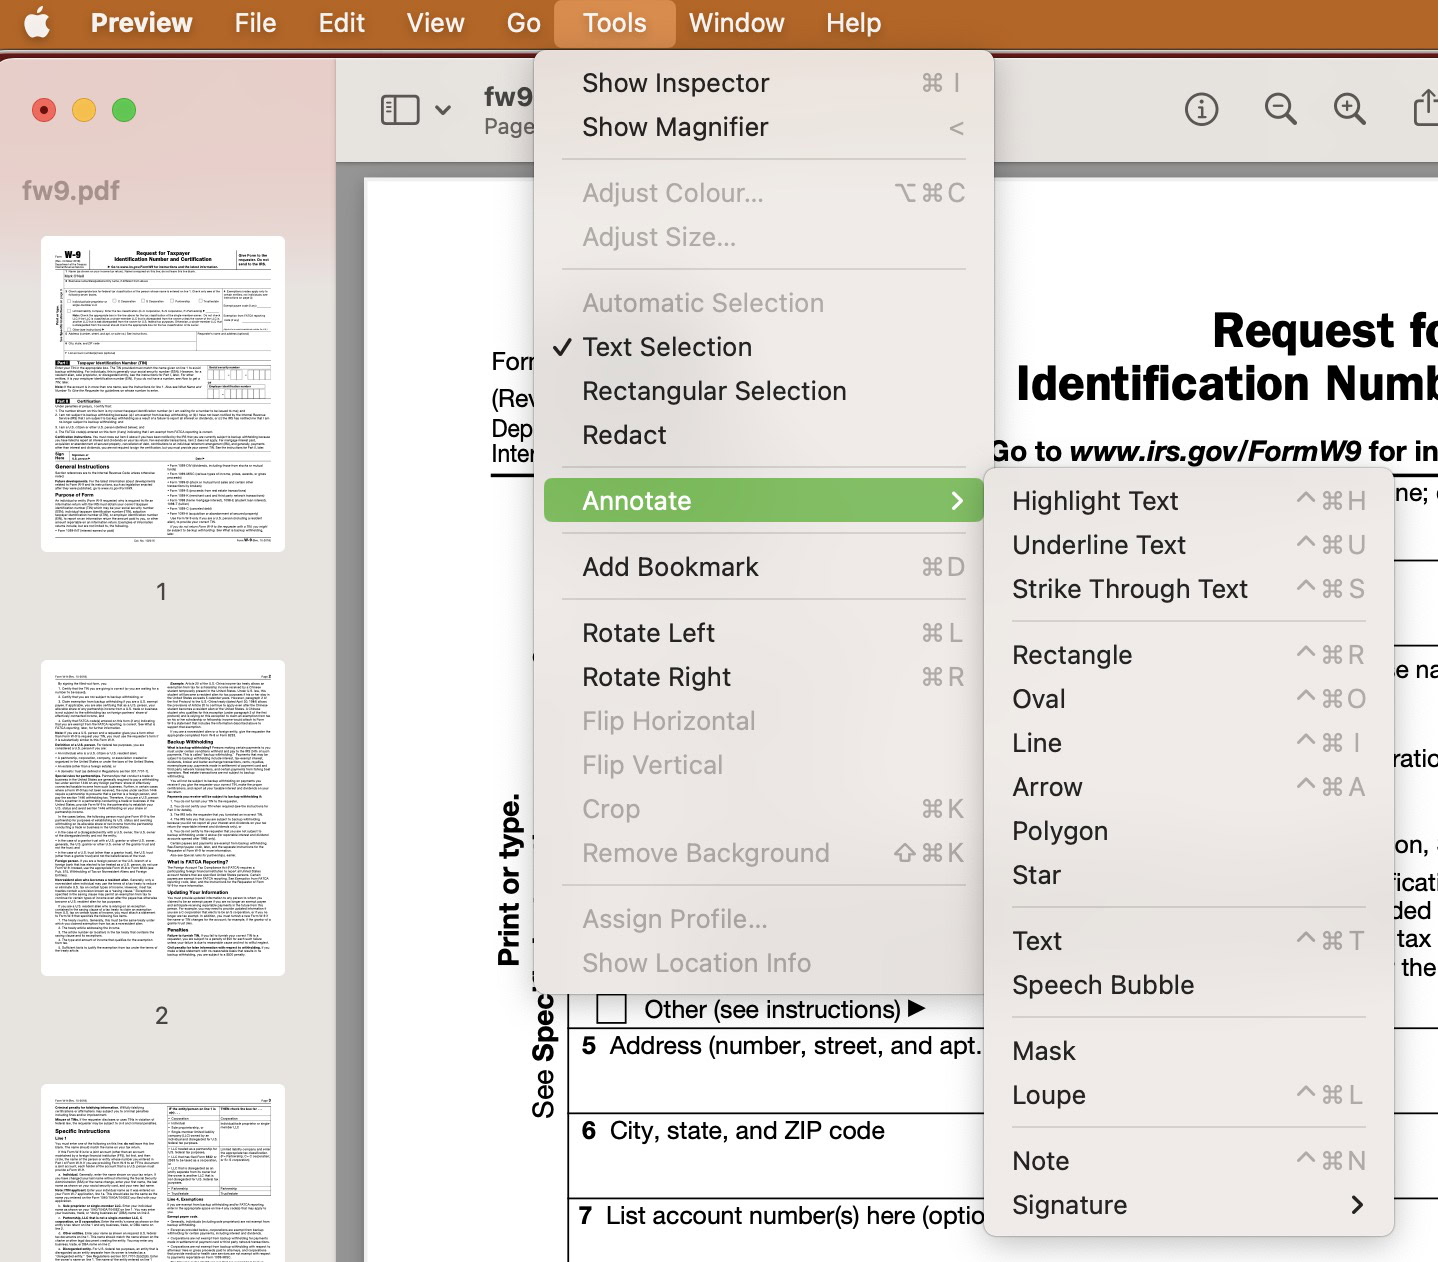
When it comes to drawing, adding shapes, and annotating text, Preview still has you covered. Just go to Tools > Annotate. Then choose what you want to do.
Drawing and adding shapes
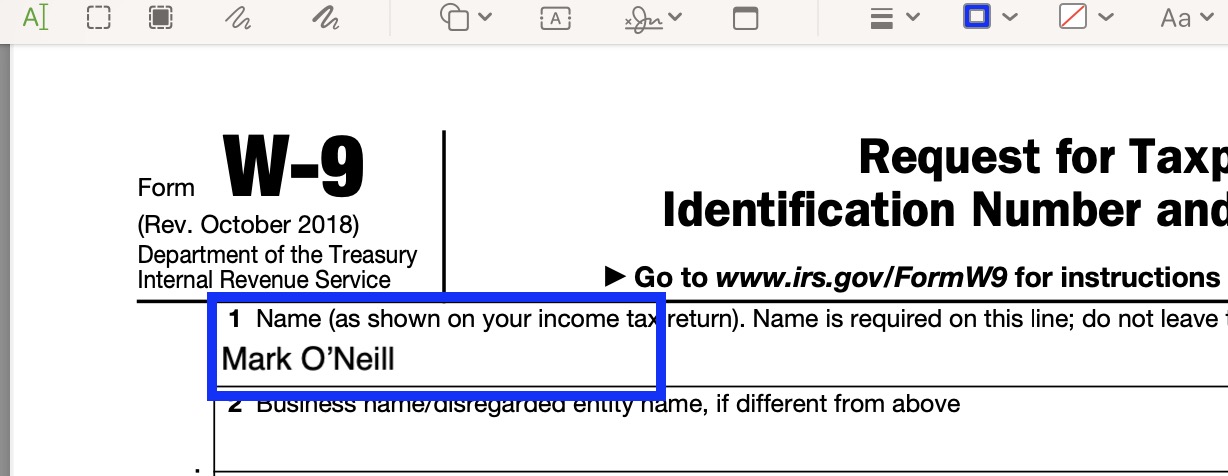
If you select a shape from the Annotate menu, it will show up on the document, where you can drag and resize it using your cursor. You can also change the color and thickness of the shape by clicking the color or thickness options in the top Preview bar. Remember to save your changes!
Annotating text
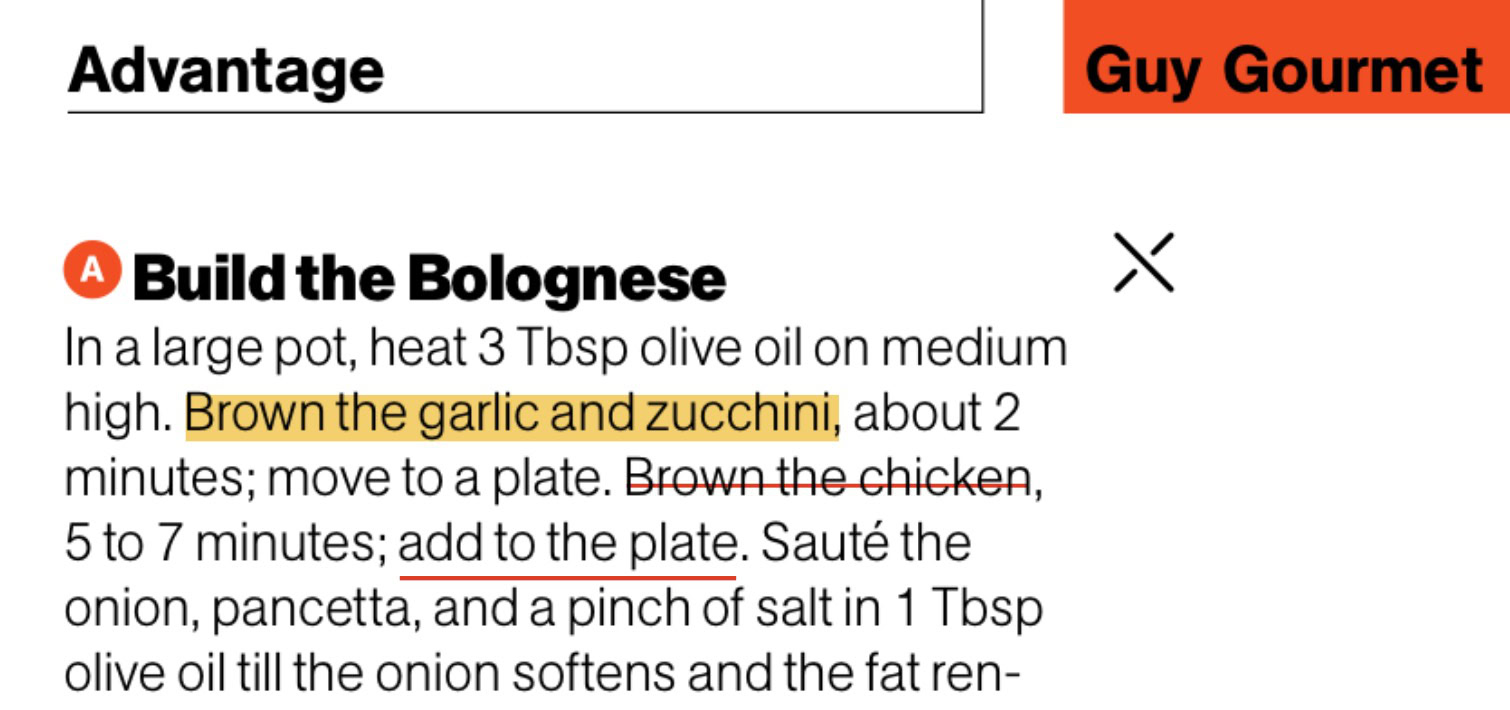
You can also select annotation options from the same menu, including highlighting, underlining, and striking through. Just highlight the text, then go to the menu and choose your annotation option. Remember to save your changes.
Adding notes

In the Annotate menu, you will also see an option for Note. This will make a small yellow square appear which you can move around the document with your cursor. To type inside the note, click it and begin typing. When you’re done, click outside the note for it to shrink back to its original tiny square again. Obviously, save the document to keep your notes safely embedded inside.

Adding a signature
We have previously looked at how to electronically sign a PDF using Adobe. But the truth is, you don’t need it. On a Mac, you can use Preview, again by going to the Tools menu and then Annotate > Signature.
Assuming you haven’t done this before, Preview will ask you to write your signature. I highly recommend the iPhone option if you have an iPhone. Failing that, the camera method. The trackpad method is just a pain in the bottom.
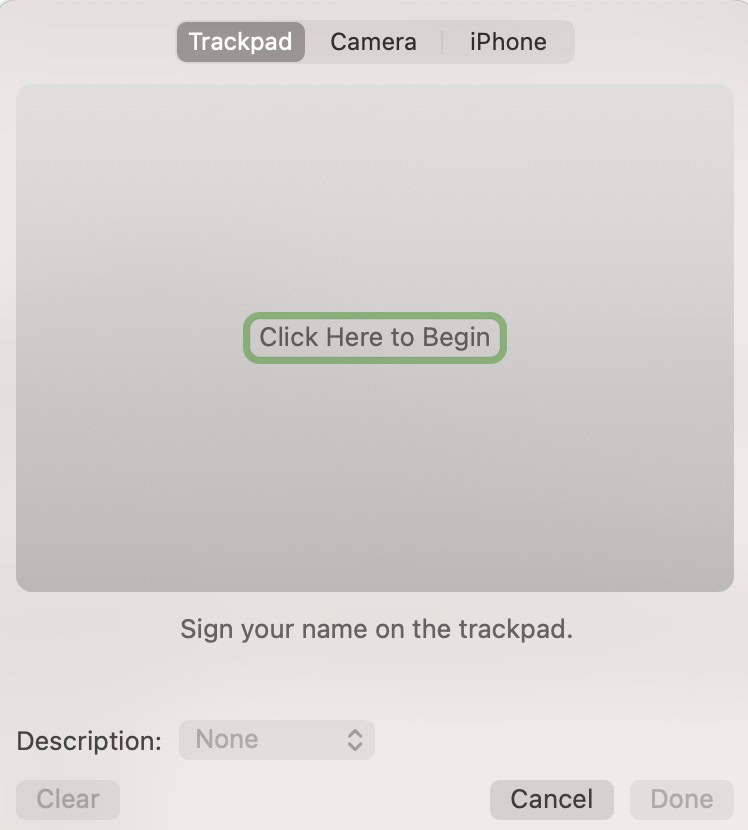
After clicking Click Here to Begin, you will be asked to write your signature. If you choose the iPhone method, a signature pad will appear on the iPhone screen. Anything you scribble there with your finger is automatically transferred over to Preview on the Mac. Once you’re satisfied with your scrawl, click Done to save it.
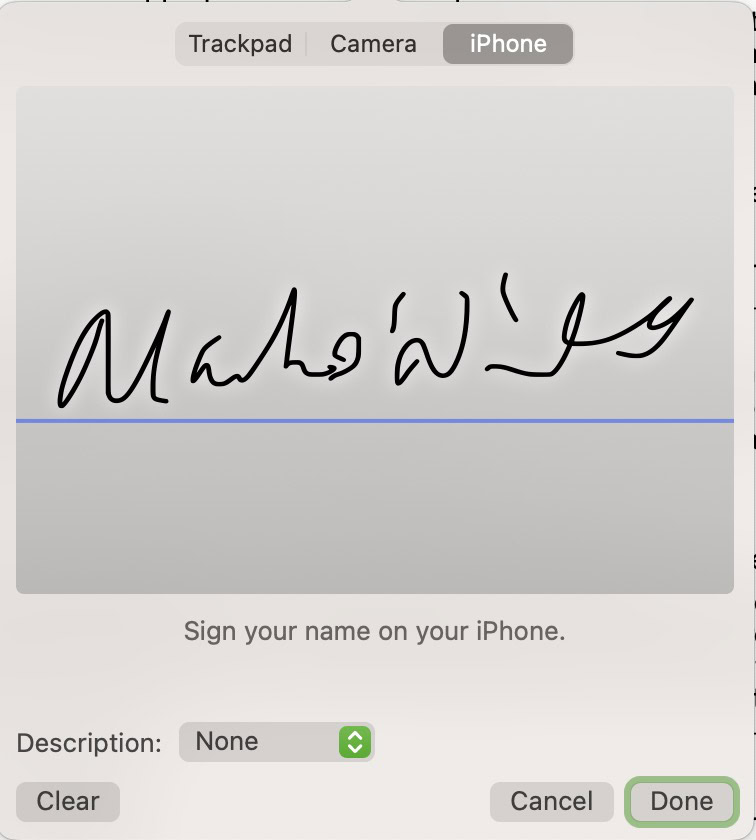
The signature icon on the top bar will now activate, showing you your saved hamster scratches. Click the signature in the box to add it to your document. For future documents, you can click that same icon to access your saved signature.
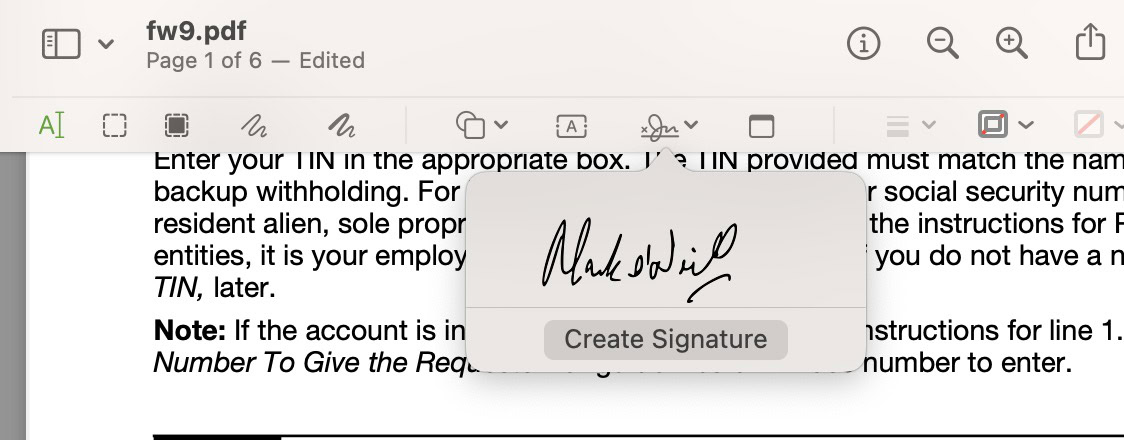
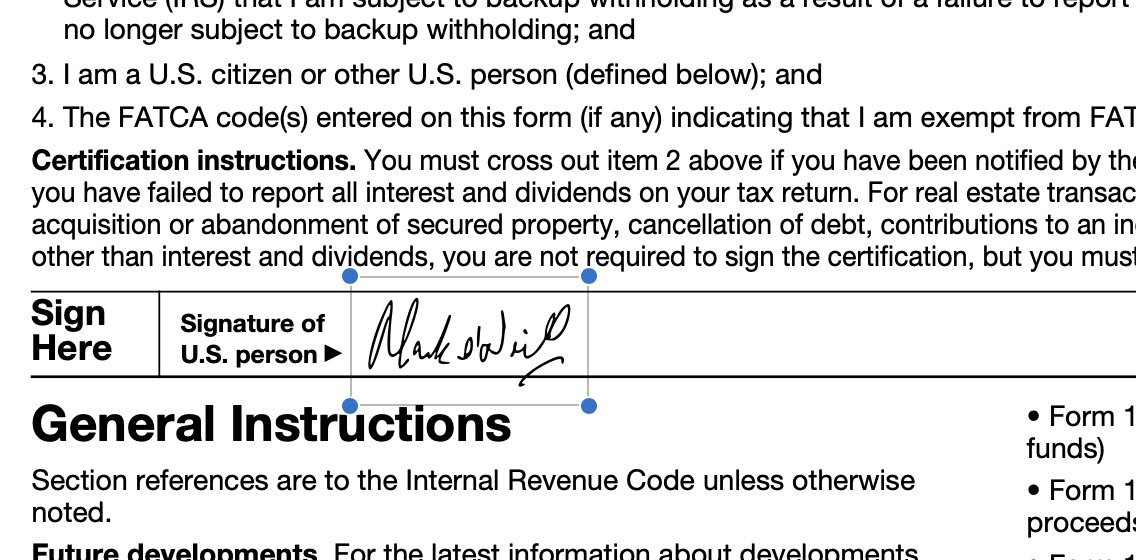
Now drag it into position on the page and, if necessary, resize it with your cursor. Oh and save the document.
Rearranging or deleting pages
Again, we’ve previously shown you how to delete PDF pages using the Adobe route, but assuming that there is no password lock on the document, Mac users can use Preview to rearrange or delete pages.
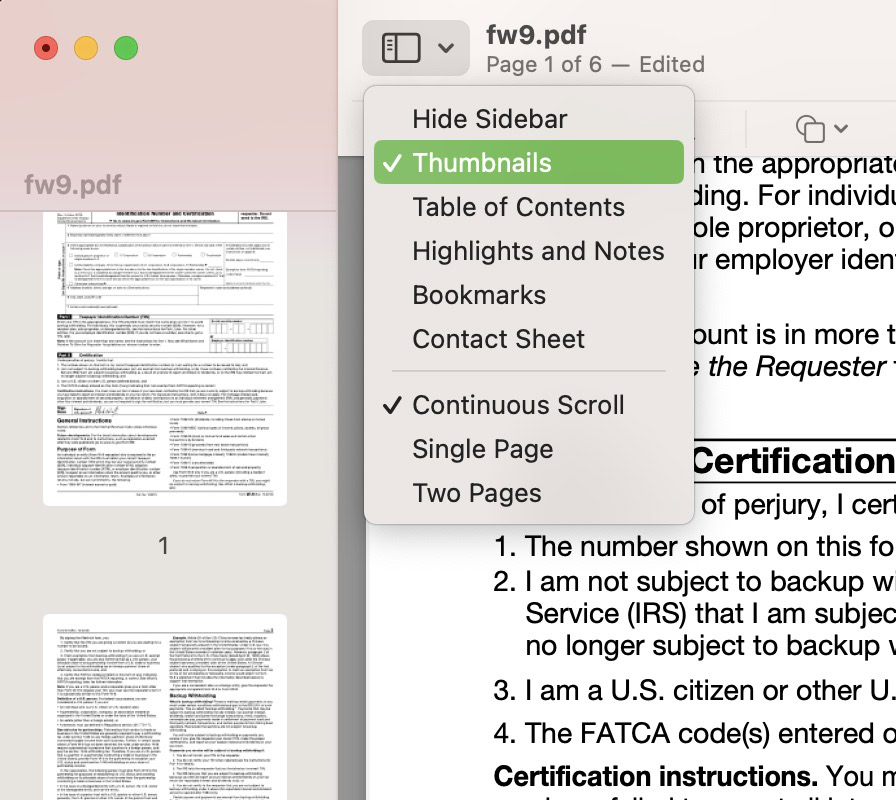
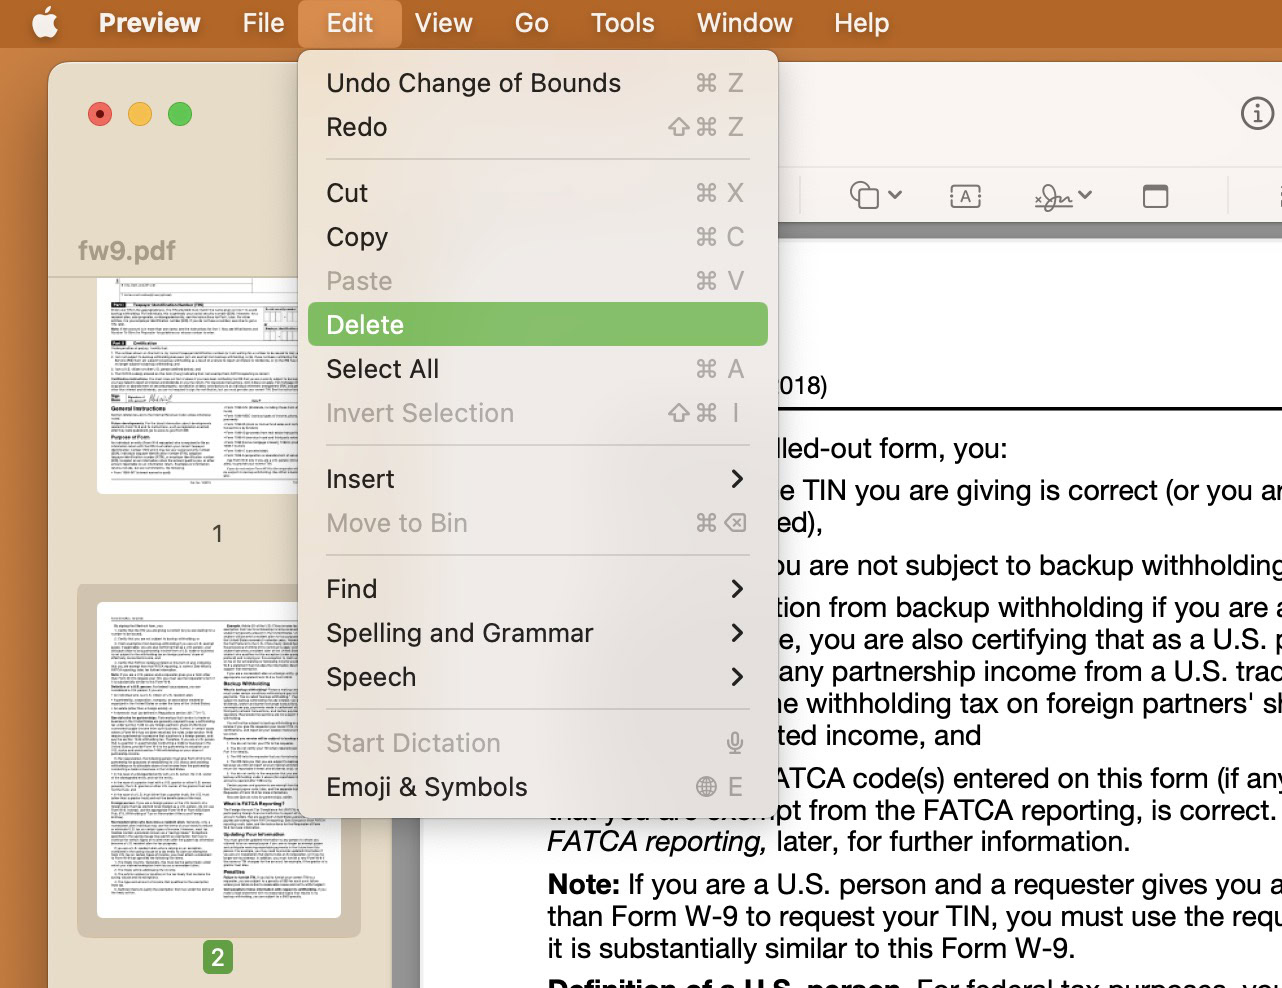
First, if the thumbnails of the PDF pages are not already showing, click the icon next to the file title and in the drop-down menu, click Thumbnails. This will open up the sidebar and reveal all the pages.
To rearrange pages, simply click on the thumbnail and move it up and down the sidebar to the desired position. Then let go. It will then automatically slot into its new place.
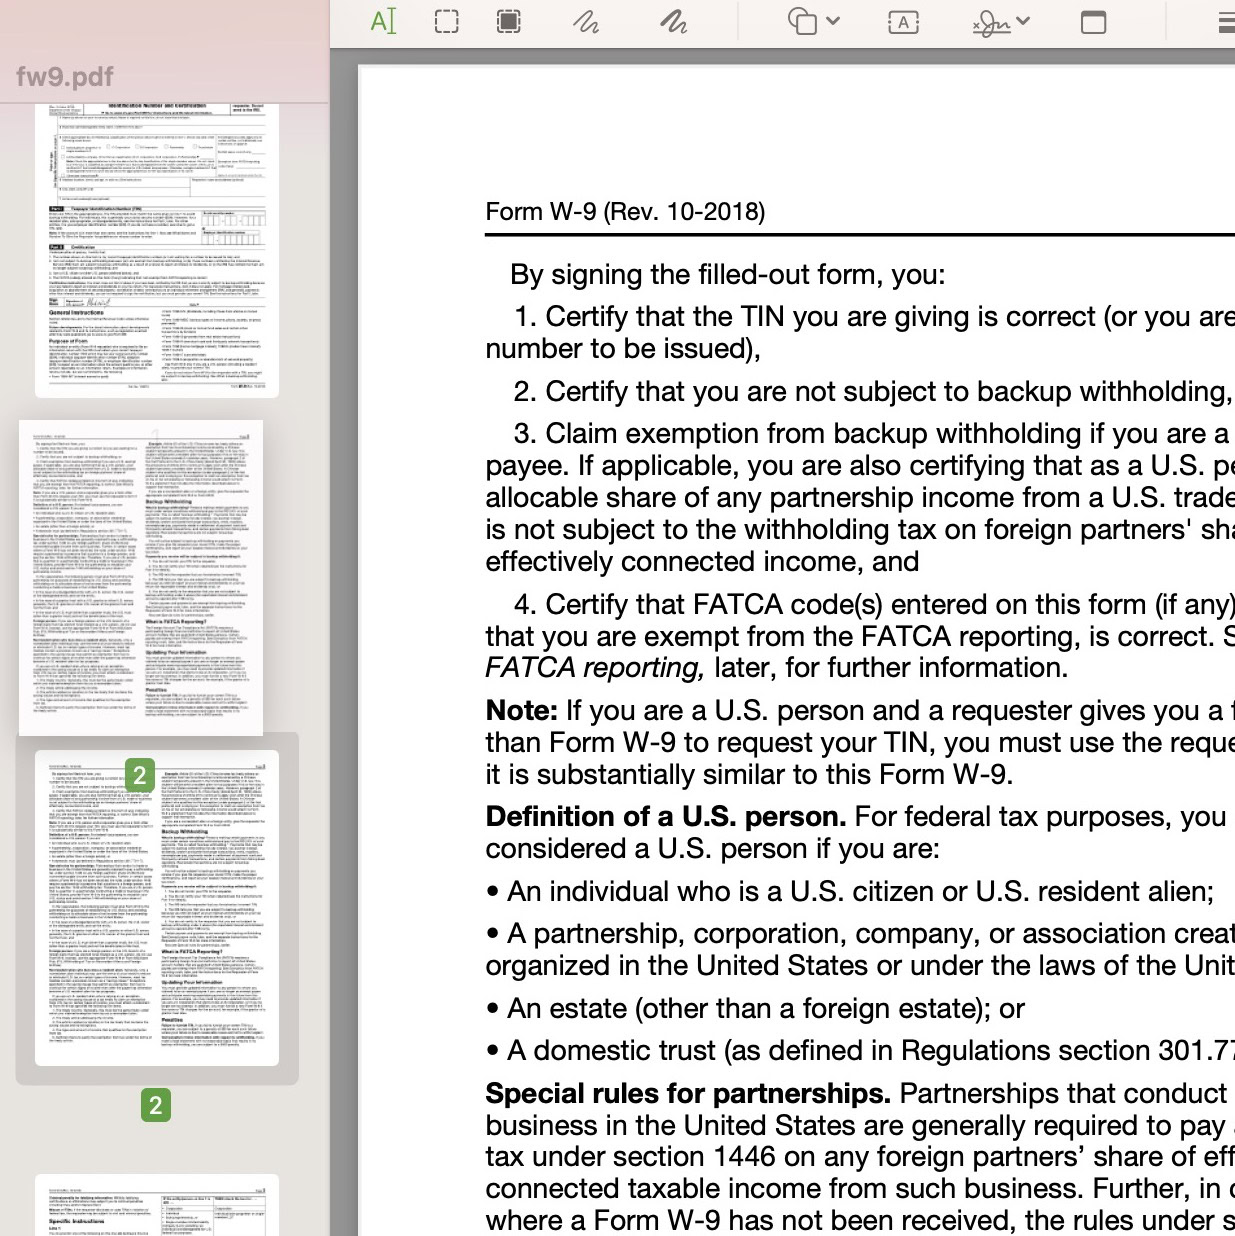
To delete a page, highlight it in the sidebar by clicking it with your cursor. Then go to Edit > Delete. Save the document so the page doesn’t come back when you close the file.
FAQs
Assuming the PDF doesn’t have a lot of formatting, it’s easiest to use Google Drive. Upload the PDF to your Drive account, right-click it and select Open in Google Docs. A Docs version of the PDF will now be made and you can edit that. Then export it from your account as a new PDF file. You can also do the same in Pages, Apple’s version of Microsoft Word.