Affiliate links on Android Authority may earn us a commission. Learn more.
How to enable notifications and Focus modes on any Mac
Published onSeptember 28, 2022
Notifications are an important part of any productivity loop. You need to know if coworkers are messaging you, when you receive emails, and when apps are done updating. Of course, the inverse is likely true too. Sometimes you want some silence while you work. We’ll show you how to see notifications on Mac. We’ll also show you how to manage and turn off notifications on Mac.
QUICK ANSWER
To enable notifications, hit the Apple menu, then System Preferences, and finally Notifications & Focus. Tick the Allow Notifications toggle on to start getting notifications. You can tick the same toggle off to turn off notifications.
JUMP TO KEY SECTIONS
How to turn notifications on and off on Mac

This is a relatively simple process. The only downside is that it takes some time to get through everything. Notifications are usually on by default, though, so you shouldn’t need to do this on a freshly purchased Mac.
- Open the Apple menu and click System Preferences.
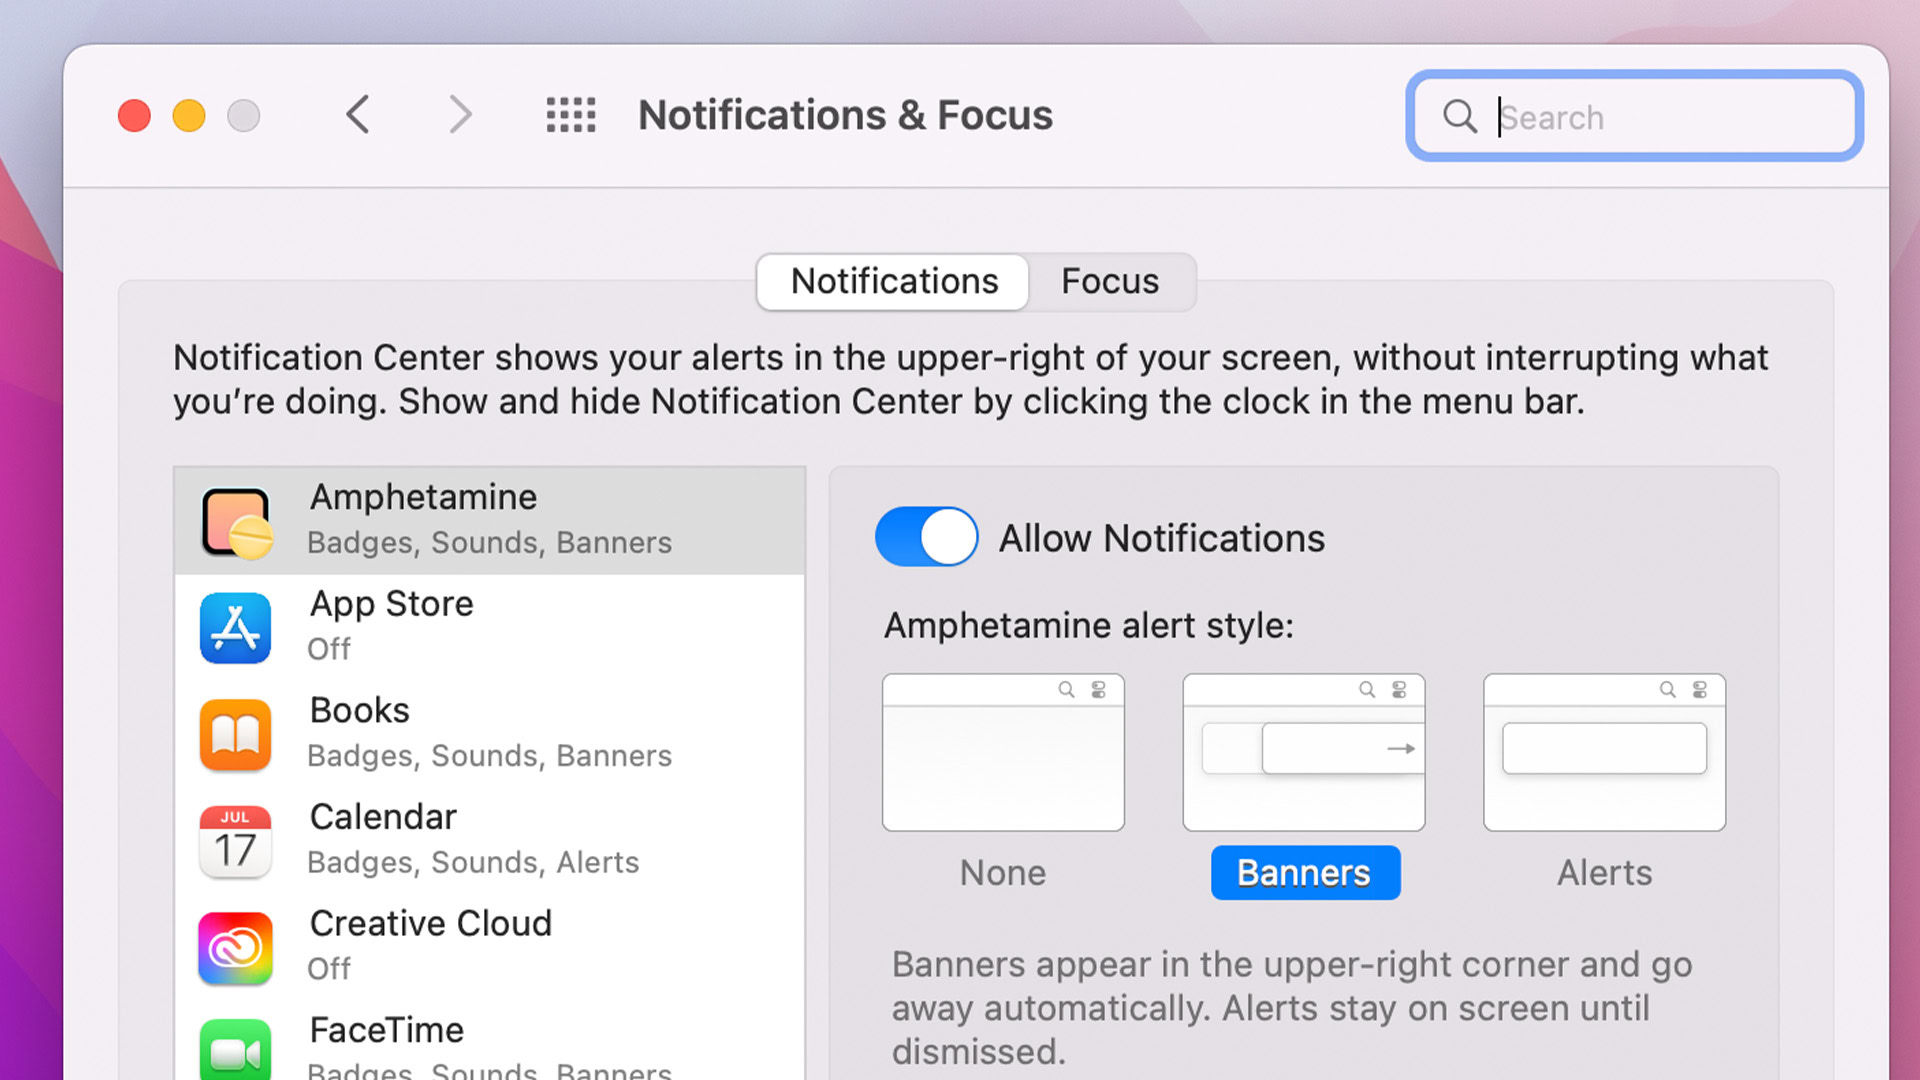
- Click Notifications & Focus. Select any app from the list on the left
- Find the Allow Notifications toggle and tick it on.
- You will now receive notifications for that app.
- Repeat the above steps for every app. Unfortunately, this step takes a while.
- To turn notifications off, perform the above steps again, except this time toggle the Allow Notifications switch off for each app.
There is no way to disable all notifications permanently with just one click. Apple wants users to use the Focus and Do Not Disturb features to silence notifications temporarily. Still, notifications stop if you tick the toggle off on all apps.
How to manage notifications on Mac

Apple has a few different ways you can manage notifications. They all take place in the Notifications & Focus section. It’s pretty easy to use. We’ll go through a few different ways to manage notifications.
- Open the Apple menu, select System Preferences, and then Notifications & Focus.
- A list of your apps will appear on the left side of the window.
- Select the app you want to manage.
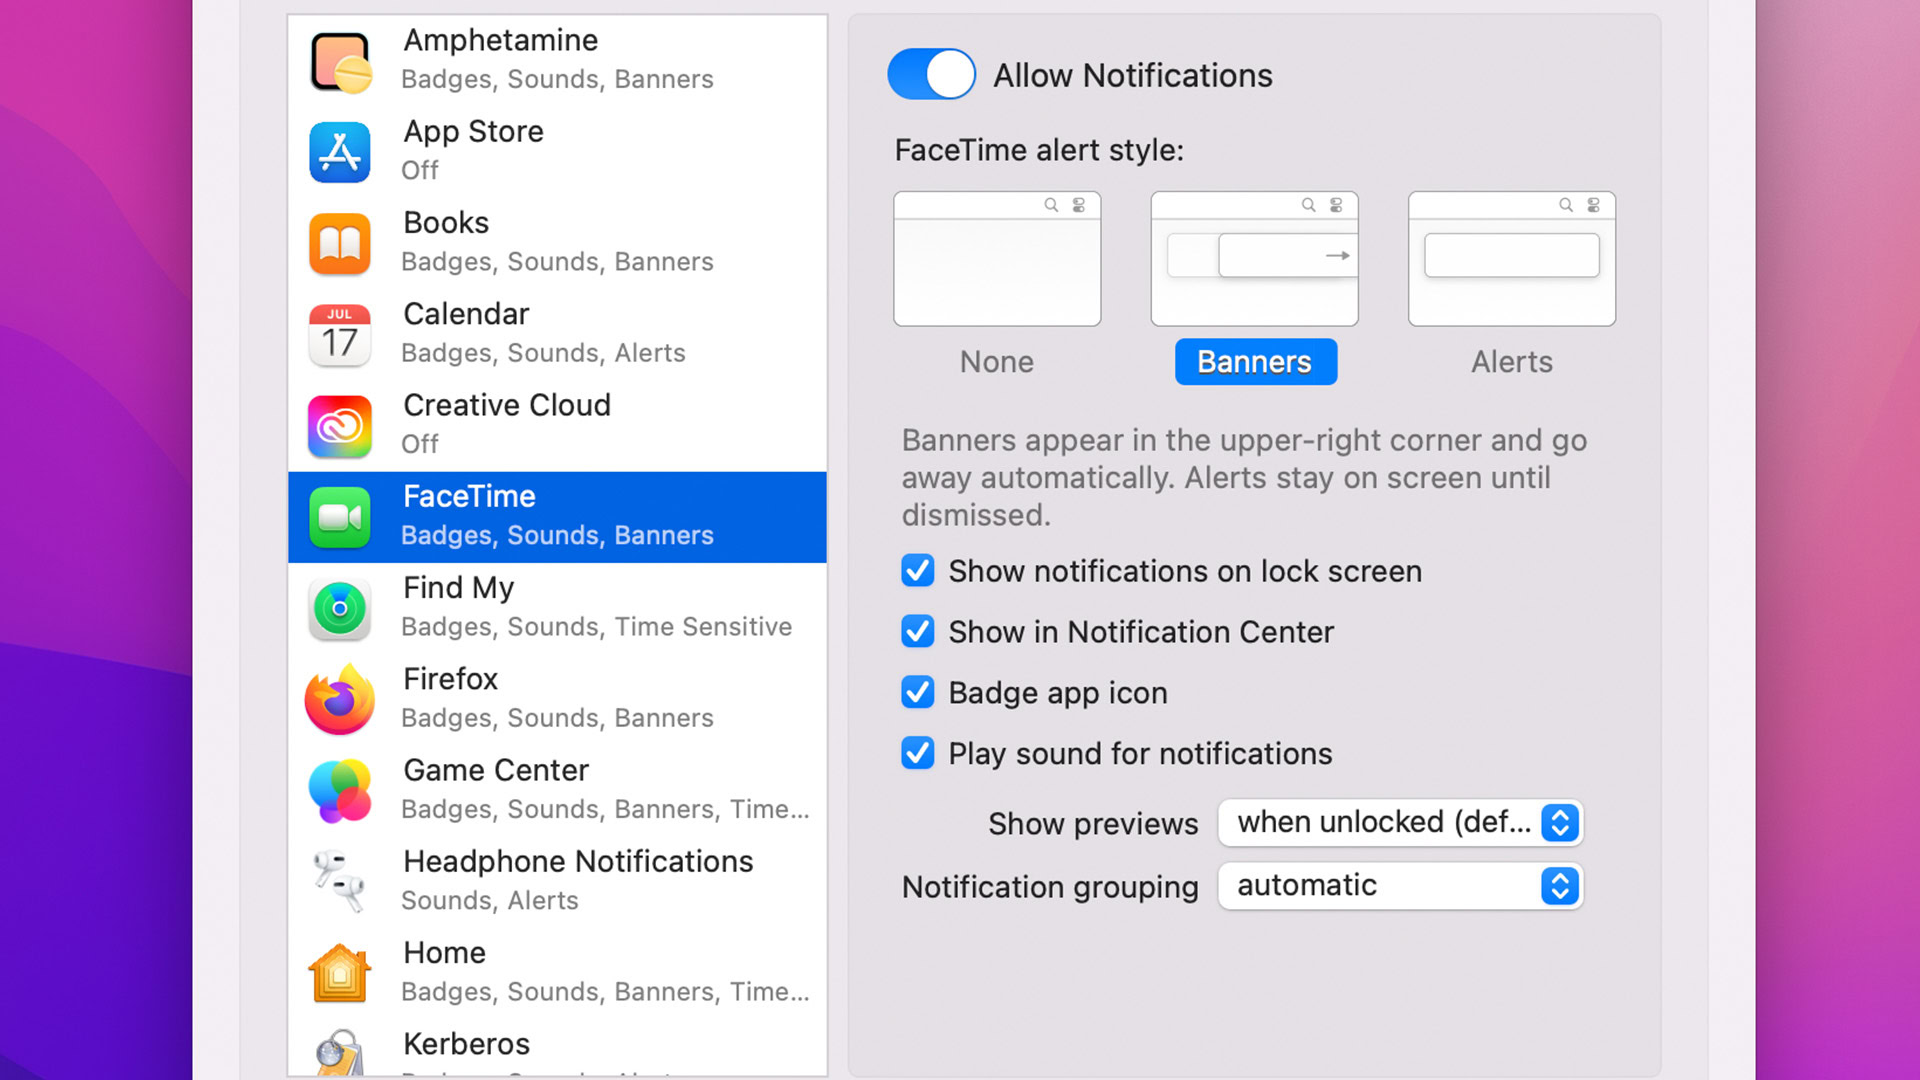
- On the right side, you have several different options.
- Allow notifications — Turn notifications all the way on or all the way off.
- Alert style — Changes how the notifications appear. You can eliminate the pop-up (None), keep it the standard style (Banners), or make it an alert-style notification (Alerts).
- Show notifications on lock screen — Disable this, and you won’t see the app’s notifications on your lock screen.
- Show in Notification Center — Disable this, and you won’t see the app’s notifications in your Notification Center.
- Badge app icon — This is the little red circle with the number in it. Disable this, and you won’t see badges on app icons anymore.
- Play sound for notifications — This is pretty self-explanatory. Disable this to not get audible notifications from that app.
- Show previews — Determine when to show notification previews on your screen. You can select Always, When Unlocked, or Never.
- Notification grouping — This will determine if the app is grouped with similar apps in the Notification Center. Your options are Automatic, By App, and Off.
Use the various options above to manage your notifications for each app. It’s a little daunting at first, but you get used to it pretty quickly.
How to use Focus and Do Not Disturb
Focus is an extension of Do Not Disturb. In fact, Do Not Disturb mode exists within Focus Mode. Focus lets you create your own Do Not Disturb modes with things like schedules, exclusions, and other customization options. We’ll show you how to use that.
Turn on Focus modes from the desktop

- To start, open the Apple menu, then System Preferences, and then Dock & Menu Bar.
- Select Focus from the list on the left. Click the dropdown where it says Show in Menu Bar and select Always. Exit the window.
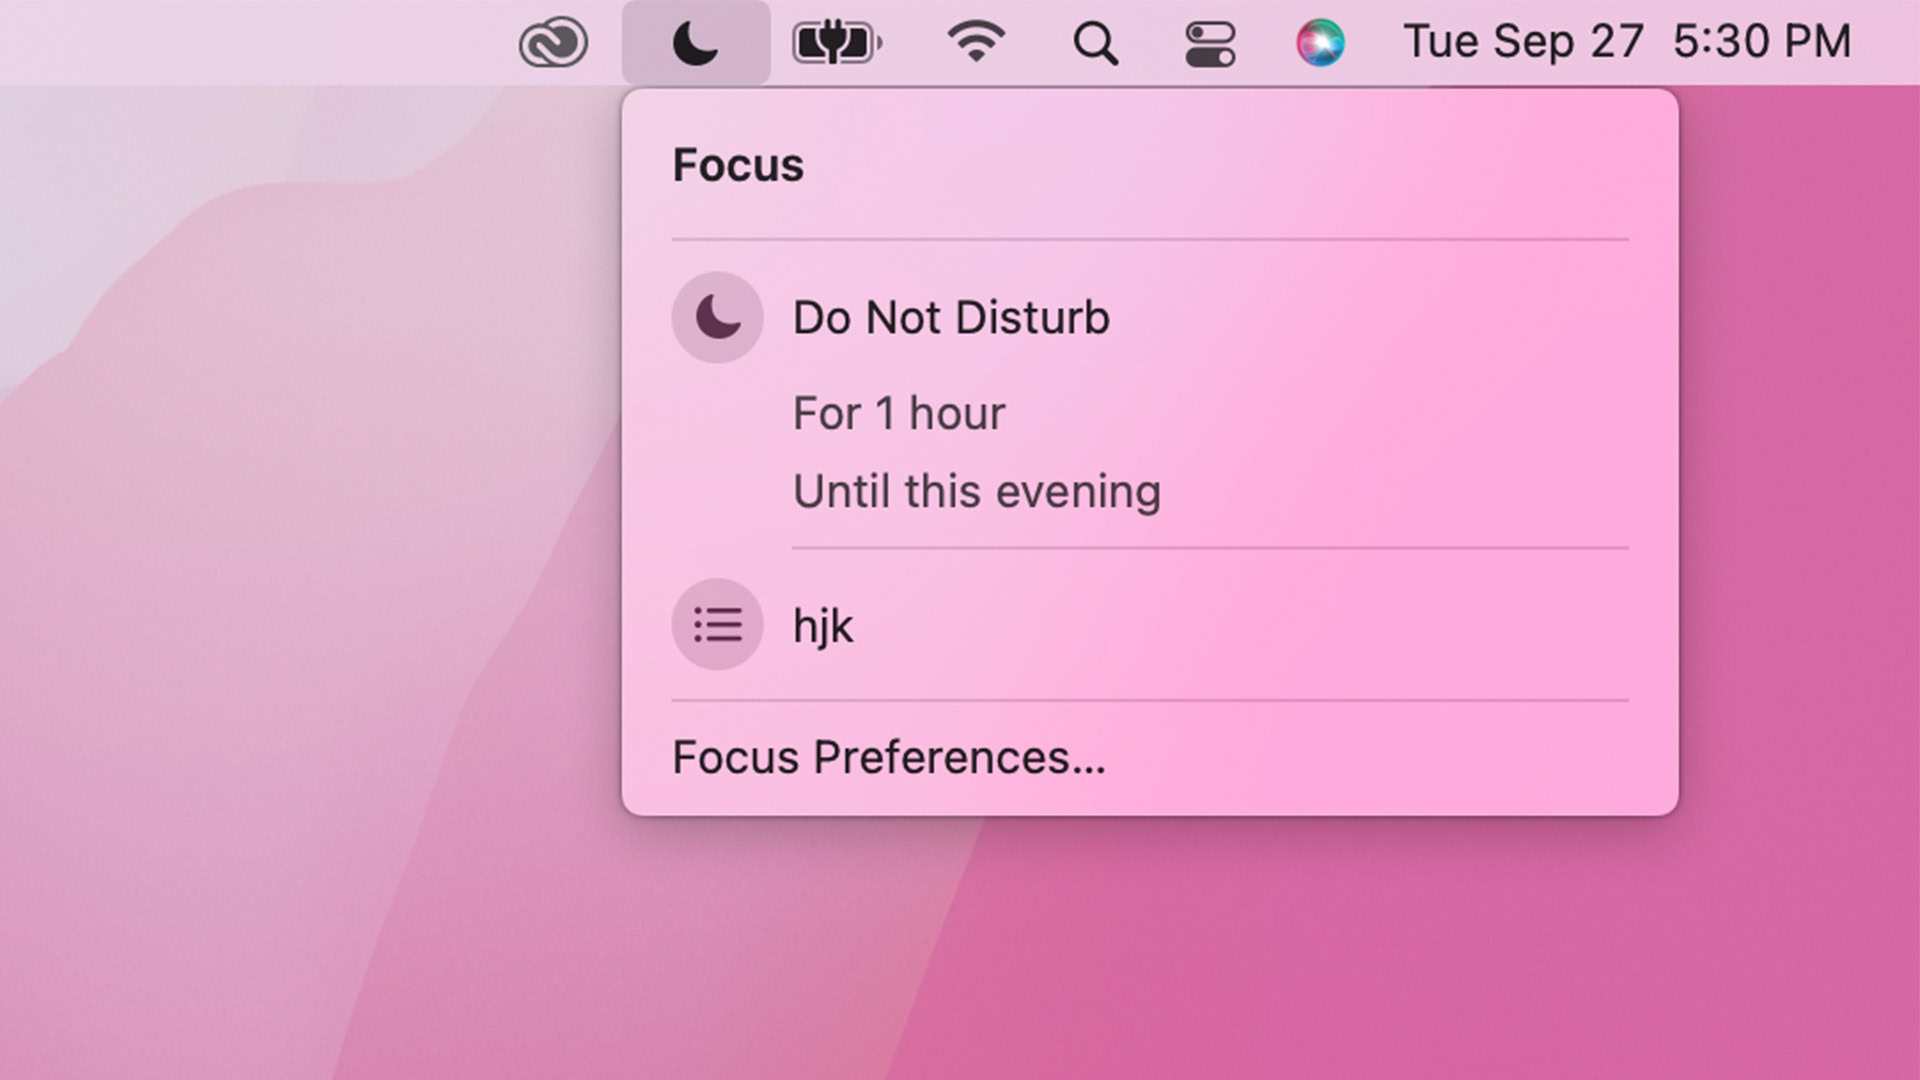
- Look for a crescent moon icon in the top menu bar. Click it to show your Focus modes. Click the Focus mode you want to use in order to activate it.
- Pro tip — Do Not Disturb exists by default as a Focus mode. It would be best if you had Do Not Disturb as a Focus mode natively.
Create your own Focus mode

- Open the Apple menu, then click System Preferences, and finally, click Notifications & Focus.
- Tab over to the Focus window and click the Plus button in the bottom left corner.
- Select Custom to create a blank Focus mode, or use Gaming, Mindfulness, Personal, Reading, or Work to use the presets that Apple provided. We’ll keep going with the assumption that you used Custom.
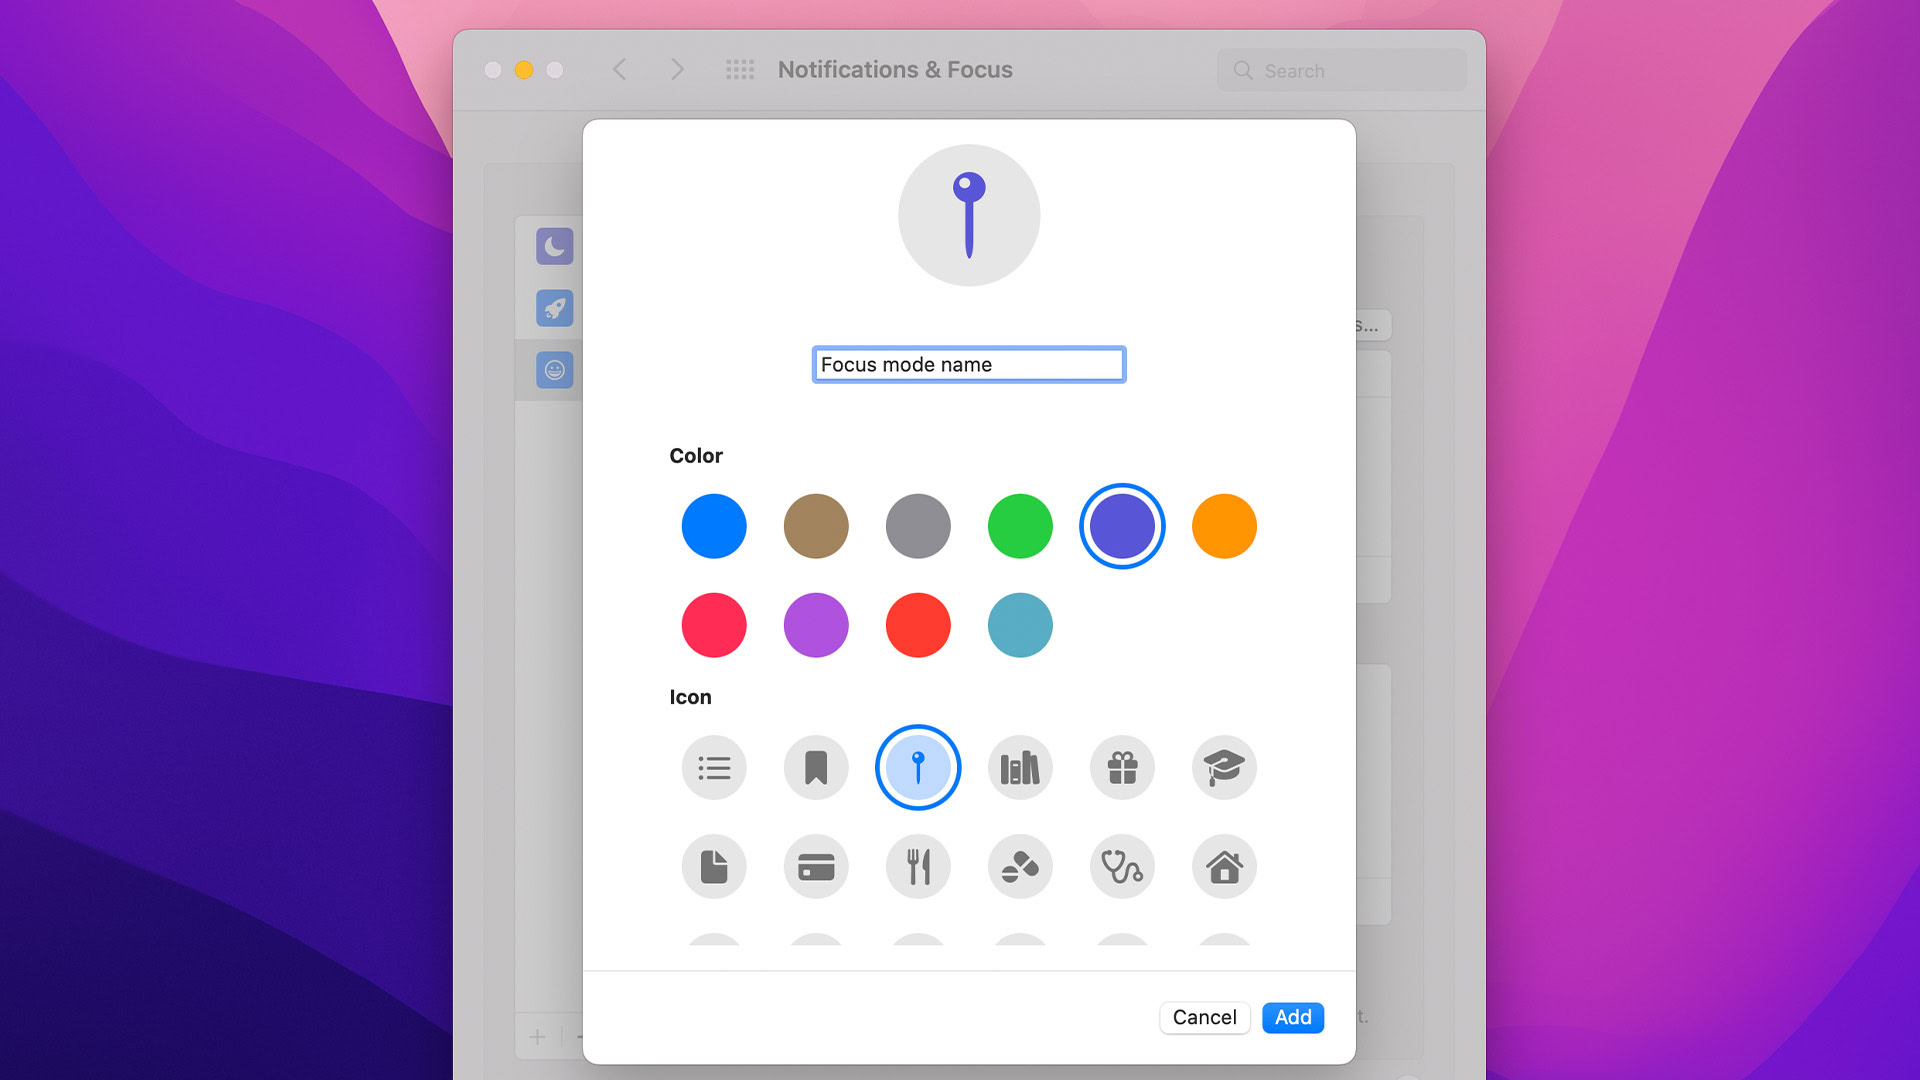
- Give your Focus a name, a color, and an icon. Hit Add when you’re done.
- Now, we can customize your Focus mode.
- On the right side, hit the Options button. You can choose to allow time-sensitive notifications. You can also set it to allow calls from everyone, just your contacts or your favorites. There is a third option to let repeat calls through in case of an emergency.
- The box below the Options button lets specific contacts through. Hit the Plus button and add the contacts you want to exclude from your Focus mode, so their notifications still come through.
- After you’re done, you can move on to the final box. This is the automation box, and it lets you determine what conditions will automatically start your Focus mode.
- Click the Plus button in the automation box to get started. Choose whether you want time-based automation, location-based automation, or app-based automation.
- Time-based automation — This will turn on your Focus mode at the prescribed time on the prescribed dates. Select this option, then pick your times and dates, and finally, hit Add. Once done, your Focus mode will activate automatically at those times on those dates.
- Location-based automation — This will turn on your Focus mode when you’re at a specific location. Select this, search for a location, and hit the Add button to add a location.
- App-based automation — Turns on your Focus mode when you’re using a specific app. Select this option, choose the app you want, and hit Add. Once you open that particular app, your Focus mode engages automatically.
- Pro-tip — You can add as much automation as you want. For example, I personally have my Macbook turn off notifications from 5 PM to 9 AM the next morning, when I’m not at home, and when I have work apps open. You can add almost as many as you want.
- Once you’re done with your automation settings, your Focus mode is done. It will activate when your automation activates or when you do it manually from the desktop.
FAQ
Yes, you can individually configure notifications for Chrome, iMessage, Slack, Adobe apps, or whatever else you want. As long as it’s one the list in the Notifications & Focus section, you can turn the notifications on or off.
There is a method to view notification history that might work, but it’s not reliable, and it requires a ton of Terminal commands. Generally speaking, there isn’t a way to easily view your notification history. New notifications should still be in the notification center unless you swiped them away.