Affiliate links on Android Authority may earn us a commission. Learn more.
How to go live on YouTube
Published onJanuary 20, 2023
YouTube allows you to start a livestream on your channel from anywhere. You can use your smartphone to start streaming if you’re on the go. The same goes for streaming on your computer, whether from a webcam or dedicated streaming software. Streaming can definitely be a lot of fun, so let’s talk about how to go live on YouTube.
Read more: How to edit videos on YouTube
THE SHORT ANSWER
To go live on YouTube, click Create > Go live. If streaming from a webcam or scheduling a stream, go through the Create stream menu and fill out the Details, Customization, and Visibility fields. If you'll be streaming from software, copy your Stream key and Stream URL, then paste those into the necessary fields on your streaming software.
KEY SECTIONS
How to enable YouTube live streaming
Live streaming on YouTube is only possible if you’ve verified your account. Verifying your account is different from applying for verification; you don’t need the verification badge to be able to stream on YouTube.
Verifying your YouTube channel entails adding a phone number and then entering a verification code sent to that phone number. This will allow you to upload videos longer than 15 minutes, add custom thumbnails, appeal Content ID claims, and go live on YouTube.
How to verify your YouTube account
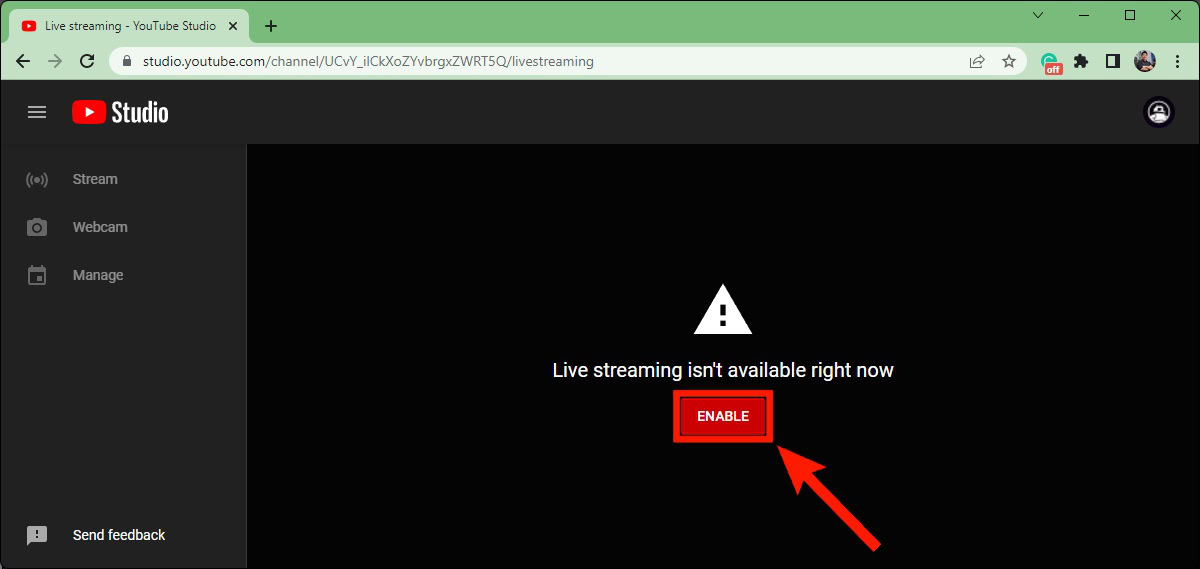
Go to youtube.com/verify. Alternatively, you can try to live stream on YouTube, then click the ENABLE button underneath the “Live streaming isn’t available right now” message.
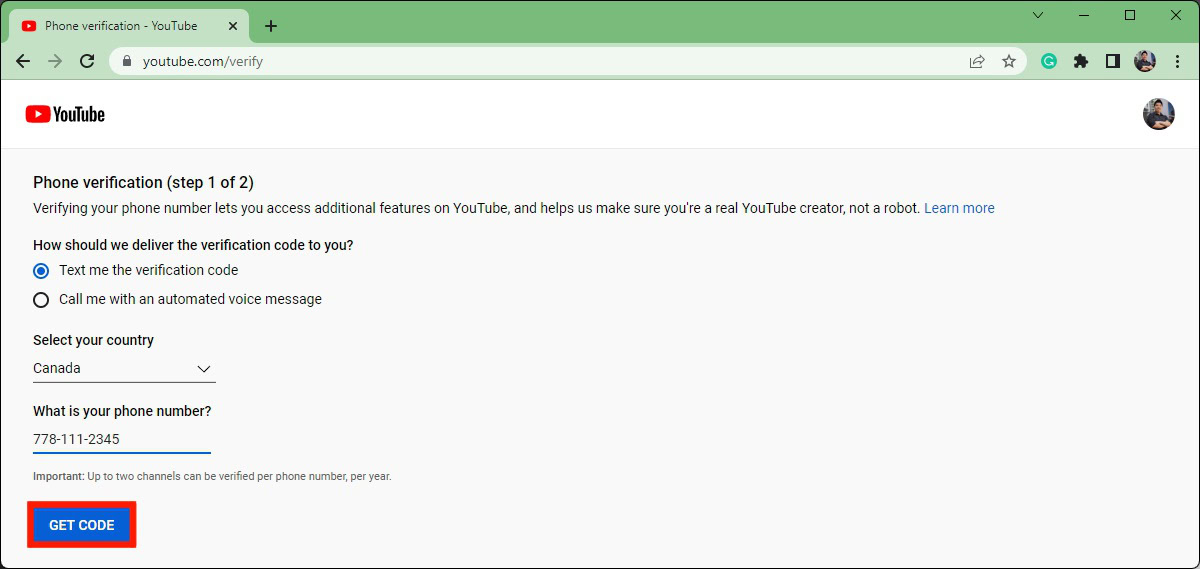
Once you’ve reached the YouTube verification page, fill out how you would like to receive the code, your country, and your phone number. When ready, click GET CODE.
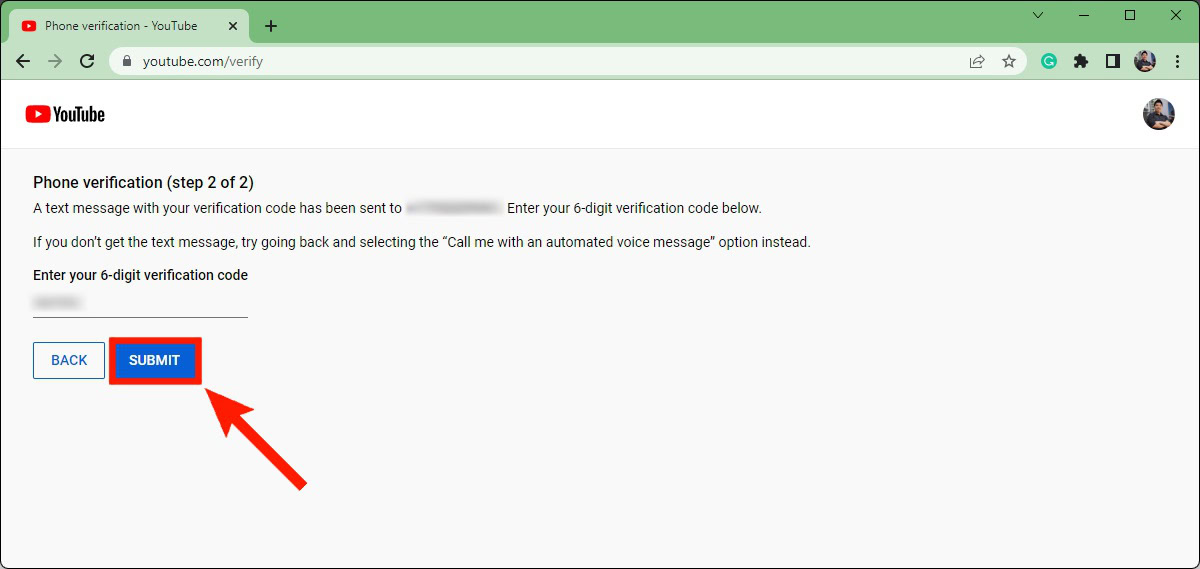
Google will send a verification code to your phone. Enter that in the Enter your 6-digit verification code field, then click SUBMIT.
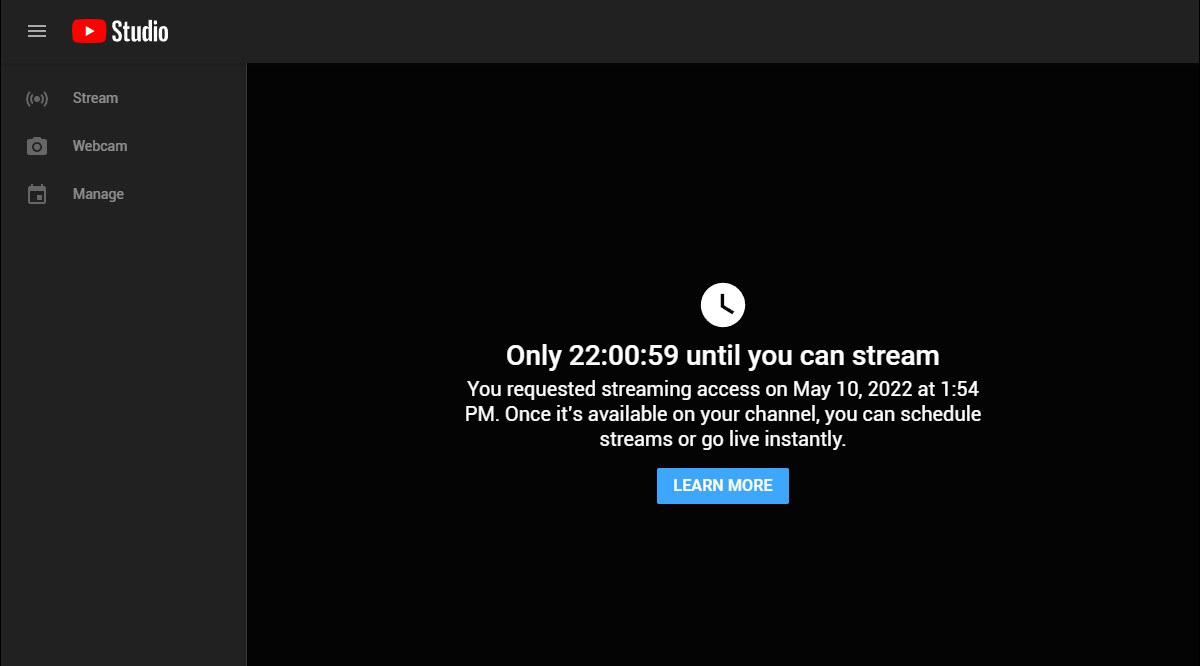
Note that there is a one-day buffer on your ability to begin live streaming if this is the first time you’ve verified your account. After 24 hours, you will be able to follow all of the steps below to begin streaming on YouTube.
How to live stream on YouTube (desktop)
If you’re using YouTube’s live streaming feature on a computer, you have two options: streaming directly from your webcam and streaming from dedicated streaming software.
Directly from your webcam
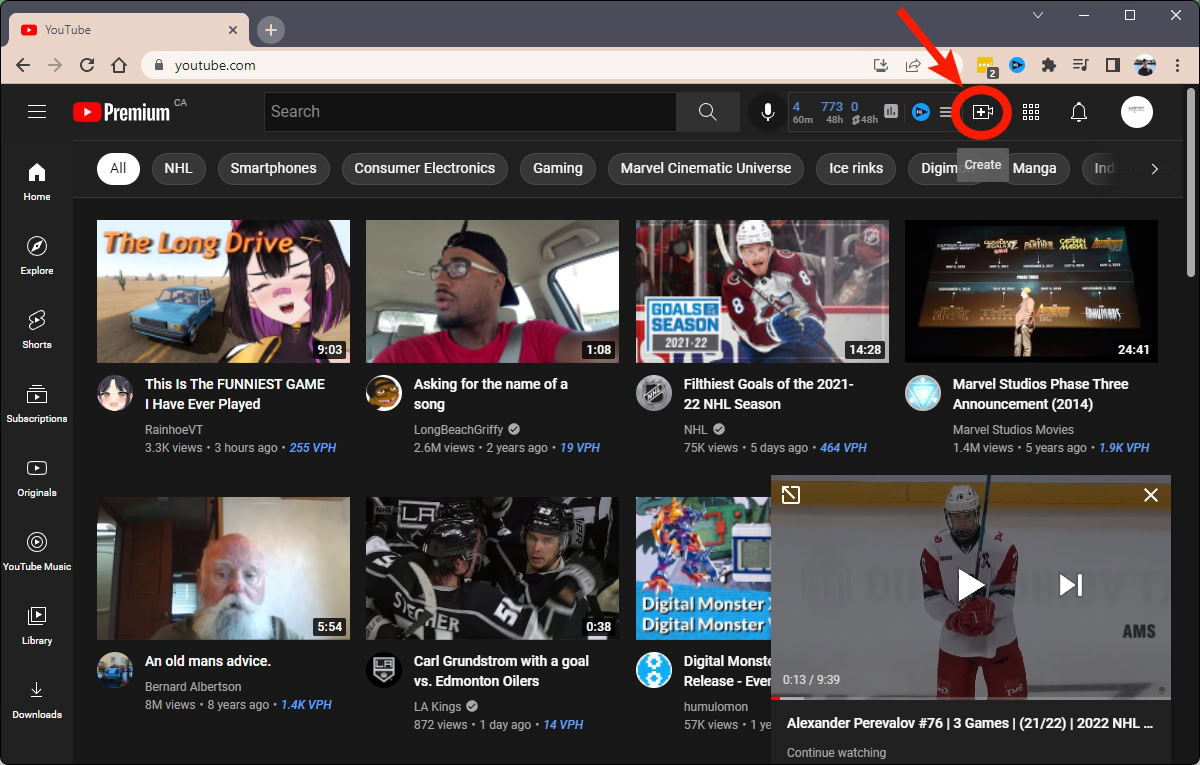
Go to the YouTube homepage and click the video camera-shaped Create button at the top of the page.
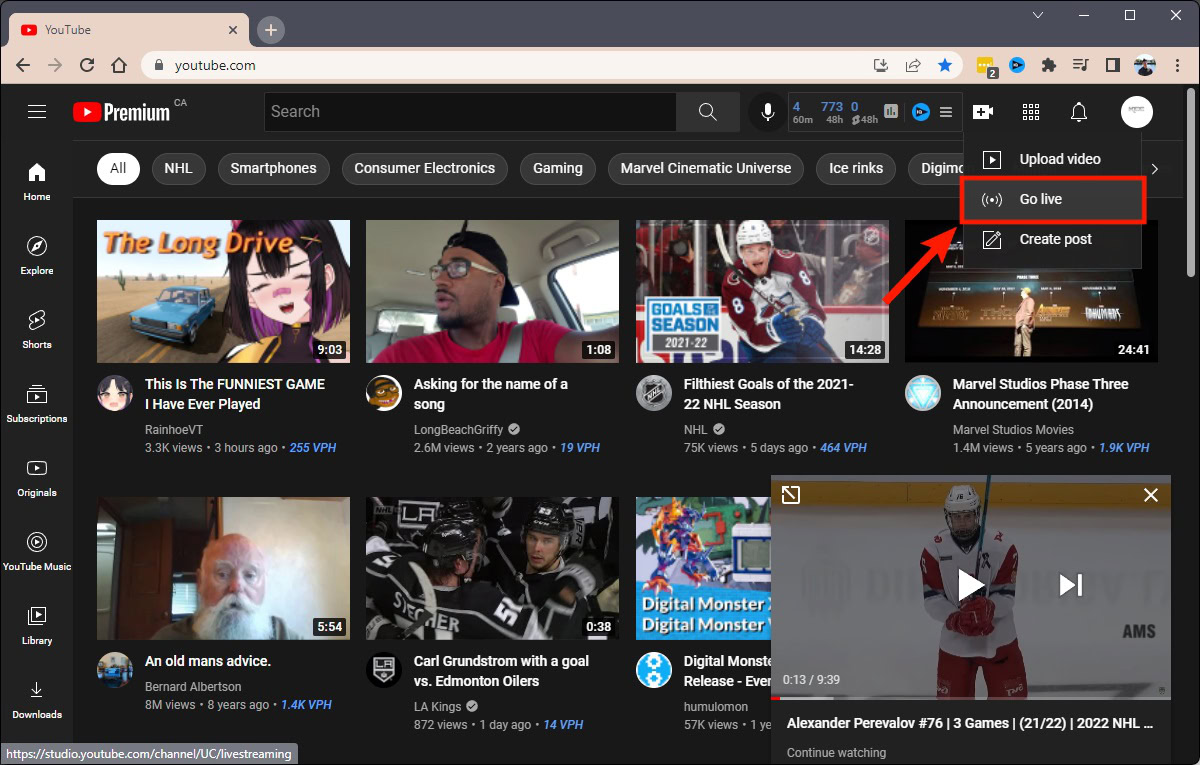
From the subsequent dropdown menu, click Go live.
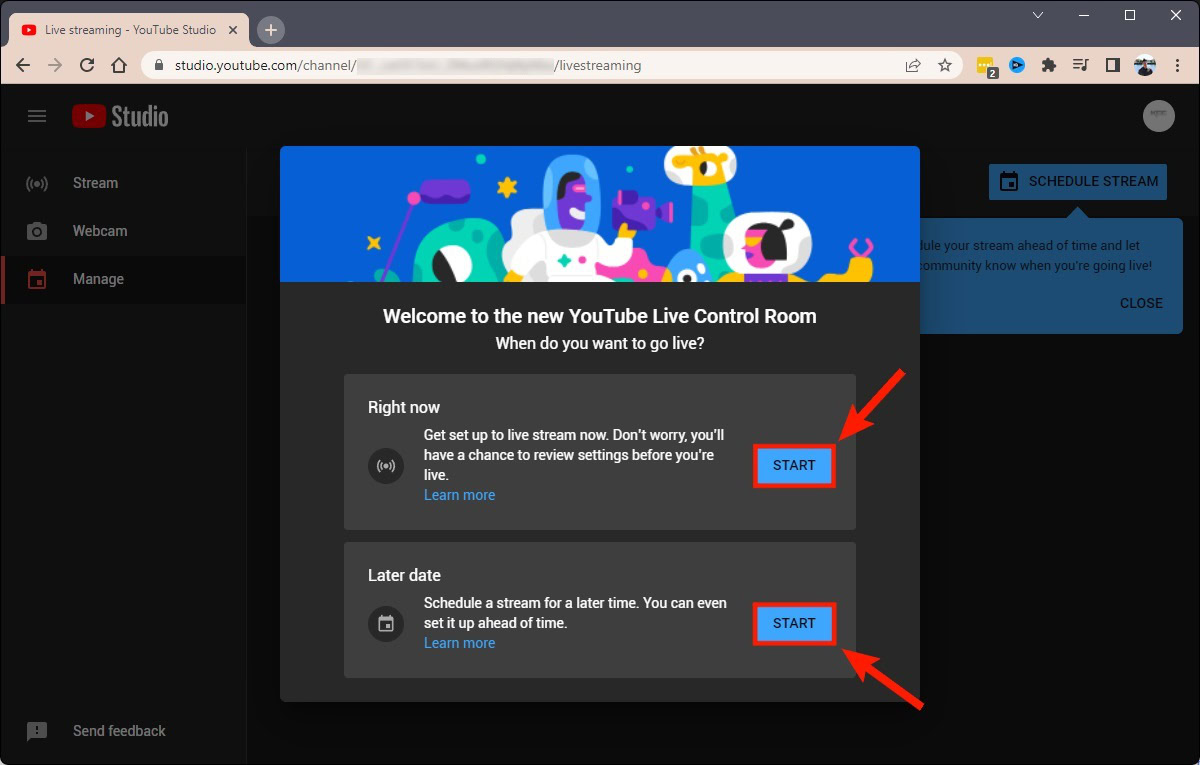
YouTube has a new “YouTube Live Control Room” menu set up. On the first page, titled When do you want to go live?, click START next to either Right now or Later date. This will determine whether your stream will begin right away or at a later time.
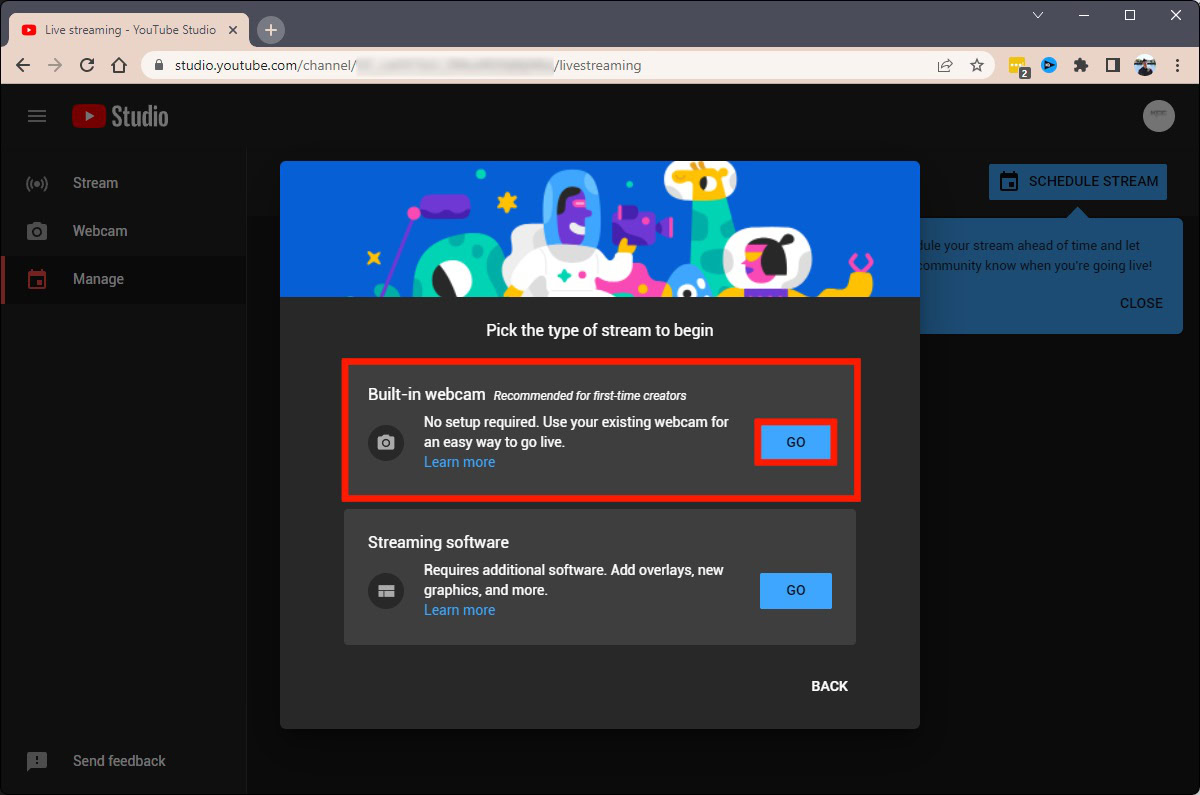
Under Pick the type of stream to begin, select Built-in webcam by clicking the GO button next to it.
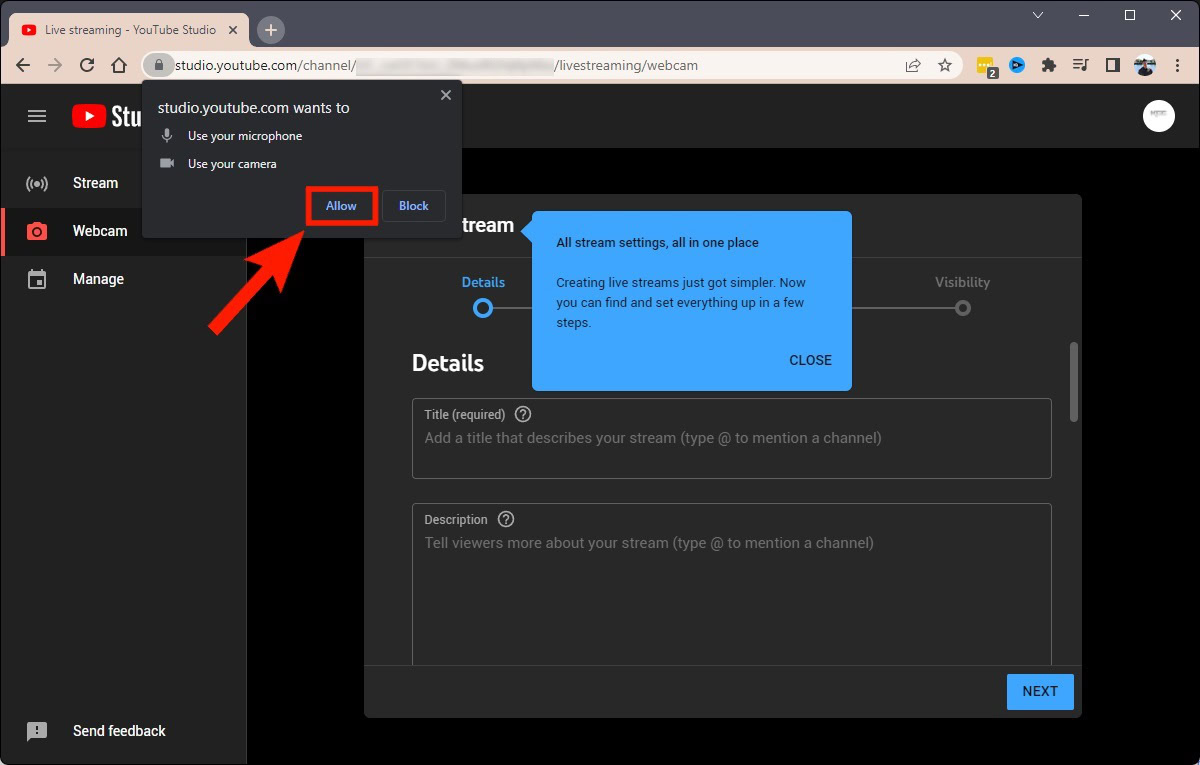
Allow studio.youtube.com to Use your microphone and Use your camera.
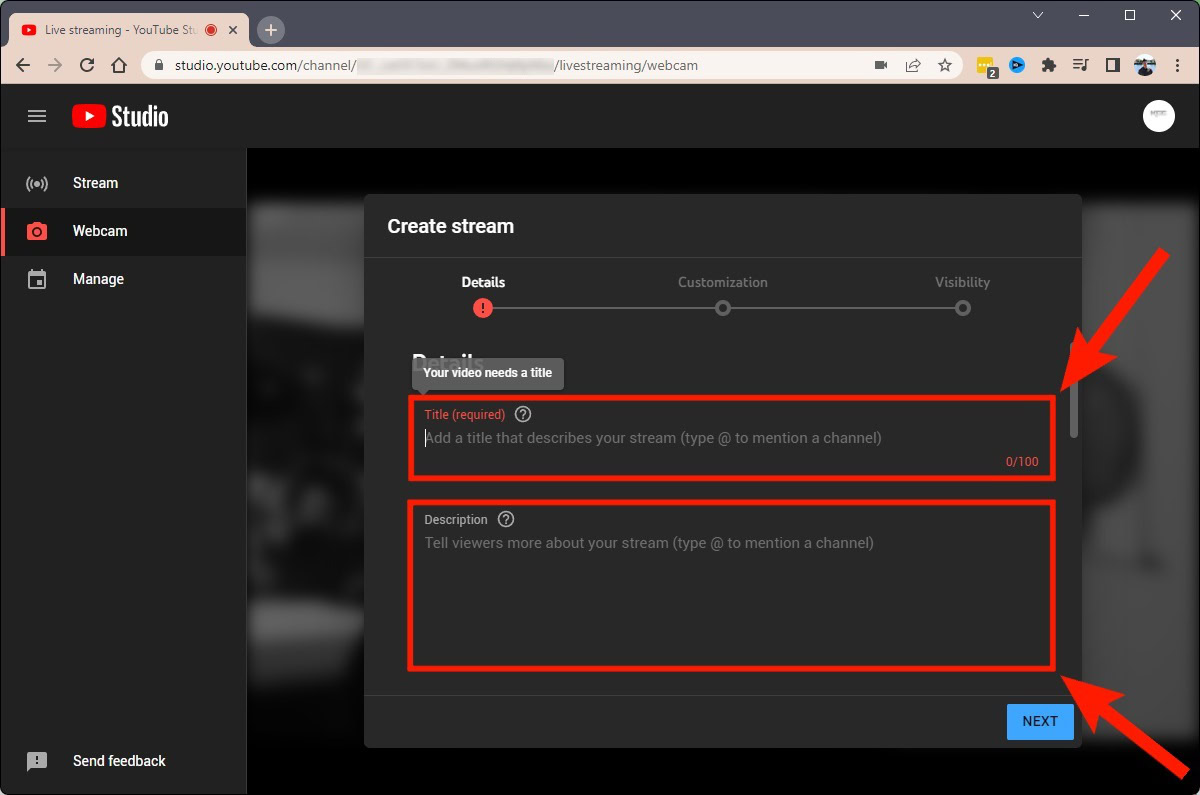
The first section of Create stream allows you to customize the Details for your upcoming stream.
Give your video a title in the Title (required) field. If you have a description ready for your stream, you can enter that into the Description field, then scroll down.
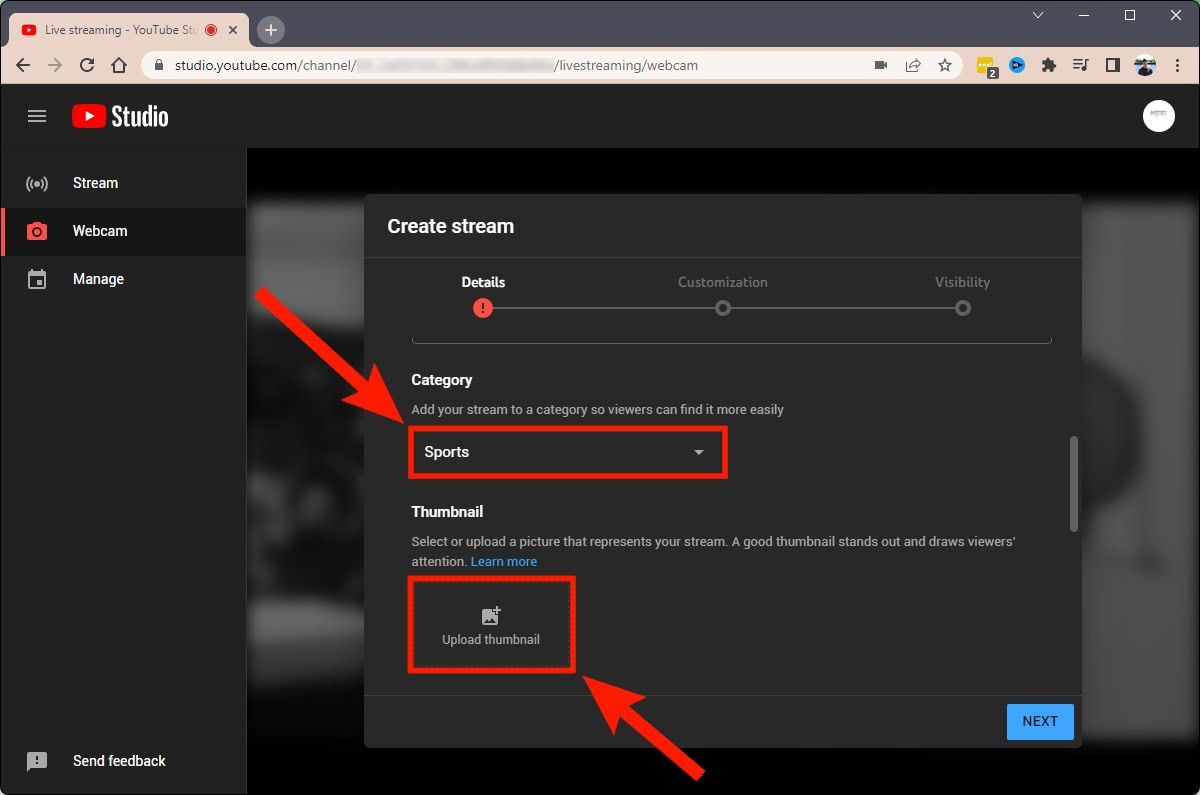
Give your stream a Category. Keep in mind that if you’re going to be gaming, you should add the title of the game you will be streaming.
Under Thumbnail, click the Upload thumbnail button to give your stream a custom cover image.
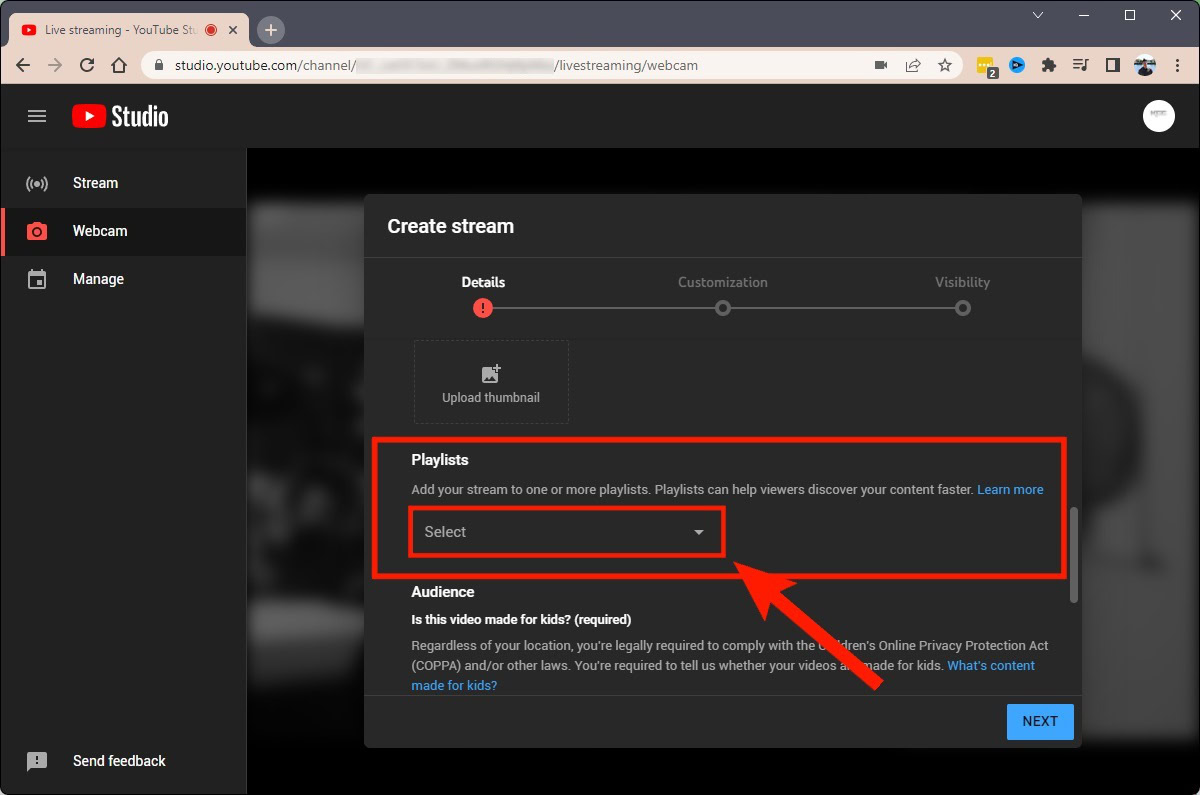
Scroll down to the Playlists section and click the Select dropdown menu to add your stream to any playlists you’ve set up for your channel.
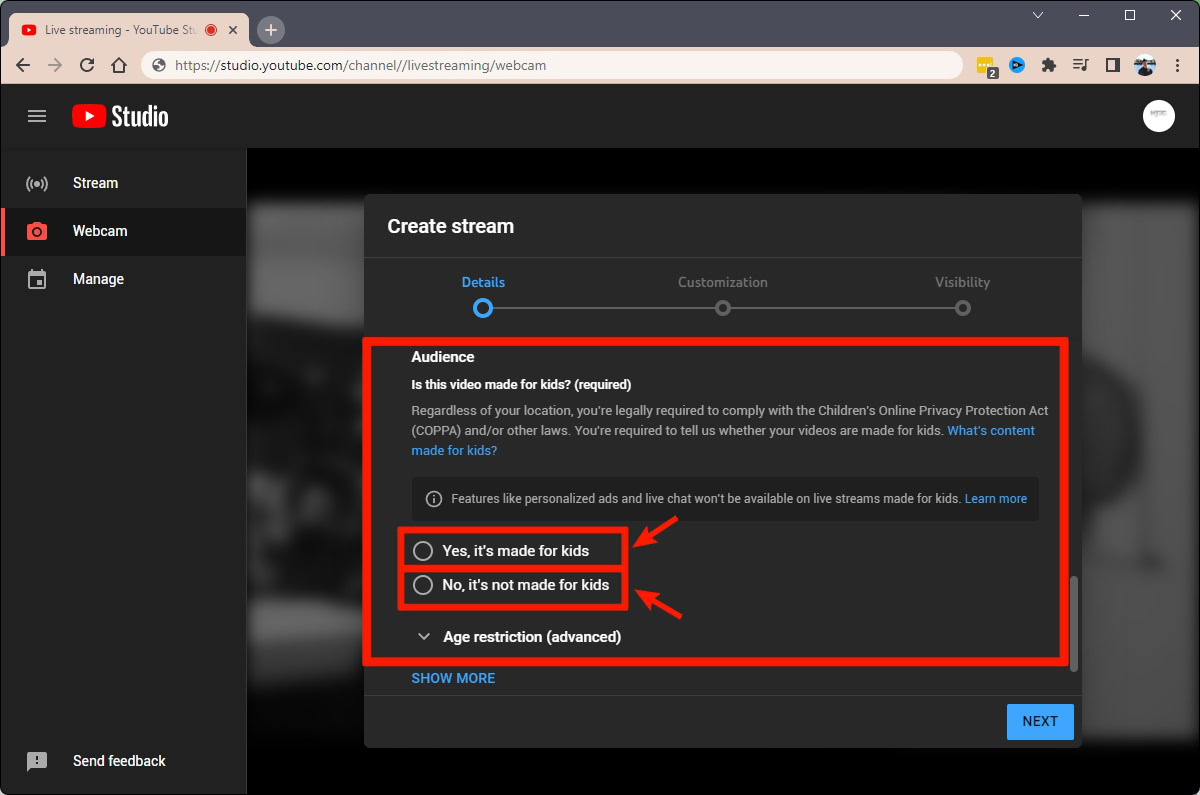
Scroll down to the bottom and select either Yes, it’s made for kids or No, it’s not made for kids under the Audience section. If you choose Yes, it’s made for kids, your stream will be very limited and comments will not be allowed. The same goes for live chat and personalized ads.
When ready to move on from Details to Customization, click the NEXT button at the bottom.
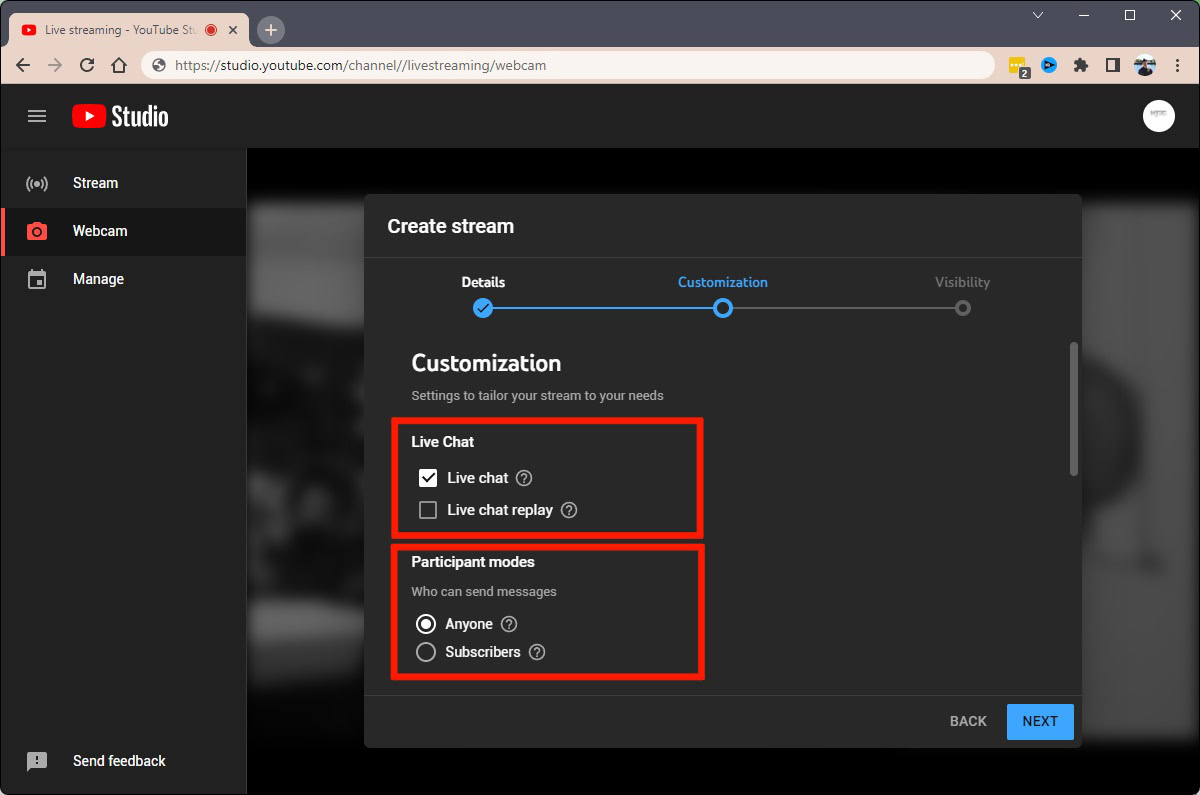
The second section of Create stream allows you control over numerous Customization features.
Under Live chat, you can enable or disable Live chat and Live chat replay. You can also control who can send messages under Participant modes.
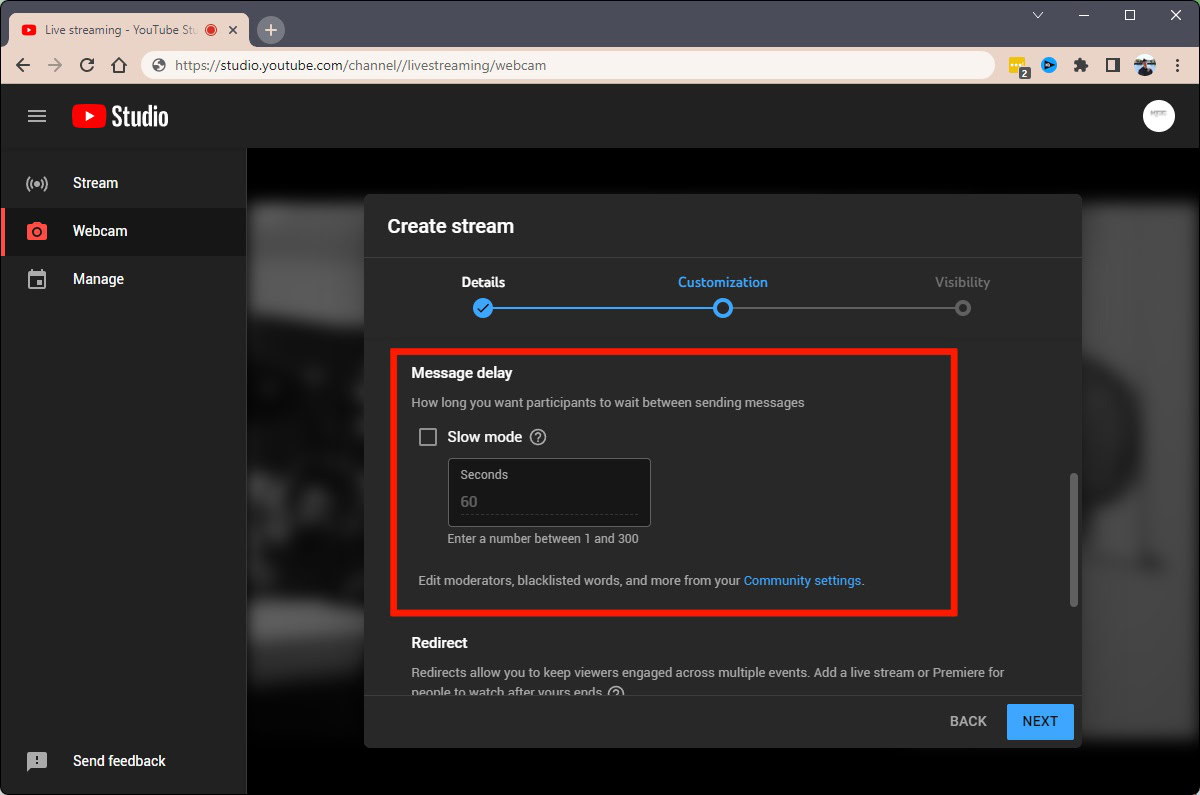
If you scroll down, you can turn on Slow mode under Message delay if you fear an onslaught of incoming chat messages. This will time out the chat so that people must wait between sending messages.
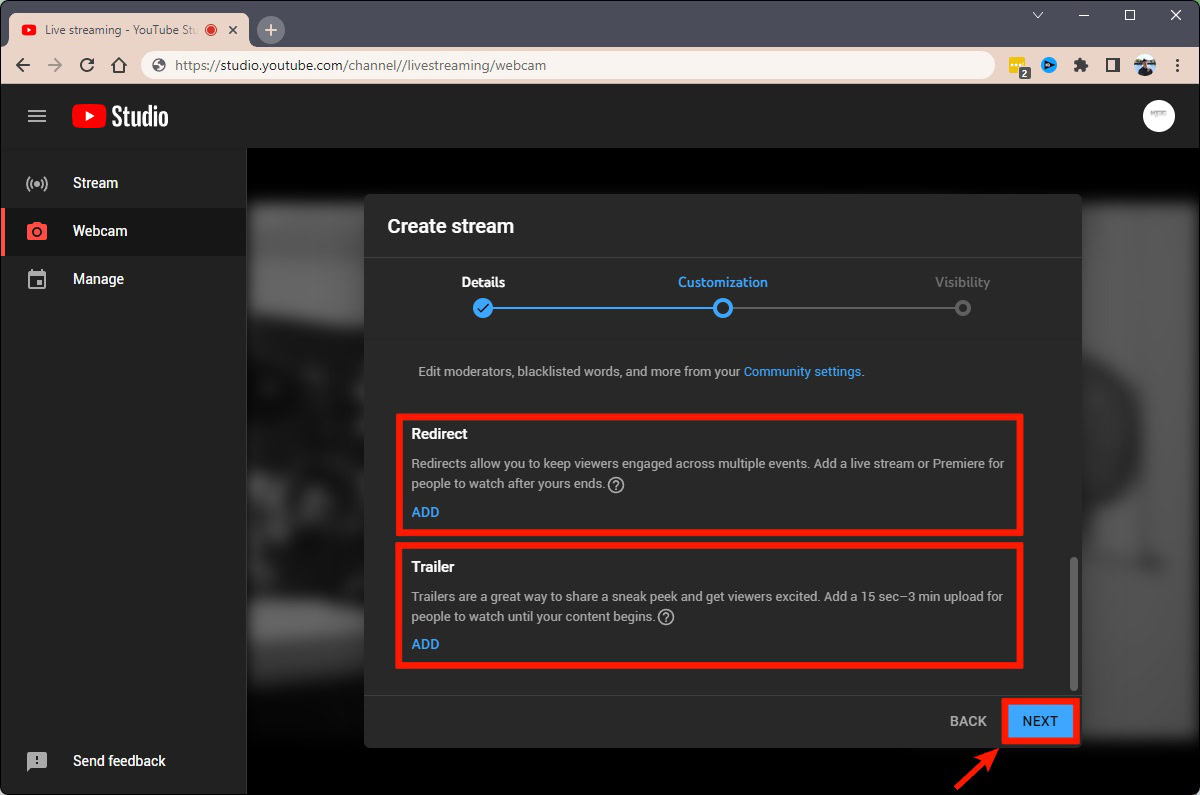
Scrolling down to the bottom of Customization, you can add Redirects and Trailers.
Click NEXT when ready.
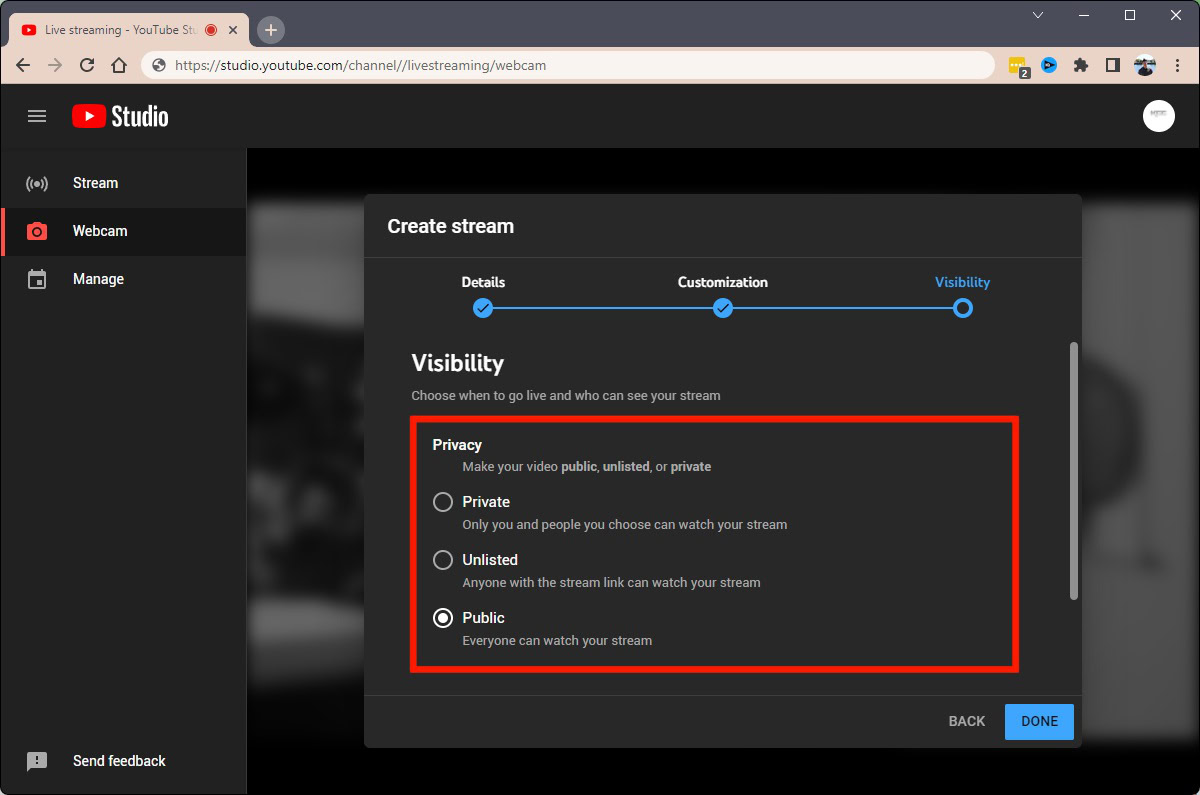
The final section of Create stream is the Visibility tab.
Under Privacy, click Private, Unlisted, or Public. If you want everyone to be able to see your stream without needing a link, select Public.
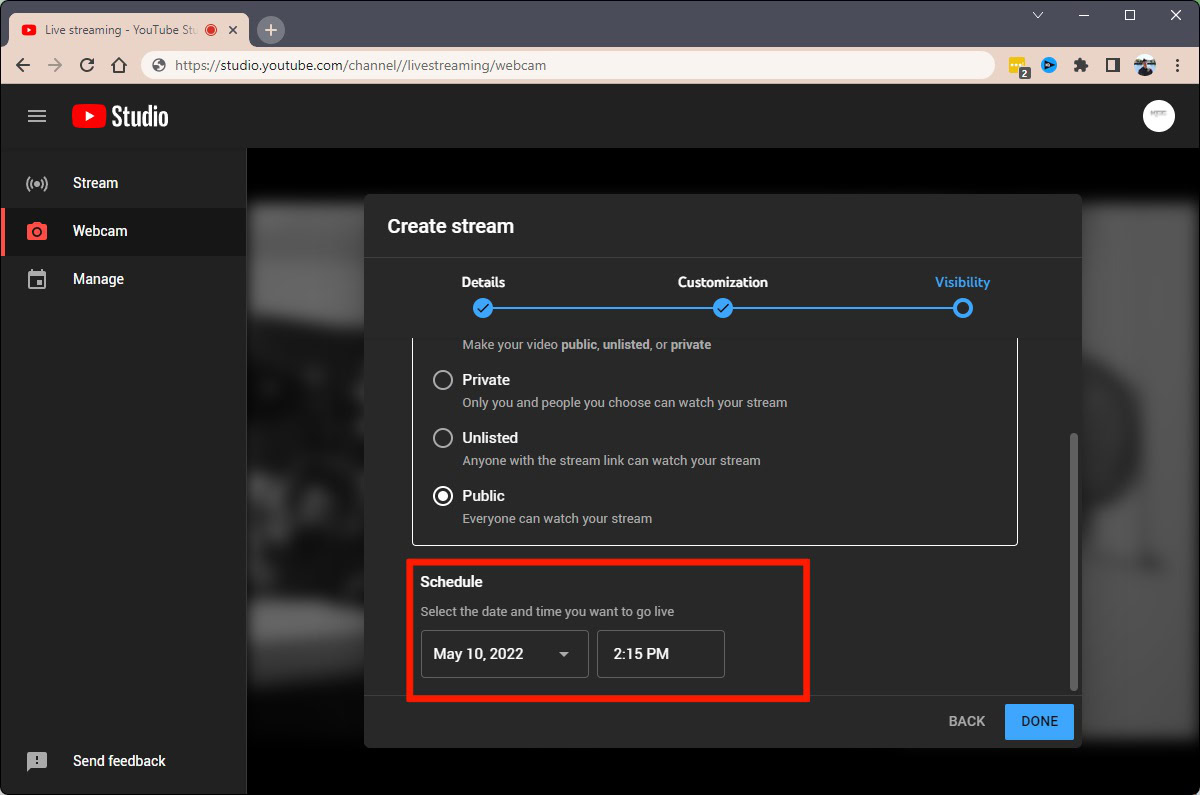
Scroll down to the Schedule section. Here you can add a specific date and time for your stream to start.
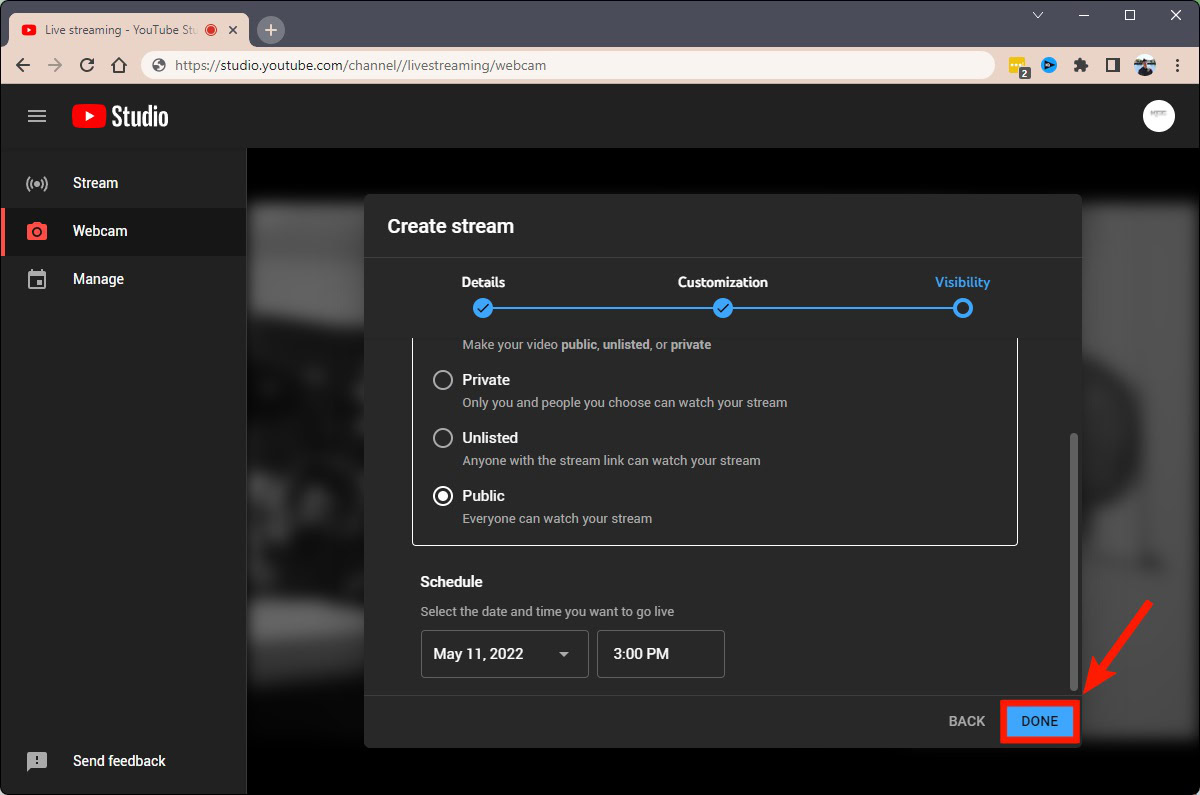
When satisfied with your stream parameters, click DONE.
Using streaming software (Streamlabs)
If you want to add overlays and stream the contents of your computer screen, you can use streaming software like Streamlabs or OBS.
Go to the YouTube homepage and click the video camera-shaped Create button at the top of the page.

From the subsequent dropdown menu, click Go live.

YouTube has a new “YouTube Live Control Room” menu set up. On the first page, titled When do you want to go live?, click START next to either Right now or Later date. This will determine whether you want to start streaming right away or schedule your stream to start some other time.
Note that we’re clicking Right now for this demonstration.

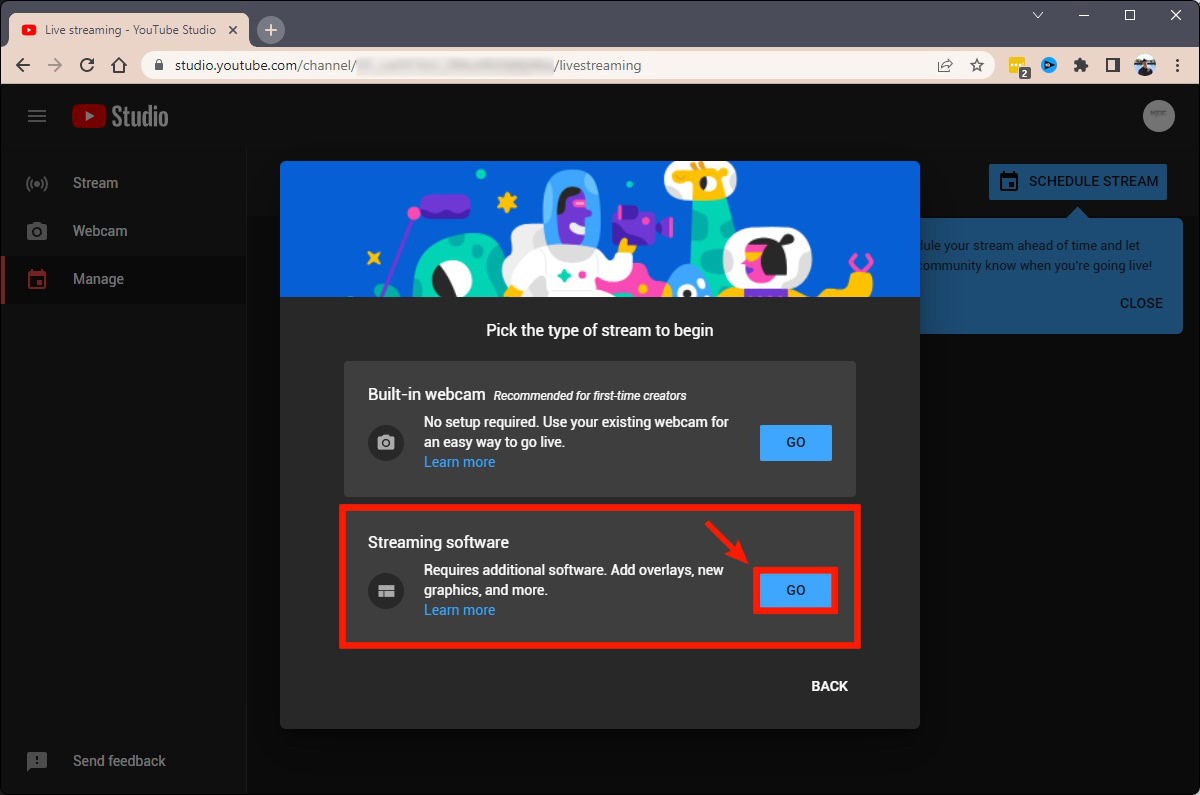
Under Pick the type of stream to begin, select Streaming software by clicking GO next to it.
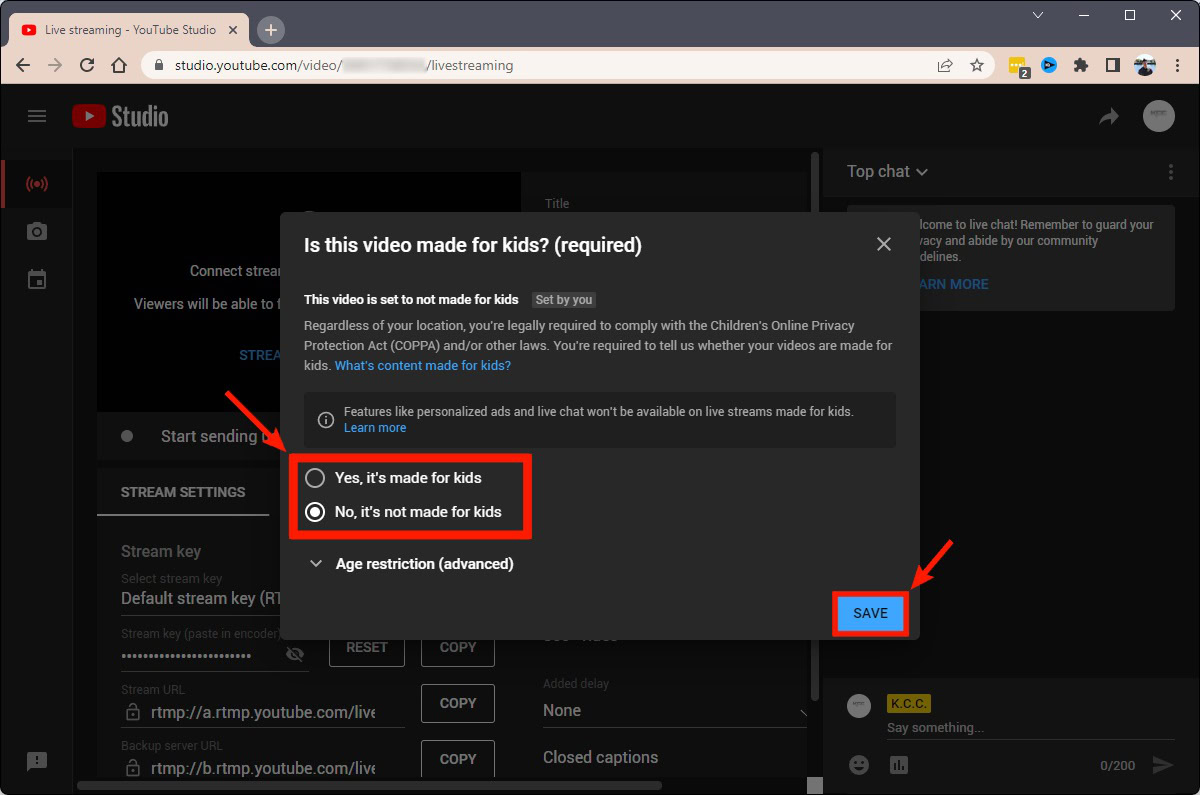
Next, click either Yes, it’s made for kids or No, it’s not made for kids. Note that if you select Yes, it’s made for kids, then your stream will be very limited and comments will not be allowed. The same goes for live chat and personalized ads.
Click SAVE when you’re ready to continue.
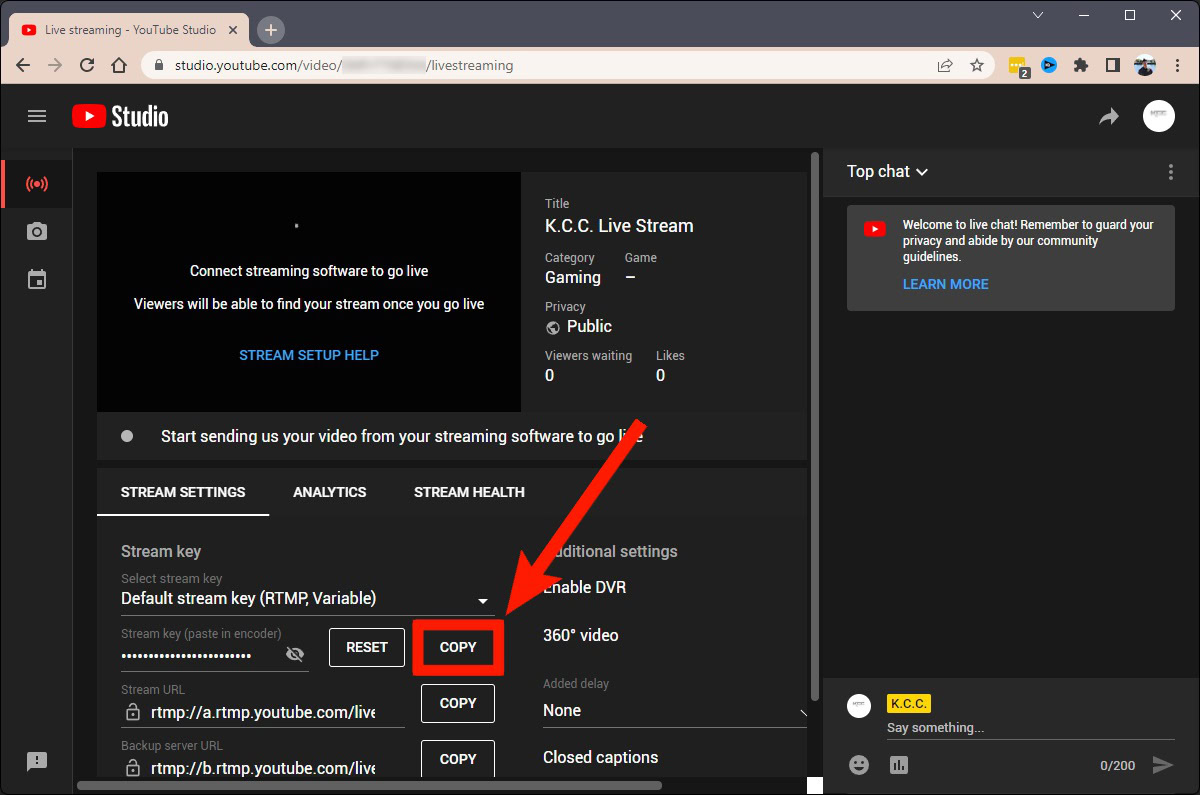
Next to Stream key (paste in encoder), click the COPY button. This will copy your stream key to your clipboard.
Additionally, we scrolled to the right at this step and changed the Privacy setting from Public to Unlisted.
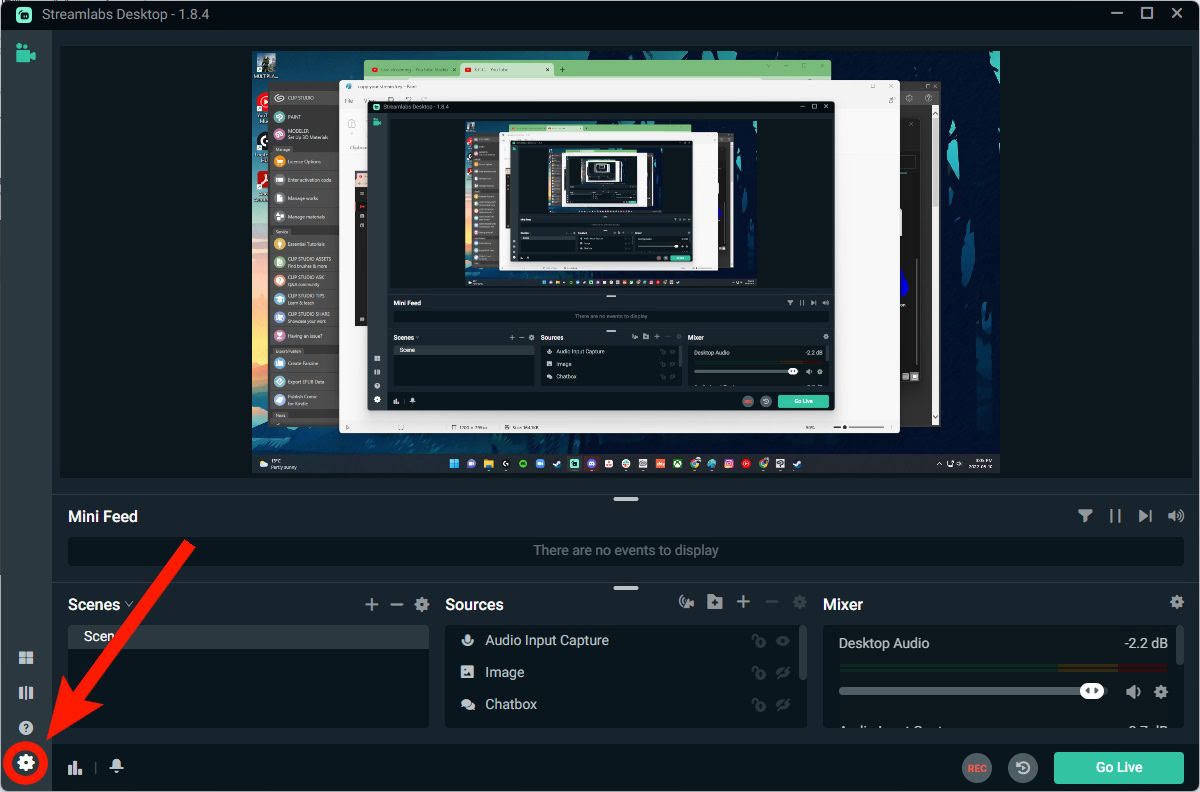
Start your streaming software on your computer. For this article, we are using Streamlabs.
On Streamlabs, click the gear-shaped Settings button in the bottom left corner.
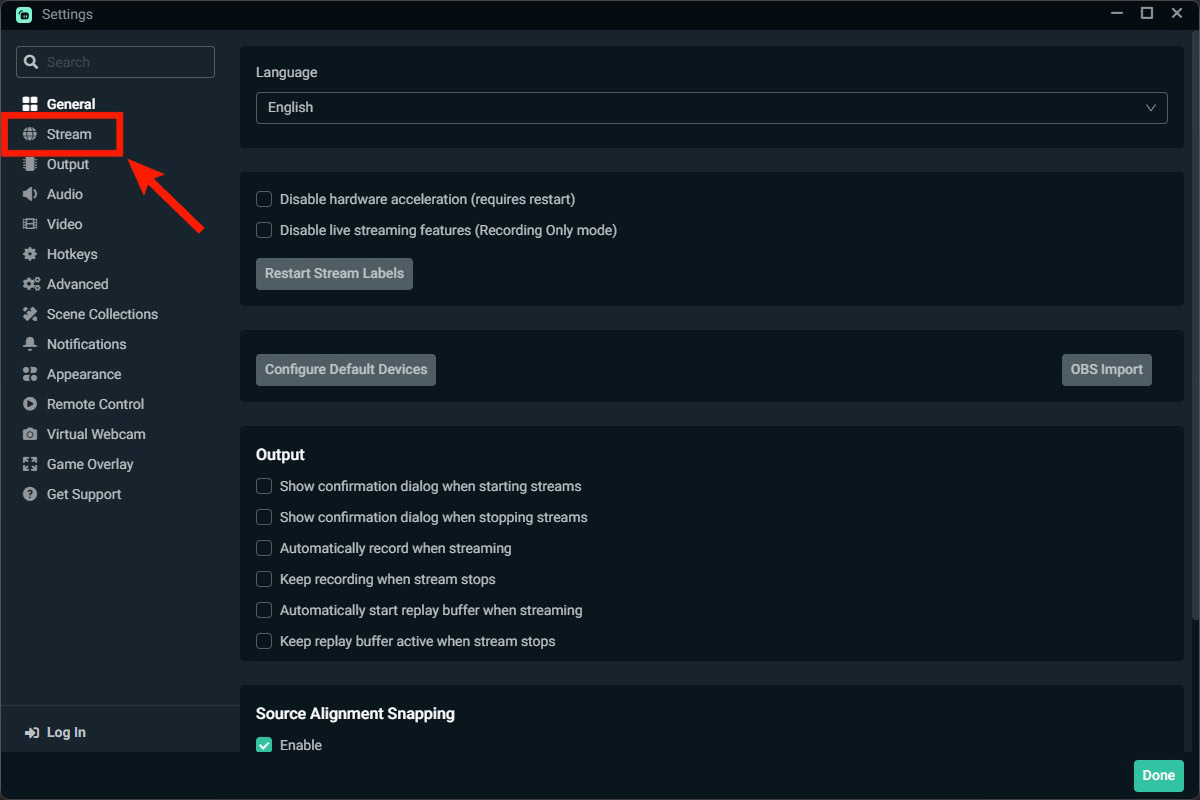
In Settings, click the Stream tab from the menu on the left.
Open the dropdown menu underneath Stream Type.
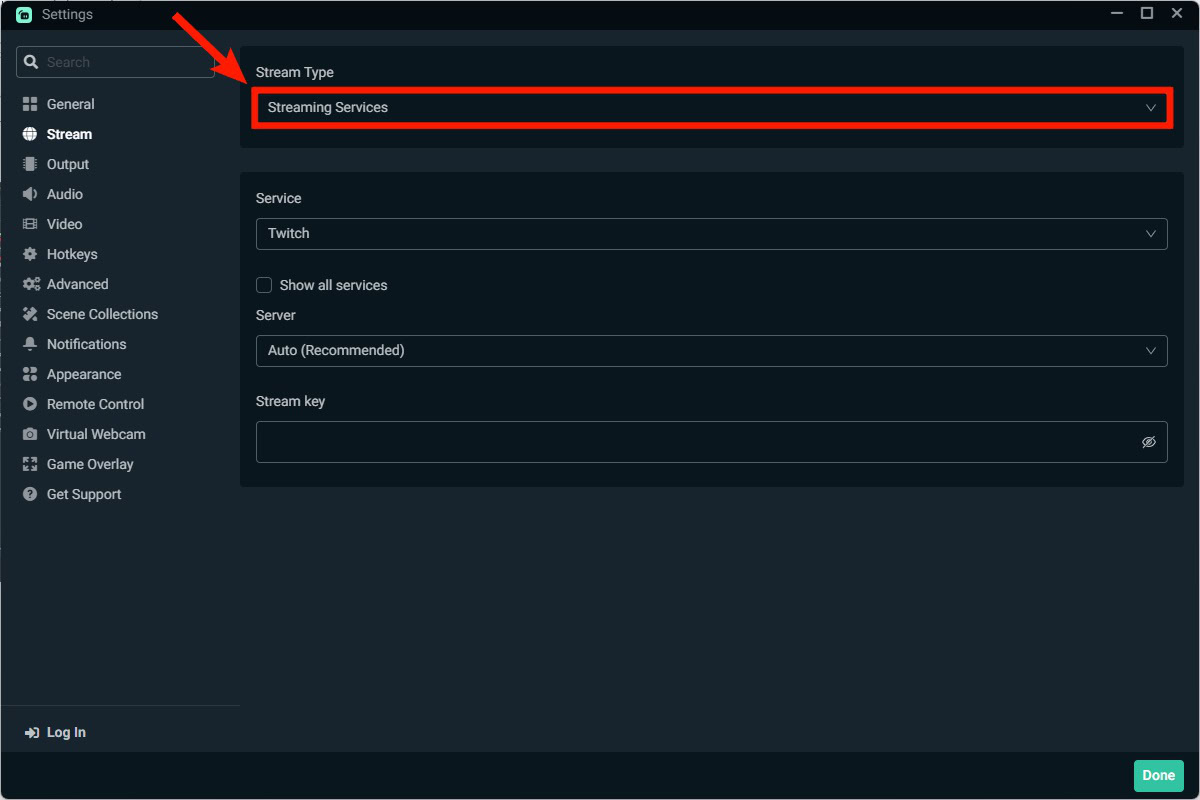
Click Custom Streaming Server.
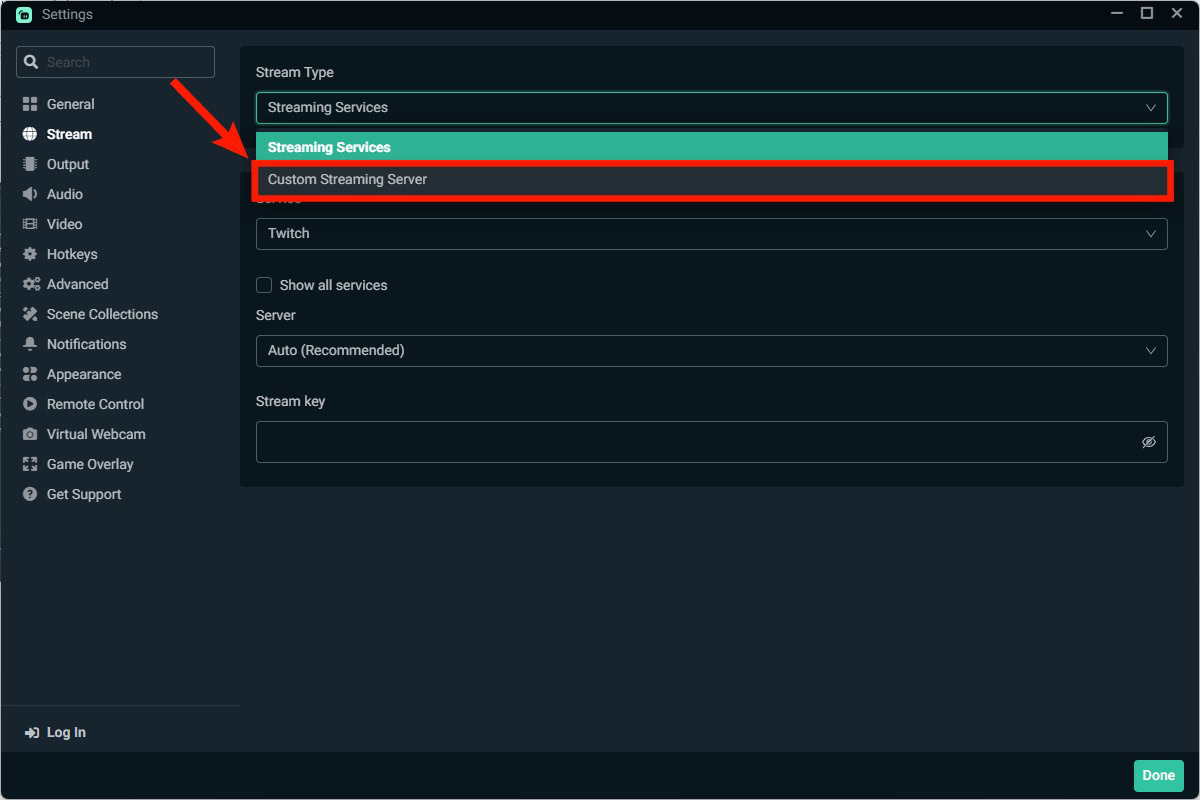
Paste the stream key you copied to your clipboard in the Stream key field.
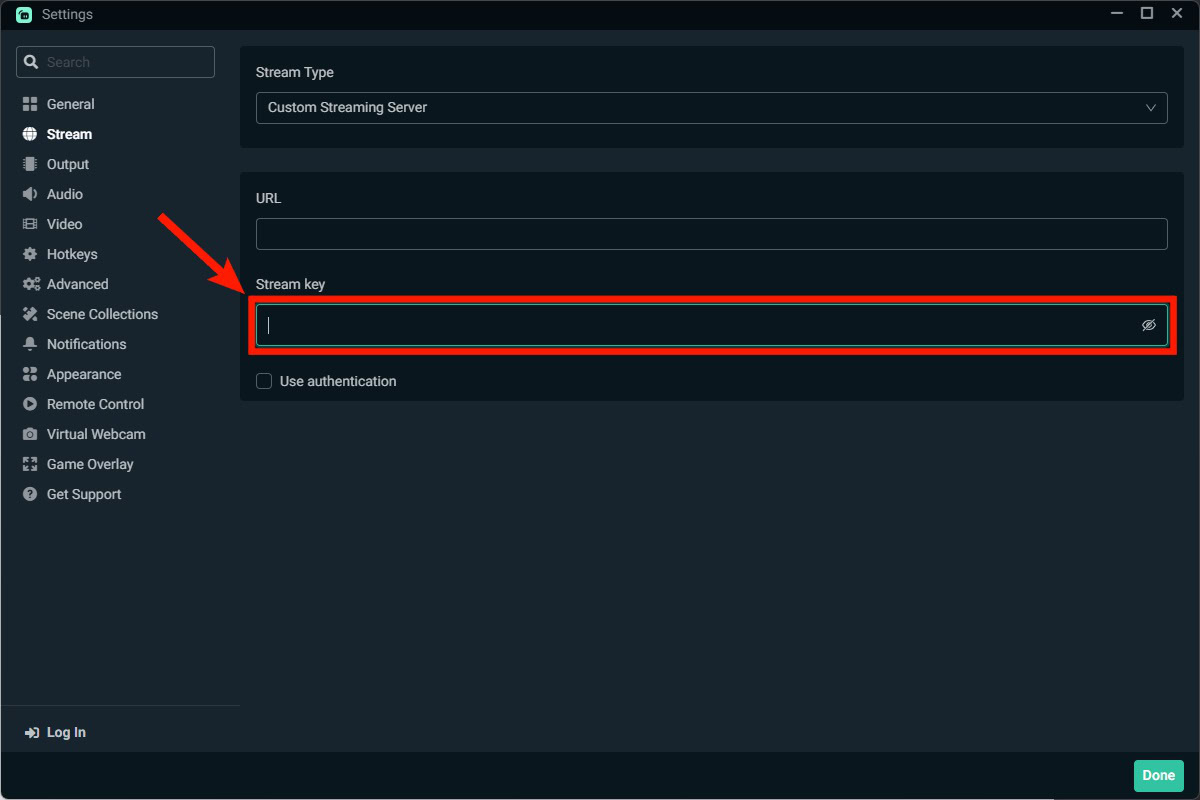
Return to YouTube Studio in your browser. Click the COPY button next to Stream URL.
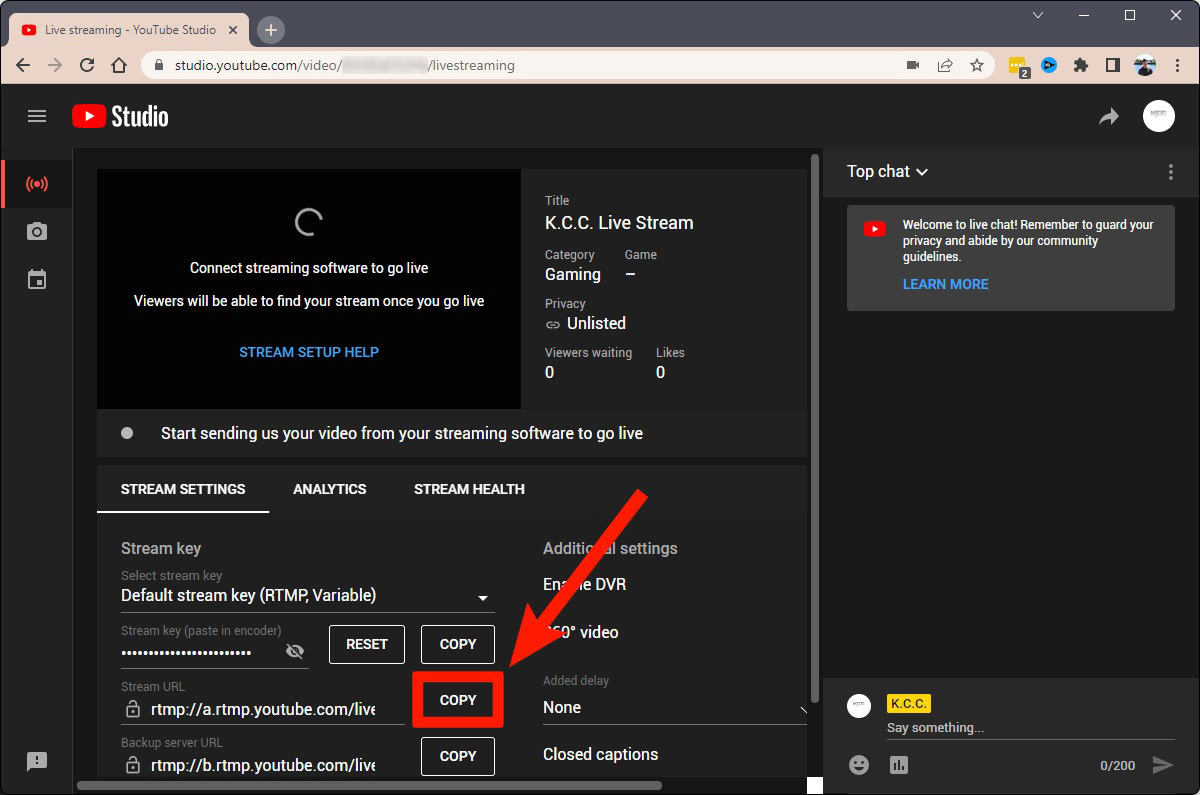
Return to Streamlabs Settings. Paste the Stream URL you copied in the URL field.
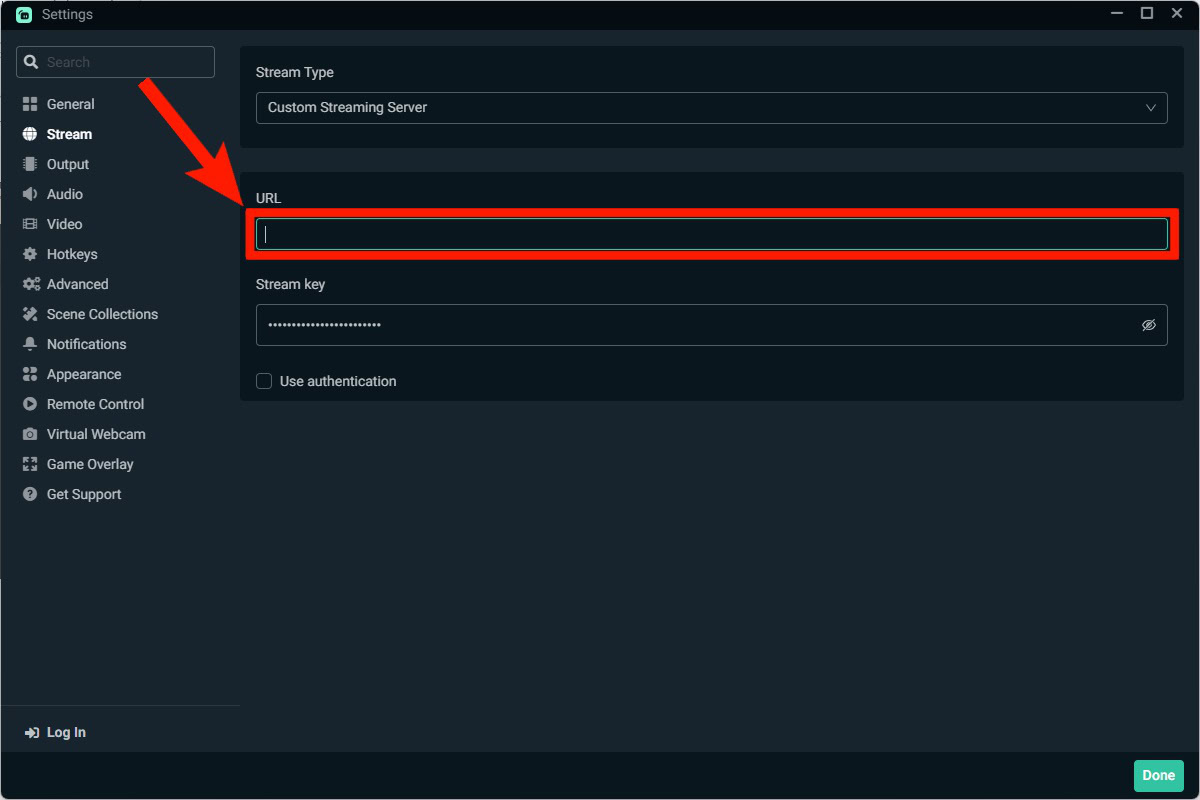
Click Done in the bottom right corner.
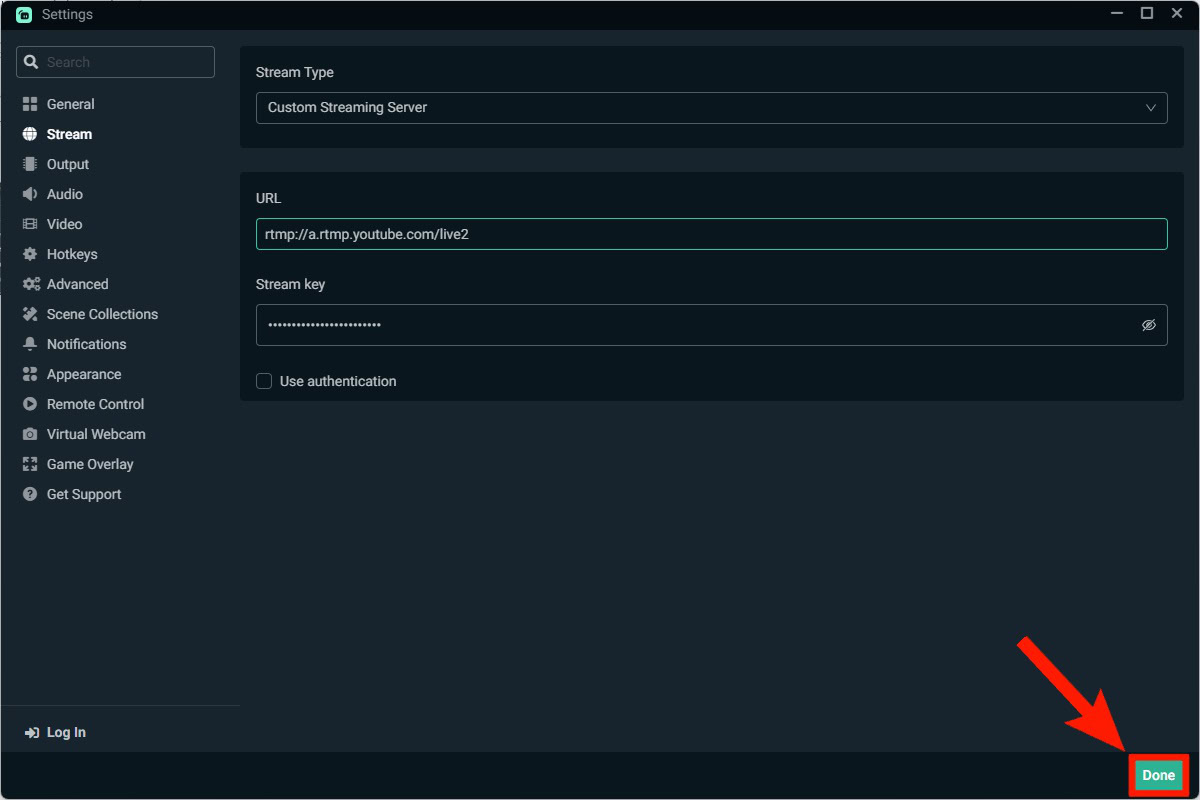
Click Go Live in the bottom right of Streamlabs.
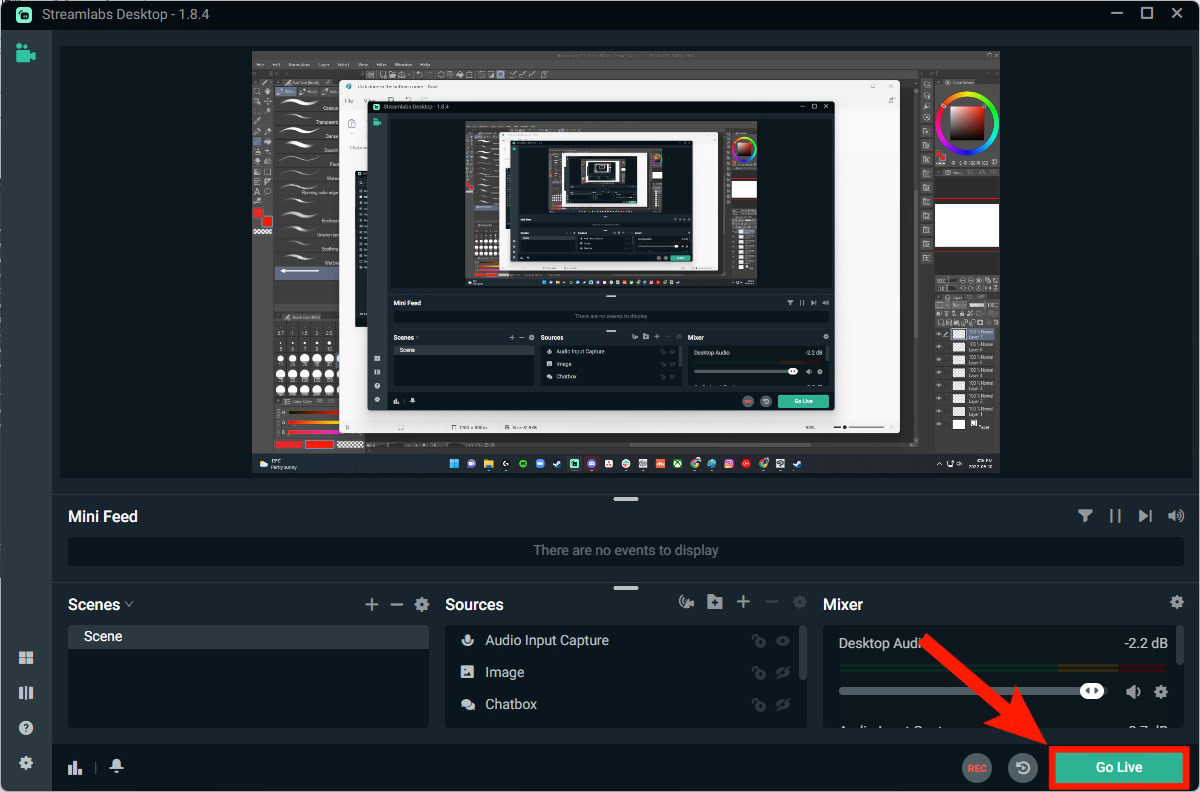
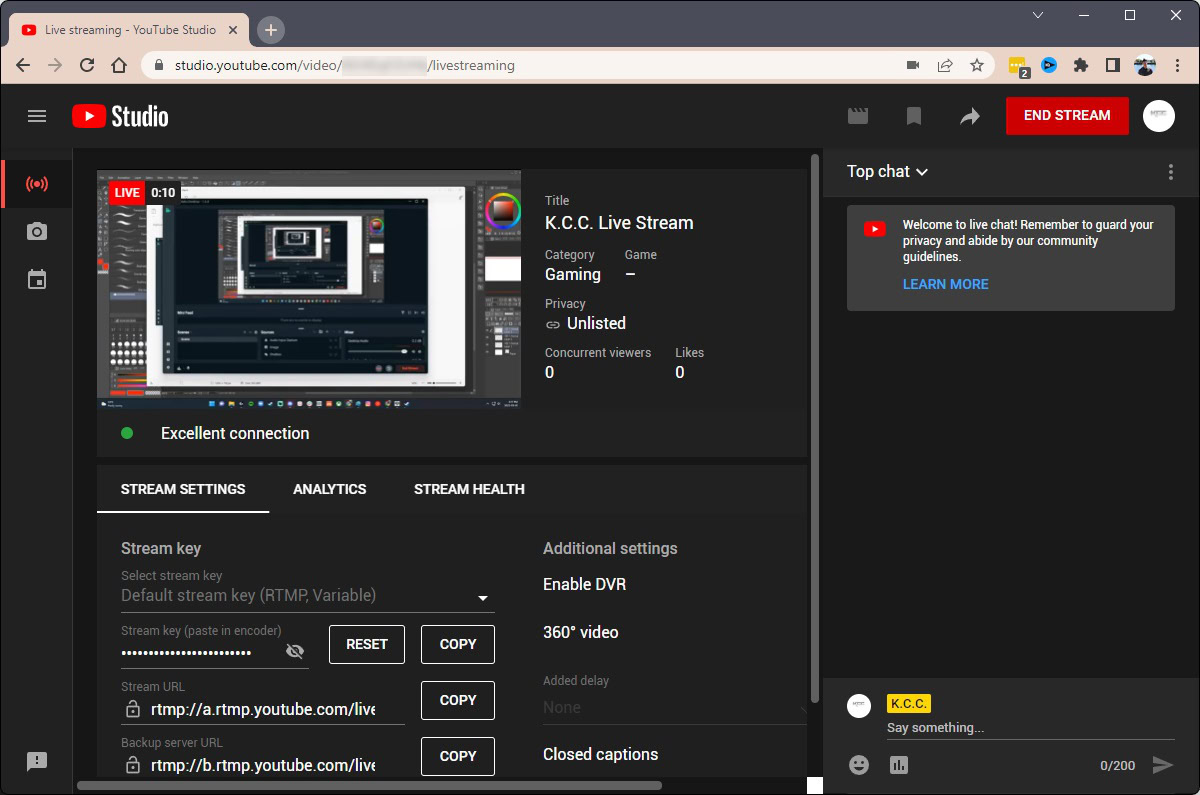
You are now live streaming from your streaming software to YouTube.
How to live stream on the YouTube app (Android and iOS)
Open the YouTube app on your mobile device and press the plus-shaped Create button at the bottom of the interface. Select Go live.
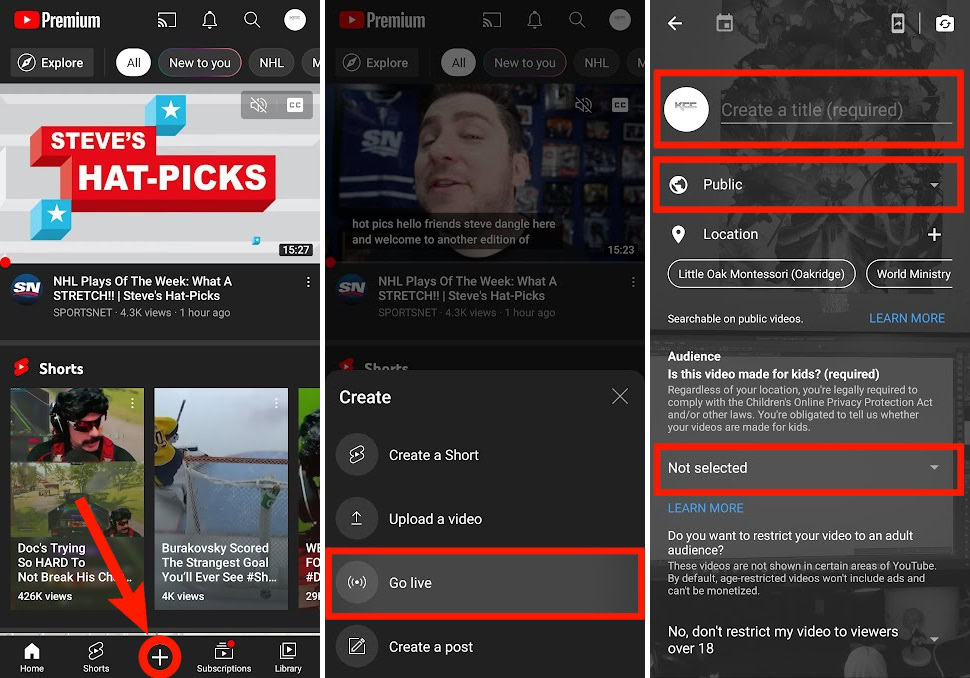
Give your stream a name in the Create a title (required) field, select whether you would like the stream to be Public, Private, or Unlisted, and add the Audience setting at the bottom. If you select Yes, it’s made for kids, then your stream will be very limited and comments will not be allowed. The same goes for live chat and personalized ads.
Press the NEXT button at the bottom to continue.
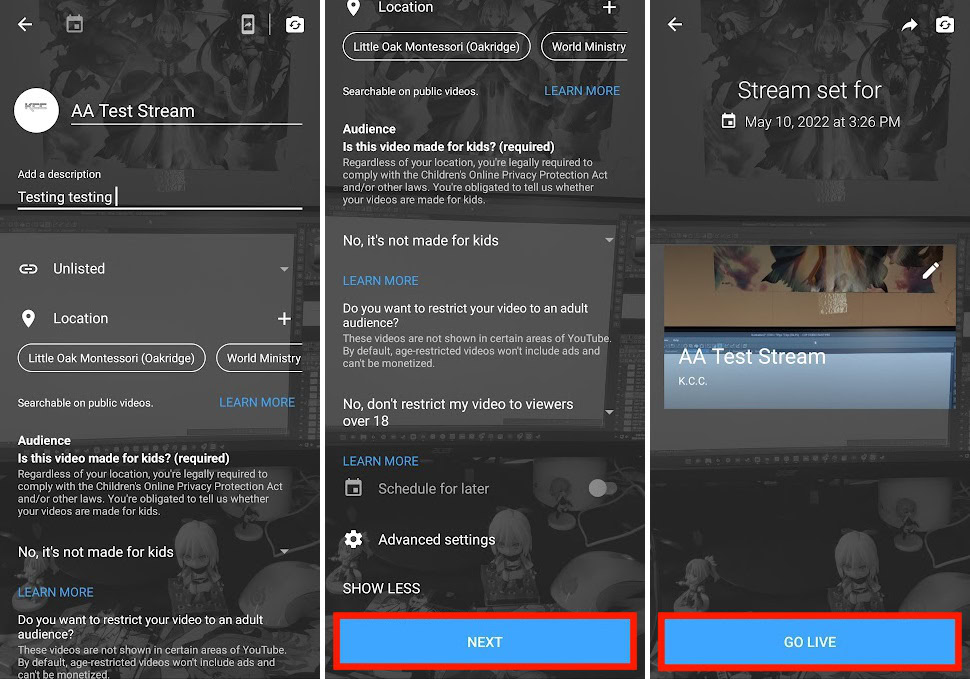
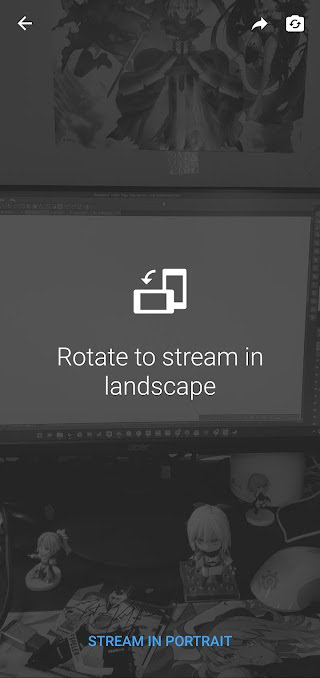
Press GO LIVE. You will then be asked to rotate your device to stream in landscape. You can do this or tap the STREAM IN PORTRAIT button at the bottom to begin your YouTube live stream.
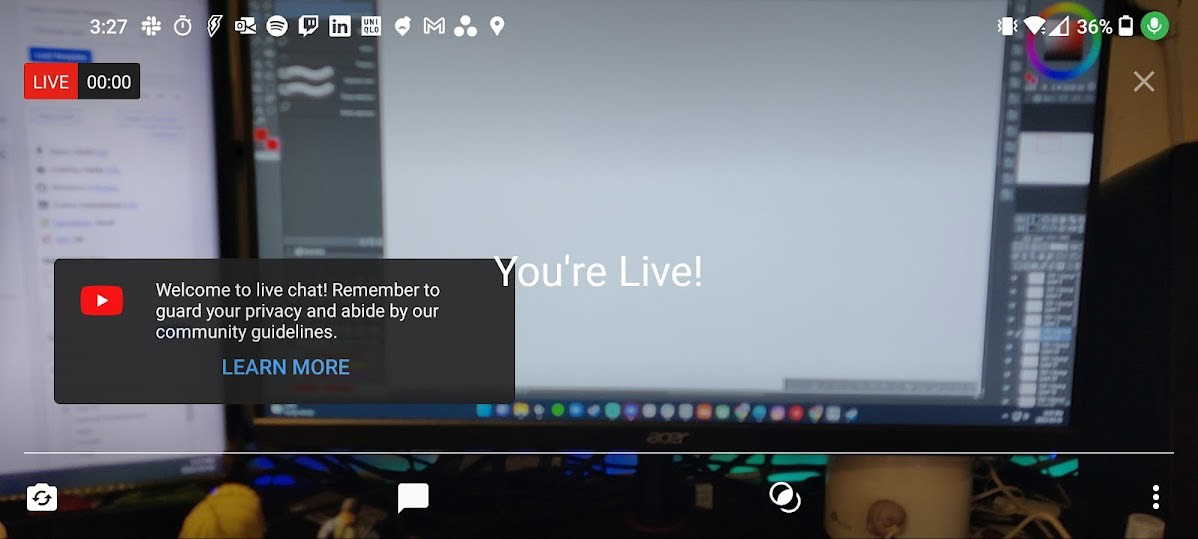
If you wish to end your stream, tap the translucent X button in the top right corner.
Read more: How to get more subscribers on YouTube
FAQs
When people are watching live, it won’t count towards your watch time. If you upload your stream to your channel as a video later on, that will.
Yes, if your stream is under 12 hours long. If it’s under 12 hours long, you can get YouTube to automatically archive your stream and post it on your channel.
Yes. All you need to do to start live streaming on YouTube is verify your account. After doing so, you must wait 24 hours before you can go live on YouTube.