Affiliate links on Android Authority may earn us a commission. Learn more.
How to install and run shaders in Minecraft
Published onAugust 29, 2024
Shaders dramatically enhance Minecraft’s visuals, from realistic lighting and reflections to experimental textures. In this tutorial, I will guide you through installing, configuring, and optimizing shaders in Minecraft Java Edition—not available in the Bedrock version used on consoles and mobile devices. Keep in mind that shaders can significantly affect game performance, especially at higher resolutions like 4K. However, the vast selection of shader packs caters to various system specifications, and many include performance impact details and adjustable quality settings to ensure smooth gameplay on both high-end and lower-end systems.
QUICK ANSWER
Download either the Optifine or Iris Shader extension for the latest version of Minecraft. Download a shaderpack file from your preferred online shader repository. You do not need to unzip it for this process. Move the .zip file to. Within the Minecraft launcher, select either Optifine or Iris as the launch version, then launch the game.
Once in the main menu, head to the Options tab, followed by Video Settings. You should see a new Shaders tab in this sub-menu. Within that list of shaders, any shaders inside the shaderpack folder will be shown. Select the one you wish to play with and click Apply.
JUMP TO KEY SECTIONS
How to run shaders via Iris

Simply downloading shaders into the game is not enough for Minecraft to understand and support them properly. First and foremost, we require a mod that will allow us to run shaderpacks. The two most well-known being Optifine and Iris Shaders. These are standalone modified versions of the game, and do not require other mod launchers such as Forge. Between the two, whilst Optifine has a reputation for being able to increase the performance of the game, I recommend Iris due to its overall better installation experience and user interface, good overall performance, and the fact that when new versions of Minecraft release, it’s much faster to update and become compatible with the latest version of the game. In order to install Iris:
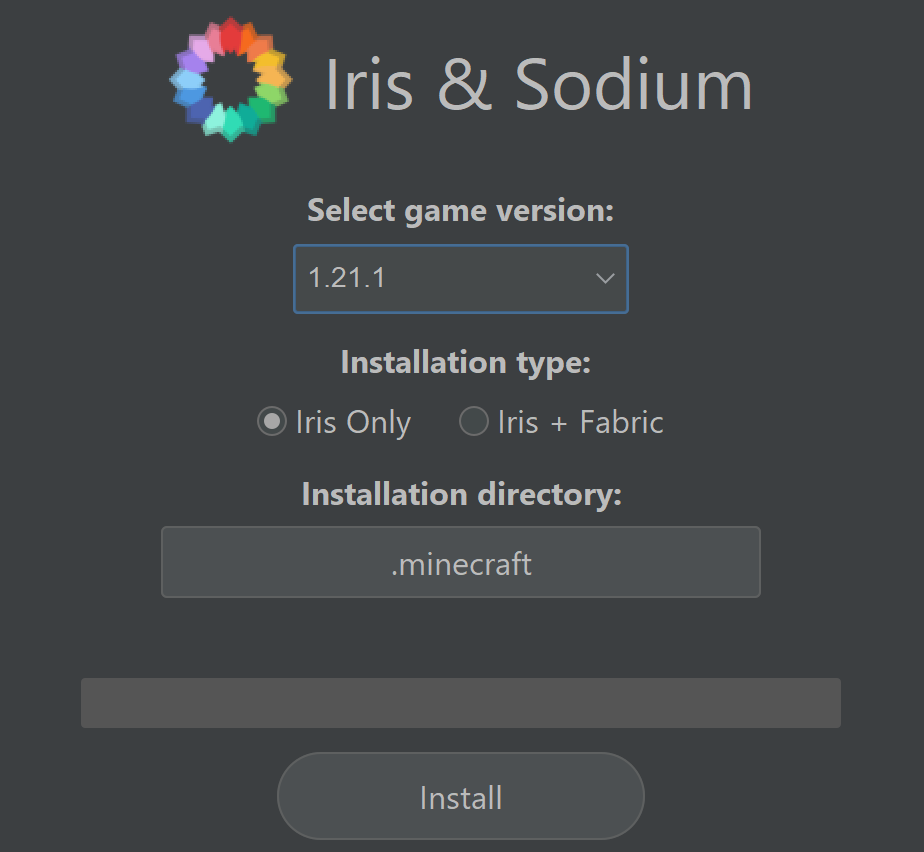
- Head to the Iris download site and download the universal JAR installer.
- Open the downloaded .jar file and click Install. If prompted by Windows which software to use to open it, select Java(TM) Platform SE Binary.
- When prompted about installing the standalone Iris launcher or Iris with Fabric, select the latter if you wish to use other mods with your shaders.
- Once it’s installed, if you open the Minecraft launcher, and click on the version selector in the bottom left, new Iris or Fabric options should become available.
With Iris now properly set up, we can now run shaders in the game, and can now download and install the shaders we want.
How to download and install shaders

Shaders can be downloaded from one of many websites online. There are many popular shader repository sites, such as or. Certain packs however feature standalone sites for download. If unsure, we recommend watching our video on the best shaders currently available for the game. Once you have found the pack you wish to use:
- Download the shaderpack from the site. It should download as a .zip file. You do not need to unzip it for the rest of the process to work.
- Press Win+R on your keyboard, and a new Run window should appear. In it, type appdata.
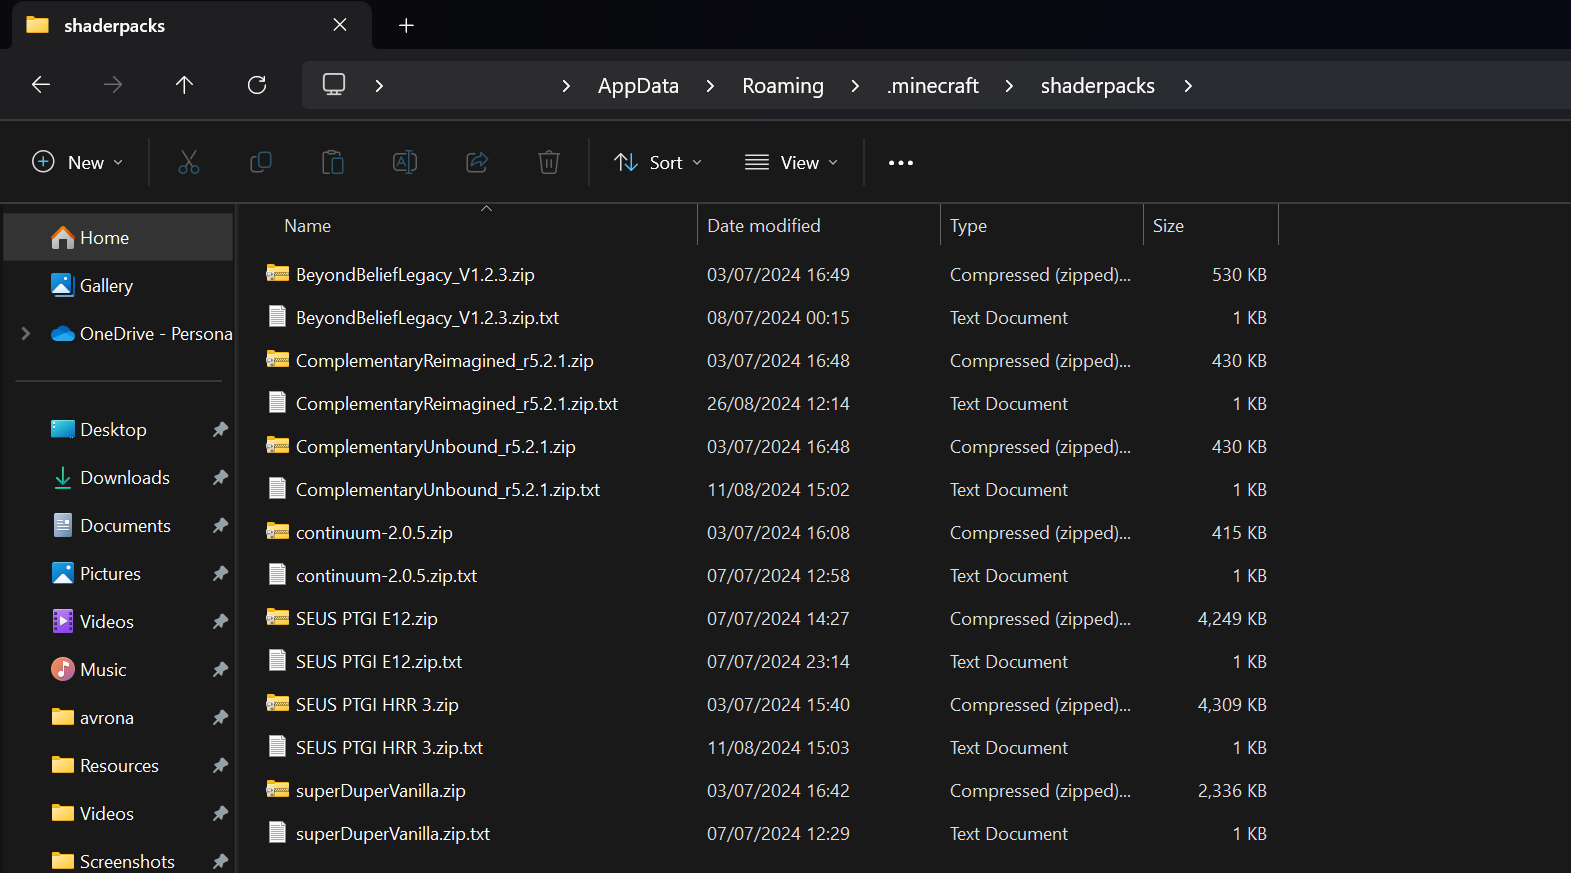
- In the folder it opens up in Windows Explorer, navigate to Roaming/.minecraft/shaderpacks.
- If no shaderpacks folder exists in that directory, create a new folder with that name, with no capital letters.
- Move the downloaded shader file to this folder. It will now be accessible within the game.
How to turn on shaders in-game

Once you have at least one shader involved, and have a version of the game capable of running shaders such as Iris, you can now activate them in-game. In order to do so:
- Launch the game in either the Iris of Iris and Fabric version of the game from the Minecraft launcher.
- Once the game is launched, head to the Settings tab, followed by Video Settings. A new version of the video settings tab should now display with several new features.
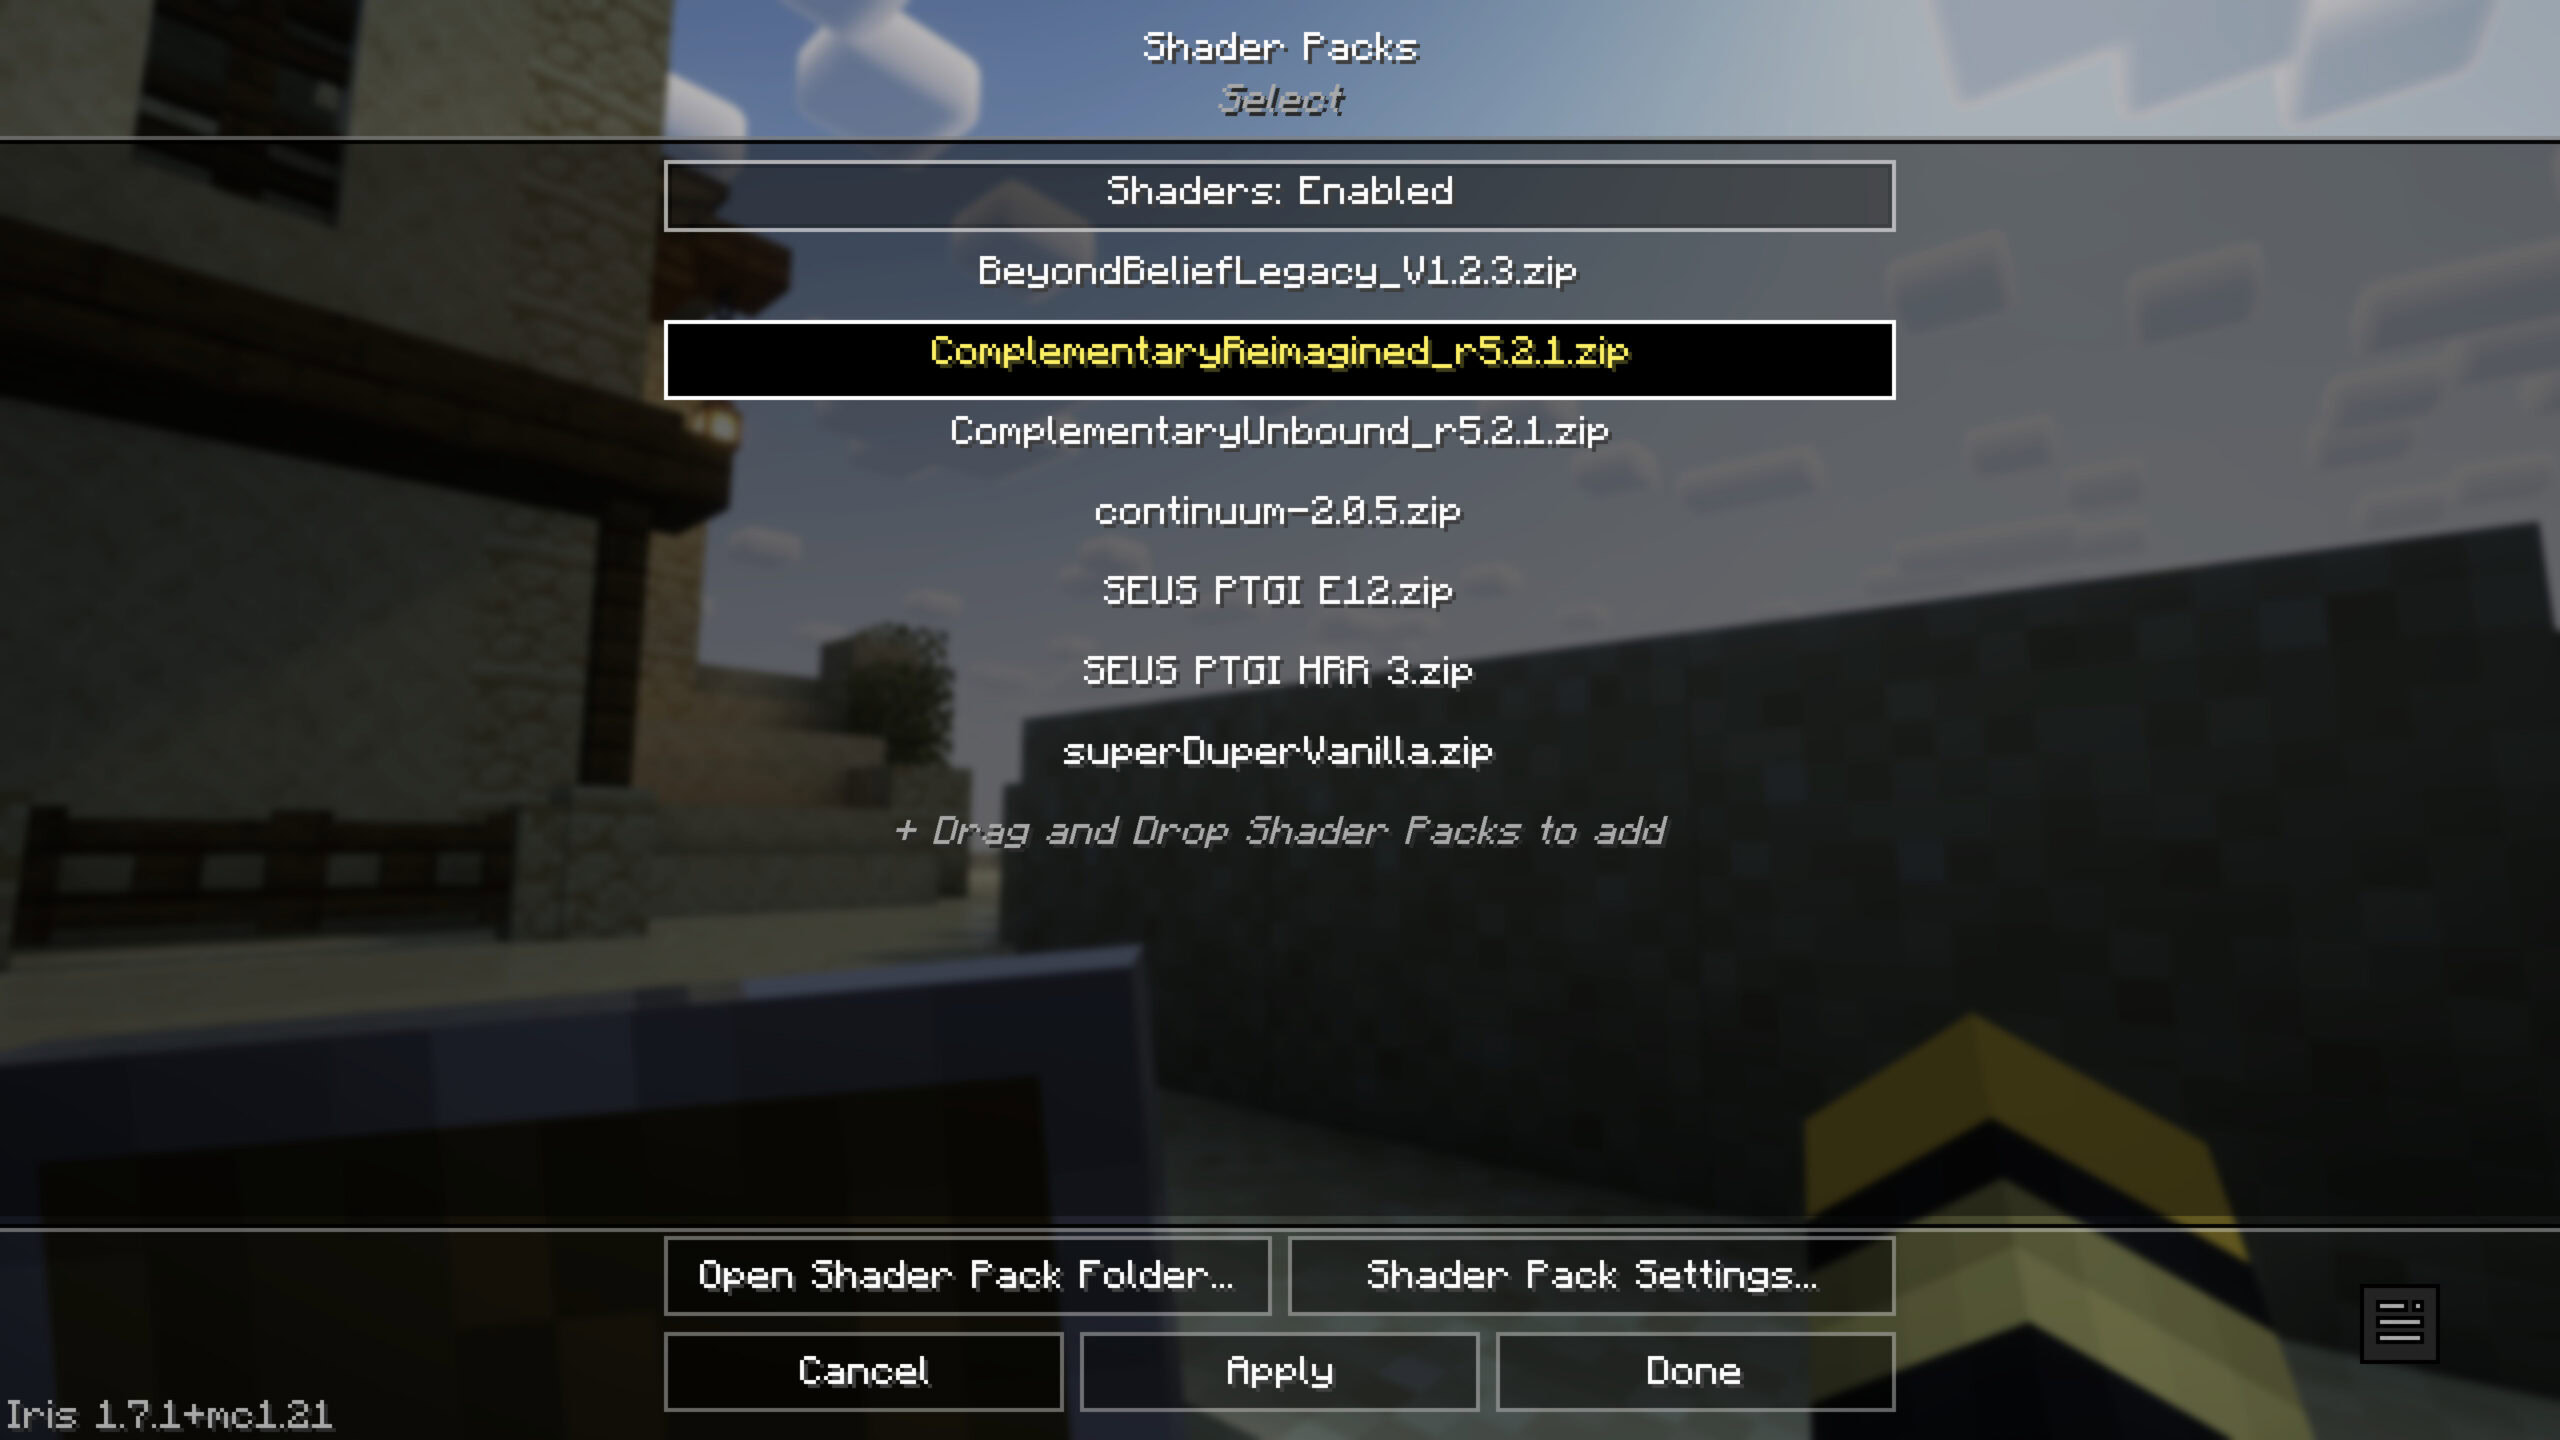
- Within this menu, select the Shader Packs tab in the selection at the top. This should now display a list of all shaders within the shaderpack folder. Select the shader you wish to use, and press Apply.
When you now load into your Minecraft world, the shader will be used.
How to configure shaders and change settings

Shaders can be further configured in-game through the new Video Settings tab. This can be done by:
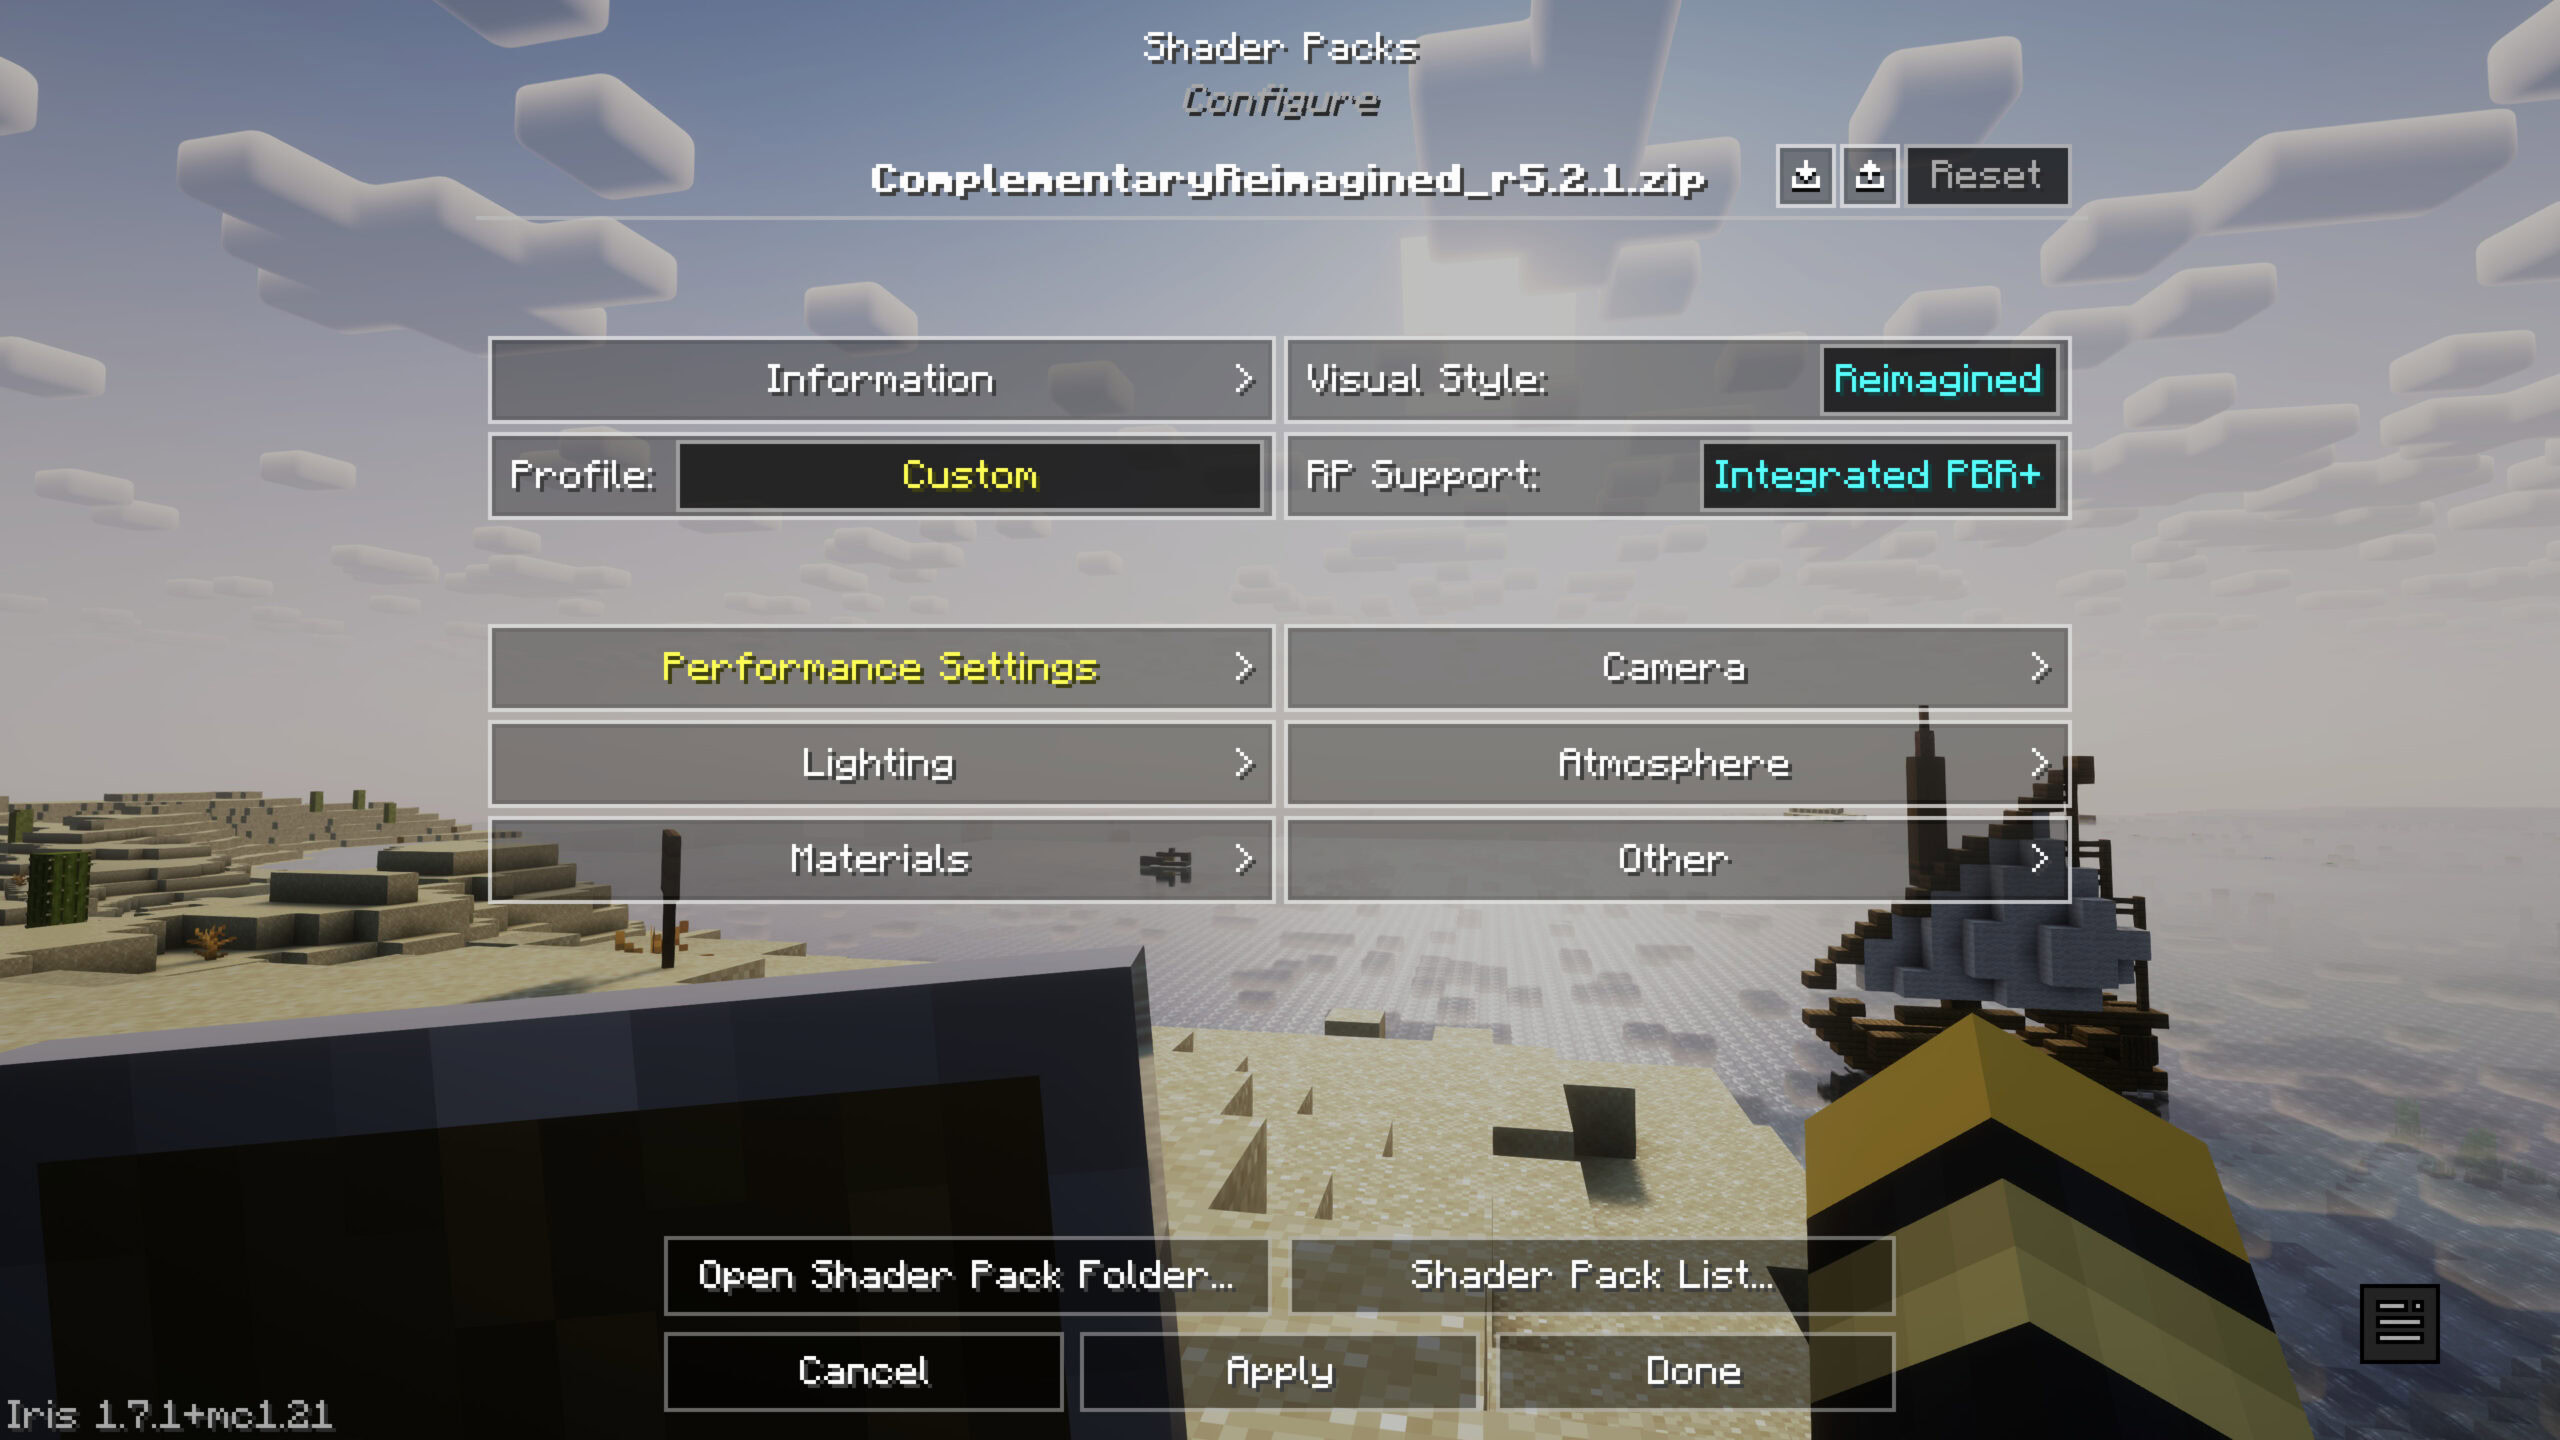
- Within the same Shaders tab as below, click on the Configure Shaders option located at the bottom of the menu.
- This will bring up the options to configure the shaders currently being used, with each shader including different options.
- These can be used to further increase graphical fidelity or the quality of effects, or turn some settings down or off completely in order to improve performance.
- This menu will appear different for each set of shaders, with each implementation offering a slightly different amount of customisation options.
FAQs
Each shader features a different performance profile, ranging from being very demanding and requiring a PC with a powerful graphics card, whilst others are specifically designed to run on even lower-end desktops and laptops. Shaders can be further configured in-game to reduce certain graphical settings within the Video Settings tab. Hardware-wise, it’s the computer’s GPU that has the biggest impact on the overall FPS of the game when using shaders, and a better graphics card with a higher amount of VRAM will result in a significant increase in performance. Shaderpacks are also often updated by their developer, with these updates often including optimisations that may improve performance. These updates are never automatic, therefore it’s recommended you ensure that the shaders you use are up-to-date, by checking for any new updates online.
Unfortunately there is currently no way to manage the amount of memory used by Minecraft Bedrock, with it losing the functionality with version 1.17.3. However, some progress towards their reintroduction have been made in the latest Minecraft previews, using the new Render Dragon system within Bedrock, meaning that some form of support may soon return in future versions of the game.