Affiliate links on Android Authority may earn us a commission. Learn more.
How to install Google Play Store on Windows 11
If you’ve upgraded to Windows 11, you may have heard about native Android emulation, which will let you run Android apps on Windows 11 without needing to install a third-party app. The feature officially uses Amazon’s App Store for Android apps, embedded inside the Microsoft Store. While Amazon’s App Store is fine, it has a much more limited app selection. You can sideload APK files, but many apps rely on Google Play Services, which means they simply won’t work. So to avoid all of these problems, here’s a quick guide on how to install the Google Play Store on Windows 11.
QUICK ANSWER
To install the Google Play Store on Windows 11, you first need to uninstall Windows Subsystem for Android. Then, compile and install the modified Windows Subsystem for Android (WSA) on your computer.
JUMP TO KEY SECTIONS
Before we begin: Microsoft future support of WSA
Before we begin, you must know that Windows 11 won’t natively support Android apps for much longer. Microsoft announced that it is shuttering support for Windows Subsystem for Android on March 5, 2025. This means you have less than a year to officially enjoy Android apps on Windows via the Amazon Appstore.
Notably, as confirmed by the MagiskOnWSALocal project on Github, the method we detail to install the Google Play Store on Windows 11 will also cease functioning on this date. Thankfully, there are workarounds and alternative methods to emulate Android apps on PC.
Step 0: How to install Google Play Store on Windows 11
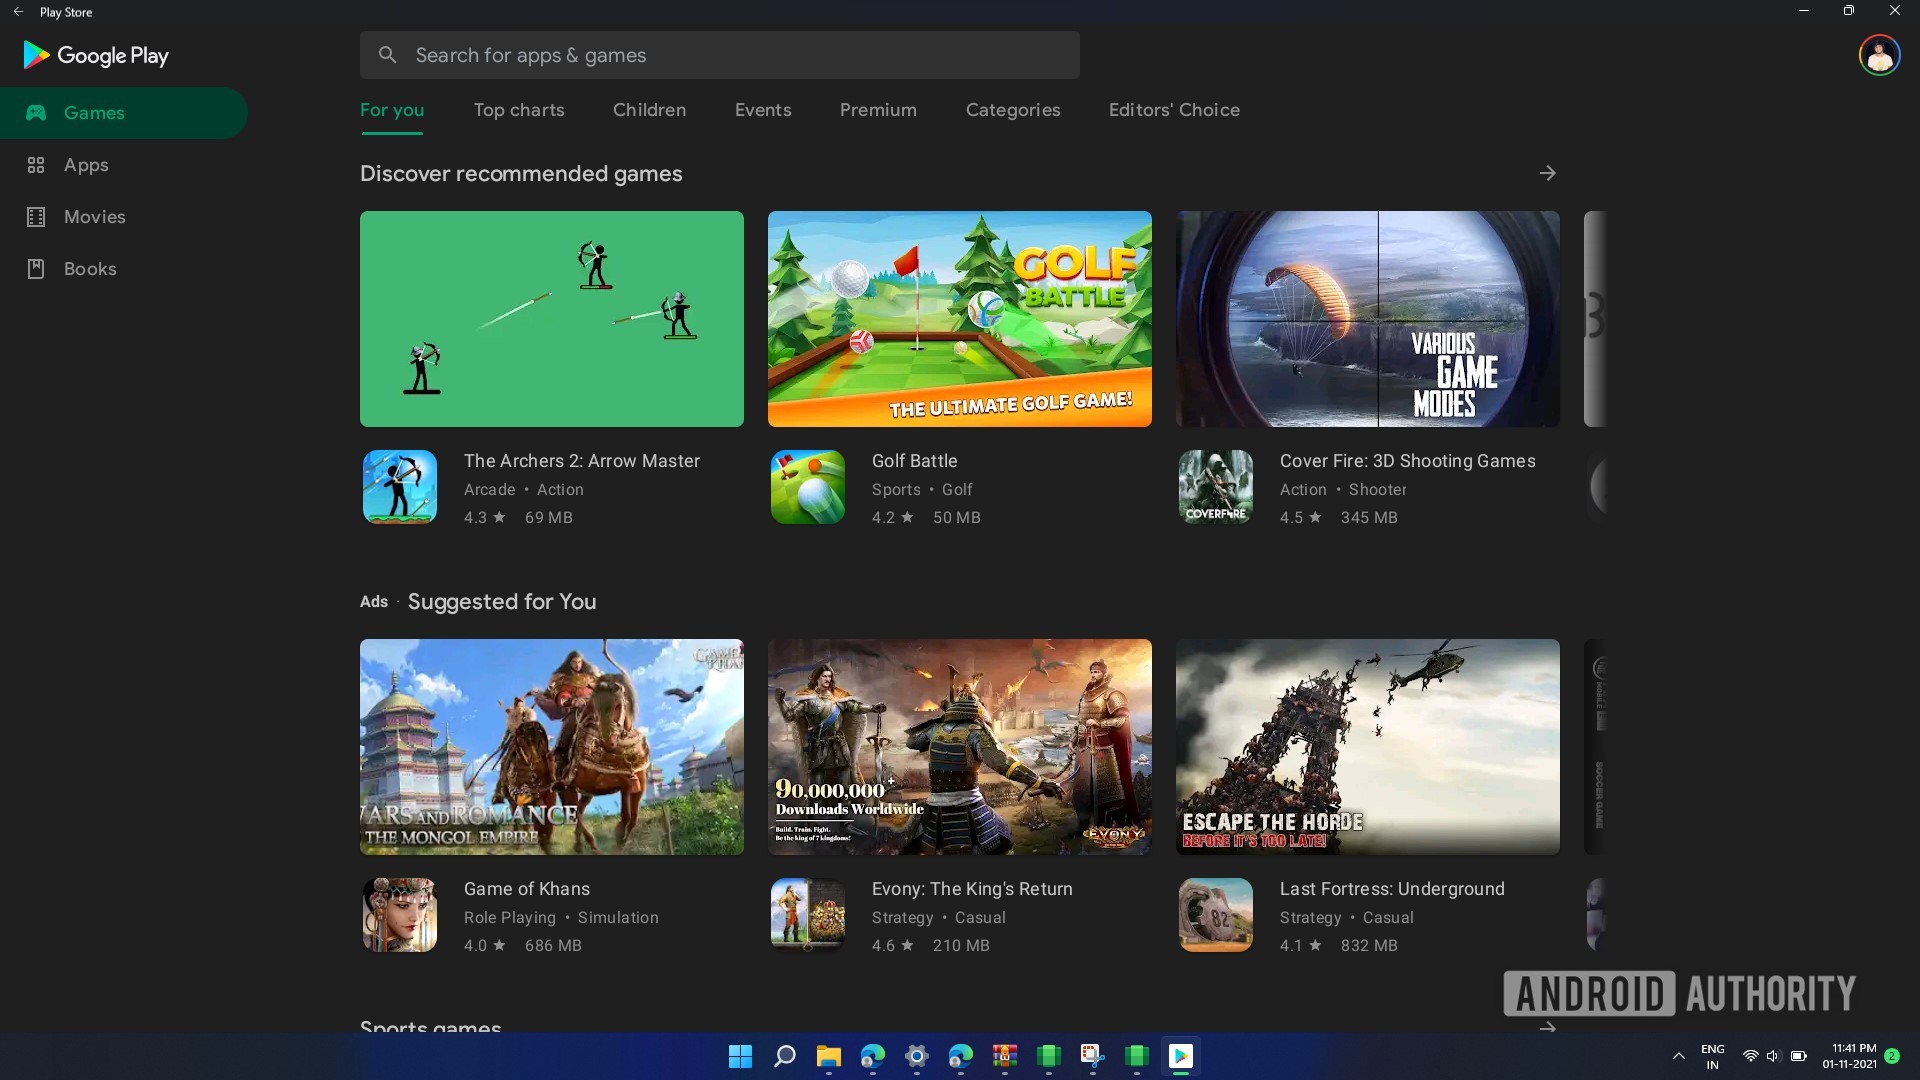
There are many steps to installing Google Play Store on Windows 11. Many of these steps include getting your system and the subsystem files ready. It will take you some time to download all the necessary files, get the system ready, and carry out the final installation process. If you want to install some simple apps that don’t require Google Play Services, you might want to sideload APKs to the unmodified Windows Android Subsystem, as detailed in our guide.
Notes and credits
The following method for installing the Google Play Store on Windows 11 comes courtesy of the aforementioned MagiskOnWSALocal Github project. Remember, you will need to meet the minimum system requirements and be on the latest Windows 11 build for this to work.
This method works by modifying the Windows Subsystem for Android and replacing the kernel with a modified one. Therefore, this method is risky and may result in data loss. Consider yourself warned.
Step 1: Uninstall Windows Subsystem for Android
For this method to work, you’ll need to uninstall the current version of Windows Subsystem for Android on your Windows 11 system. Here’s how:
- Head over to the Settings app in Windows 11.
- Click on the Apps tab from the left pane and select Apps & features in the right menu.
- It should be the first tab in the Apps section.
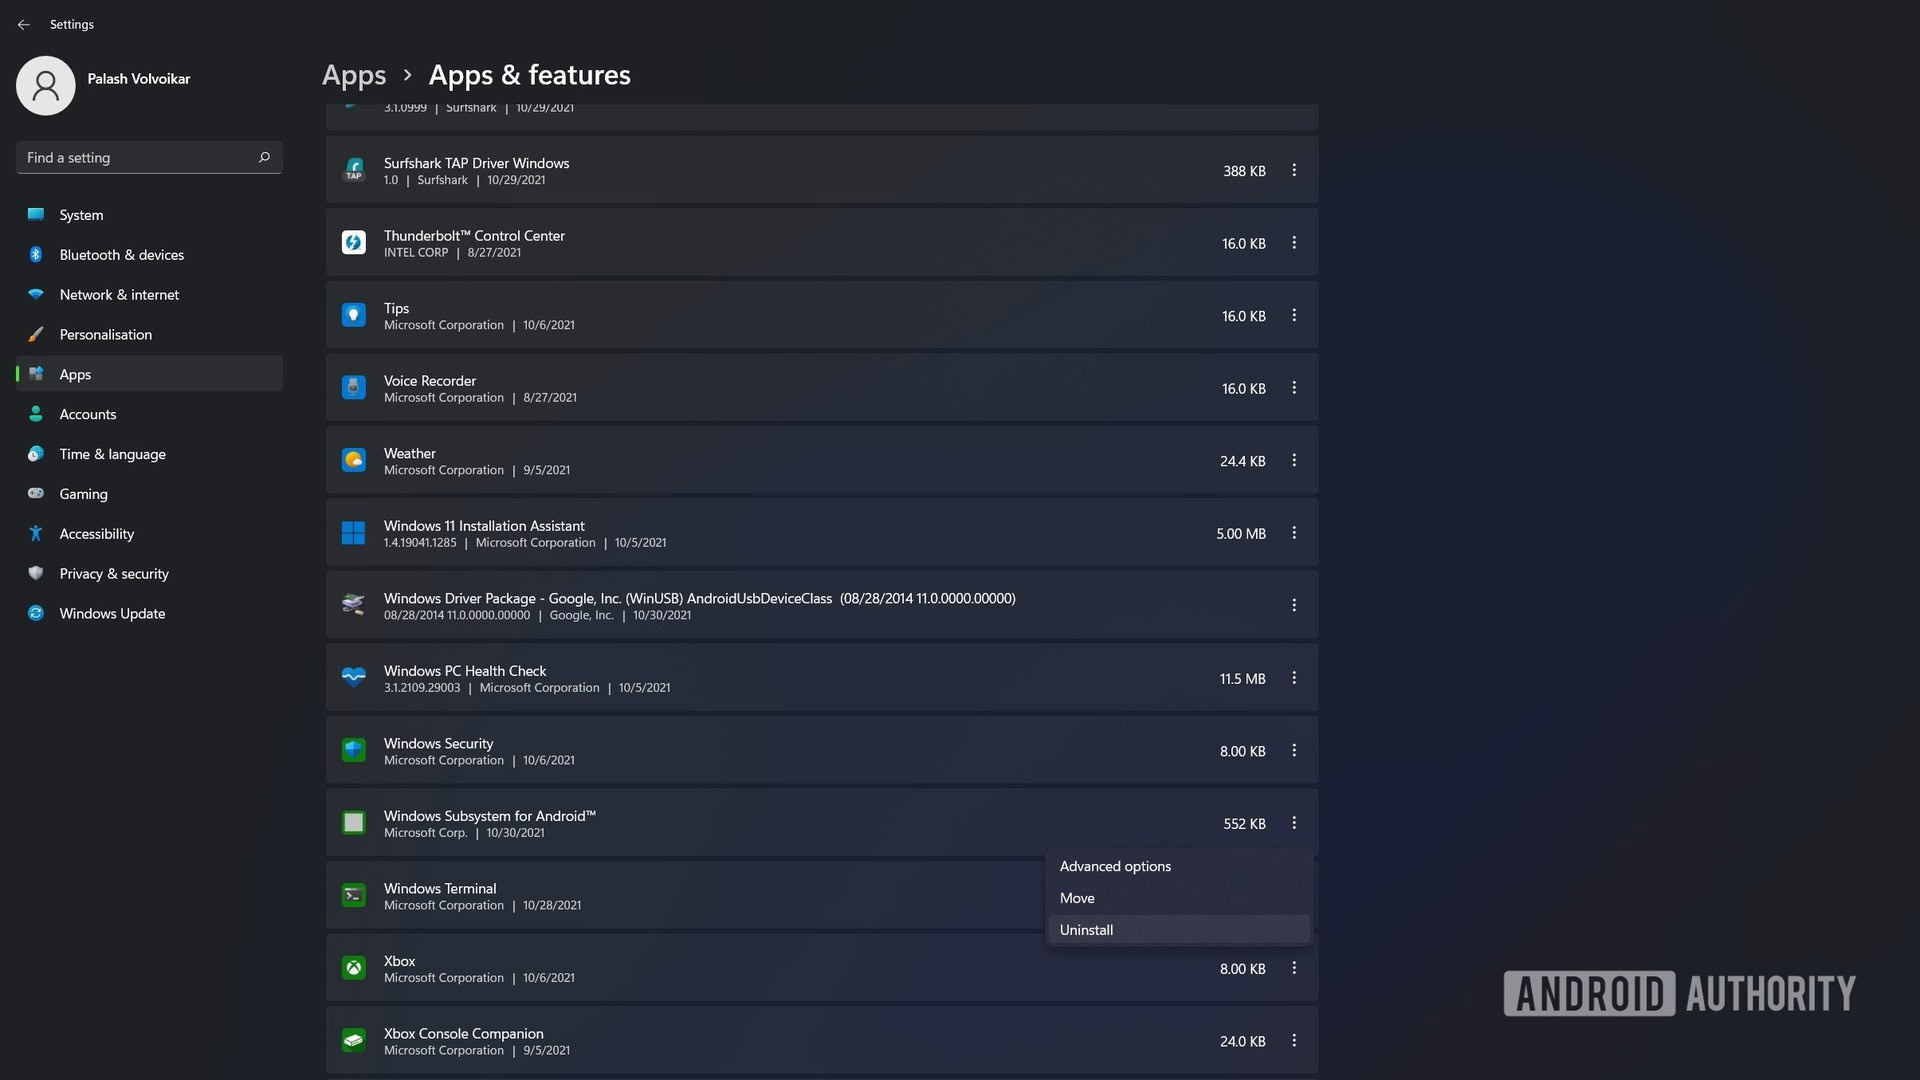
Scroll down to Windows Subsystem for Android in the apps list. Click the three-dot menu, and click Uninstall.
Step 2: Getting and packaging the modified Windows Subsystem for Android
Windows Subsystem for Android doesn’t include the Play Store by default, so we’ll have to build and install a modified version ourselves. Luckily, the open-source community has built a script that automates the entire modding process for us. Unluckily, however, the script will only run on a Linux distribution so we cannot run it directly on Windows. But don’t worry — using the Windows Subsystem for Linux, we can get the Ubuntu command line on Windows 11.
To get started, navigate to the Microsoft Store page for Ubuntu and click Install. This should open a Microsoft Store Window, where you can actually start the installation.
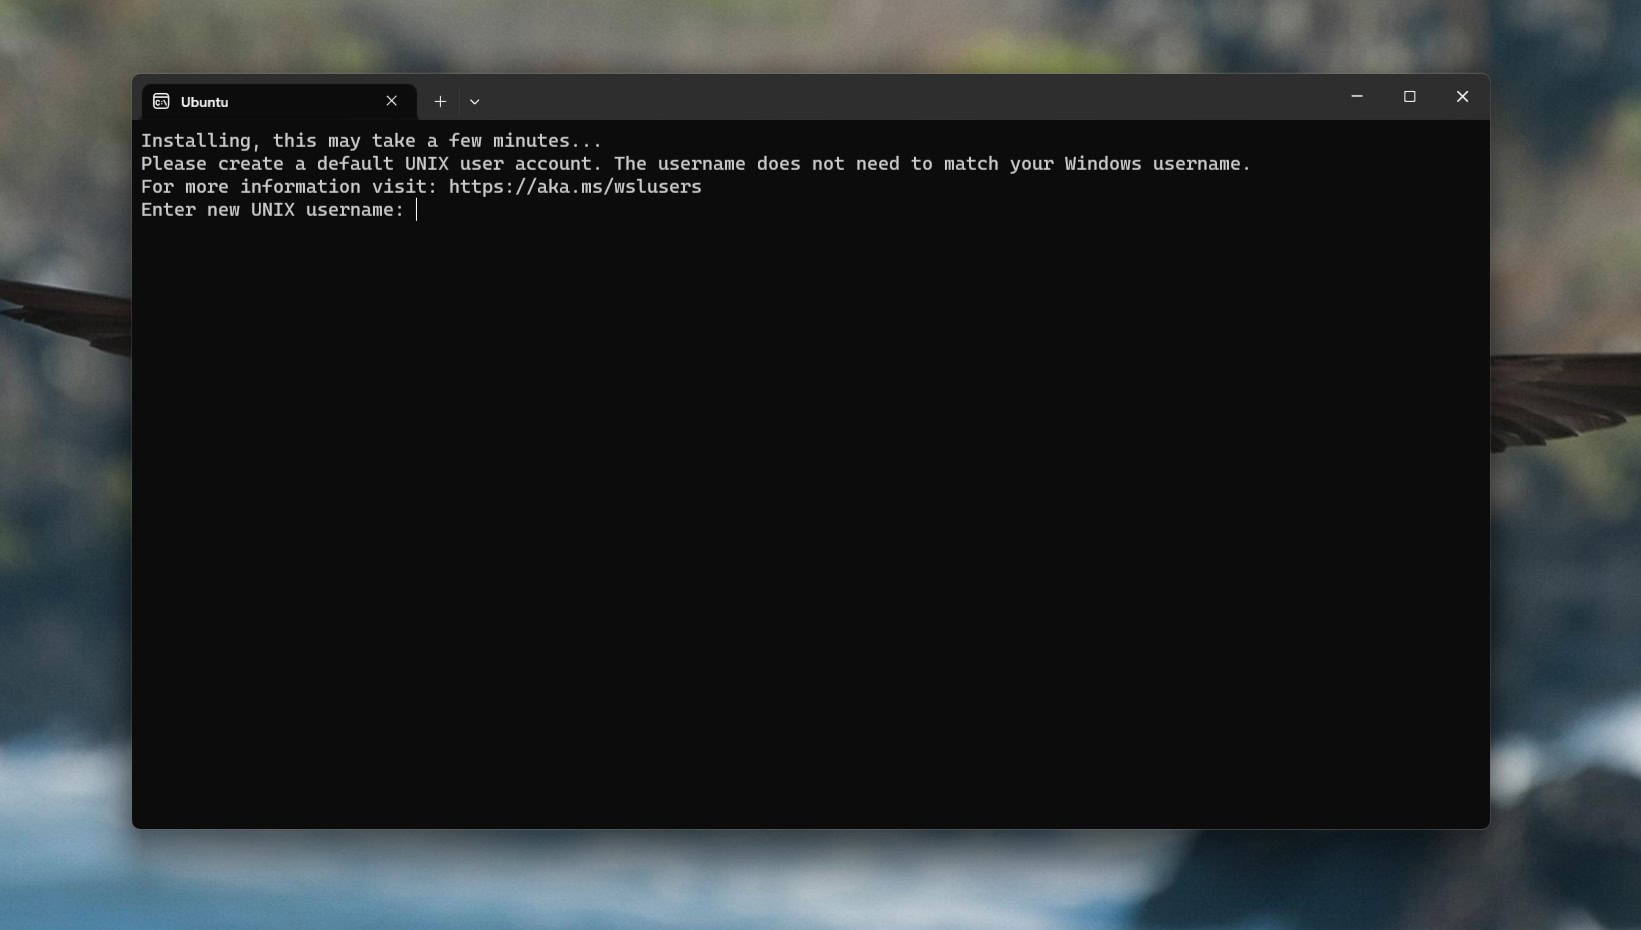
Once the installation is complete, click the Open button. A command prompt window will show up (pictured below). If you get an error that reads “The Windows Subsystem for Linux has not been enabled”, hit the Windows button on your keyboard, search and open the Terminal app, type in wsl --install and hit the Enter key. Follow the instructions until you’ve successfully enabled the Windows Subsystem for Linux. You may have to reboot your system for the change to take effect.
In the Ubuntu window, enter a username and hit enter. After that, you’ll be prompted to enter a password for that account. This doesn’t have to match your Windows account password, but don’t forget it! We’ll need it in a bit.
Eventually, you’ll see the Installation successful message, followed by an empty command line waiting for your input.
Type git clone https://github.com/LSPosed/MagiskOnWSALocal.git and hit the Enter key. Wait for the download to complete.
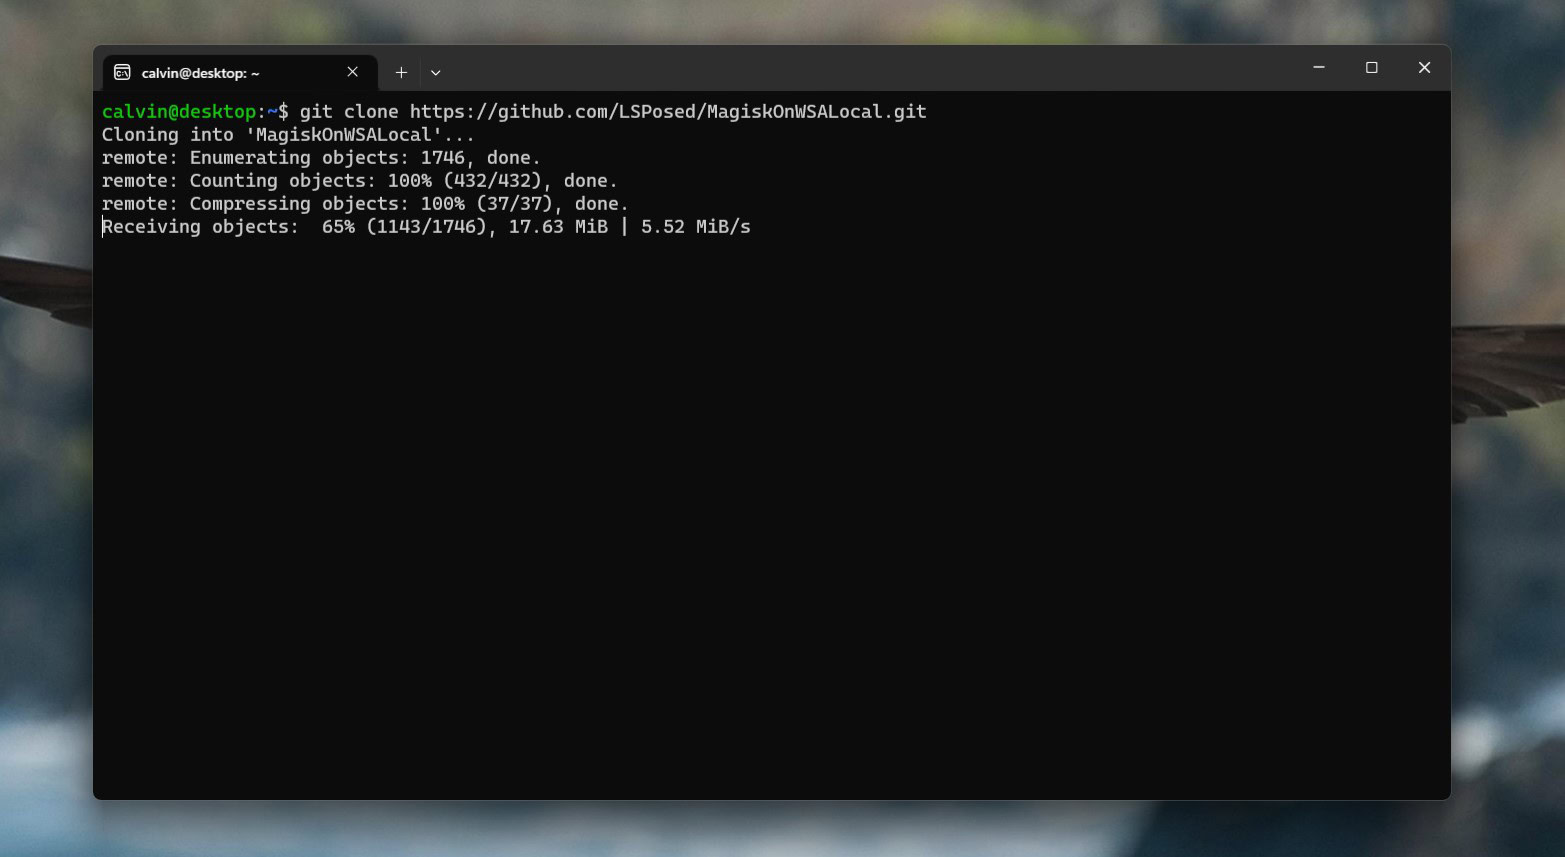
Next, we need to navigate to the folder we just downloaded. The script we need to run is in the scripts directory. Enter the folder using the command: cd MagiskOnWSALocal/scripts.
Type ./run.sh and hit the Enter key to execute the script. You’ll be asked to enter your Ubuntu account password from a couple steps ago. The next stage will involve downloading and installing a few packages.
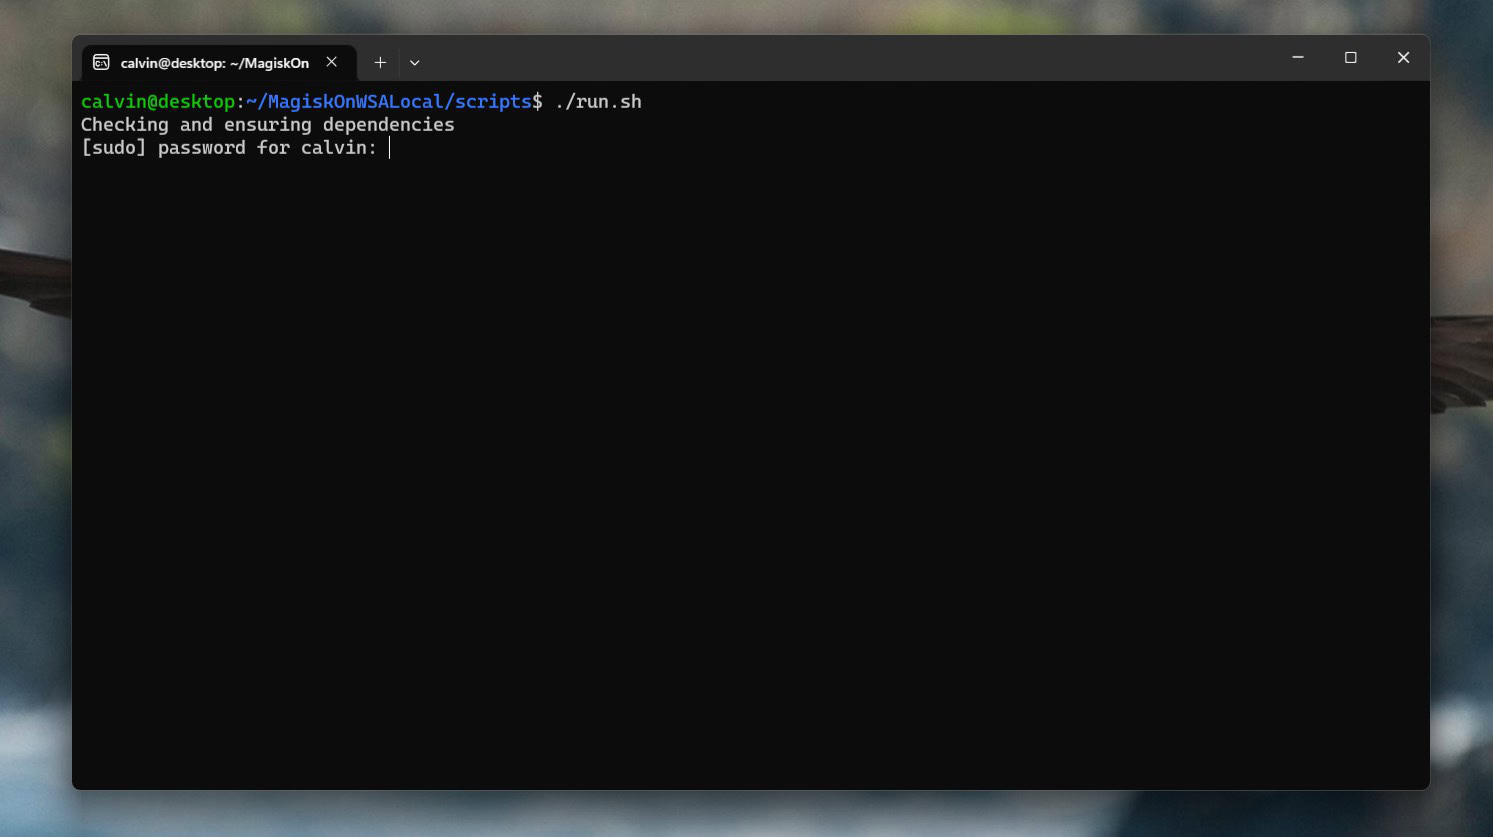
Once the packages have been installed, you’ll be presented with a few options. You can proceed with the defaults here – simply press Enter until you reach the step that asks whether you’d like to enable root access. Select No here. Finally, when asked whether you want to install GApps, select the Yes option. You can choose whether or not you want to keep the Amazon app store. At the step where it asks whether you want to compress the output, select No.
After the final prompt, you’ll have to wait for the script to download the required files and compile the modified Windows Subsystem for Android.
Once it’s successful, you’ll see an empty command line prompt once again. We’re now ready to copy and install this modified build.
Step 3: Install the modified Windows Subsystem for Android with Play Store
We now have to navigate to the output folder in the main MagiskOnWSALocal folder. Type cd ../output and hit Enter.
Now that we’re in the output folder, we need to open it in File Explorer. To do this, simply enter explorer.exe . and hit the Enter key. Don’t miss the space and period after explorer.exe!
In the output folder, double click on the WSA_… folder and look for the Run.bat file (pictured below). Double-click this file and provide it with administrative permissions when prompted.
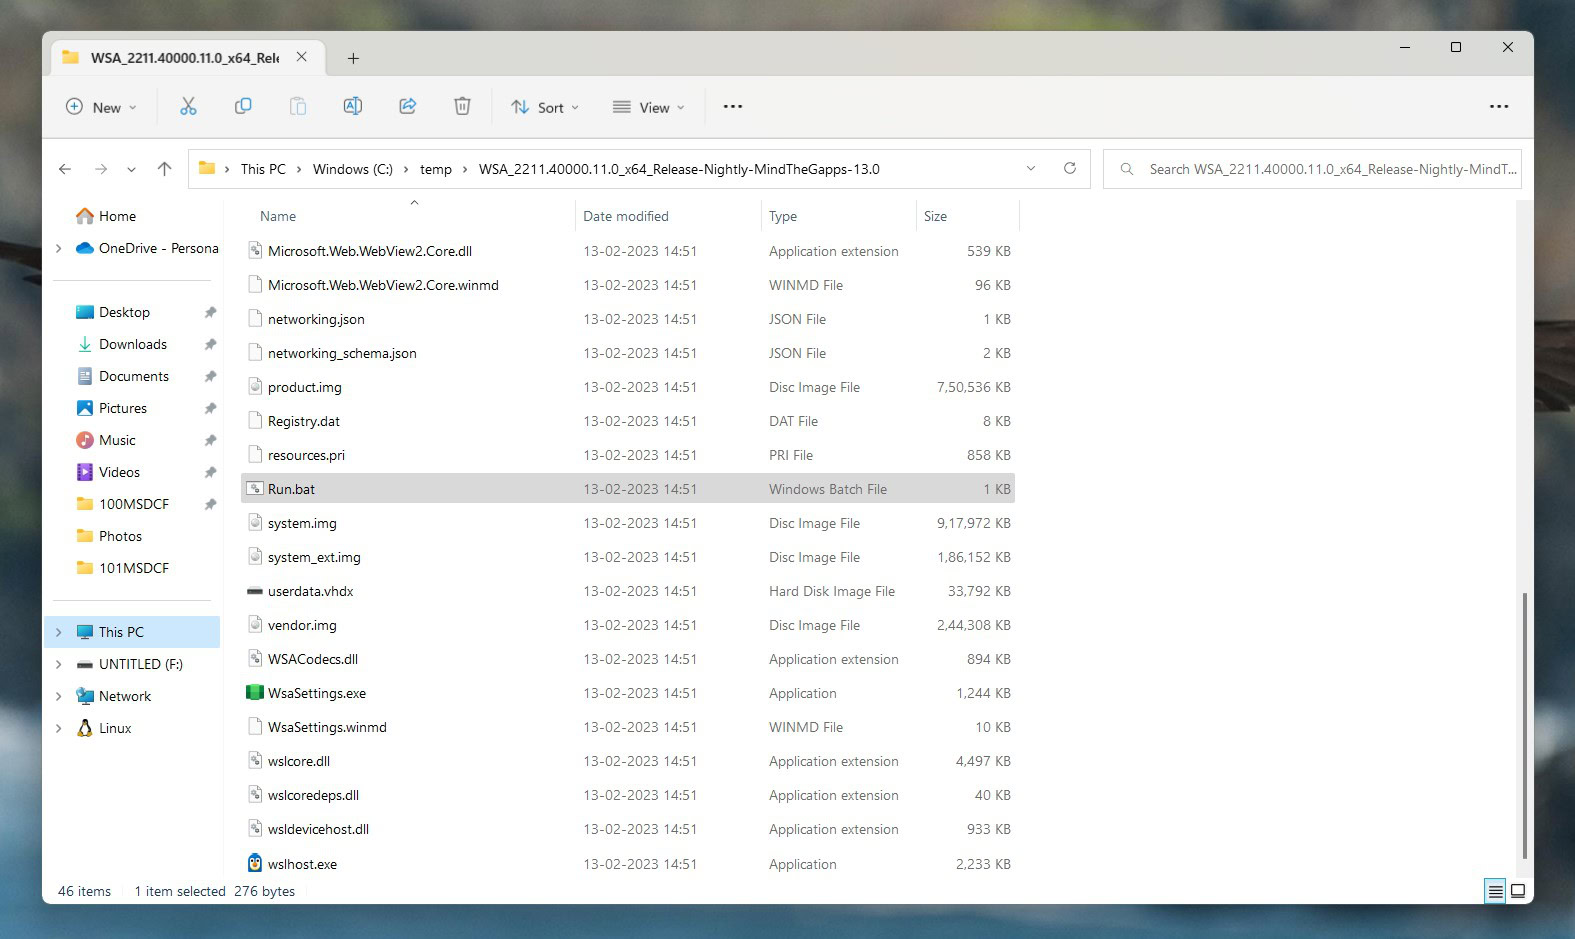
A minute or two later, the installation should be completed. The Play Store start screen will now appear on your screen. That’s it — we’ve reached the end!
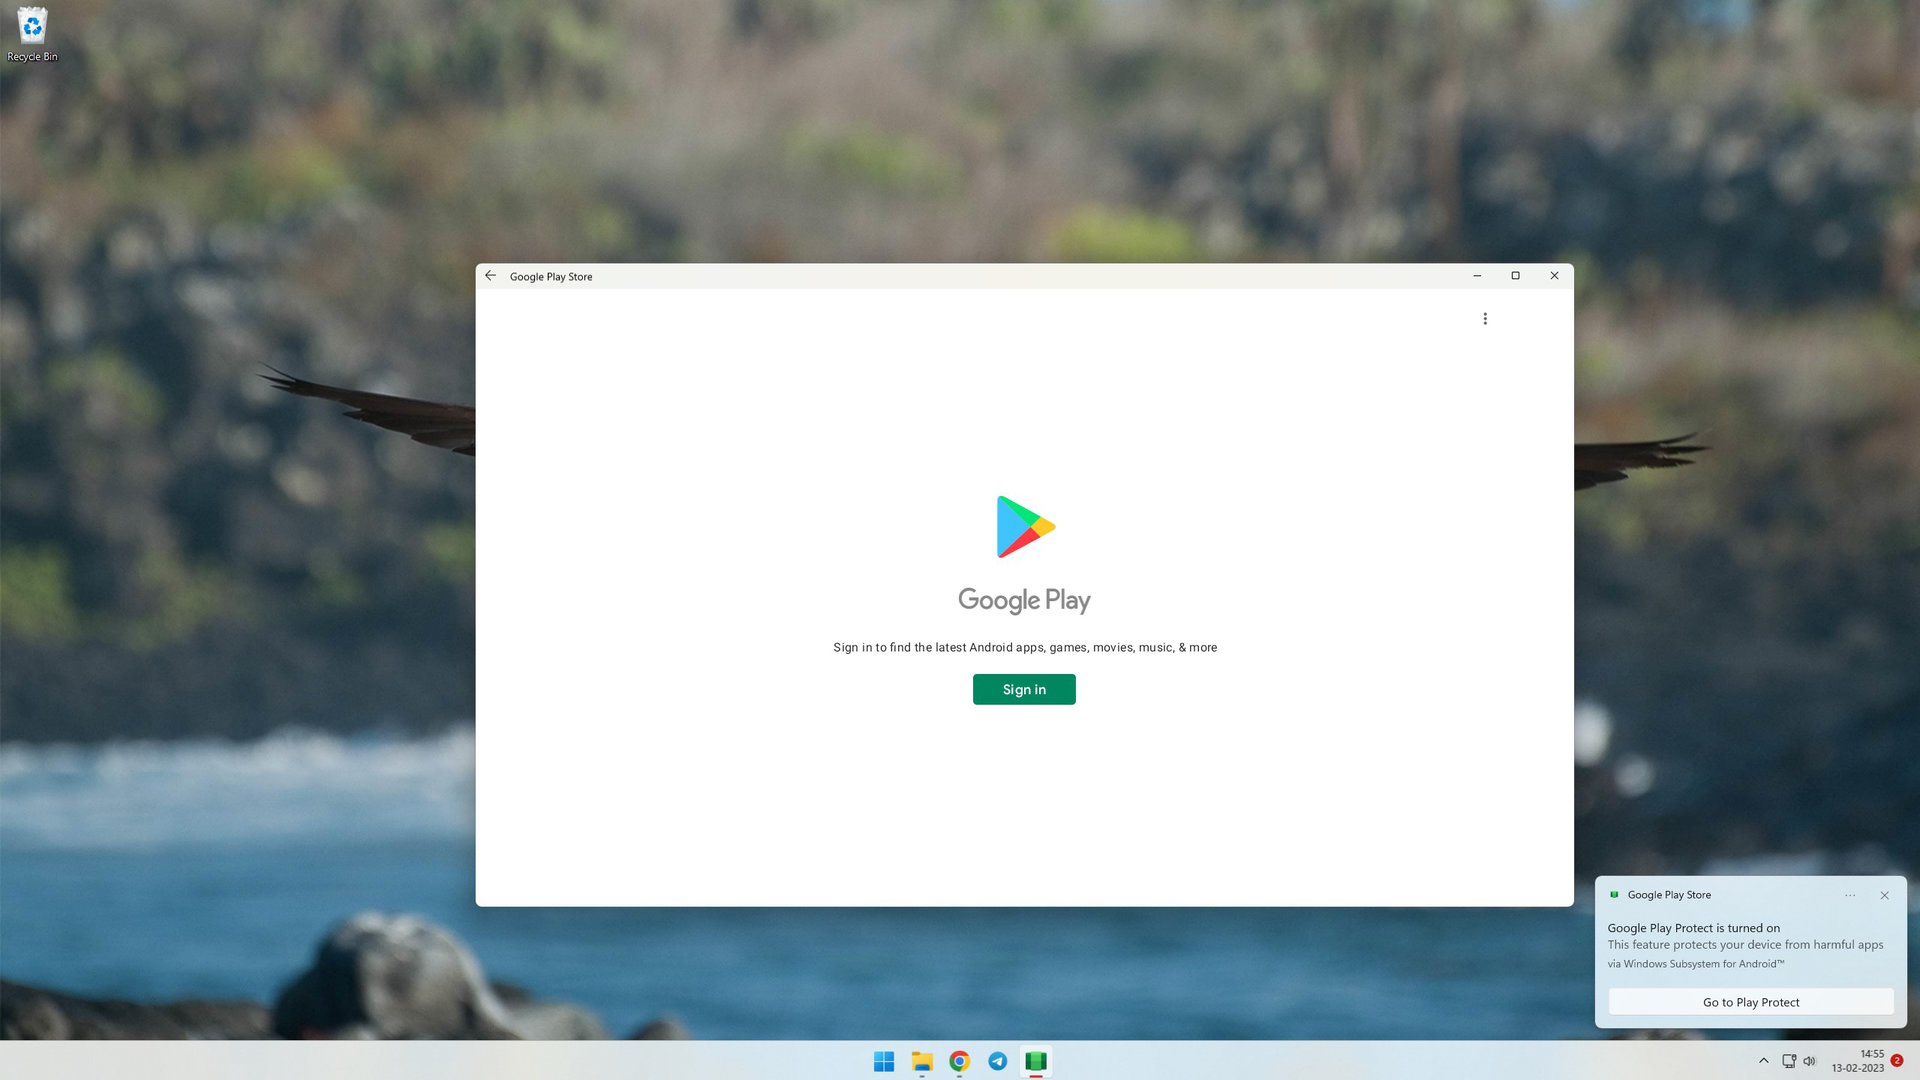
Final step: Using Google Play Store on Windows 11
The rest of the usage will be similar to using Play Store on a phone or an Android emulator. Just search for the app, and download it. Note that this is still a modified build, so you’re likely to run into issues. However, we had no problems downloading chat apps like Telegram and WhatsApp on our machine.