Affiliate links on Android Authority may earn us a commission. Learn more.
How to make and share your own custom icon packs
Published onApril 12, 2019
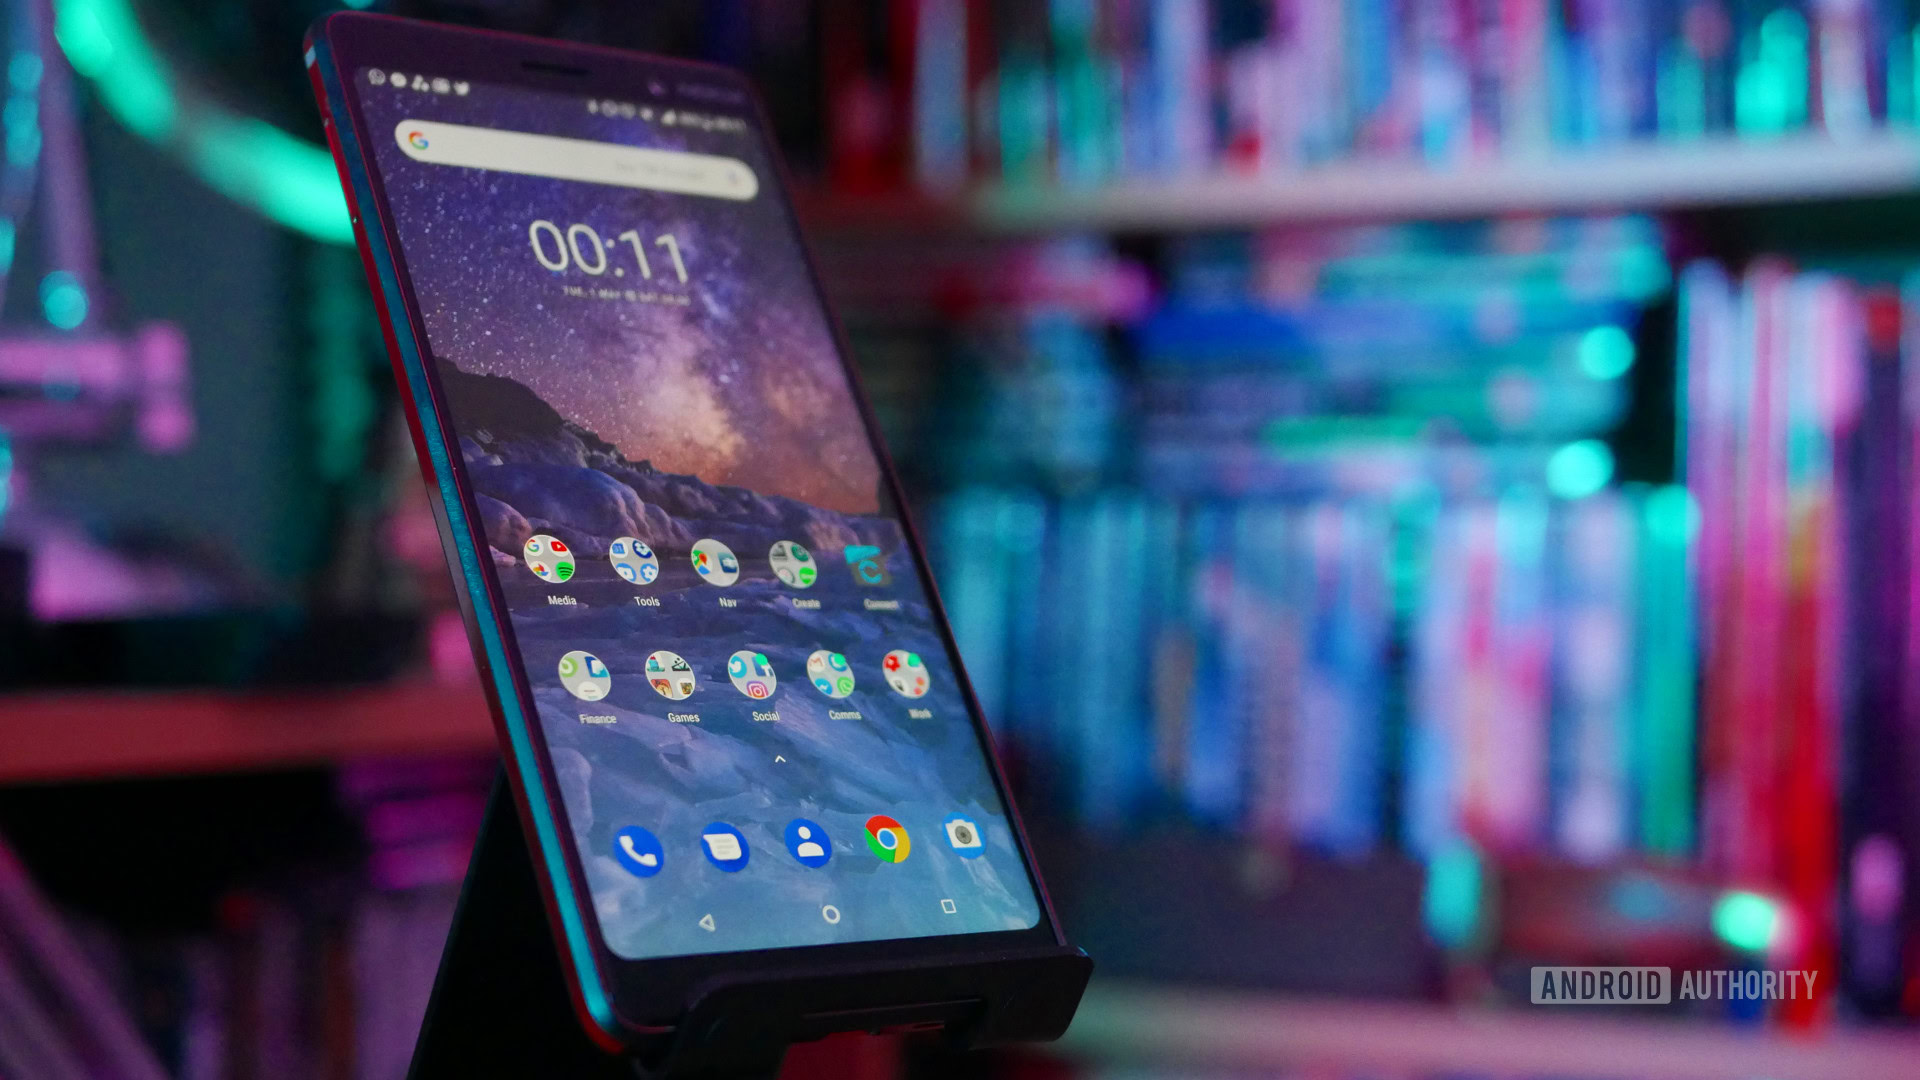
When it comes to customizing your Android device, one of the most enticing options of all is to make your own icons. You can choose unique homemade graphics for each icon, or create a uniform scheme that does away with the inconsistencies introduced by wayward developers. Doing this opens up nearly endless possibilities for how you want your device to look.
Let’s look at various different options for making unique icons: from changing them manually for your own purposes, to creating and distributing entire icon packs through forums or even the Play Store.
A word of warning though: if you’re looking for an easy app you can make and sell, this probably isn’t it!
How to create custom Android icons and icon packs for fun
These days, launchers like Apex or Nova allow you to set any graphic you like as an icon, as well as install existing icon packs.
To change an icon in Nova, all you need to do is long-press the icon in question and click “Edit.” A dialog box will pop up letting you change the name and tap on the icon on the left to swap it out for a new one.
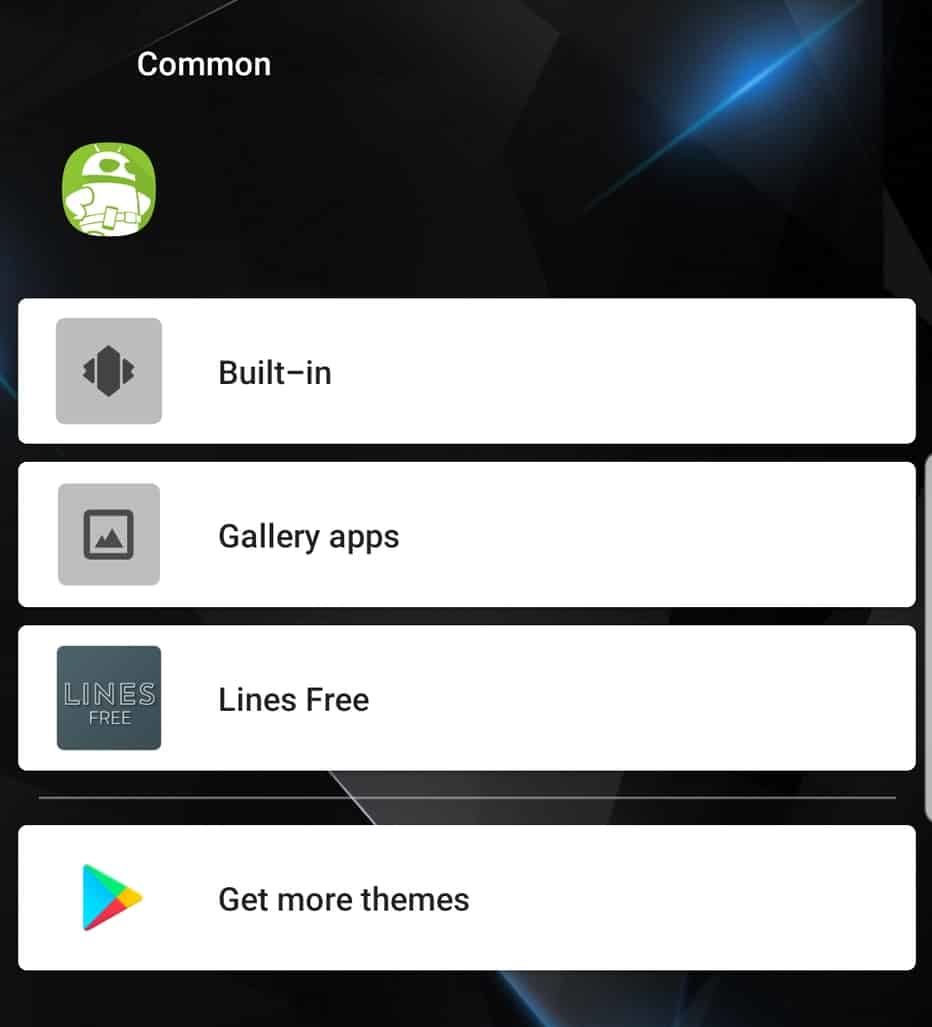
In Nova you have four options: you can choose built-in Nova icons, an image from your gallery, or one from an icon pack, or you can head to the Play Store to find more.
In Apex, the process is extremely similar: Long press on the icon you want to use, tap “Edit,” then choose the option that best suits you.
If the launcher doesn’t support custom images as icons — as is the case for Samsung Experience Home — then you can use an app like Awesome Icons instead. Awesome Icons works by creating desktop shortcuts for you that then launch a shortcut to that app via Awesome Icons.
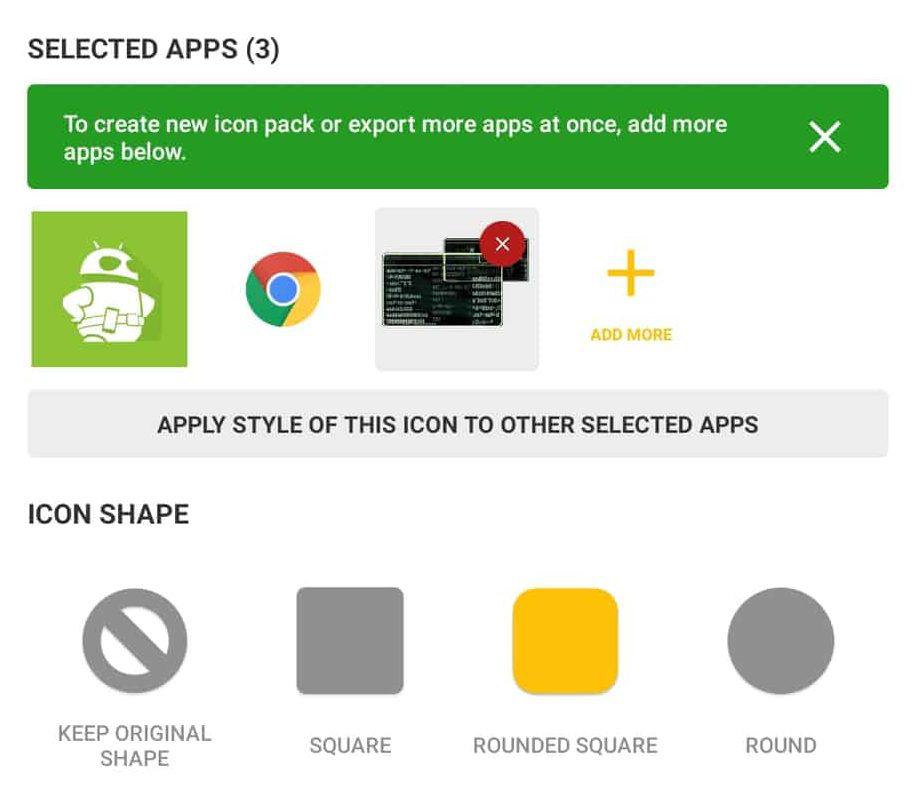
Perhaps the coolest option is to create your own icon pack as an APK, using the excellent Adapticons (not the sworn enemies of the Adaptibots). This app lets you create icon packs by choosing apps from a list, then editing their icons from a simple menu or swapping them entirely.
When you pick save, you can choose to save it as a shortcut or widget, export any new .png images you’ve created, or export as an icon pack. If you choose the latter, the APK will be generated and installed automatically (once you give the app permission).
You can even locate that APK now by looking in /storage/emulated/0/Android/data/pl.damianpiwowarski.adapticons/files/iconpack/. It will be called “iconpack.apk.” Alternatively, just do a “deep search” using ES File Explorer.
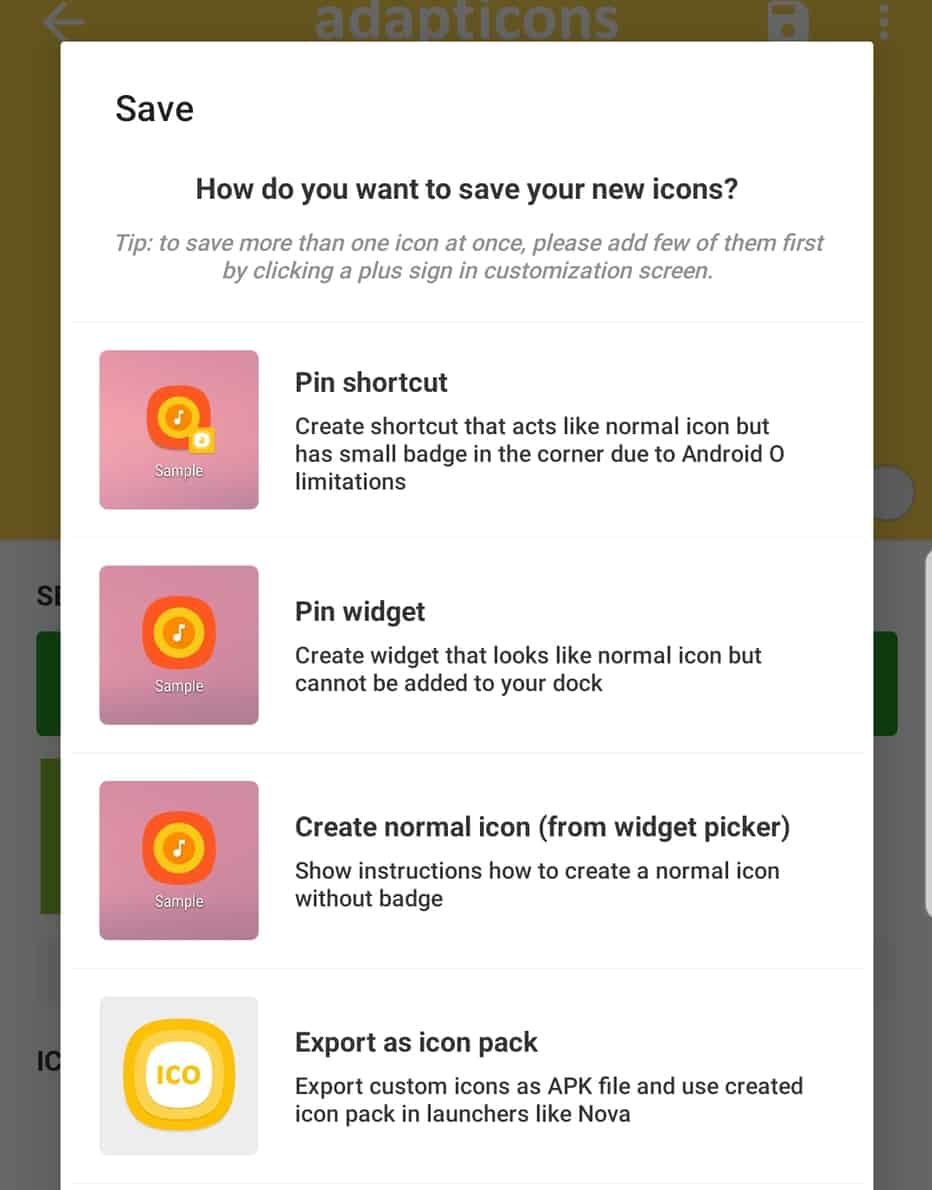
This way, you can then rename the package file and share it with friends, or keep it as a way to quickly install your icons when you get a new device!
The unfortunate limitation is that you won’t be able to upload this to the Play Store. In theory, you could install the APK through another app and distribute it that way, but then you would still need permission from the developer as you’d be using their code and their icon.
How to draw your own icons
So now you know how to make an icon pack, how do you go about making the images you’ll want to use?
When it comes to drawing your own icons, there are multiple different options. In fact, any image can work as an icon, as long as it is large enough (108 x 108) and accounts for launchers that apply masks that trim the edges off and make only the inner 72 x 72 pixels visible.
If you are going for a pixelated look, any image editing software will suffice. You can take photos and crop them, or even make some pixel art in Paint! If you want something a bit crisper looking, it is worth learning Adobe Illustrator — this will help with editing your images in the future as well.
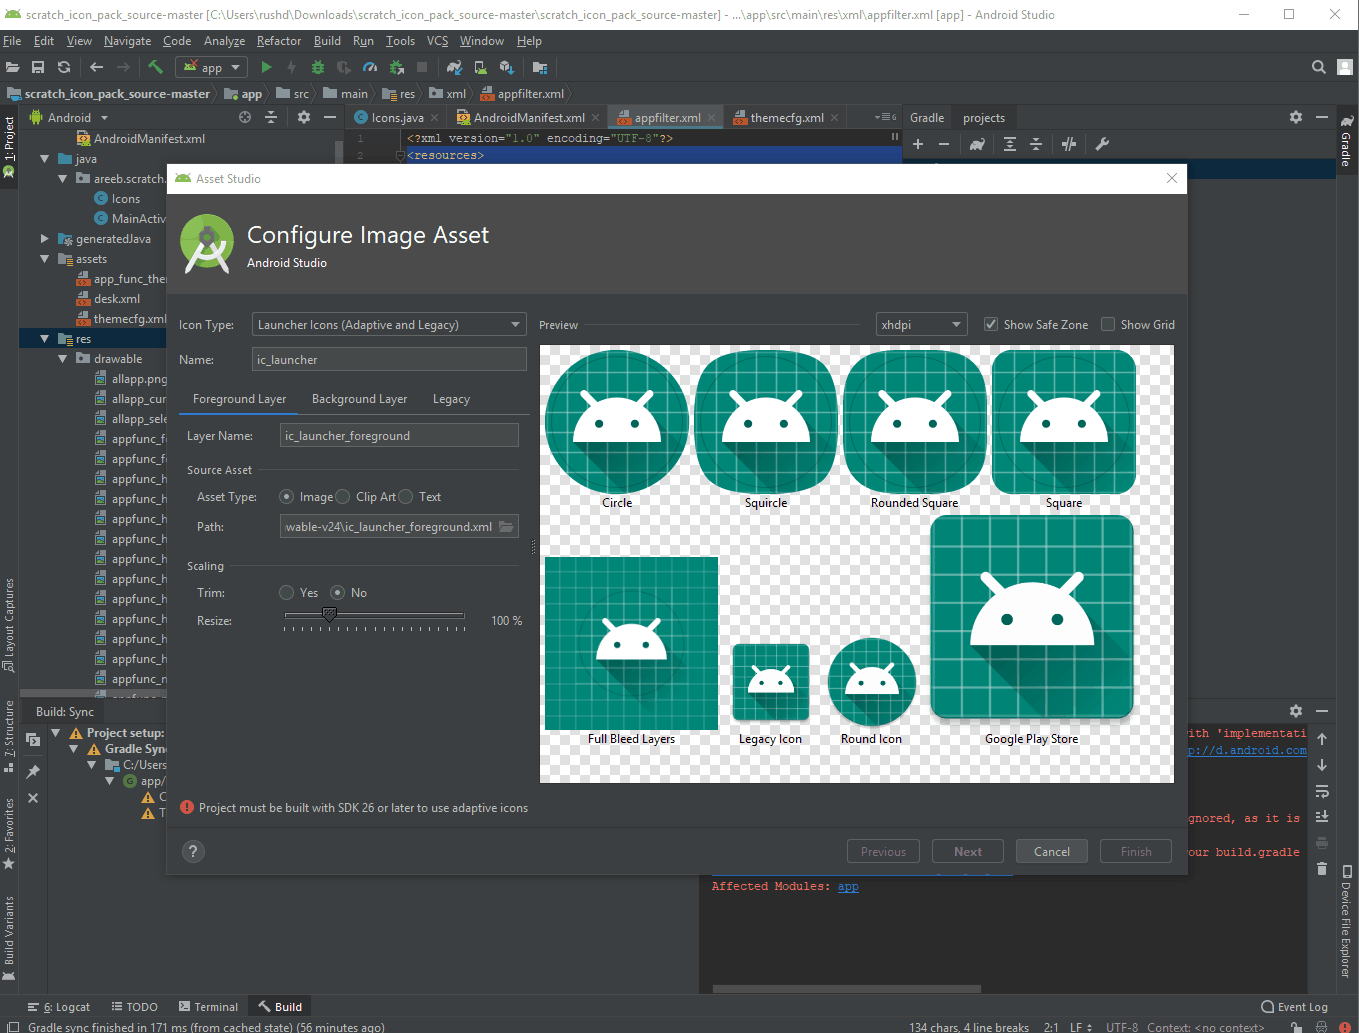
Remember to add transparency to your image if it doesn’t fill the entire dimensions. You can’t do this in Paint, but free software like Gimp will let you. You’ll want to save the file as a .png, too.
If you like the official Material Design approach, you could try using the Android Asset Studio. This free tool lets you create apps using a variety of templates, right in the browser. Android Studio itself also has a feature called Image Asset Studio. Just right click on the Res folder in your Project window, then select “Image Asset.”
Both these options will allow you to create an image conforming to Google’s Material Design guidelines, and they work for both Adaptive and Legacy icons.
How to make an icon pack app from scratch
While customizing icons creates more design opportunities for users, it also opens up more possibilities and more ways to make money for developers. In theory this could be an easy way to make some money as a developer: just design some icons and then sell them as an app!
Unfortunately, this is a case of reality failing to meet expectations. This is actually a very in-depth and lengthy process, and it’s sure to give you some serious headaches. Still, once you’ve built a template, it’s something you’ll be able to use to create lots of new apps quickly — creating a very good ROI potentially.
There is no universal method for creating an icon pack, so you’ll need to provide intents and XML files to account for every possible option. This would be fine if there was any information out there to help developers get started, but there just isn’t. Most tutorials are at least a few years old, and there are no guides published by ADW, Nova, and so on. Most templates available on GitHub are likewise severely outdated and difficult to reverse engineer. It seems there just isn’t the demand for icon packs that there once was.
By far the best example is IconShowcase-Dashboard
By far the best example I have been able to find after a lot of digging is the open source IconShowcase-Dashboard, which is available in its entirety on GitHub. More importantly, it comes with a gigantic Wiki that explains the set up process and the configuration you’ll need to handle yourself. This is an extremely lengthy process I won’t go through here.
To summarize: first, you will need to set intent filters in your manifest file for the launchers you want to support. This will allow your app to listen out to the intents used by those launchers when the user tries to install an icon pack. An example from a different project can be found here.
Likewise, you’ll also need to create and edit a large number of specific XML files required by various launchers.
Key among these is appfilter.xml, it’s in here that you will tell the launcher which images from your drawable folder will belong to which apps. You will do this with the following line:
<item component="ComponentInfo{com.package.name/com.package.name.ActivityName}" drawable="icon_name"/>It is best practice to name the images using the package names of the apps you want them to represent (using underscore in place of period).
In the values folder, you’ll also add a file called icon_pack.xml, which will contain arrays with the names of your icon files.
Most tutorials are at least a few years old, and there are no guides published by ADW, Nova etc.
There is a fair bit more configuring you’ll need to do if you want your pack to support as many launchers as possible. Of course, you’ll also need to actually add the images you’ve created themselves to the drawables folder!
It’s not an easy process, but hopefully these resources and starting tips will help you to save a lot of time and digging. Good luck!
Closing thoughts
Unfortunately, making an icon pack is not the straightforward process you may have thought, and support is very limited these days. Which seems to be a real shame given how customization is one of the most appealing features of Android to begin with.
Fortunately, it’s easy to customize your own app icons and you can even share your creations thanks to Adapticons.
Build your first basic Android game in just 7 minutes (with Unity)
In an upcoming article we’ll be looking at another potential option for making money from your designs: creating a Samsung theme. Stay tuned!