Affiliate links on Android Authority may earn us a commission. Learn more.
How to easily resize images on any Mac
Published onAugust 29, 2022
There are thousands of places where you can use an image. There are many places, whether a new avatar or emote on Discord or a new profile picture on Twitter, where the images have to be a specific size. In any case, almost every website wants images in a different size. In this tutorial, we’ll show you how to resize an image quickly, so it fits wherever you need to upload it. Here’s how to resize images on any Mac.
Read more: How to quickly reinstall macOS on any Mac
QUICK ANSWER
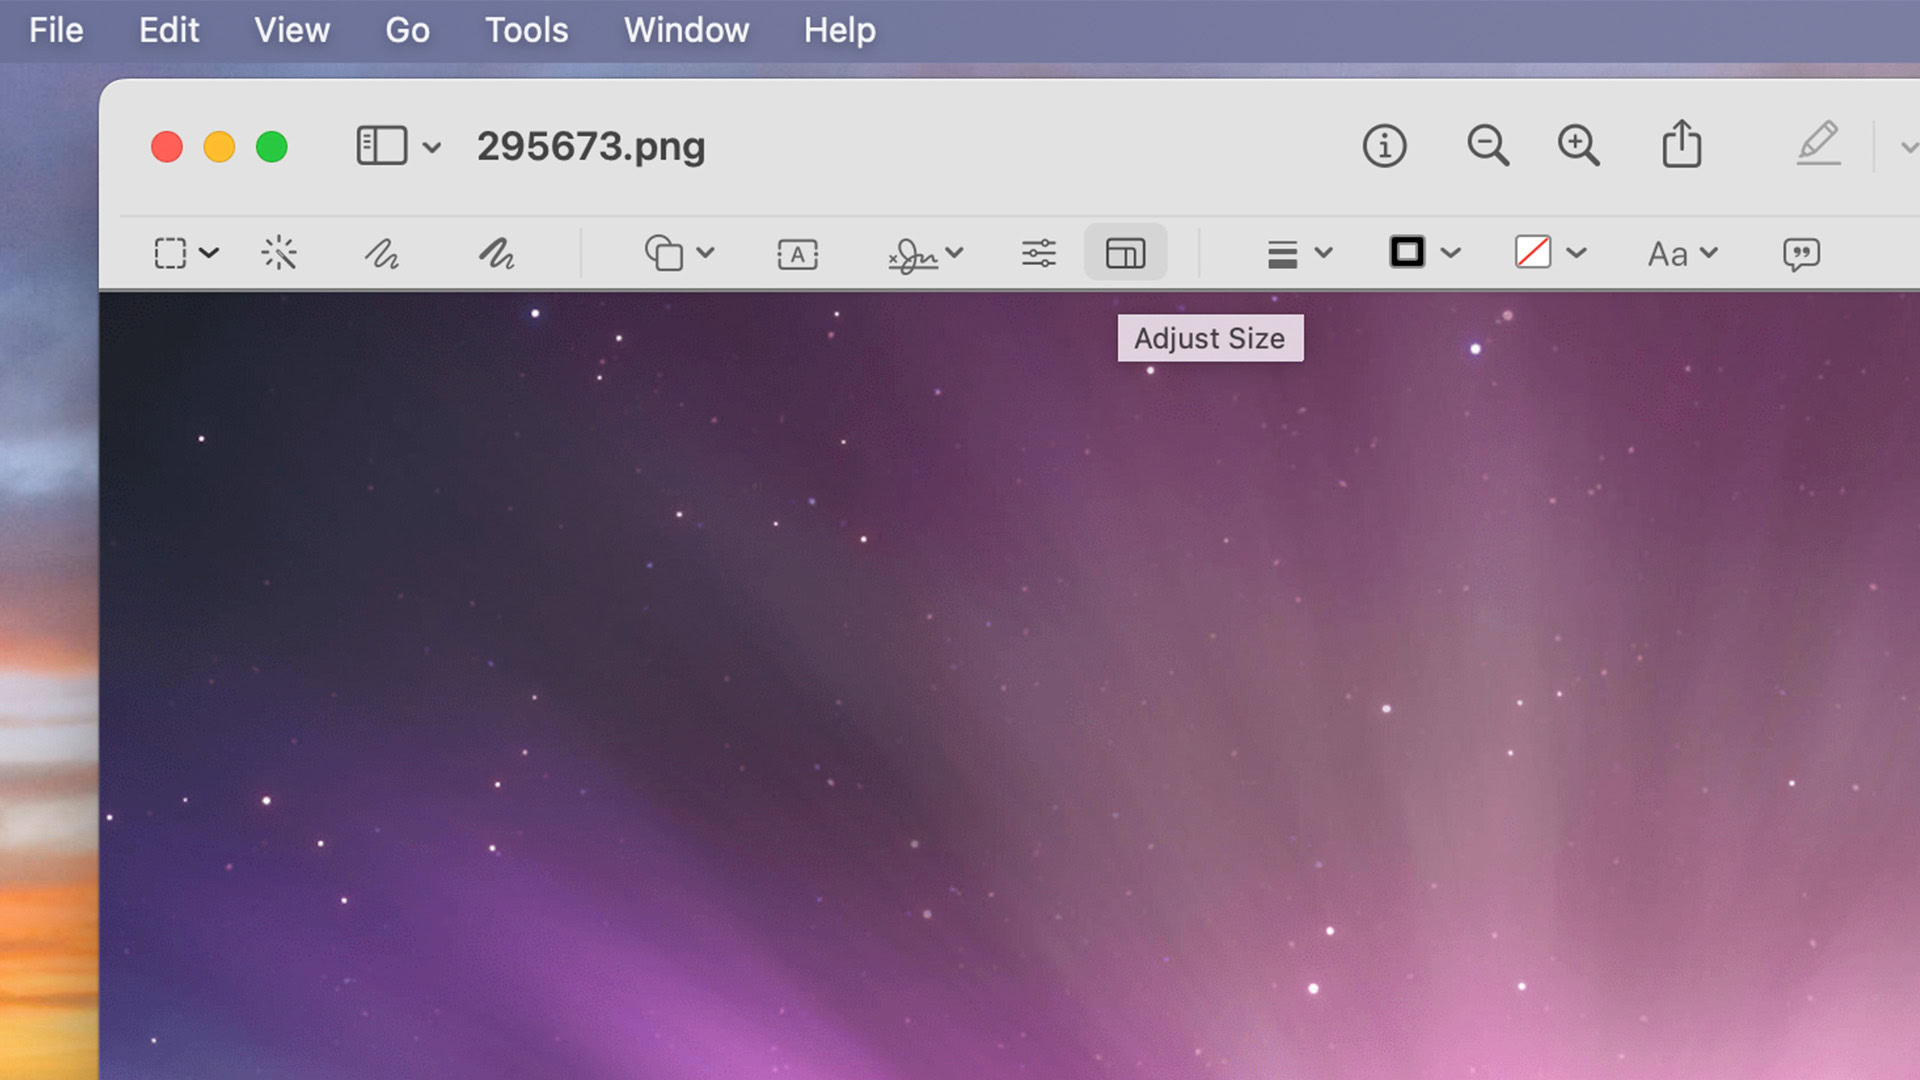
To resize an image on Mac, open the image in Preview. First, go to File, then Duplicate to make a copy so you still have the original if needed. Hit the Show Markup Toolbar button next to the search bar to open the Markup toolbar. Then, click the Adjust Size button. Change the dimensions as necessary and hit OK. Finally, hit Command+S to save the copy with its new size.
JUMP TO KEY SECTIONS
How to resize an image with Preview

Preview is the default image viewer on macOS. It has a tool for resizing images natively and it should work for the majority of use cases. Here’s a quick tutorial on how to use it.
- Find the image you want to open. Command+Click on it and hit Open With. Select Preview from the list.
- Preview will open with the image. Go to File, then click Duplicate. This opens a copy of the image, which you can mess with. That way, you can keep the original in case something goes wrong. Close out of the original image and work with the duplicate.
- Click the Show Markup Toolbar button. It’s a circular button with an ink pen in it next to the search bar.
- With the toolbar open, click the Adjust size button. Check the screenshot above to see what it looks like.
- A new window appears with a few options. Resize your image as necessary using the Width and Height adjustments. The Fit into dropdown also has some common sizes for quick use
- Once done, hit OK.
- Next, hit Command+S to save the image as its own copy. Give it a name and hit Save. We recommend naming it differently than the original copy so you can tell the two apart.
That’s it, you should have a new image that is sized to your liking. You may need to play around with the Adjust Size window a bit to get it how you want. Just make sure you use the Duplicate function so you can keep the original and start over if you mess up.
How to resize an image with ColorSync Utility

This is basically the same method as Preview, but macOS has a ColorSync Utility app that actually has a resizer in it. We include how it works here for completeness, but we recommend using the Preview method over this one.
- Find the image you want to resize. Right-click or Command+Click on it, select Open With, and select ColorSync Utility.
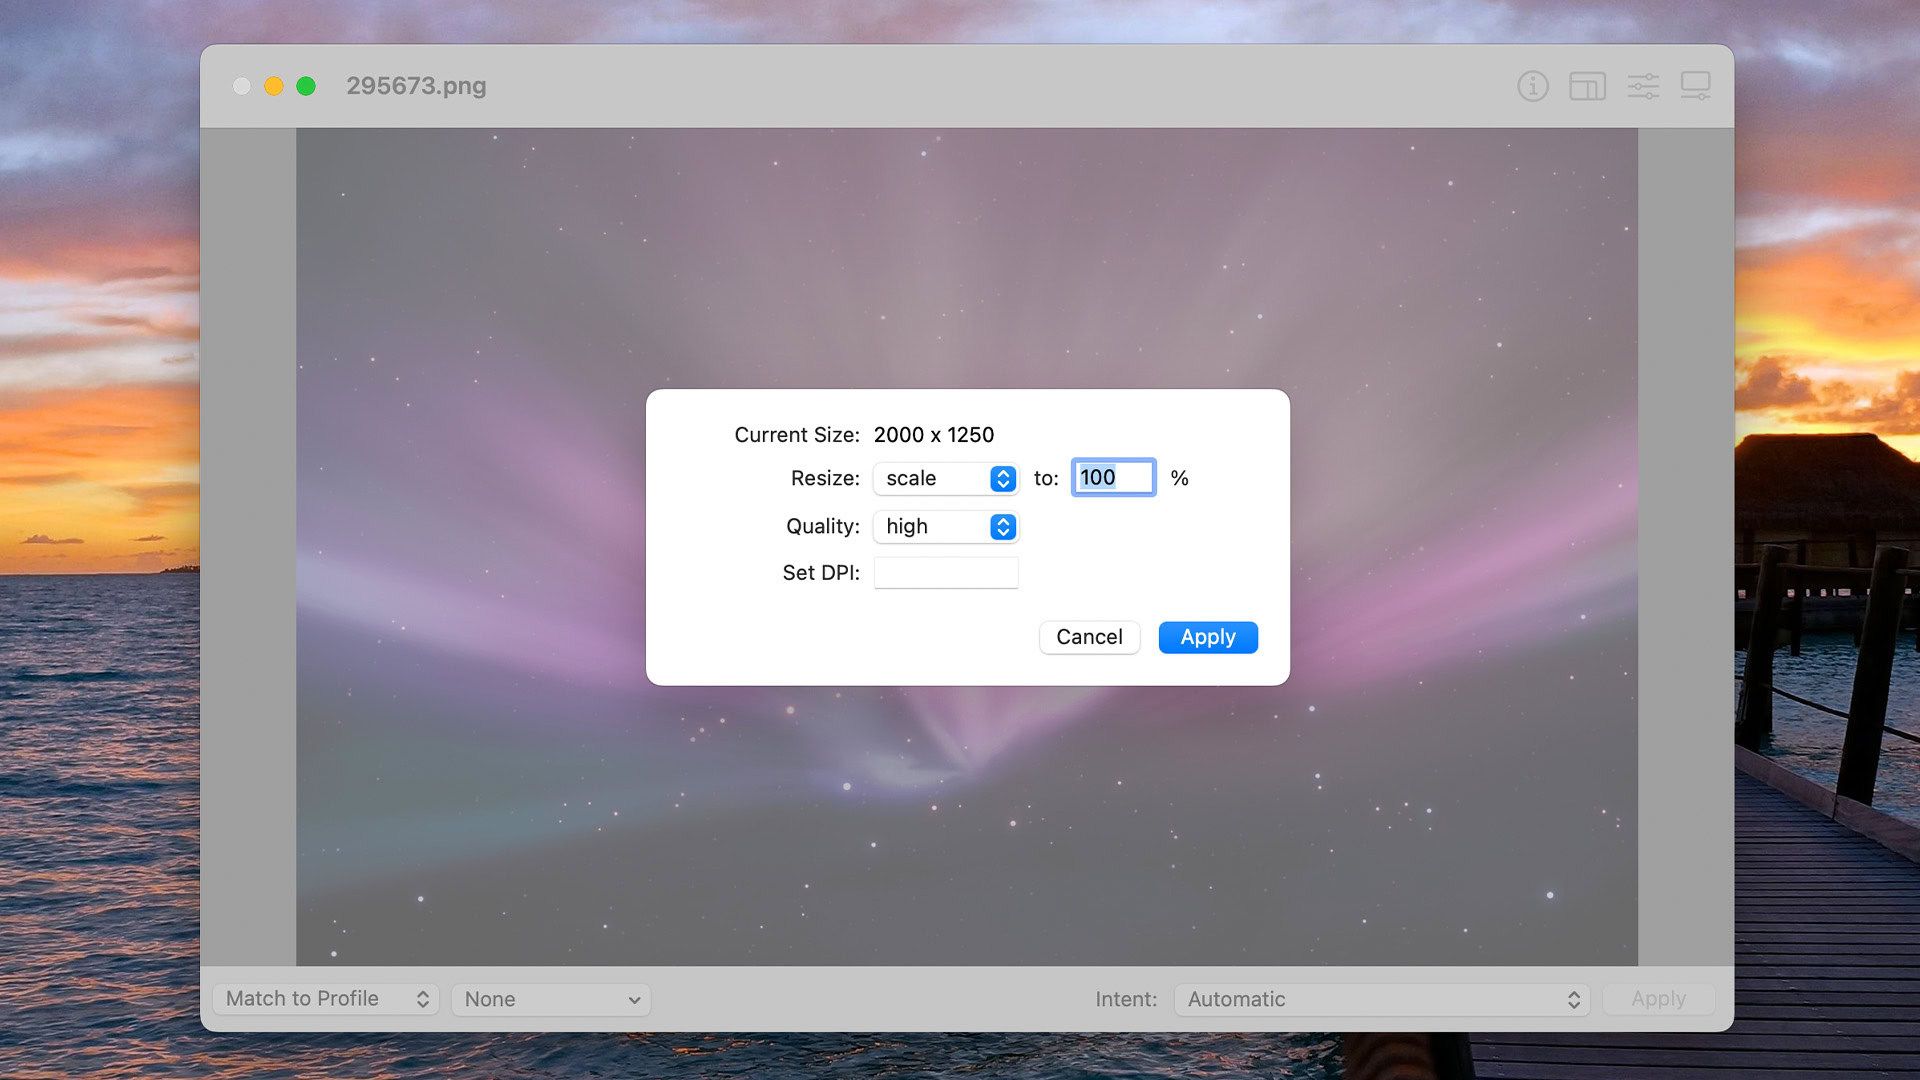
- Once it opens, you can find the same Adjust Size button from Preview in the top right corner of the window. Click it.
- On the next screen is a very simple resize tool. You can only adjust the percentage size. In other words, you can make it bigger or smaller, but you can’t change the aspect ratio. Select the percentage you want and hit Apply.
- Go to File, select Save As, give your file a name, and hit Save.
This is actually the faster option if you just need to make an existing image bigger or smaller but want to maintain its aspect ratio. However, Preview has more robust options, and you can still change the size without changing the aspect ratio, so we recommend just using Preview.
Use a third-party app

Obviously, there are dozens of third-party image editors that can do this job for you. They all require different steps to perform the work, but it is the same work overall. We’ll list some common image editors for macOS along with a tutorial on how to resize an image for each one.
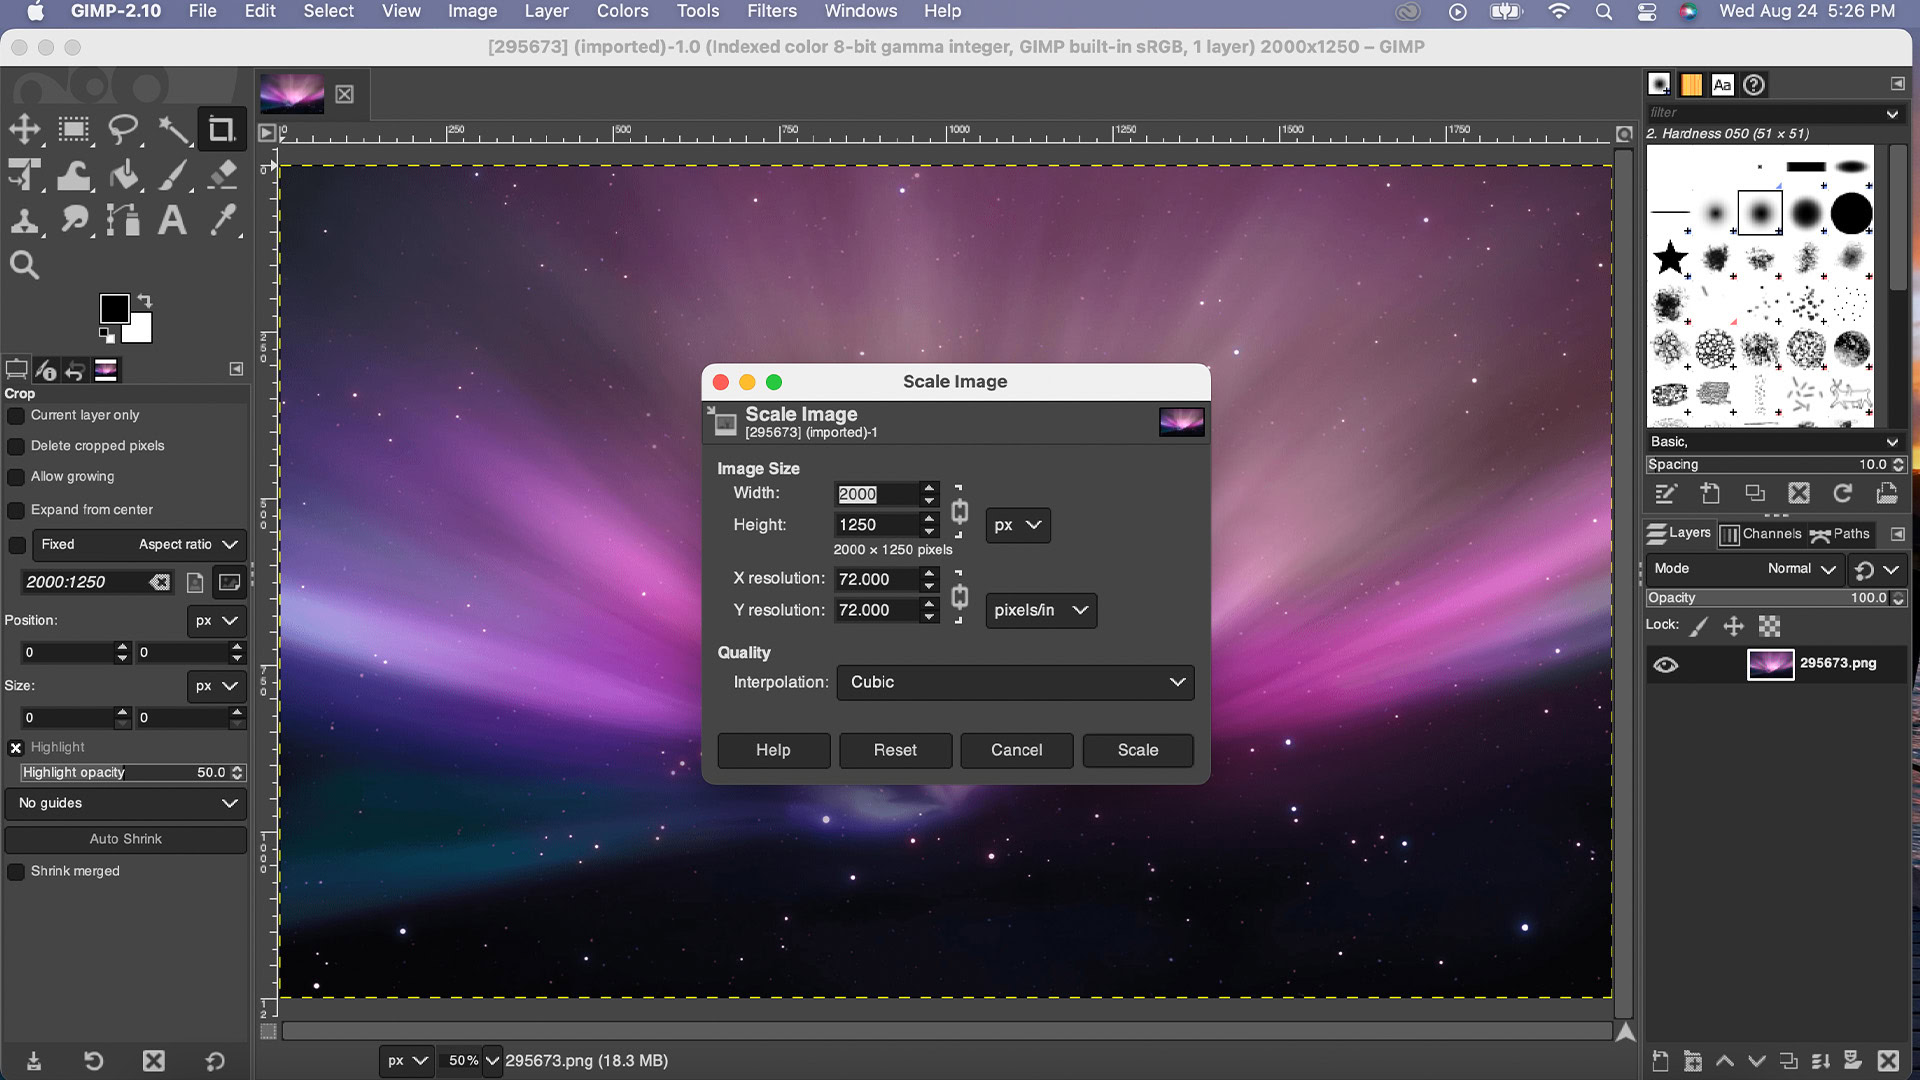
- Gimp (Free) — Gimp is a free and open-source solution that a lot of folks use instead of Photoshop. Here is their tutorial on resizing images.
- Adobe Photoshop and Lightroom (Up to $54.99 per month) — The gold standard for image and photo editing. It costs more, but this is what many of the pros use. Here is the tutorial for resizing images in Photoshop, and here’s the one for doing it in Lightroom.
- Exposure X ($129-$149) — Exposure X is a photo editor for macOS that a lot of people like. It deals primarily with photographs, so we don’t recommend it for random graphics. The Exposure X7 bundle includes their image resizer tool, or you can buy it for $79 on its own.
- Luminar AI ($47) — Luminar AI is another image editor similar to Gimp or Photoshop. It’s a bit expensive but works well. In any case, here is the tutorial on resizing images in Luminar AI.
Of course, most photo editors, in general, have an image resize option. You may need to search around the settings of your preferred image editor, but it’ll almost certainly be there.
Up next: How to fix “macOS cannot verify that this app is free form malware”
FAQ
Unfortunately, any given image only has so many pixels. Making it smaller won’t degrade quality. However, increasing the size of an image definitely will almost no matter what you do. There are some advanced tools that can upsize an image without degradation, but they are expensive.
As long as you keep the image in its original aspect ratio, you won’t get stretching. If you need to resize the image in such a way that you can’t keep the original aspect ratio, we recommend resizing the image to be larger than you need and then cropping it down to fit. You’ll lose part of the image this way, but it prevents stretching.