Affiliate links on Android Authority may earn us a commission. Learn more.
How to set up a VPN on any platform
Published onJune 6, 2022

The easiest way to set up a VPN on any platform is to use an app from a third-party VPN provider. Download it to your device, type in your username, password, and other required information, and you’re good to go. However, not all providers offer apps for every platform. The software may be available for Windows but not for Android. If you use your devices for remote work, you might also need to manually connect to your office VPN. Here’s how to set up a VPN on Android, Chrome OS, Windows, iOS, and macOS.
Read more: The best VPNs for every use case
QUICK ANSWER
To set up a VPN on Android, go to Settings-->Wireless & Networks-->More and tap the "+" icon in the top-right corner. Type all the required information into the window that pops up and tap Save.
JUMP TO KEY SECTIONS
How to set up a VPN on Android
Setting up a VPN on an Android device is a breeze. Head to Setting–>Wireless & Networks–>More and tap the “+” icon in the top-right corner. Type all the required information into the window that pops up — you can get it by contacting your VPN provider or your office network admin — and hit Save to finish the process.
The settings menu might look slightly different than described above, depending on your Android device. The VPN option could be hiding in a separate folder, so you may have to dig to find it.
How to set up a VPN on Chrome OS

You first have to import a CA certificate to your Chromebook. After getting the certificate from your provider and storing it on your computer, type chrome://settings/certificates into the Chrome browser’s address bar. Click the Authorities tab at the top of the page, press Import, choose the CA certificate, and follow the onscreen instructions.
You can now enter the network settings. Click on your account photo in the bottom-right corner of the screen and open the settings. The next step is to select the Add connection option (located under the Network section) and click Add OpenVPN/L2TP.
Type the information required (Server hostname, Service name) into the form that pops up and select Connect. If you’re an ExpressVPN customer, you can find the necessary information here. If you use a different service, you’ll have to contact your provider or dig through its website to find it.
Set up a VPN on Windows

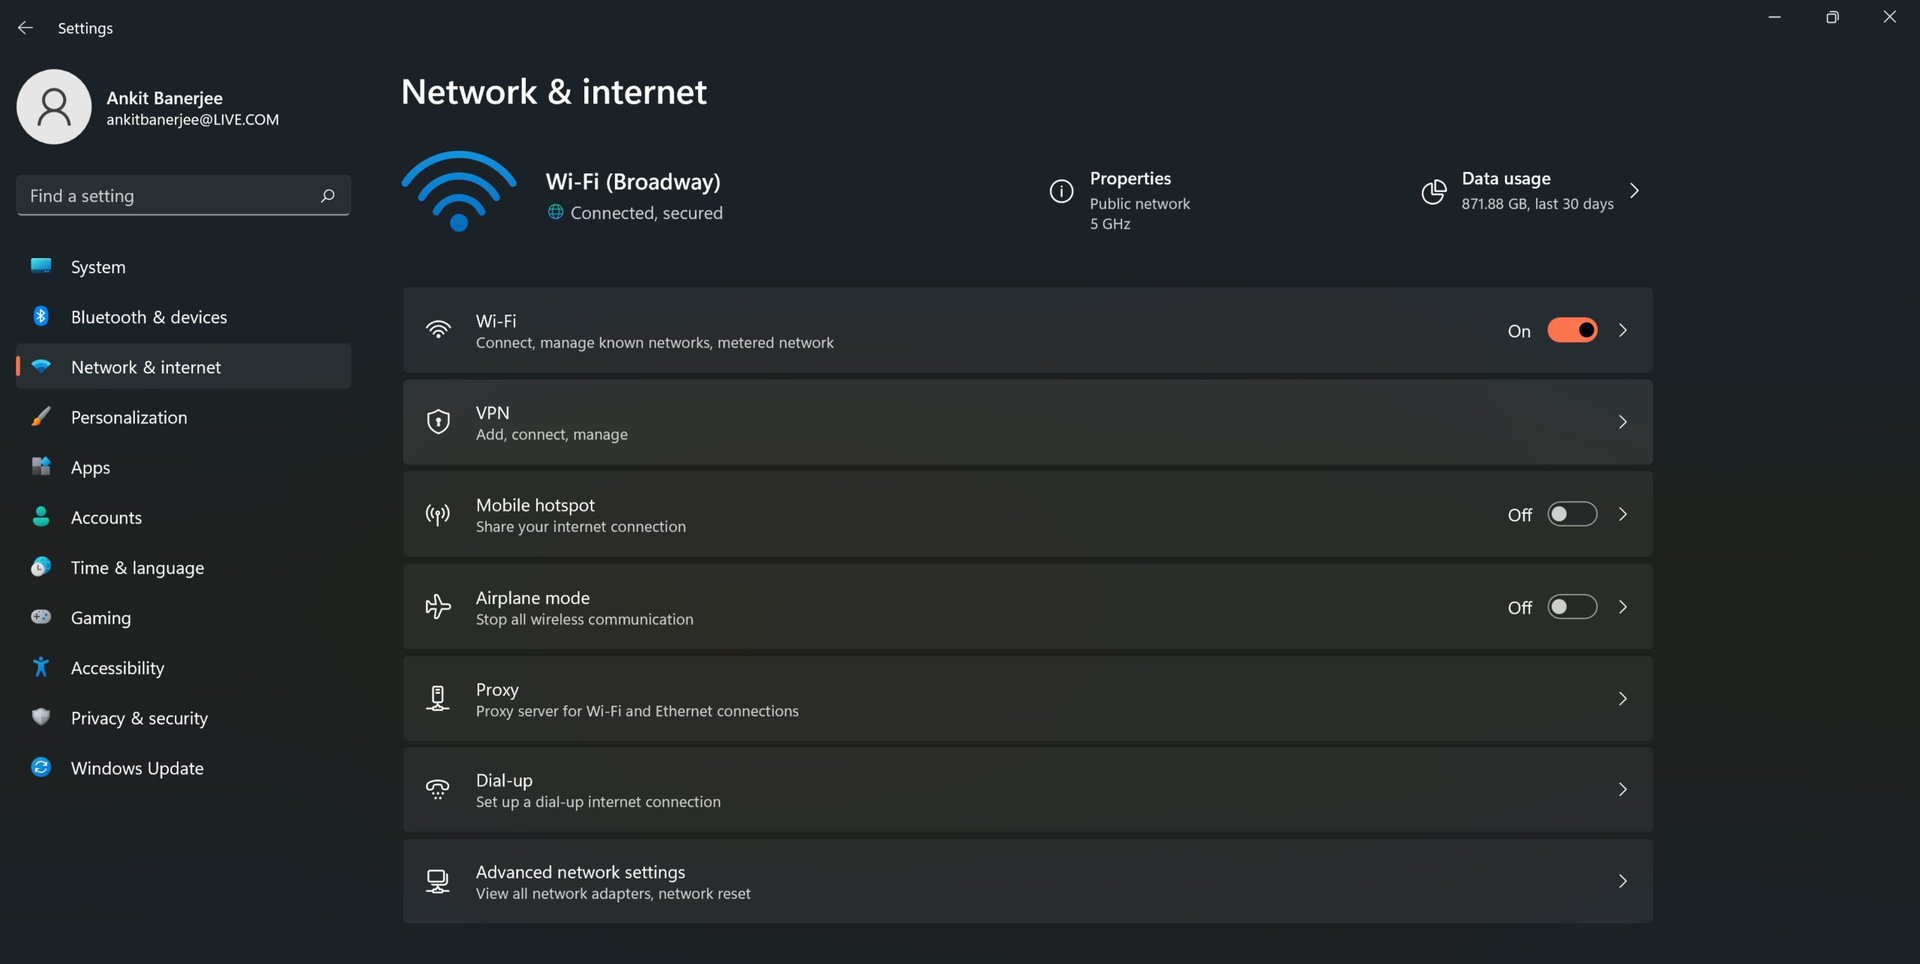
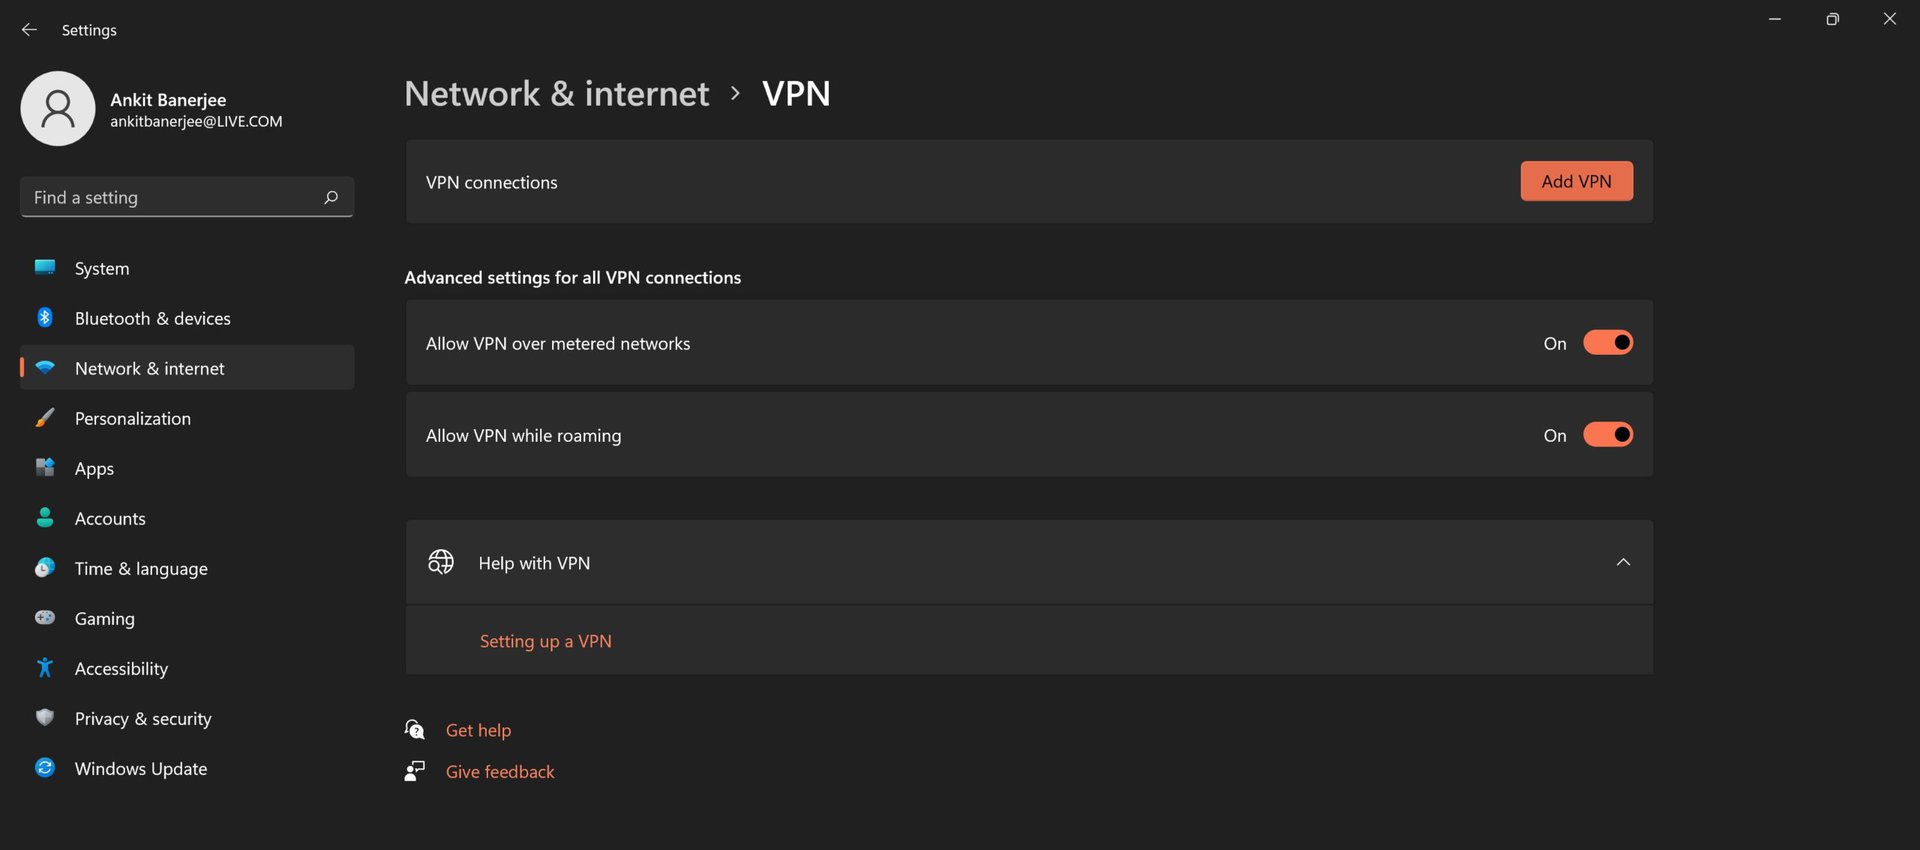
Here’s how you can set up a VPN on Windows using the PPTP protocol. Go to Network settings (Network and internet on Windows 11)–> VPN–>Add a VPN connection (or Add VPN in Windows 11).

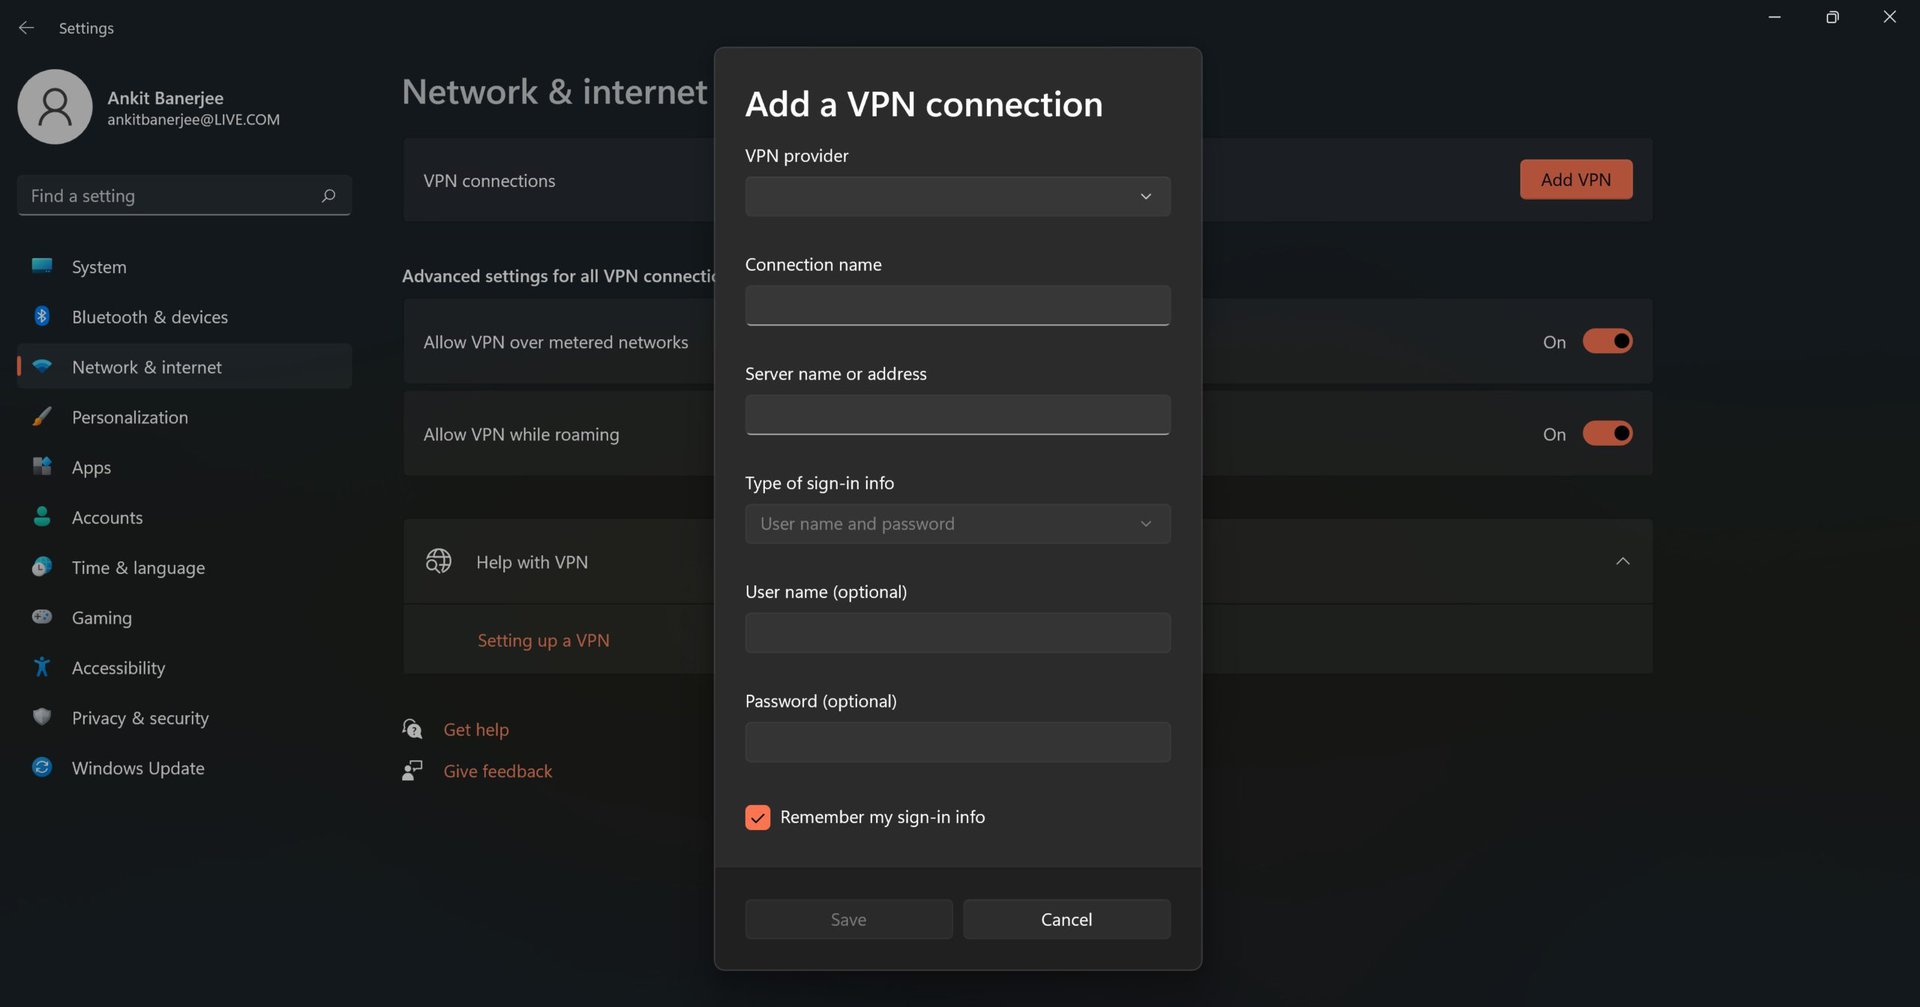
When the new window pops up, choose Windows (built-in) from the VPN Provider drop-down menu and Point to Point Tunneling Protocol (PPTP) from the VPN type menu. Fill out all the other fields like username, password, and server name — you may have to contact your VPN provider for some of the data.

Click Remember my sign-in info — so you won’t have to log in every time you’ll want to use the VPN — and select Save. The last step is to choose your newly created VPN connection from the list and click the Connect button.
Set up a VPN on iOS

Launch the Settings app on your iOS device, go to General–>VPN–>Add VPN Configuration–>Type, select the PPTP protocol, and go back to the previous screen. Fill out all the required fields, including the account name, password, and server — you may have to contact your VPN provider for some of the data. Then click Done and toggle the Status switch on.
How to set up a VPN on macOS

Read more: The best VPN apps for Android
FAQs
If you are using a third-party VPN service, the cost of the subscription can vary from as low as $2/month to $12/month. There are a few free options worth checking out, but if you plan to use a VPN a lot, a paid subscription is the better way to go. You don’t need to pay if you manually set up a VPN to connect to your office network.
It depends on the VPN provider you subscribe to. Some, like NordVPN, have a Chrome browser extension available that you can easily install and enable. Check the list of platforms the VPN supports to see if it has a Chrome extension available.