Affiliate links on Android Authority may earn us a commission. Learn more.
How to set up dual monitors on your desktop PC
Published onDecember 22, 2021
If you never seem to have enough space on your desktop, a second monitor can make a world of difference. No more switching between tabs or losing windows. You’ll finally have enough screen real estate for all your tasks. Once you have the hardware sorted out, a dual monitor setup is easy to configure. We’ll show you how to set up dual monitors on every major operating system.
Read more: The best portable monitors
QUICK ANSWER
To set up dual or multiple monitors on Windows, assuming you've already mounted and connected the physical monitor, press Windows key + I to open the Settings menu. In Settings, navigate to System > Display, which should show you a representation of all connected monitors. If not, press Detect and if it still won't show up, make sure all cables are properly plugged in. Once you see all connected monitors in the Display menu, re-arrange their graphical representations to resemble your physical setup, then select one of the monitors, scroll down, and customize its setup. Repeat this last step with all other connected monitors.
JUMP TO KEY SECTIONS
What you need for a multiple monitor setup
We’ll assume you already have a computer, a suitable second monitor, and a way to mount it. But do you have everything else you need?
- A graphics card that supports more than one monitor. That should be most of them these days. If you’re not sure, Google the model to find out.
- An extra power outlet for the second monitor, ideally on a power strip with a surge protector.
- The right cables, depending on which ports you’ll be using. Standard ports for connecting displays include HDMI, DVI, VGA, DisplayPort, Thunderbolt, and USB-C.
- If you’re using a laptop that’s short on ports, we recommend getting a USB-C docking station with additional ports, including an HDMI port.
- Possibly adapters. macOS users trying to connect a non-Apple monitor will most definitely need to look into adapters.
Once you have connected everything properly, your computer should detect both monitors, and display your desktop on both of them. Even if everything looks good right away, let’s dive into the system settings or preferences, and make some improvements. You’ll want to adjust your monitors’ orientation, resolution, and more. We’ll also show you some troubleshooting tricks.
How to set up dual monitors on a Windows PC
If your Windows PC recognizes the second monitor, it should automatically display a duplication of your desktop. Head to Start > Settings > System > Display where you should see a graphical representation of your monitors. If a display is missing, click Detect or Multiple displays > Detect. If the monitor still doesn’t show up, troubleshoot your cables, ports, or graphics card setup.
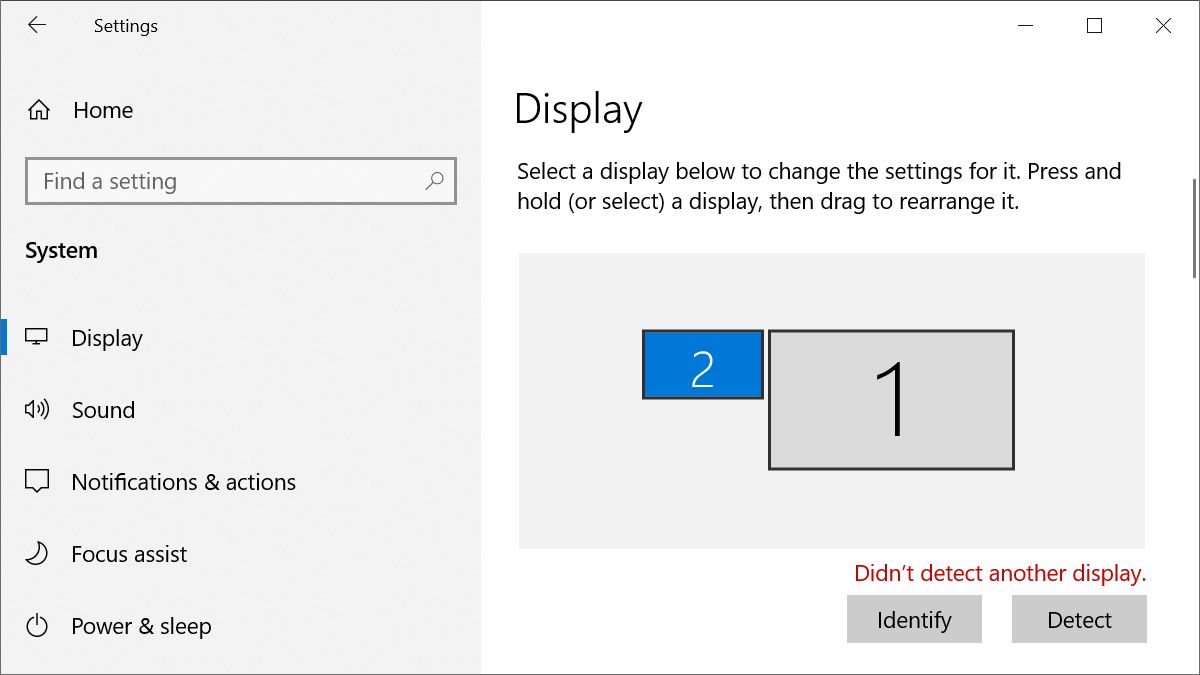
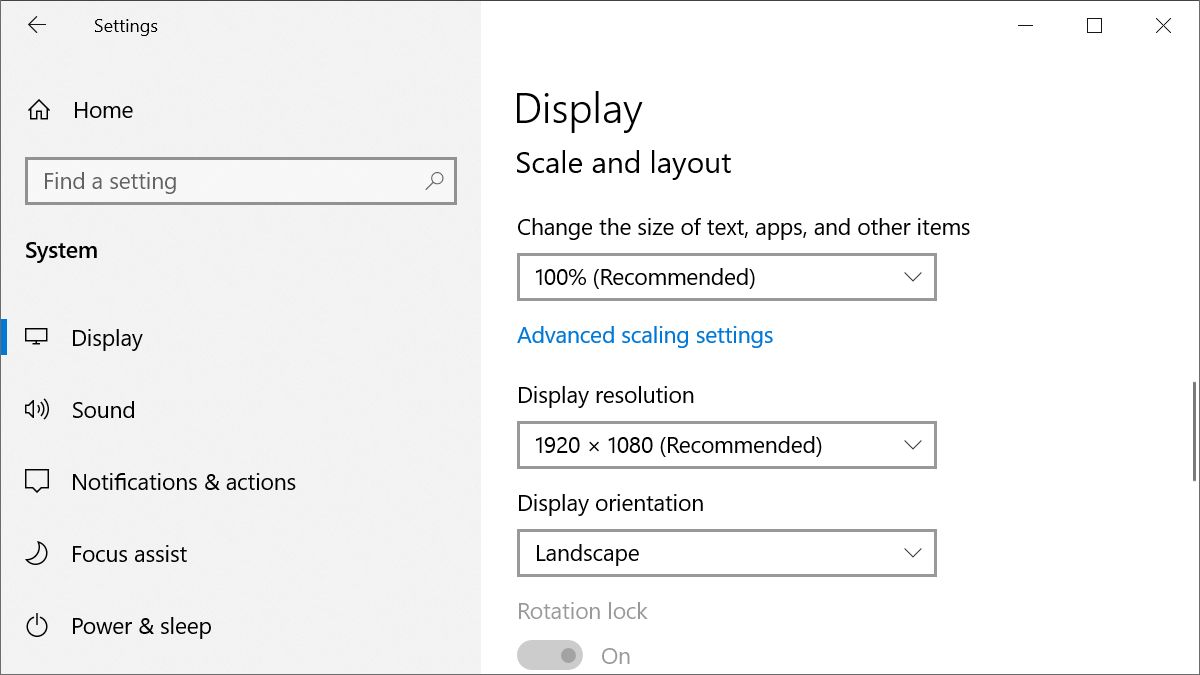
To adjust individual display settings, click to select the respective display box (above, #2 is selected), then scroll down to Scale and layout where you can change your display’s scaling, resolution, and orientation.
Rearranging the displays shown in the Settings menu changes how you can move your mouse and windows between displays, when you extend your desktop. Rather than having two monitors next to each other, you might have a laptop screen with a desktop monitor on top. Be sure to click Apply to save your changes.
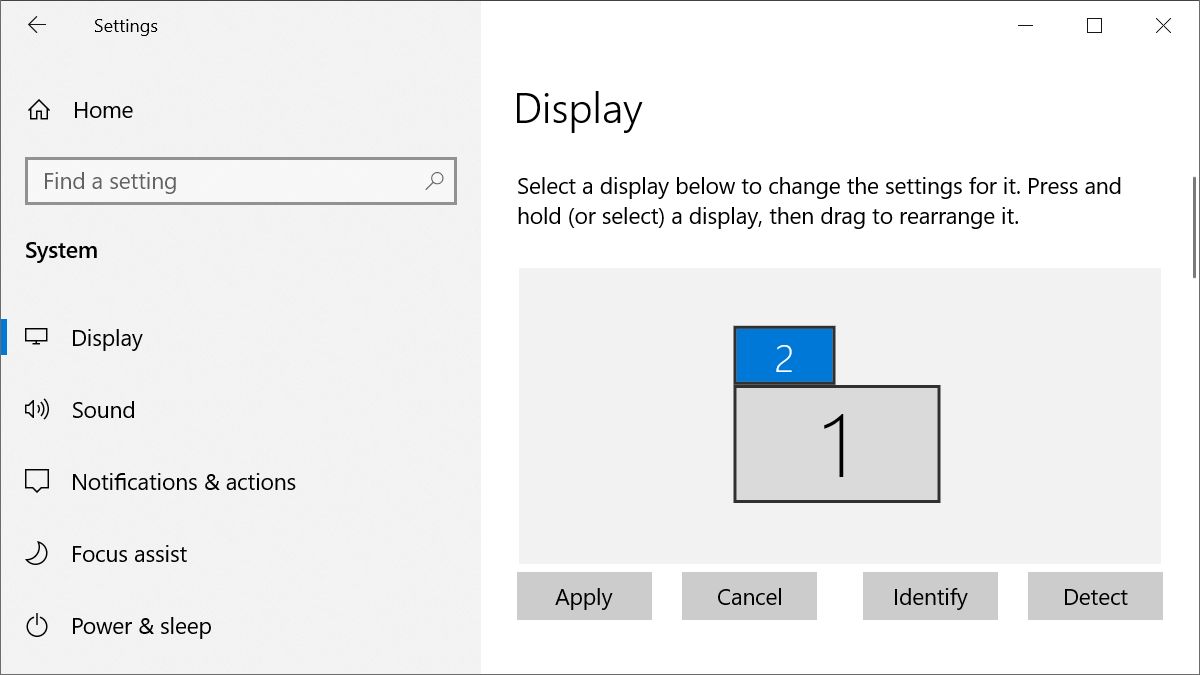
If you’re not sure which display is which, click Identify and a different number should show up on each of your monitors.

To change how your desktop shows across your monitors, scroll down to the Multiple displays section and choose an option from the drop-down menu. Select Extend these displays to get more screen real estate. Here, you can also check a box to Make this my main display, which will make it the active desktop.
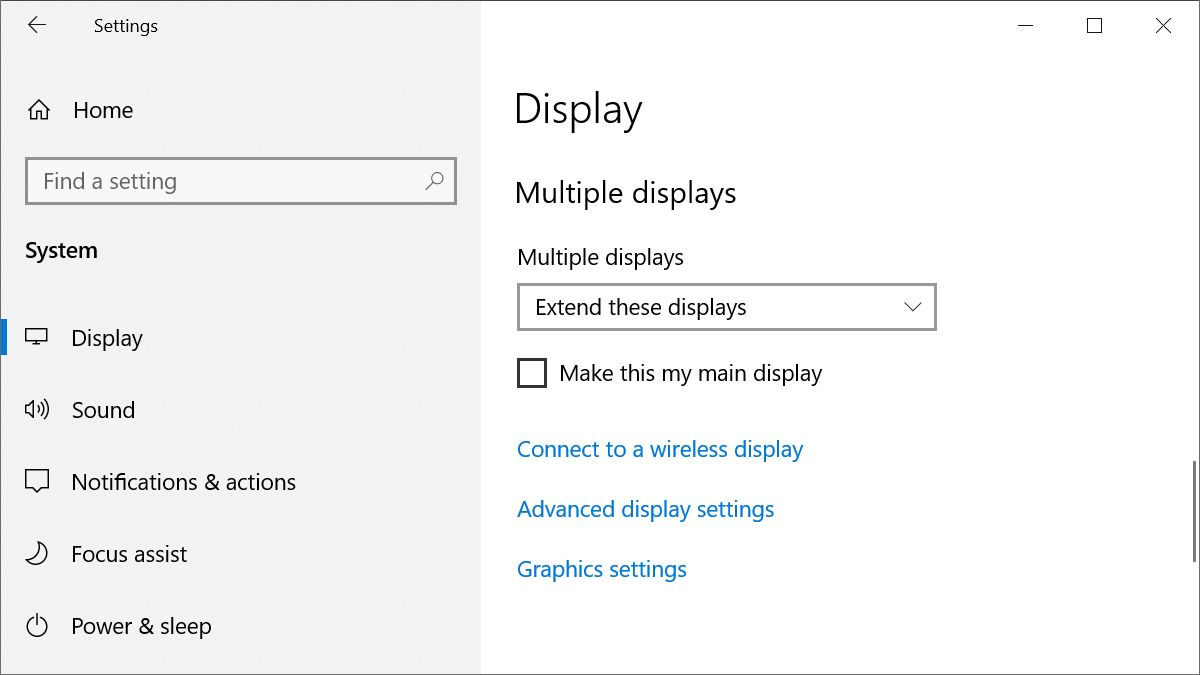
If you want to change this later, you don’t have to return to the Settings menu. Pressing the Windows logo key + P brings up a menu that lets you switch between these options, too.
How to set up dual monitors on a Mac
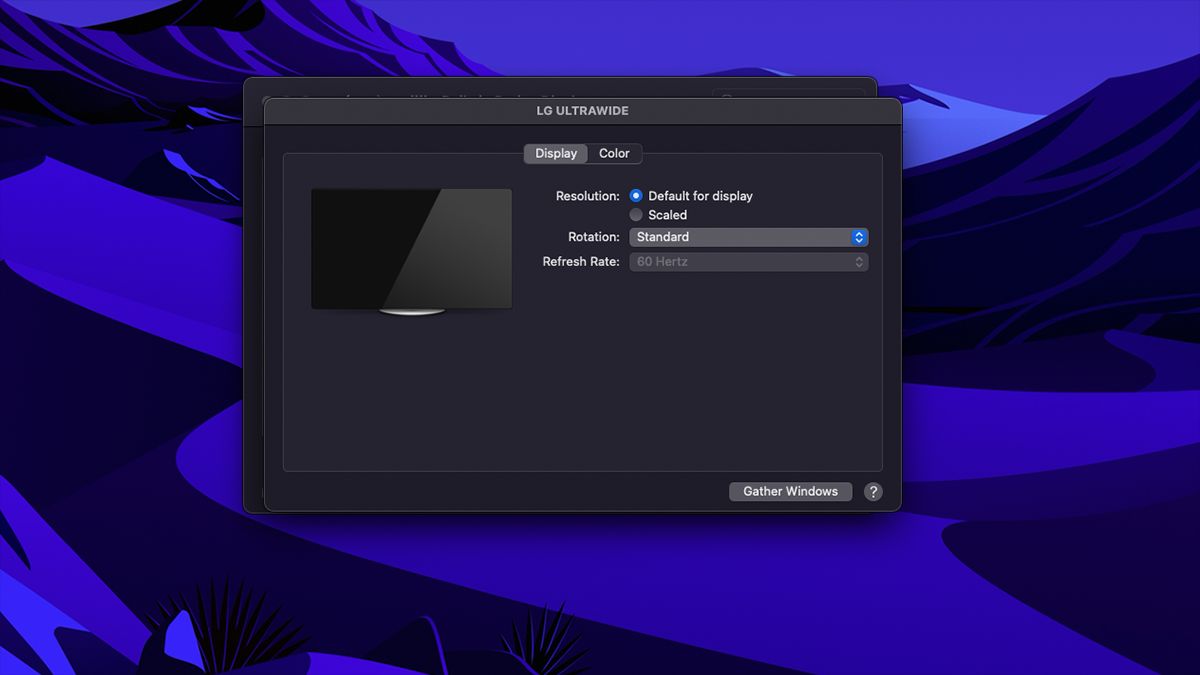
Your Mac should automatically recognize the second monitor, once you plug it in. If it doesn’t, try putting your Mac to sleep and waking it. Here’s how to set up the second display.
- Expand the Apple menu, select System Preferences, and click the Displays icon.
- Click the Gather Windows button in the bottom right to bring up a menu for the second monitor. Here, you can change its rotation, resolution scaling, and more. If the desktop background looks off, click Scaled and find the correct resolution for your display.
- Back in the main Display window, switch to the Arrangement tab. Here you can rearrange the displays to match their real arrangement. You can also move the menu bar.
- By default, macOS will extend your display. If you prefer to duplicate the desktop, check the Mirror Displays box in the Arrangement tab.
With Sidecar, you can set up your iPad as a second display.
How to set up dual monitors on Ubuntu Linux
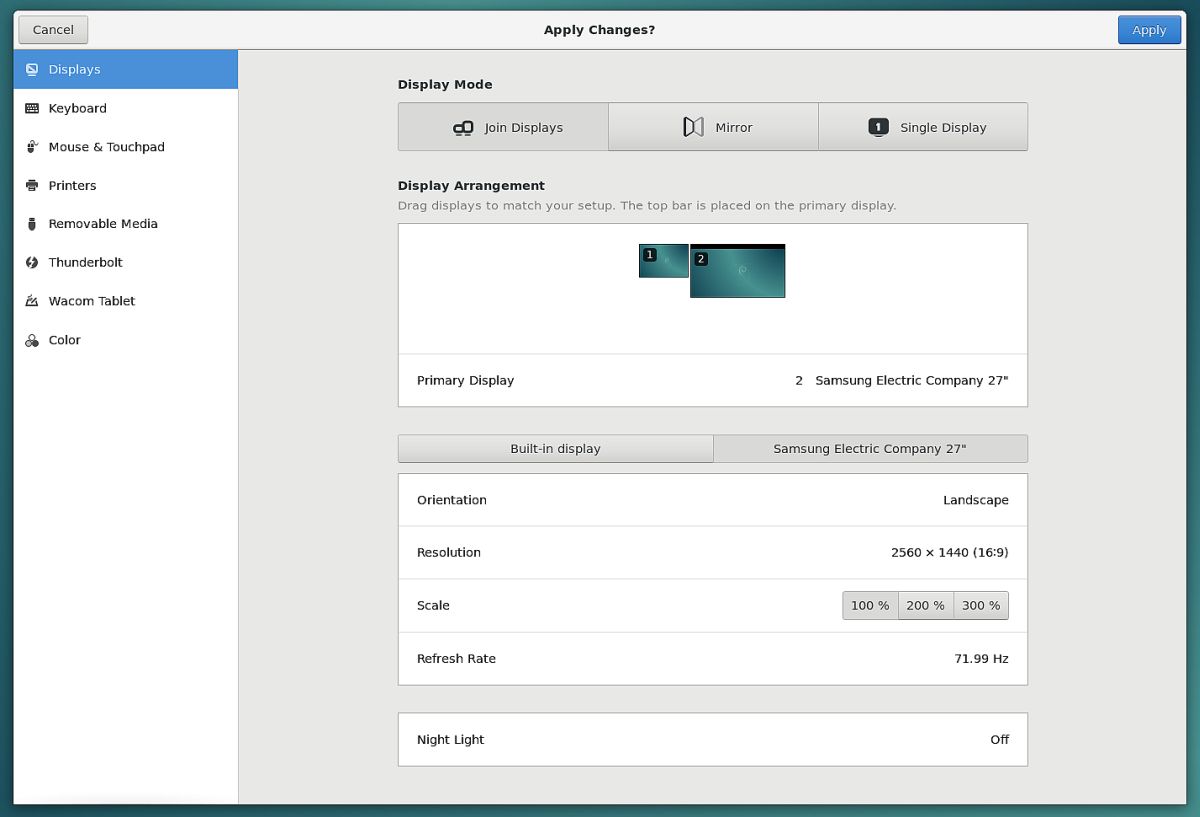
When you connect a second monitor to your Ubuntu Linux computer, your system should pick it up on its own. If it doesn’t, or to change the settings, follow these steps:
- Open the Activities overview, type Displays into the search bar, and click the top result to open the panel.
- You’ll see a display arrangement diagram where you can drag the displays to your preferred position.
- You can choose a Primary Display by clicking the respective option. This display will be home to the top bar and Activities overview.
- With only two monitors, you can choose from one of three display modes:
- Join Displays: Two separate desktops with linked edges, so you can pass things from one to the other.
- Mirror: The second display is an exact copy of the first, including resolution and orientation.
- Single Display: Configure only one display and keep the other turned off. This can be useful if you’re connecting an external display to a laptop.
With more than two displays connected, Join Displays will be your only option.
- Set the orientation, resolution or scale, and refresh rate for each of the displays.
- When you’re done, click Apply and Keep Changes to confirm or simply wait for 20 seconds if you’d like to revert to the previous settings.
How to set up dual monitors on Chromebook
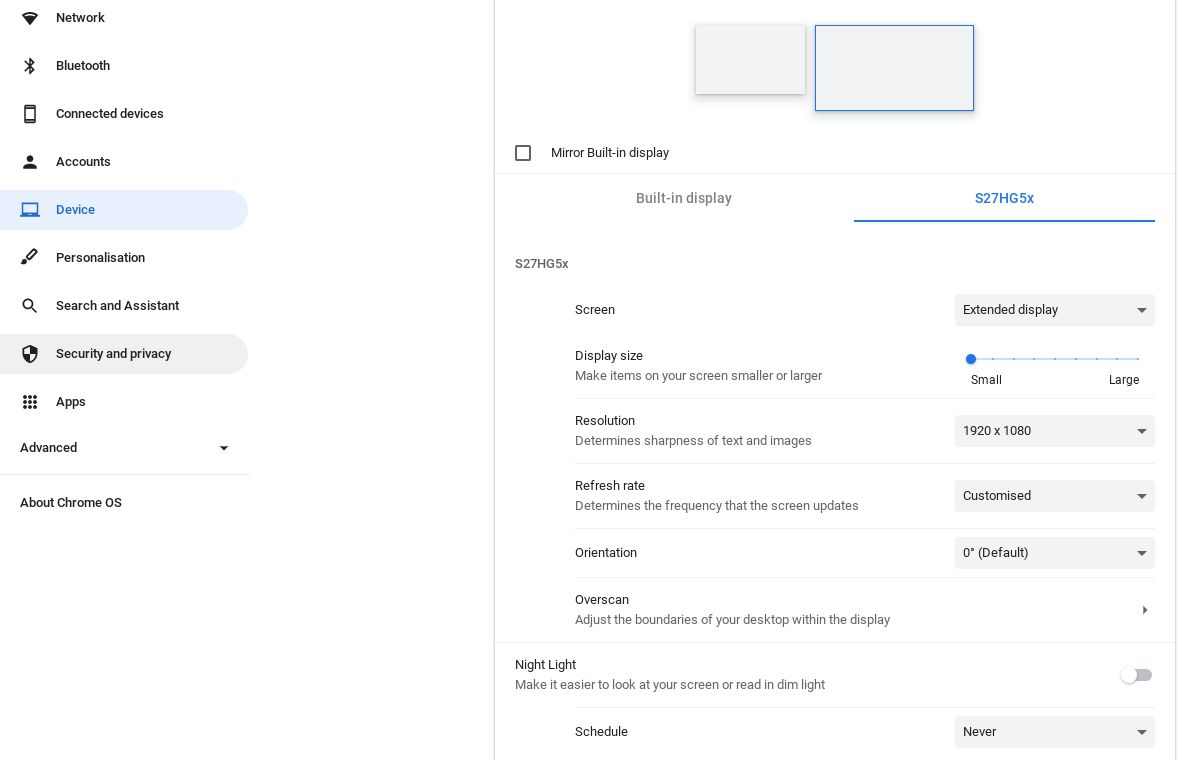
Your Chromebook should come with an HDMI, DisplayPort, DVI, or VGA port. If that’s the case, you can connect it to an external monitor or TV.
- Click the clock in the bottom right and head to Settings > Device > Displays.
- Arrange the displays to mimic your physical setup.
- Select Built-in Display or your external monitor to adjust its settings. You can change the display size, resolution, refresh rate, orientation, or overscan.
- You also have the option to Mirror Built-in Display, in which case you won’t need to adjust the settings of your external monitor.
- Click Done to save your changes.
To turn off your Chromebook screen and only view content on the external monitor, press and hold the decrease brightness button.
FAQs
Can dual monitors be hooked to a laptop?
Most laptops today support a second monitor. If your laptop runs any modern Windows operating system, it may also support two external monitors, but that depends on the graphics card and the ports built into your laptop.
To find out whether your laptop’s graphics card can handle two external monitors, check its specifications on the manufacturer’s website. Not sure which graphics card you have? Press Windows + X to open the WinX menu, open the Device Manager, and check the entry under Display adapters.
If your graphics card does support two external monitors, check whether your laptop’s port matches the ports on your monitors. You might have to use adapters, a display splitter, or a docking station to connect multiple monitors.
Will a dual monitor setup lower FPS?
Yes, connecting a second monitor and extending gameplay across both monitors can lower your FPS, but the drop might be minor (within 10 FPS), depending on your graphics card. If you connect a second monitor, restrict gameplay to the primary monitor, and only view 2D items on the other monitor. It shouldn’t affect FPS.
