Affiliate links on Android Authority may earn us a commission. Learn more.
How to take a screenshot in Windows 10
Published onJune 10, 2019
You’re watching a funny YouTube video and you want to grab a snapshot for social media. Maybe you’re having issues with a program and you want to show someone exactly what’s on the screen. We show you how to take a screenshot in Windows 10.
Our guide provides several ways to take a screenshot ranging from the standard Print Screen key to utilizing Microsoft’s OneDrive platform. This guide is based on Windows 1809 (October 2018 Update).
Take a screenshot of everything on your Windows 10 screen and create a file
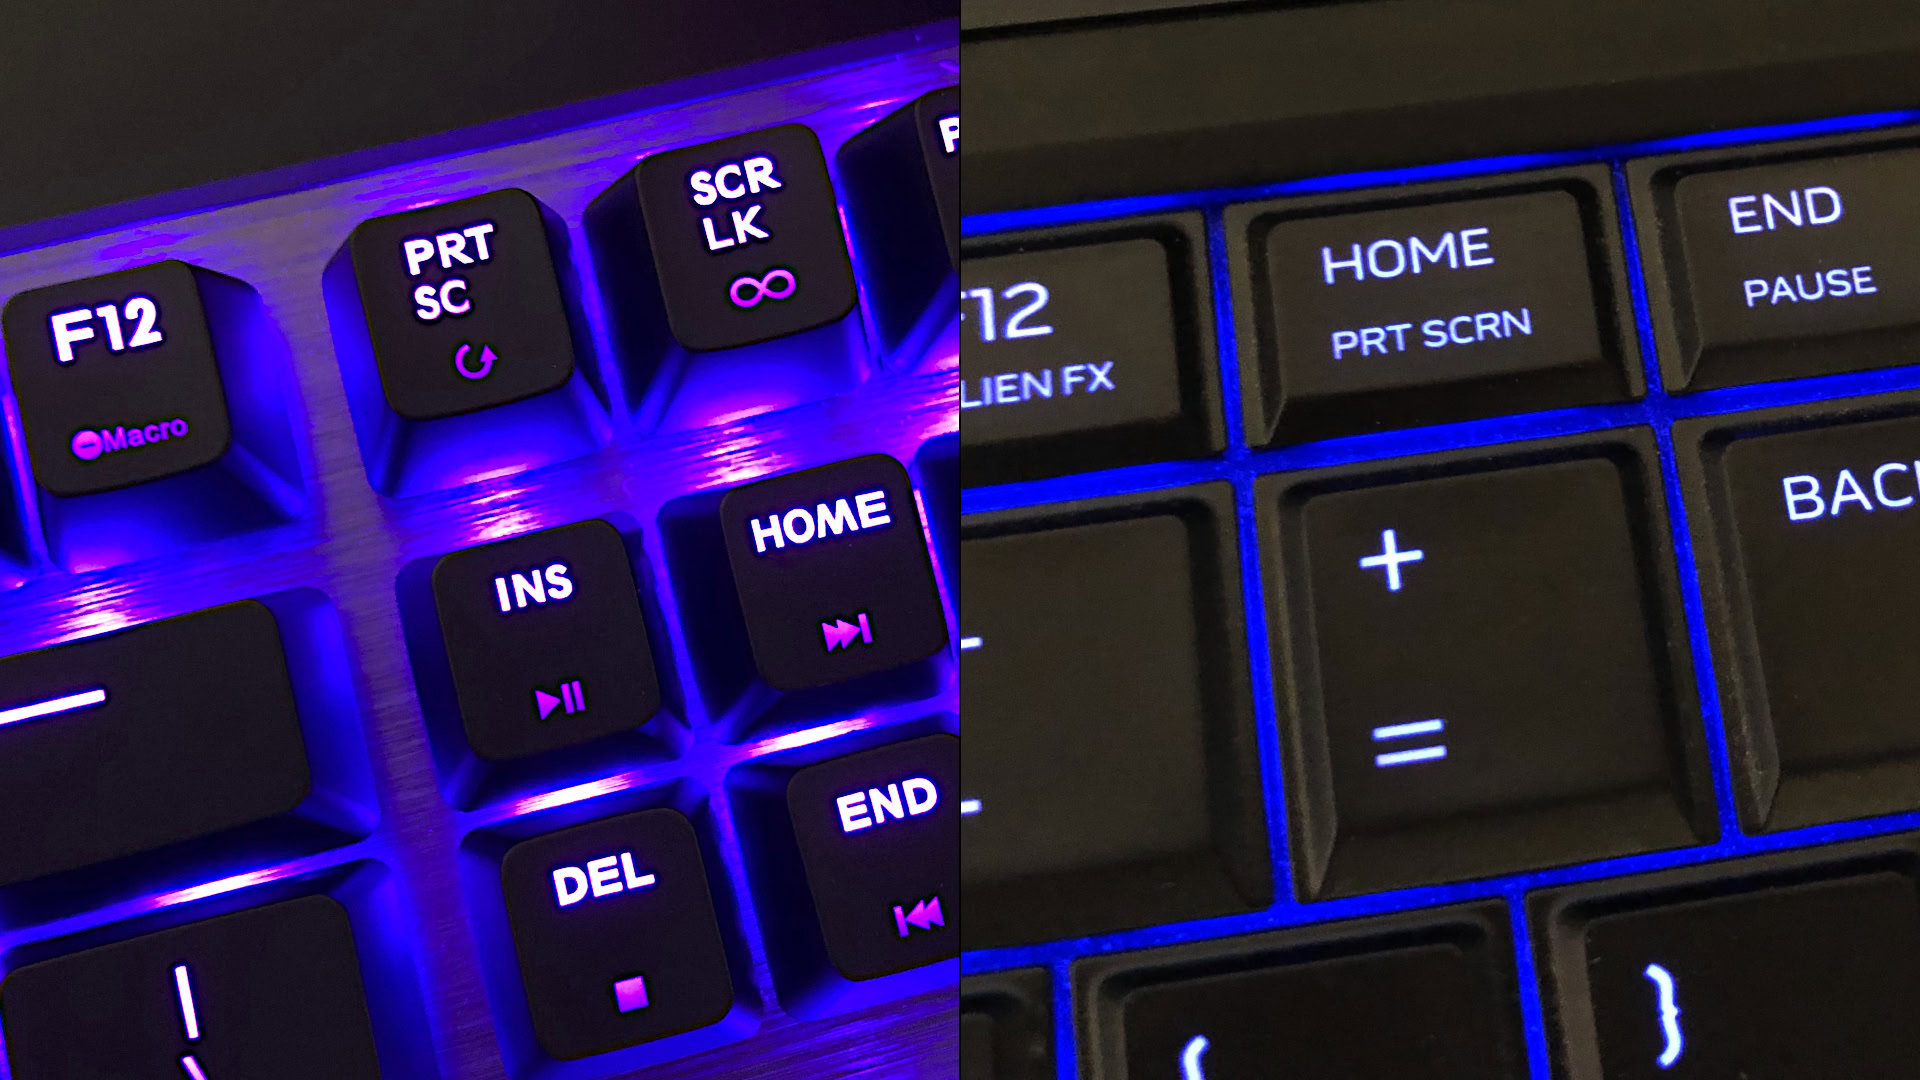
USB-based desktop keyboards typically provide a stand-alone Print Screen key near the Home and Delete keys. In contrast, laptop keyboards normally don’t have a stand-alone Print Screen key. Instead, manufacturers cram this function alongside another command on a single key due to the laptop’s restricted space.
For instance, our Alienware laptop has a key labeled both HOME and PRT SCRN. To use the Print Screen function and take a screenshot, we also press the Function (or FN) key. If we want to save a screenshot as a file, we must also press the Windows key at the same time for a three-key combo.
1. Press the Windows and Print Screen keys simultaneously. The screen grows dim for several seconds. On laptops, you may need to press the Windows, Function, and Print Screen keys.
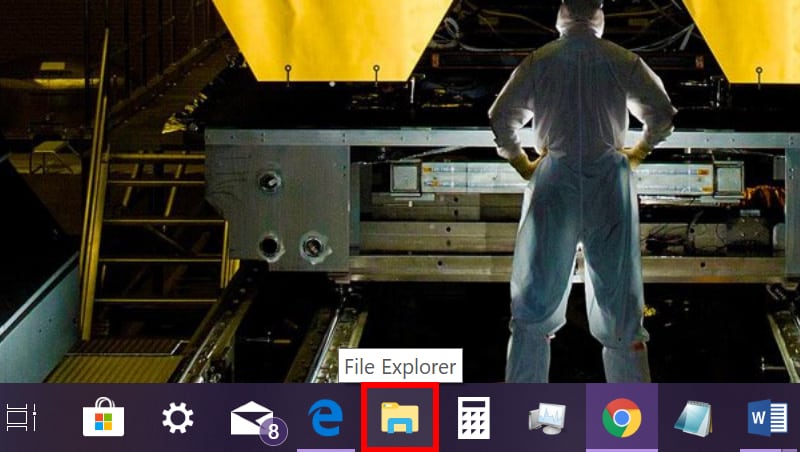
2. Click the Folder icon on the taskbar. This opens File Explorer.
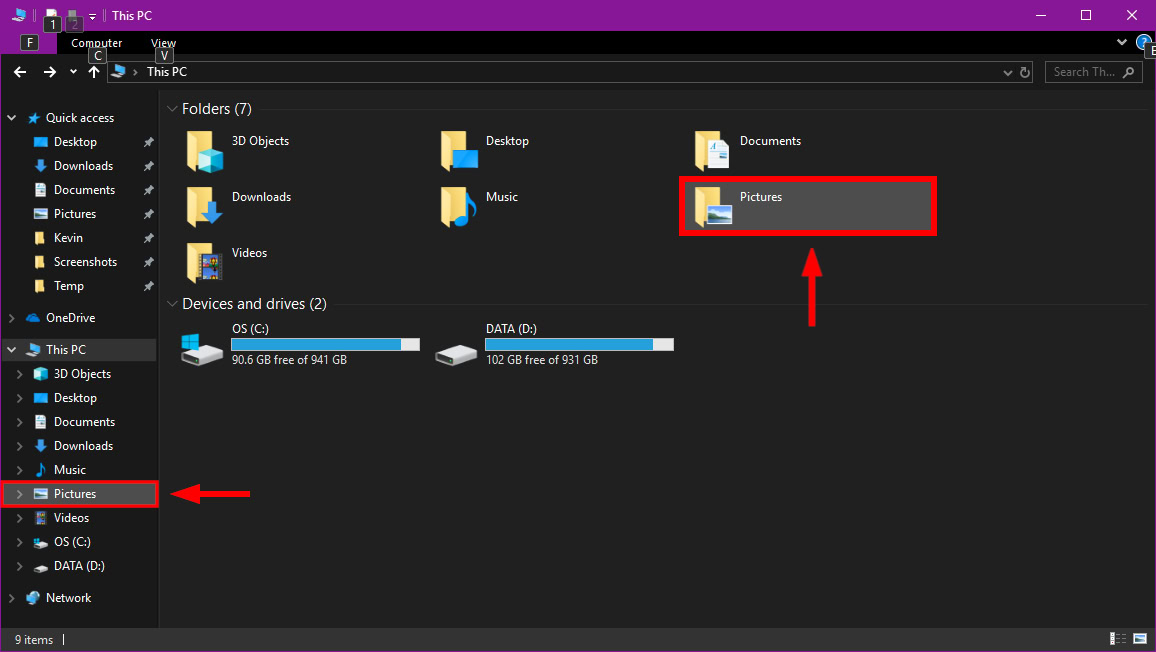
3. Select Pictures on the menu to the left or the folder icon towards the top.
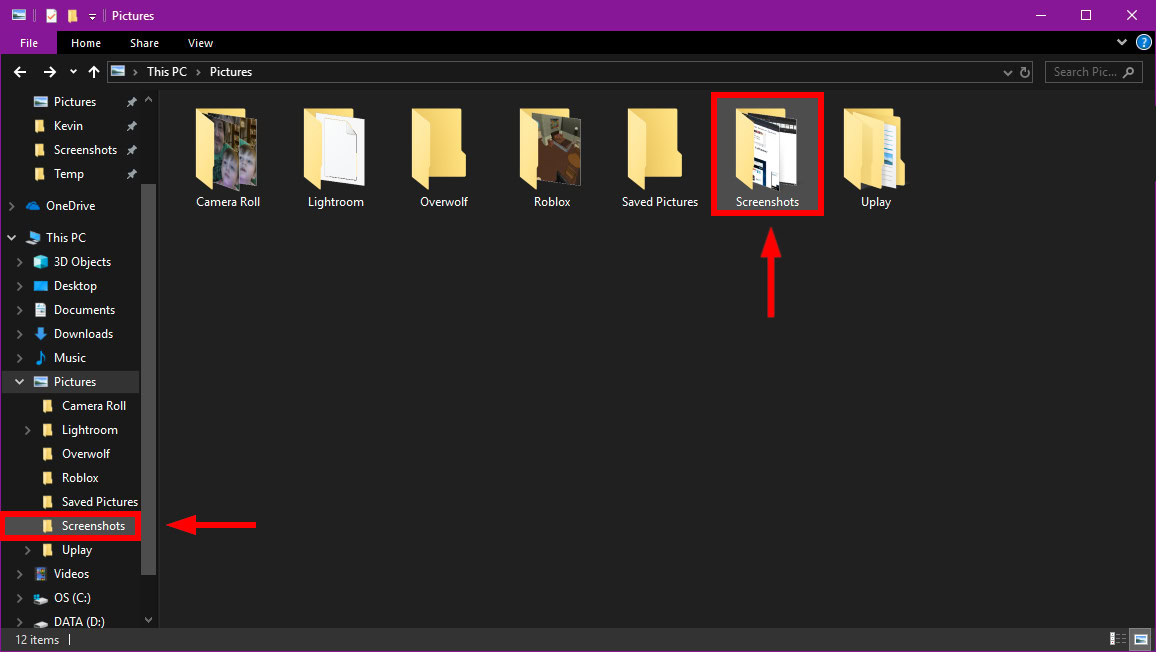
4. Double-click the Screenshots folder.
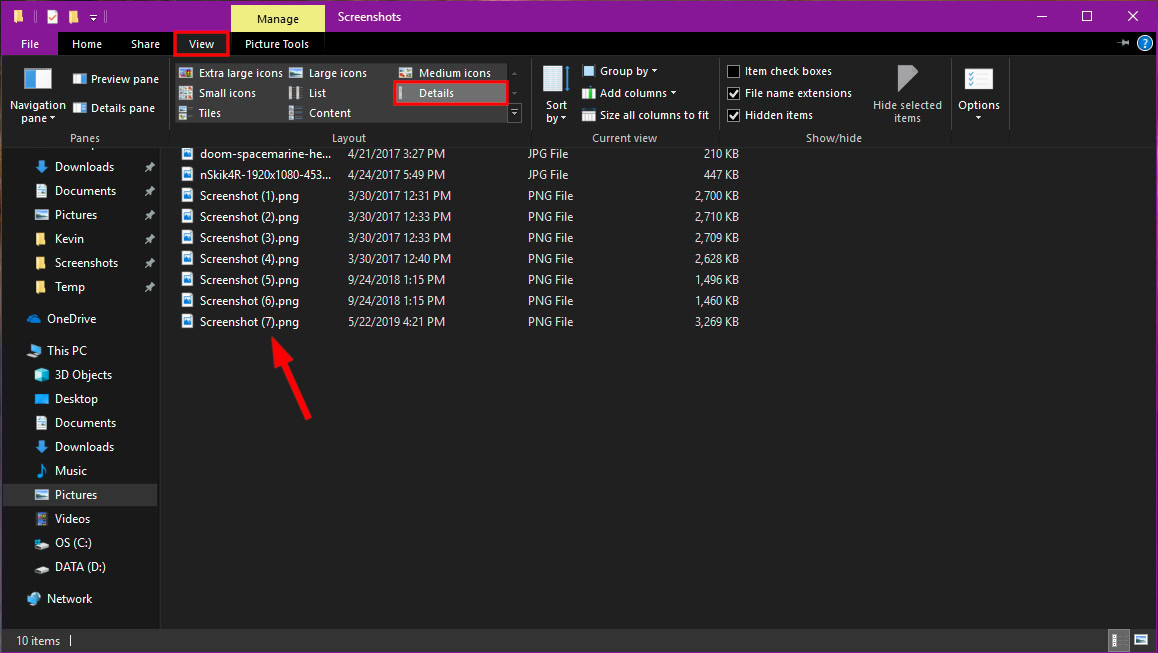
5. Click View and select Details in the drop-down menu.
6. The Screenshot.png file you just created has the current date and time. You’ll also see a (#) in the name for multiple screenshots captured with the same name. The Details setting is useful if you have more than a few screenshots saved in this folder.
Capture everything to the Clipboard
You may not want to create a file, but merely send a screenshot to the clipboard and paste it into an image editor, document, or some other application. This example highlights GIMP and Microsoft Word though typically you can type Control + V to paste the image into any Windows-based program.
GIMP
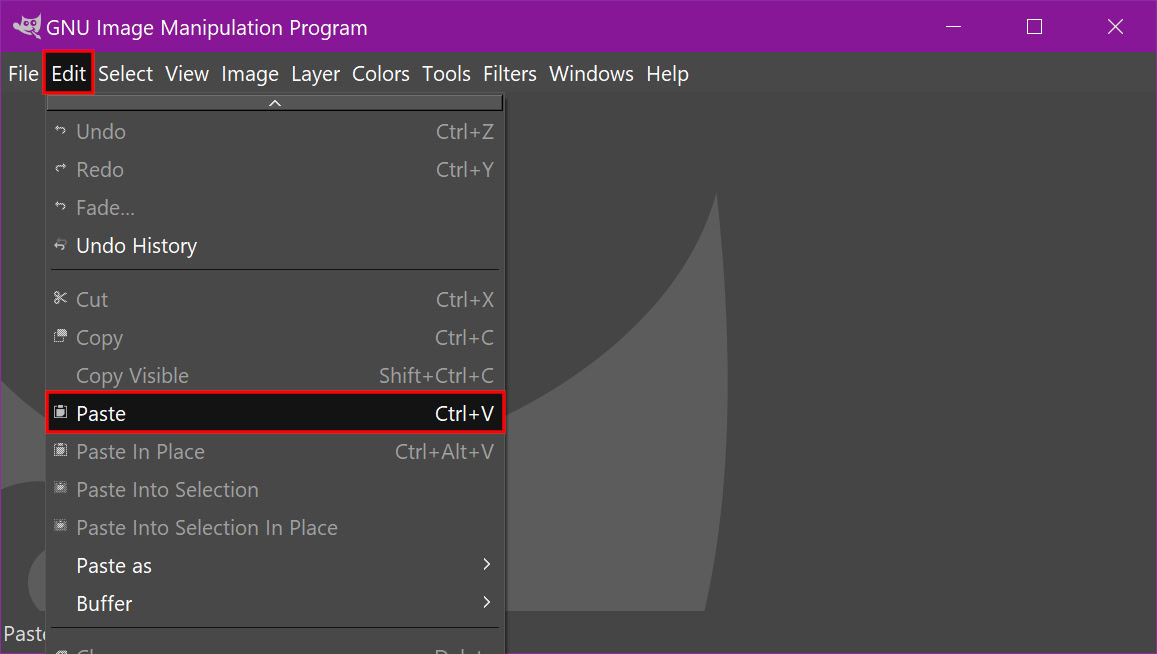
1. Press the Print Screen key.
2. Open your image editor.
3. Select Edit from the toolbar.
4. Select Paste in the drop-down menu. Alternatively, you can select Paste as New Layer, Paste as New Layer In Place, or Paste as New Image. The wording may be different in your favorite image editor.
Microsoft Word
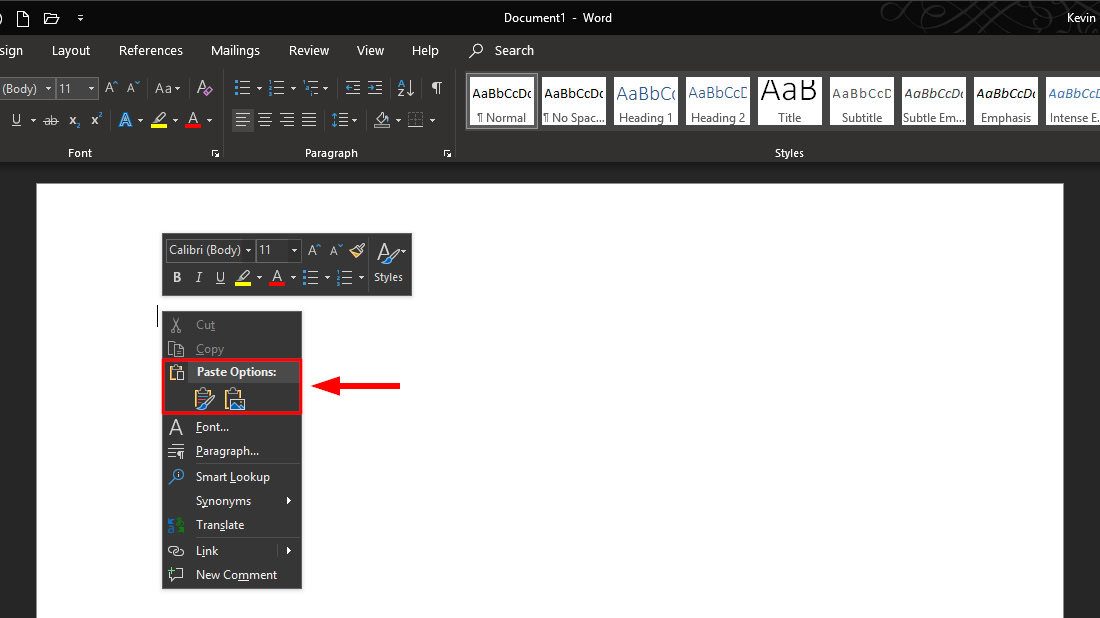
1. Press the Print Screen key.
2. Right-click within your document.
3. Under Paste Options, select the clipboard and paintbrush icon to paste the screenshot into your document while retaining its original format. Select the clipboard and picture icon to paste the screenshot into your document without keeping the format.
Capture a single window for the Clipboard
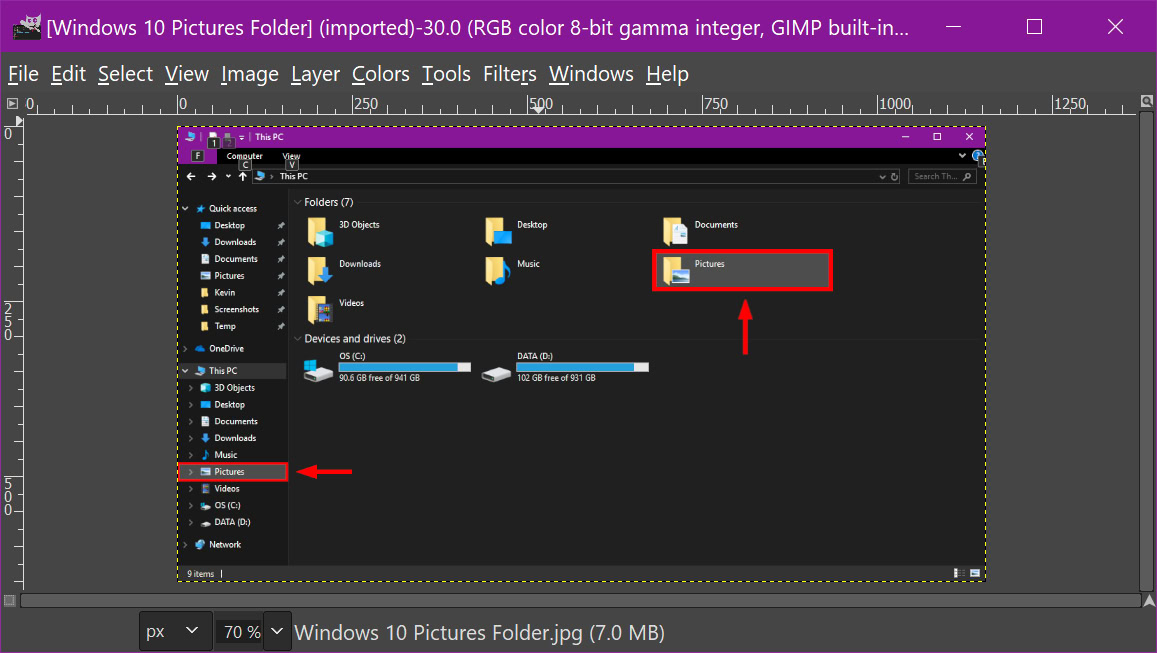
1. Press the ALT and Print Screen keys simultaneously.
2. Paste the copied image into your favorite image editor, document editor, or another Windows-based application. Refer to the previous instructions highlighting GIMP and Microsoft Word.
Capture a defined area for the Clipboard
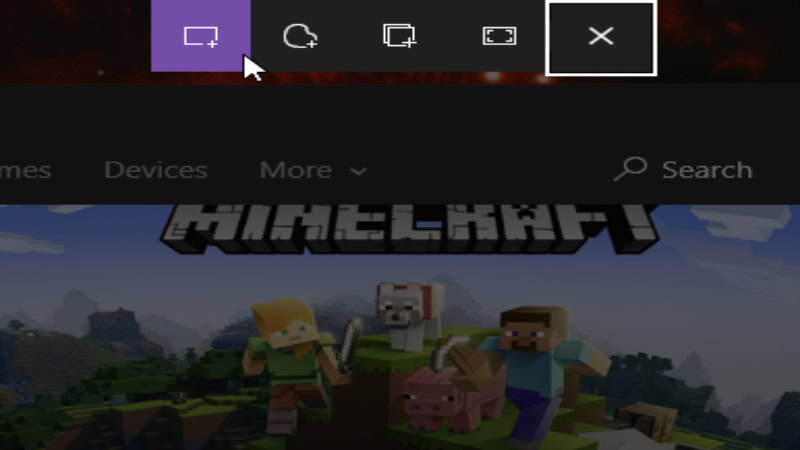
1. Press the Windows, Shift, and S keys simultaneously.
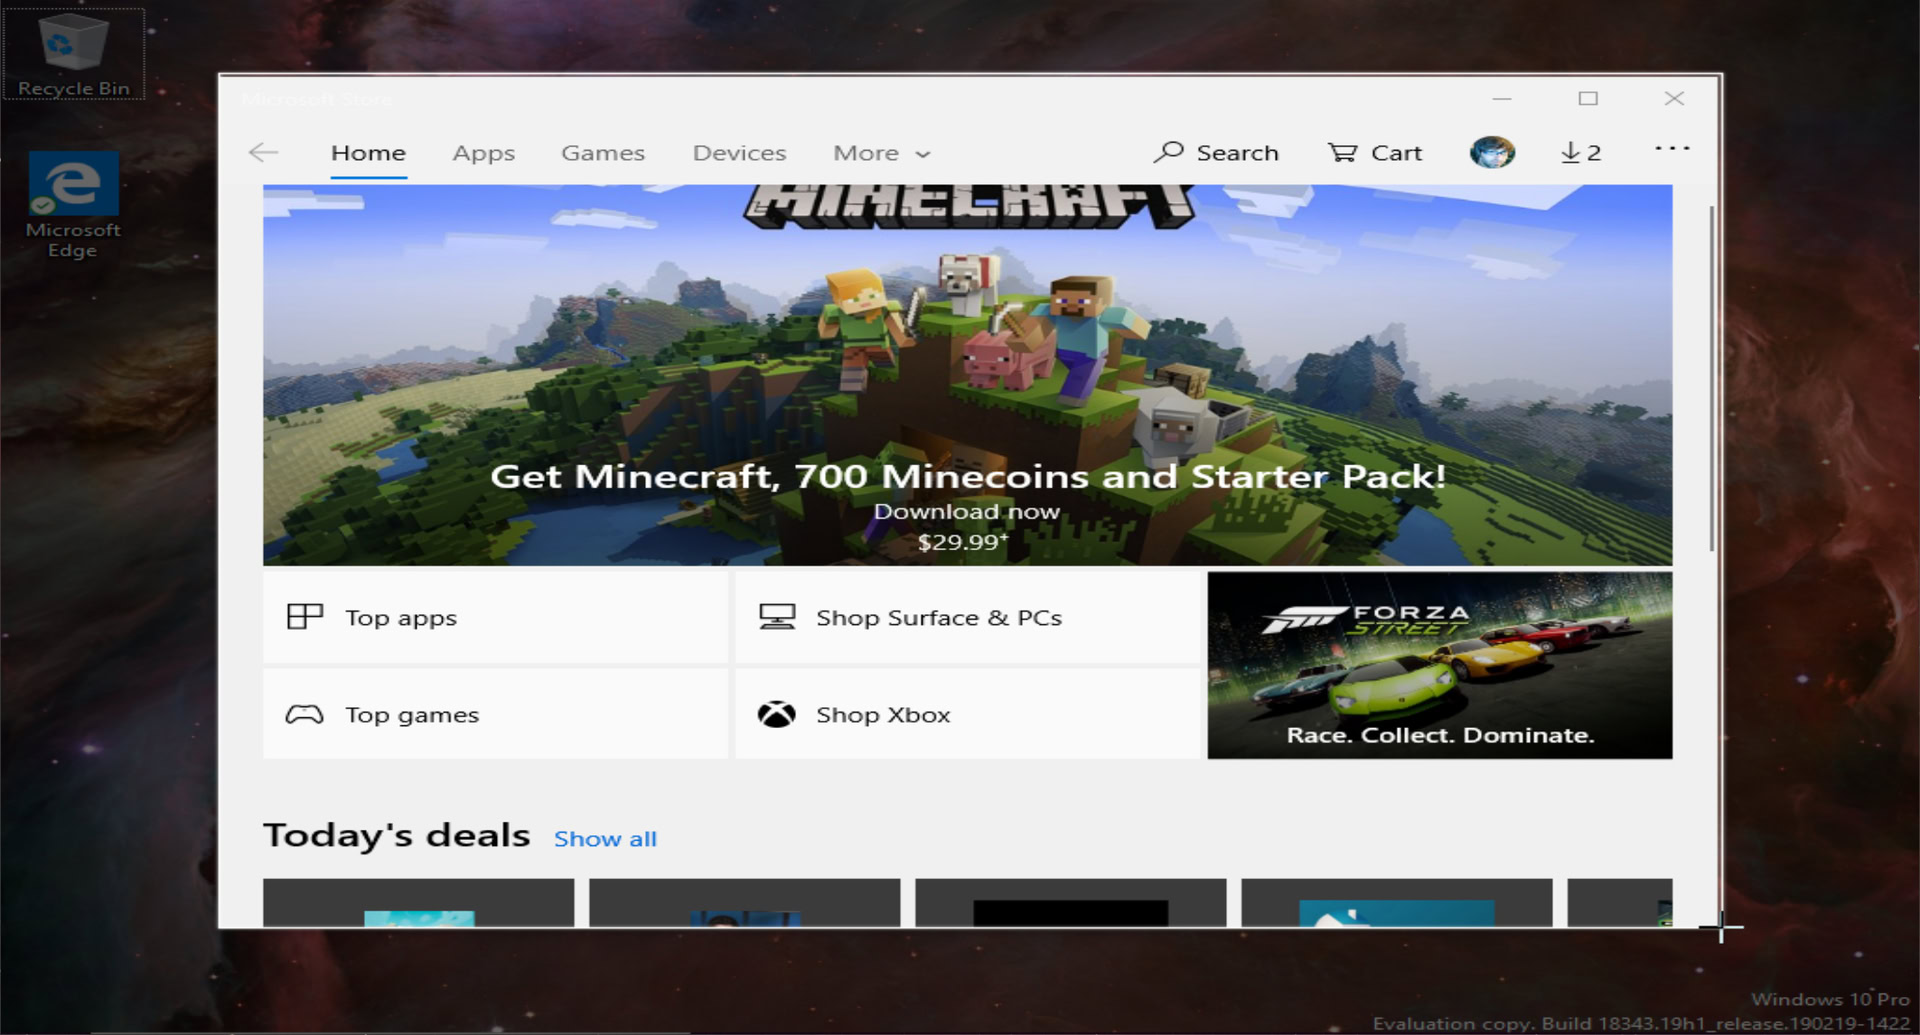
2. A dark overlay appears stating Draw a shape to create a screen snip. Your mouse cursor becomes a white “+” icon.
3. Create a capture area by holding the mouse button and dragging the “+” icon across the screen.
4. Release the mouse button to complete the screenshot capture area. Windows 10 will then send that image to the Clipboard.
Related: How to use the Mail app in Windows 10 to access Gmail, iCloud, and more
Use OneDrive
The benefit here is that your screenshots reside in Microsoft’s cloud. If you set OneDrive to sync the screenshot folder to your PC, you’ll have local access to these shots versus accessing and downloading the files through a browser.
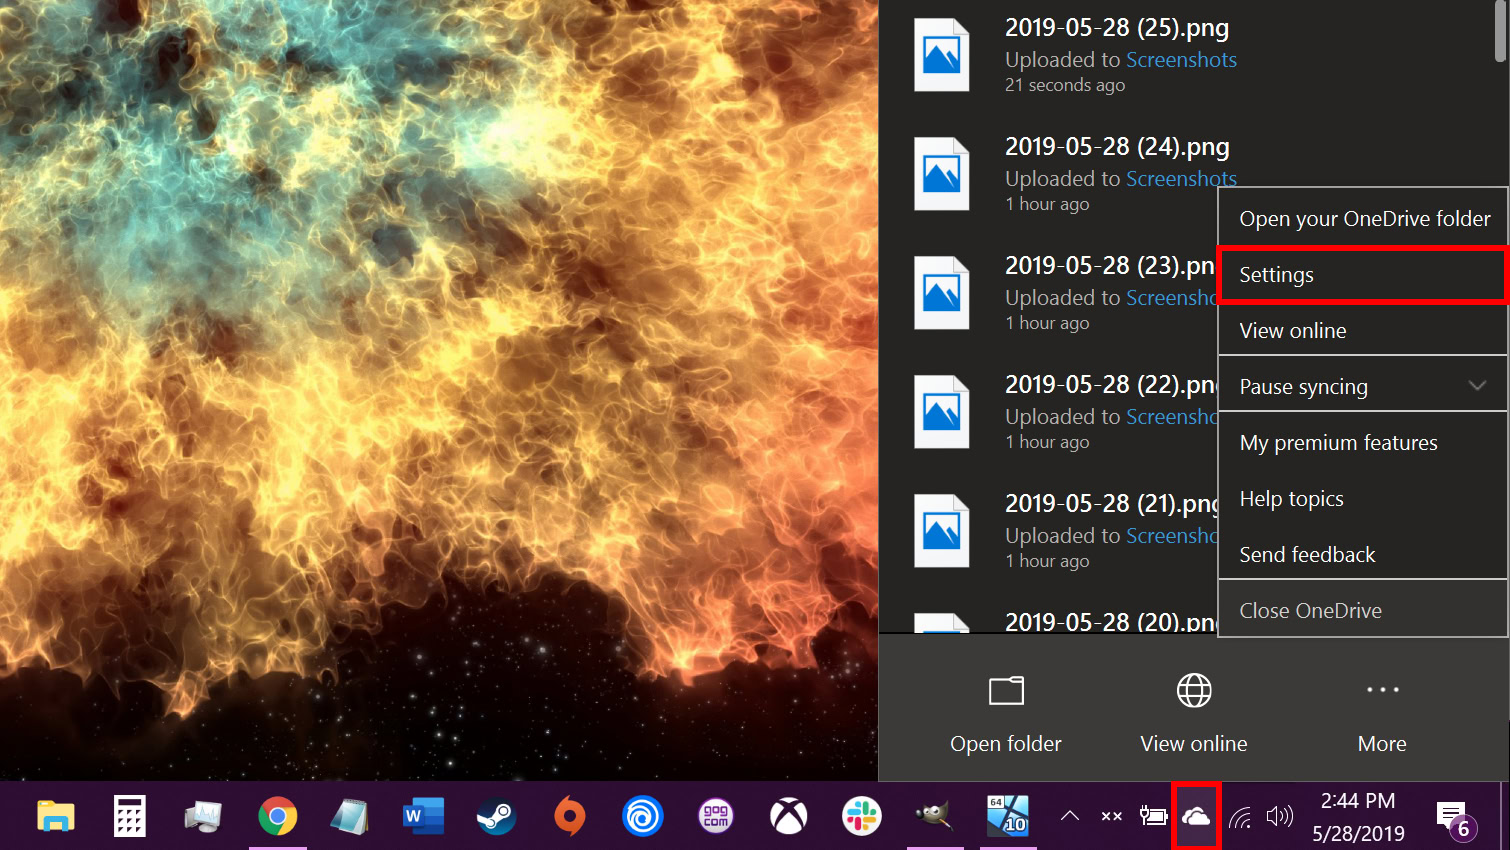
1. Right-click on the cloud icon parked next to the system clock on the taskbar.
2. Select Settings in the pop-up menu.
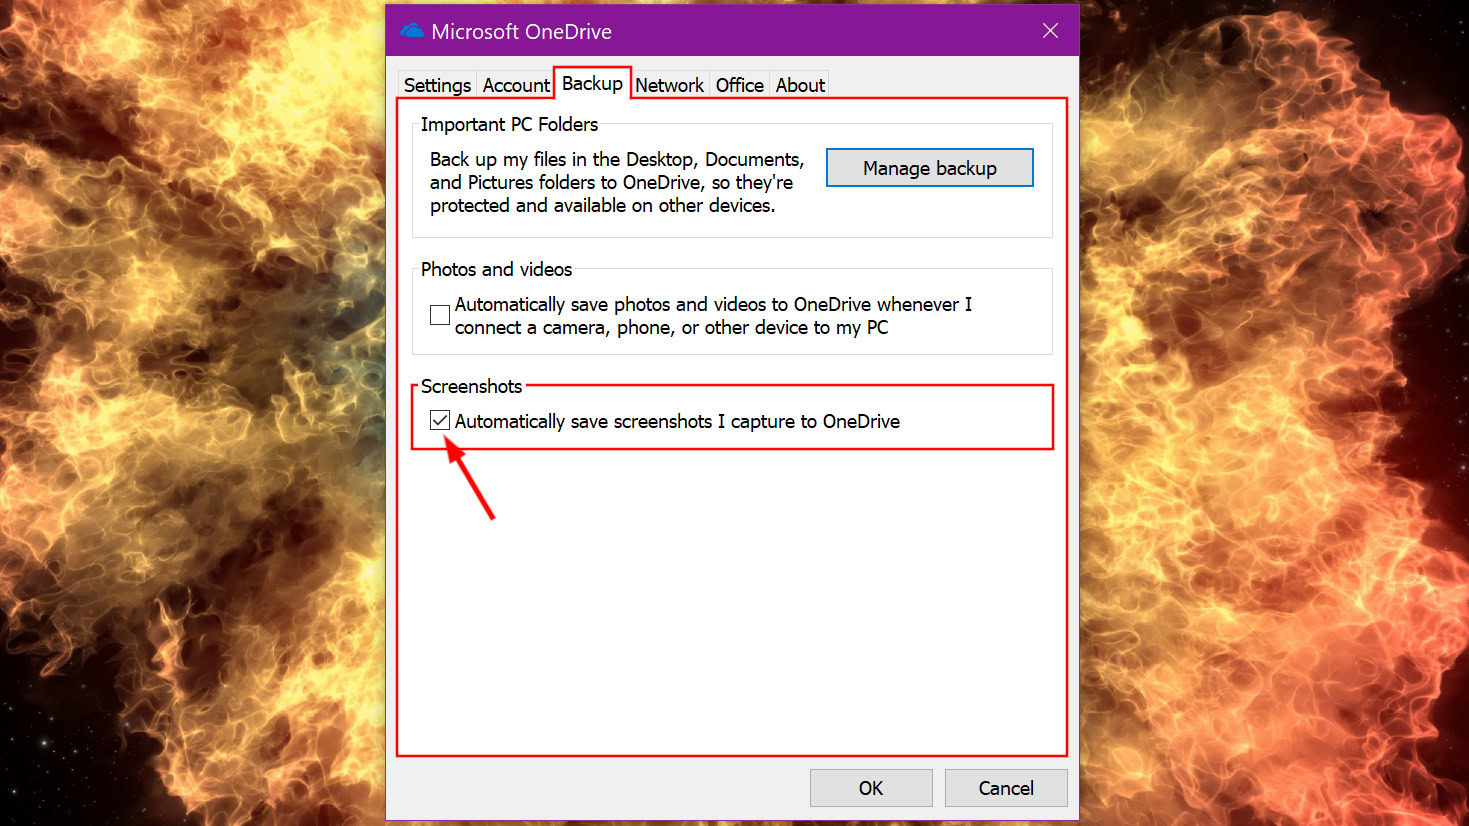
3. Select the Backup tab.
4. Select the Automatically save screenshots I capture to OneDrive option under Screenshots.
5a. Press the Print Screen key to take a full screenshot OR-
5b. Press the ALT and Print Screen keys simultaneously to capture the current active window OR-
5c. Press the Windows, SHIFT, and S keys simultaneously to create a specific screen capture window.

6. Click the Folder icon on the taskbar to open File Explorer.
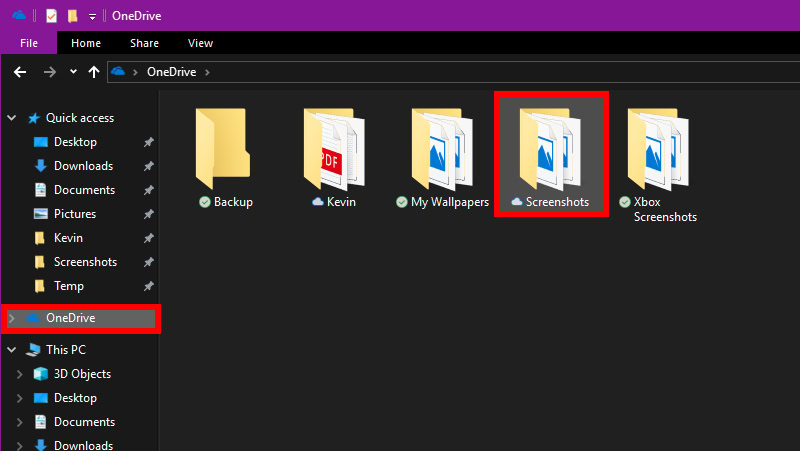
7. Click the OneDrive listing on the left.
8. Double-click the Screenshots folder on the right.
9. Locate your captured screenshot here.
Use Microsoft’s Game Bar
Sure, this tool targets gamers, but you can actually use Game Bar to take a screenshot of anything on your Windows 10 screen.
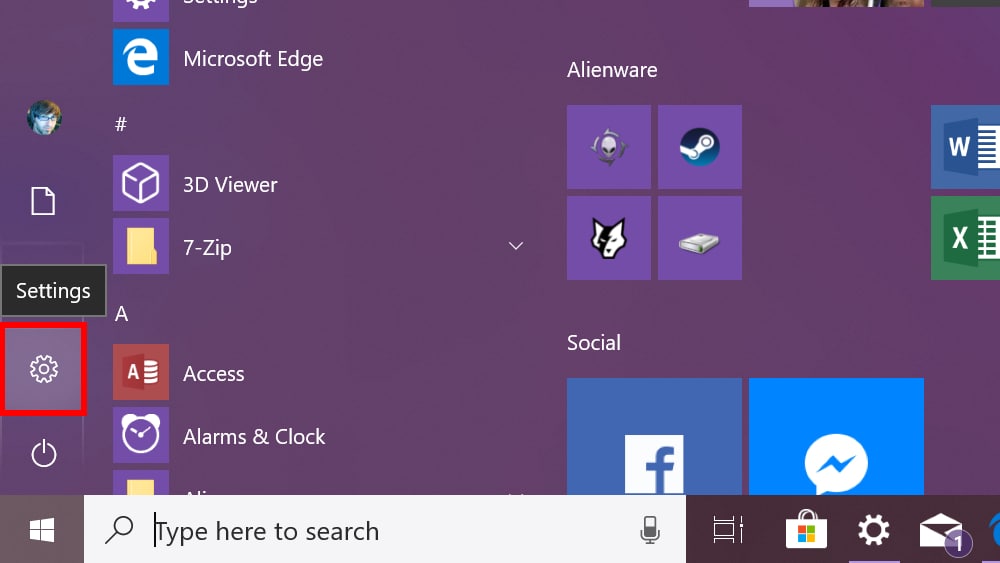
1. Click Start followed by the “gear” icon listed on the Start Menu. This opens the Settings app.
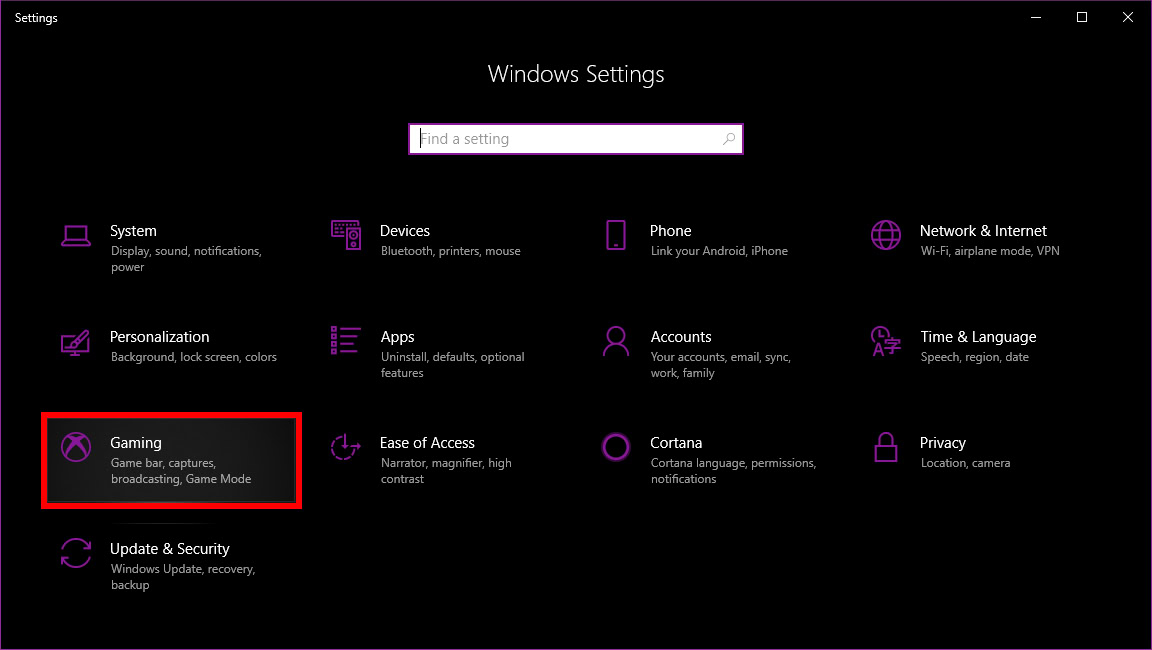
2. Select Gaming.
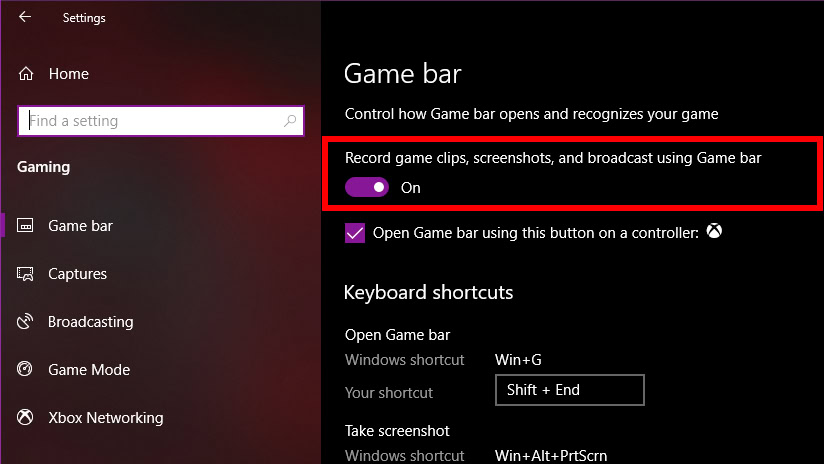
3. Toggle on the Record game clips, screenshots, and broadcast using Game bar setting.
4. This is your default screenshot keyboard shortcut:
Windows + ALT + Print Screen
Create a new key combination if needed.
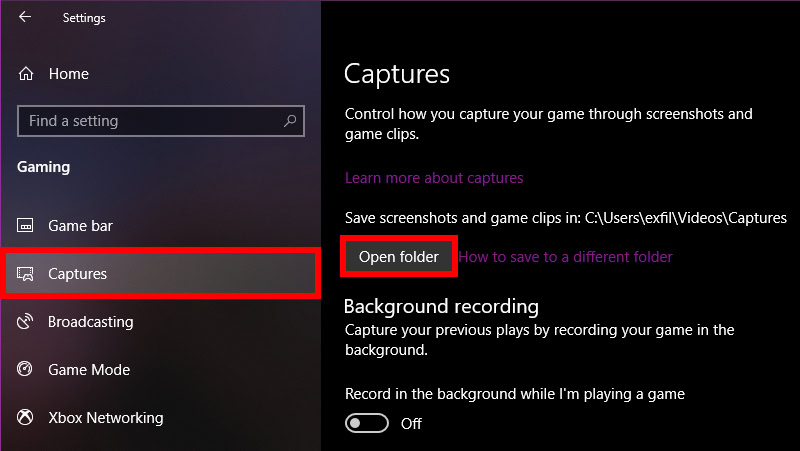
5. Select Captures on the left.
6. This is your default screenshot and video capture folder:
C:\Users\[your user name]\Videos\Captures
You can relocate this folder anywhere on your PC. Windows 10 will continue to throw captured media into the folder no matter where it resides.
7. Use the Game Bar keyboard shortcut (default or custom) to capture the desktop.
8. Select Yes, this is a game (even if it’s not).
9. Find your screenshot in the Captures folder.
Use the Snip & Sketch tool
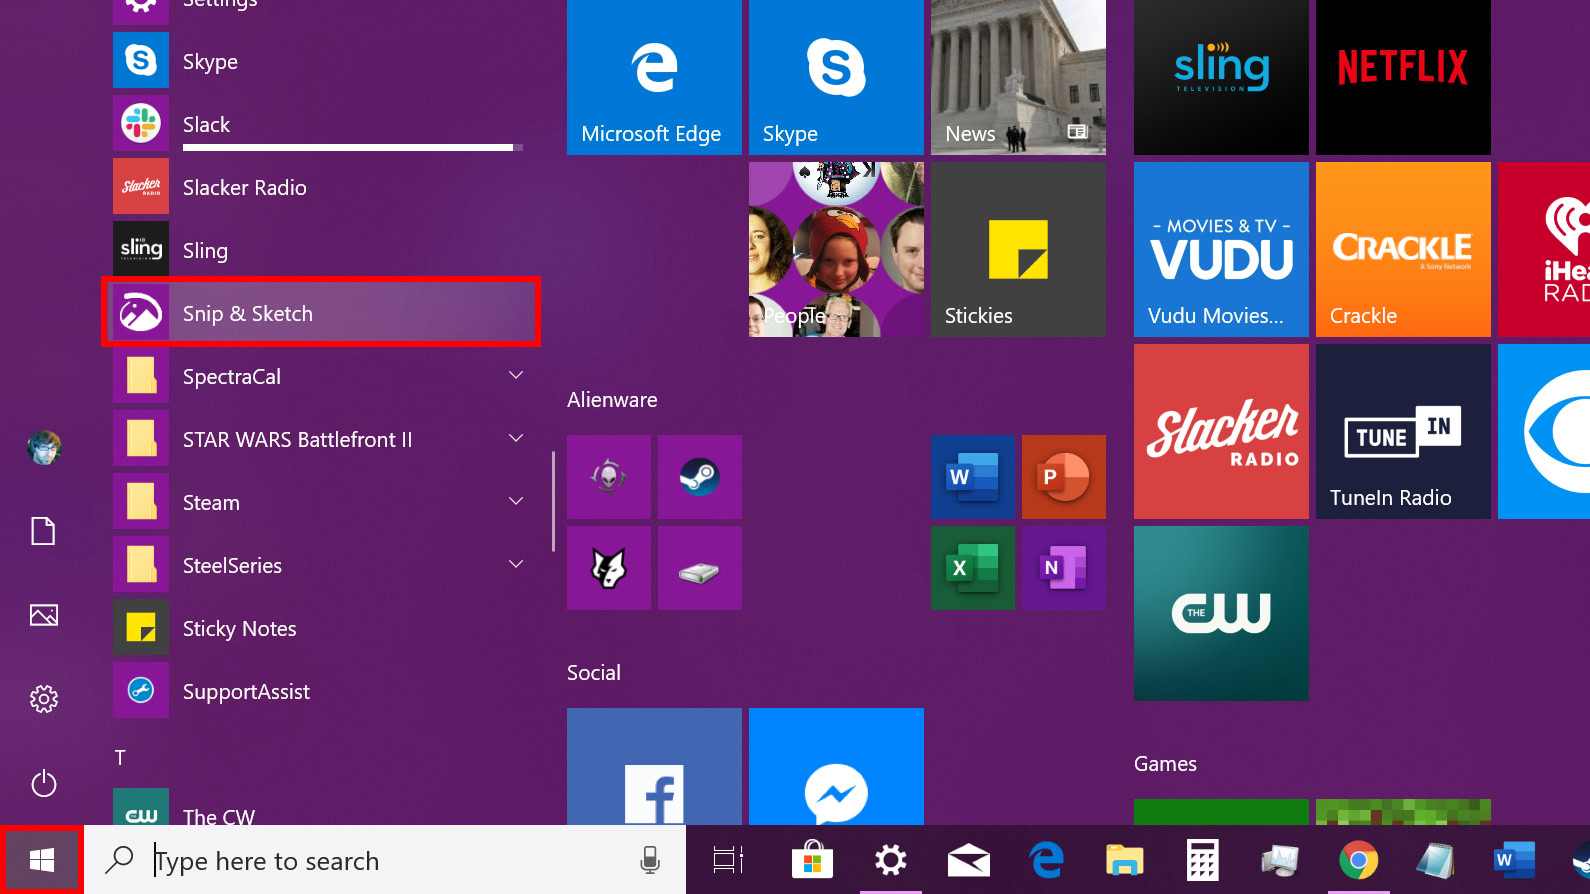
1. Click Start.
2. Click the Snip & Sketch shortcut on the Start Menu.
3. Click the New button.
4. The screen dims with a four-button toolbar located at the top. Select Rectangular Clip, Freeform Clip, or Fullscreen Clip.
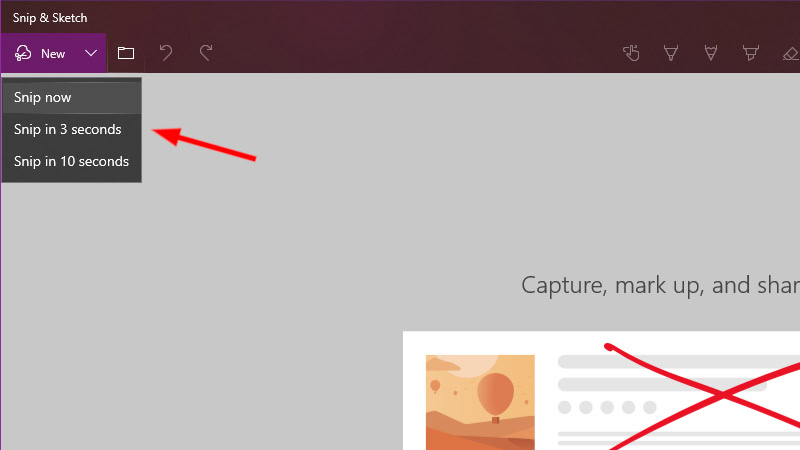
5. As an option, click the arrow down icon to take a screenshot now, grab a screenshot in three seconds, or grab a screenshot in ten seconds. The screen will not fade and display the toolbar until the timer ends.
6. Edit the screenshot as needed.
7. Click the floppy disk option to save the file at any location on your PC.
Use the Snipping Tool
Microsoft is phasing out this long-time tool in favor of the Snip & Sketch app, but it’s still available in Windows 10 1809.
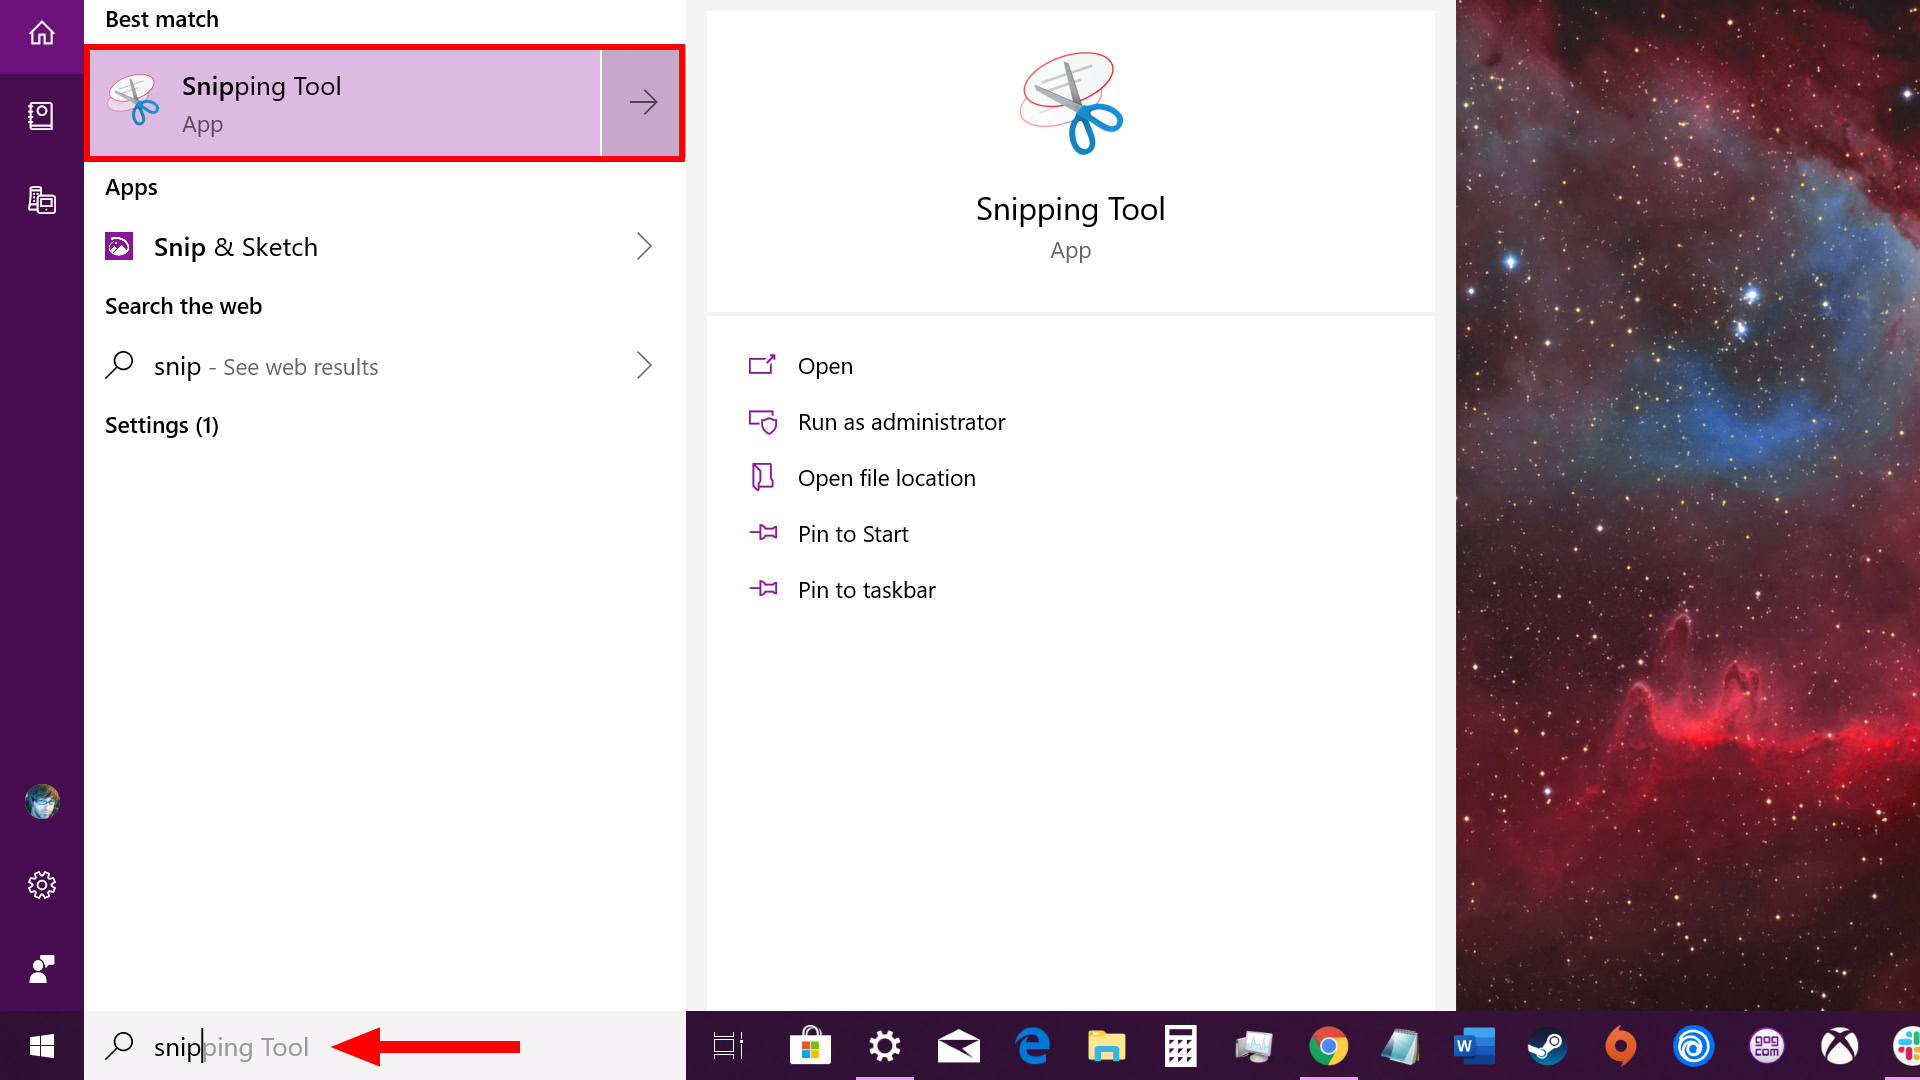
1. Type Snip in Cortana’s search field on the taskbar.
2. Select the Snipping Tool in the search results.
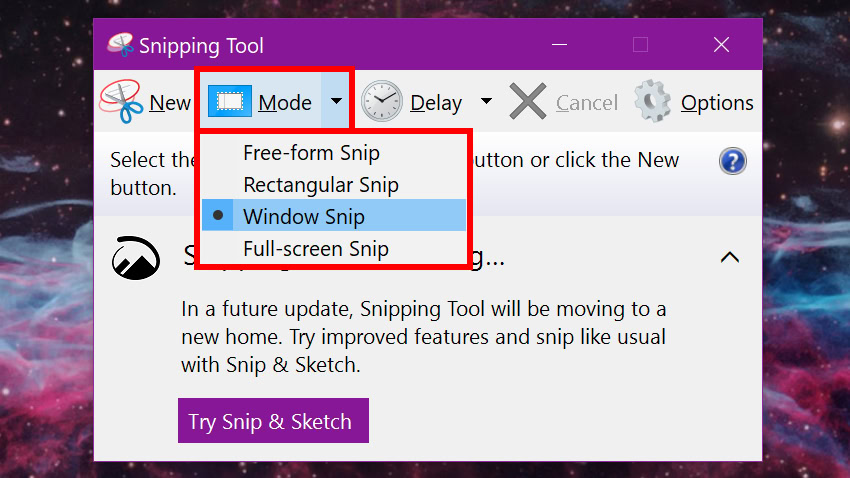
3. Click Mode and select a screenshot type, as shown above.
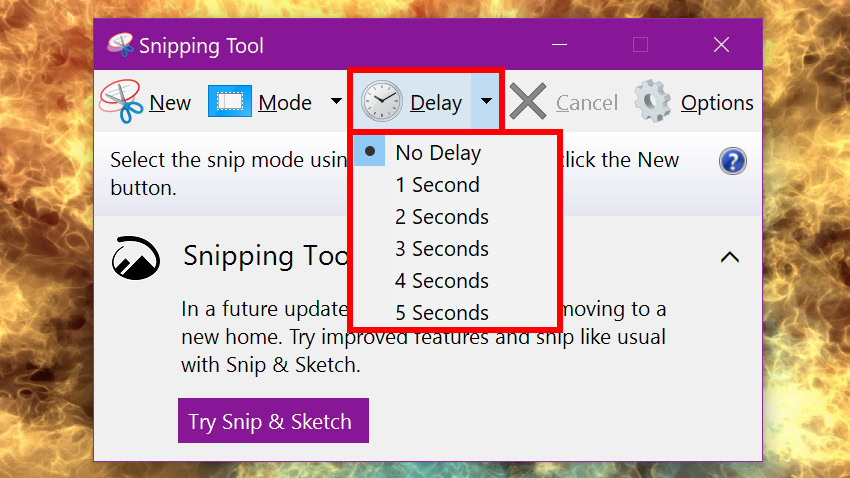
4. Click Delay if you want the tool to delay its screen grab between one and five seconds.
5. Click the New button. The screen will dim white.
6. Depending on your mode, create a rectangle or shape, or select the current window. The Snipping Tool automatically grabs a screenshot if you select the Full-screen mode.
7. Edit and save your file.
That concludes our guide on how to take a screenshot in Windows 10. For additional tips and tricks, check out these guides: