Affiliate links on Android Authority may earn us a commission. Learn more.
How to take a screenshot on a Mac
Published onMarch 21, 2023
When you’re learning the basics of how to use a Mac computer, screenshots are pretty much the bread and butter, especially if you need them to do your job. Screenshots can be used to explain something to someone, show something to someone, or simply to preserve proof that you saw something on your screen. There are several ways to achieve those screenshots, whether it’s capturing the whole window or part of the window, as well as the method by which you choose to capture them. Here’s everything you need to know on how to take a screenshot on a Mac.
QUICK ANSWER
There are a couple of ways to take a screenshot on a Mac. The first (and probably the easiest for most people) is to use a keyboard shortcut. The second is to use the built-in screenshot app. Once the screenshot is taken, you can edit and share them according to your needs, as well as change the default location of where your screenshots are stored.
JUMP TO KEY SECTIONS
How to take a screenshot on a Mac using keyboard shortcuts

If you like to use your keyboard to carry out routine tasks, then you will most likely gravitate to using keyboard shortcuts to take a screenshot.
The whole screen (Command + Shift + 3)
If you need to take a screenshot of your entire screen, then it’s a simple case of pressing Command + Shift + 3 in that order. Hold down each button until you hit the 3 and when you hear the click, release the buttons. You will now see a thumbnail appear in the corner of the screen (unless you disabled that feature.) Clicking the thumbnail enables you to edit the screenshot without having to go to Finder to edit it.
Taking a screenshot of the entire screen will include visible multiple apps or windows and system elements like the menu bar, desktop, and dock. However, you can easily crop anything out that you don’t need or you don’t want others to see.
Part of the screen (Command + Shift + 4)
On the other hand, if you only need a certain section of your screen, then you can use Command + Shift + 4. Using this keyboard shortcut, you can drag your cursor across the screen to capture the area you need.
- After pressing Command + Shift + 4, the screen freezes and a target-like icon appears on-screen.
- Using your mouse or trackpad, drag that icon across the area you want to screenshot. As you drag it around, two numbers will rapidly change. This is the height and width pixels of the area you are currently covering.
- When you have the area you need, release your finger from the mouse or cursor. A clicking sound will be heard and the thumbnail will appear in the corner of the screen, ready to be edited. Alternatively, you can find it in Finder and edit it there.
- Note that, if you want to exit the screenshot mode without taking a screenshot, simply hit the Esc key at any time.
A single window (Command + Shift + 4 + spacebar)
The third option is to take a picture of the entire window. Where that differs from the whole screen is that this method does not capture any system elements like the menu bar, the dock, and anything peeking out from the sides. You’re going to need two hands for this one as it involves holding down four keys.
- Hold down Command + Shift + 4 + spacebar. A small camera icon will now appear and the window will have a blue shadow covering it.
- Click the window and the screenshot will be taken. The usual thumbnail will appear for editing, or y0u can find it in Finder.
- As before, if you want to exit the screenshot mode without taking a screenshot, hit the Esc key at any time.
How to take a screenshot on the Mac using the screenshot app

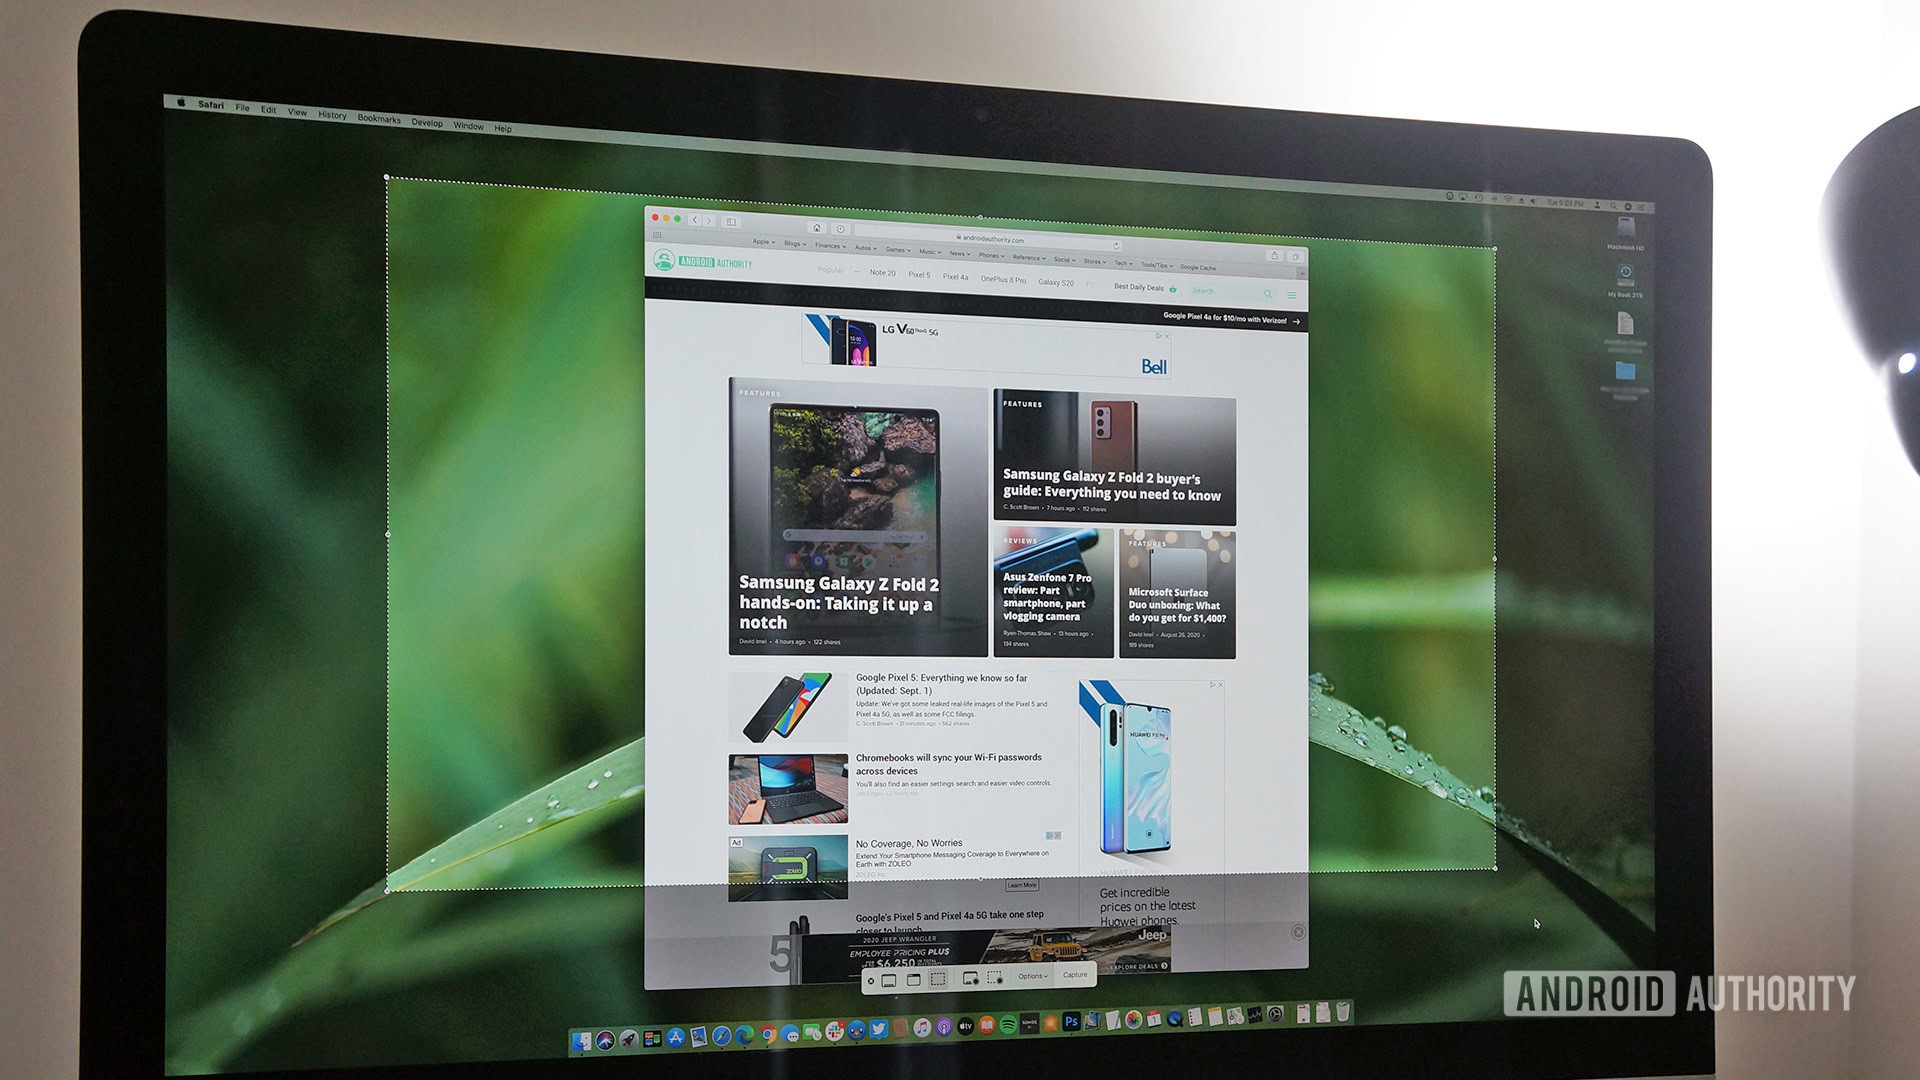
If keyboard shortcuts are not your thing, then you can always default to using the built-in screenshot app. You will find it in Applications > Utilities, but it can also be brought up using the keyboard shortcut Command + Shift + 5.
When the screenshot app starts up, you have the same three options as the keyboard shortcuts. You need to look at the three far-left options on the floating bar that appears.
- The whole screen — as the name says, it’ll capture the entire screen. To use it, click the button on the toolbar and then click the Capture button.
- A single window — use this to take a screenshot of just the browser window. To use it, tap the button and then the window you want to screenshot. It should automatically take the screenshot once you select the window.
- Part of the screen — This option creates a resizable box. Simply resize the box with your cursor and click the Capture button to take a screenshot.
Where are my screenshots saved on a Mac?
By default, screenshots are saved on your Mac desktop. However, if you wish to change that default location, there are a couple of ways to do it.
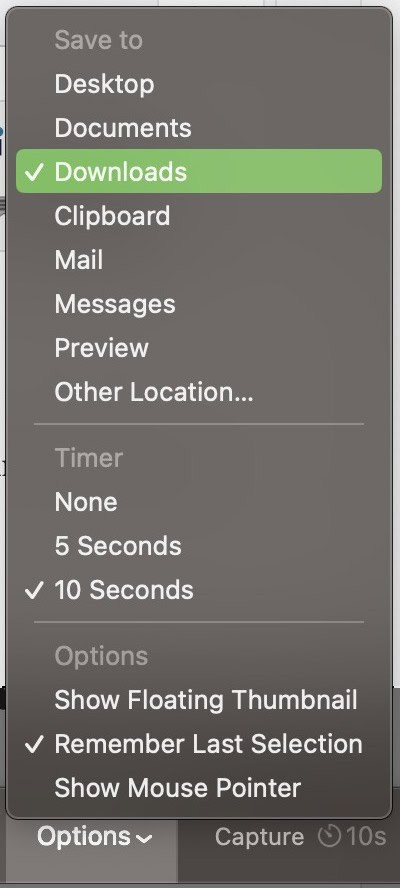
The first one is to open the screenshot app, click Options and choose the Save to location. This setting will apply even when you subsequently do screenshots with the keyboard shortcuts.

The second option is to use the free app called OnyX. This is an app which you can use to change various Mac settings and the screenshot settings are just one of them. Go to Parameters > General and you’ll see various Mac screenshot options.

How to edit and share your screenshots on a Mac
Once you have your screenshots, how do you edit them and share them? If you open a screenshot in Finder, you will be presented with all the usual editing tools. To access them, click the pen icon at the top-right, next to the search box. This opens up a new menu.

This new menu has editing tools such as cropping, resizing, color adjustment, adding arrows and other shapes, adding text, adding signatures, and many more.

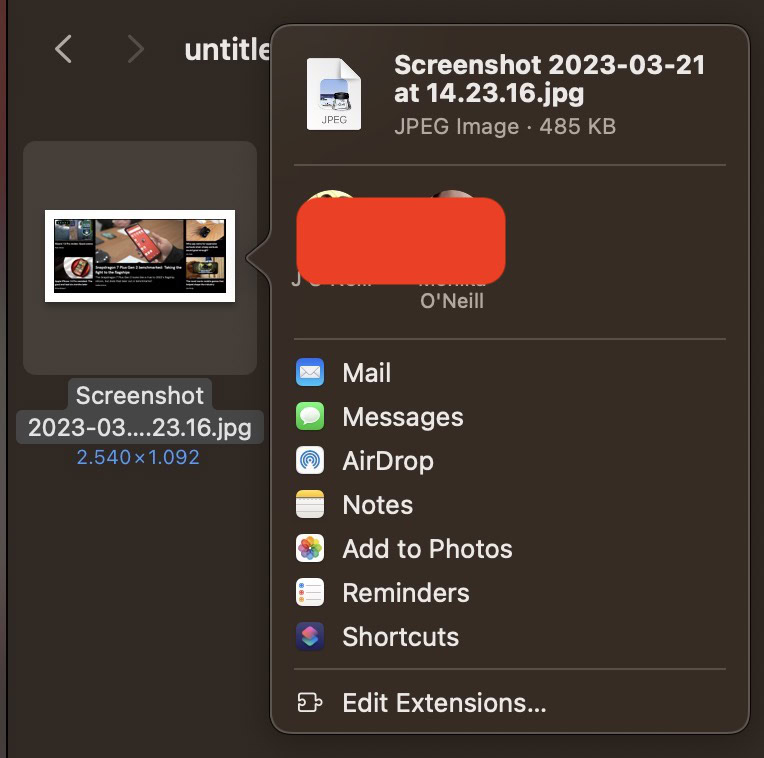
Once you have saved your edits and need to share the screenshot with someone, right-click on it and select Share. Alternatively, you can Compress it into a zip file for easier sending.

Your sharing options will now be revealed. It doesn’t cover everything, so if you want to share in another app, you will have to go directly to that app and drag the file in from there.

FAQs
To automatically send your Mac screenshot to the clipboard, hold down the Control key while taking your screenshot.
Some apps, such as Apple TV will not allow it. Others will not allow it either, due to security and privacy reasons. Hidden menu items, which need a keyboard key to be revealed (such as “save as” in the File menu) can only be screenshotted by using the Screenshot app and the timer.
You can use Universal Clipboard. Hold down the Control button while taking your screenshot. This puts it on the clipboard. Then press CMD + V on the other Apple device to paste it there. Note that both devices must be signed into the same iCloud account for this to work.

