Affiliate links on Android Authority may earn us a commission. Learn more.
How to turn dark mode on and off on a Mac
March 3, 2023
If you sit in front of a computer for much of the day, your eyes are going to take a hit. The bright light of the screen is taxing on the eyes, especially later in the day when it gets dark. That’s why dark mode is such a big thing for many people. It also helps the Mac battery last longer, and let’s be honest, it just looks really cool. If you’re fed up with the plain white uninspiring look, or you want to give yourself a better night’s sleep, then read on to find out how to make your Mac dark.
QUICK ANSWER
To turn dark mode on and off on your Mac, go to System Settings > Appearance. You can choose between Light, Dark, and Auto. Auto will switch between light and dark, depending on the time of day. Selecting Dark will make the computer permanently dark, regardless of the time of day. You should also change the Accent color and Highlight color to make other aspects of the screen stand out better.
How to enable or disable dark mode on a Mac
It only takes a few clicks to make your Mac go into dark mode, either permanently or depending on the time of day.
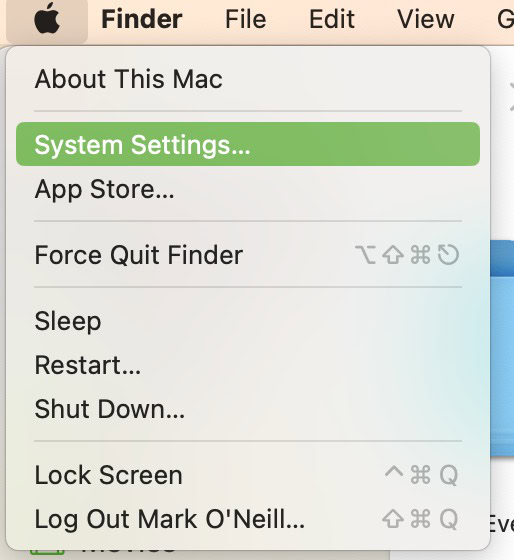
- First, as always, click the Apple logo in the top-left of the screen and select System Settings.
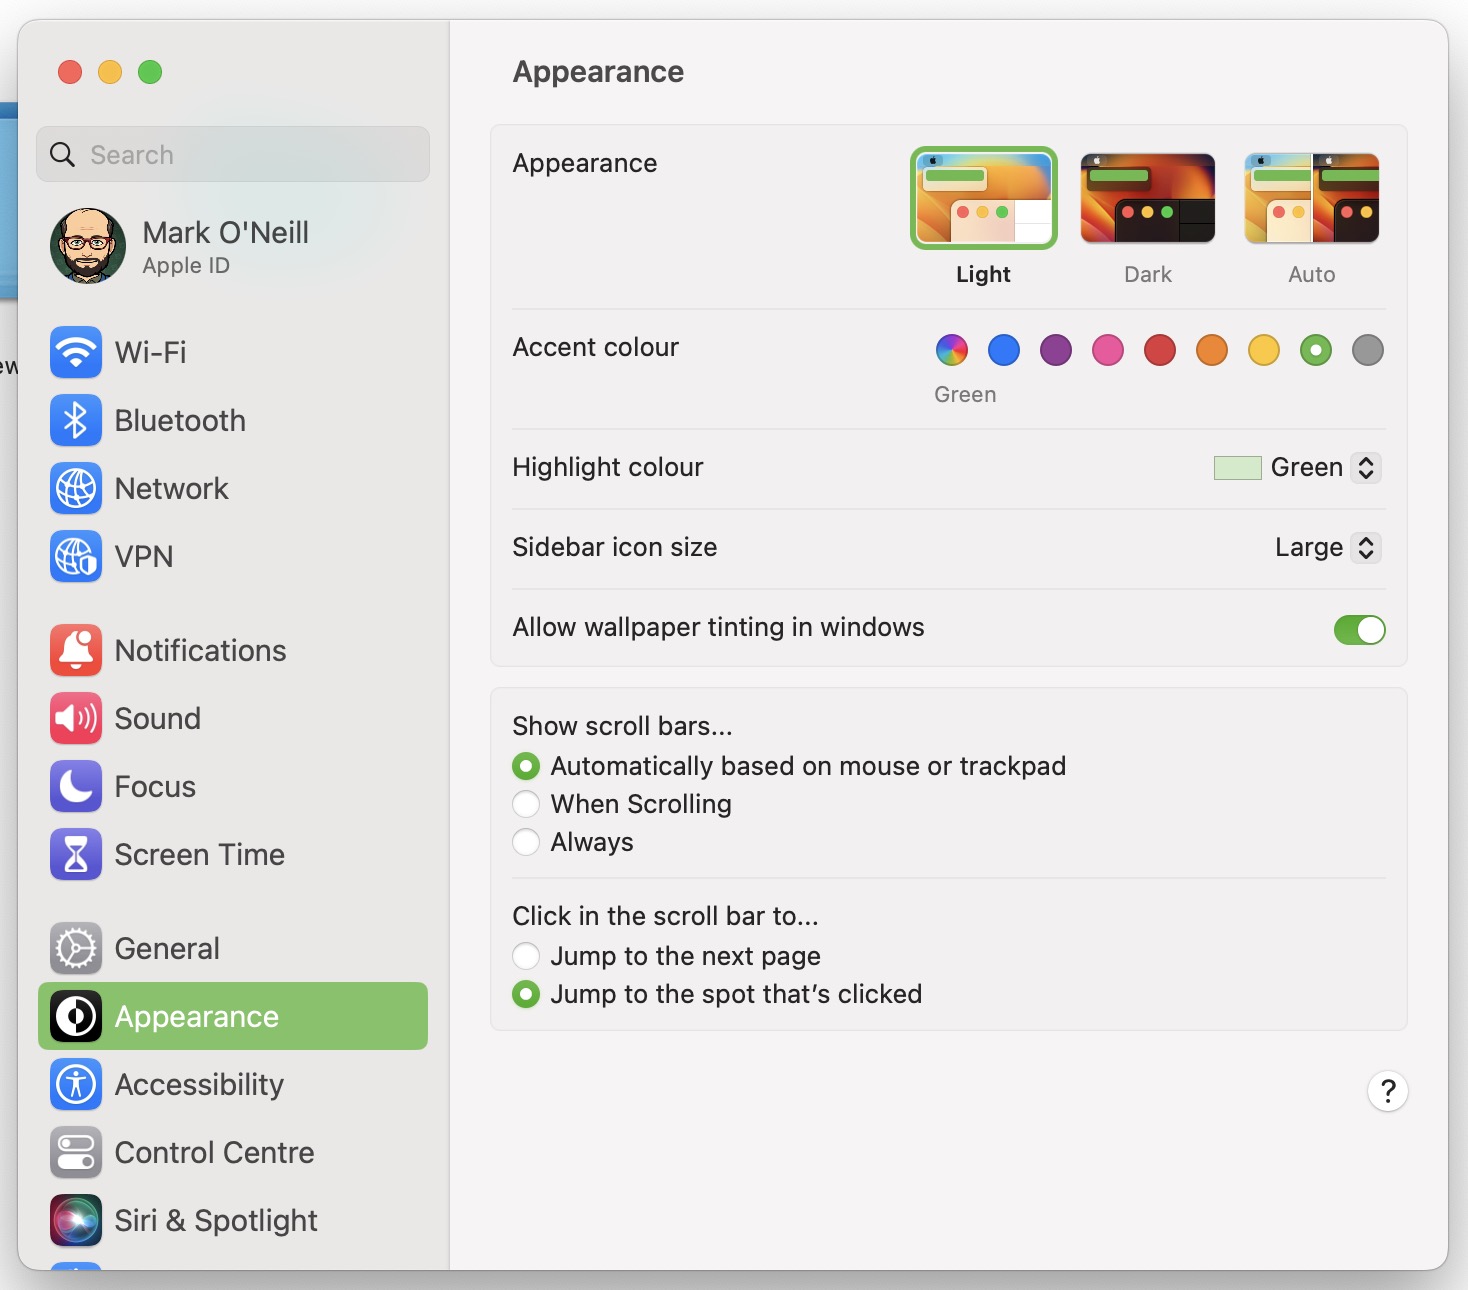
- Under the Appearance section, you will be offered three different possibilities — Light, Dark, and Auto. Obviously, we’re not interested in Light, so the other two are what we need to focus on.
Option 1: Dark
Selecting the Dark option switches your entire Mac system to dark mode permanently (at least, until you change it again in System Settings.) It will remain dark no matter what time of day it is.
Option 2: Auto
Auto switches your Mac system from light to dark to light again, depending on the time of day. It works by asking you for your location which you have to explicitly give permission for. Your IP address tells your device your location and when it gets dark outside in your location, dark mode on the Mac automatically kicks in until sunrise the following morning.
If you use a VPN to spoof your location, the Auto function will not work at the right times, as it will obviously put you in a completely different timezone.
Selecting Dark and what happens as a result
Once you choose Dark, your entire Mac will go black. Note that this will affect macOS functions such as Safari, Notes, Finder, and so on, which will also go black. Websites, however, will not go black as a general rule. You would have to enable dark mode on them on an individual basis.
Saying that, some websites will detect the operating system change and ask you if you want to change the website colors accordingly. Facebook is one of them. Gmail, on the other hand, is not. You would need to manually apply a black wallpaper on Gmail.
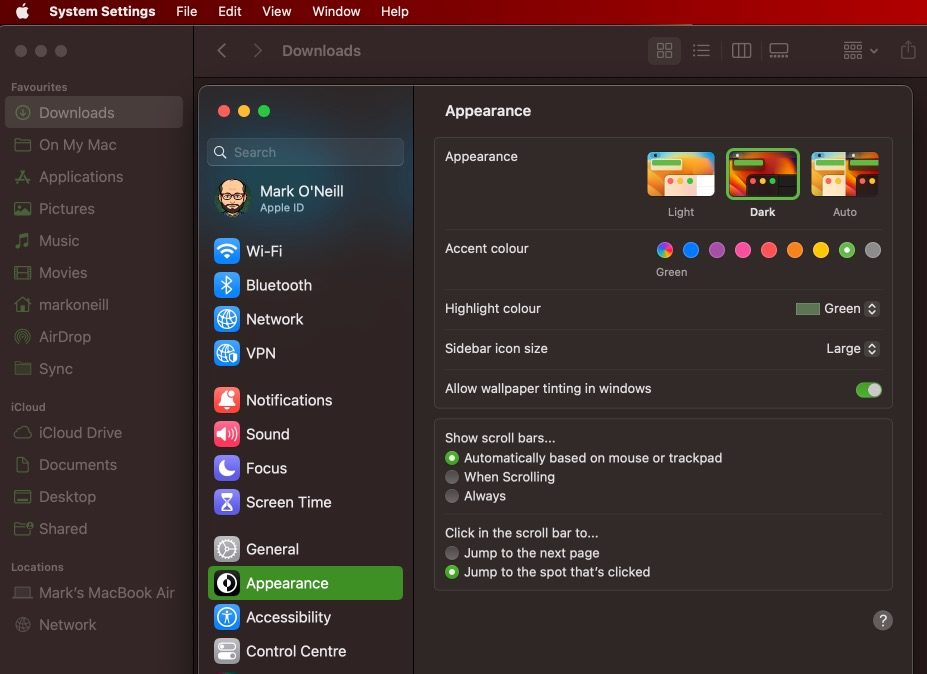
You should also take a moment to change the Accent Color and the Highlight Color. This will make things like buttons and bars different colors, making them stand out better against the new dark background.
How to get your Mac to automatically switch to dark mode
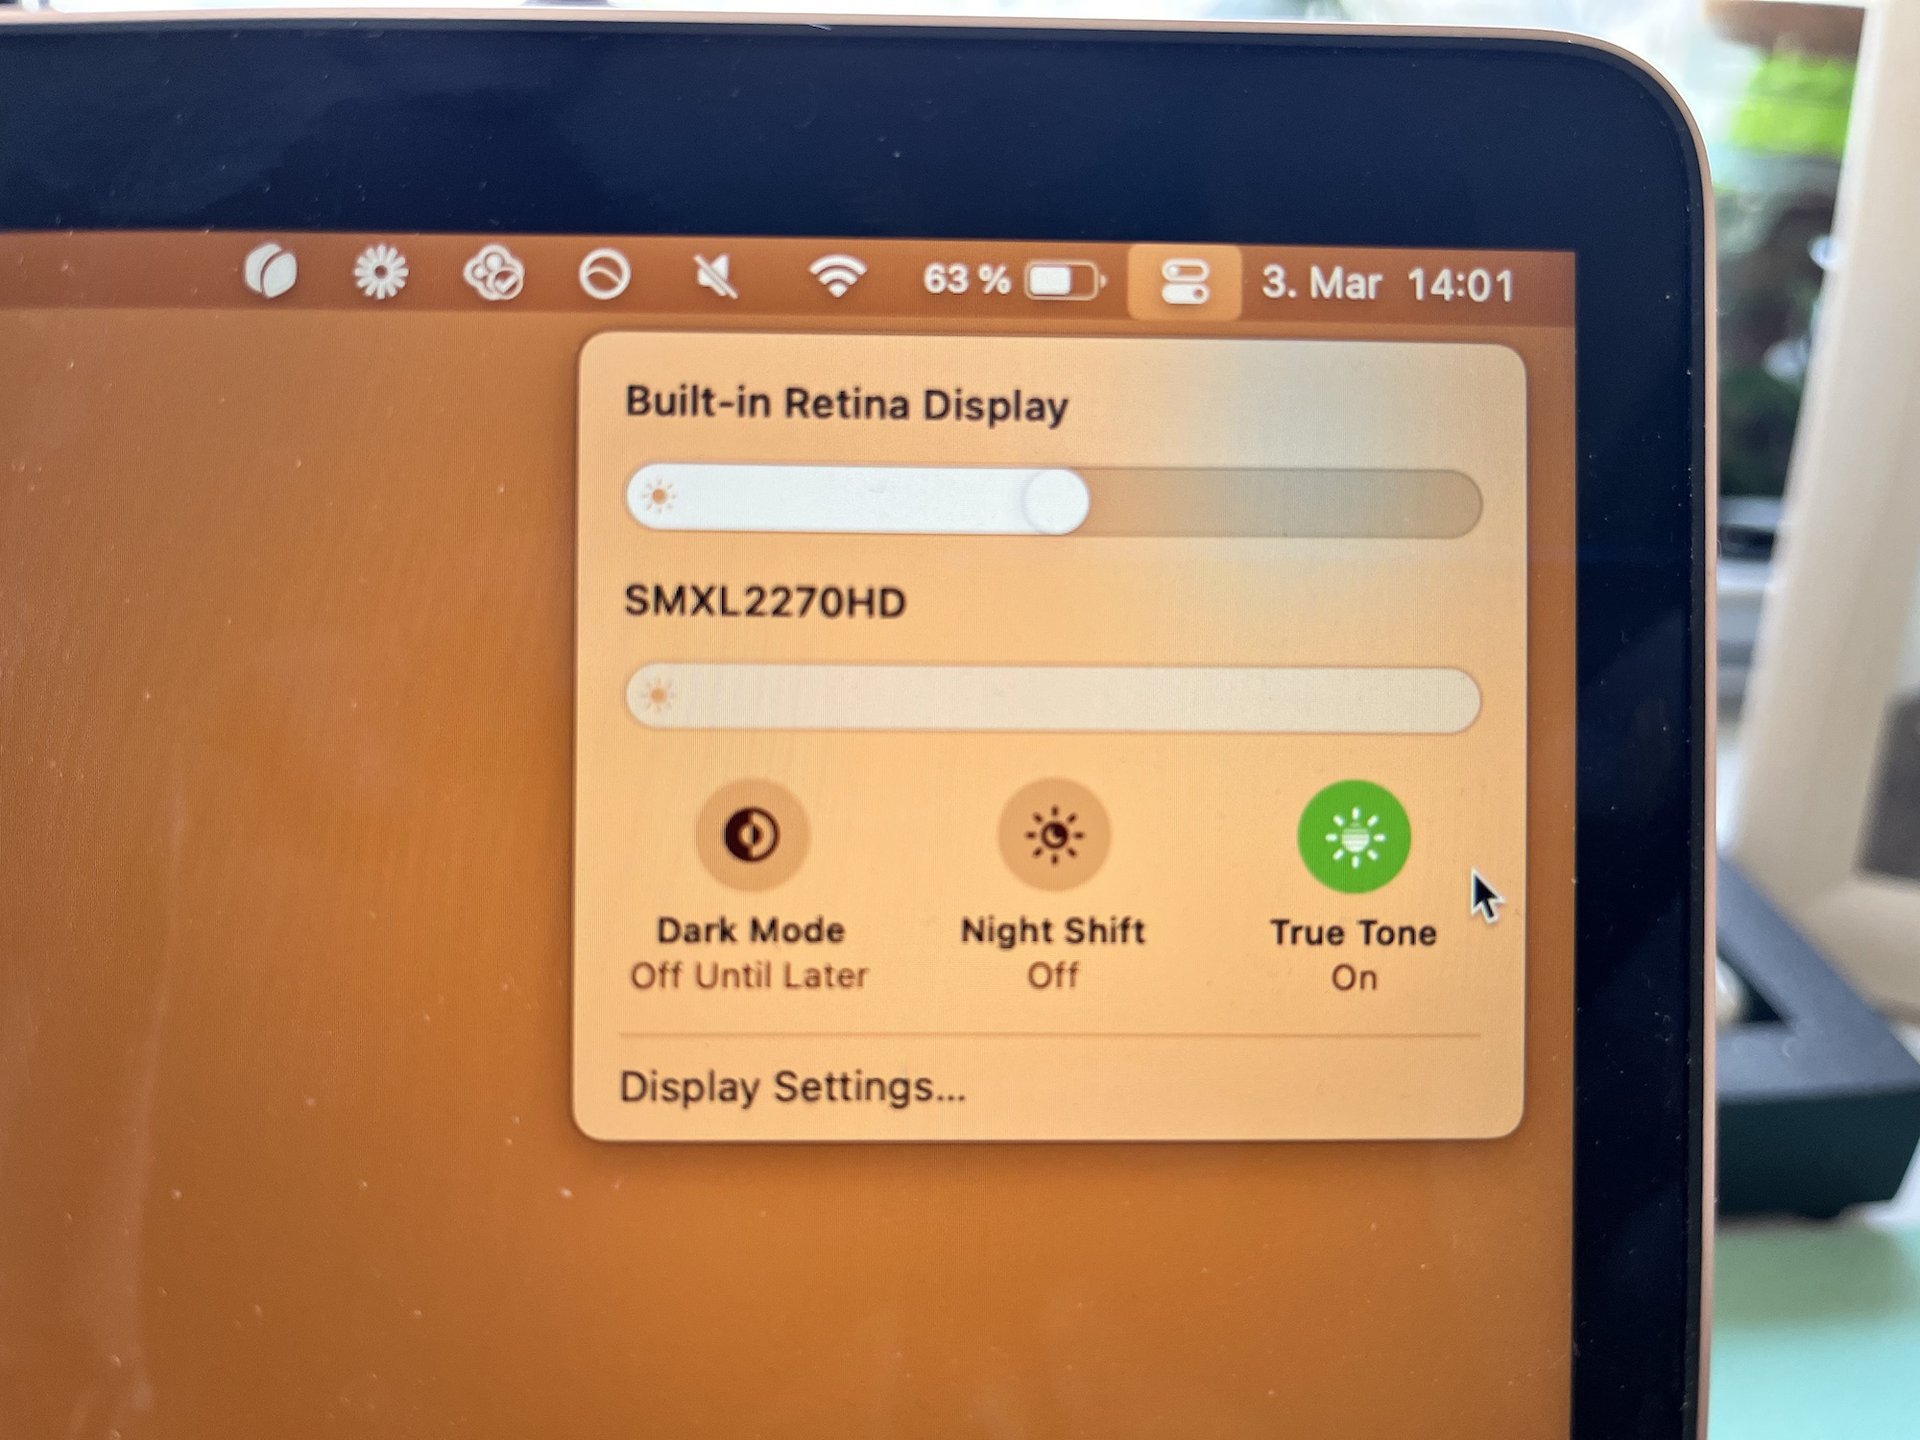
As we explained in the previous section, the Auto function is how to get your Mac to automatically switch to dark mode. Some users may not want dark mode on all the time and this would therefore be the right option to choose. Just remember to disable your VPN so it can accurately judge your location.
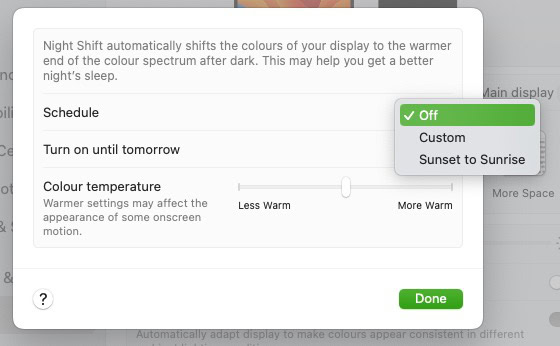
One other thing you need to disable is Night Shift. Night Shift is a built-in blue light filter, which started appearing on MacBooks with the introduction of Big Sur. Night Shift is obviously not necessary if the screen is dark so you need to disable it.
To do so, go to System Settings > Displays. At the bottom, you will see a Night Shift button.
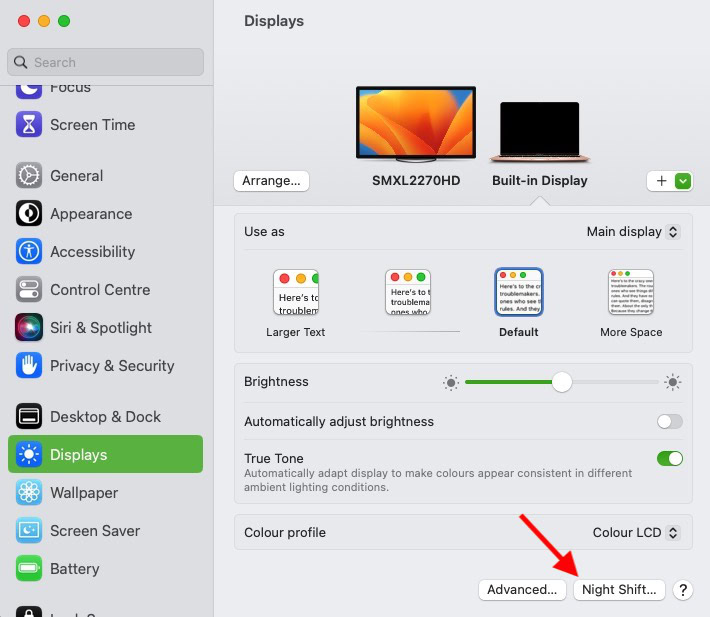
In the box that pops up, drop down the Schedule menu and select Off.
How to create a keyboard shortcut for Mac dark mode
Although it is very easy to enable and disable Mac dark mode (you can even ask Siri to do it for you), some users still prefer a good old-fashioned keyboard shortcut. If this is you, here’s how to do it.
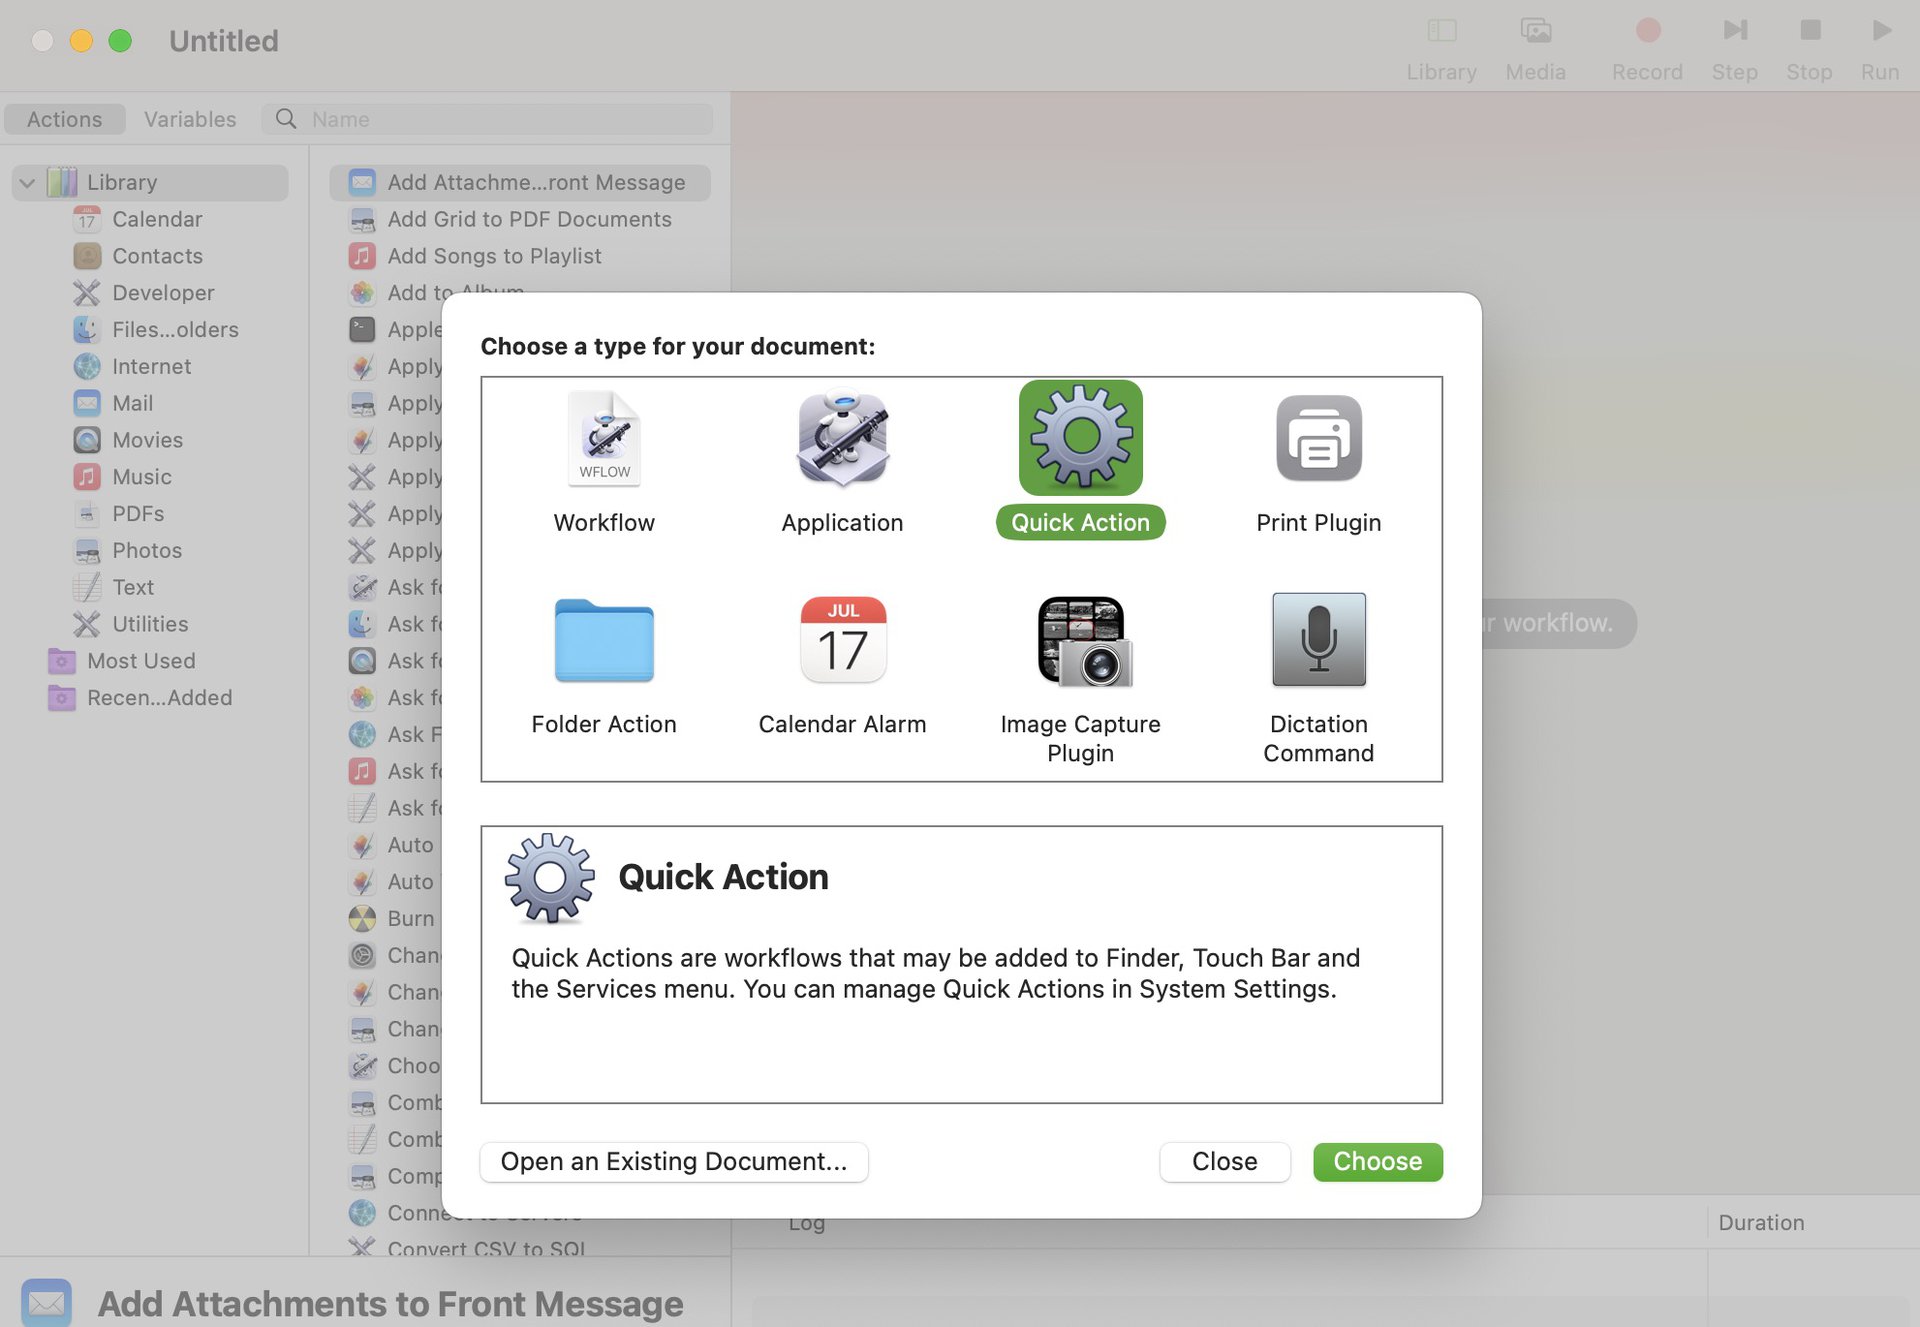
- Open Automator in the Applications folder and start a new document. Then choose Quick Action.
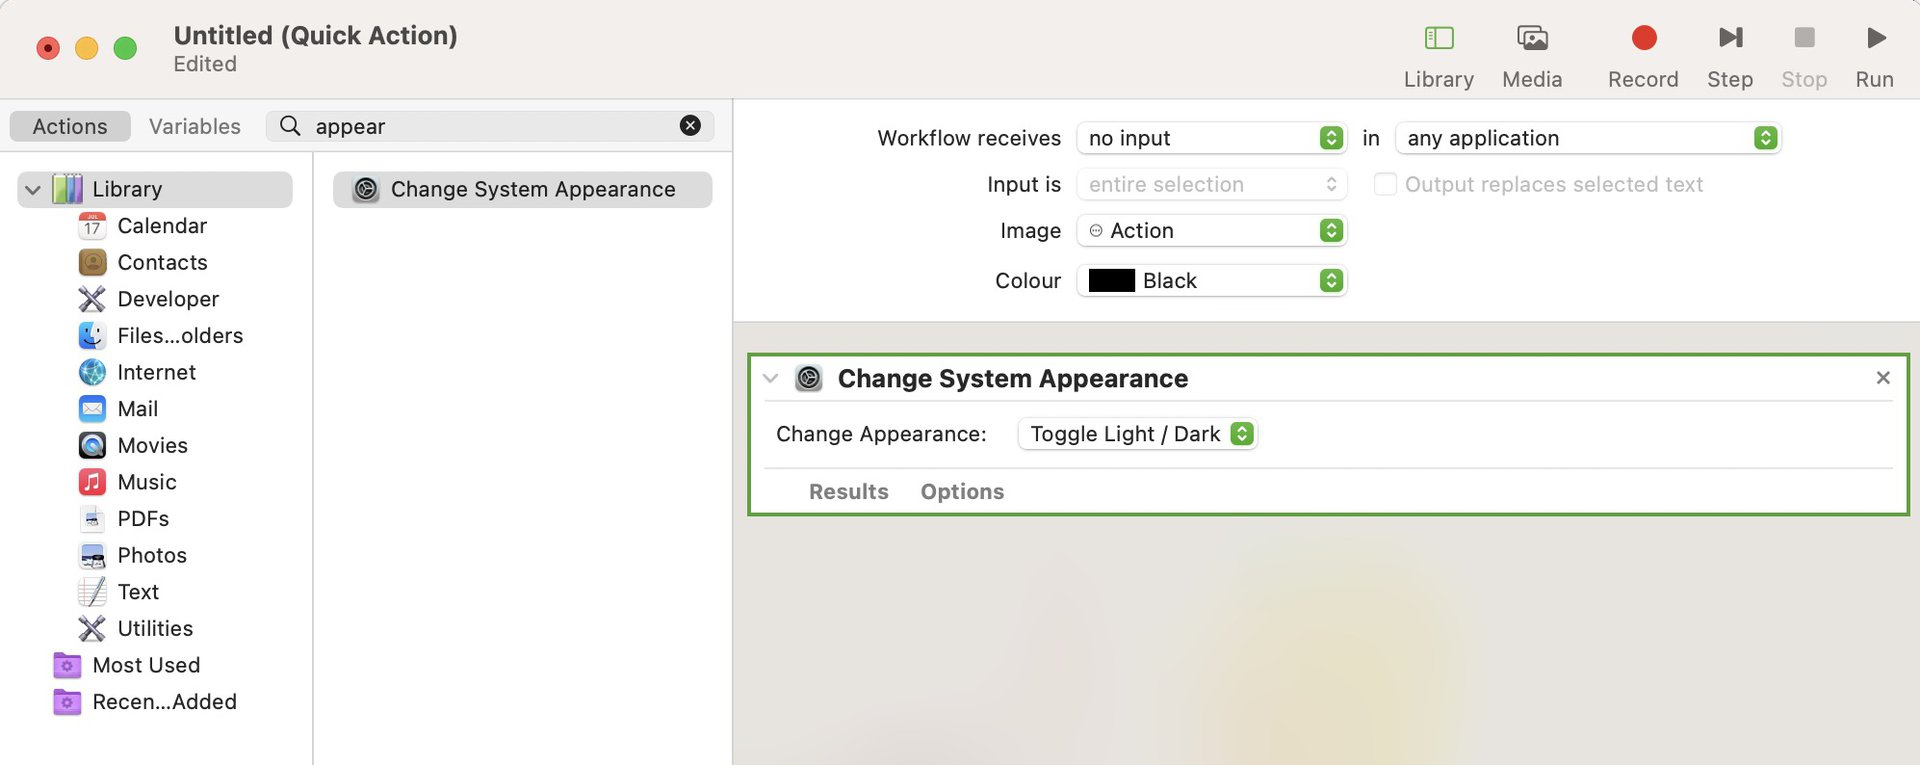
- On the right-hand side, make sure that Workflow receives is set to no input. Then, on the left, start typing in the search field to find Change System Appearance.
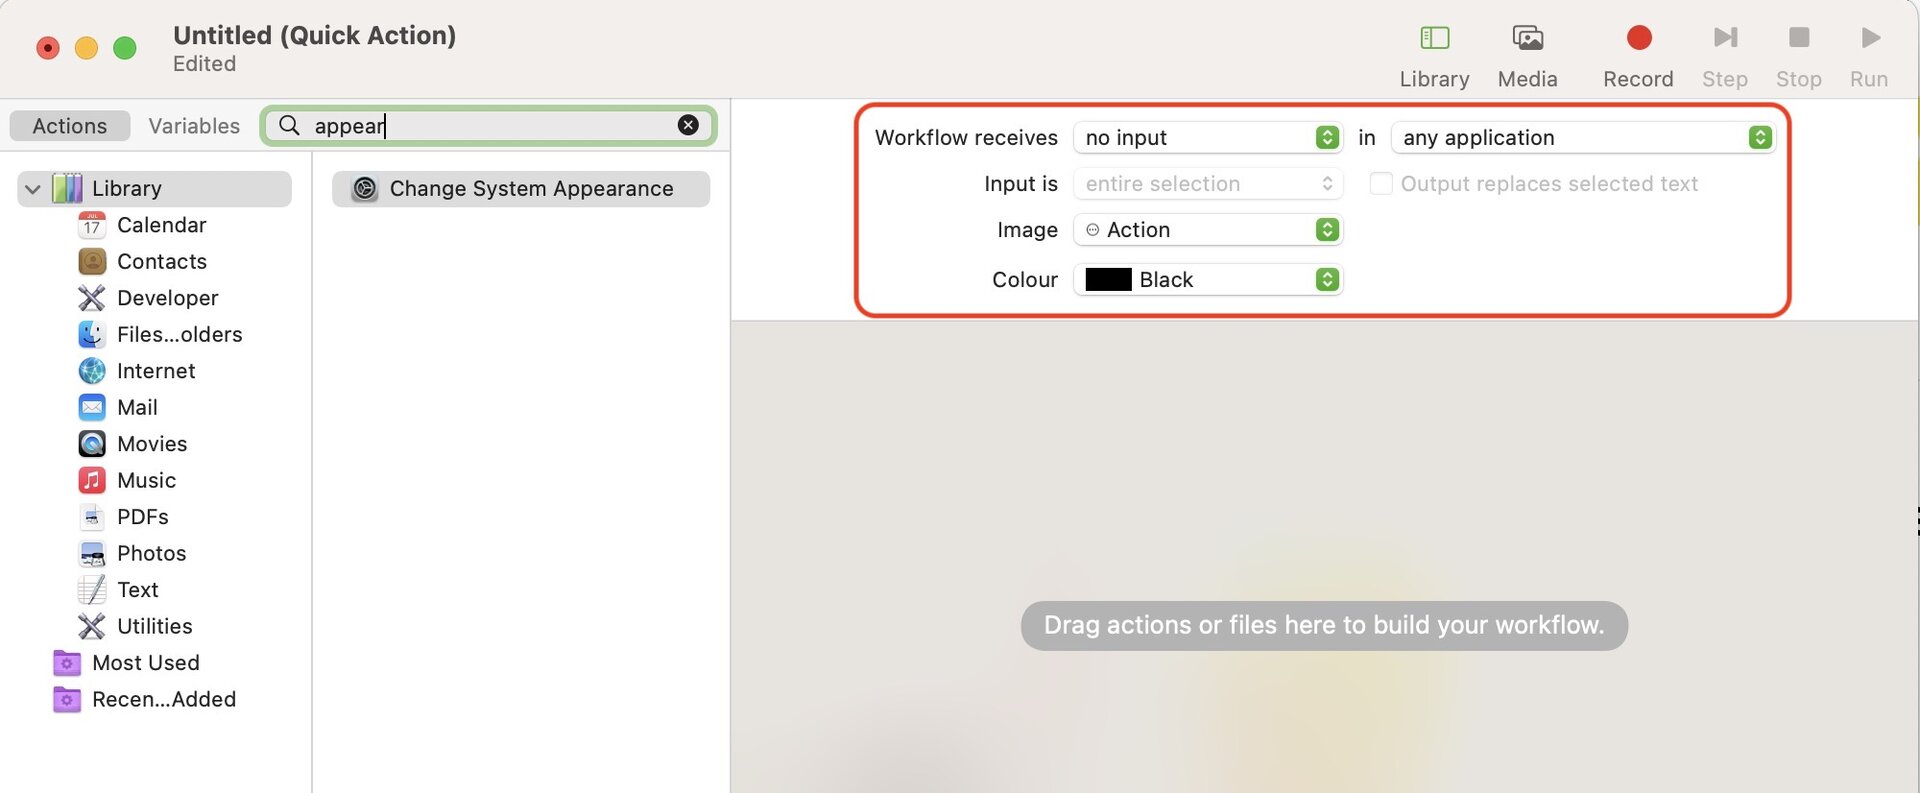
- Use your cursor to drag Change System Appearance over to the main window on the right. You will now get a white window, which is the next stage in the automated workflow. Make sure that Change Appearance is set to Toggle Light/Dark.
- Go to File > Save at the top of the screen and save your workflow with a good name. This will be the name that appears in your system menu so make it clear what it is.

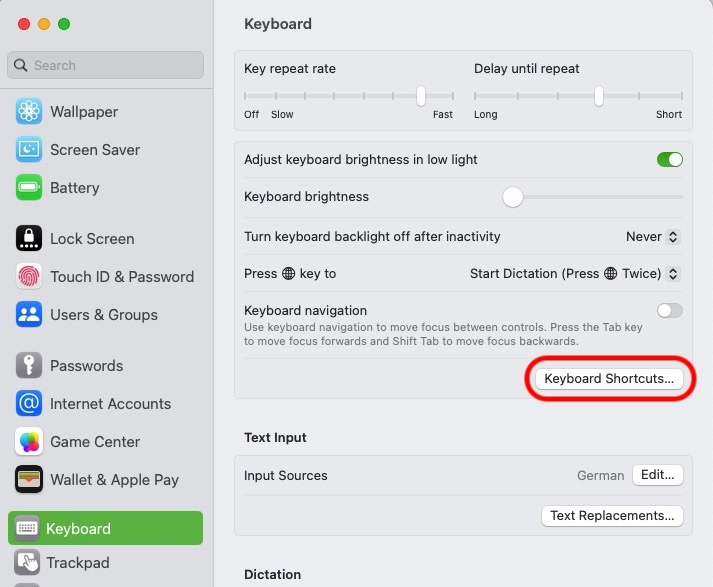
- To assign a keyboard shortcut to it, go to System Settings > Keyboard > Keyboard Shortcuts.
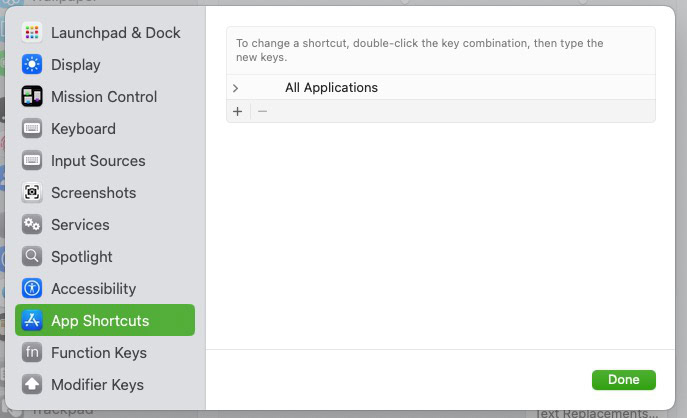
- Click App Shortcuts and then the small + icon to start a new entry.
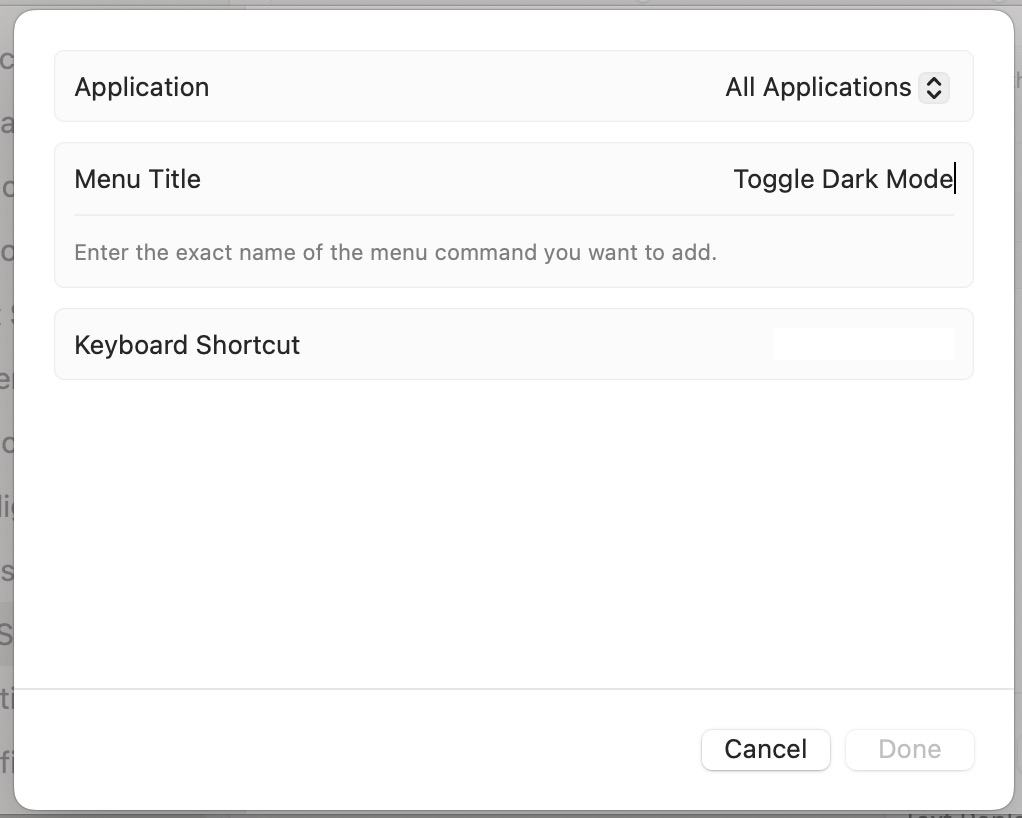
- Make sure Application is set to All Applications. Under Menu Title, enter the exact same name that you saved your Automator workflow under.
- Then tab down to Keyboard Shortcut and enter your desired shortcut. If the shortcut is already being used by another app, selecting it here won’t override the other app.
- If you now check your Services menu, you’ll find your new Automator workflow, along with the keyboard shortcut assigned to it. You can either click the Services menu entry or use your new keyboard shortcut.
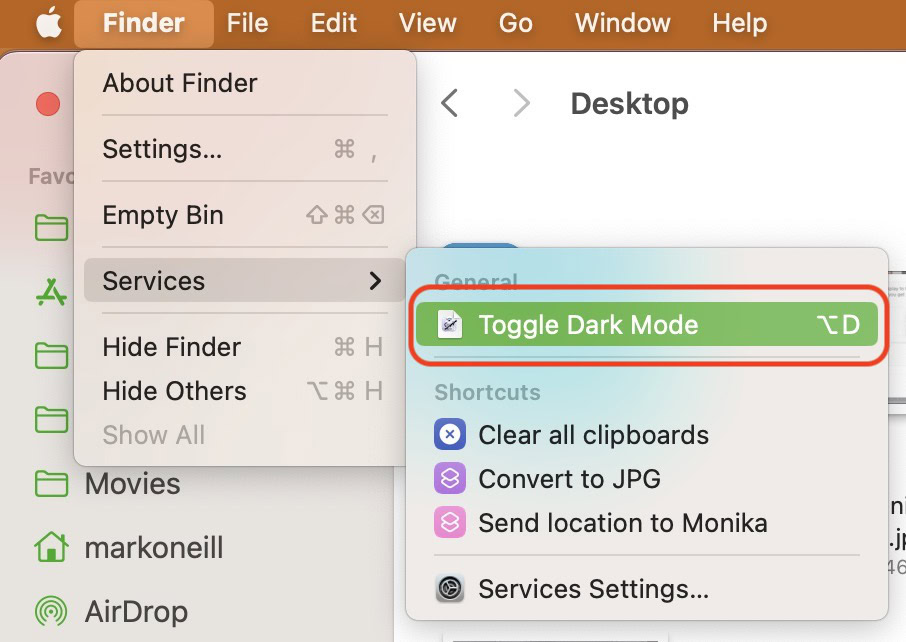
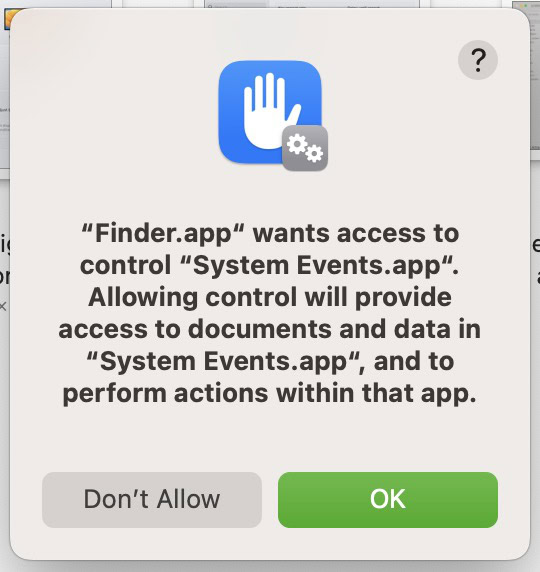
One thing to mention though is that when you use the Automator workflow for the first time in each app, it will ask you for permission to run. But after the first time, it won’t ask again.
FAQs
If your Mac operating system is older than Mojave, then the dark mode option is not available.
Many sources have suggested that dark mode slows down your Mac because it uses more RAM. You need to assess your own situation and disable dark mode if it becomes unusable.
Dark mode only has an effect on MacBooks with OLED screens. Anything with LCD screens will not see a difference.
Surveys have consistently put the number of dark mode users on Mac to be at least 90% and as high as 95% of Mac users. 36% of iOS users use dark mode on Apple Mail.
If you have a MacBook running macOS Big Sur or later, you can use the built-in blue light filter by going to System Preferences >Displays >Night Shift. From here, you can adjust the intensity of the filter and set a schedule for when it should be on. However, if you have Dark Mode enabled, Night Shift needs to be disabled. They obviously don’t work together.
Thank you for being part of our community. Read our Comment Policy before posting.