Affiliate links on Android Authority may earn us a commission. Learn more.
How to uninstall NVIDIA drivers
Published onApril 21, 2024
NVIDIA makes it pretty easy to install updated drivers through the GeForce Experience app. But what if you want to uninstall drivers, say because you’re switching to a different graphics card, or you think a corrupted install is causing trouble? Here’s how to go about uninstalling NVIDIA drivers — and what you can expect if you follow through.
QUICK ANSWER
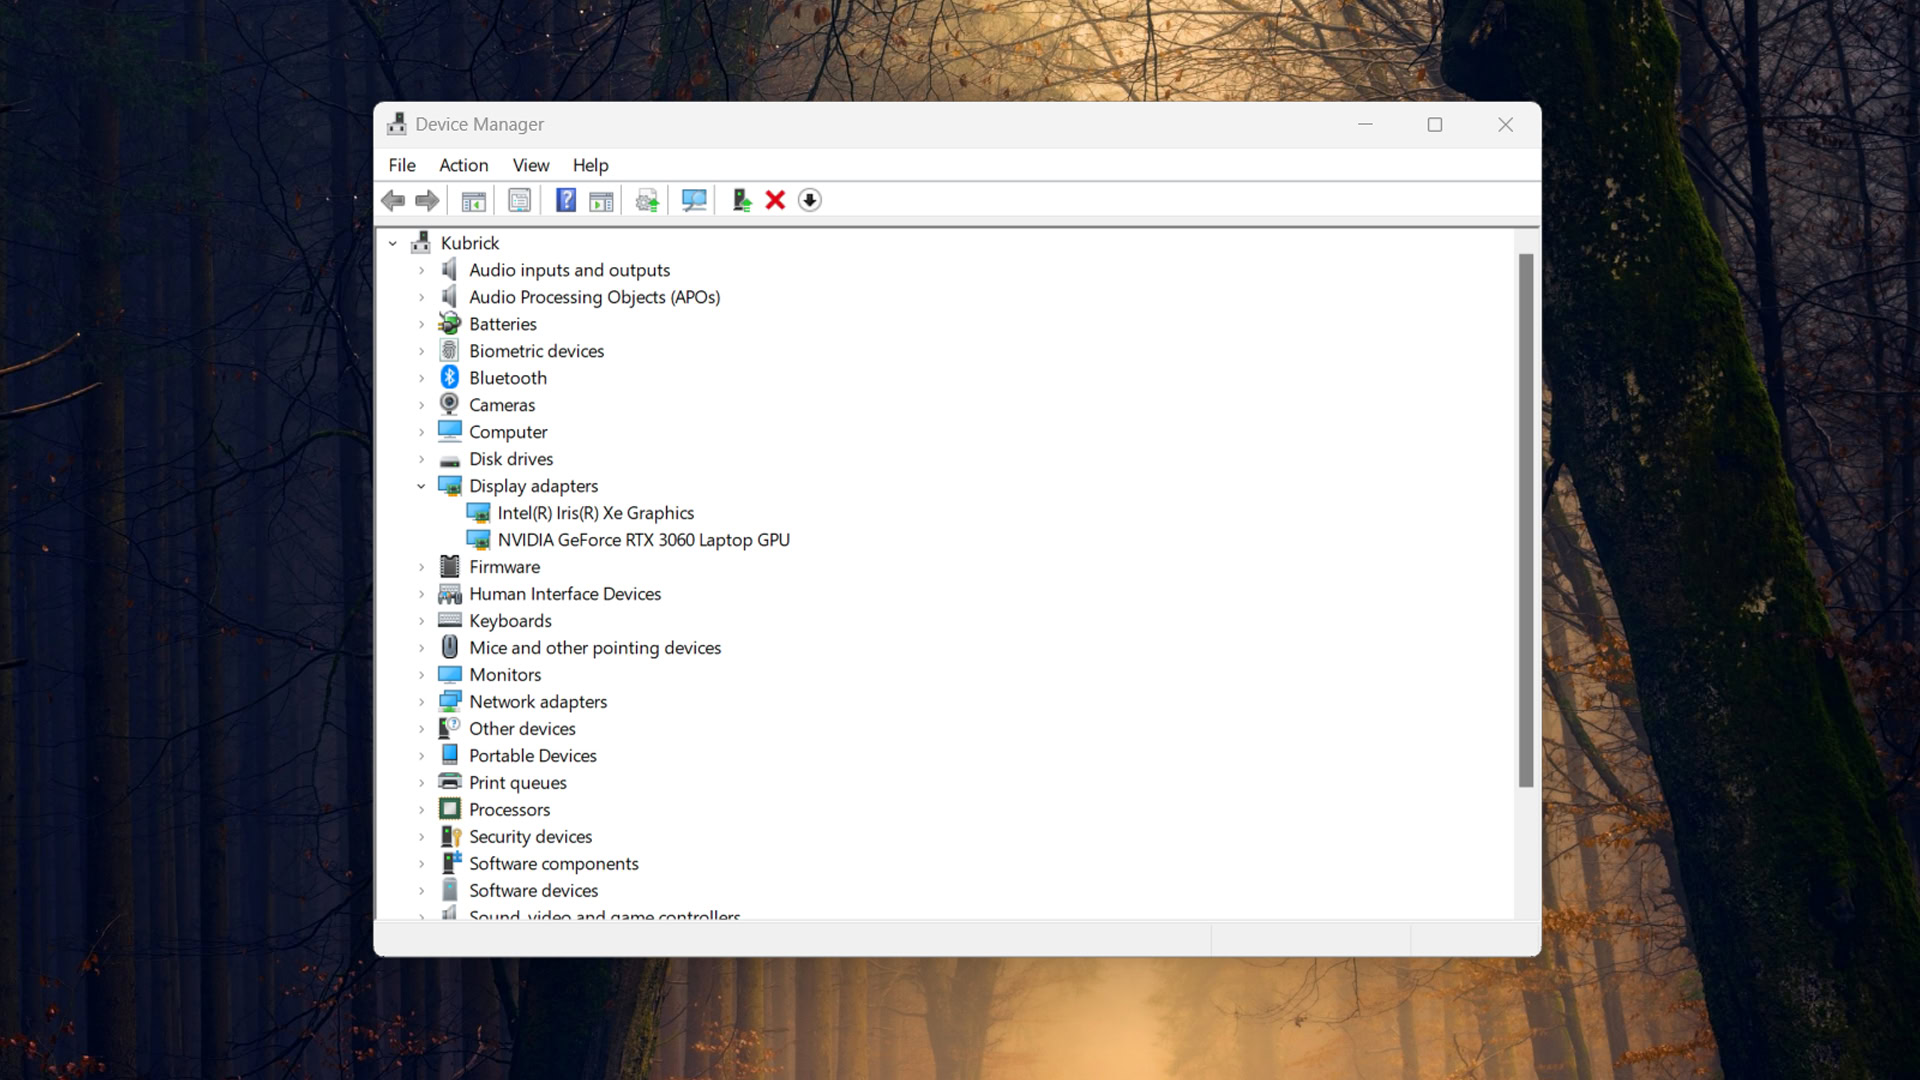
To uninstall NVIDIA drivers in Windows 11 or 10:
- Using Windows search, find Device Manager and open it.
- Click the arrow next to Display adapters.
- Select your NVIDIA card, right-click, and choose Uninstall device.
- Make sure Delete the driver software for this device is selected, then click Uninstall.
- Follow any further onscreen prompts.
JUMP TO KEY SECTIONS
Do you need to uninstall old drivers to install new ones?
If you’re simply updating existing NVIDIA drivers, the answer is no, at least not manually. When you trigger a driver update in GeForce Experience, the app handles the uninstall process for you, quickly swapping in the replacement. In fact you probably shouldn’t manually uninstall drivers if you intend to use GeForce Experience, although you can always get the latest updates from NVIDIA’s download site as a fallback.
You should consider uninstalling old drivers if you’re installing a new graphics card. While it may not be necessary, especially if the new card comes with software that will perform the process for you, you do run the risk of conflicts if you leave the old drivers in place.
How to uninstall NVIDIA drivers

The steps below should work in both Windows 11 and 10.
- Using Windows search, find Device Manager and open it.
- Click the arrow next to Display adapters to open that subsection.
- Double-click on your NVIDIA GPU.
- Navigate to the Driver tab.
- Choose Uninstall device.
- If asked, make sure Delete the driver software for this device is selected, then click Uninstall.
- Follow any subsequent onscreen prompts.
What happens when you uninstall NVIDIA drivers
Nothing catastrophic, in case you’re worried. All modern PCs have some form of integrated graphics processor, and Windows has default graphics drivers it can rely on.
You’ll want to install better drivers as soon as possible, however. If you have a dedicated graphics card — whether from NVIDIA or AMD — Windows can’t take advantage of its performance using stock drivers. If you try to run a 3D game or any other graphically intense app, you’ll encounter slow performance, assuming the app can run at all. In some cases, you may even be limited to lower desktop resolutions.
FAQs
Yes, since Windows has defaults it can always go back to. You won’t get the full performance of your GPU without custom drivers, though, so plan on installing new ones as soon as you can.
Deleting old NVIDIA drivers can help resolve compatibility issues, improve system performance, and ensure smooth operation of your graphics card with the latest software updates.
Not necessarily, but it’s a reasonable precaution. It can avoid potential software conflicts caused by leaving old drivers in place.