Affiliate links on Android Authority may earn us a commission. Learn more.
How to update Windows 10 and resolve update problems
Published onApril 28, 2019
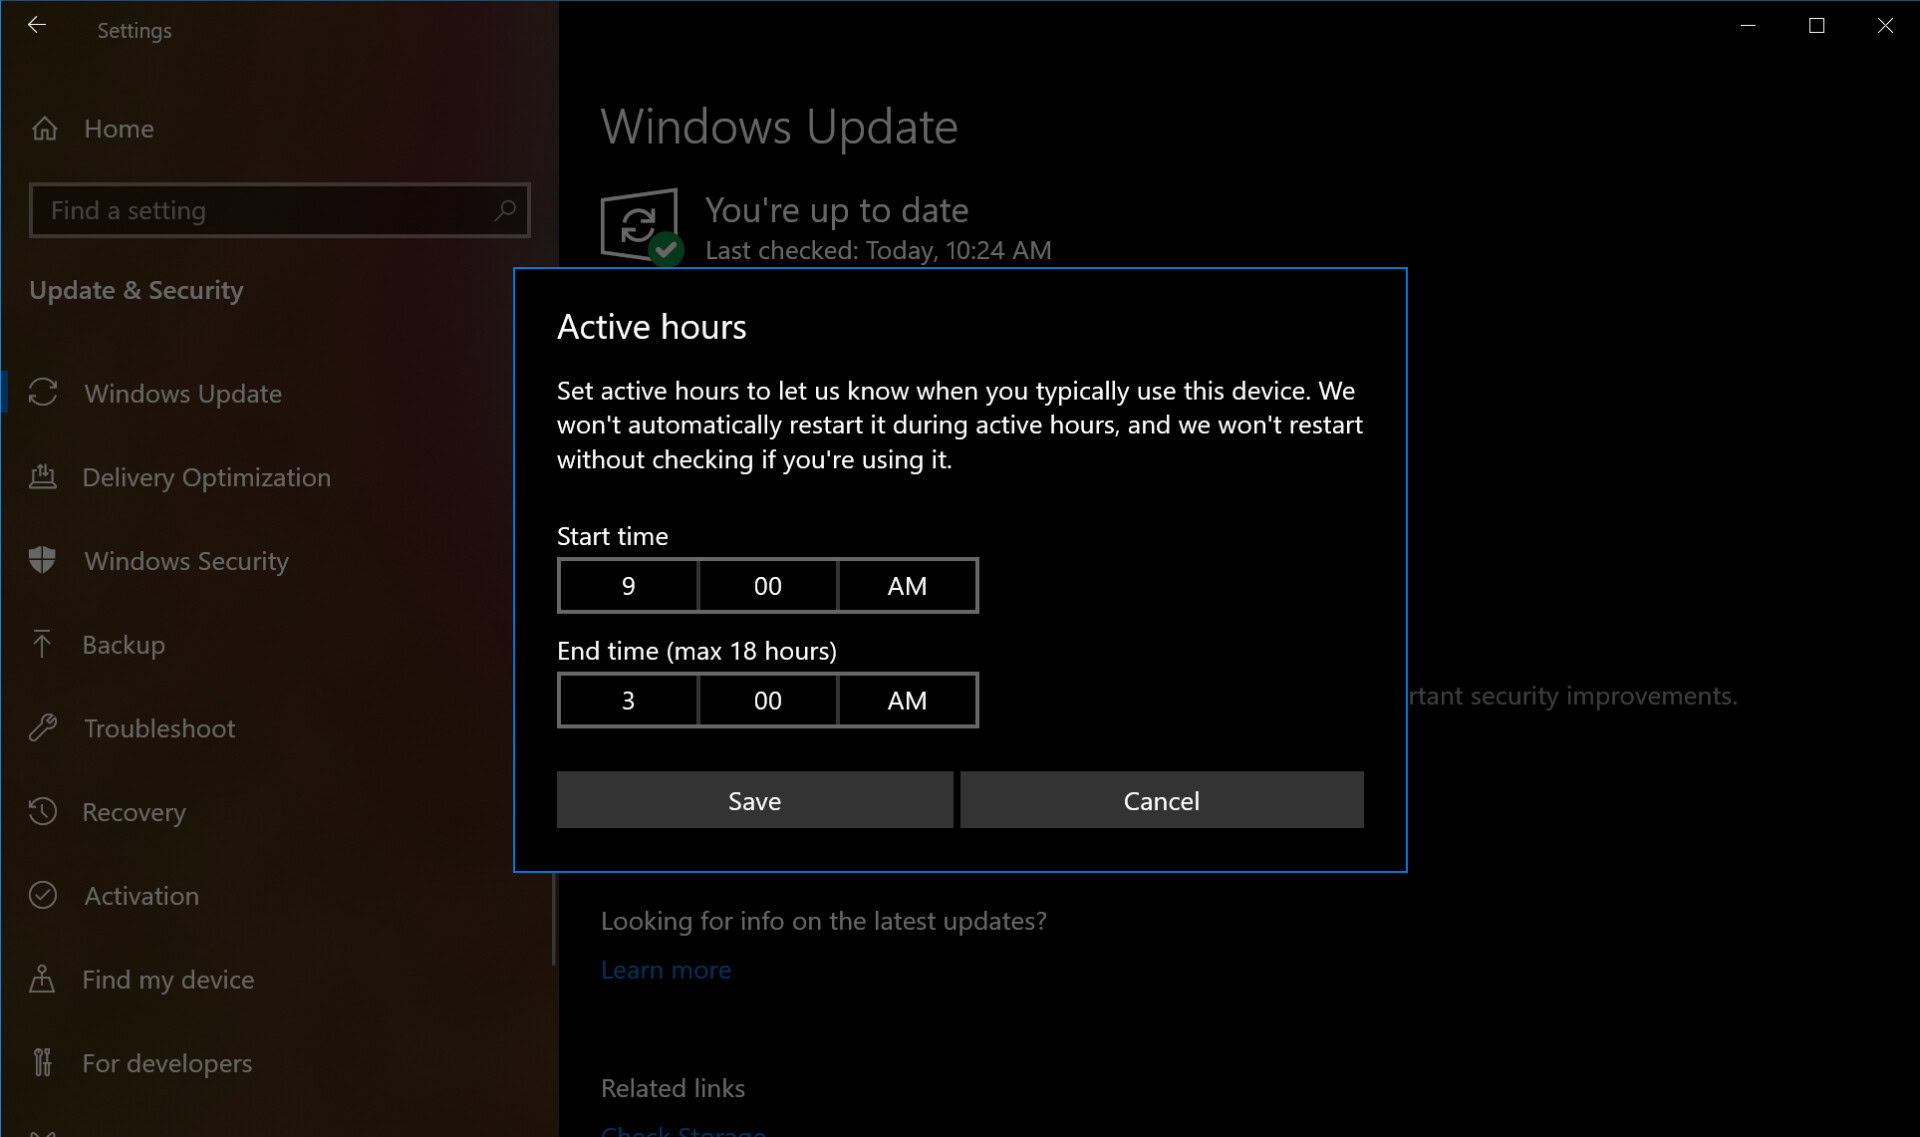
Windows 10 desktops and laptops require constant maintenance. It’s a highly-targeted platform forcing Microsoft to distribute security updates and mega-patches each month along with minor patches in-between. Windows 10 typically updates itself in the background during inactive hours, but there are situations demanding your immediate attention. We show you how to update Windows 10.
But note that each manufacturer has its own set of updates you need to keep current that are separate from Windows 10. These updates typically include Bluetooth, storage, touchpad, audio, Wi-Fi and other necessary drivers provided through special desktop programs installed by manufacturers. These programs are typically shown on the taskbar and/or listed on the Start Menu.
Check your version of Windows 10
You should always know what version of Windows 10 you’re currently running. Most mainstream Windows-based PCs ship with Windows 10 Home or Windows 10 Pro, the latter of which includes a few extra features for business-oriented customers like Remote Desktop, assigned access, and more. Windows 10 in S Mode is limited in function and features, targeting students.
You should also keep track of the version number, so you’ll know what Windows 10 Home or Pro build you’re currently running. At the time of this publication, the most recent mainstream release is version 10.0.17763 dubbed as October 2018 Update. Prior to that, Microsoft updated Windows 10 with the April 2018 Update last spring.
In both cases, Microsoft added features to the operating system as part of its ongoing Windows-as-a-Service initiative, meaning Microsoft has no plans to release another retail version of Windows. Instead, Microsoft will merely build on Windows 10.
Here are the major releases thus far:
| Name | Version | Codename | Build |
|---|---|---|---|
| Name October 2018 Update | Version 1809 | Codename Redstone 5 | Build 10.0.17763 |
| Name April 2018 Update | Version 1803 | Codename Redstone 4 | Build 10.0.17134 |
| Name Fall Creators Update | Version 1709 | Codename Redstone 3 | Build 10.0.16299 |
| Name Creators Update | Version 1703 | Codename Redstone 2 | Build 10.0.15063 |
| Name Anniversary Update | Version 1607 | Codename Redstone 1 | Build 10.0.14393 |
| Name November Update | Version 1511 | Codename Threshold 2 | Build 10.0.10586 |
| Name Original launch | Version 1507 | Codename Threshold 1 | Build 10.0.10240 |
To find out what you’re currently running, perform the following:
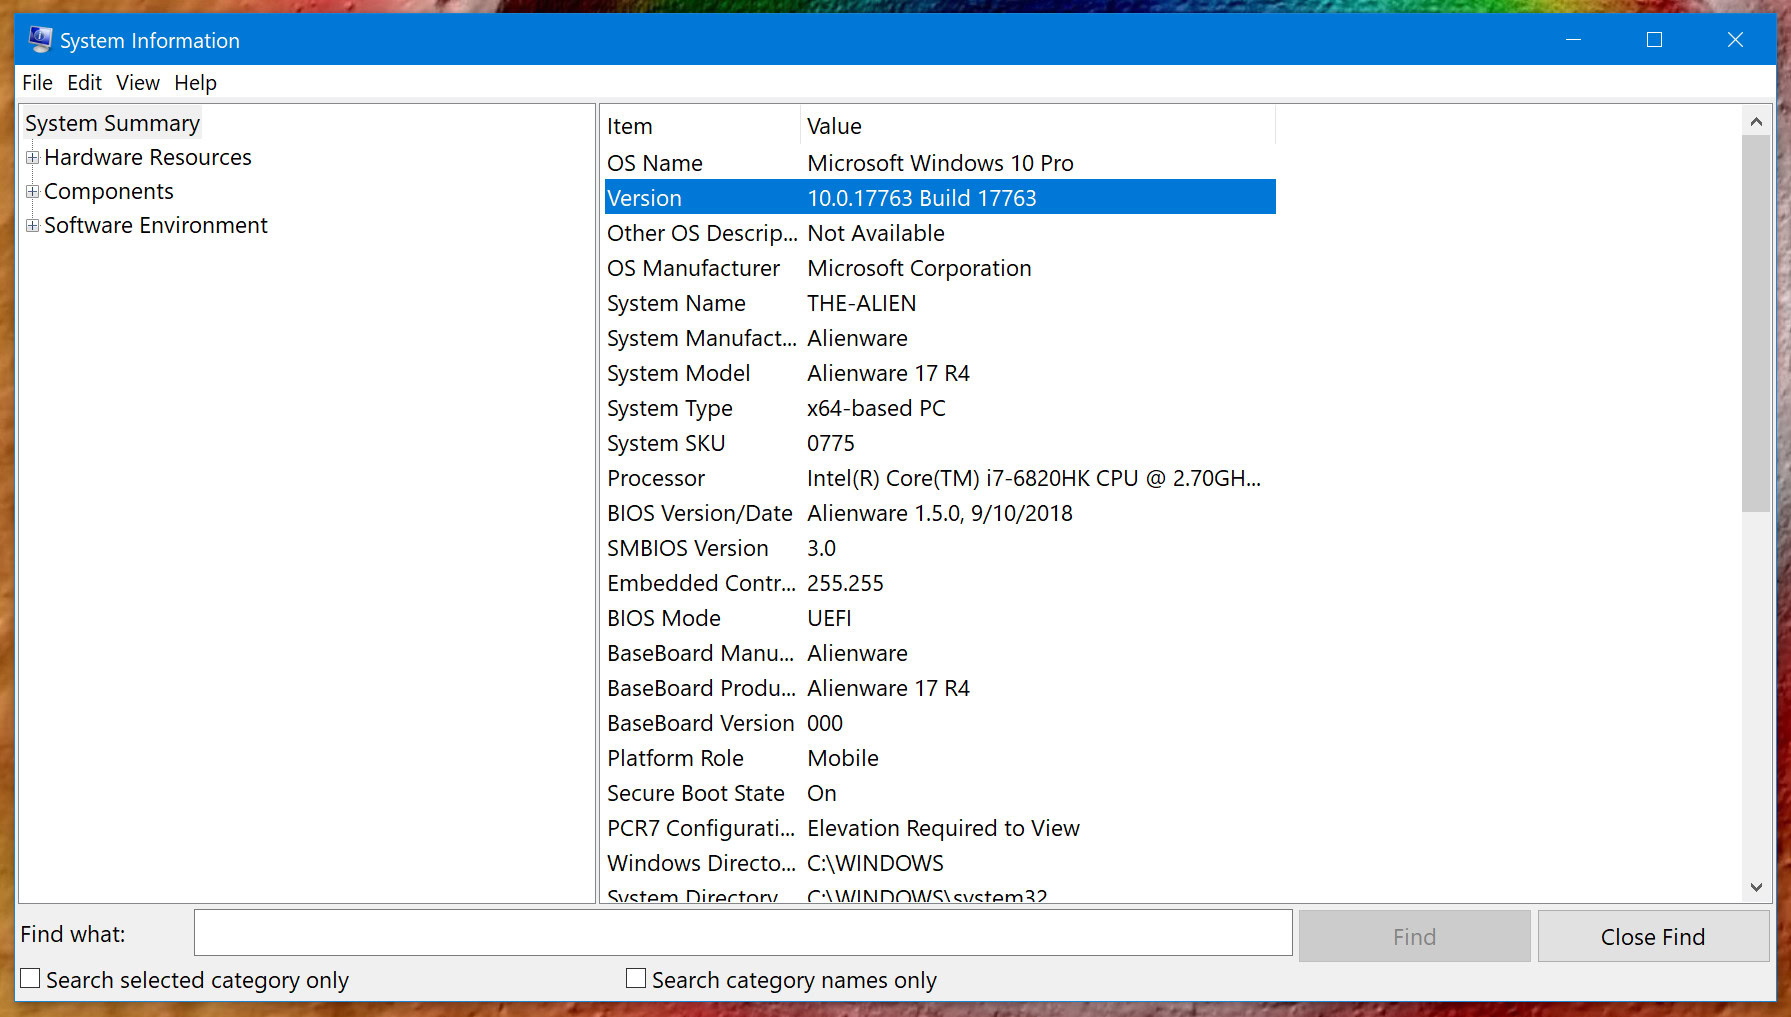
1. Place your mouse cursor inside Cortana’s search field.
2. Type Windows version.
3. Select System Information in the results.
4. Once the desktop app loads, you’ll see information listed in the right panel. The number you want is next to Version towards the top under OS Name as shown above.
5. Now compare that number to the chart above to see if you have the latest feature update.
Manually update Windows 10 Part 1
As previously stated, Windows 10 will automatically keep your PC up-to-date in the background during inactive hours (more on that later). But if you’d rather take full control of the update process, begin by following these steps.
If you’d rather keep automatic updates on and merely want to make sure Windows 10 has the latest patches, skip to Part 2.
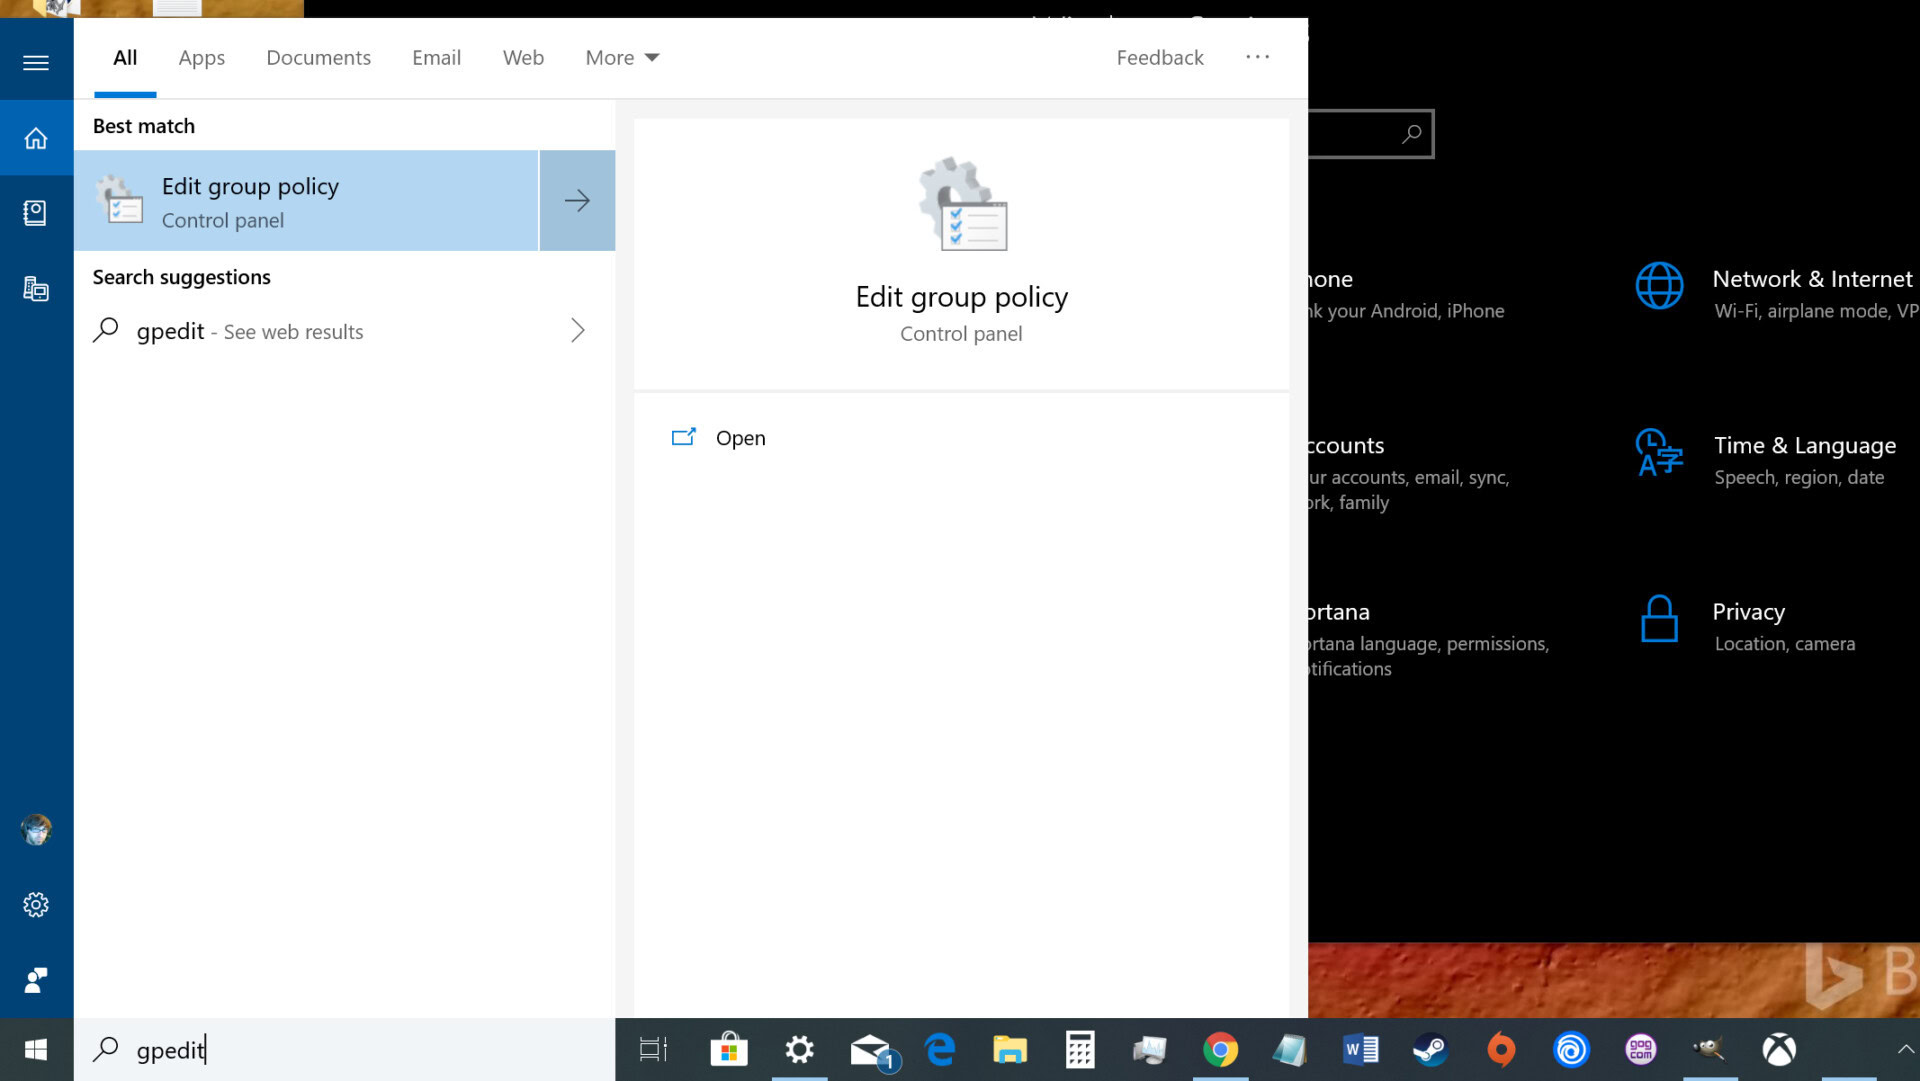
1. Type gpedit.msc in Cortana’s search field.
2. Select Edit group policy in the results as shown above.
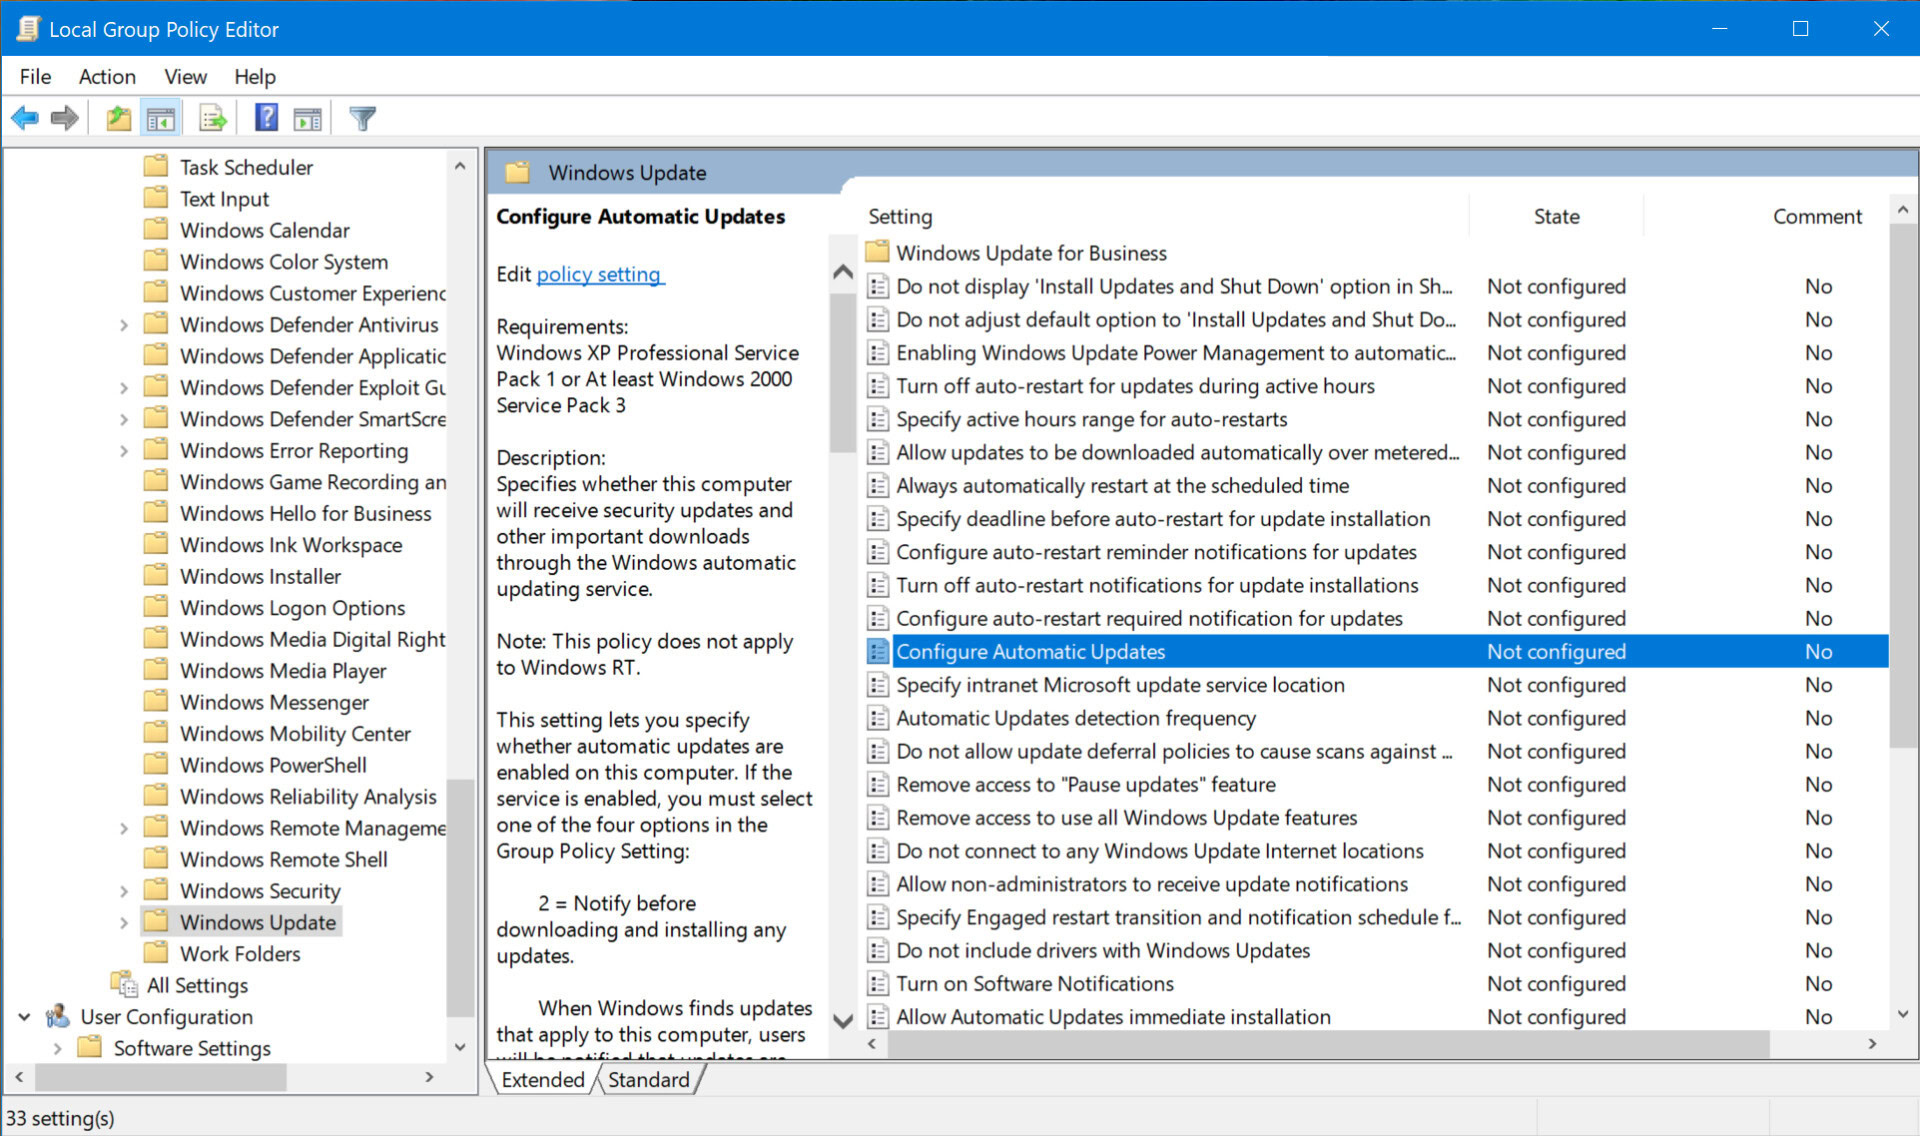
3. In the Local Group Policy Editor, follow this path:
Computer Configuration > Administrative Templates > Windows Components > Windows Update
4. Locate and double-click on Configure Automatic Updates in the right panel as shown above.
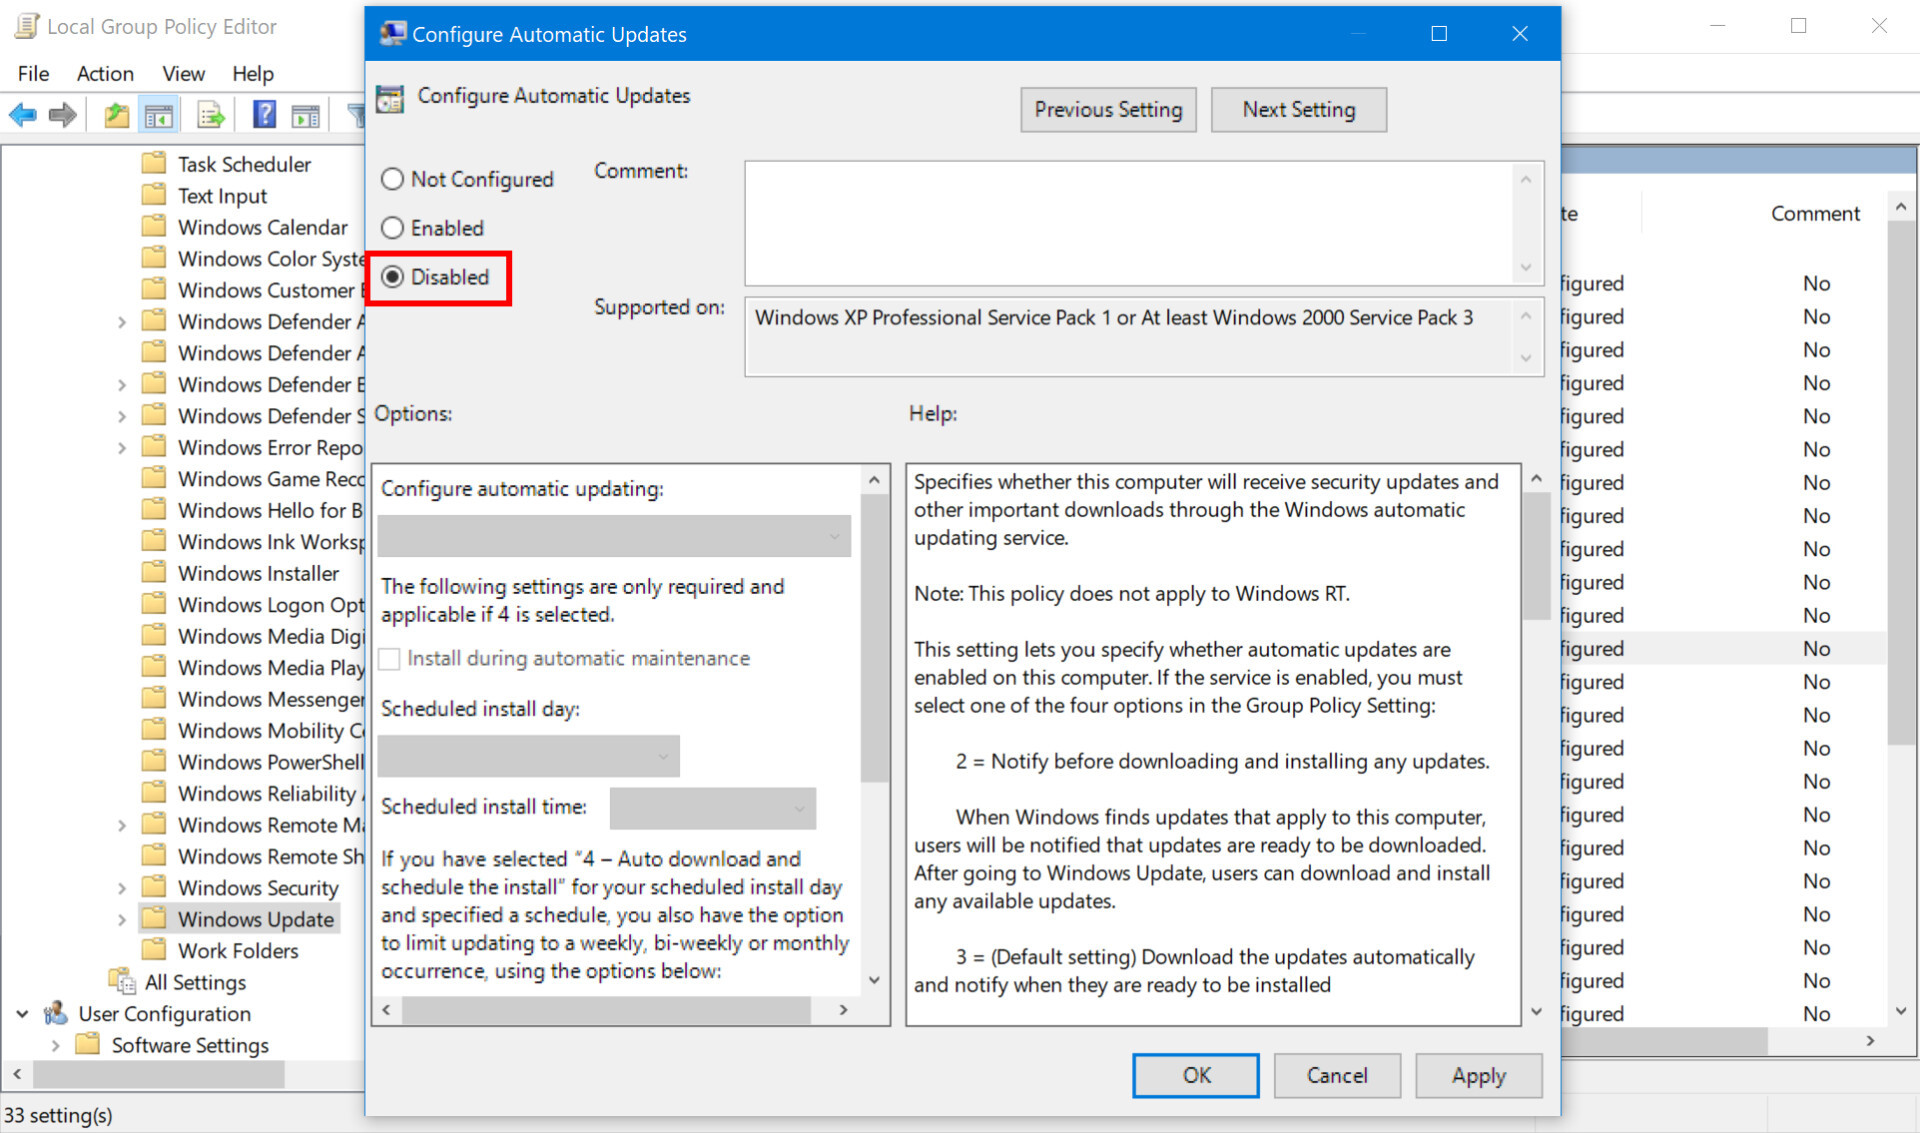
5. In the pop-up window, select Disabled.
6. Click on the Apply button.
7. Click on the OK button.
Now you have full control of the Windows 10 update process!
Manually update Windows 10 part 2
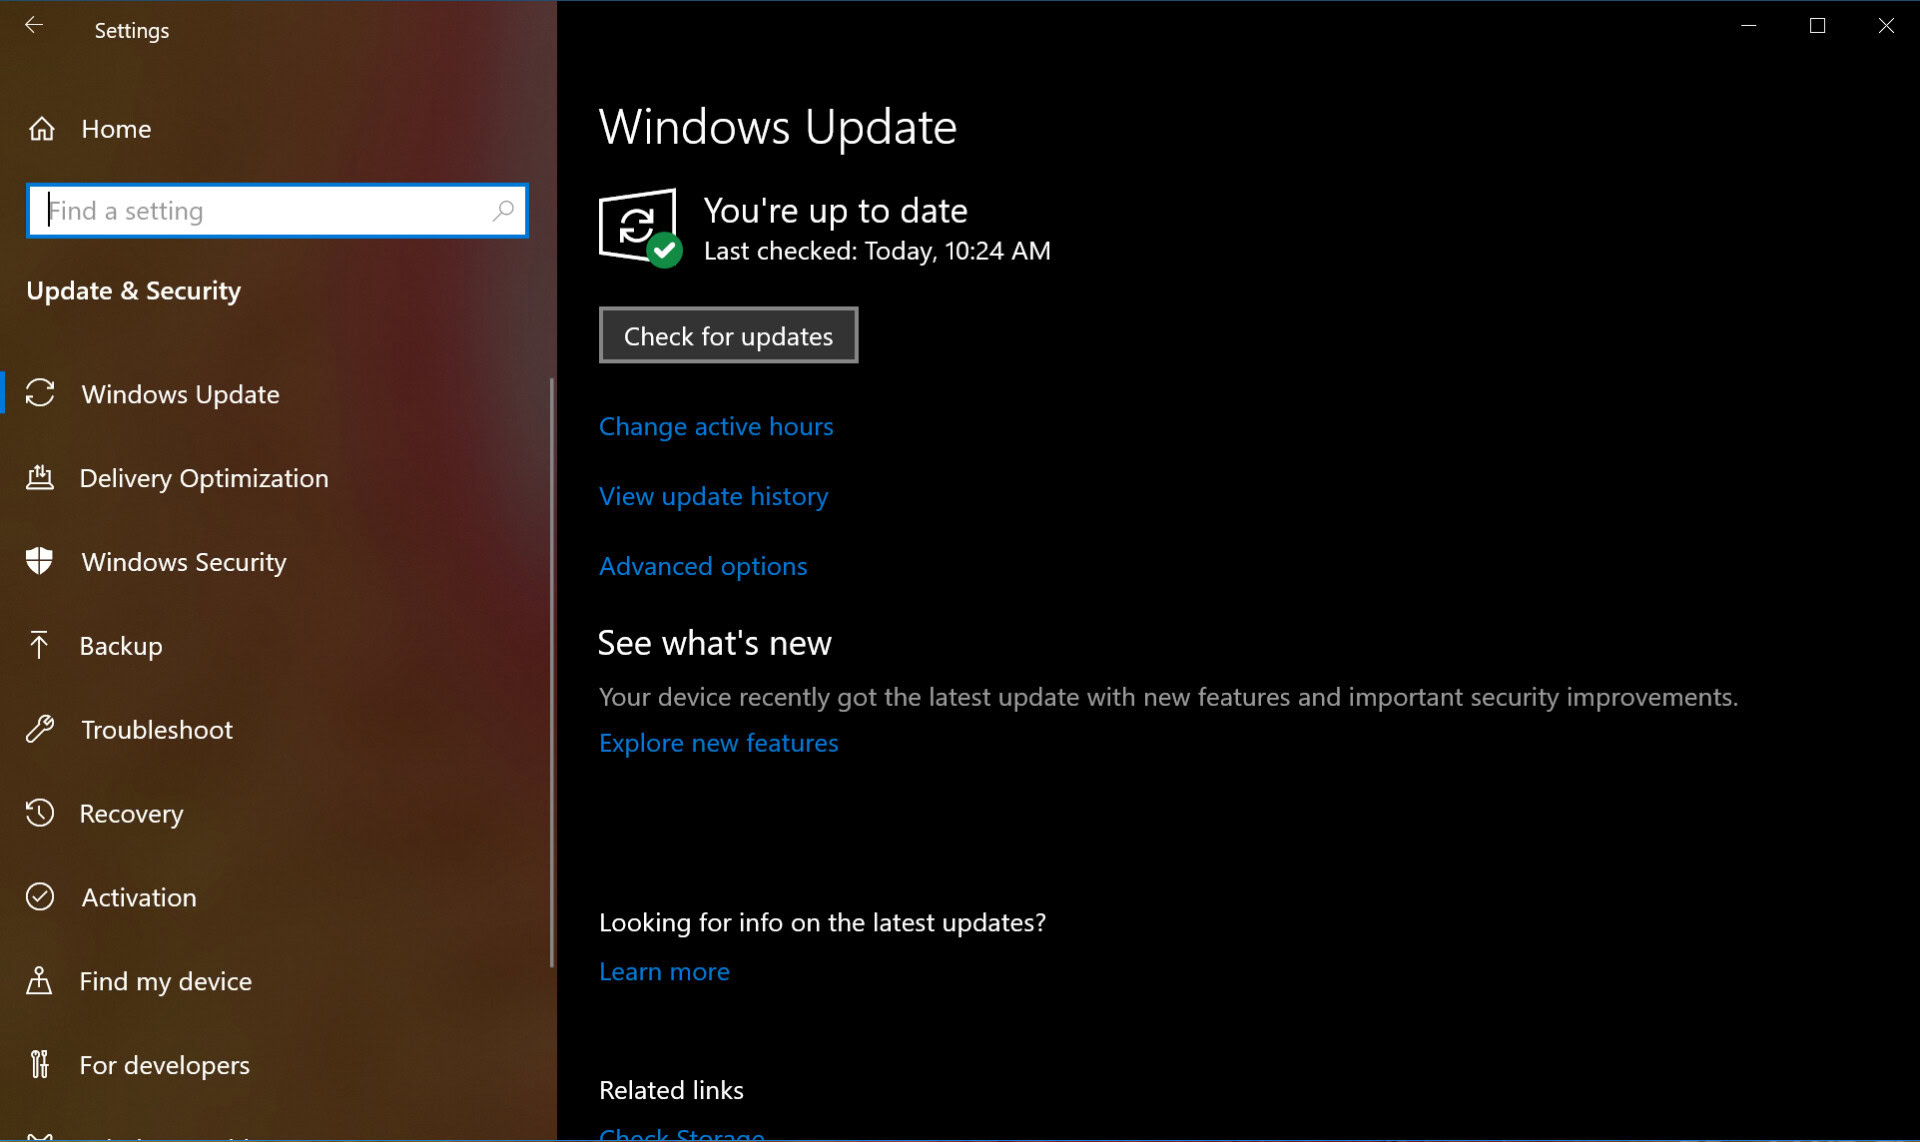
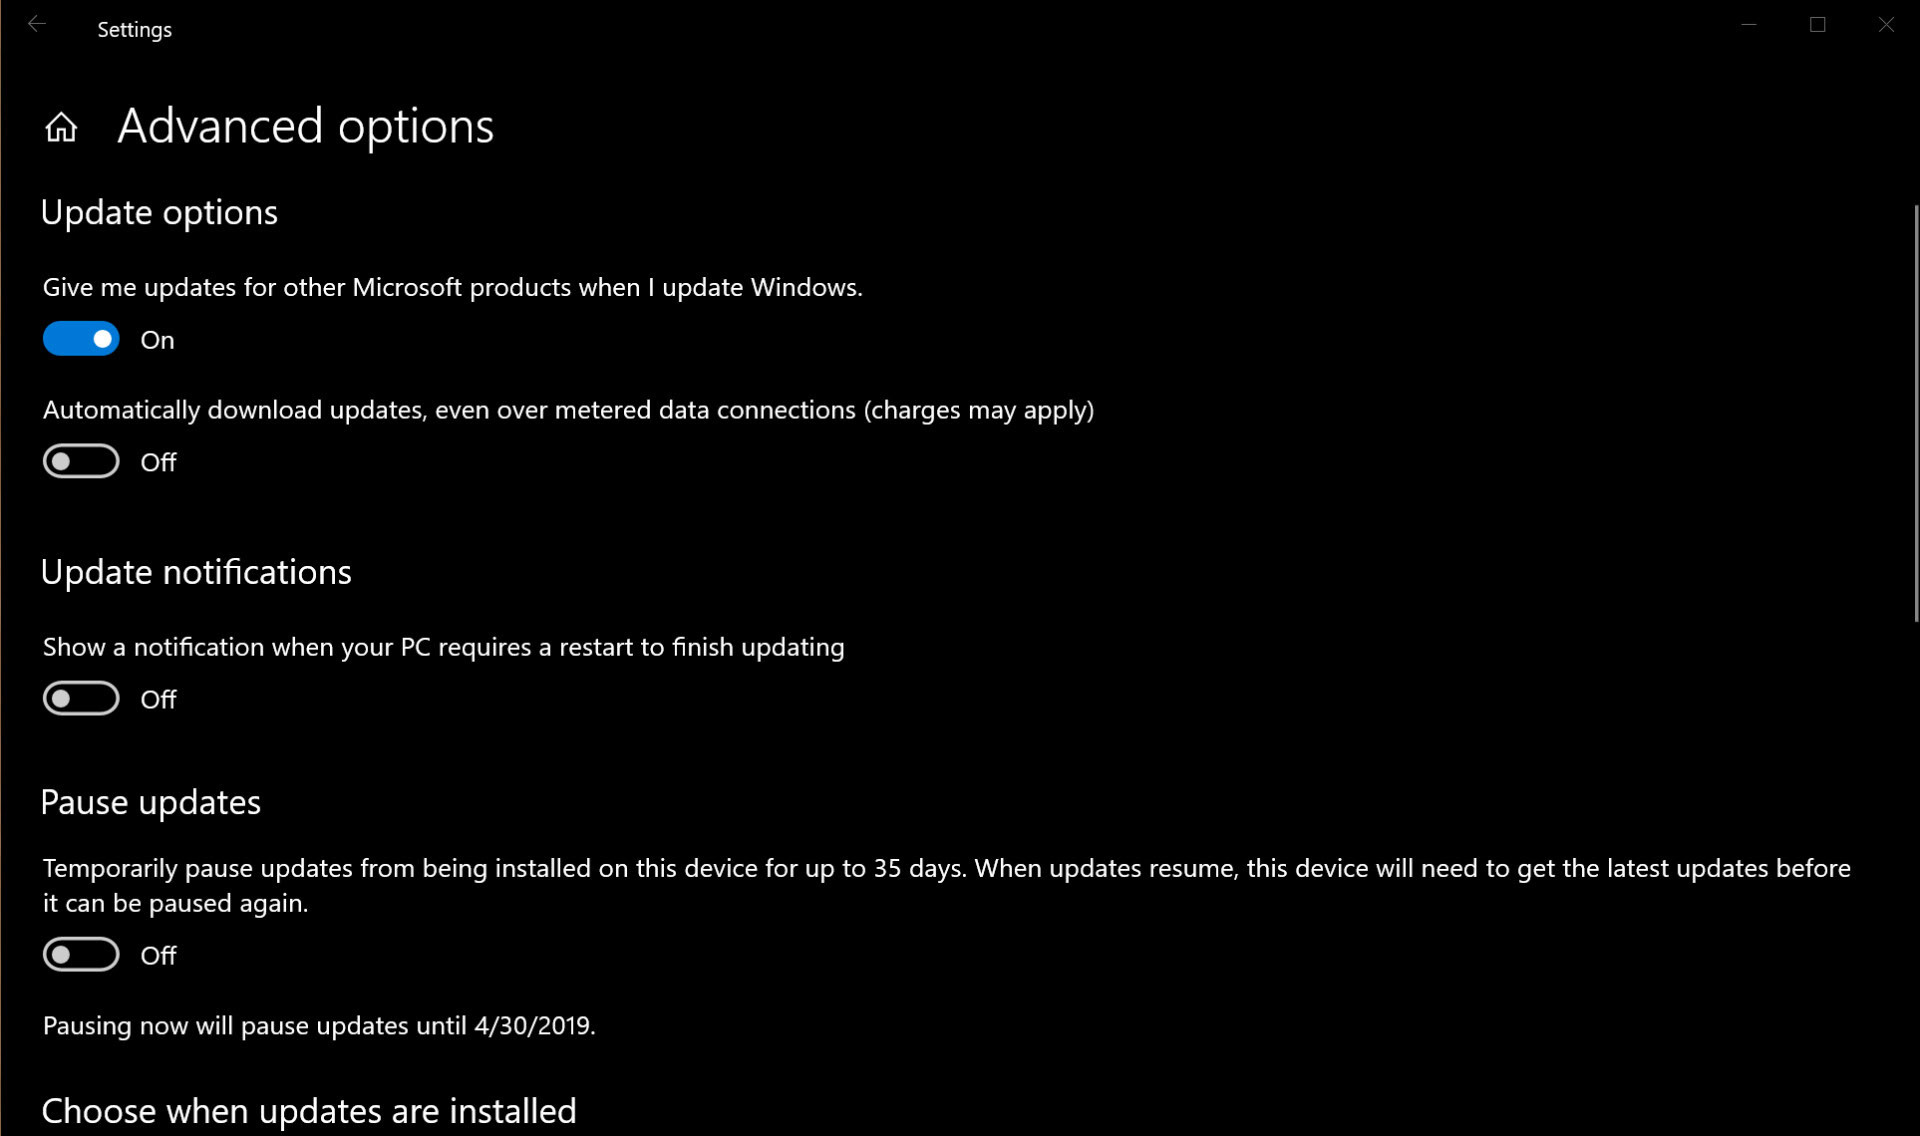
Whether you’ve disabled automatic updates or chose to let Windows 10 retain control, follow these steps to manually obtain the latest patches, security fixes, and feature updates:
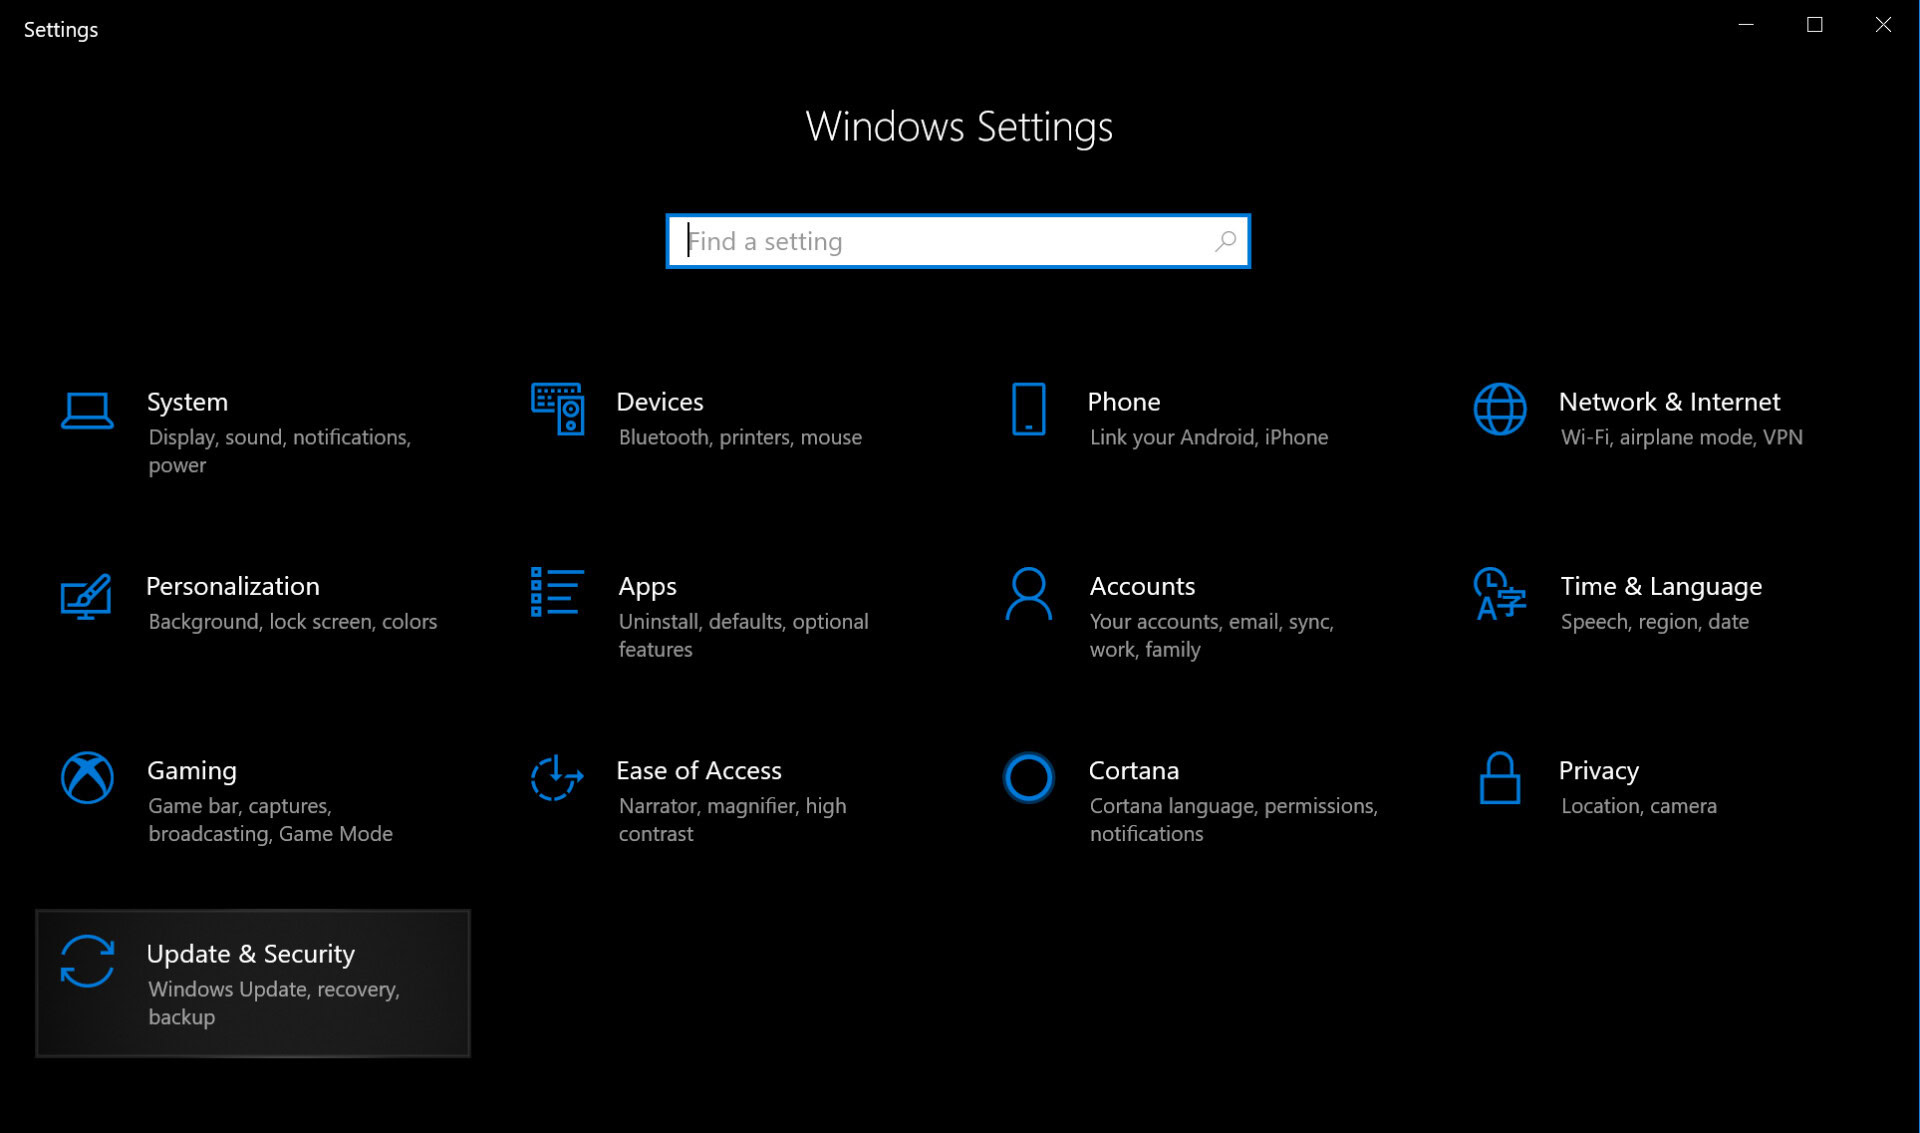
1. Click the Start button and then click on the “gear” icon on the left side of the Start Menu. This opens the Settings app.
2. Once the app loads, select Update & Security.
Fixing update issues
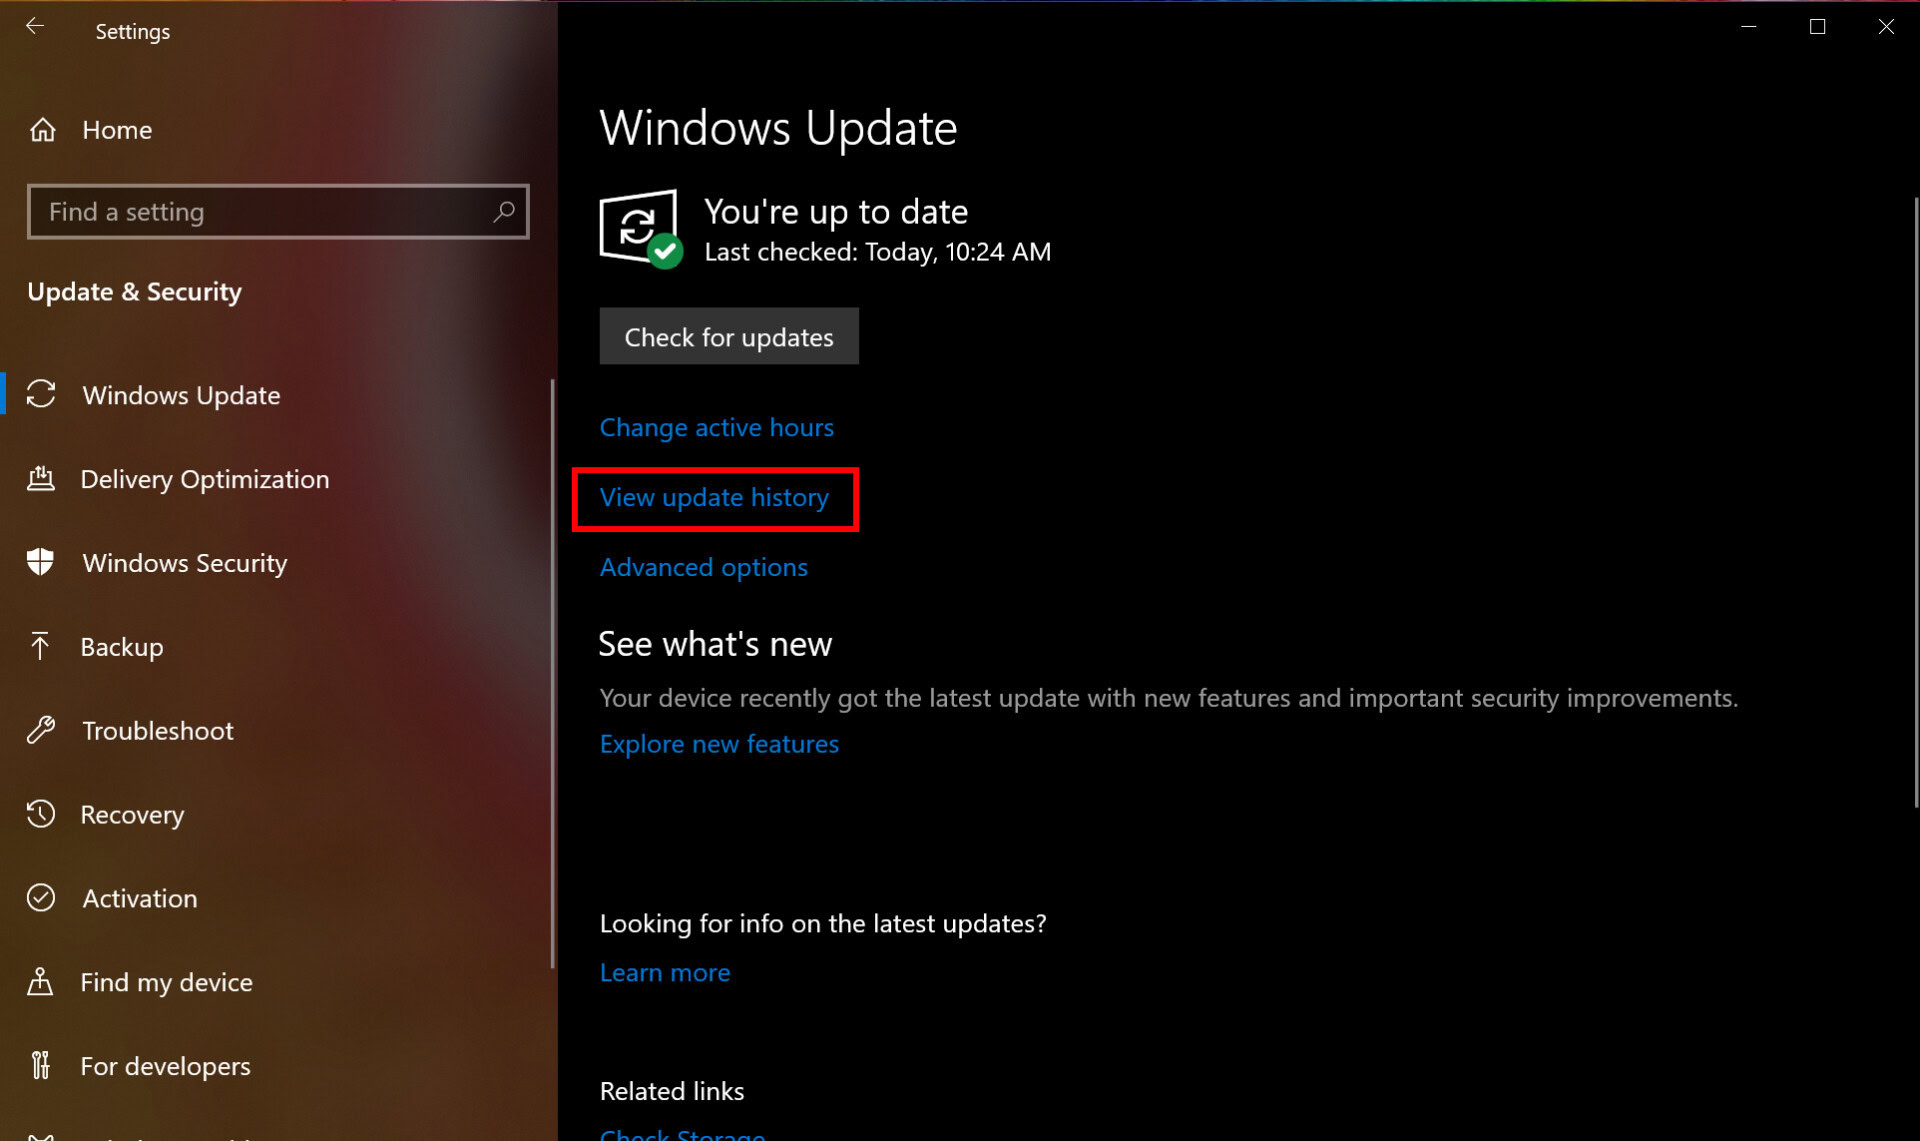
If you’ve updated Windows 10 with security fixes, patches, or a feature update and are suddenly having problems, you can uninstall one or all offending updates. Perform the following:
1. Click the Start button and then click on the “gear” icon on the left side of the Start Menu. This opens the Settings app.
2. Once the app loads, select Update & Security.
3. The default window is Windows Update. Click on the View update history link as shown above.
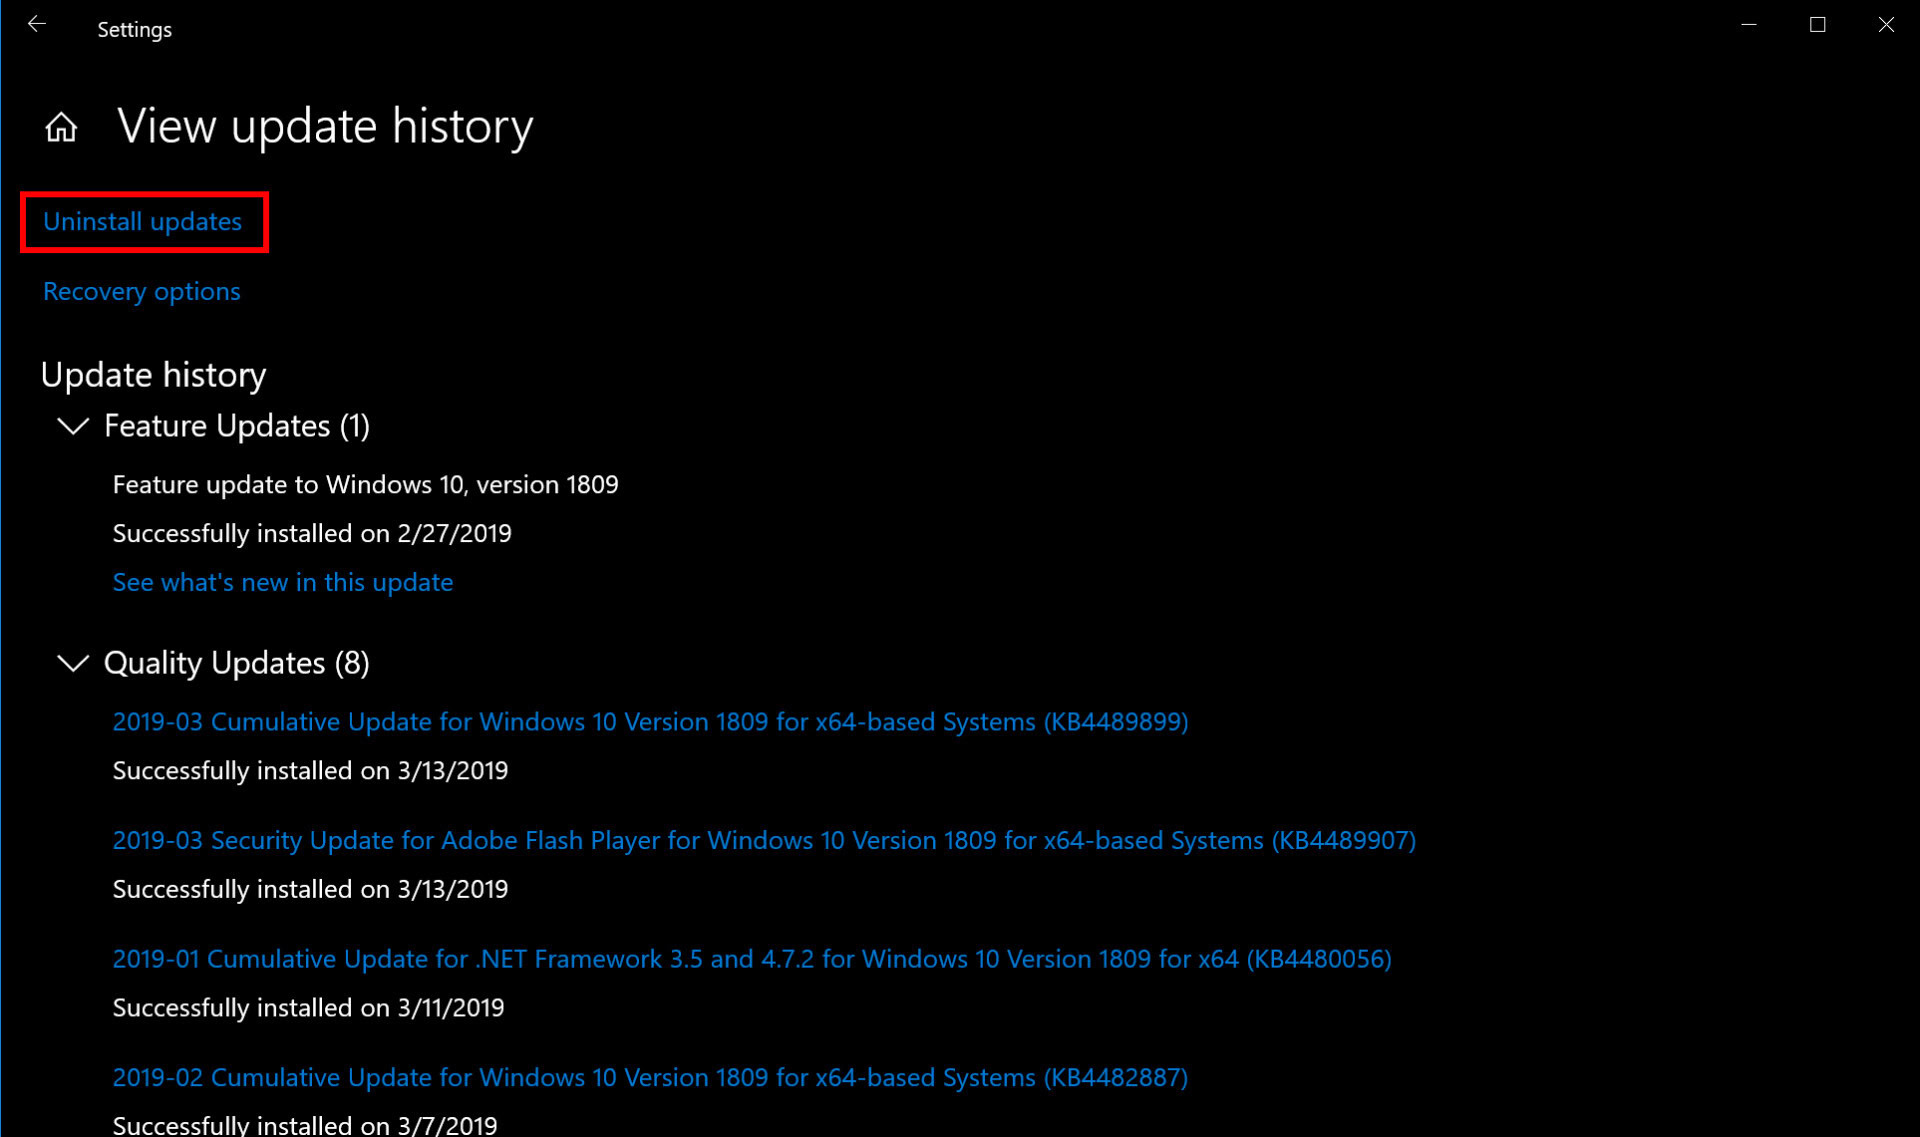
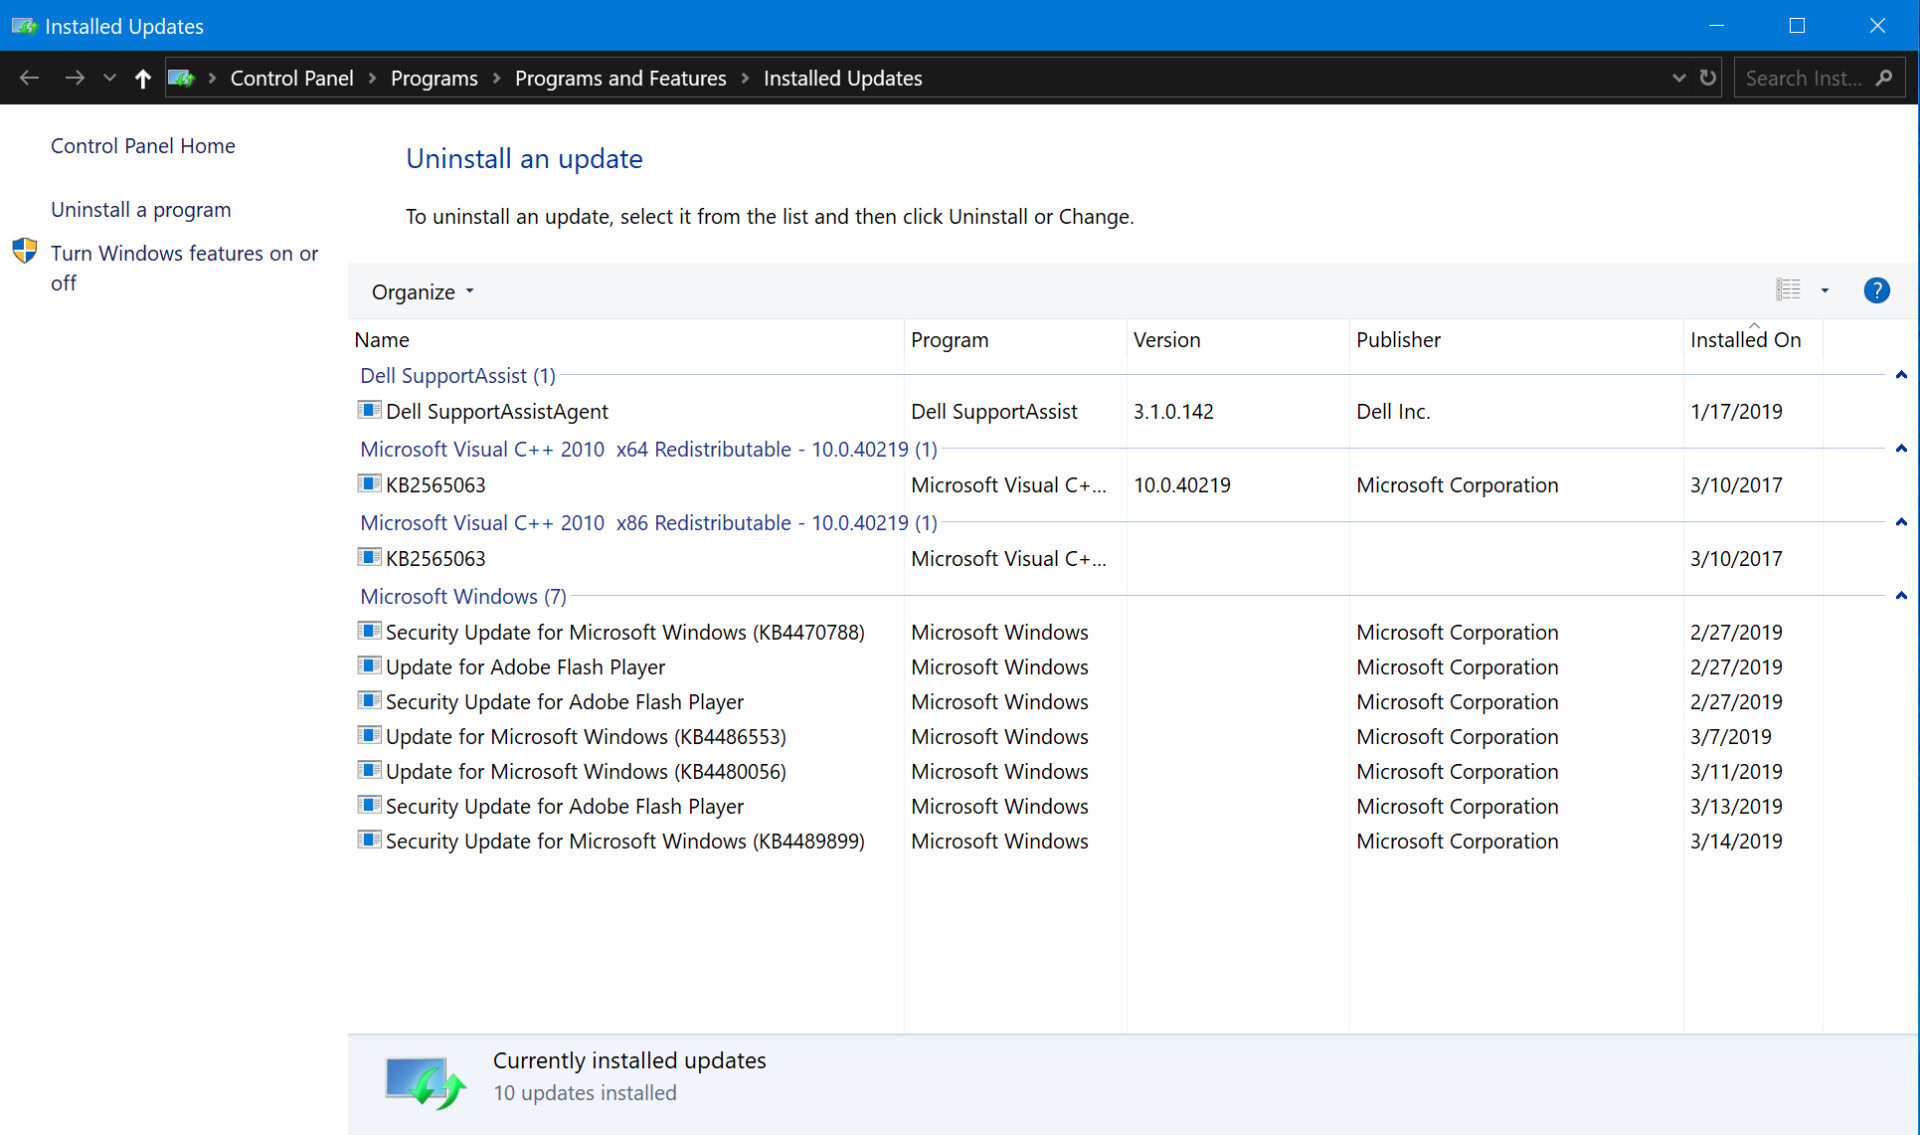
6. Click on the Installed On column header so that install dates descend chronologically from top to bottom.
7. Uninstall any recent update that may be causing an issue. Research online first to make sure you pick the correct update.
An alternate method is to reset your PC, use the “fresh start” tool, or simply downgrade to the previous version. Resetting the PC means Windows 10 reverts to its original out-of-the-box state when you first purchased and turned on the PC. This method allows you to keep or delete on-device files if needed, and retains all drivers and programs installed by the manufacturer.
The Fresh Start option re-installs Windows 10 with the latest version, including all security fixes, patches, and feature updates. This method keeps your files intact but discards all apps and software pre-installed by the manufacturer. Fresh start requires an Internet connection while resetting the PC does not.
Finally, downgrading to a previous version of Windows 10 means you’re simply uninstalling a feature update that isn’t working correctly on your PC, such as uninstalling the October 2018 Update and downgrading to the April 2018 update.
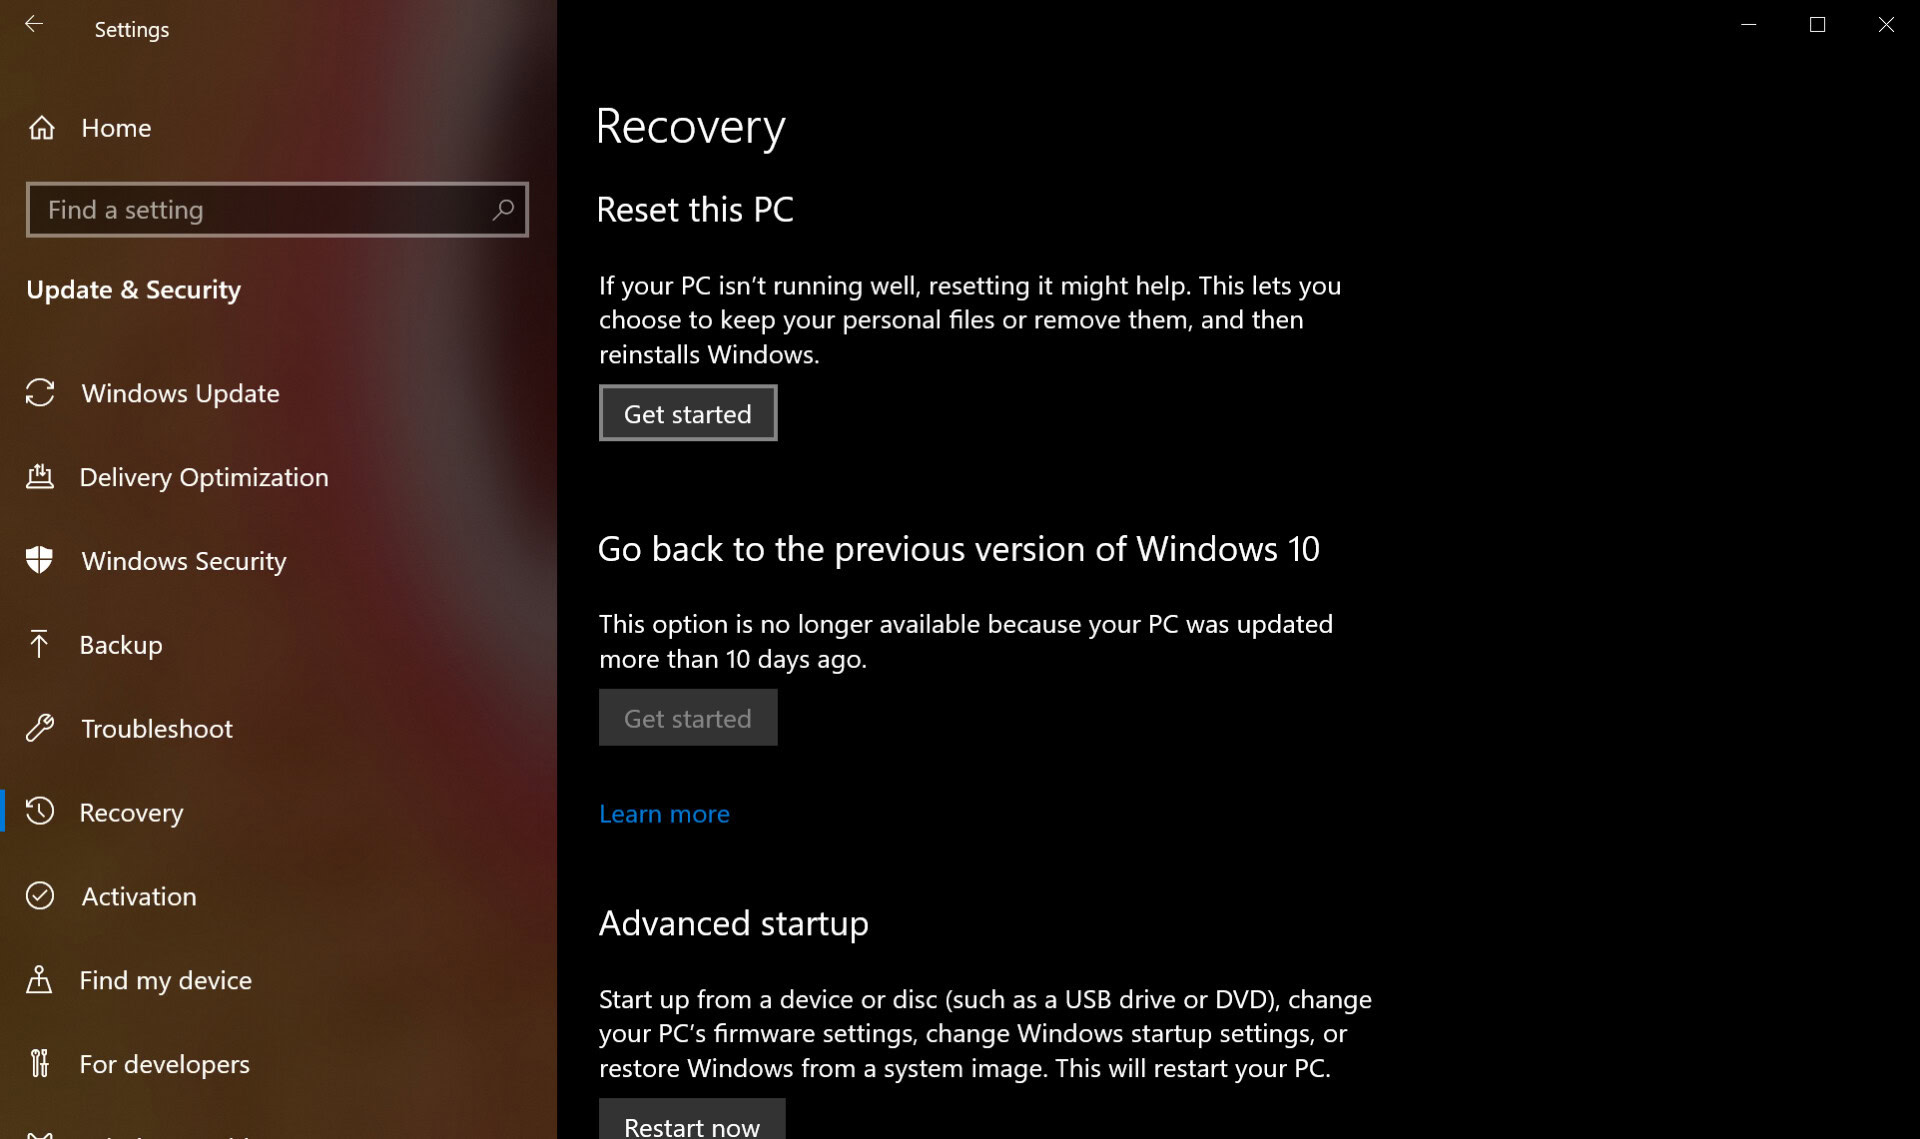
To reset your PC:
1. Click the Start button and then click on the “gear” icon on the left side of the Start Menu. This opens the Settings app.
2. Once the app loads, select Update & Security.
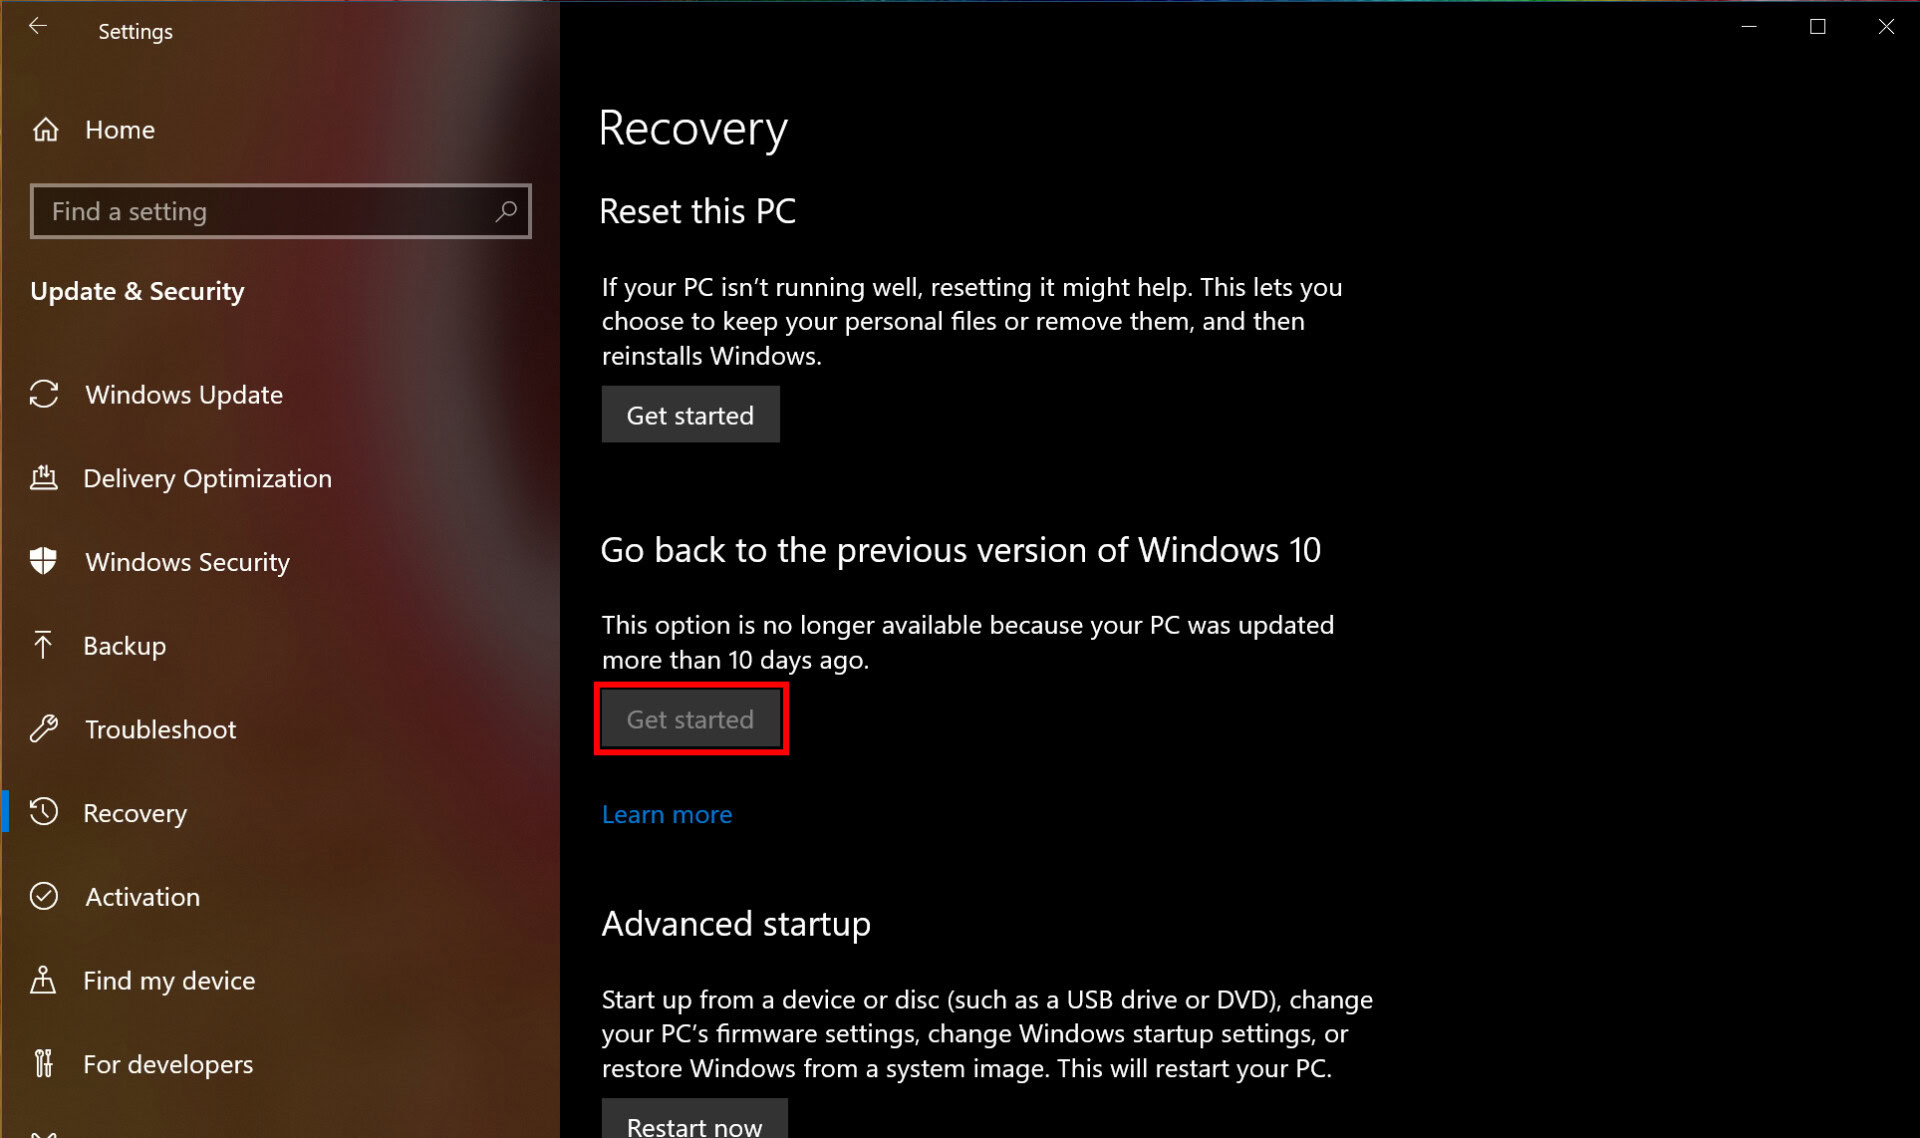
3. Select Recovery on the left.
4. Click on the Get started button under Reset this PC.
5. Choose to keep your files or remove everything. The process to reset the PC will automatically begin.
Go back to the previous version of Windows 10:
1. Click the Start button and then click on the “gear” icon on the left side of the Start Menu. This opens the Settings app.
2. Once the app loads, select Update & Security.
3. Select Recovery on the left.
4. Click on the Get started button under Go back to the previous version of Windows 10 and follow the instructions.
Use Fresh Start for Windows 10:
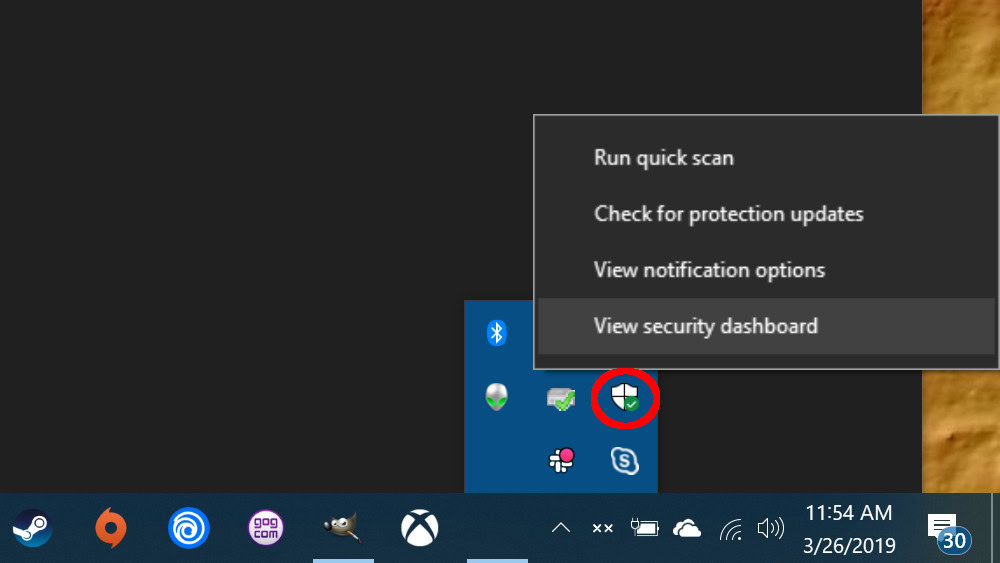
1. Click on the up arrow next to the system clock located on the taskbar.
2. Right-click on the “shield” icon and choose View security dashboard. Alternatively, you can type Windows Security in Cortana’s search bar to load the Windows Security app.
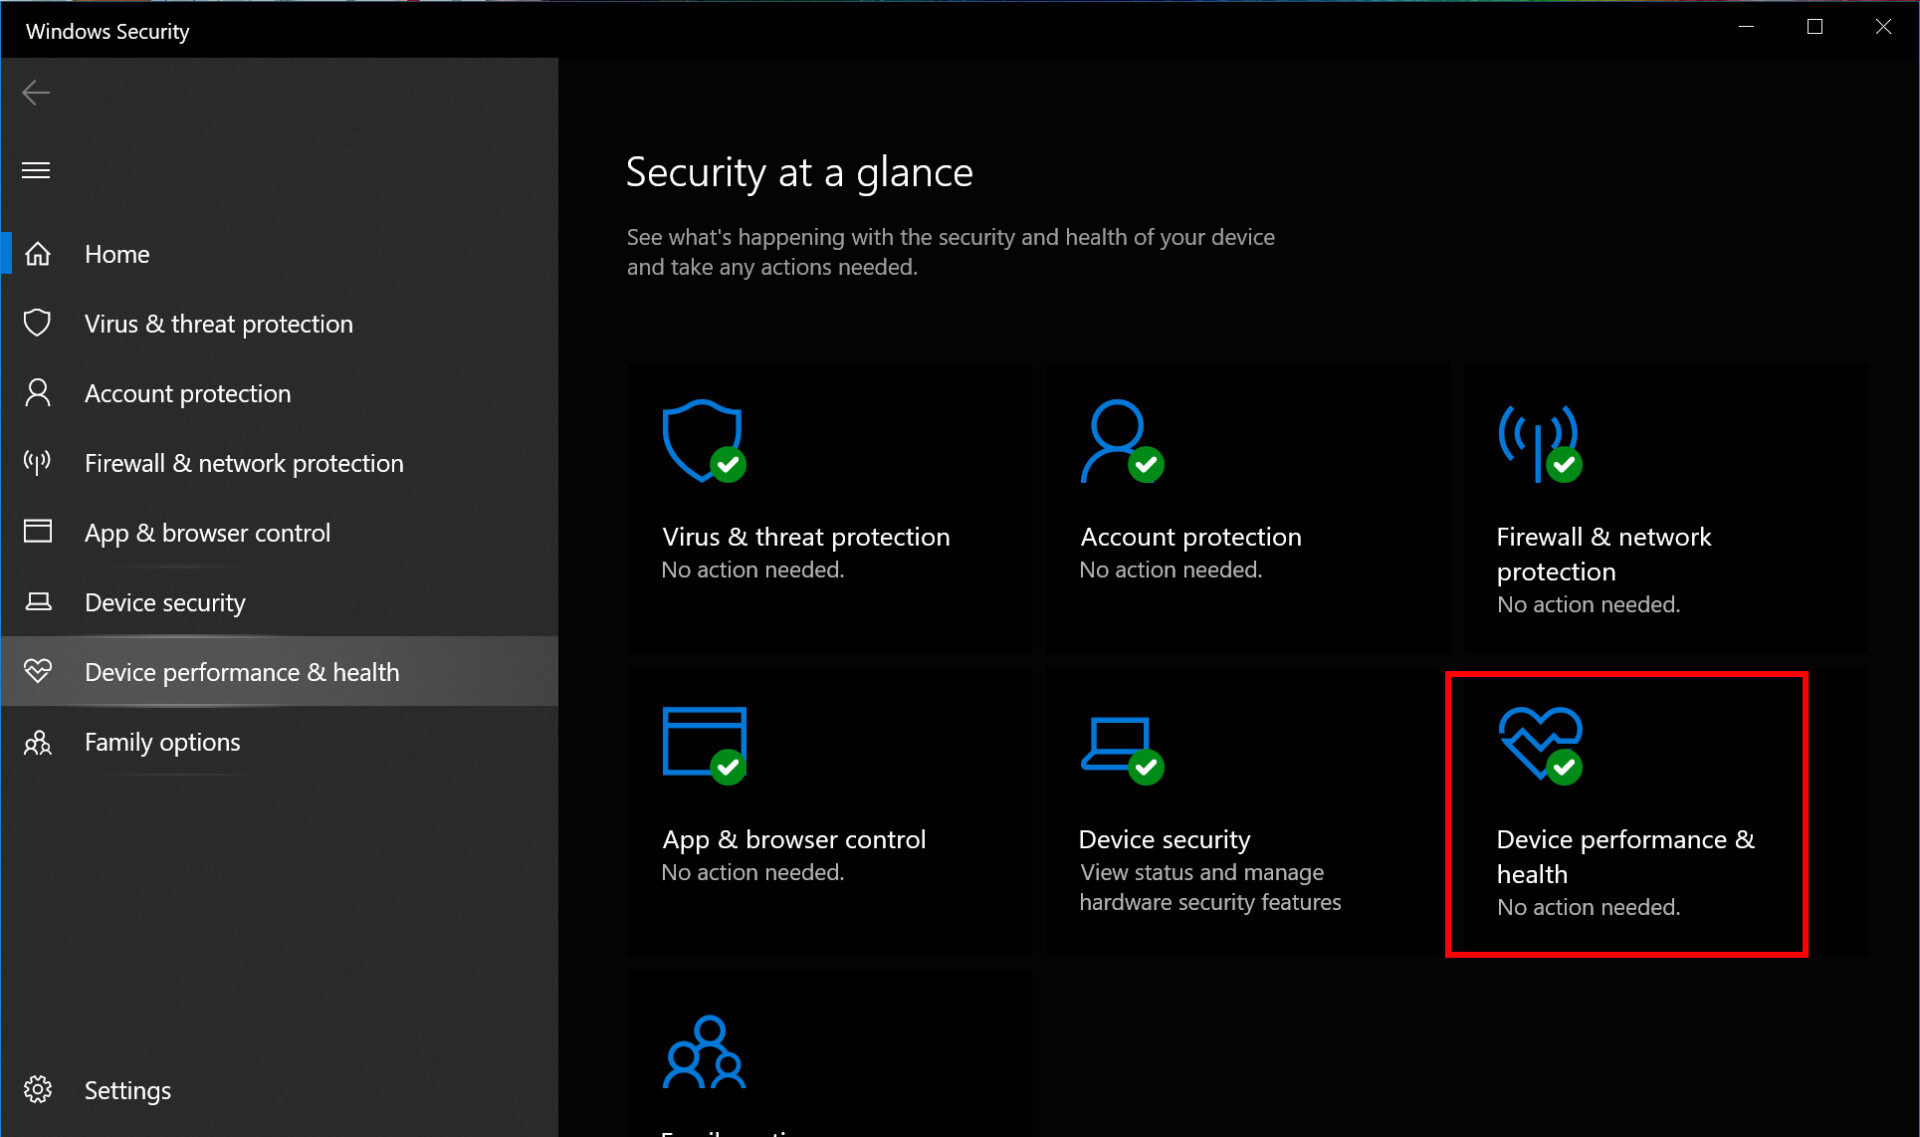
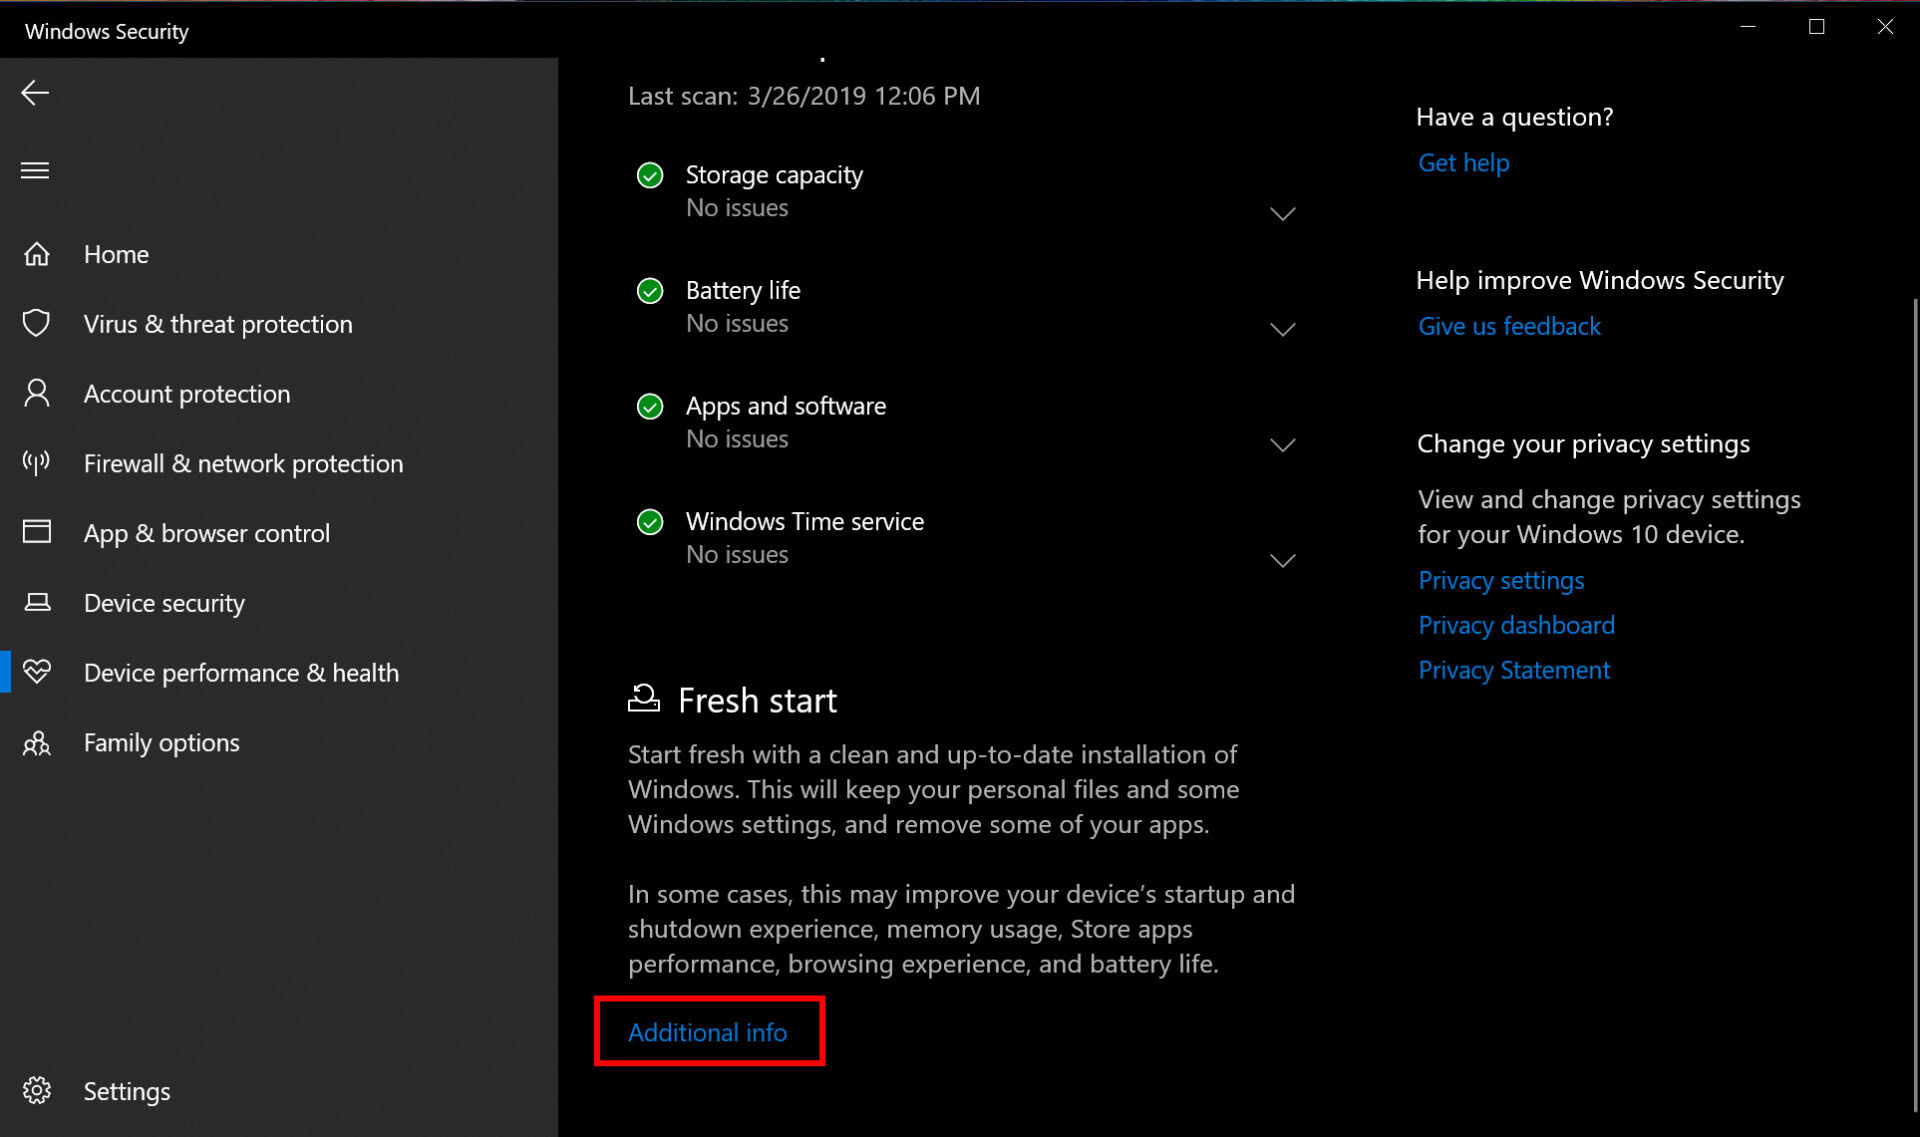
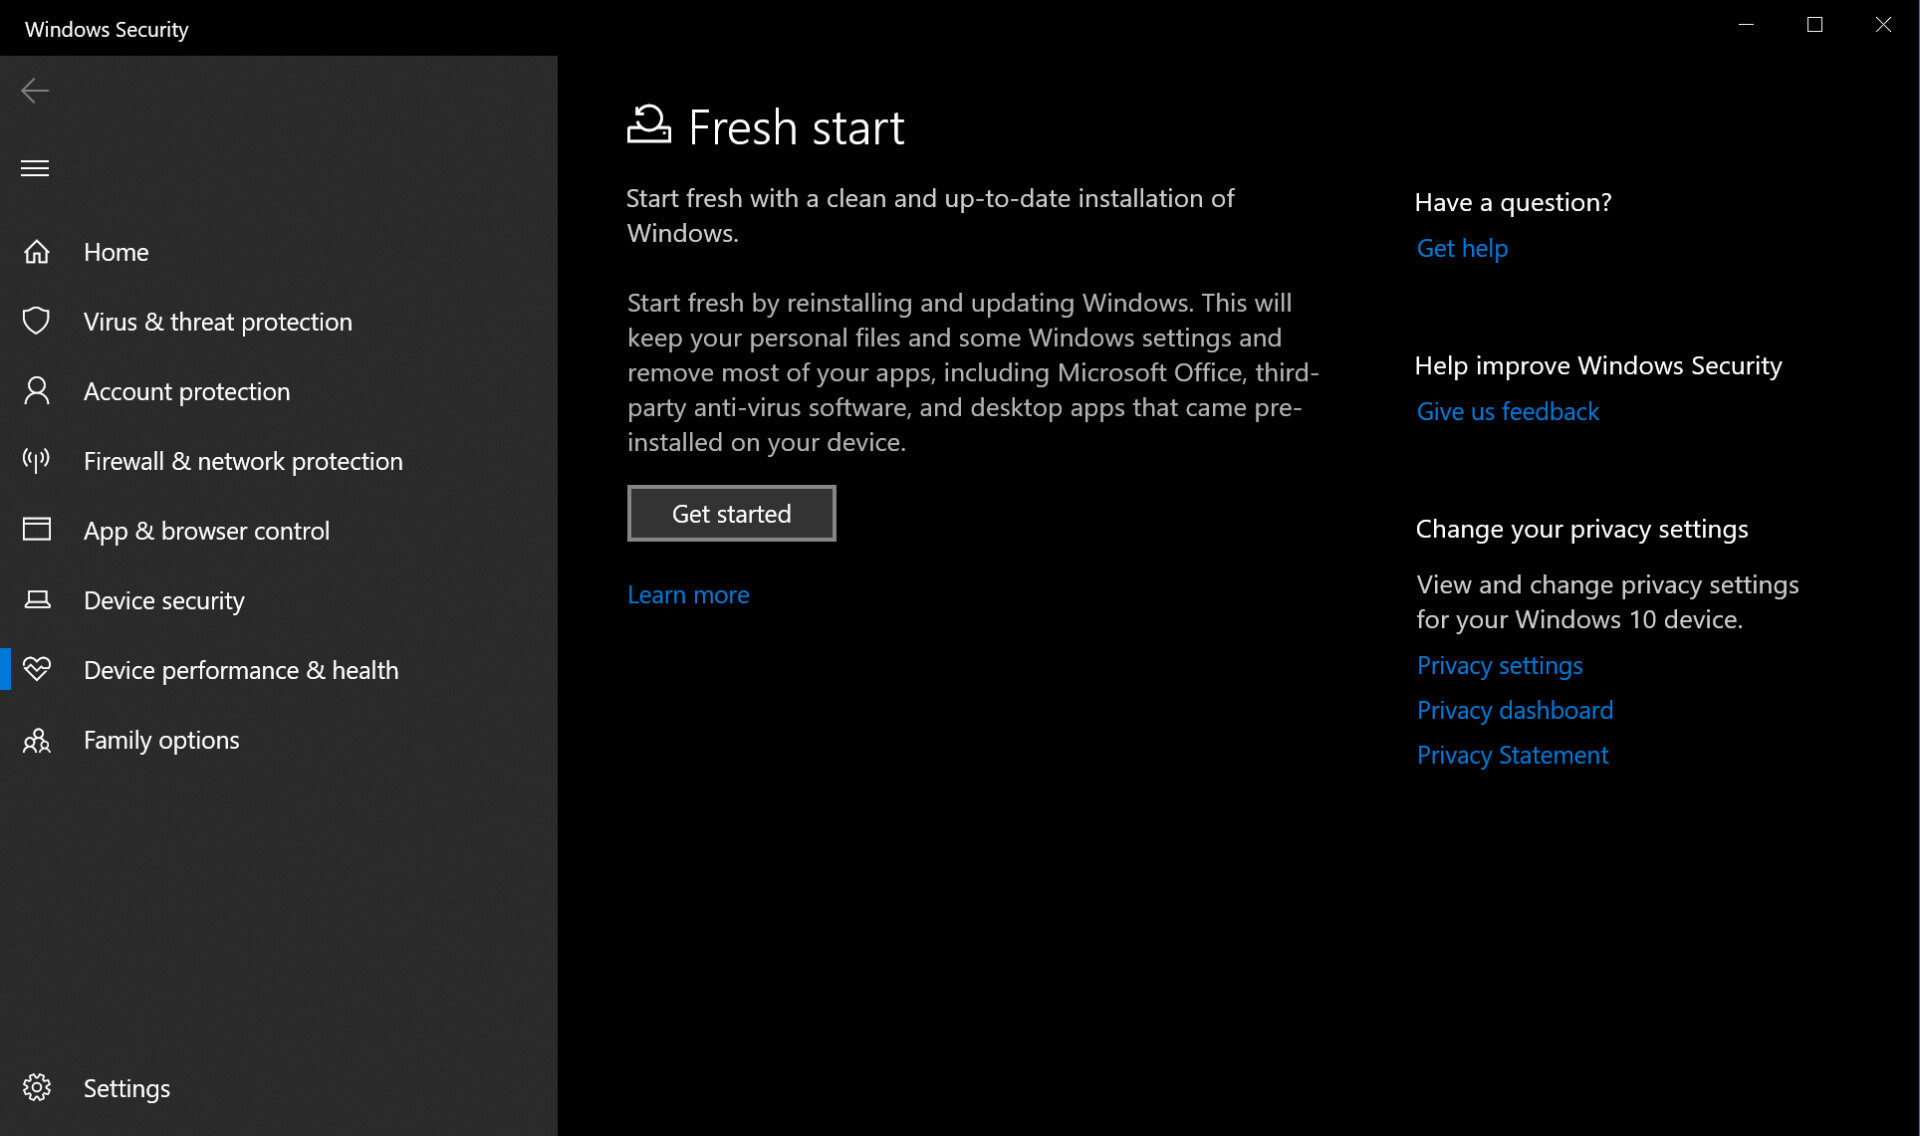
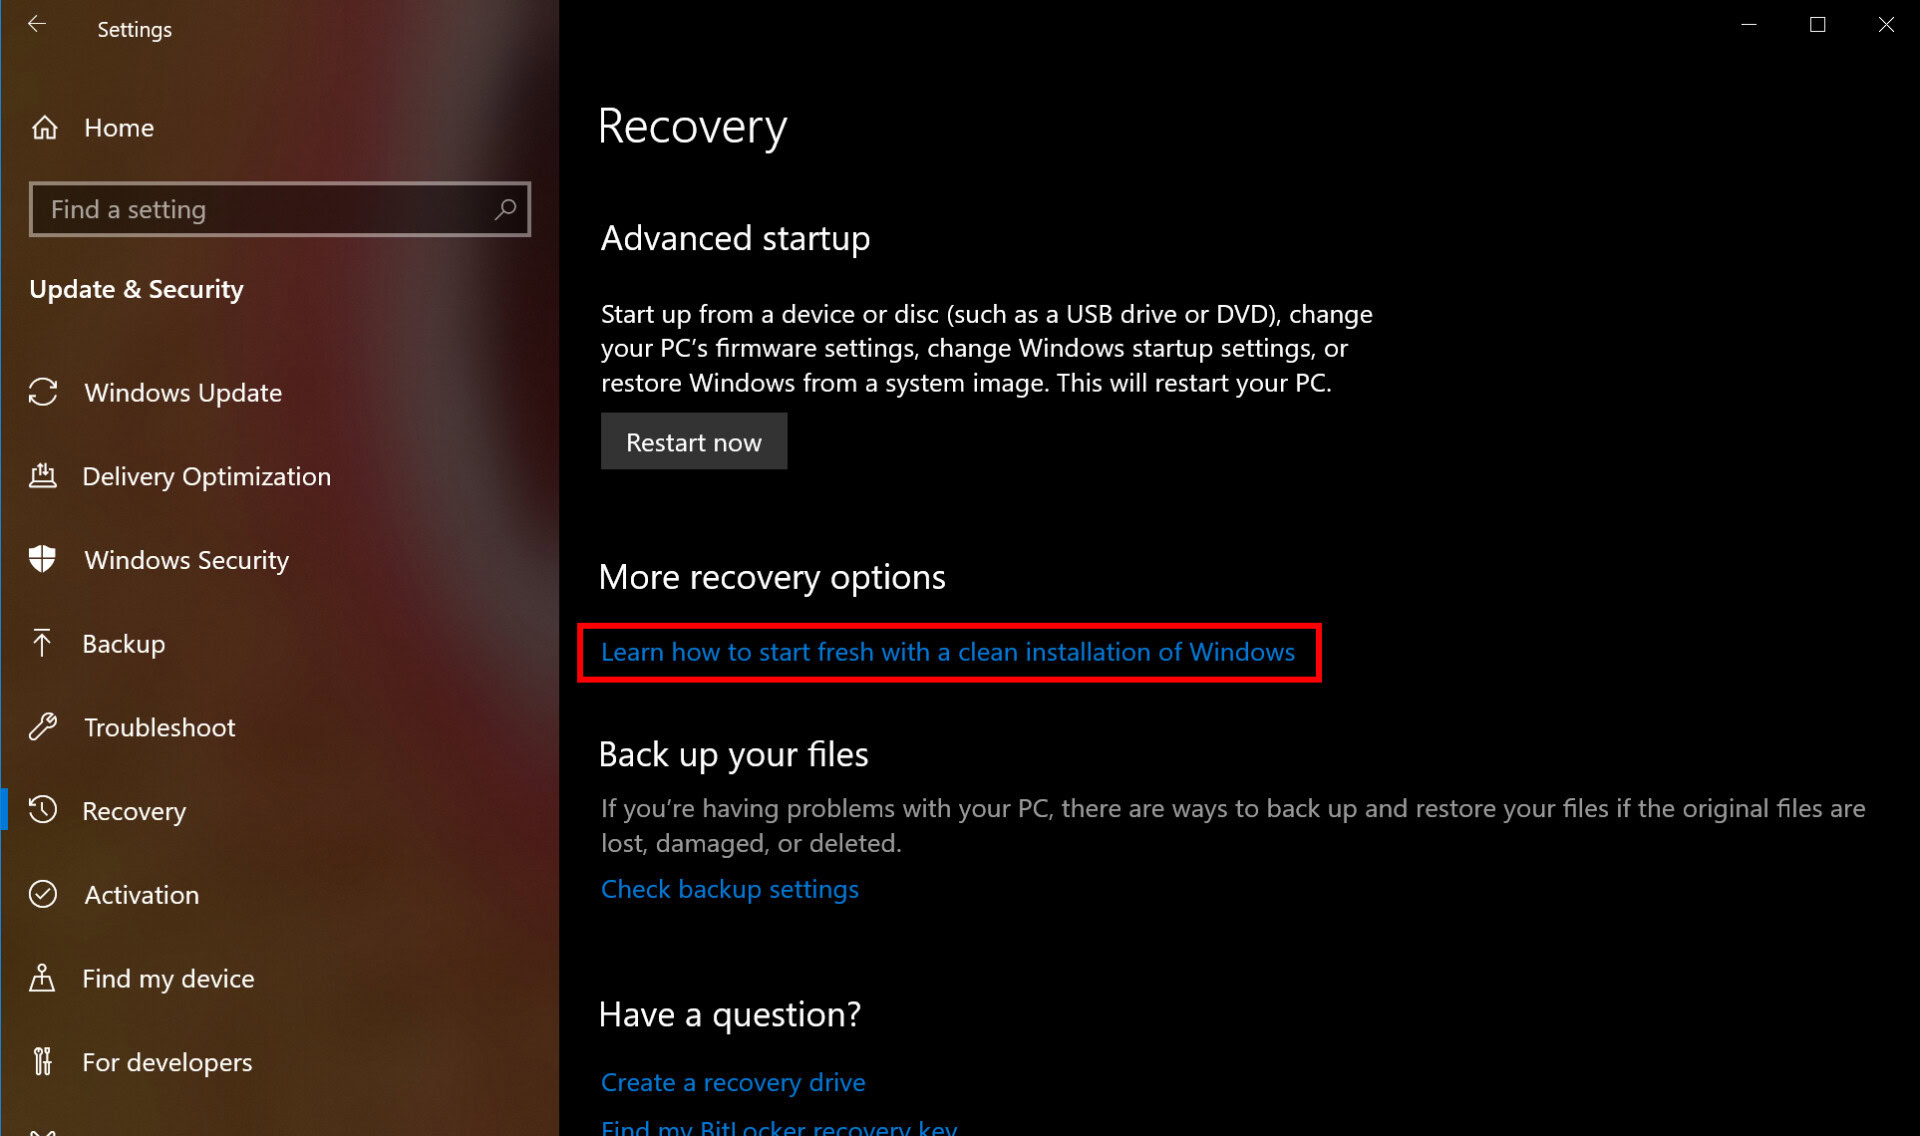
You can also access Fresh start through the Settings app. Here’s how:
1. Click on Update & Security.
2. Select Recovery.
3. Scroll down to More recovery options and click on the Learn how to start fresh with a clean installation of Windows link.
4. A pop-up window asks if you meant to switch apps. Click Yes.
5. The Windows Security app appears with Fresh start in the right panel.
Manually install a feature update
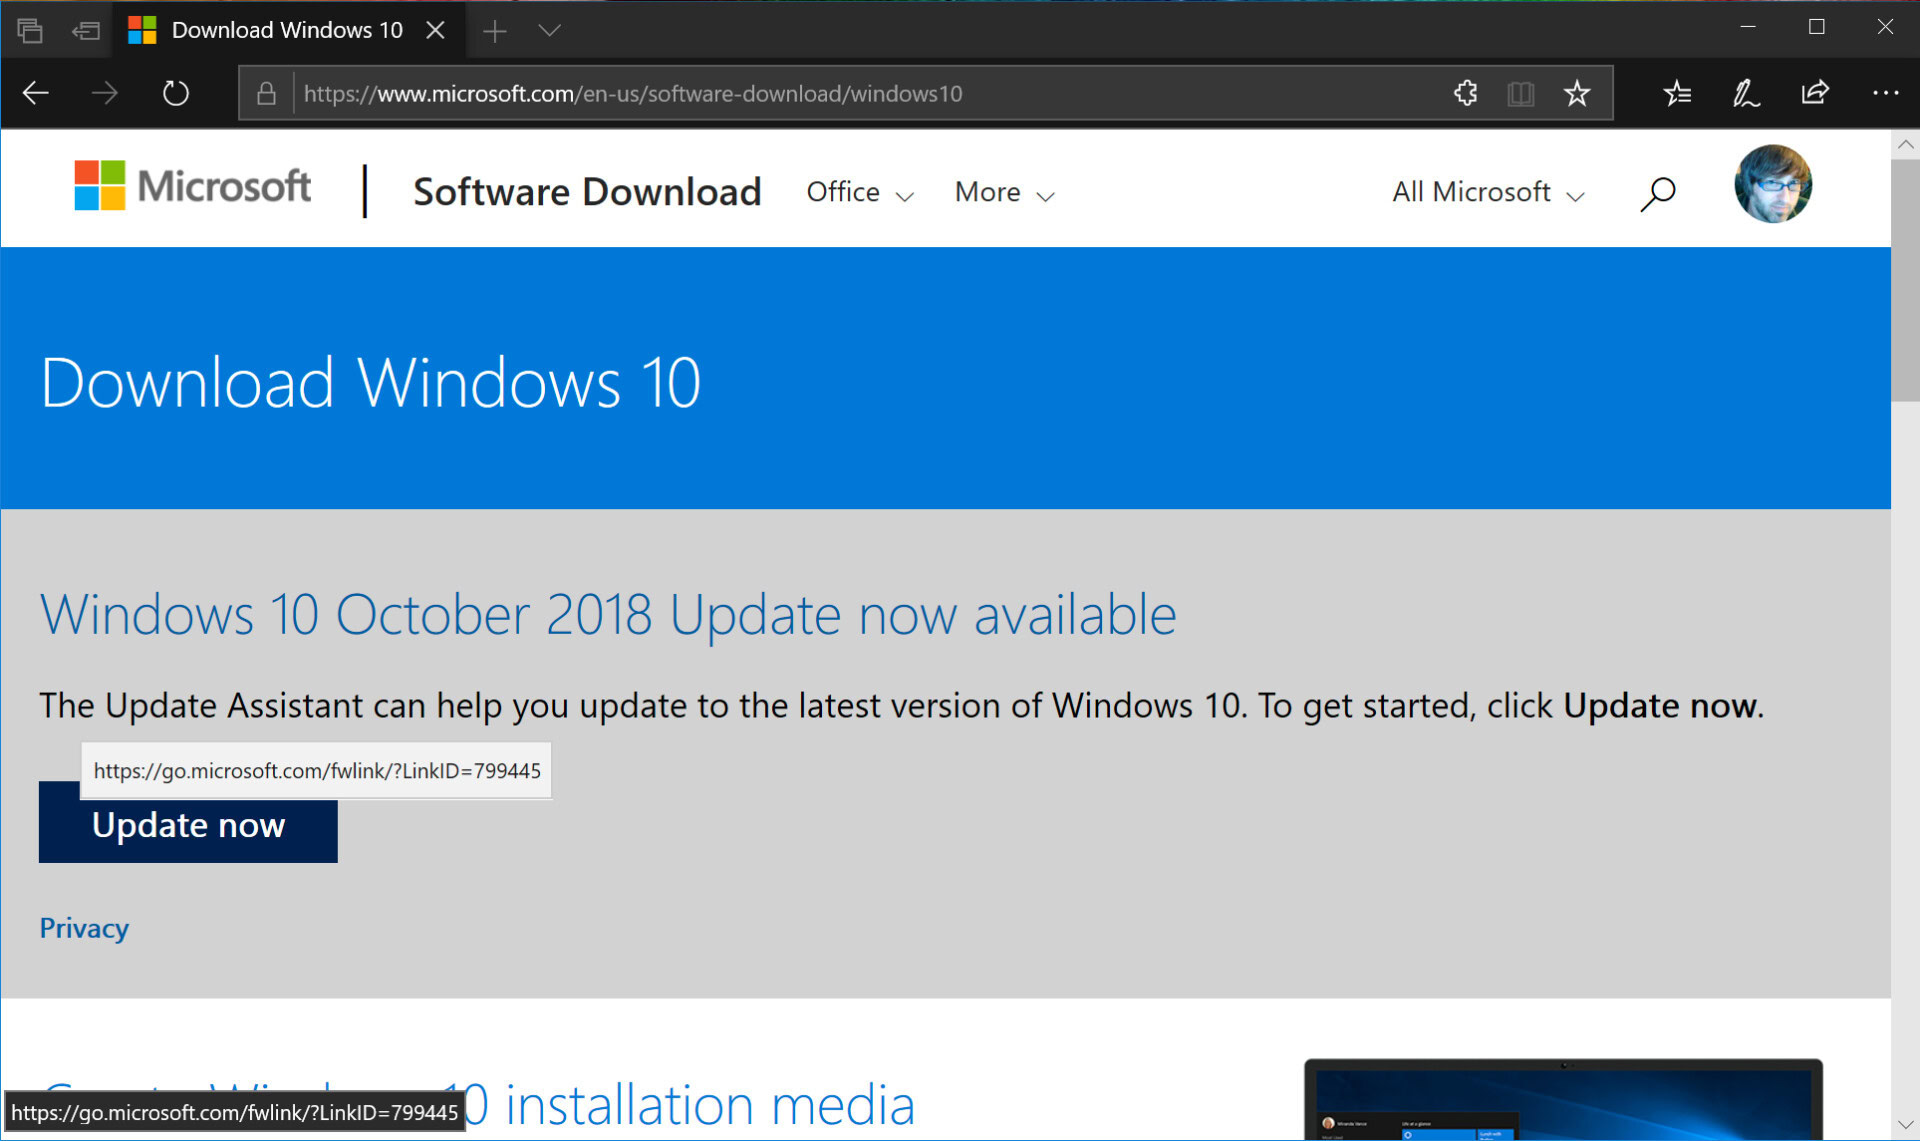
If for some reason a feature update refuses to download and/or install correctly, you can manually upgrade Windows 10. Do the following:
1. Open your browser and head to https://www.microsoft.com/en-us/software-download/windows10.
2. Click on the Update now button to download Microsoft’s Upgrade Assistant.
3. Locate and run the program and follow the instructions. Installing a feature update can take time, so minimize the Upgrade Assistant and continue working until Windows 10 reboots your PC.
So that’s it, you now should know how to update Windows 10. Here are a few other Windows 10 guides to help you on your Windows journey: