Affiliate links on Android Authority may earn us a commission. Learn more.
Let's build a simple endless runner game in Unity
Published onMarch 27, 2017
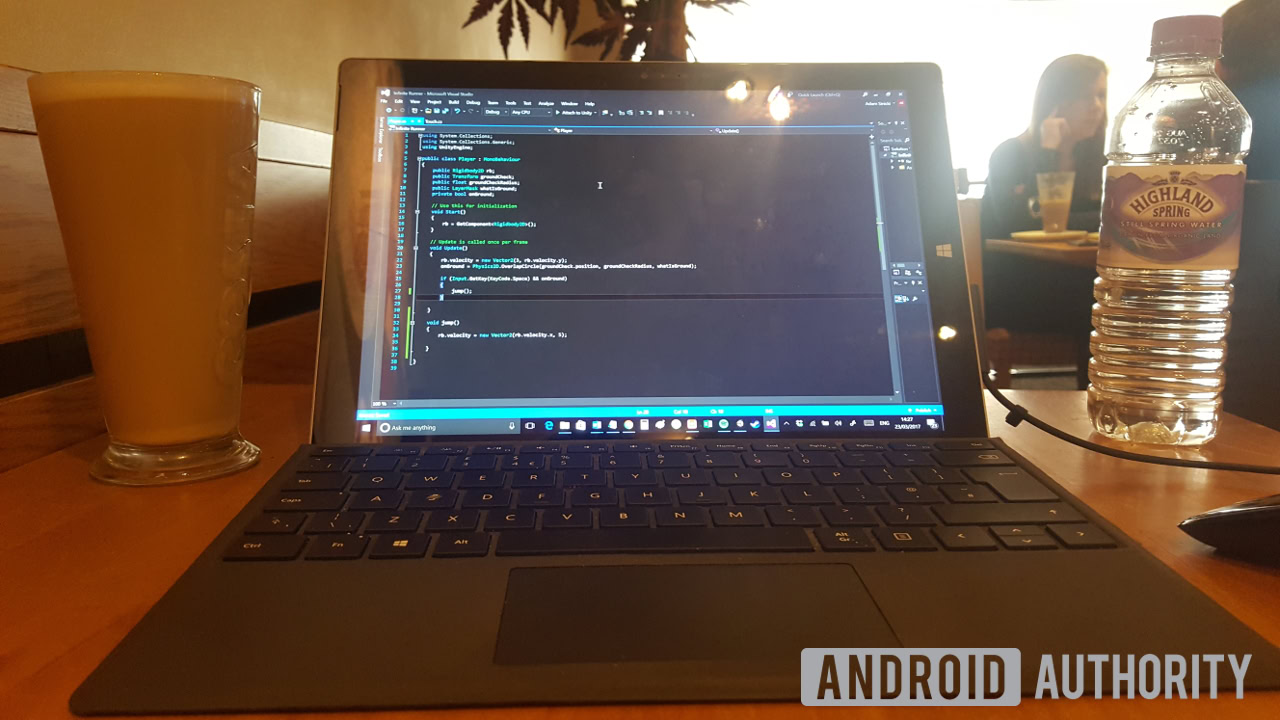
When developing a game or app, it is always important to consider the strengths and weaknesses of the platform you’re targeting. This way, you can ask what kinds of software work best in that context and thereby create something that will provide the best possible experience for your users.
This is a particularly important issue for game developers working on mobile. While mobile gaming is big business, the limitations of the platform are very apparent: screen sizes are small, there are no physical buttons and processing power is modest compared to consoles or PCs.
Some games like ‘The Room’, ‘Angry Birds’ or ‘Pokemon Go’ take advantage of the unique features of mobile platforms to great effect. These games lend themselves to shorter play sessions and the touchscreen, gyroscope and even GPS as input methods in fascinating ways.
Short of developing your own bold new play style though, one of the simplest gameplay styles to emulate that lends itself perfectly to mobile devices is the infinite runner or ‘endless runner’.
Infinite runners are those games that have the character running forward endlessly and then throw obstacles at them along the way for them to hurdle, punch and dodge. What’s so great about this style of gameplay is that it often only has one input – tap to jump. Because the character runs forward on their own, there is no need for directional control.
For developers, infinite runners are also particularly simple to create thanks to the small number of inputs and the resultant simple physics. Moreover, infinite runners are often procedurally generated – meaning that levels are effectively ‘random’ and don’t need to be manually designed.
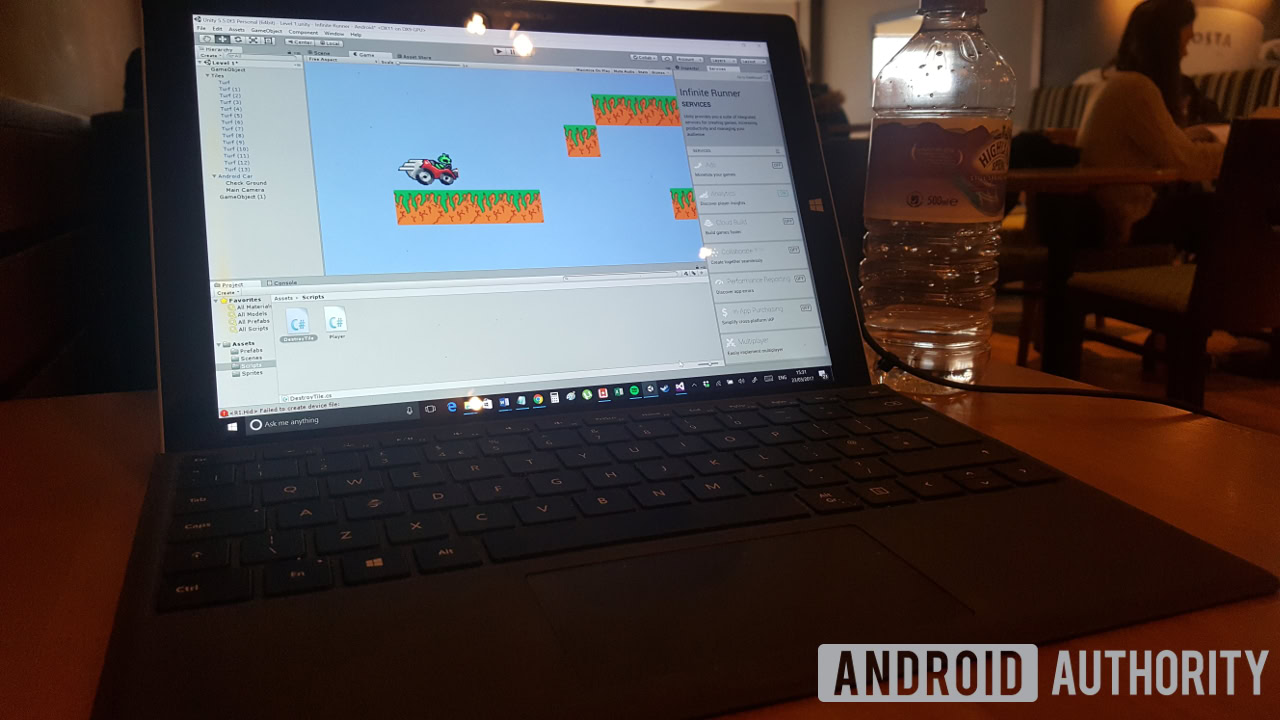
With that in mind then, the infinite runner represents the perfect ‘first project’ for anyone interested in learning game development. That also makes it the perfect choice for a tutorial and in this post, we’ll go through every step necessary to build a functioning infinite runner that will be almost ready for the Google Play Store.
Getting started
First, you need to install and set-up Unity, along with the Android SDK and Java JDK. This is a fairly simple process that involves downloading Unity from Unity3D.com and then following the installation instructions. You’ll get the JDK from Oracle and this should also be pretty straightforward to install – but make a note of the installation paths in both cases. Downloading the Android SDK is a little more complicated but it’s also something we’ve gone over plenty of times before on this site.
Note that when you’re setting up Unity, you’ll have the choice of which components you want to include in the installation. Make sure that you have ticked ‘Android Build Support’ and ‘Microsoft Visual Studio Community 2015’. The latter is the IDE you’ll be using to add the C# code and the former is what will allow us to build APKs.
While you won’t need it for this particular project, it can also be a good idea to select ‘Standard Assets’, which will give you lots of scripts, 3D models, effects and more that you can play around with and use.
The final thing you’ll need to do, is to make sure that you tell Unity where it can find the SDK. That means going to Edit > Preferences > External Tools and then entering the path into the box next to ‘SDK’. Do the same for the JDK.
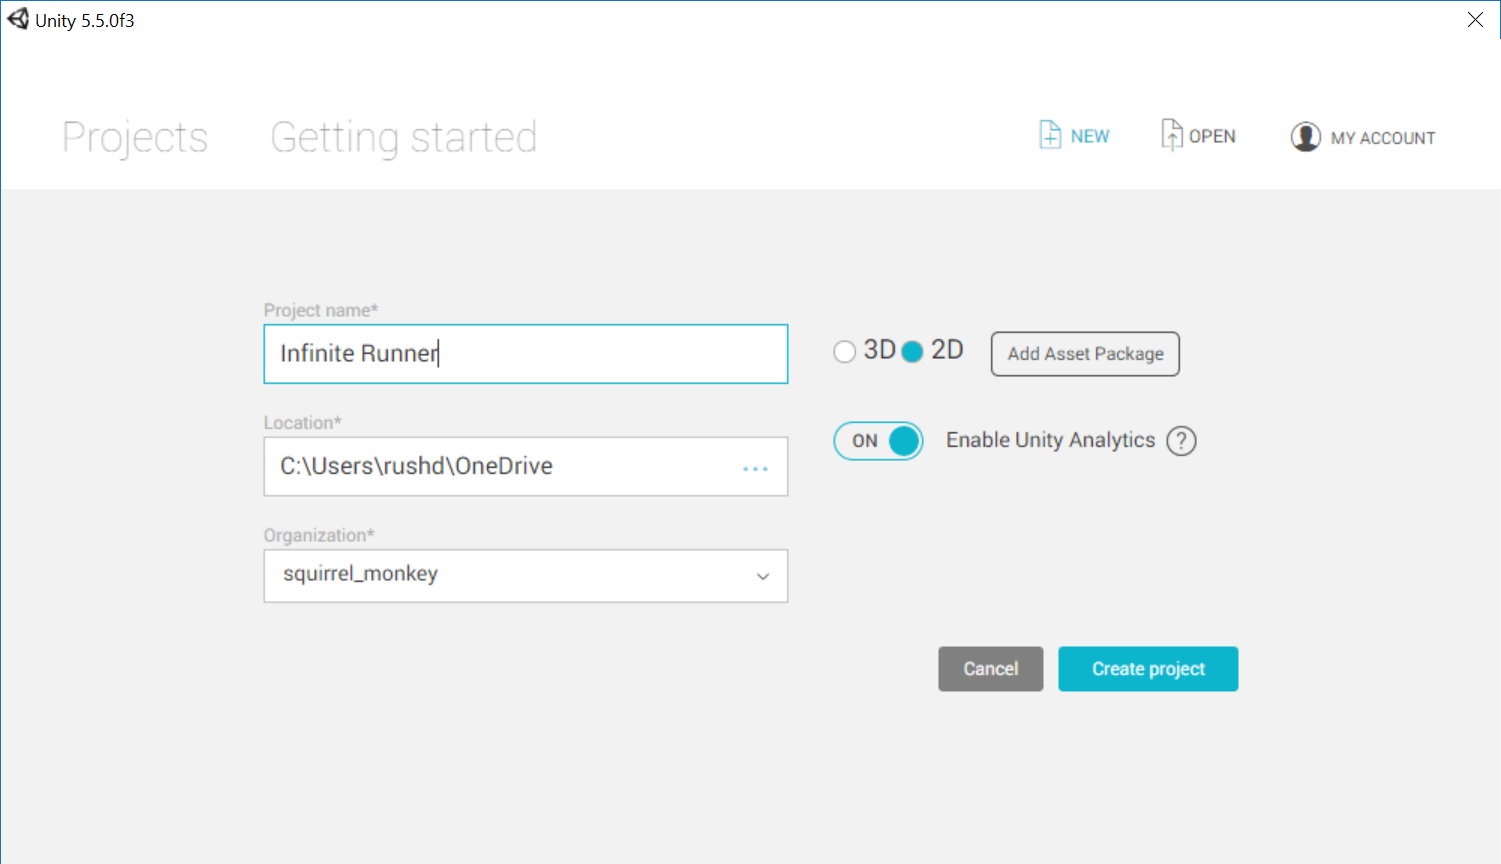
You’ll then want to launch Unity and create a new 2D project. I’ve called mine Infinite Runner because apparently I’m lacking in imagination this morning…
Now we’re going to relatively quickly set up the pieces we’ll need for any basic platformer game. If I appear to be rushing through some of these steps then that is because I’ve actually dealt with many of them before on this site. For a more detailed explanation regarding how to set up an Android platformer, see my tutorial series.
Creating basic tiles
Those that already feel confident though can follow along with these simple instructions.
First, we’re going to create a platform prefab. This will be a basic block that our character will stand on and that we can then repeat over and over again throughout the level to create our obstacles. I’ve created a tile that is 50 x 50 pixels and as this will be the top layer of ground, I’m going to call it ‘Turf’. Feel free to use it in your own games, or if you want tips on creating pixel art yourself, check out this previous post.

To import the sprite into your Unity project, first create a new folder in your Assets called ‘Sprites’. Right click on the Project window and then choose Create > Folder and name as appropriate. You can then either drag the sprite into the window from explorer, or you can right click anywhere and select Import New Asset.
Select the Turf sprite in the Project window and then set ‘Pixels Per Unit’ to 50 in the Inspector window (on the right) and click Apply. Now you should find that if you drop the sprite into your Scene view (drag it from the Project window), it will perfectly fit one of the boxes created by the default grid. Those boxes are the ‘Units’ in question.
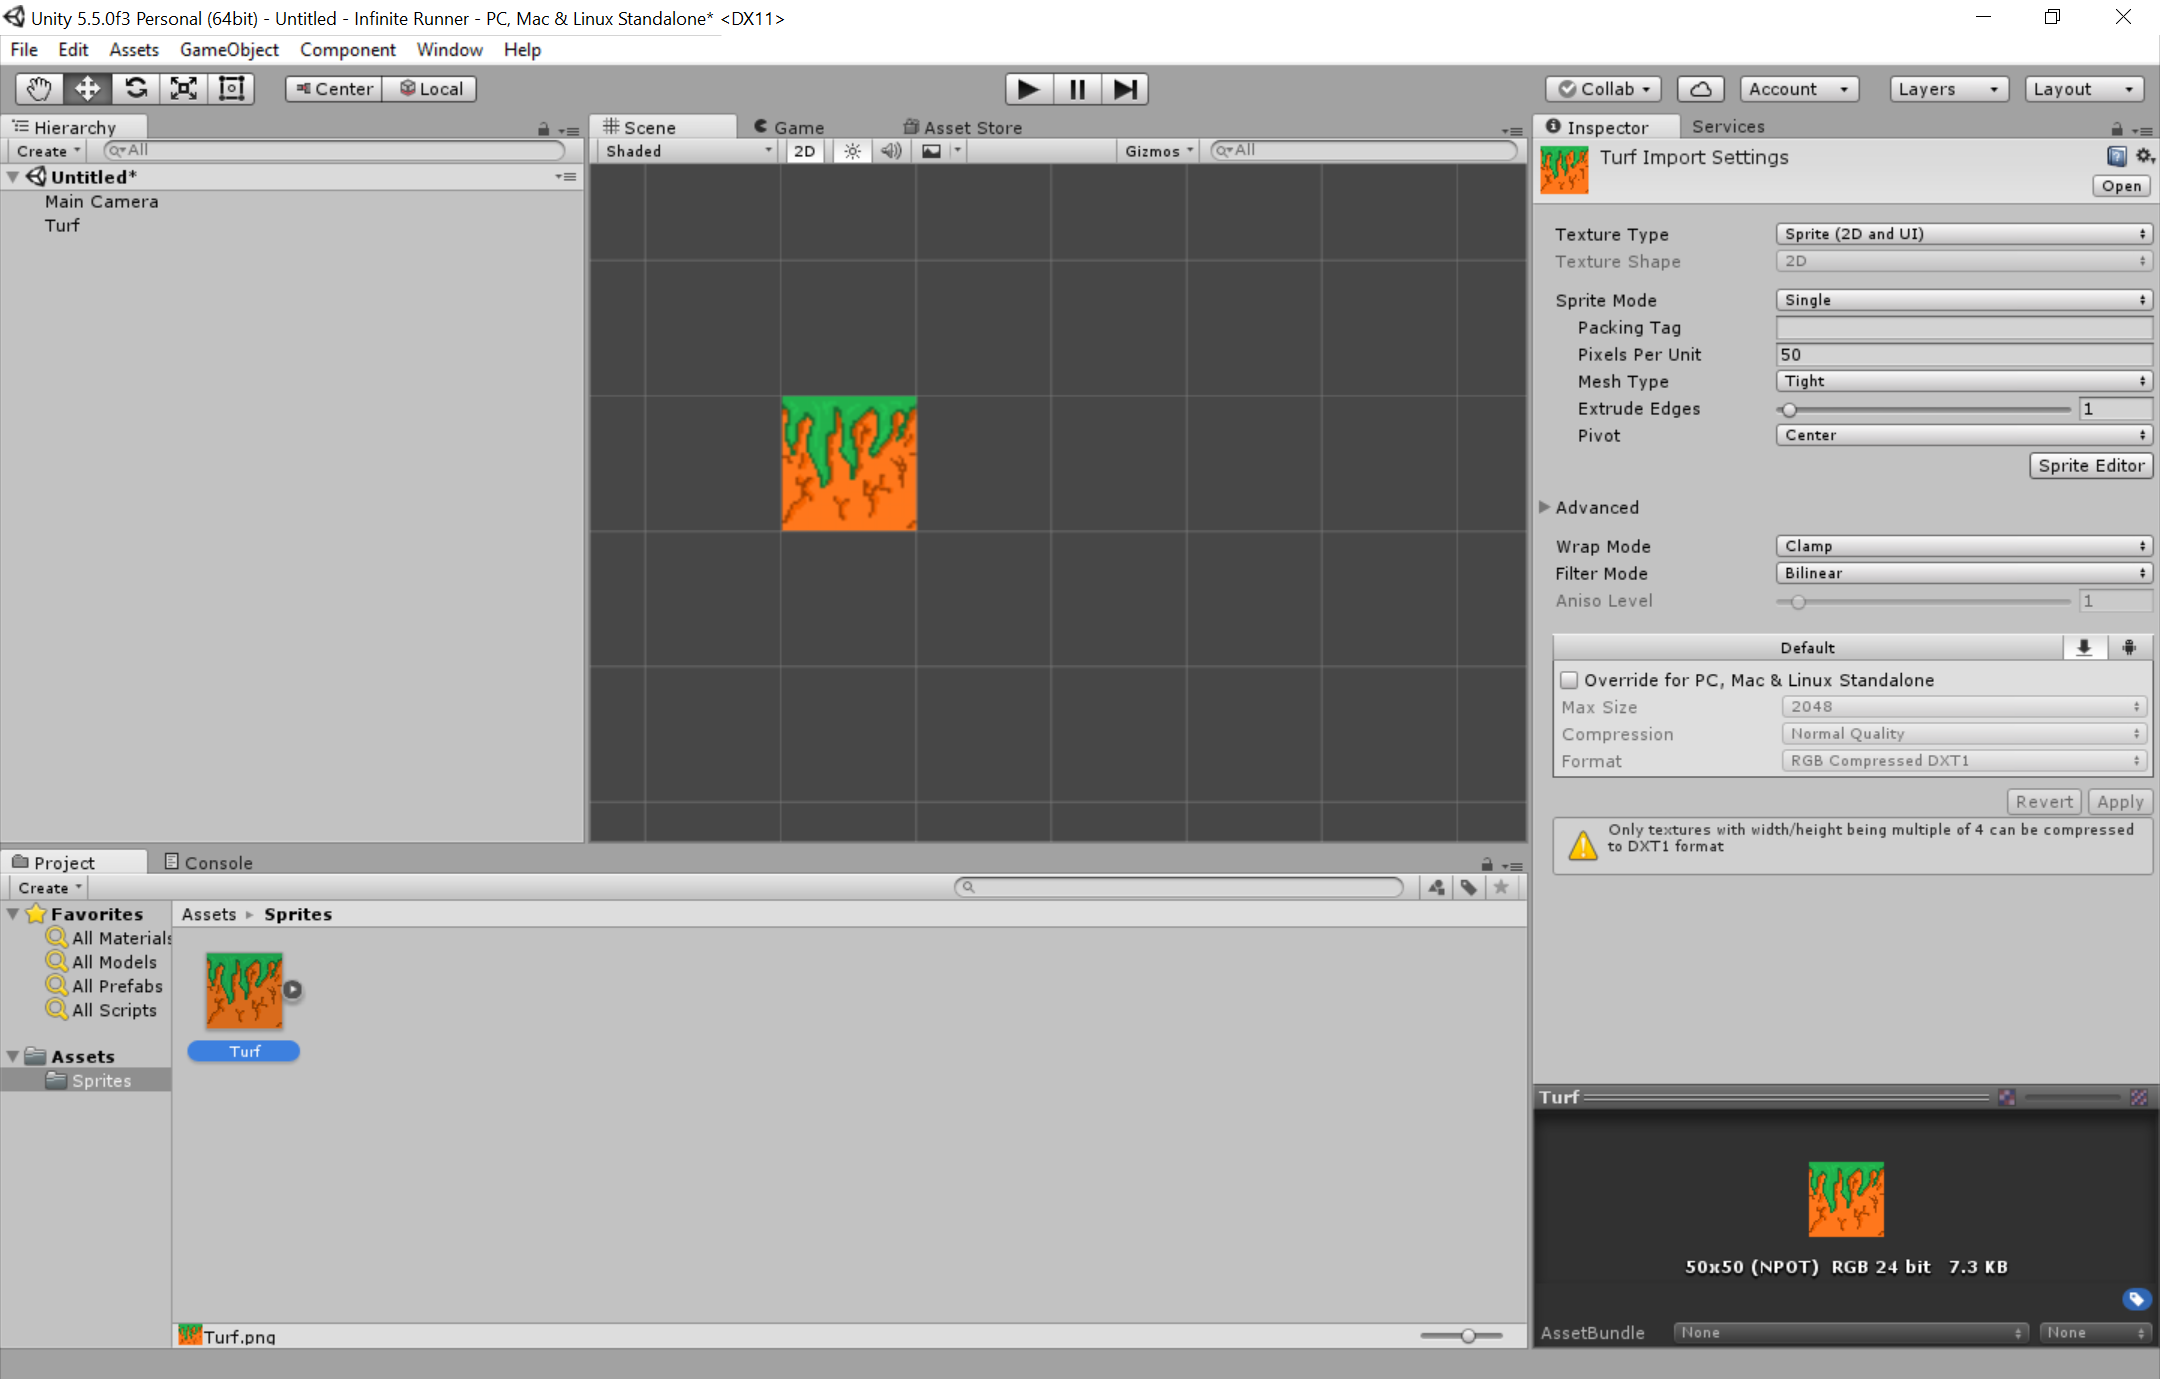
Better yet, if you click on the sprite in the Scene view and then move while holding control, you should find that it moves in whole units and ‘snaps’ into place. This means we can now easily copy and paste plenty of platforms around the place while keeping them perfectly spaced apart. To move sprites, make sure you have the move tool selected in the top right – this is the second from the left and looks like four arrows. If you find that the sprites are moving too far or not far enough, then go to Edit > Snap Settings and make sure that ‘Move X’ and ‘Move Y’ are set to ‘1’.
Once this is all working properly, select the sprite in the Scene view – not the Project window – and then click the button that says ‘Add Component’ in the Inspector. Choose Physics 2D > Box Collider 2D and a thin green box should appear around the outside. This is our collision cage and it will tell the game where the boundaries of the platform are. It should perfectly fit around the Turf sprite. Tick ‘Used By Effector’.
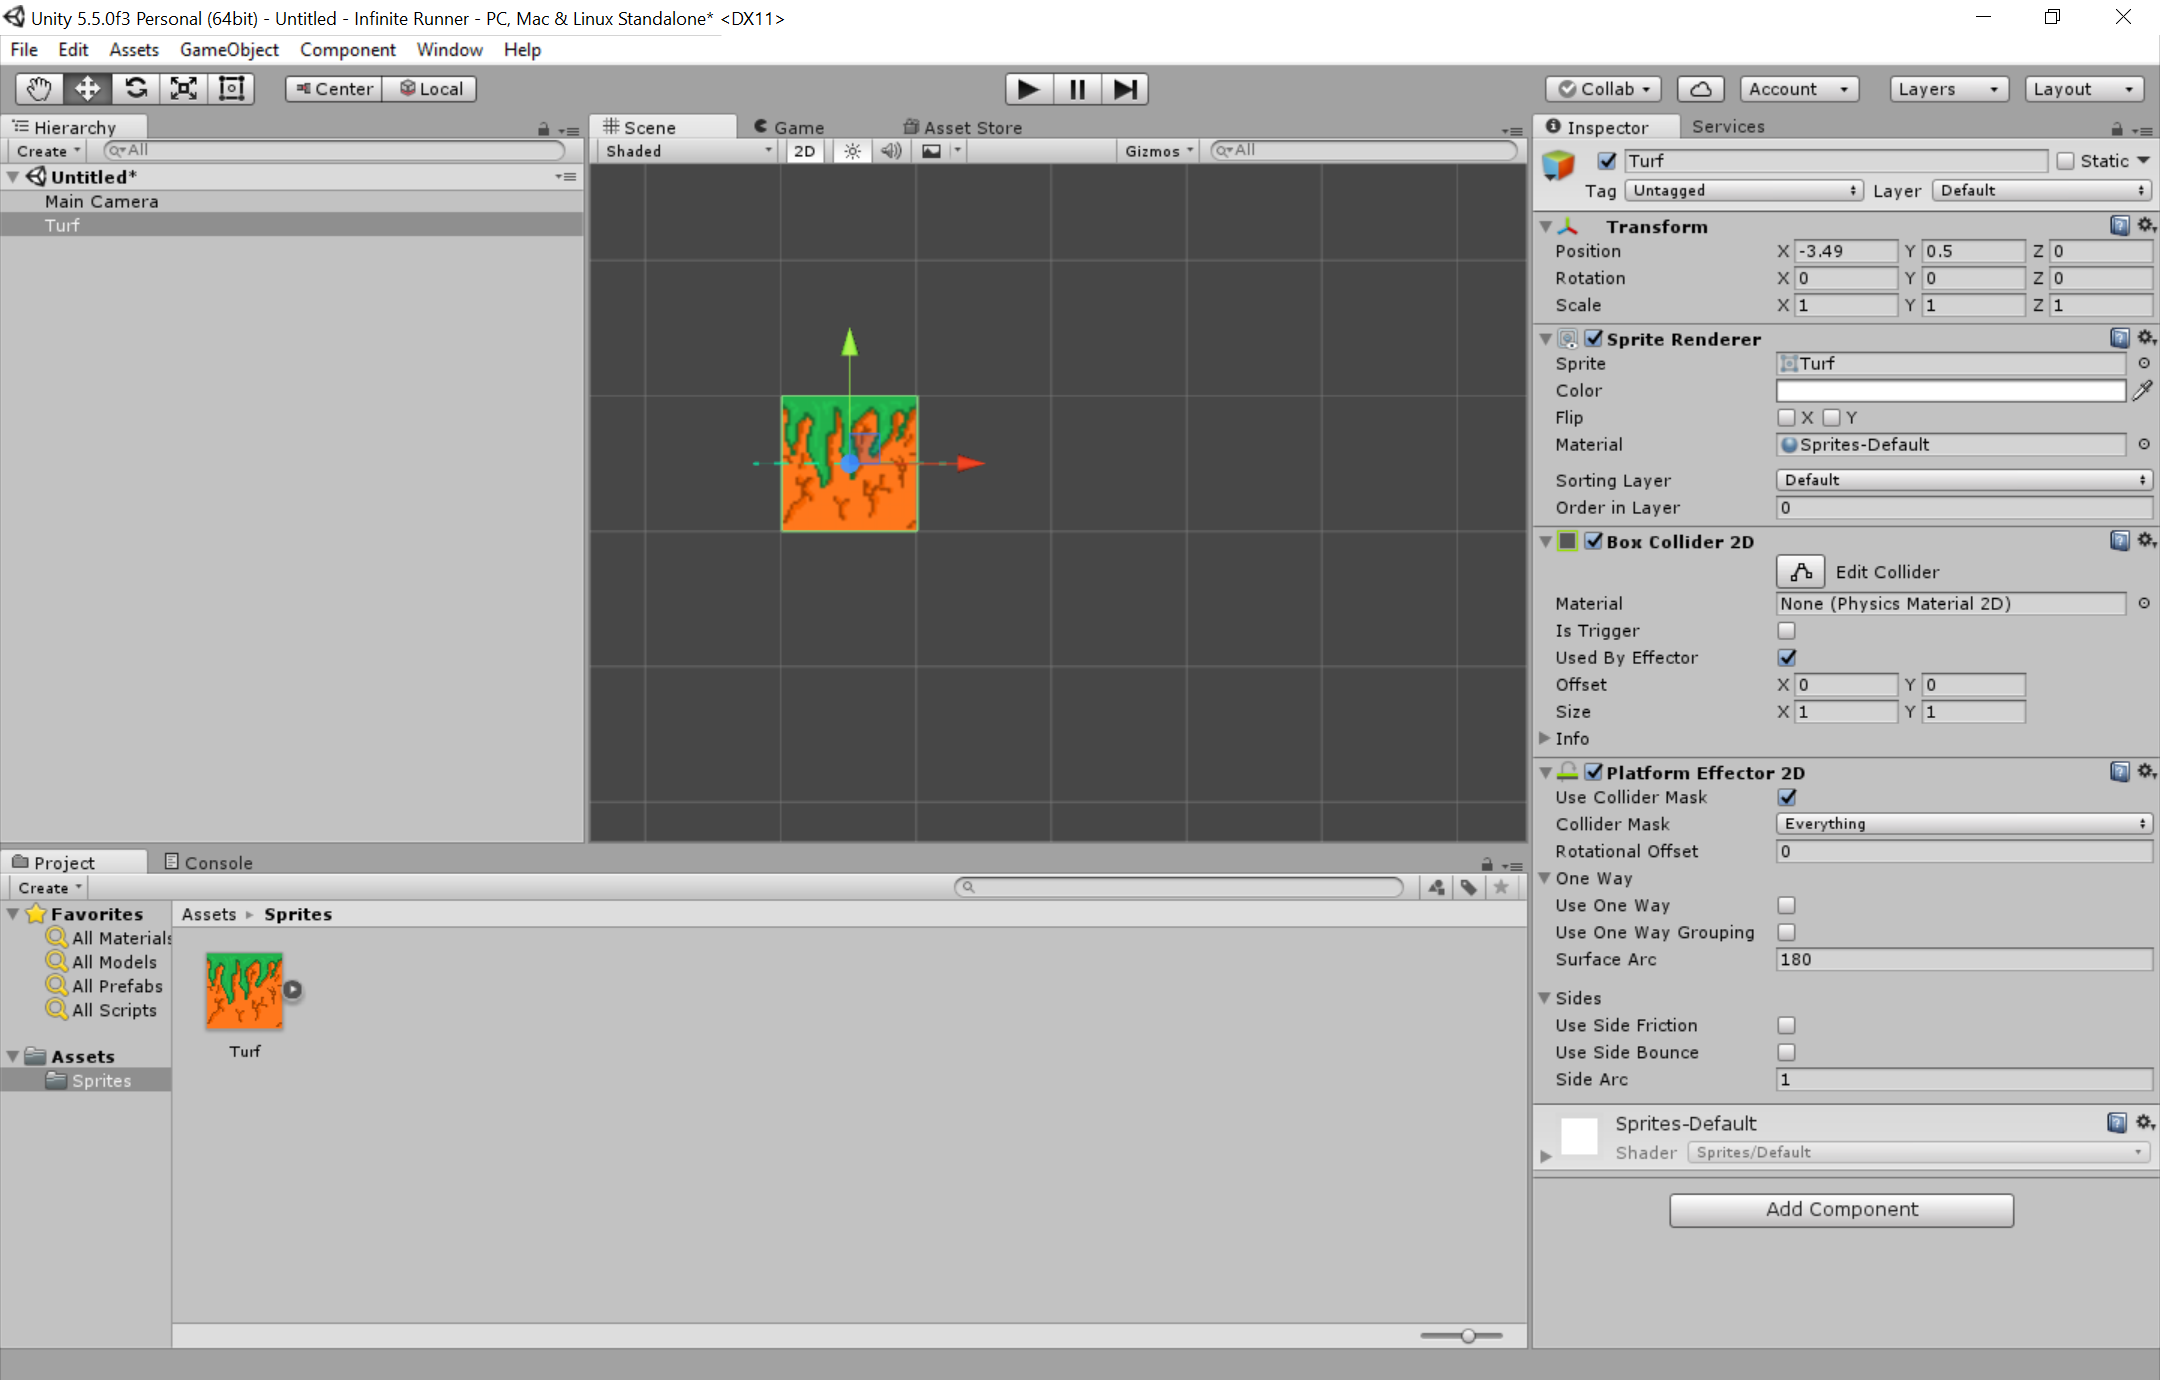
Then click ‘Add Component’ a second time and select Physics 2D > Platform Effector 2D. Untick ‘Use One Way’. Don’t worry too much about what this does for now, but suffice to say that it makes platforms behave like platforms – preventing things like excessive friction.
Setting the scene
Now before you go pasting those tiles around the level, you’re going to head into the Assets folder again (click ‘Assets’ in the Project Window) and then create another folder called ‘Prefabs’. Now, grab your Turf sprite from the hierarchy on the left – not the Project window – and drag it into that folder.
Whereas the ‘Turf’ that exists in the Sprites folder is just a sprite, the Turf that is now in the Prefabs folder is a GameObject. This means that it has all the properties and behaviors that we’ve given it so far in tact – such as its collider and its effector. Delete the ‘Turf’ from your Hierarchy and then drag this ‘new’ Turf into the Scene from your prefabs folder.
Now the ‘Turf’ that is in your Scene is an instance of your Turf object. That means that any changes you make to the prefab will instantly be reflected across all instances. In other words: if you decide you want to change something, you can make a single change to the prefab and that change will be reflected across all the tiles in your game. Consider it like a blueprint or a ‘master copy’.
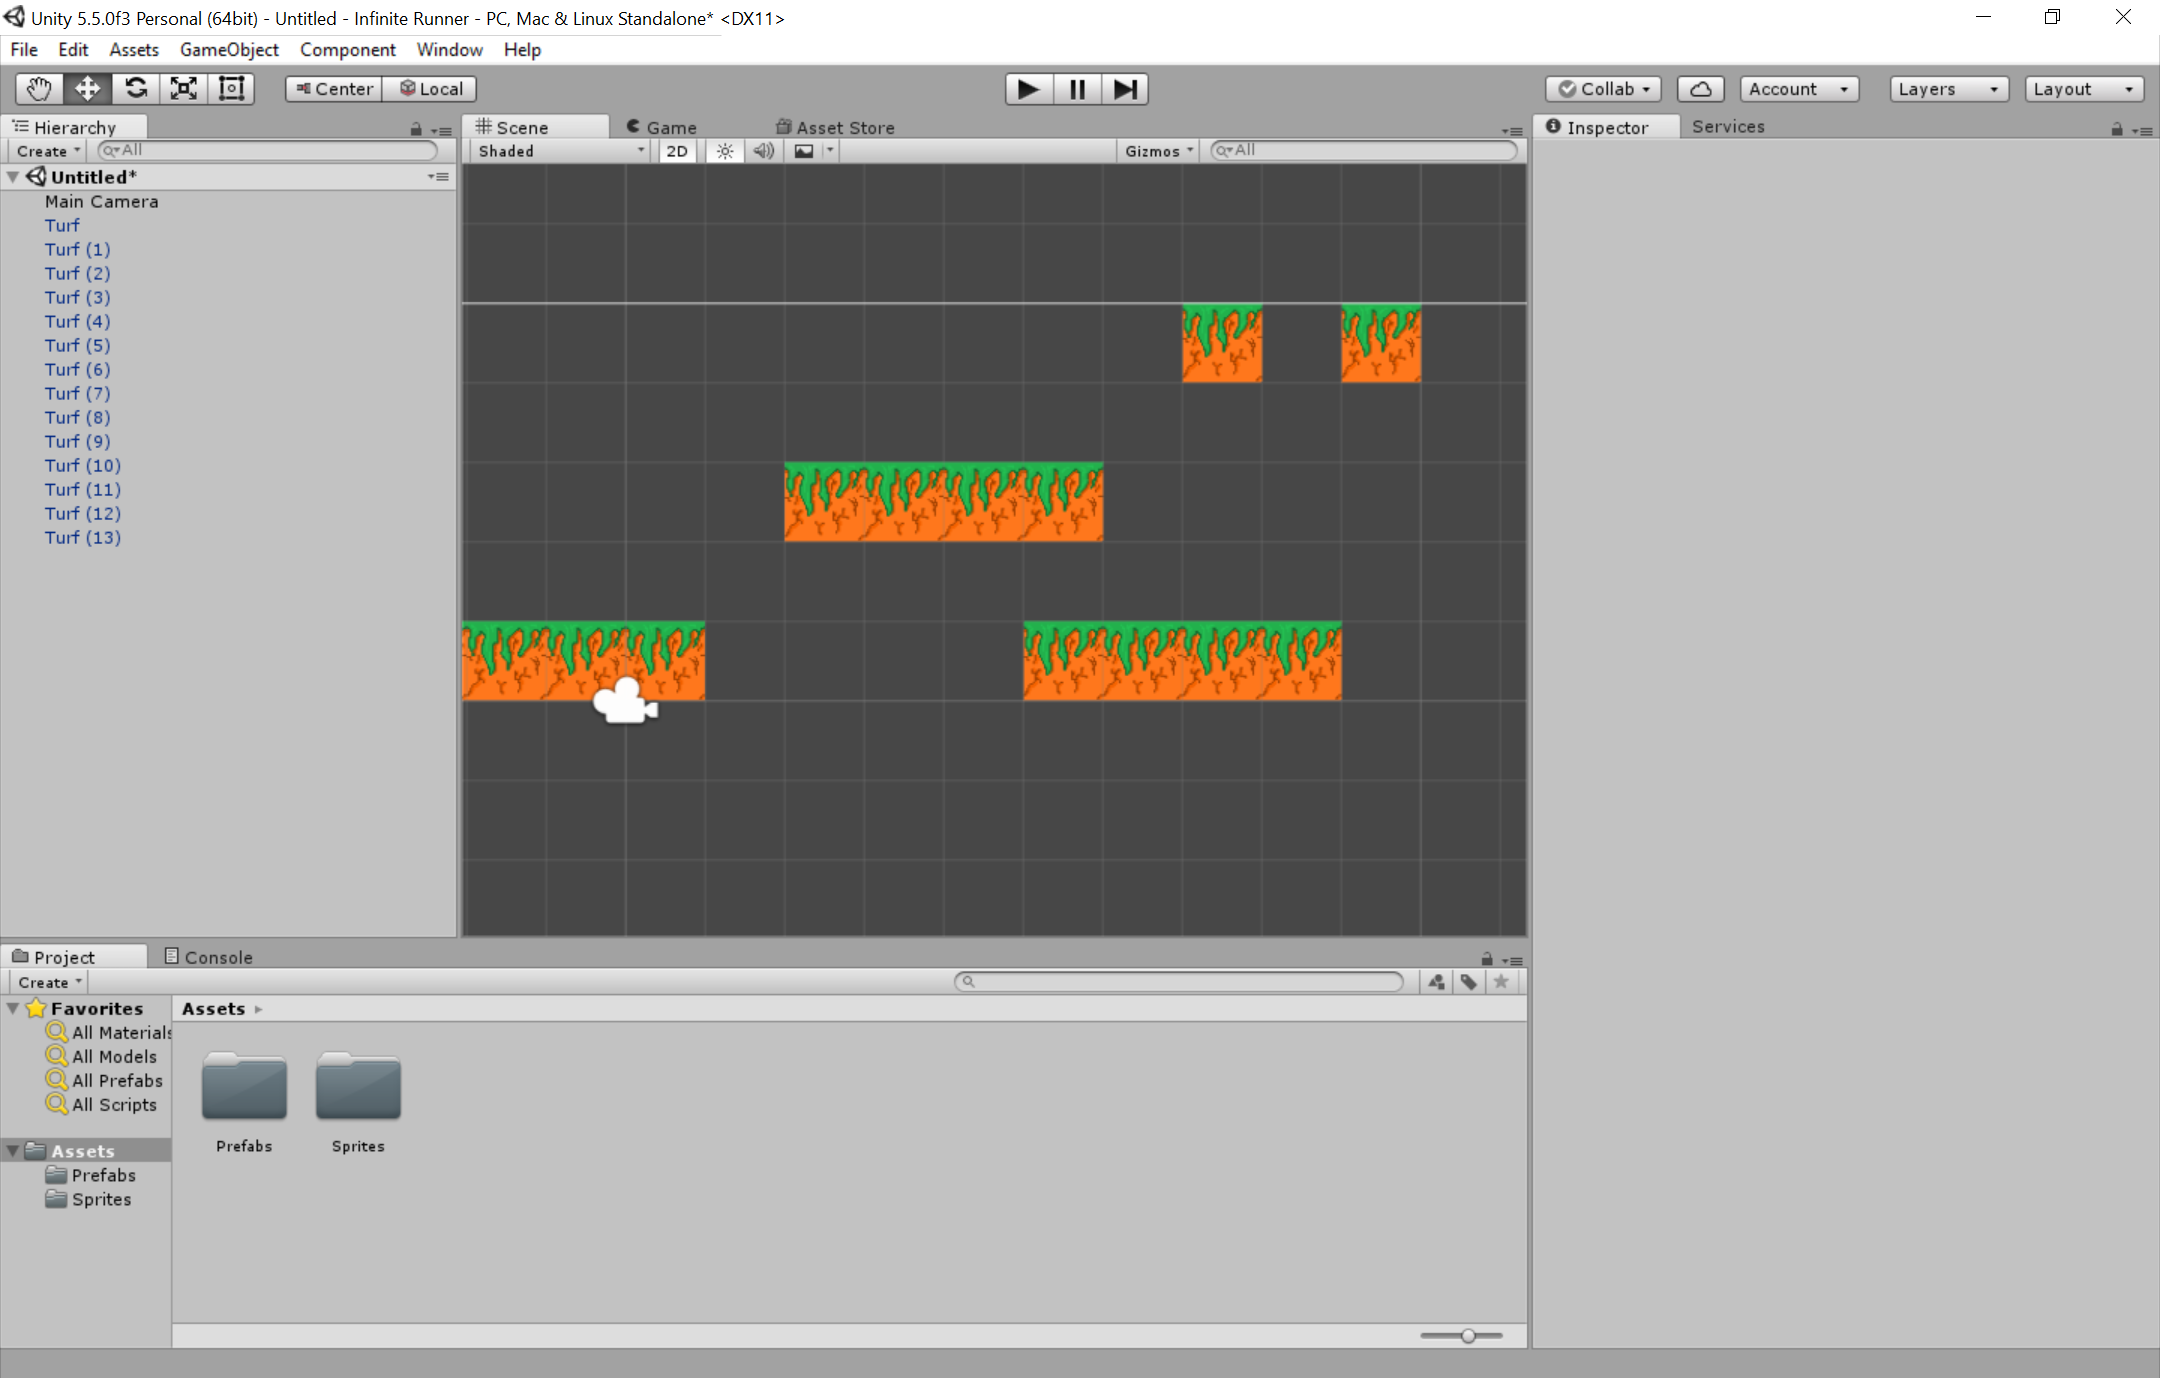
This means you’re now ready to start building your level! Copy the Turf object in your Scene view and then paste it and use Ctrl + drag to create nicely tiled platforms.
Note: If you’re a bit OCD like me and you want the tiles to line up perfectly with the grid, then set the position of the first tile to x = 0.5 and y = 0.5.
Before things start getting too messy, I recommend tidying up your Hierarchy slightly.
To do this, right click anywhere in that window and then choose ‘Create Empty’. This will birth an empty GameObject called… GameObject. Rename it – either in the inspector or by right clicking – and call it ‘Tiles’.
Now drag all of Turf tiles on top of that GameObject and they will be arranged underneath it. There’s a little arrow next to Tiles on the left and by clicking that you’ll be able to collapse or expand the category. What’s more is that if you move the ‘Tiles’ GameObject around, it will move all of the tiles in relation to its position. We now say that our Turf objects are children of the Tiles object. Keeping things neat and tidy like this is good practice and will help us out in the long term.
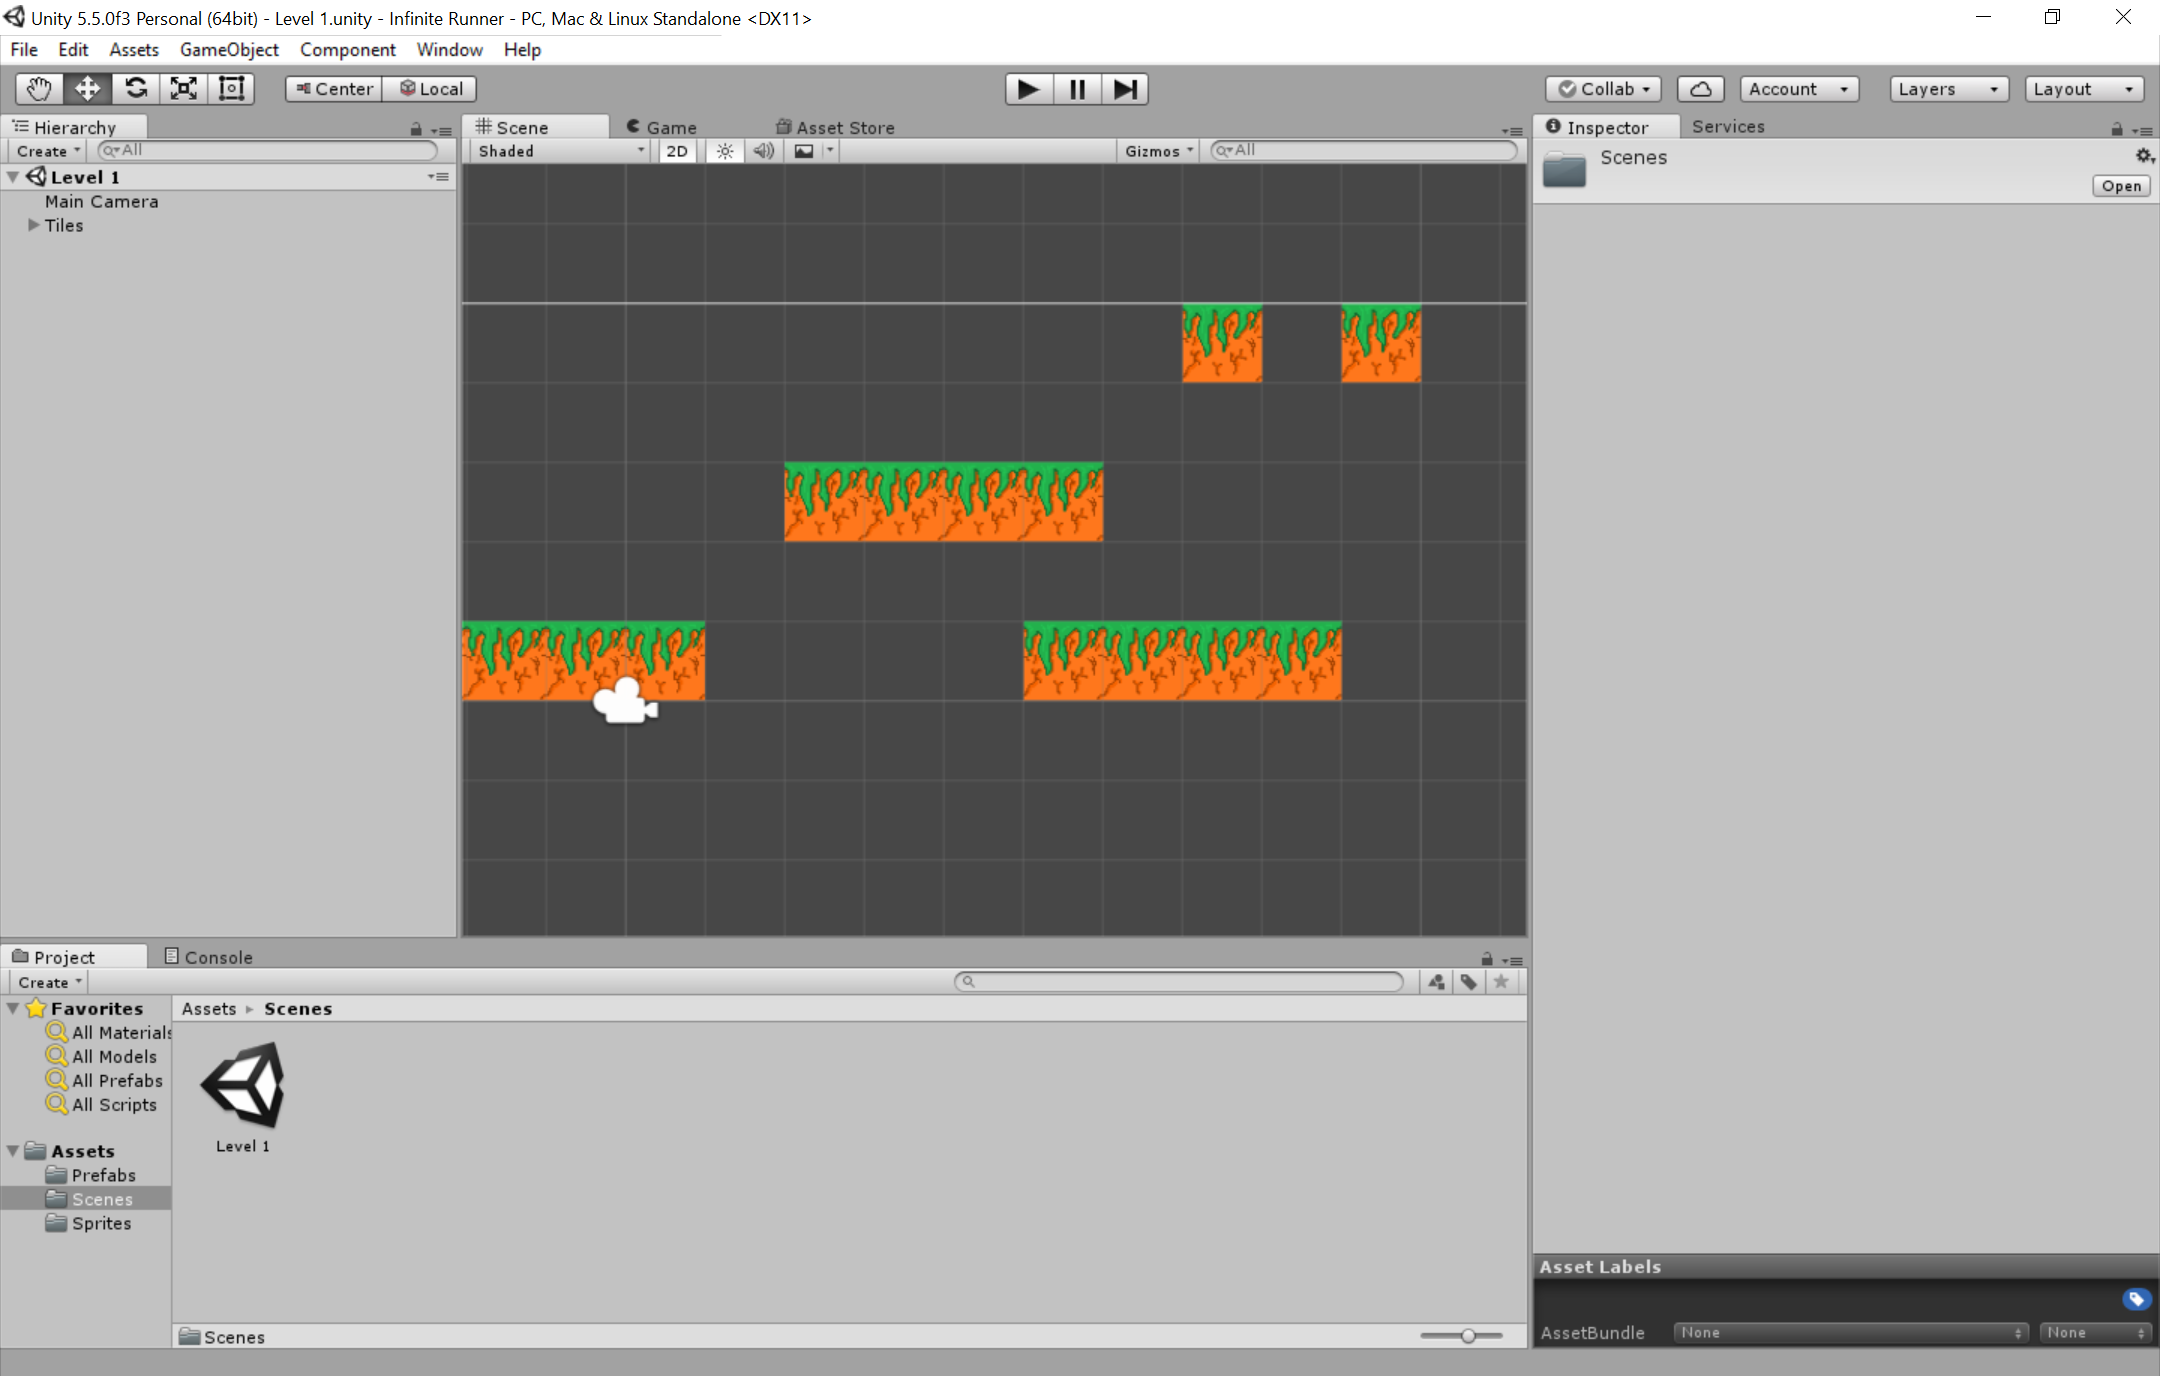
It would also be a good idea to save the game at this point but to do that, you’ll want to create another folder in Assets, this time called ‘Scenes’. In Unity, ever level works essentially like its own program, so rather than saving the project, you are really saving the level. Once the new folder is created, you can hit Ctrl + S and save your work so far as ‘Level 1’, making sure that it goes into the ‘Scenes’ folder.
Adding a playable character
And now with all that done, we can finally add an actual character to our game.
To do this, we first need to create a new sprite. As I want to keep things nice and easy for myself (and you!), I’m going to make this sprite a car. Cars are easy to animate because they have wheels instead of legs and they don’t even need a jump animation!
I’m choosing to put Android guy in the driving seat so that we keep things on brand and don’t forget to use a transparency so that the white background isn’t included (use Gimp for a free tool that will let you add transparencies).

You can then go ahead and drop your character into the Sprites folder as before and to set the pixels-per-unit to 50. You’ll also want another collider. My character is pretty much a rectangle, so I’m using the box collider again. If your sprite is a more unusual shape, then you might need to use the polygon collider instead. Keep in mind that this is more resource intensive however if you have lots going on in your game.
Make your character into a prefab again too. While you won’t need multiple instances of the player in this project, it is still good practice and would come in handy if you had multiple levels. From now on, changes we make to this object will be done via the Prefab.
And as it just so happens, we do need to make another change, which is to add another component. This time, the component will be the one called ‘RigidBody2D’.
This is essentially a script that will apply basic physics to our player character: meaning that it will fall until it detects a collision and meaning it will have properties such as momentum and torque. Only we actually don’t want torque, so you need to tick Constraints > Freeze Rotation Z to keep the car from flipping over.
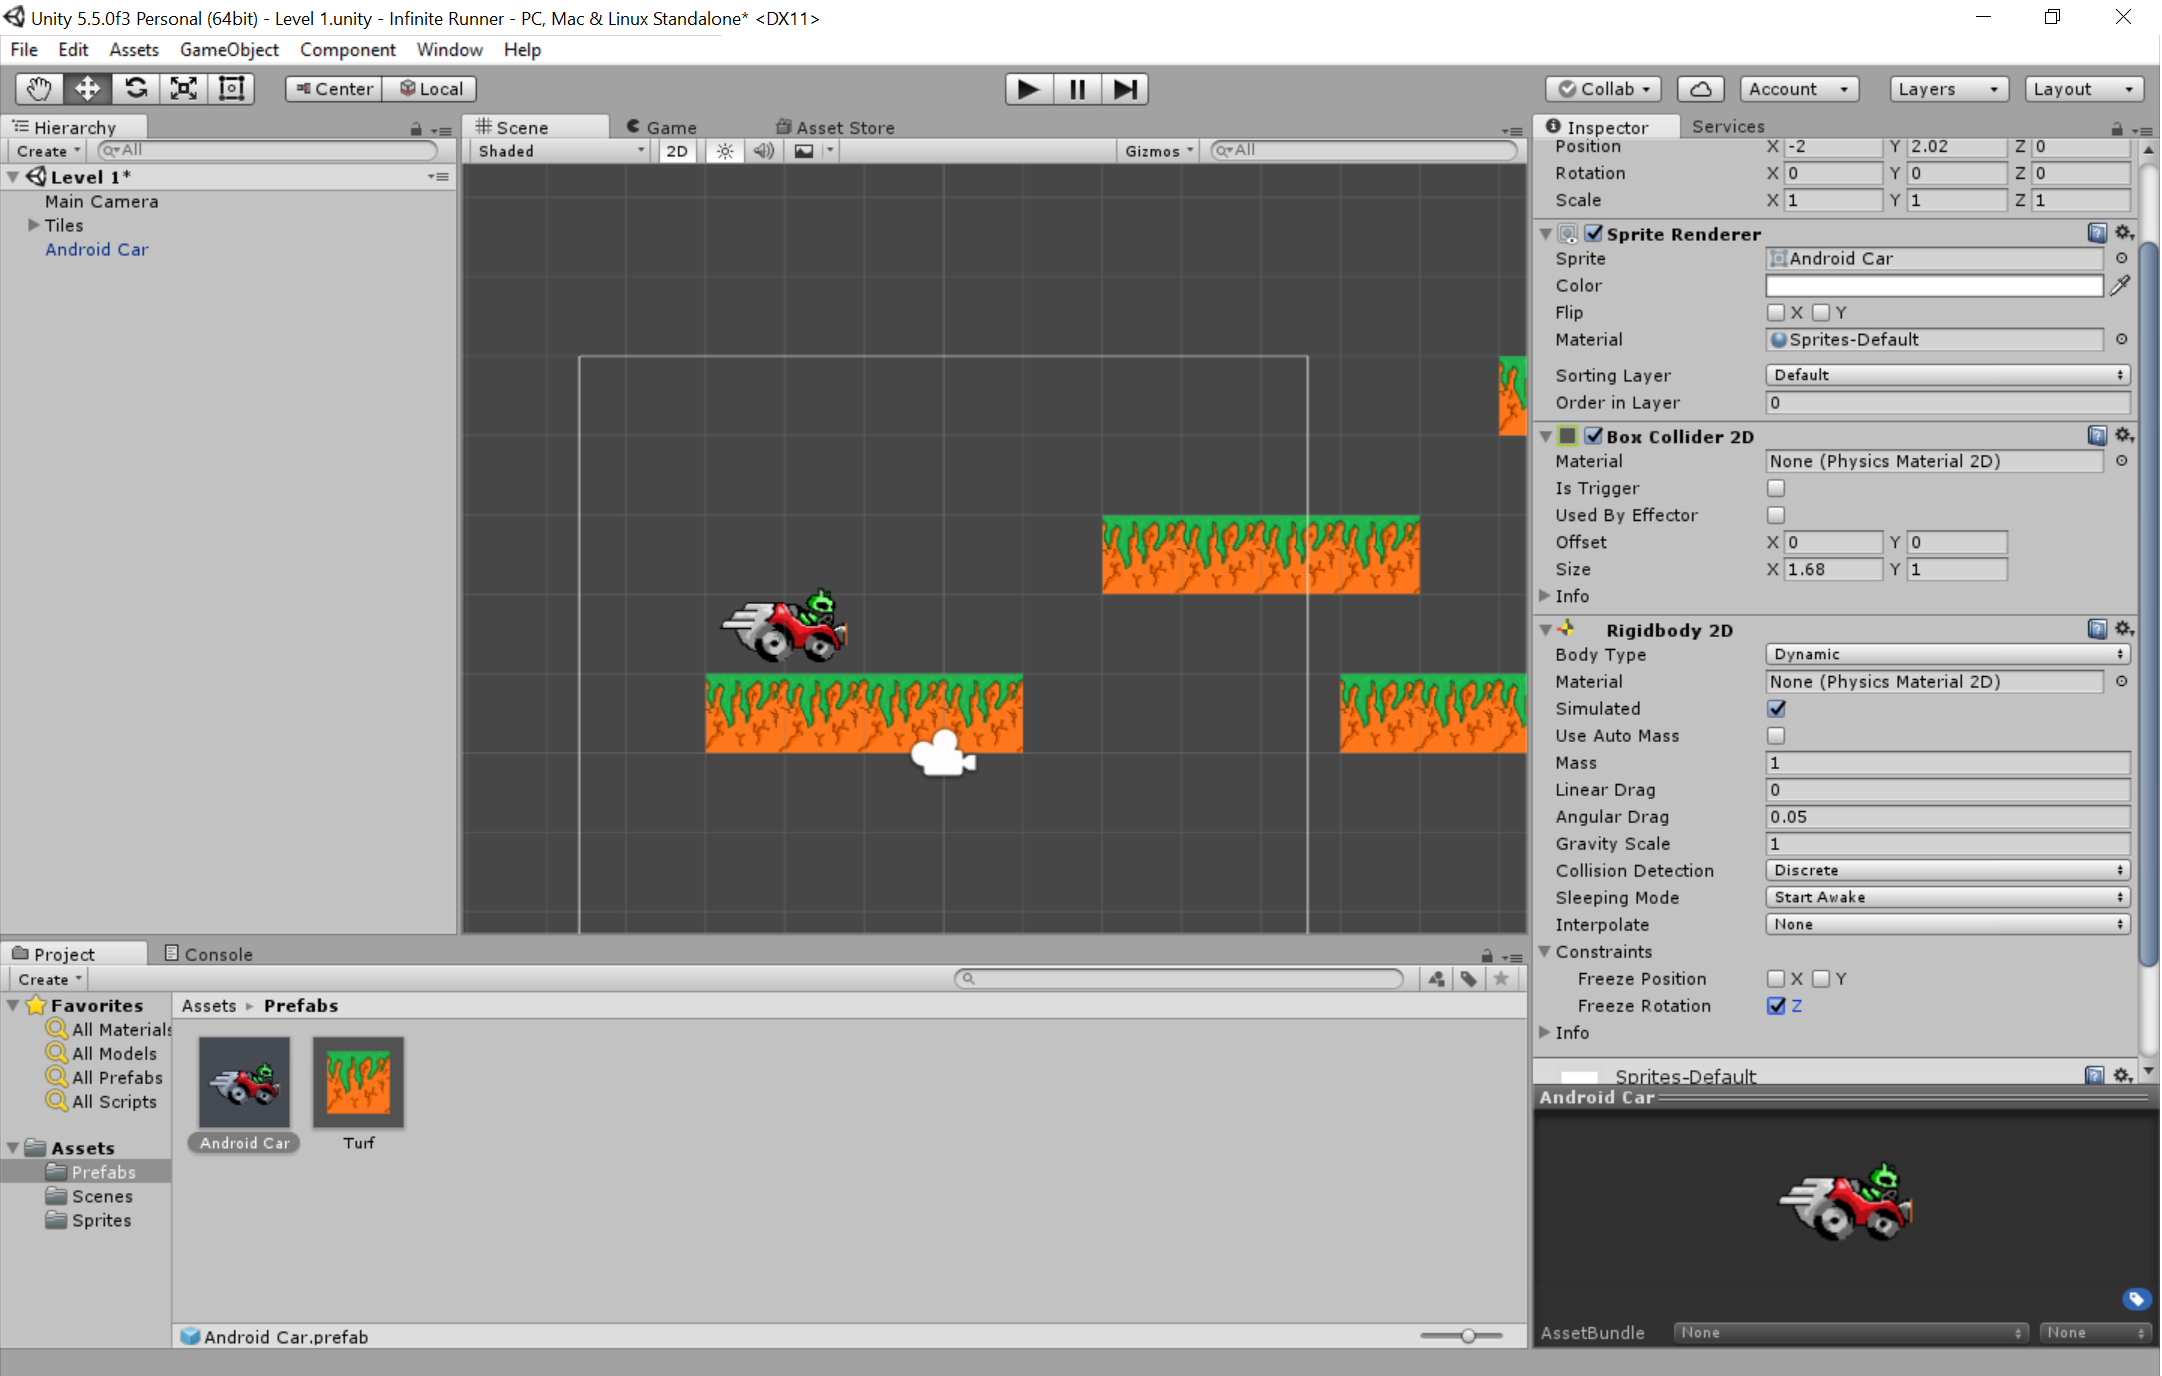
You also need to drag the Main Camera in your Hierarchy window onto the Player object (mine is called ‘Android Car’) so that it becomes a child. Remember how I said earlier that moving the ‘Tiles’ empty GameObject would cause all its children to move by the same amount? The same effect applies here, meaning that the camera will now stay fixed to the player and move whenever it does!
Move the camera so that it is positioned just in front of the player. This is an important tip for an infinite runner because you need to see what’s coming up ahead.
With the camera selected, you can now also choose the color of the background (if you wanted, you could just place a sprite behind the level) and you can choose the ‘size’ which will control how zoomed in everything is. Zooming out will make the game easier because the player will be able to see more, but zooming in will give us more of a pixel art effect. I’ve set mine to 3 and given it a nice light blue background.
Gameplay and scripts
We’ve managed to get this far all while avoiding doing any programming but now it’s time to get our hands dirty. Fortunately, the code is going to be much simpler than usual, seeing as we don’t need to worry about things like walking left or right.
First, create a new folder in assets and call it ‘Scripts’, then open up this folder and use RMB > Create > C# Script and call this script ‘Player’. Double click on your Player script and it should launch Visual Studio for you to add some code.
And when I say ‘some code’, I mean this code:
public class Player : MonoBehaviour
{
    public Rigidbody2D rb;

    void Start()
    {
        rb = GetComponent<Rigidbody2D>();
    }

    void Update()
    {
        rb.velocity = new Vector2(3, rb.velocity.y);
    }
}
This code works by first looking for Rigidbody2D script and then applying a little velocity on the X axis. As the comments suggest, the Start method is called when the script is first created and the Update method is called every frame. If you want your character to move a little faster – and you do – try setting the speed higher than ‘1’. You could also put this inside another method called FixedUpdate, which isn’t tied to the refresh rate of the screen.
Now go back to Unity, select the player prefab from the Prefabs folder, and click Add Component > Scripts > Player through the Inspector.
Try hitting ‘Play’ now and you’ll find that the character should simply move forward at a slow pace until he falls off the platform or perhaps bumps into something.
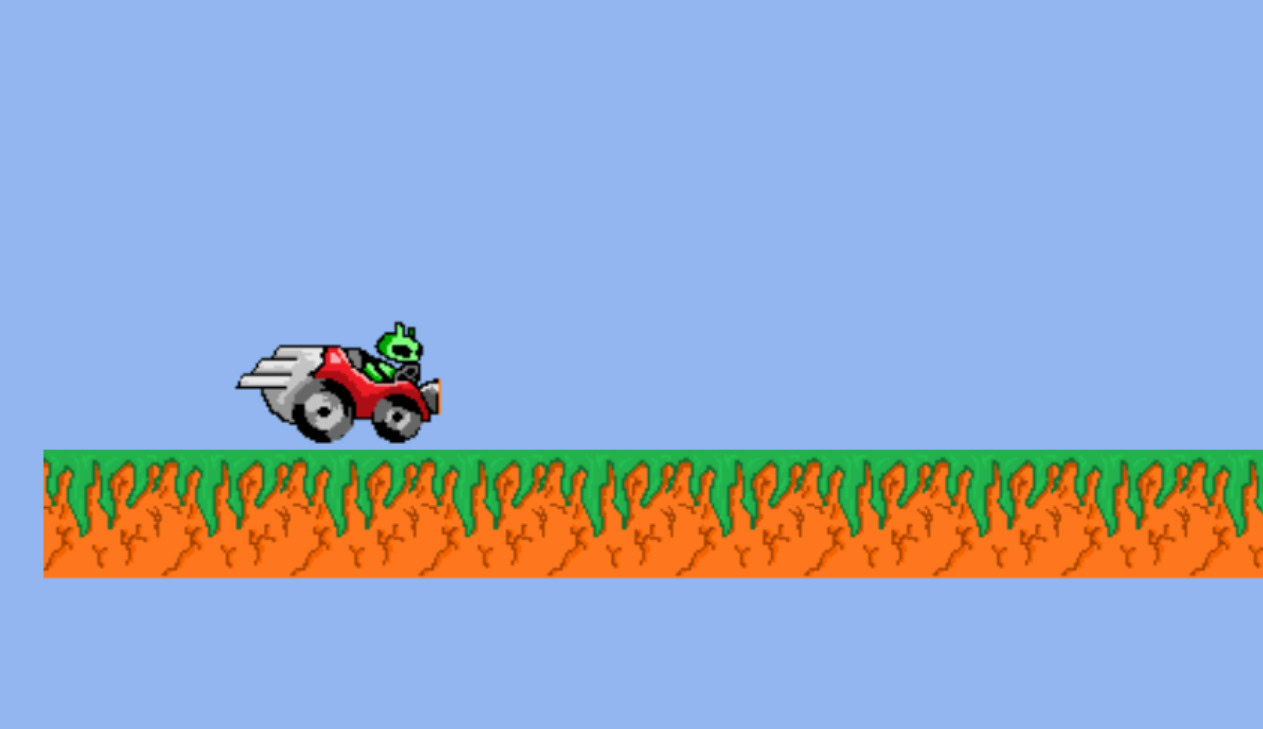
Note: If your player just stops for seemingly no reason, then this may be due to a collider issue. Unity has a glitch at the moment which can cause issues with tiled box colliders. A solution is to use the edge collider for the platforms, or to use the polygon collider for your Player character and to make a very minor bump along the bottom. This latter option will give the player a slight slope that it can use to slide over imperceptible obstacles in the ground
Now all that is left for us to do is to add some kind of input! That input is going to be a simply ‘jump’ button, which of course needs to be handled by tapping the screen and which should only work when the player is actually on the ground.
We’ll start by doing this with the space bar, then we’ll map that same action to an on-screen control.
First, add the following code to the script above the ‘Start’ class:
public Transform groundCheck;

public float groundCheckRadius;

public LayerMask whatIsGround;

private bool onGround;
Now, add this line to your Update method. Don’t worry if you don’t understand what’s going on just yet; all will become clear!
onGround = Physics2D.OverlapCircle(groundCheck.position, groundCheckRadius, whatIsGround);Because onGround is a boolean, that means it can be either true or false. In this line of code, we are stating that onGround is true as long as the statement that follows is true – that the position of groundCheck overlaps something that is made from the same stuff as whatIsGround. We’ll be setting these variables in the next few steps.
First, go back to Unity and create a new empty GameObject, which you’re going to call ‘Check Ground’. Like ‘Main Camera’, this should be made to be a child of the Player object and you need to position it so that it is just beneath the player’s collider.
Now click on the player GameObject (in the hierarchy, not the prefab this time) and you should see a number of options in the Inspector. These are the ‘public’ variables that you just added with the first bit of code. A public variable is a variable that can be accessed by other classes or scripts.
You’re going to find the option here that says ‘Ground Check’ and then you’re going to drag the Check Ground’ GameObject you just created into here. We defined Ground Check as a ‘Transform’, which means that it is a set of coordinates. Now, those coordinates will be equal to the coordinates of the GameObject.
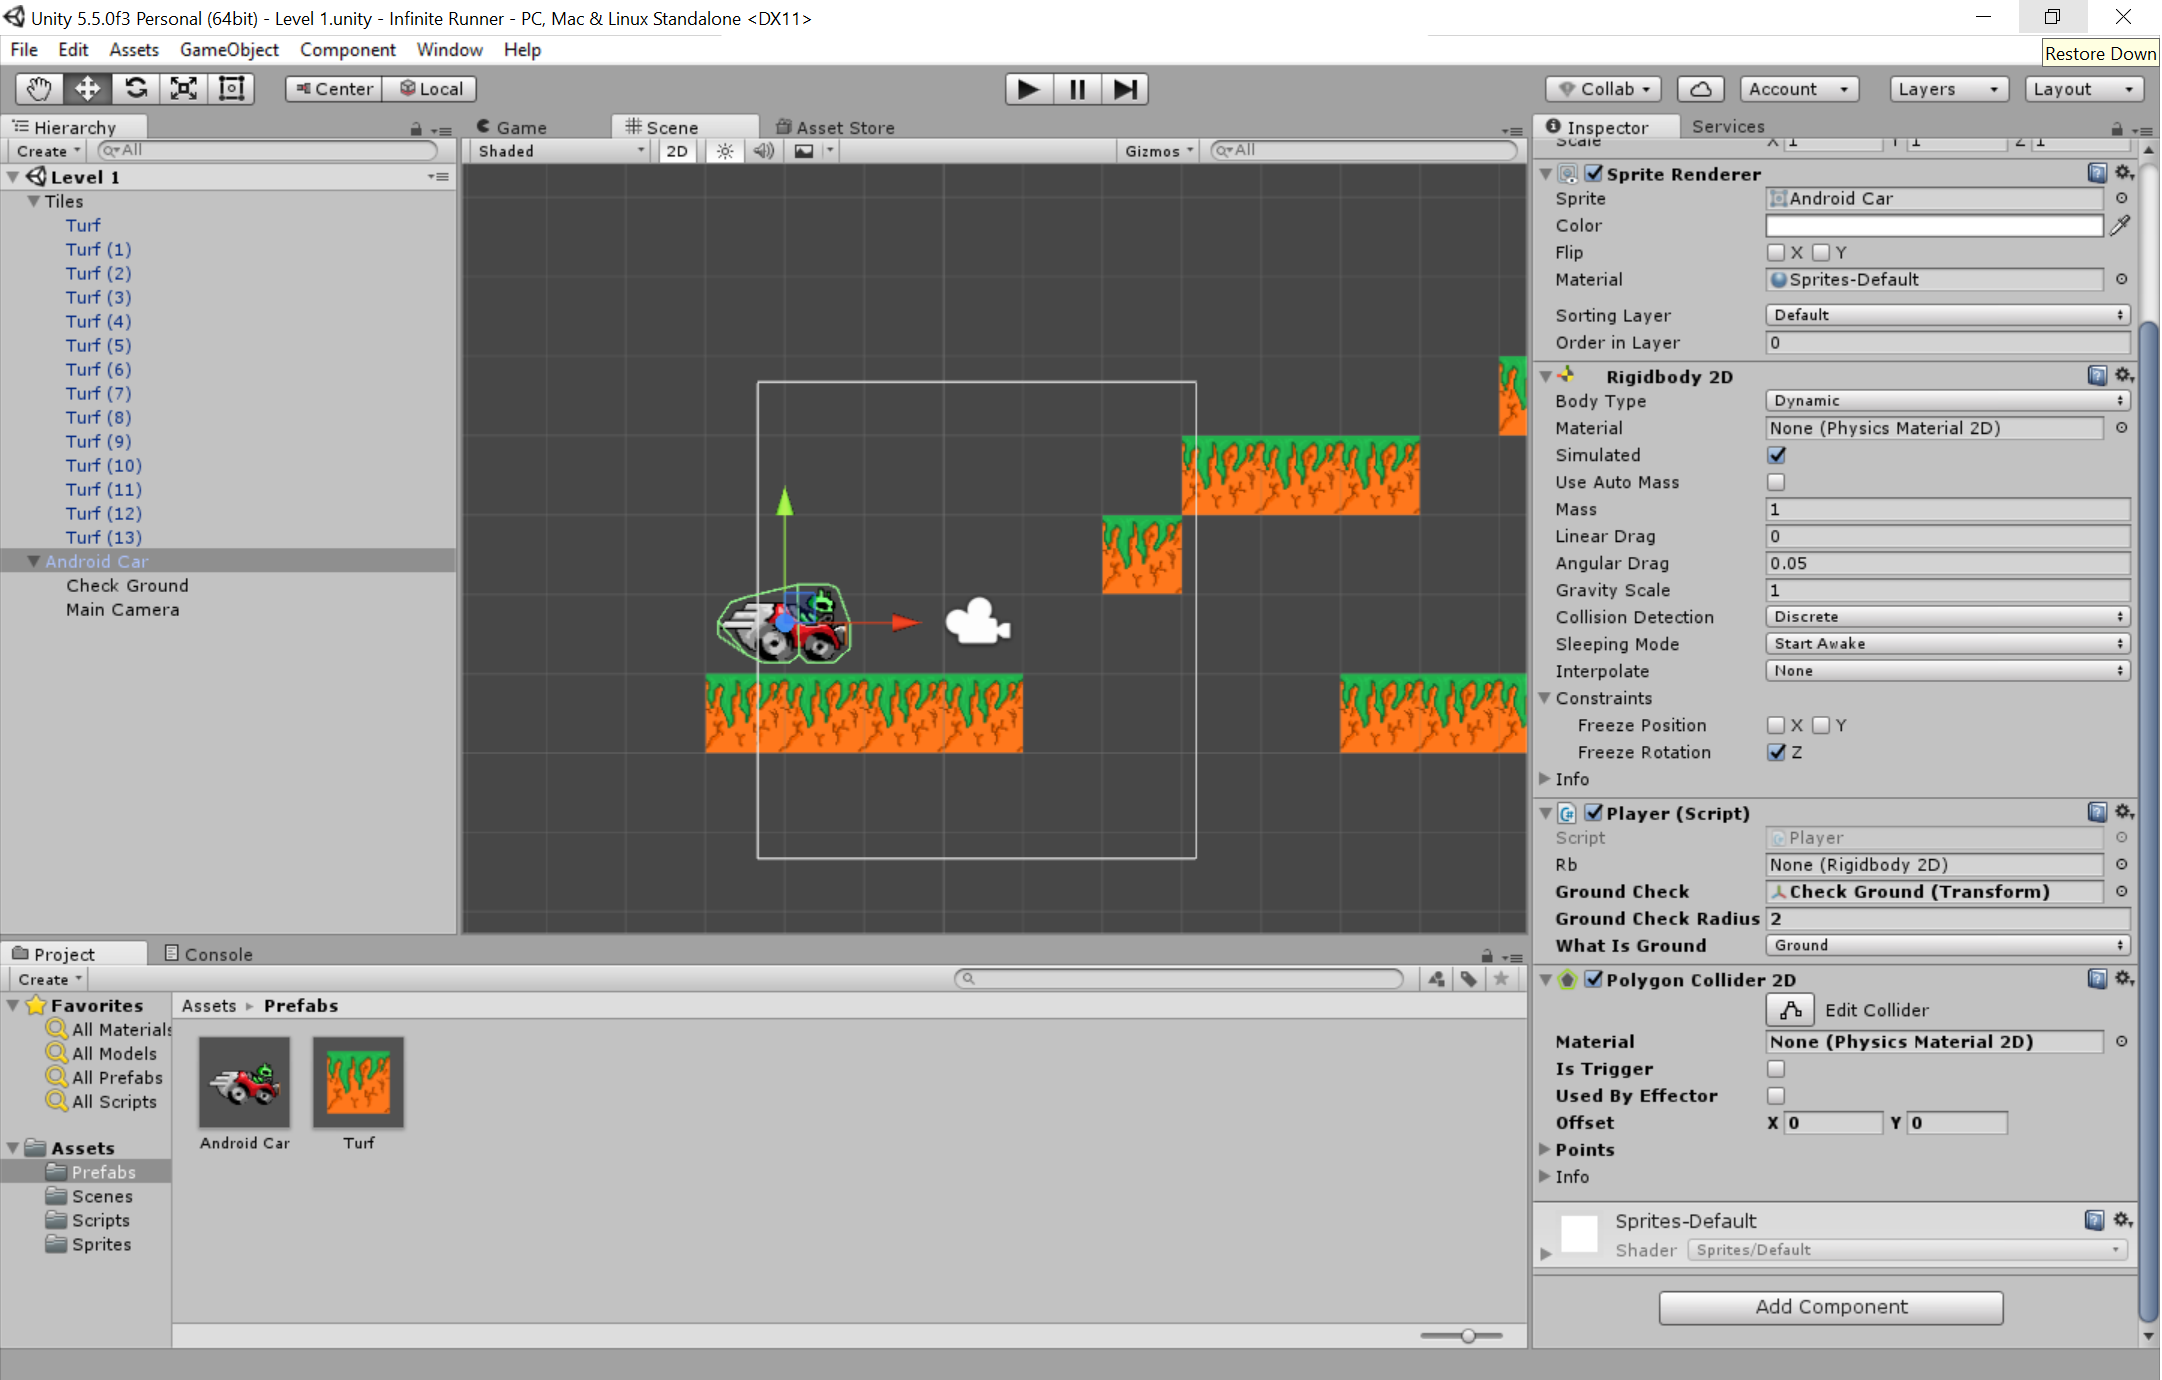
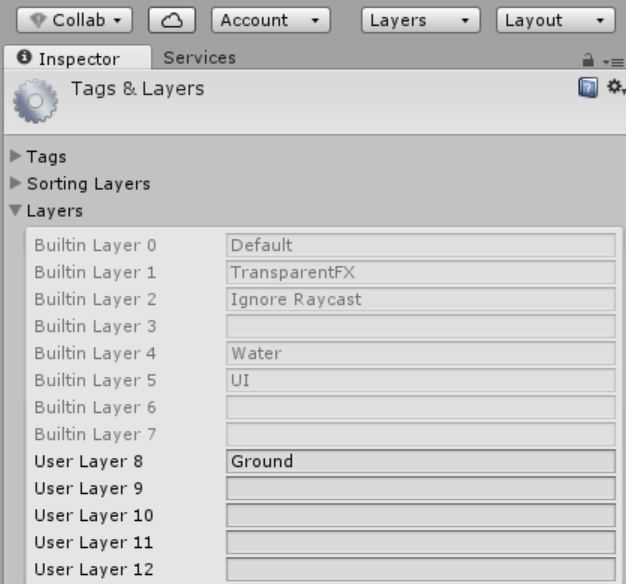
Next, we’re going to add a new layer, which essentially is a way for us to define roles for different elements in our game. Select any GameObject and then find the option that says ‘Layer’. Click the arrow next to it to open up a drop down menu and then choose ‘New Layer’. This will take you to a new screen where you can enter a name for ‘Use Layer 8’ (or whichever layer is the first that’s available for editing). Name this ‘Ground’ and then go back to your Turf prefab in the Project window. In the inspector, choose the same drop down menu and this time select ‘Ground’ as the layer so that the change will be reflected across all of your tiles. You will also need to set the public variable ‘What is Ground’ to ‘Ground’, which does exactly what it sounds like. Set ‘check ground radius’ to something like .2 or .1, so that the circle is very small.
Now simply add this final line of code to the Update method in your Player script:
if (Input.GetKey(KeyCode.Space) && onGround)
{
    rb.velocity = new Vector2(rb.velocity.x, 5);
}
This is simply going to add upward momentum to the player whenever the player hits ‘Space’. As long as the player hits space and onGround is ‘true’, then the momentum is added.
Hit ‘Play’ and now the character will drive along automatically and you can just hit ‘space’ to cross the gaps.
If you’d rather just copy and paste the whole script, then you can get it here:
public class Player : MonoBehaviour
{
    public Rigidbody2D rb;
    public Transform groundCheck;
    public float groundCheckRadius;
    public LayerMask whatIsGround;
    private bool onGround;

    // Use this for initialization
    void Start()
    {
        rb = GetComponent<Rigidbody2D>();
    }

    // Update is called once per frame
    void Update()
    {
        rb.velocity = new Vector2(3, rb.velocity.y);
        onGround = Physics2D.OverlapCircle(groundCheck.position, groundCheckRadius, whatIsGround);

        if (Input.GetKey(KeyCode.Space) && onGround)
        {
            rb.velocity = new Vector2(rb.velocity.x, 5);
        }
    }
}
Right, now we just need to map that same effect to an onscreen control!
Setting it up for Android
And here’s the really good news: instead of having to mess around with on-screen controls like we did last time, all we have to do is to replace Input.GetKey(KeyCode.Space) with Input.GetMouseButtonDown(0). We can touch anywhere on the screen seeing as there’s only one input, and as far as Unity is concerned, a screen press and a click are the exact same thing!
Give it a try and you should find that clicking the screen now makes our Android Car jump – which means we’re ready to make an APK! Fortunately, Android makes this super simple. All you need to do is to save the scene and then choose File > Build Settings. Drag the scene you just saved into ‘Scenes in Build’. When you have multiple scenes, the one at the top will be the one that runs first – so this is where your menu page would go in future.
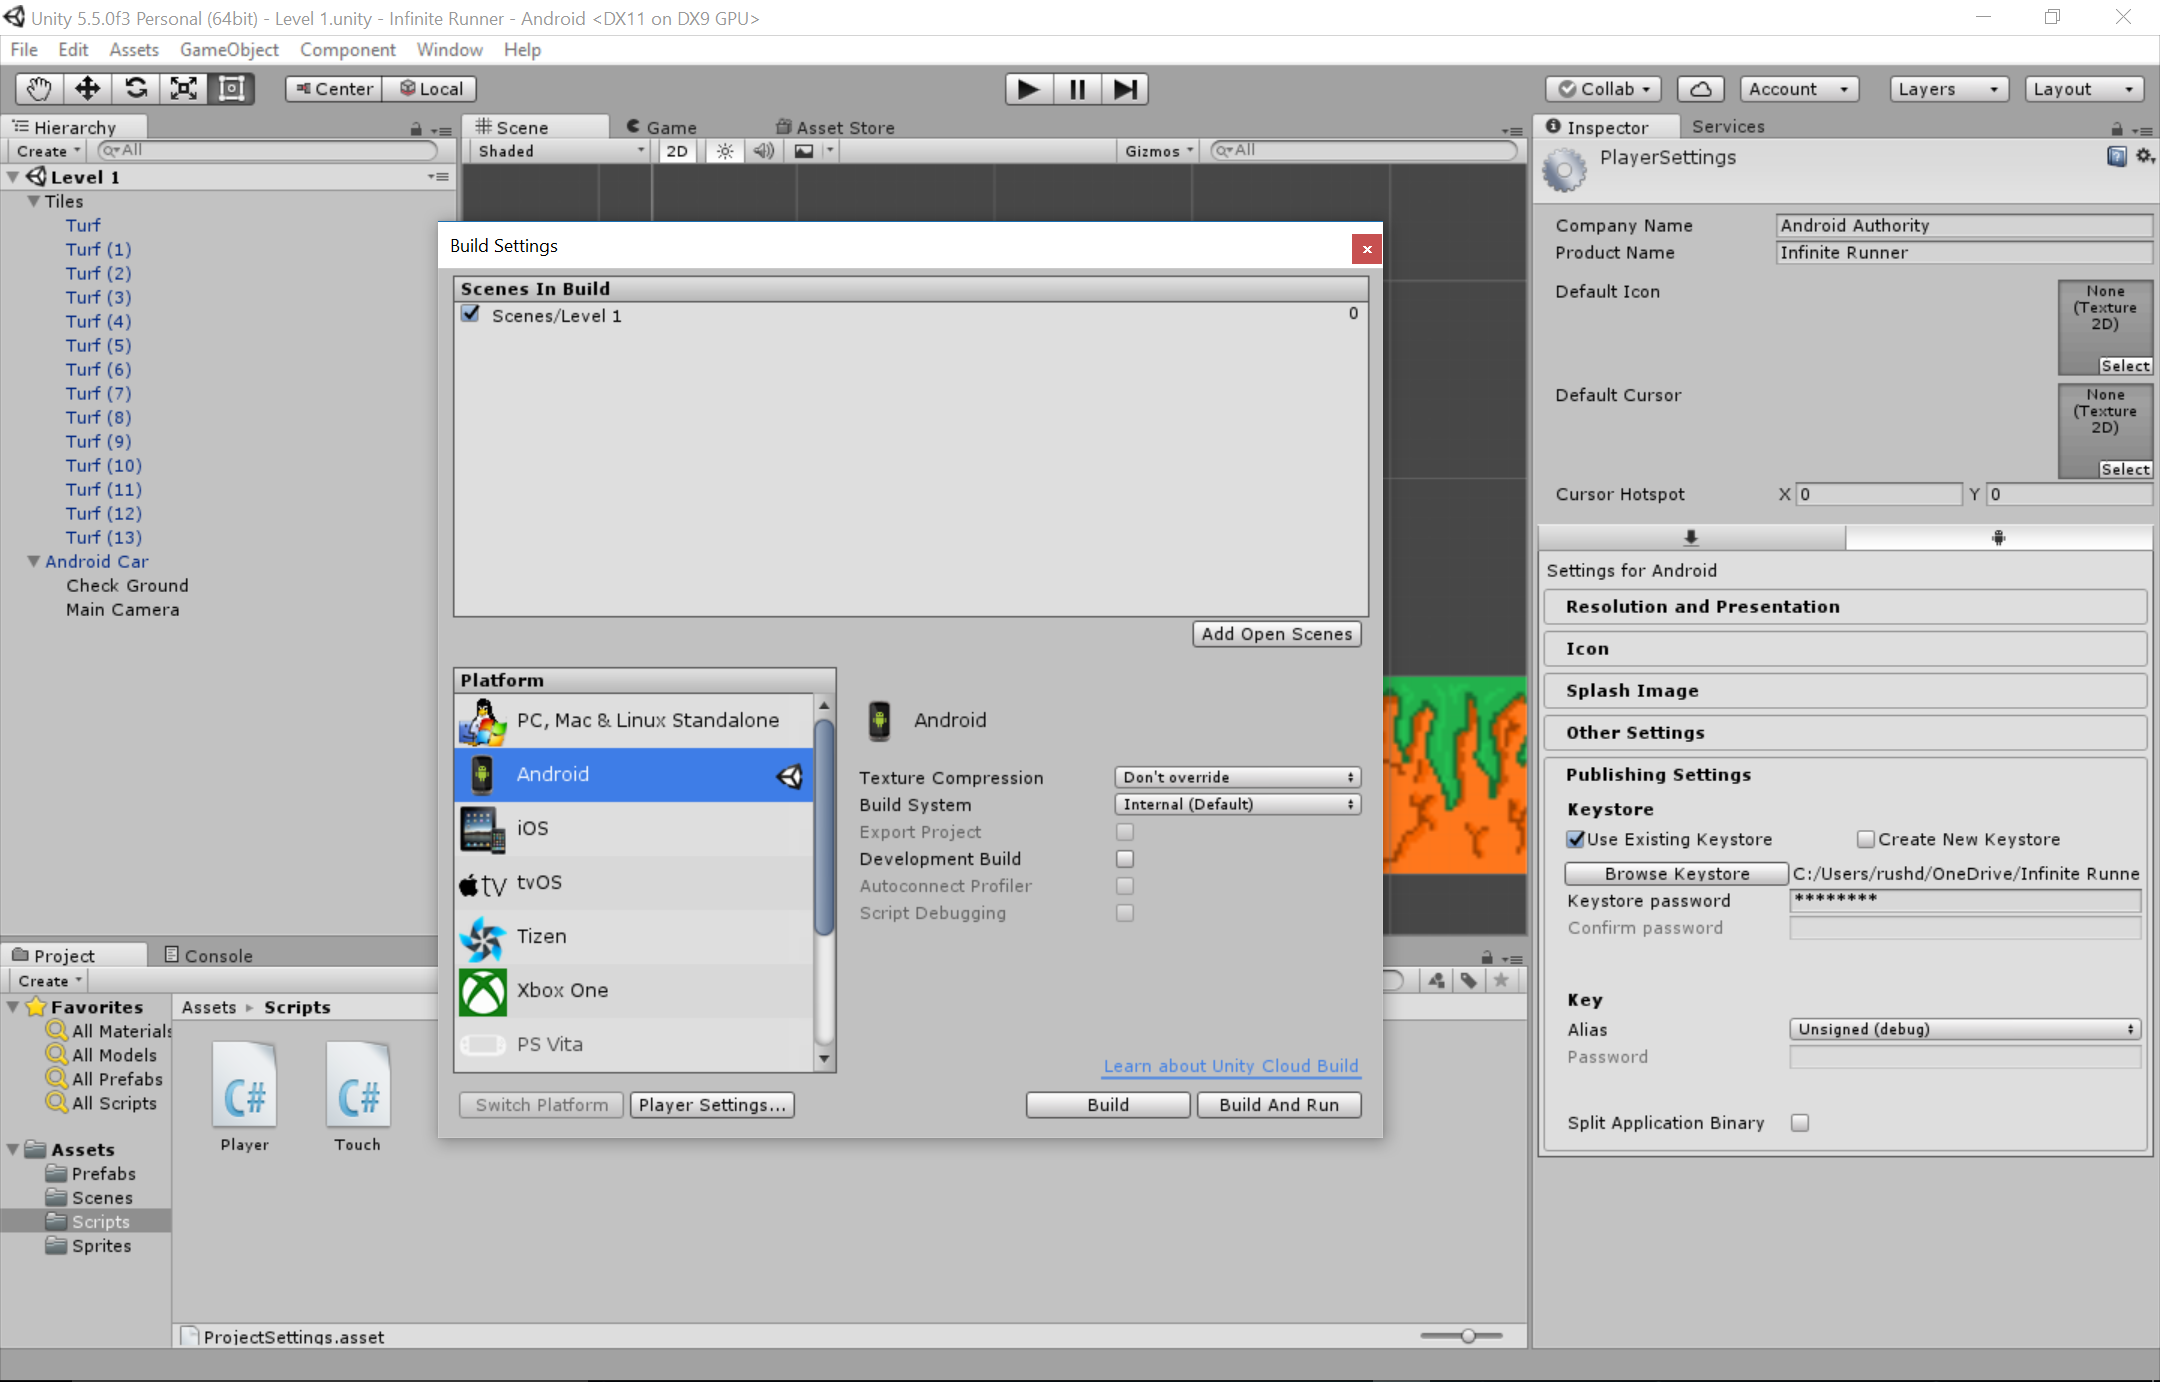
Now you want to select the platform as ‘Android’ and then click ‘Switch Platform’. Next click ‘Player Settings’ and you’ll open up a bunch more options in the Inspector. Here you can generate your private key sign in the Publishing Settings and choose a package name as you would do in Android Studio. Set your ‘Default Orientation’ to ‘Landscape Right’ and choose an icon if you so wish.
Then just click ‘Build and Run’ and the game will launch on your Android device – as long as it’s plugged in. Otherwise, you can choose ‘Build’ to make an APK and then just boot that up on your device.
Adding challenge and procedural levels
Of course, there are a few things missing here, but they’re generally pretty simple to rectify/add in.
It would be good if the player would ‘die’ when they fell off the bottom of the screen for example, so we can add that with a few easy lines of code. First, add the following to your Player script:
private void OnCollisionEnter2D(Collision2D collision)
{
    if (collision.gameObject.tag == "Enemy")
    {
        rb.transform.position = new Vector2(-2, 2);
    }
}
Now, any time the player bumps into a collider with the tag ‘Enemy’, they will die – i.e. teleport back to the start of the game. So, if you want to make deadly spikes, all you need to do is add the tag ‘Enemy’ – which is very similar to adding new layers.
Likewise, we can create an empty GameObject with a collider and stretch it out along the bottom to make the player die when they fall off the screen. If you’d like a more gory and drawn out death, then you can find out how to do that in this post.
You could add animations if you wanted to (I talked about that here) to make the wheels go round for example.
You’ll probably want to add a nicer background too, etc. etc. But for the most part, you now have a game that plays just like an endless runner! And you can create as many levels as you want (or one very long one) by simply copying and pasting your platforms in whatever configurations you wish. This is how infinite runners like Super Mario Run and Rayman Jungle Run work – using beautifully arranged levels and challenges that have been designed by hand. This is also how Tron Run/r works on Steam – a favorite of mine.
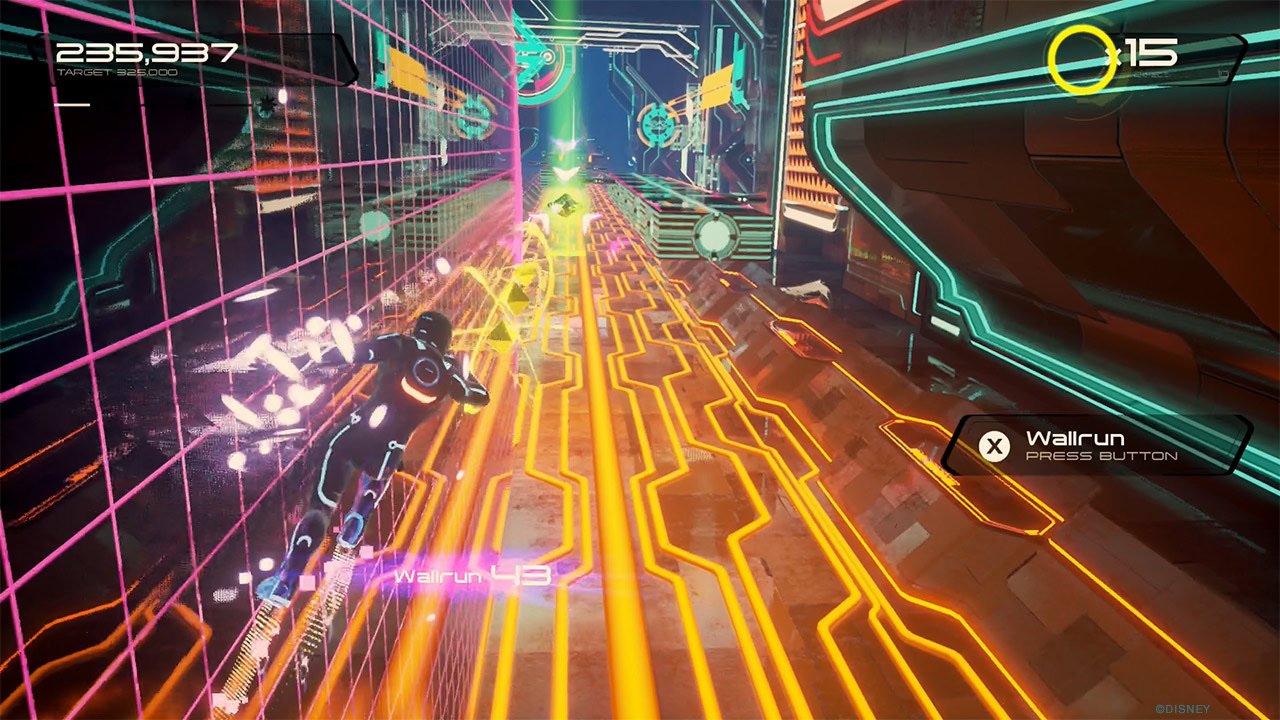
But if you want to make a more ‘pure’ infinite runner experience, then you need to make levels generate themselves on the fly – they need to be ‘procedural’. This is how games like Canabalt work and they have many advantages – meaning that no two play sessions are ever identical and meaning that you never have to design more than one level!
To do this, you first want to add scripts to your Turf prefab so that the tiles get destroyed when they go off the edge of the screen. There are various ways you can do this but a simple option would be to make them get destroyed by a collider too and then to create an invisible ‘wall’ to the left of the screen.
Just add this to a script attached to your tile prefab:
private void OnTriggerEnter2D(Collision2D collision)
{
    if (collision.gameObject.tag == "Eraser")
    {
        Destroy(gameObject);
    }
}
OnTriggerEnter2D is slightly different from OnCollissionEnter2D because it allows other objects to pass through but still registers contact. You’ll also have to tick the box that says ‘IsTrigger’ for your Turf prefab. Make the invisible wall follow the player by making it a child of the player GameObject and make sure it’s tall enough that no tiles can pass through.
Now, when an instance of the tile prefab hits the invisible wall on the left, it will be removed from memory. Of course you need to make sure that there are some tiles regenerated when the player first starts again after dying though! Just create another script called ‘LevelGenerator’ or something of the sort and attach it to an invisible GameObject somewhere in your Scene. This should have a public method called ‘Regenerate’ which should be called from its own Start method and whenever the player is killed (just add LevelGenerator.Regenerate(); to your death sequence).
Generating tiles is very simple thankfully. Just use the following code, making sure that turf is a public Game Object and that you have added this as the Turf prefab through the inspector:
Instantiate(Turf, new Vector2(-2, 1), gameObject.transform.rotation);If you create a whole row of tiles underneath the player when they respawn and have this happen right at the start as well, then you can safely remove the level you designed at the start of the game.
Meanwhile, this script is also a good place to generate new tiles as they appear on the right-hand side of the screen – otherwise we have just built a very short game! Perhaps have a new tile appear every time the player moves one whole unit to the right and then randomize whether or not that tile gets deleted (while paying attention to whether the last tile was also deleted).
This is where you need to come up with a balanced algorithm that won’t make the game too hard or too easy and that will make sure that there is never an impossible gap to jump. A good way to do this is to start out by creating a very simple series of platforms that move up and down by 1 or 2 tiles (depending on how high you can jump) and then removing tiles to increase the difficult (rather than trying to draw difficult levels with the tiles already missing). Add in lines of code to ensure that the game never deletes more than 3 tiles in a row for example and consider gradually increasing the speed and number of gaps over time to make the game get harder.
Of course, you also need to ensure that the game stays interesting, so consider adding in new elements over time, changing up the background and generally rewarding the player for continuing to play.
Tweaking this algorithm is a great way to experience some of the fun of programming. You have all the actual code you’ll need (generate a random number with Random.Range(lowest,highest)).
As a very simple example, something like this would create a not-particularly-fun sequence of platforms to navigate:
private float oldx;
private int howmanymissed;
private float turfPositionY;

void Update () {
    if (player.transform.position.x >= oldx + 1)
    {
        if (Random.Range(1,7) > 3 || howmanymissed > 1)
        {
            if (Random.Range(1,4) == 2)
            {
                turfPositionY = turfPositionY = +Random.Range(-3, 3);
            }

            Instantiate(Turf, new Vector2(oldx + 11, turfPositionY), gameObject.transform.rotation);
            howmanymissed = 0;
        } else {
            howmanymissed++;
        }

        oldx = player.transform.position.x;
    }
}
But like I say, keep tweaking with it and find a formula that keeps pushing your players’ reflexes. That’s what will make your game fun and unique and that’s where you’ll get to flex your programming muscles.
Oh and of course make sure you find a way to set your game apart from the crowd. Every game needs a hook! With this basic code though, the possibilities are, well, endless!
Have fun and let us know in the comments down below what you manage to create.
