Affiliate links on Android Authority may earn us a commission. Learn more.
Let's build a simple notepad app for Android
May 24, 2017
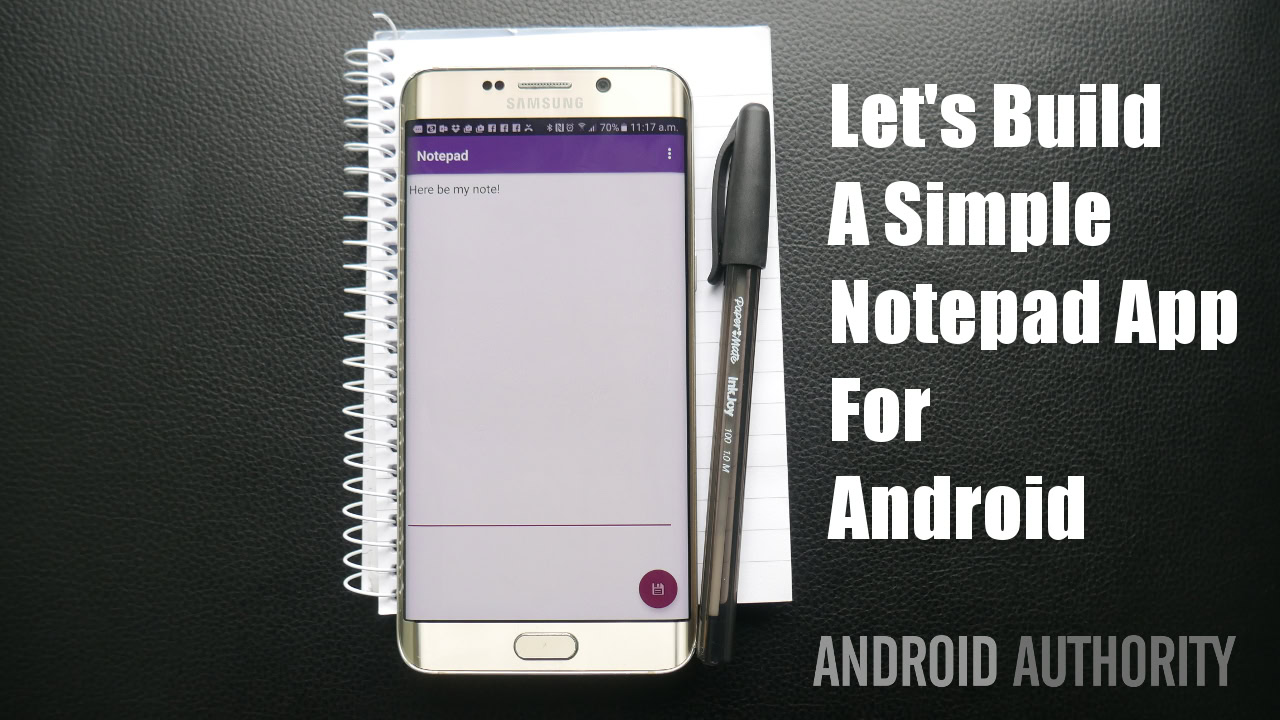
In this post, you are going to learn to make a basic notepad app. This is a great project to get to grips with because it will lend itself to a range of alternative uses as similar concepts can be used to create SMS apps, email apps and anything that requires text input. This will allow us to look at saving and opening files, as well as working with strings and recycler views, all of which will serve you well in the future.
Before we do anything else, first we need to create a new project. To do this, just open up Android Studio and then select New > New Project. Choose ‘Basic Activity’ (the one with the Floating Action Button) and then you should be good to go!

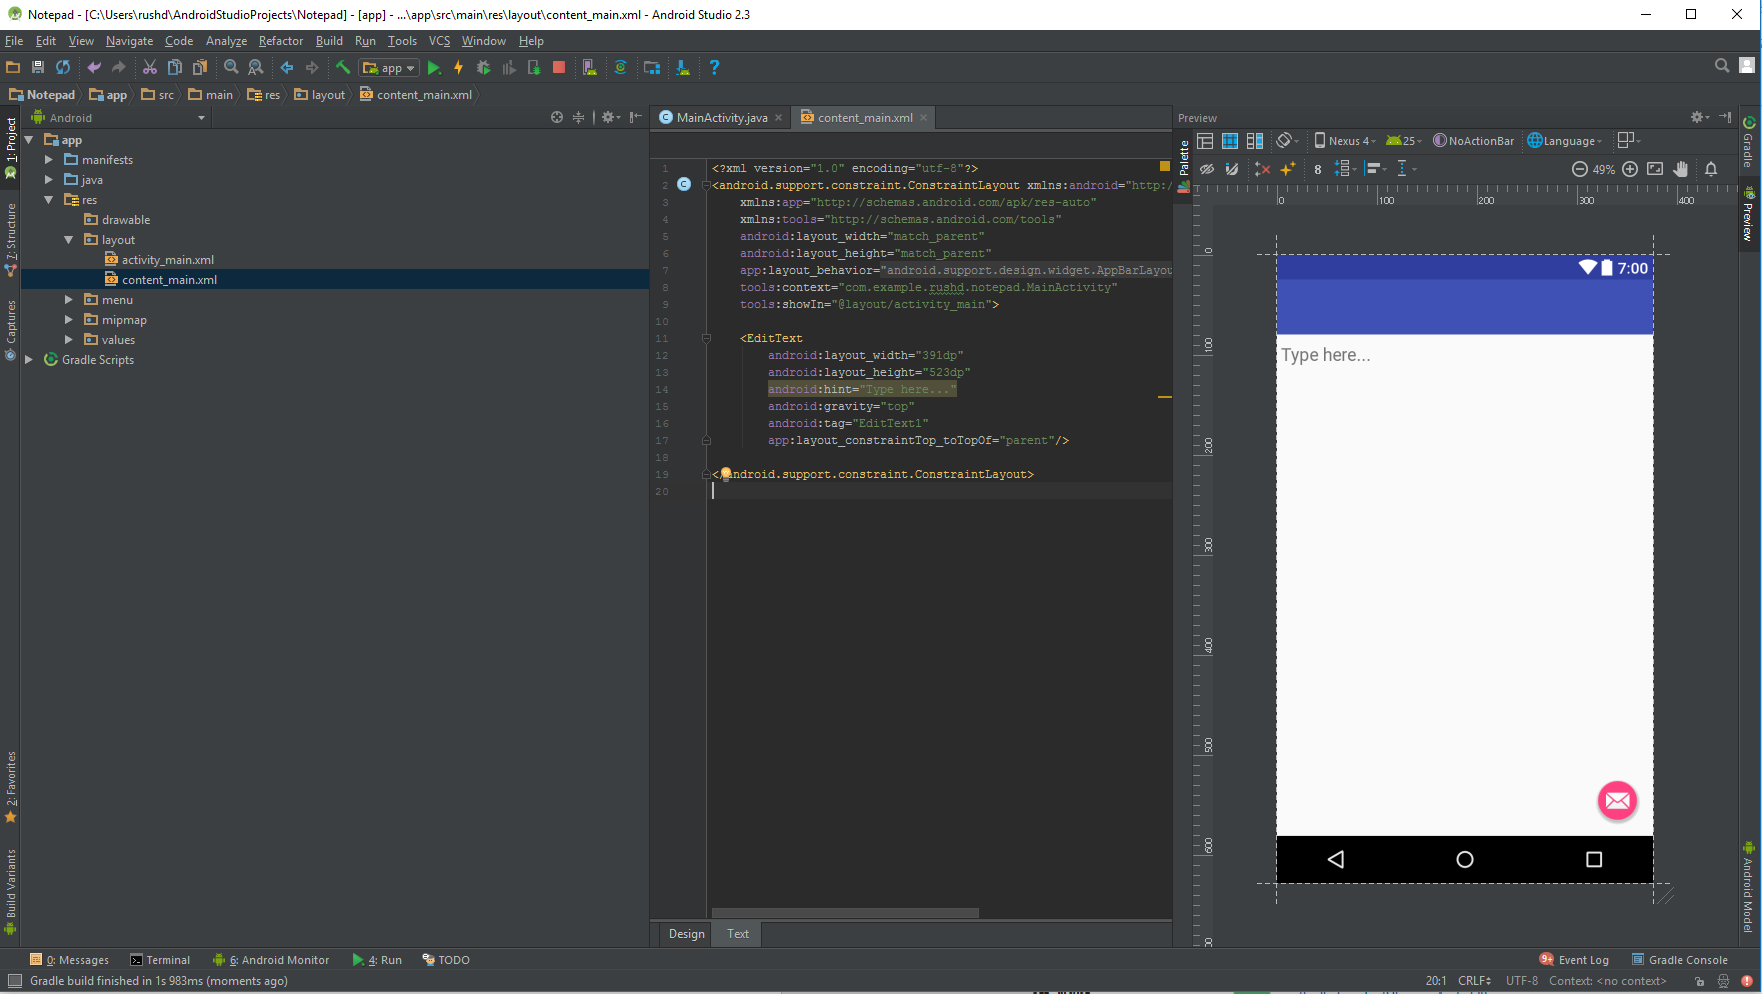
If you open up content_main.xml using the window on the left, then you should be greeted with a preview of what your app is going to look like (if you can’t see this, then hit the ‘Design’ tab along the bottom). The default set-up is a blank screen with a label saying ‘Hello World’.
In the Preview window, drag that label so that it fills the whole usable screen. Now, in the Text view, change ‘TextView’ into ‘EditText’. Instead of a static label, that view will become a small window where we can type our notes.
Pretty easy so far! But don’t get complacent…
Your XML code should look something like this:
<EditText
 android:layout_width="391dp"
 android:layout_height="523dp"
 android:hint="Type here..."
 android:gravity="top"
 android:id="@+id/EditText1"
 app:layout_constraintTop_toTopOf="parent"/>
We’ve changed the text and made it a ‘hint’ (meaning it is greyed out and will disappear when the user starts inputting text), we’ve fixed the gravity so that the text is aligned along the top and we’ve given our view an ID so that we can find it in our Java code later on.
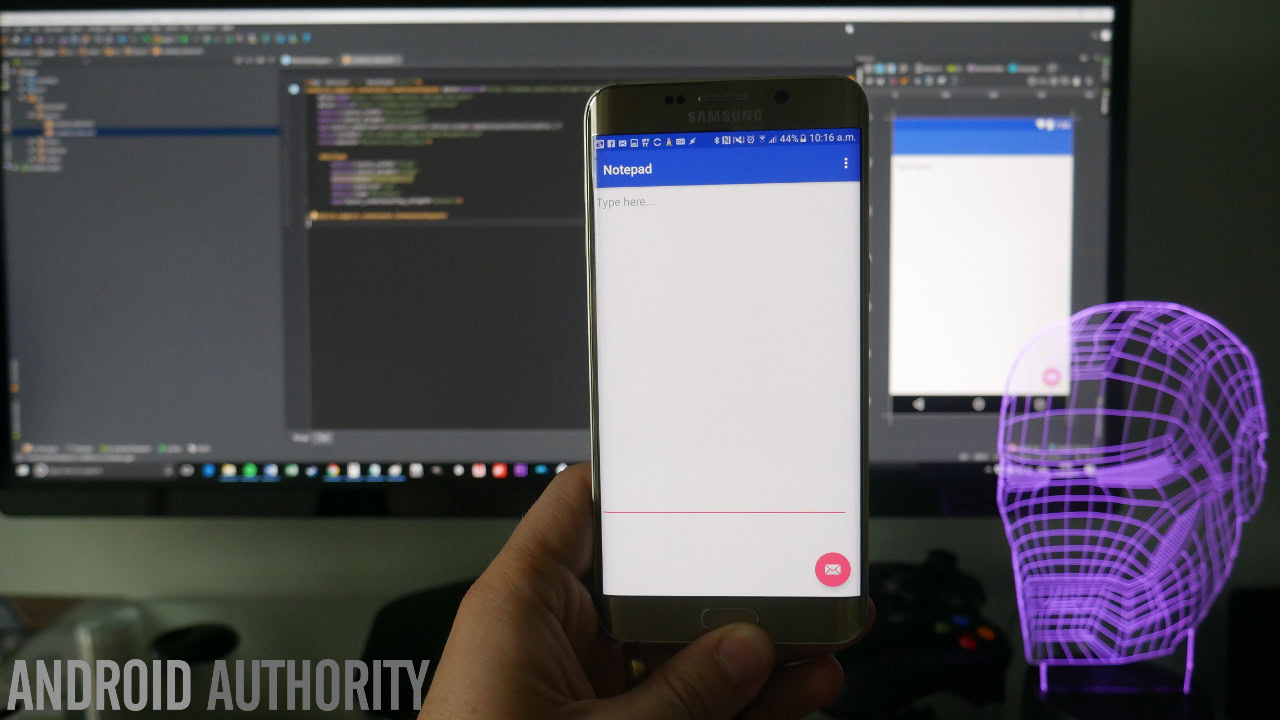
Give this a try and you should now be able to enter some text as you would like.
Saving files
Next up, we need to give our users the ability to save their notes. There’s not much use in a note-taking app without this feature!
There are a number of options here but in most cases, you’ll want to save your notes internally. That is to say that we aren’t creating text files to store on the SD card where other apps can access them, seeing as most users don’t regularly navigate their file hierarchies the way they do on a Windows PC. That and we wouldn’t want another app spying on our users’ notes! Thus, we want to use internal storage. This essentially works just the same as writing external files, except the directory is only going to be visible to our app. No other app can access it and the user can’t view the files using a file manager unless they have root. Note that the files in this directory will be destroyed if the user uninstalls and re-installs your app though.
Luckily, this is a very straightforward process and it simply involves getting a reference to a file object and then using a FileOutputStream. If we don’t define the location for our files, the internal storage will be the default.
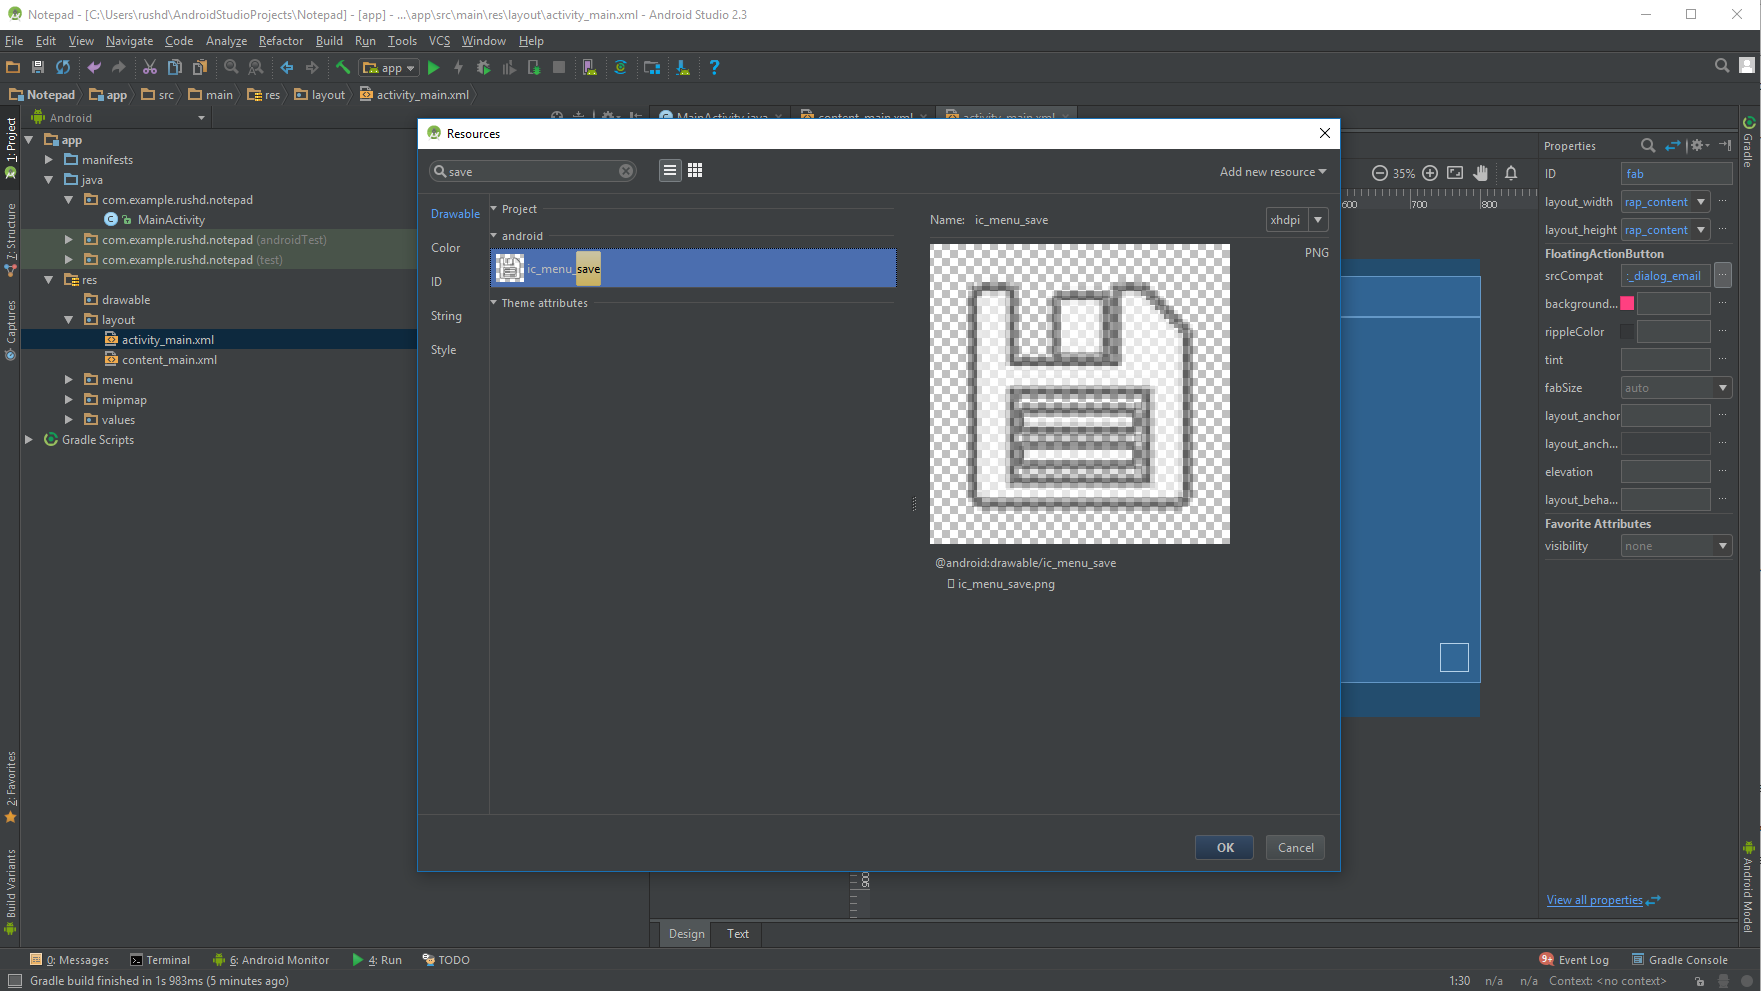
And to keep with Google’s Material Design design language, we’re going to map this action to the FAB. So open up the activity_main.xml (which controls the layout of your activity) and then enter the Design view. Now double click on the FAB in order to view some options on the right. Click the three dots next to srcCompat and then search for the save icon.
We want to make something happen when the user clicks the save button too. Fortunately, that’s pretty easy as Android Studio has already shown us how to do it. Open up MainActivity.java and look for the text that says “Replace with your own action”. Stick whatever you want in here and it will happen whenever the user clicks save. We’re going to put this code into a method though, so that we can easily re-use it at will. We’ll call our method ‘Save’ (that seems to make sense…) and we shall make it work as follows:
public void Save(String fileName) {
    try {
        OutputStreamWriter out =
            new OutputStreamWriter(openFileOutput(fileName, 0));
        out.write(EditText1.);
        out.close();
        Toast.makeText(this, "Note Saved!", Toast.LENGTH_SHORT).show();
    } catch (Throwable t) {
        Toast.makeText(this, "Exception: " + t.toString(), Toast.LENGTH_LONG).show();
    }
}
This code will create a new file with the same name as whatever string we pass it. The content of the string will be whatever is in our EditText. That means that we also need to define the EditText, so just above your onCreate method, write EditText EditText1; and then somewhere in the onCreate method at some point after setContentView, write: EditText1 = (EditText)findViewById(R.id.EditText1);. Don’t worry, I’ll share the full code in a moment.
Remember, when we use certain commands we need to first import the relevant class. If you type something and find it is underlined as an error, click on it and then hit Alt+Enter. This will automatically add the relevant import at the top of your code.
We also want to call the new Save method from OnCreate, so add: Save(“Note1.txt”); to execute your handiwork. Then hit play.
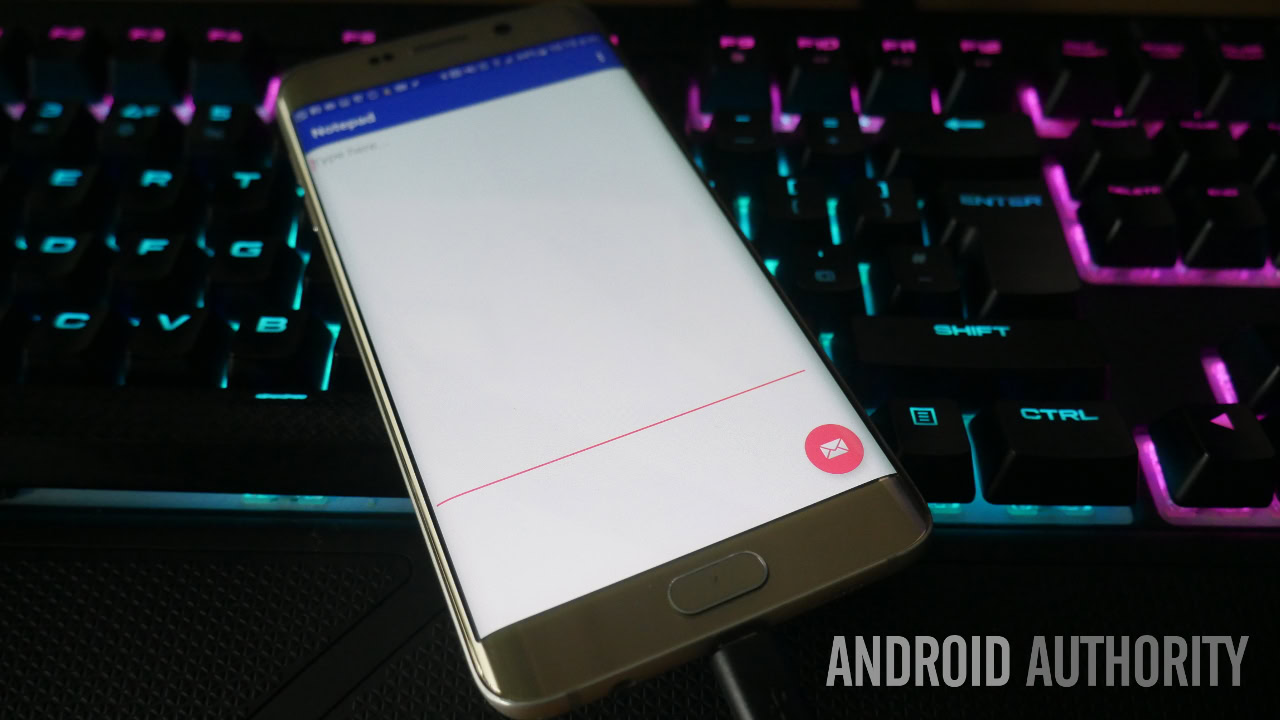
If you’ve done this all correctly, then hitting save should create a new file in the app’s internal directory. You won’t be able to see this though, so how do we know it’s worked? Now we need to add a load function!
Loading files
Loading files is done in a similar way to saving them with a few additional requirements. First, we need to check that the file we’re loading actually exists. To do that, we’re going to create a Boolean (true or false variable) that checks to see if the file exists. Place this somewhere in your code, outside of other methods:
public boolean FileExists(String fname){
  File file = getBaseContext().getFileStreamPath(fname);
  return file.exists();
}
Now we can create the following Open method and pass it the file name string that we want to open. It will return the content as a string, so we can do with it as we please. It should look like so:
public String Open(String fileName) {
    String content = "";
    if (FileExists(fileName)) {
        try {
            InputStream in = openFileInput(fileName);
            if ( in != null) {
                InputStreamReader tmp = new InputStreamReader( in );
                BufferedReader reader = new BufferedReader(tmp);
                String str;
                StringBuilder buf = new StringBuilder();
                while ((str = reader.readLine()) != null) {
                    buf.append(str + "\n");
                } in .close();
                content = buf.toString();
            }
        } catch (java.io.FileNotFoundException e) {} catch (Throwable t) {
            Toast.makeText(this, "Exception: " + t.toString(), Toast.LENGTH_LONG).show();
        }
    }
    return content;
}
This reads each line and then builds a string out of them, using the ‘\n’ (newline symbol) at the end of each line for basic formatting. Finally, we use this new string to populate our EditText1.
I’m calling this Open function from the onCreate method for now, which means the file will show as soon as the app loads. Obviously, this isn’t typical behavior for a notepad app but I quite like it – it means whatever you write will be instantly visible upon loading – like a mini scratchpad where you can jot down things you need to remember temporarily!
The full code should look like this:
public class MainActivity extends AppCompatActivity {
    EditText EditText1;
    @Override
    protected void onCreate(Bundle savedInstanceState) {
        super.onCreate(savedInstanceState);
        setContentView(R.layout.activity_main);
        Toolbar toolbar = (Toolbar) findViewById(R.id.toolbar);
        setSupportActionBar(toolbar);

        FloatingActionButton fab = (FloatingActionButton) findViewById(R.id.fab);
        fab.setOnClickListener(new View.OnClickListener() {
            @Override
            public void onClick(View view) {
                Save("Note1.txt");
            }
        });

        EditText1 = (EditText) findViewById(R.id.EditText1);
        EditText1.setText(Open("Note1.txt"));
    }

    @Override
    public boolean onCreateOptionsMenu(Menu menu) {
        // Inflate the menu; this adds items to the action bar if it is present.
        getMenuInflater().inflate(R.menu.menu_main, menu);
        return true;
    }

    public void Save(String fileName) {
        try {
            OutputStreamWriter out =
                new OutputStreamWriter(openFileOutput(fileName, 0));
            out.write(EditText1.getText().toString());
            out.close();
            Toast.makeText(this, "Note saved!", Toast.LENGTH_SHORT).show();
        } catch (Throwable t) {
            Toast.makeText(this, "Exception: " + t.toString(), Toast.LENGTH_LONG).show();
        }
    }

    public String Open(String fileName) {
        String content = "";
        if (FileExists(fileName)) {
            try {
                InputStream in = openFileInput(fileName);
                if ( in != null) {
                    InputStreamReader tmp = new InputStreamReader( in );
                    BufferedReader reader = new BufferedReader(tmp);
                    String str;
                    StringBuilder buf = new StringBuilder();
                    while ((str = reader.readLine()) != null) {
                        buf.append(str + "\n");
                    } in .close();
                    content = buf.toString();
                }
            } catch (java.io.FileNotFoundException e) {} catch (Throwable t) {
                Toast.makeText(this, "Exception: " + t.toString(), Toast.LENGTH_LONG).show();
            }
        }
        return content;
    }

    public boolean FileExists(String fname) {
        File file = getBaseContext().getFileStreamPath(fname);
        return file.exists();
    }

    @Override
    public boolean onOptionsItemSelected(MenuItem item) {
        // Handle action bar item clicks here. The action bar will
        // automatically handle clicks on the Home/Up button, so long
        // as you specify a parent activity in AndroidManifest.xml.
        int id = item.getItemId();

        //noinspection SimplifiableIfStatement
        if (id == R.id.action_settings) {
            return true;
        }
        return super.onOptionsItemSelected(item);
    }
}
Try running that again. Write something, save and exit the app. Then pop back in and you should find that the text persists. Success!
Managing notes
So far so good, but in reality most notepad apps should give their users the ability to save more than one note. For that, we’re going to need some kind of note select screen!
Right click somewhere in your hierarchy on the left and select New > Activity, then choose ‘Basic Activity’ again. We’re calling this one ‘NoteSelect’. Enter that into the Activity Name and then hit ‘Finish’.
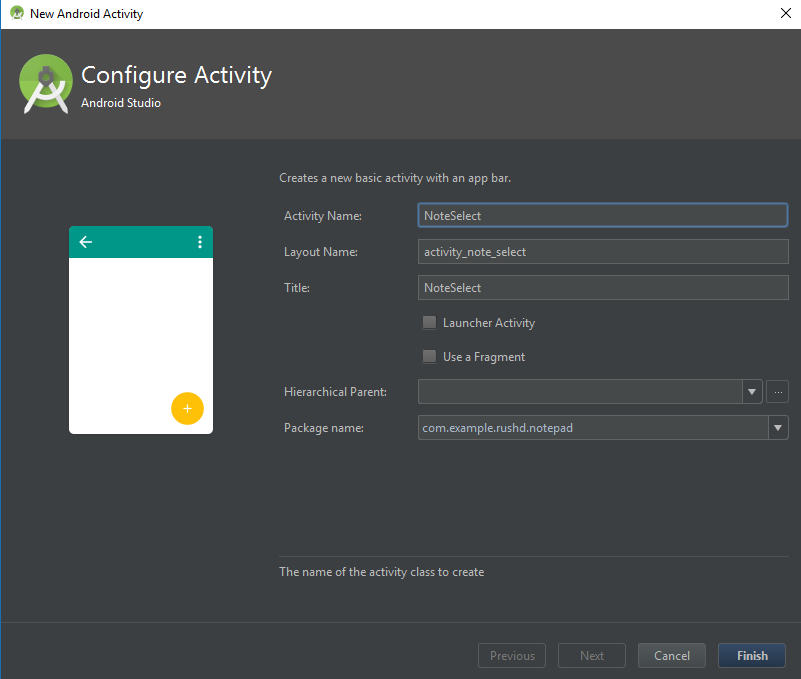
This will generate your Java file, your content layout and your app layout. Open up the activity_note_select.xml file and we’re going to make some similar changes to last time. This time, we want our FAB to display a ‘newnote’ icon for creating new notes. There’s nothing already available that really satisfies our requirements, so make your own and drop it into your app’s ‘drawable’ folder. You can do this by navigating to the project directory, or right clicking on the folder on the left of Android Studio and selecting ‘Show in Explorer’. You should now be able to select it from the list as before – remember that file names in your resources need to be lower case.
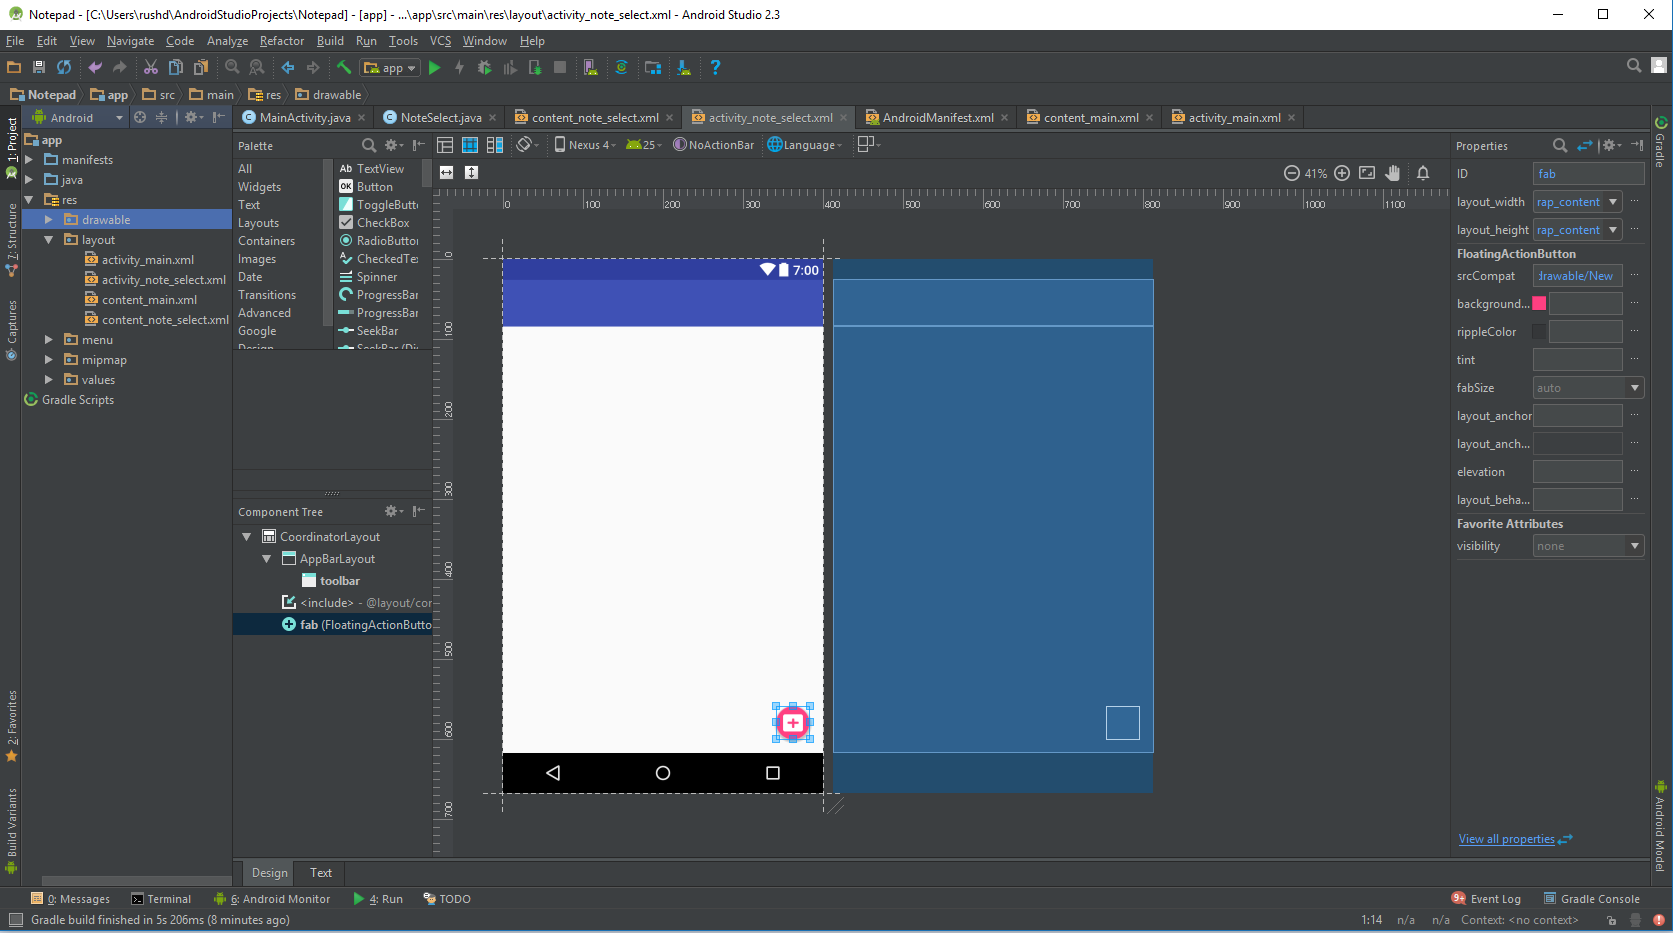
We’re going to use a recycler view in order to display our notes, which makes life a little more complicated. The good news is that using recycler views has become easier since last time (when we built the gallery app). You no longer need to add the dependency to Gradle and now the view can be selected straight from the designer, nice!
So add your recycler view as usual to the notes_select_content.xml and give it the ID ‘notes’. The XML code should look like this:
<android.support.constraint.ConstraintLayout xmlns:android="http://schemas.android.com/apk/res/android"
 xmlns:app="http://schemas.android.com/apk/res-auto"
 xmlns:tools="http://schemas.android.com/tools"
 android:layout_width="match_parent"
 android:layout_height="match_parent"
 app:layout_behavior="@string/appbar_scrolling_view_behavior"
 tools:context="com.example.rushd.notepad.NoteSelect"
 tools:layout_editor_absoluteX="0dp"
 tools:layout_editor_absoluteY="81dp"
 tools:showIn="@layout/activity_note_select">

<android.support.v7.widget.RecyclerView
 android:layout_width="0dp"
 android:layout_height="0dp"
 android:clipToPadding="false"
 android:gravity="top"
 tools:layout_editor_absoluteX="8dp"
 tools:layout_editor_absoluteY="8dp"
 tools:layout_constraintTop_creator="1"
 tools:layout_constraintRight_creator="1"
 tools:layout_constraintBottom_creator="1"
 android:layout_marginStart="8dp"
 app:layout_constraintBottom_toBottomOf="parent"
 android:layout_marginEnd="8dp"
 app:layout_constraintRight_toRightOf="parent"
 android:layout_marginTop="8dp"
 tools:layout_constraintLeft_creator="1"
 android:layout_marginBottom="8dp"
 app:layout_constraintLeft_toLeftOf="parent"
 app:layout_constraintTop_toTopOf="parent"
 android:layout_marginLeft="8dp"
 android:layout_marginRight="8dp"
 android:id="@+id/notes"/>
</android.support.constraint.ConstraintLayout>
Next, create a new Java class (we’re ignoring the new activity for now). This Java class is going to build our note object (quick primer on what an object is in programming) so we’ll call it NotesBuilder. Right click on the Java folder and select New > Java Class. Add the following code:
public class NotesBuilder {

    private String title,
    content;

    public NotesBuilder() {
    }

    public NotesBuilder(String title, String content) {
        this.title = title;
        this.content = content;
    }

    public String getTitle() {
        return title;
    }

    public String getContent() {
        return content;
    }
}
Now we need another new layout file, which is going to define the layout of each row in our recycler view. This will be called list_row.xml and you’ll create it by right clicking on the layout folder and then choose New > Layout resource file. Pick ‘Relative Layout’ in the next dialog that comes up. The great thing about recycler view is that you can be as elaborate here as you like and include images and all kinds of other views in each row. We just want something simple for now though, so it will look like this:
<RelativeLayout xmlns:android="http://schemas.android.com/apk/res/android"
 android:layout_width="match_parent" android:layout_height="match_parent">

<TextView
 android:id="@+id/title"
 android:textSize="16dp"
 android:textStyle="bold"
 android:layout_alignParentTop="true"
 android:layout_width="match_parent"
 android:layout_height="wrap_content" />

<TextView
 android:id="@+id/content"
 android:layout_below="@id/title"
 android:layout_width="match_parent"
 android:layout_height="wrap_content" />

</RelativeLayout>
Next we need to create an ‘adaptor’. Basically, an adaptor takes a data set and attaches it to the recycler view. This will be another new Java class and this one will be called ‘NotesAdapter’.
public class NotesAdapter extends RecyclerView.Adapter & lt;
NotesAdapter.MyViewHolder & gt; {

    private List & lt;
    NotesBuilder & gt;
    notesList;

    public class MyViewHolder extends RecyclerView.ViewHolder {
        public TextView title, content;

        public MyViewHolder(View view) {
            super(view);
            title = (TextView) view.findViewById(R.id.title);
            content = (TextView) view.findViewById(R.id.content);

        }
    }

    public NotesAdapter(List & lt; NotesBuilder & gt; notesList) {
        this.notesList = notesList;
    }

    @Override
    public MyViewHolder onCreateViewHolder(ViewGroup parent, int viewType) {
        View itemView = LayoutInflater.from(parent.getContext())
            .inflate(R.layout.list_row, parent, false);

        return new MyViewHolder(itemView);
    }

    @Override
    public void onBindViewHolder(MyViewHolder holder, int position) {
        NotesBuilder note = notesList.get(position);
        holder.title.setText(note.getTitle());
        holder.content.setText(note.getContent());
    }

    @Override
    public int getItemCount() {
        return notesList.size();
    }
}
Now if you look over this code, you’ll see that it is going through a list called notesList that has been built with our NoteBuilder class. Now everything is in place, we just need to add the relevant code to the NoteSelect.java script. This will read as follows:
public class NoteSelect extends AppCompatActivity {

    private List & lt;
    NotesBuilder & gt;
    notesList = new ArrayList & lt; & gt;
    ();
    private NotesAdapter nAdapter;
    private RecyclerView notesRecycler;

    @Override
    protected void onCreate(Bundle savedInstanceState) {
        super.onCreate(savedInstanceState);
        setContentView(R.layout.activity_note_select);
        Toolbar toolbar = (Toolbar) findViewById(R.id.toolbar);
        setSupportActionBar(toolbar);

        FloatingActionButton fab = (FloatingActionButton) findViewById(R.id.fab);
        fab.setOnClickListener(new View.OnClickListener() {
            @Override
            public void onClick(View view) {
                Snackbar.make(view, "Replace with your own action", Snackbar.LENGTH_LONG)
                    .setAction("Action", null).show();
            }
        });

        notesRecycler = (RecyclerView) findViewById(R.id.notes);

        nAdapter = new NotesAdapter(notesList);
        RecyclerView.LayoutManager mLayoutManager =
            new LinearLayoutManager(getApplicationContext());
        notesRecycler.setLayoutManager(mLayoutManager);
        notesRecycler.setItemAnimator(new DefaultItemAnimator());
        notesRecycler.setAdapter(nAdapter);

        prepareNotes();

    }

    private void prepareNotes() {
        File directory;
        directory = getFilesDir();
        File[] files = directory.listFiles();
        String theFile;
        for (int f = 1; f & lt; = files.length; f++) {
            theFile = "Note" + f + ".txt";
            NotesBuilder note = new NotesBuilder(theFile, Open(theFile));
            notesList.add(note);
        }

    }

    public String Open(String fileName) {
        String content = "";
        try {
            InputStream in = openFileInput(fileName);
            if ( in != null) {
                InputStreamReader tmp = new InputStreamReader( in );
                BufferedReader reader = new BufferedReader(tmp);
                String str;
                StringBuilder buf = new StringBuilder();
                while ((str = reader.readLine()) != null) {
                    buf.append(str + "\n");
                } in .close();

                content = buf.toString();
            }
        } catch (java.io.FileNotFoundException e) {} catch (Throwable t) {
            Toast.makeText(this, "Exception: " + t.toString(), Toast.LENGTH_LONG).show();
        }

        return content;
    }
}
Again, make sure that you’re remembering to import classes as you are prompted to do so.
So what’s happening here? Well first, we are using a LinearLayoutManager and populating the RecyclerView using the adapter so that it shows our notes. prepareNotes is the method where this happens. Here, we are opening up the internal storage directory and we’re looking through the files. We called the first note we created ‘Note1’ and we would follow this nomenclature as we went if we were to build this app further. In other words, the next note would be Note2, Note3 and so on.
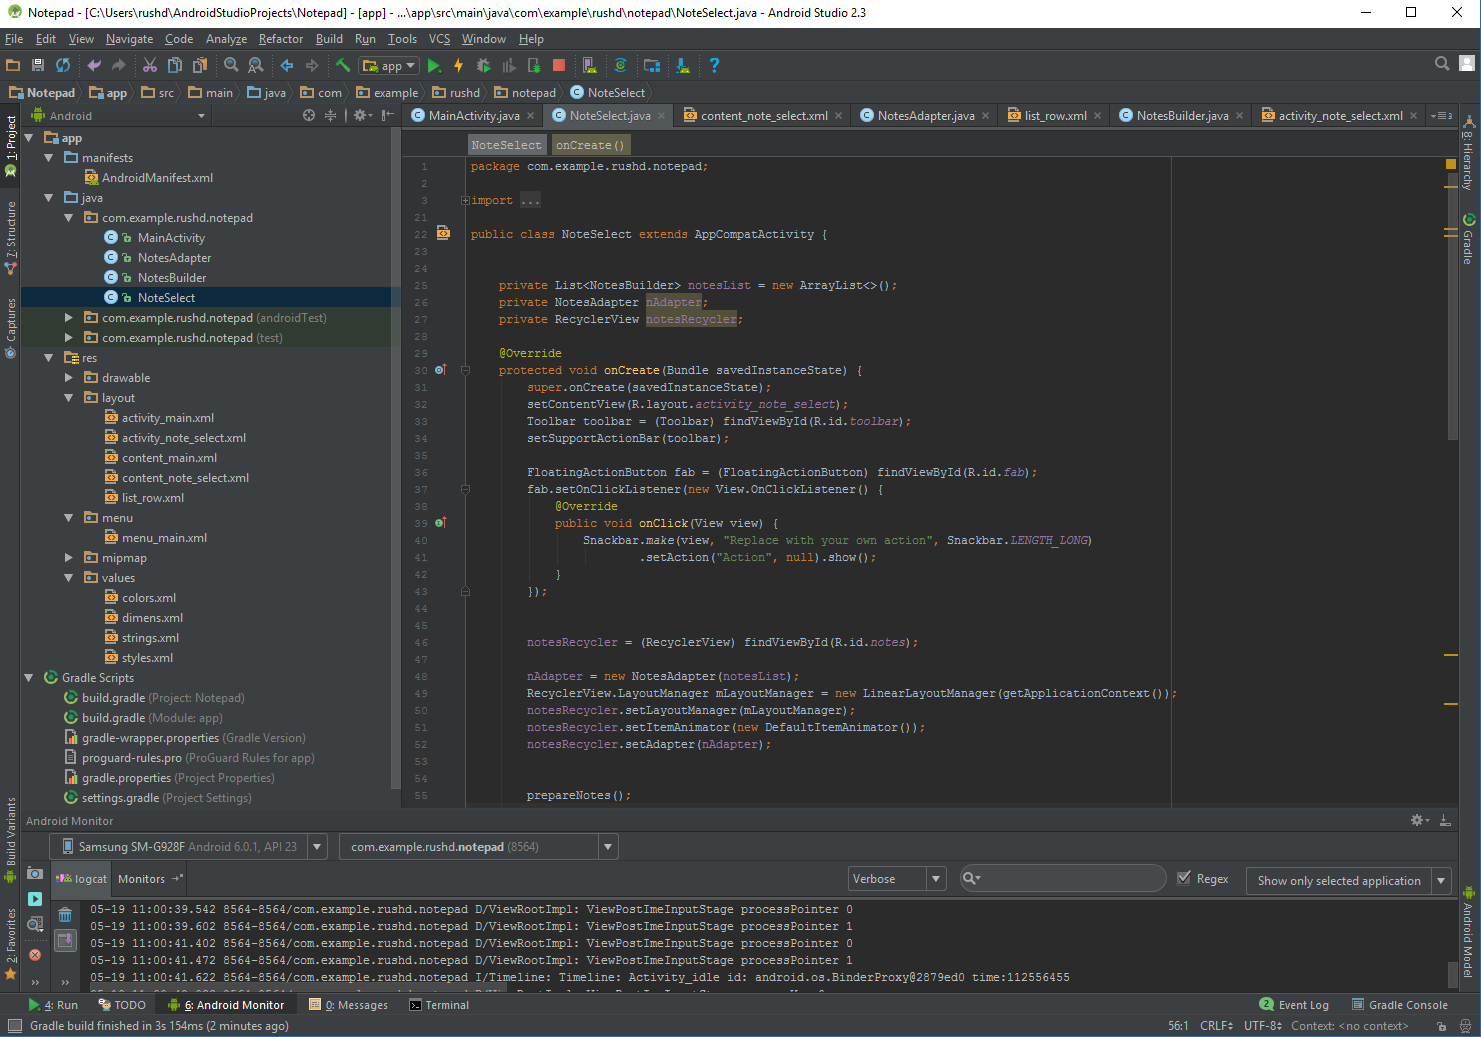
So this means we can use a For loop in order to look through the list of files. Each one is then used to populate the list, so that the file name is the title and the content is displayed underneath. To grab the content, I’m re-using the Open method.
Where to go from here
Now in an ideal world, we would place the Save and Open methods in a separate Java class and call them from there, but this is an easy way to do it in the interests of brevity.
Likewise, were we going to build this into a full app, we’d probably only want to load the first line of the text file. We’d likely want to give the user a way to create their own app titles too. There’s lots more work to be done here!
But as a starting point, you now have the ability to create, list and load notes. The rest is up to you!
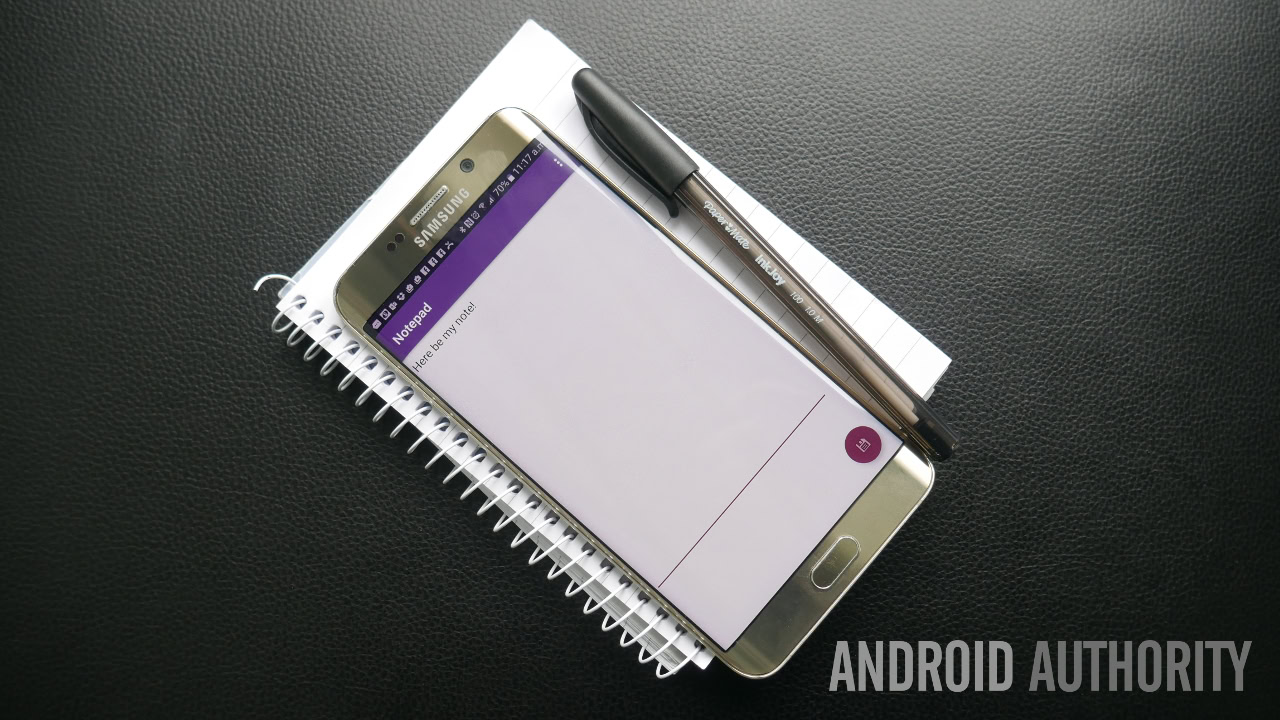
One last tweak: you need to be able to access the list of notes! To do this, add the following code to your onOptionsItemSelected method in MainActivity and change the value of action_settings from ‘Settings’ to ‘List Notes’ in the strings.xml resource file. While you’re there, change the color codes too to make your app a little less generic.
Now the top right menu will give you the option to ‘List Notes’ and tapping that will take you to the list of your notes:
Intent myIntent = new Intent(MainActivity.this, NoteSelect.class);
MainActivity.this.startActivity(myIntent);
We would want to add an onClickListener to our recycler so that hitting a note would do something similar – starting the MainActivity and passing an extra parameter telling the activity which note to load. If the user opted to build a new note using the FAB, then the file name would be the number of files in the internal directory +1. Clicking save would then save this file and add it to the list.
Give it a go, have a play around and hopefully inspiration will strike! At the very least, you’ll have a nice note taking app that you can customize to your liking and you’ll have learned some handy skills along the way!
Thank you for being part of our community. Read our Comment Policy before posting.