Affiliate links on Android Authority may earn us a commission. Learn more.
How to make a basic Android game in Unreal Engine in 7 minutes
February 4, 2019
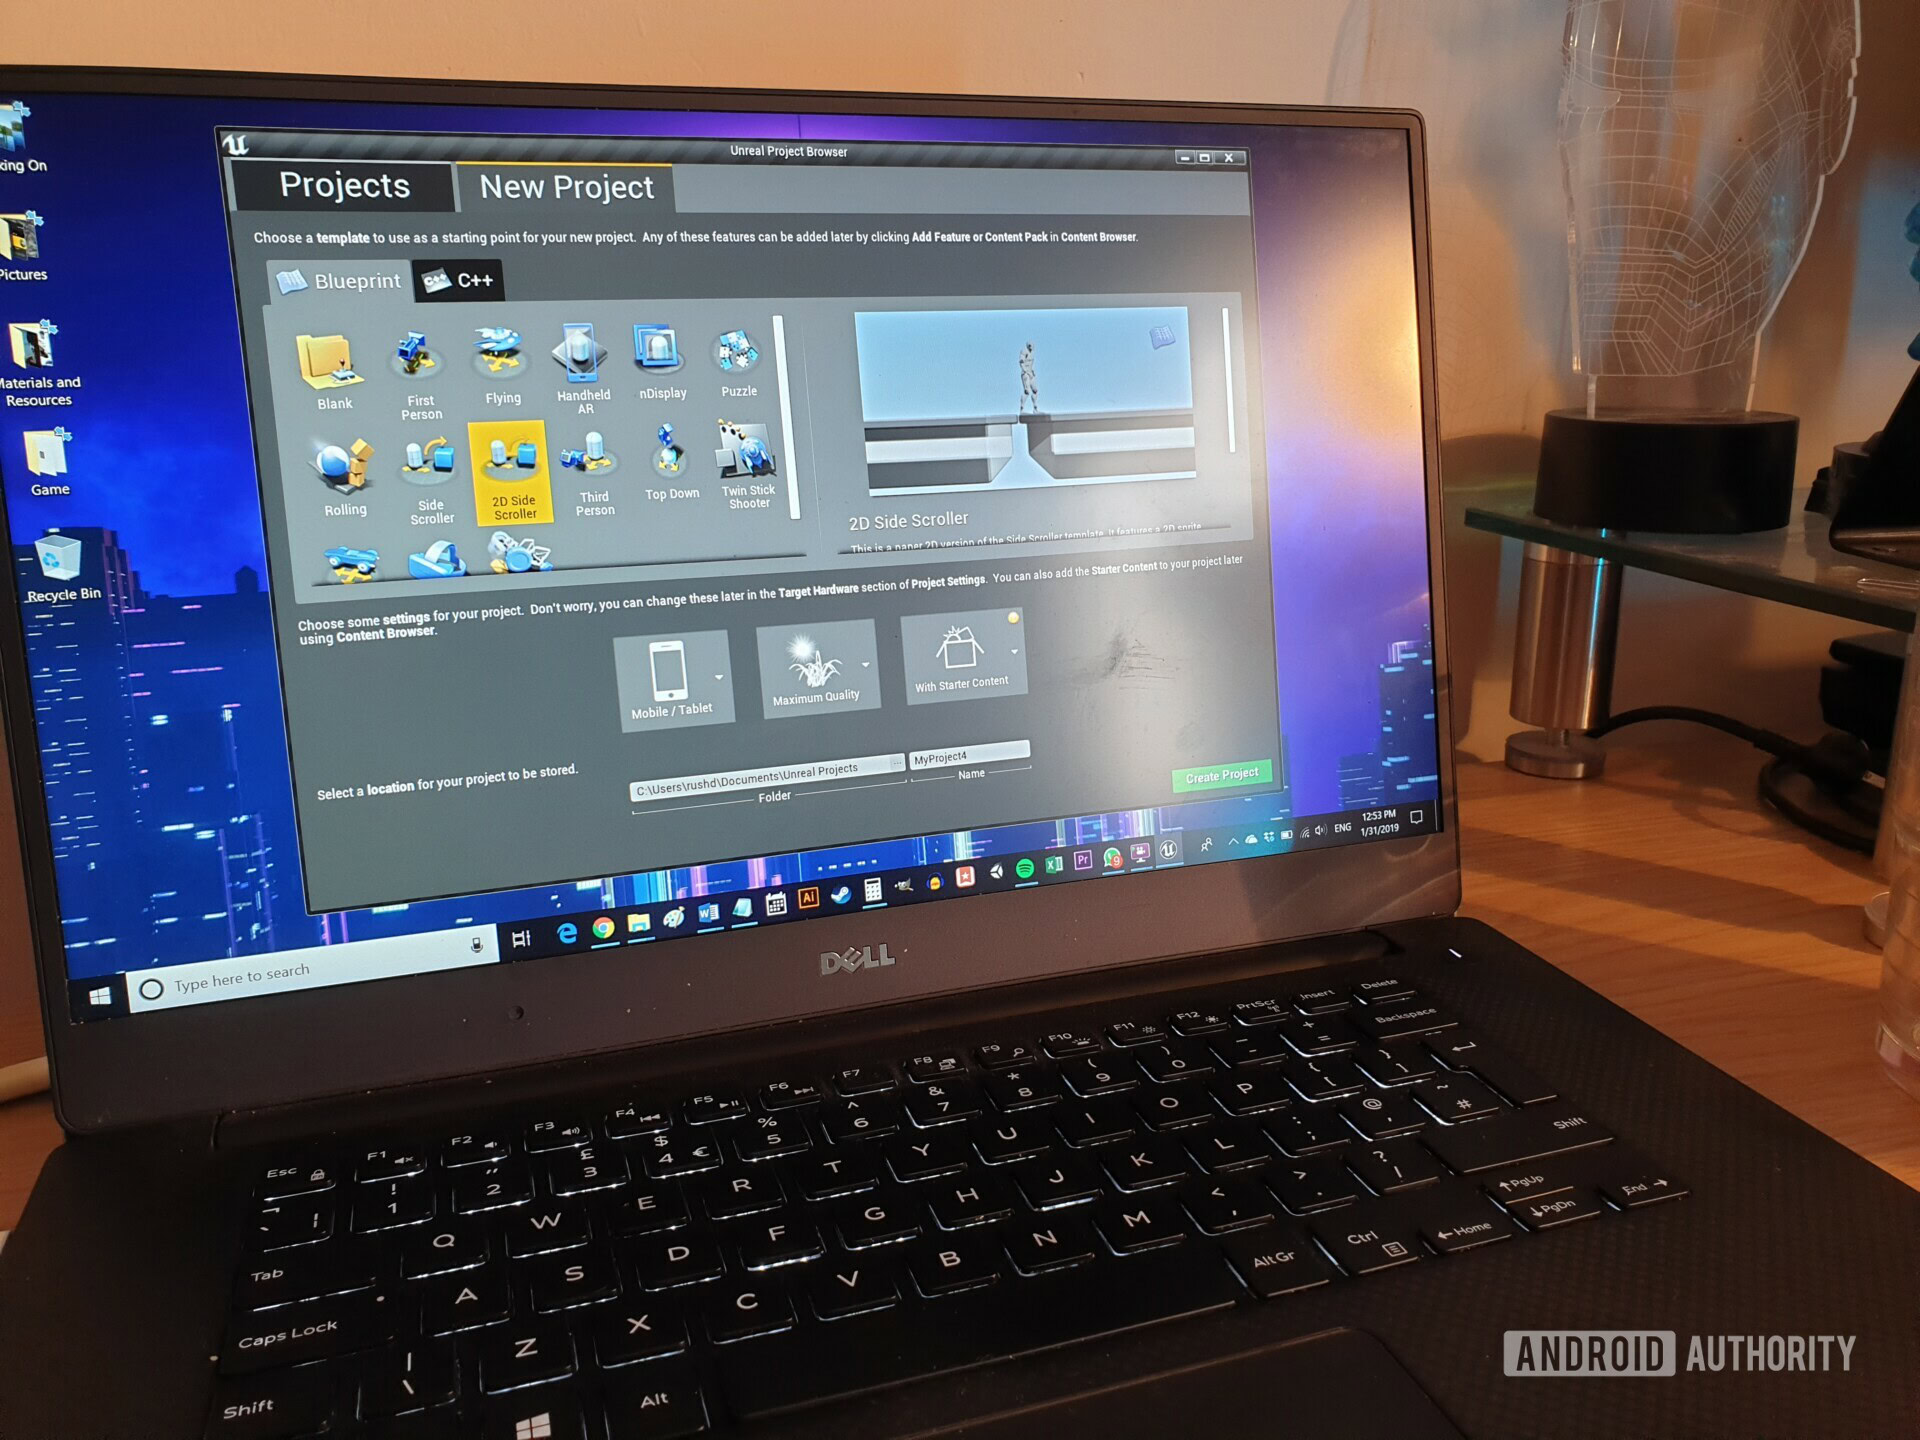
If you want to create a game for Android, then Unreal Engine 4 is a very good choice, with a lot of power and flexibility. Upon first loading the editor up though, you might feel overwhelmed by all the windows and jargon, and the generally impenetrable nature of it all. There are tutorials, but they tend to involve so much preamble that you’ll be five hours in before you’ve achieved anything.
Ain’t nobody got time for that!
The aim of this post is to help you make a quick start and grasp the basics. In just seven minutes, you’ll learn to create the basic start of a 2D platformer. It’s not a full game, but it’s enough to hopefully create some enthusiasm and momentum, so you can start designing and having fun.
What you’ll need
You will need to have Unreal Engine 4 set up on your machine, along with the Android SDK and NDK, JDK, and Apache ANT. You should also go and make or locate some sprites. You can use CodeWorks for Android to simplify this setup process. You’ll need a tile or platform sprite, and sprites for a main character with an idle animation and a walking animation. You can make these yourself, or find some to use for free.

Starting your first project
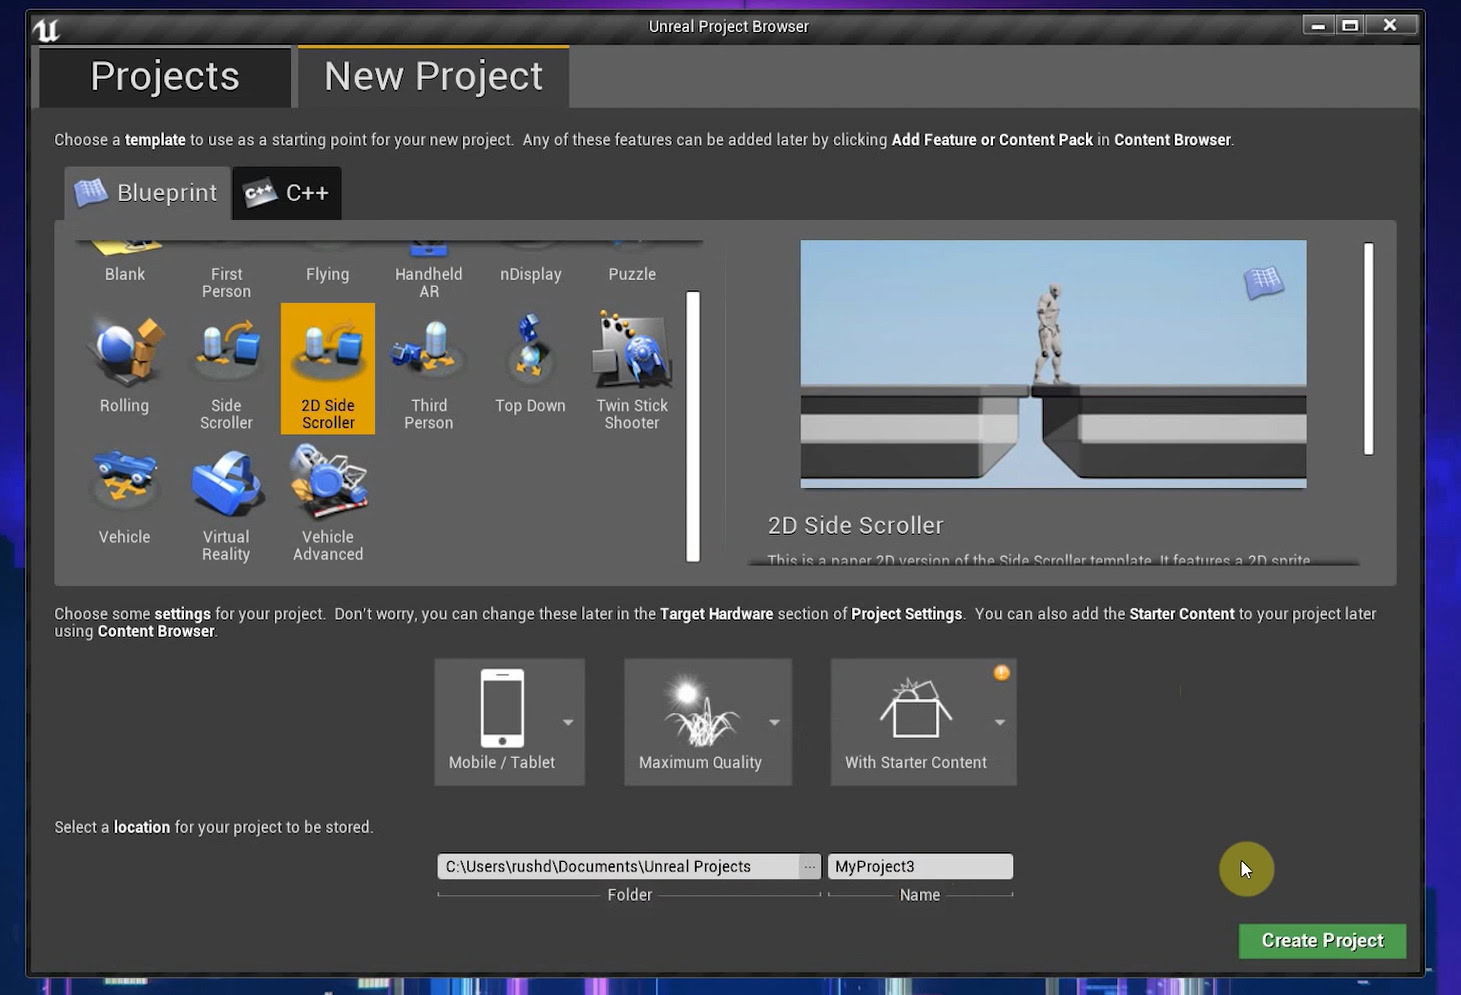
First you need to create a new project. There are lots of options available, suited to different types of games. Let’s choose 2D Side Scroller, and set it for Mobile/Tablet, with Maximum Quality, and including Starter Content. The top tab should say “Blueprint” rather than C++, as this is means we won’t need any coding to get things up and running.
Once that’s finished, you’ll already have a playable platforming game! Hit Play and click on the Viewport and you’ll be able to run around, jump, and watch the pretty animations.
There you have it! Your first 2D game in just 20 seconds!
Obviously we’re going to do a bit more than that. More specifically, we’re going to customize all the elements already here so you can turn this generic prototype into the basis for your own unique game, with your own graphics and animations. In doing so, hopefully you’ll learn the basics of Unreal Engine 4 and be able to build on from there.
Finding your way around
With everything set up, this is what you should have in front of you.
The 3D viewport is where you will see your level layout, sprites, and other game elements. To navigate, hold the right mouse button and press the WASD keys. Use Q & E to go up and down. You can also hit the right mouse button and then drag the world around. The World Outliner on the right provides you with a list of all the elements in your game, which in Unreal are called Actors.
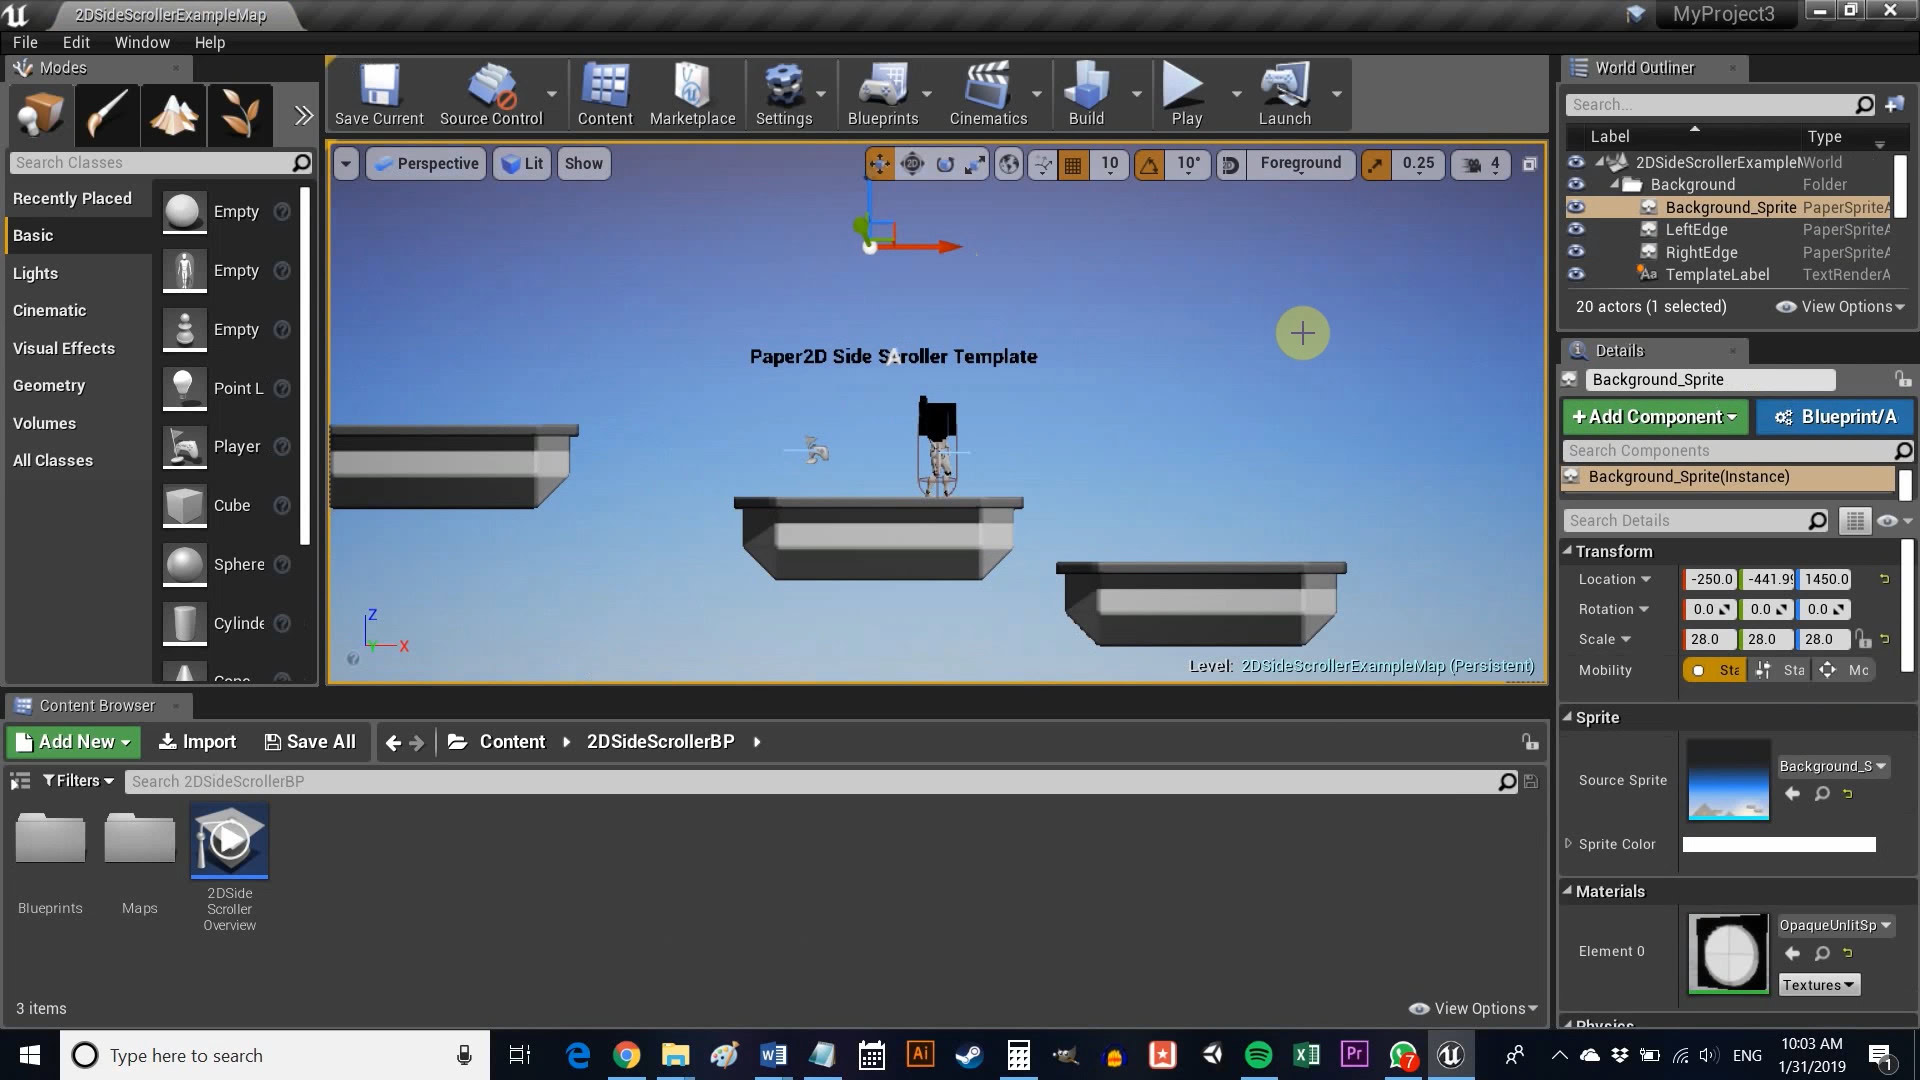
Here we have our Background, Background_Sprite, Ledges, among other things.
On the left is the Modes window. This allows you to effectively change what you are going to be doing in the 3D view — whether that is placing cubes, or adding visual effects. The Content Browser is what you’ll use to browse your project files.
Finally, the Details pane on the right will show you information about whatever Actor or element you have selected. This lets you quickly edit the properties of that element, or just to learn more about it. You’ll find the Sprites folder in Content > 2DSideScroller > Sprites. You should instantly recognize the background sprite and ledge as the elements in the viewport.
Flipbook animations animate elements in the game world by stringing together multiple sprites.
If there’s anything else you don’t understand, hold Ctrl + Alt while hovering the mouse over that element, and you’ll be able to see what it does. This is very handy when you start out.
Creating a level
First let’s learn to create new Actors for our game (remember, this is the generic term for any game object). I’m using the existing Sprites folder. Drop a PNG or other image in here through the File Explorer, and then right click on it and go to Sprite Actions > Create Sprites.
Now head to the Blueprints folder. You can bring up the directories on the left if it helps. Right click again, this time anywhere in the folder, and select Create Basic Asset > Blueprint Class > Actor. This is object will let us create lots of different iterations of the same object, like a platform. If you’re familiar with Unity, it’s the equivalent of a prefab. In code, it is a class. Call this FloorTile, or Tile, or something like it.

Now double click on that new Blueprint Class to open up an editor. In the top left, select +Add Component and then choose Sprite (you can also search, it’s quicker).
Now select this new sprite in the Components window and drag and drop your platform sprite into the Sprite box. You can now see the tile image is part of your platform. The 3D circle is called a node and is going to serve as the reference point for dragging and dropping your elements. Later, this can also be used to apply logic via graphs.
Don’t forget to adjust the scale if your sprite isn’t already the perfect size! Now click Save and then return to your game.
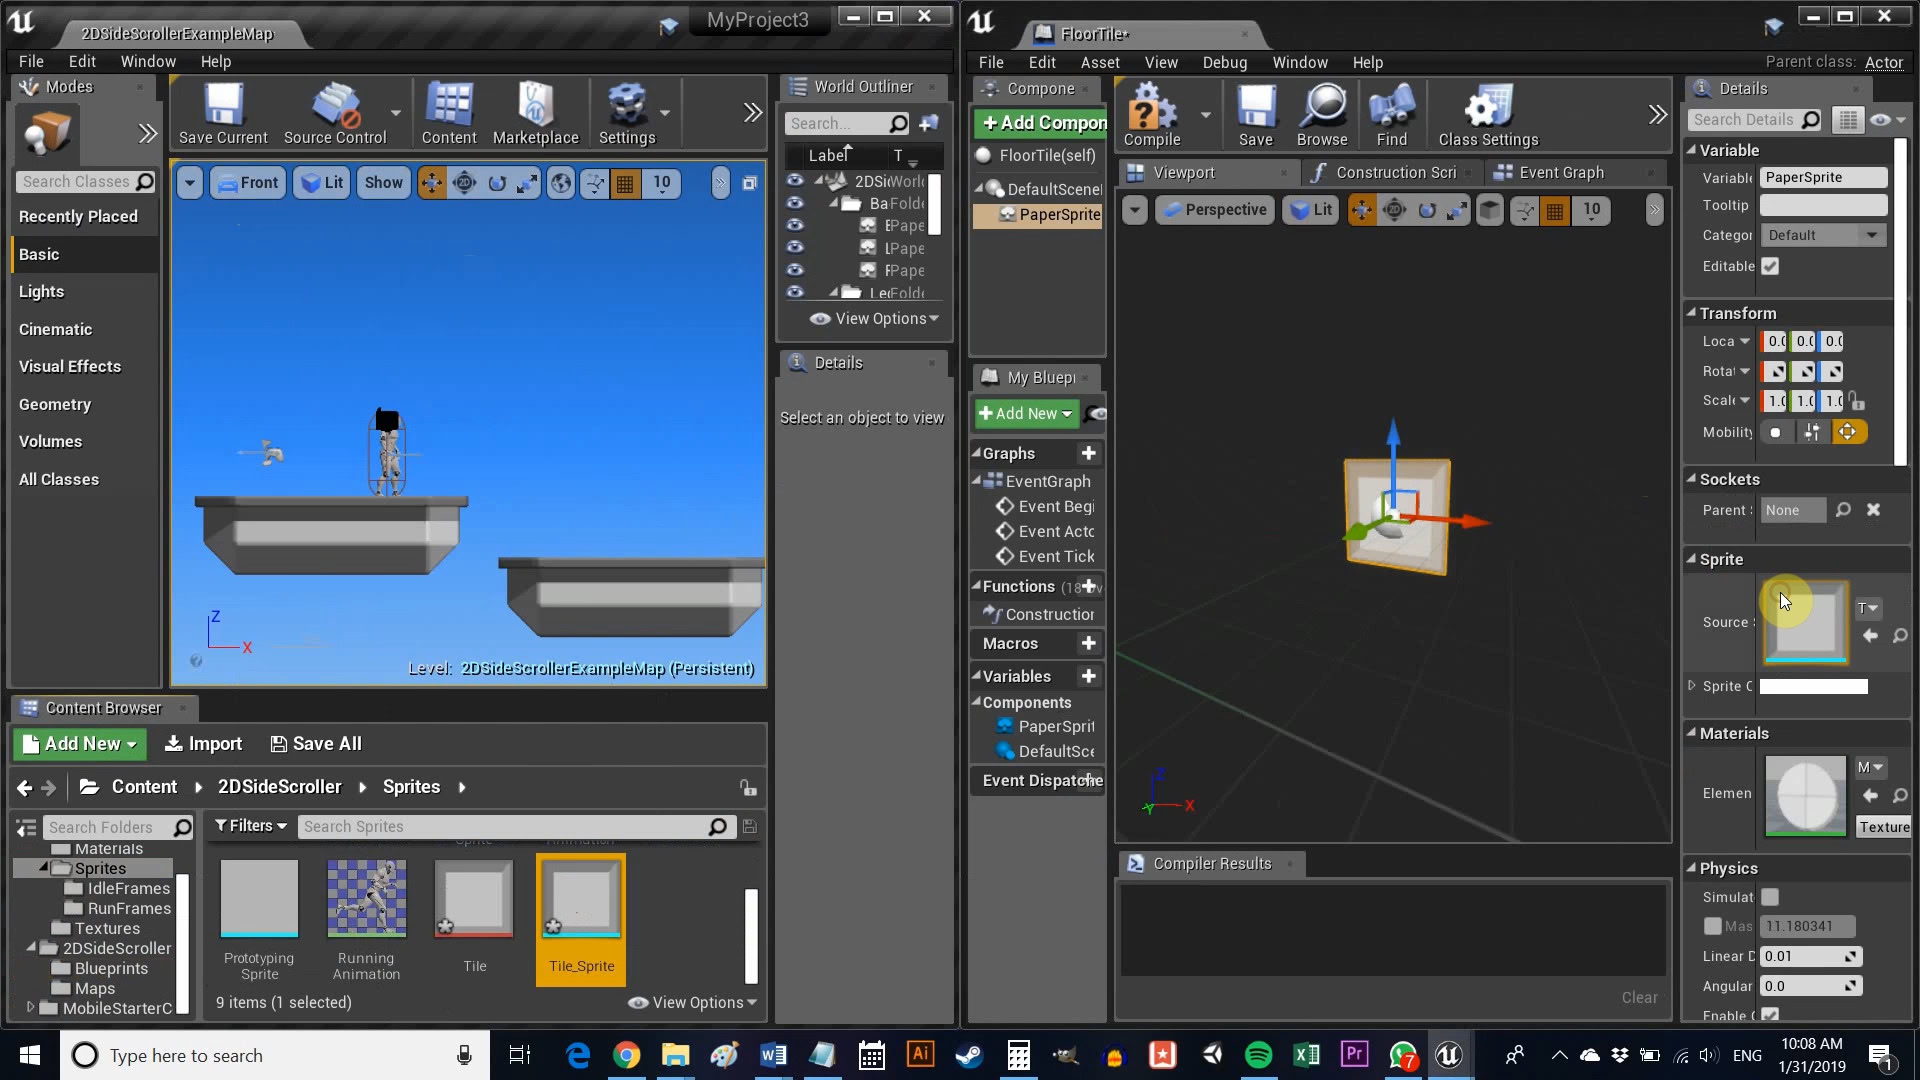
Once you’ve done that, simply drag and drop the new element anywhere into your game! When you drop your platform into the level, make sure the Y coordinate (which for some reason behaves like the Z coordinate) is set to zero so it isn’t in front or behind the player. You’ll notice your platform already has a collider — a yellow box that tells Unreal your player shouldn’t be able to pass through the item. This means we can jump on it.
If you selected the Simulate Physics and Enable Gravity check boxes, the platform would fall out of the sky and then be moveable. You’d also want to use constraints to freeze the third axis though.

Of course, you can create many more types of actors and drop them into your levels like this. By using different sprites, different settings, and different logic via graphs (many of which you can easily look up online), you can create a whole host of challenging obstacles, interesting environmental items, and rewarding collectibles.
To further customize the level, you might also want to change the background. Do this simply by selecting Background_Sprite in the World outliner (top right), and then changing the Source Sprite to one of your own in Details. I’m using a starry sky I created.
Animating the player character
The last thing we need to change to make this our platformer is the main character.
To handle this, we’re going to need to use some more sprites, which we’re going to turn into animations.
To get started, head back to the Sprite folder (though it’s really up to you how you organize this). Now create a new folder called “Animations” with two sub-folders: “Idle” and “Walking” (Animation Flipbooks is just the term Unreal uses for its animations).
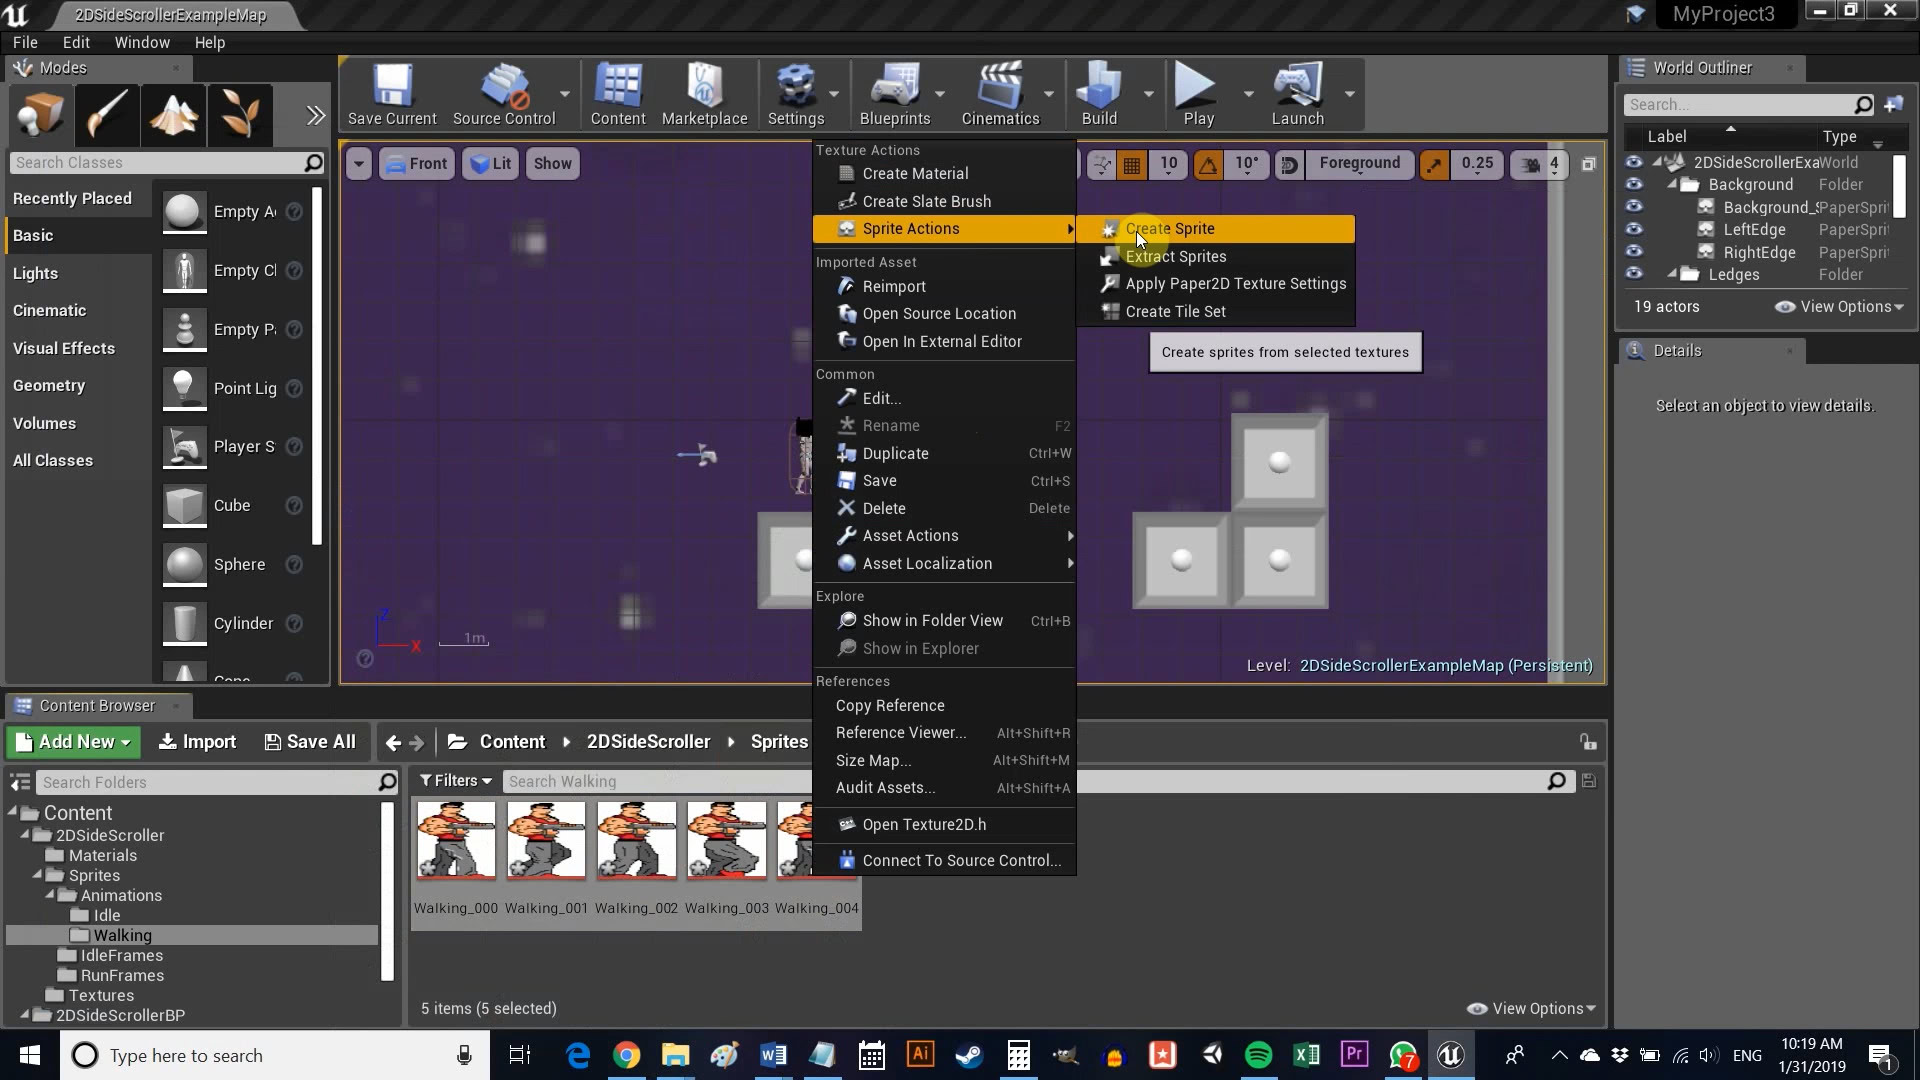
Into each, we’re going to drag and drop our character sprites. Instead of using a sprite sheet, we’re adding individual images and naming them in ascending numerical order to keep things simple. I’m using sprites I made for another tutorial, but you can grab them for free from a bunch of places.
Drop these into the relevant folders, select them all together, and select Sprite Actions > Create Sprite.
We’ll do the idle animation first. I only have two images for this which is meant to simulate breathing in a kind of low-frame, pixel-art manner (tip: choose pixel art and you have far less work!). To set this up, right click in the folder and choose Animation > Paper Flipbook. Name your new animation Idle and then double click to open it up.
In there, head over to where it says Sprite and add two keyframes by hitting the “+” button. This will add two members you can expand by hitting the arrow on the left. Just drag and drop your new sprites into those windows and the animation will cycle through its frames. You can also just drop sprites straight into the timeline box down the bottom.
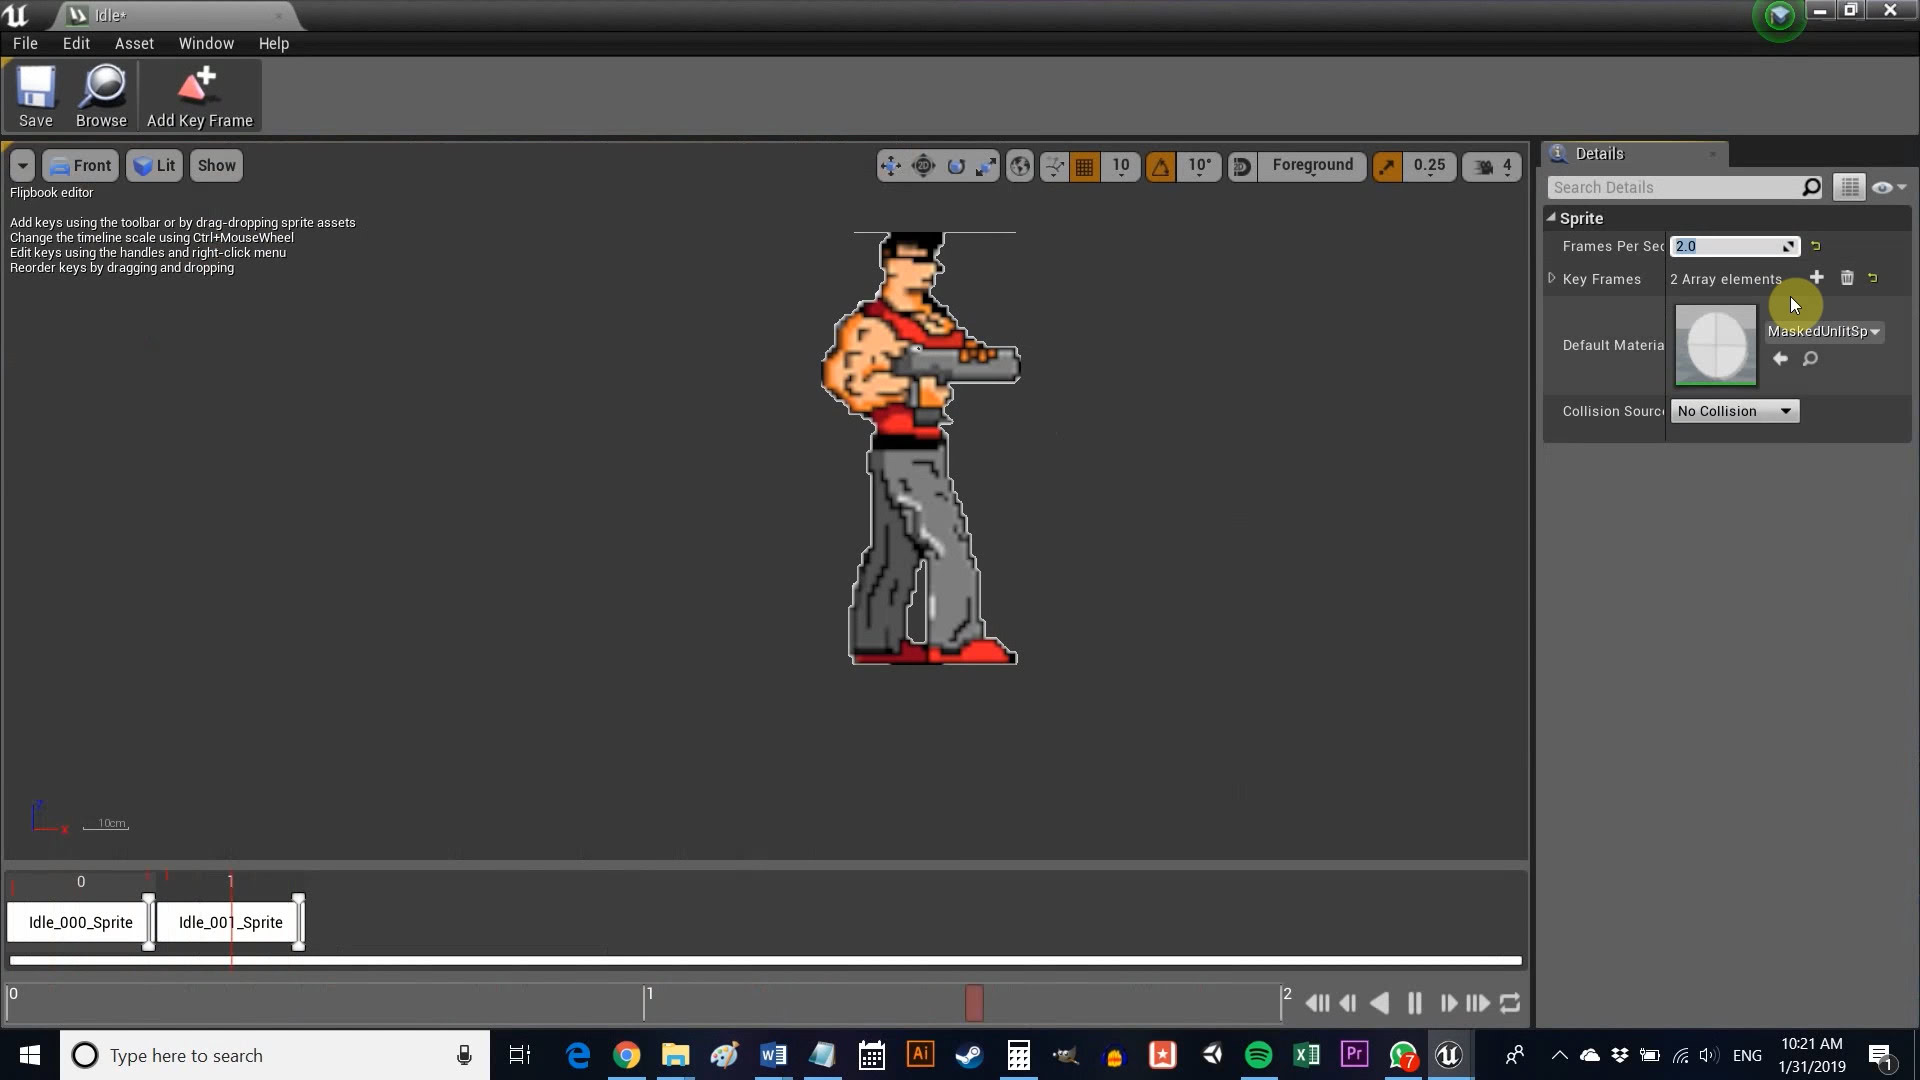
Right now, this is seizure inducing, so set the Frame Run value to 8 (or thereabouts) and it looks a lot more like breathing.
You can do the same thing with your walking animation, but keep the frame rate higher and add more keyframes. I set mine to two so it would still look nice and 16bit.
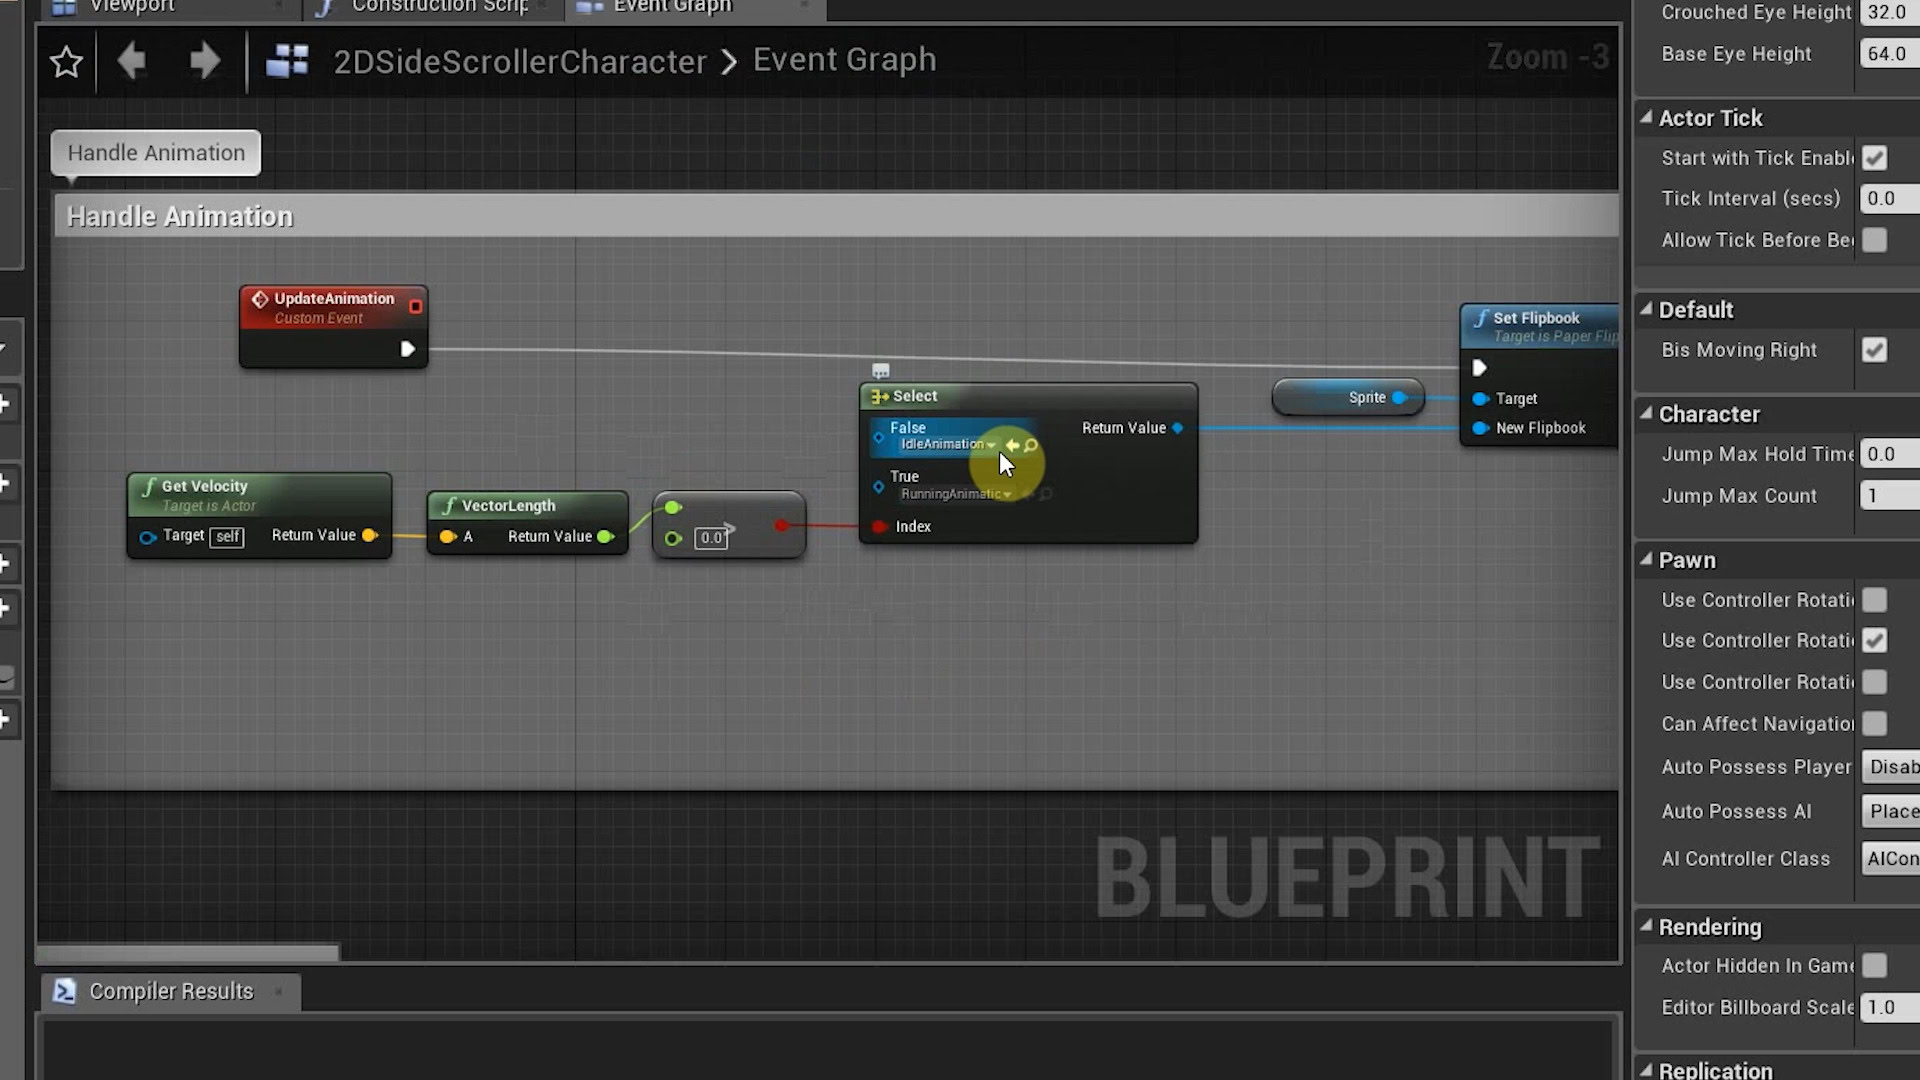
Once they’re both done, head over to 2DSideScrollerBP > Blueprints and double click on 2DSideScrollerCharacter. Double click on this and you’ll be greeted with something a little different: a graph. Remember that we chose graphs instead of C++ when we set up the project. Basically, this means we’re using a visual flow chart of sorts in place of actual code, which is great if you don’t know a lot of programming. If you’re familiar with code, you’ll quickly understand what a lot of these things do from context.
Zoom out, find the box that says Handle Animation, and then find the drop-down menus under Select. These will look familiar: IdleAnimation and RunningAnimation. Click those buttons and swap them out for the ones you created.
Finally, flick over to the Viewport window and find the box that says Source Flipbook on the right. Switch that for your idle animation (make sure that the character is selected in the Viewport). Make sure to edit the scale under the Transform heading on the right to set your character to be the right size.
Remember to hit compile and save once that’s done.
And you’re on your own
To run on your device, simply go to File > Package Project > Android. Choose ETC1. You’ll then be able to create an APK, which you can pop onto your device to test. You should have a working basic platformer with touch input and animations — a pretty exciting start.
You’ll still need to have set all this up correctly to begin with. My advice is to remove Gradle support for the build — it doesn’t work quite correctly at the moment. I’d also advise using CodeWorks for Android to install all the necessary elements. It makes life significantly easier.

With that, your time is up!
Where would you go from here? Now you can create lots of different platforms and obstacles, and add animations to things. If you play around in the graphs, you can access and set different properties for Actors as you wish, which is how you would create more complex interactions (enemies that follow you, weapon buttons, changing jump heights etc.). To add new inputs, you can go to Settings > Project Settings > Input and then find Action Mappings.
There’s lot more to learn, but hopefully you now have a good idea of how everything slots into place. All that’s left is to decide what kind of game you want to build and let your imagination run wild!
Thank you for being part of our community. Read our Comment Policy before posting.