Affiliate links on Android Authority may earn us a commission. Learn more.
Nexus 7 not charging? How to replace the USB port and headphone jack - Android customization
Published onDecember 10, 2015
I hope you had some fun changing up the text-to-speech output settings on your Android device with last week’s Android customization article. That was pretty simple stuff, and while this week is also really easy, our new project can be a little intimidating to those that are not comfortable with a screwdriver. If your 2012 Nexus 7 is not charging, and you think it is the USB port that’s dead, or your headphones have stopped working and you think it is the headphone jack, let’s replace them.
Let me explain a little more before we get started. My Nexus 7 began experiencing charging issues, sometimes it would charge up no problem, other times it was a pathetic trickle, if any charge at all. As I desperately tried to identify why my favorite tablet was failing me, I eventually found that certain power cables would work, and others would work if they had some pressure from the side. There was some extra wiggle in the plug. Bottom line, my USB port had worn out.
Aside from the USB port on the Nexus 7, if your headphone jack is toast, know that the board and cables for these two items are connected. To fix one will replace the other.
Before we begin
While the original Nexus 7 has a proven track record of the USB port wearing out, please take the time and care to be sure that yours is needing replacing. To be sure, use the pogo-pin connectors on the side of your tablet to charge up the battery, if this works as it should but your device still will not charge or connect to your PC through the micro USB cable, it’s a safe bet your port is dead.
Parts & Tools
To fix your Nexus 7, you will need just one part, the small chipboard with ribbon cables that includes the micro USB port and headphone jack for your device. I found mine on Amazon for about $13. It is now just $12, and best of all, it comes with a little tool kit to get you started.
If you go looking for your own parts, please try to find OEM ASUS branded replacement parts. Others may work just fine, but sometimes it is better to be safe than sorry.
Luckily, minimal tools are required for this fix. Be sure to set yourself up in a clean and clutter free environment, an anti-static computer repair pad is highly recommended, as is an anti-static wrist strap ofrgloves. Otherwise, the list is short:
- Plastic spudgers or guitar pick
- Electrical tape (optional)
- Small Phillips head screwdriver – #1 should work, but maybe bring a #0 as well
This package deal has more than you need today, except the tape:
Replace your Nexus 7 USB port and headphone jack
Please take your time preparing for this project, there is no point having to open your Nexus 7 more than you absolutely need too. The plastic clips are very resilient, but they’re not perfect, you don’t want to break any of them.
Once you dive into this, please also take your time on the inside, oils from your fingers or any other debris or contaminant is not good for the electrical components. Be sure to avoid electrostatic shock to your device as well, that little spark from your fingertips can destroy small electronic components.
That out of the way, let’s dive in and fix your Nexus 7!
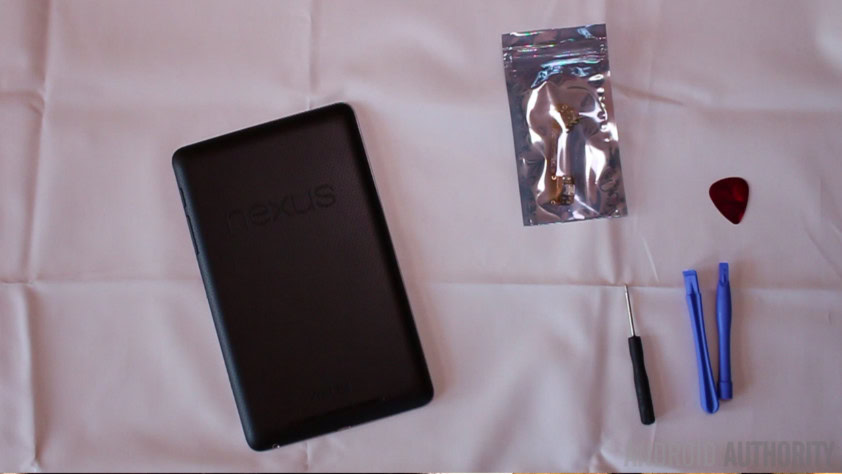
Bring all of your tools, parts and your Nexus 7 to your anti-static mat. Be sure to have good lighting and prepare to take notes or draw diagrams to remember where the screws should be replaced.
Open your Nexus 7
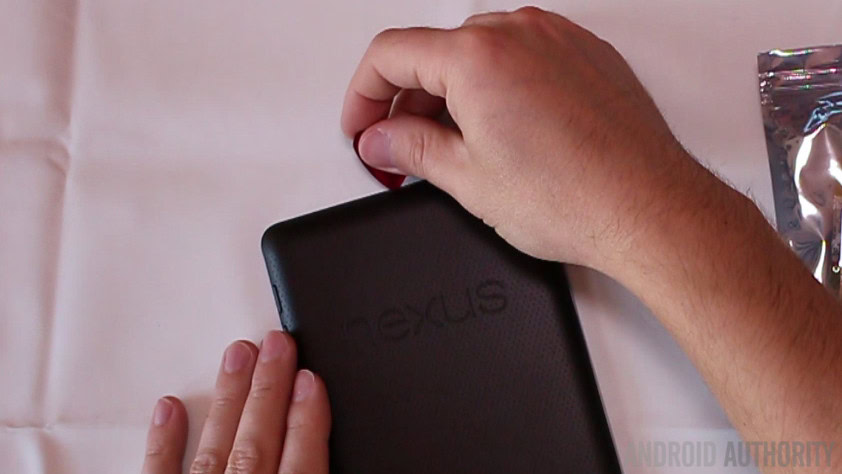
There is a good chance you’ve done this before, place your Nexus 7 face down on your surface then use the plastic spudger or guitar pick to pry open the tablet. Work your way around the edges slowly to loosen the back cover.
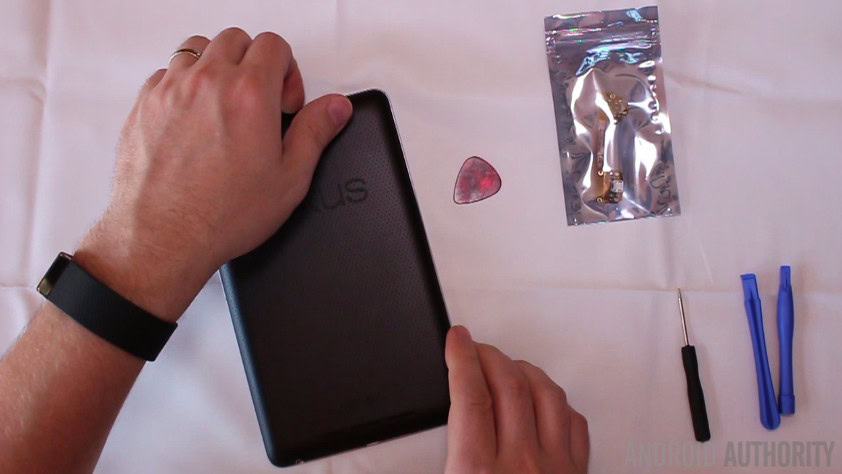
With most or all of the backing loose, pull the cover straight off of the tablet, pull by hand and grip from the top. There are extra mounting points along the bottom edge, there is no trick to get passed them, just take care to pull slowly to not break anything.
Look at all those fancy components.
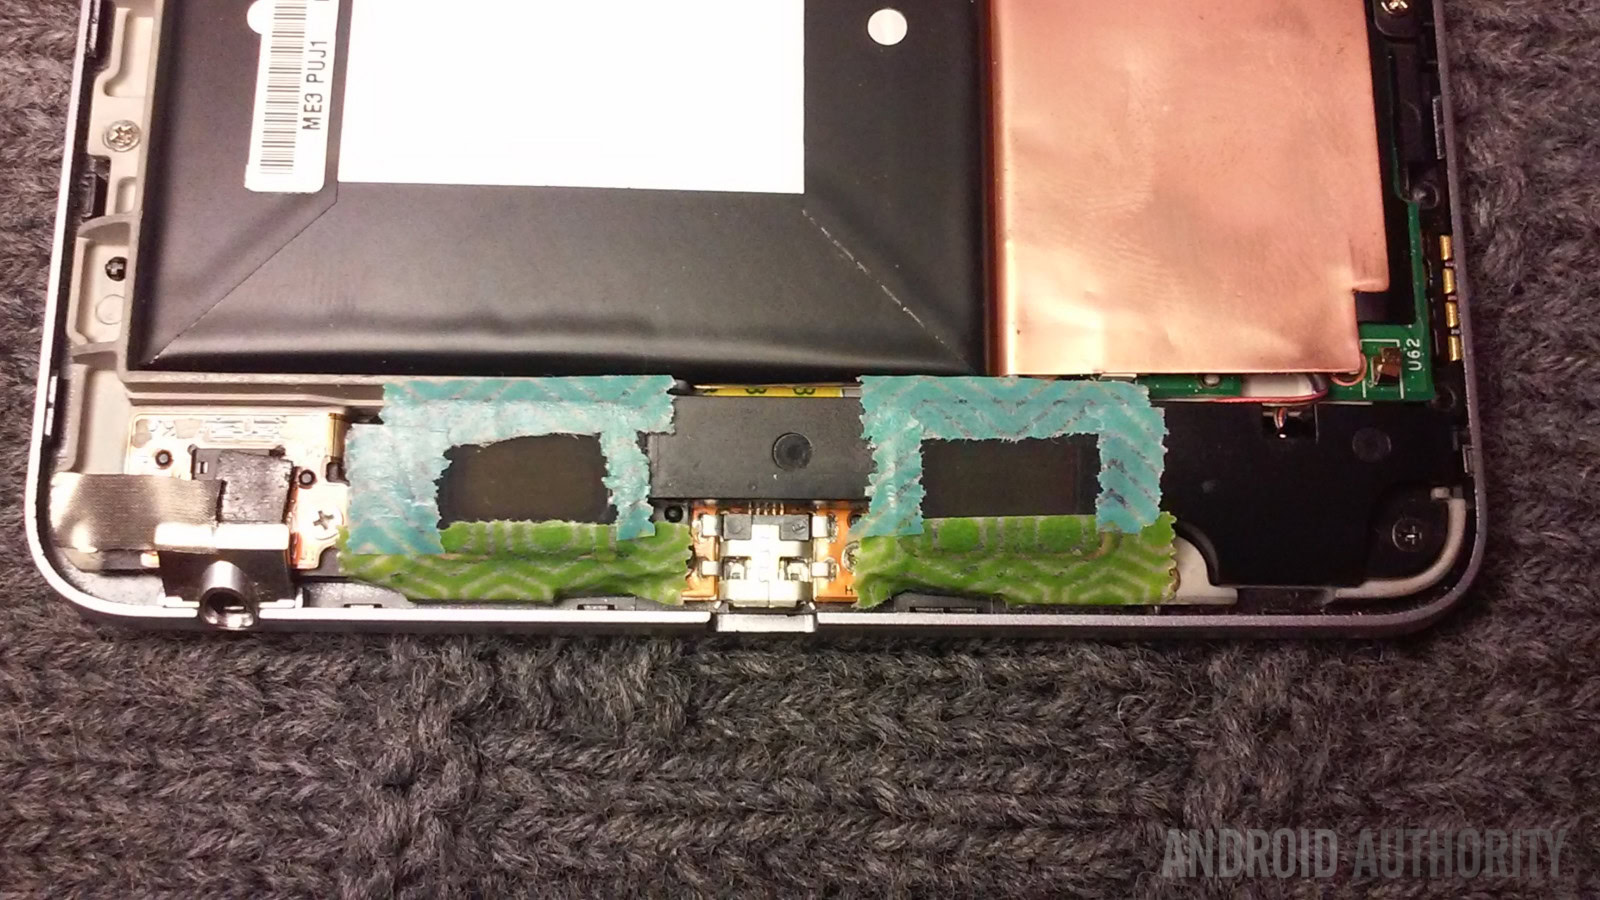
Pro tip: Before we proceed, you see how I have colored tape on a number of pieces under the hood. These are mostly unnecessary, except for the speakers. The bit of tape over the battery connection in the top right is just for peace of mind, helps prevent the connector from coming loose, which has never happened to me. The tape on the speakers at the bottom serve a different purpose.
The back cover of your tablet will slowly destroy the default black cloth speaker covers, when they finally tear through, wires become exposed. These wires create a short as they contact the back cover, resulting in audio problems from the speakers and the headphone jack. This may be the cause for your headphone jack and/or USB port failures to begin with, or other random issues with your tablet. Use a touch of your electrical tape, or your wife’s decorative wrapping tape if it is handy and you are lazy like me. Just be sure to leave the center of the speaker uncovered, you still need sound to come out.
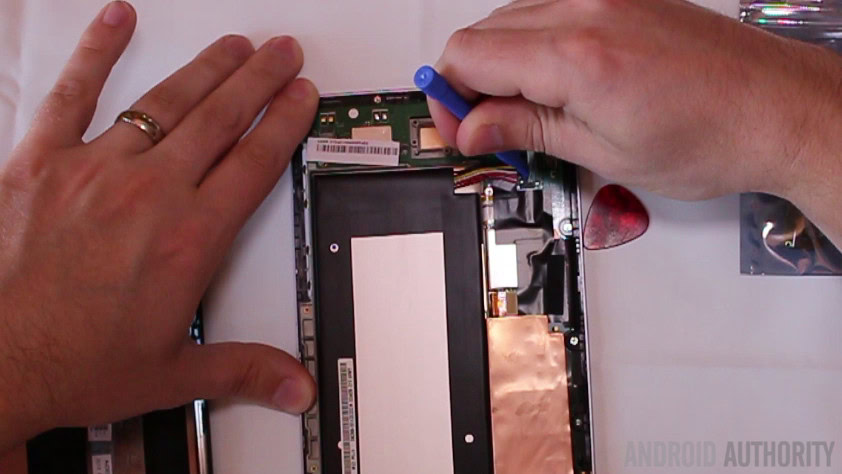
First things first, please remove the connection for the battery. Located near the top right of the device, it is a multi-wire connector that simply pulls out. Use the spudger to assist, you don’t want to damage anything.
Battery unplugged, start pulling the screws.
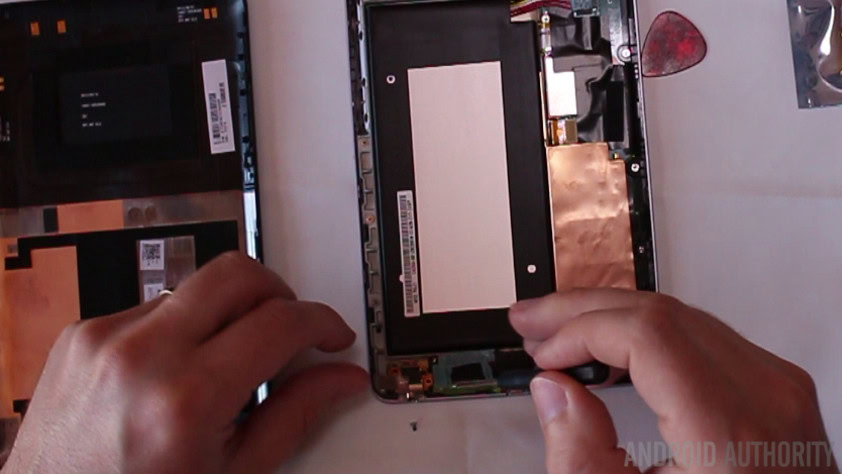
You can pull all of the screws across the bottom, or just pull the few to release the speaker bar. Just be sure to keep them in order so you can put them back later.
Pull the speaker bar up to release, then flip it over to the side to get it out of the way. We do not want to unplug the speaker, it is just in our way.
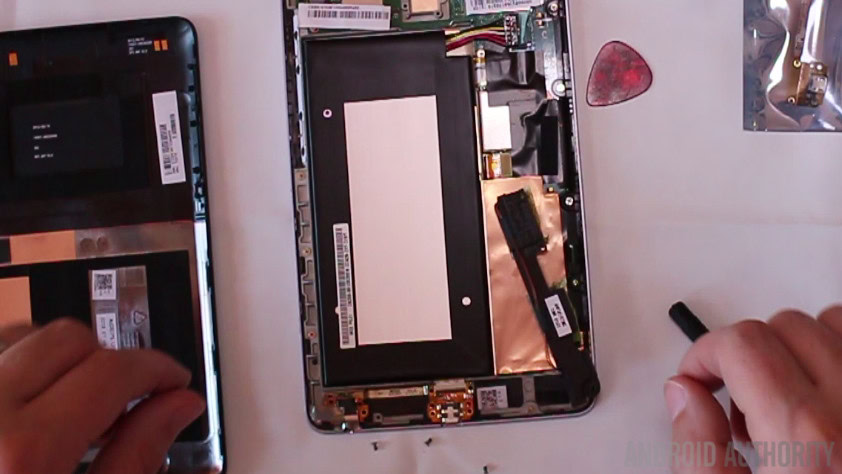
Finish pulling all the screws across the bottom. You’ll find more underneath the speaker bar and one hidden under the silver tape at the far left.
Screws removed, carefully pull up on the USB port and headphone jack to release them from their position. They will just slightly pop loose for now, do not yank on anything just yet.
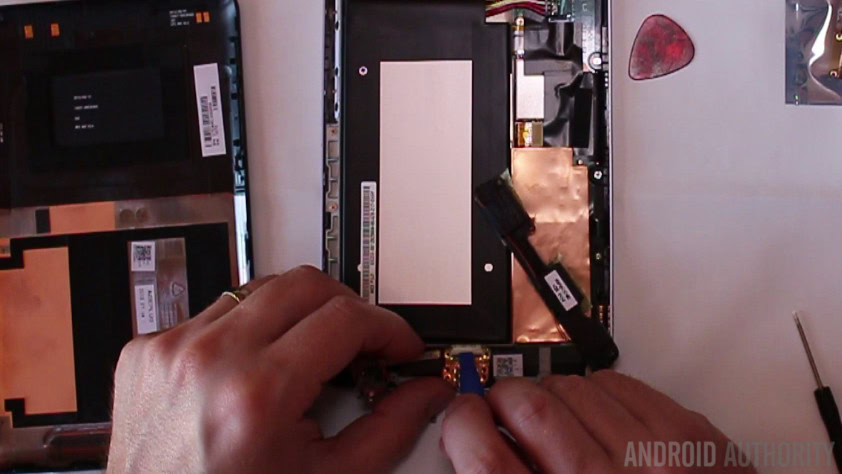
Release the little clip to disconnect the wired connection to the USB board. It is just above the USB port.
Pull the old USB board to the side and place it next to your new USB board.
Inspect to ensure they appear the same.
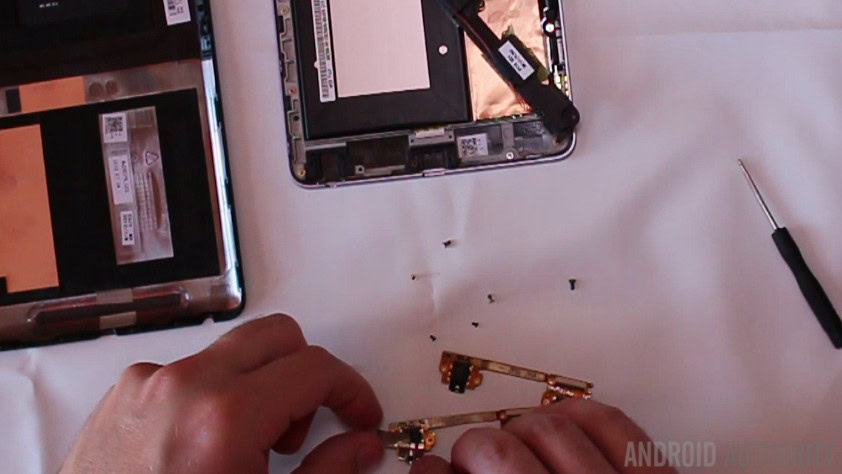
Once you are satisfied that they look like the same part, you’ll want to pull the silver tape off of the headphone jack. This will pull up a small silver casing as well. Transfer both the casing and tape to the new USB board.
You are ready to re-assemble.
If you are comfortable with things, simply reverse the steps above then jump to the What’s next section for some new ideas. Otherwise, let’s walk through the re-install quickly.
Place the new USB board into place. Make sure it all fits before anything else, then proceed.
Connect the electrical plug into the new USB board. Put the board in place and begin replacing just the screws that went below the speaker bar.
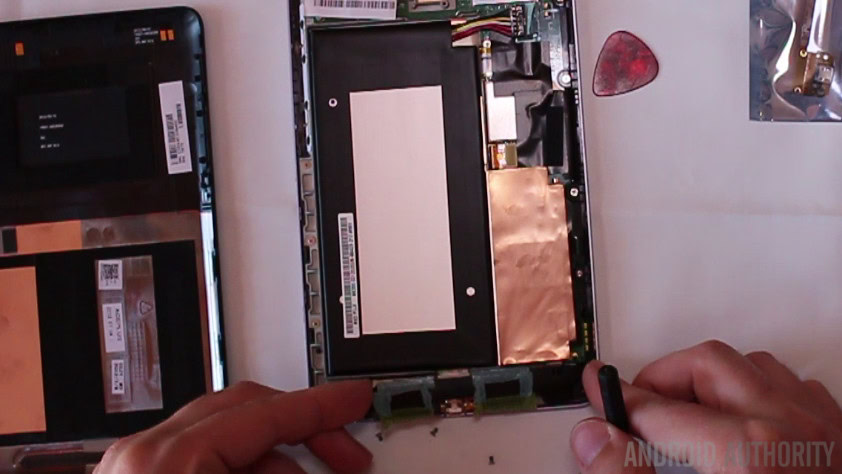
Once the USB board is screwed down, (gently, it should only need a couple pounds of force on each screw,) bring the speaker bar back into place.
Replace all of the screws to your tablet. Again, ensure that they are snug, but do not over tighten.
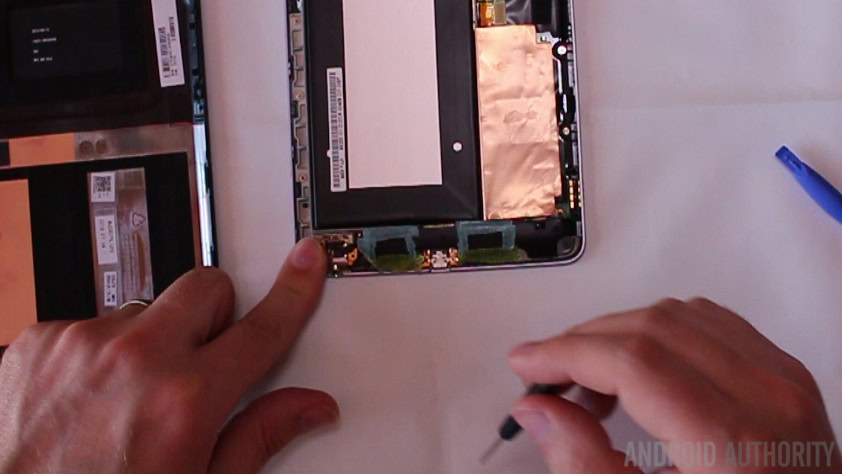
Screws in place, time to reconnect your battery. The battery plug is pretty simple and easy, just pop it in, give it an extra push with a spudger if you want, then put some tape over top the connection, which is still optional.
Take one last inspection to make sure everything looks like it did before, then we are ready to finish up.
Put your back cover on your Nexus 7.
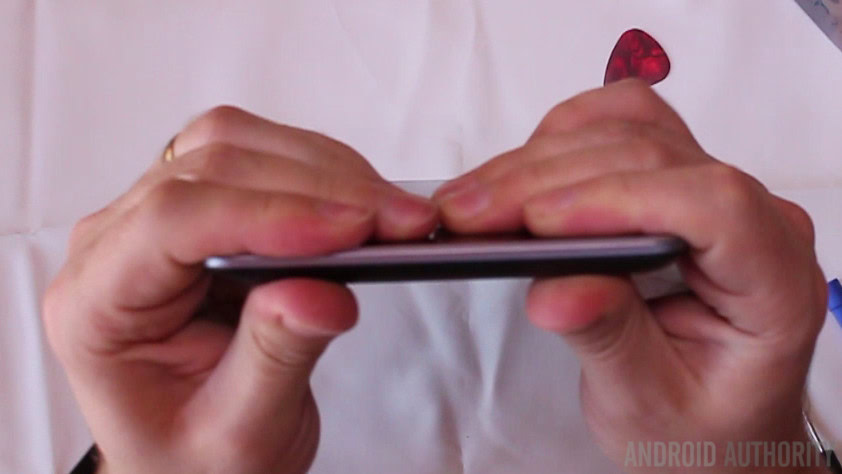
I know this is common sense, but it is important that you ensure the back cover is properly installed. Go around all edges at least twice to make sure all the clips are secure. What you may not know is that the back cover houses several antennae for your device. Your cover needs to be snug or else those connections may not stick and your WiFi, GPS, NFC and more may not work.
That’s it folks. Go ahead and connect your micro USB power cord and see if your Nexus 7 has life once again. Also, be sure to test the speakers and the headphone jack to ensure they are all working as well.
The USB port and headphone jack may be a little tight, be gentle with them until they break in.
What’s next
Do you remember those pogo-pins on the side of your tablet? They provide docking functionality to your tablet. The default configuration, with the tablet in portrait orientation and the top where it belongs, on top, the bottom pin is your power positive connection, the top pin is your ground connection and the center two are for left and right speakers. You can purchase a dedicated dock, or you can build your own, please just use good connectors, don’t mess with the wires like I did.
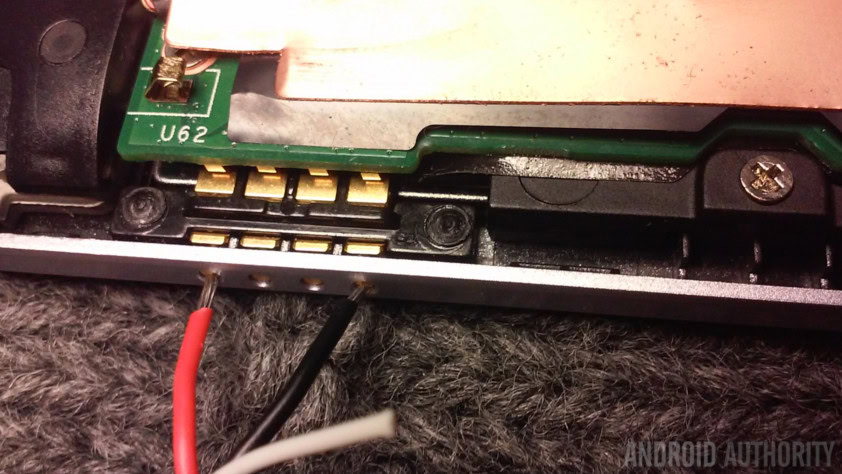
Special note: The pogo pin connection does not offer the same level of smarts as the micro USB port. You are still protected from overcharge by the internals, but you will not be able to transfer data to your PC, only the USB port can do that.
To extend the life of your Nexus 7, I said this before, please try to avoid contacting or damaging the parts inside your tablet. For example, that big brown shiny sticker you see in there is the heat shield/sync for your processor. Without that sticker, your tablet will likely overheat and incur damage.
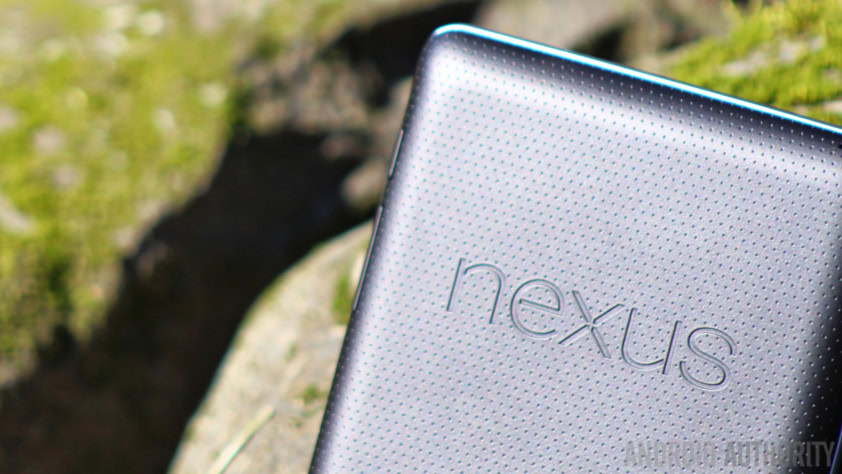
If you can’t decide if you should repair your problematic Nexus 7, don’t forget that it is still a capable device for simple applications. It would make a great photo frame, still plays music without issue, makes a great little message board and can even install into your car’s dashboard, if you’re ready to take your DIY skills to the next level.
Next week
If the allure of screw drivers and electrical tape is not your thing, no worries, we’ll take our Android customization series back to software for next week. Join us as we take a look at root. That’s right, we’ve been slowly working toward this day, the day we root a device for you and play around with some of the great tools available in the community. We’re going to start off with the Nexus 7 you see above, you didn’t think we revived it for nothing, did you!
What physical repairs or alterations have you made to your Android devices?
For more customization projects: Android customization series