Affiliate links on Android Authority may earn us a commission. Learn more.
How to open Disk Management in Windows
Published onMay 19, 2023
Disk Management is a utility built into Windows to view and manage hard disks and associated drives. It provides a way to create, partition, and resize drives, extend or shrink partitions, assign and change drive letters, and troubleshoot problems with hard disks. It works with built-in and external drives and is an essential tool to set up your Windows system properly. There are a few different ways to access this tool, and all are quick and easy. Here’s how to open disk management in Windows.
QUICK ANSWER
To open Disk Management in Windows, click on the Windows search bar and type Disk management. Click the option that says "Create and format hard disk partitions" to launch the tool. You can also open the tool through the Power User menu. Right-click the Start button, or use the Windows key + X shortcut, to open the menu and click Disk management. Other ways to launch the service include using the Computer Management application, the Run box, the Windows File Explorer, the Windows PowerShell or Command Prompt, or the Windows 11 settings menu.
How to open Disk Management in Windows
Use the Windows Search bar
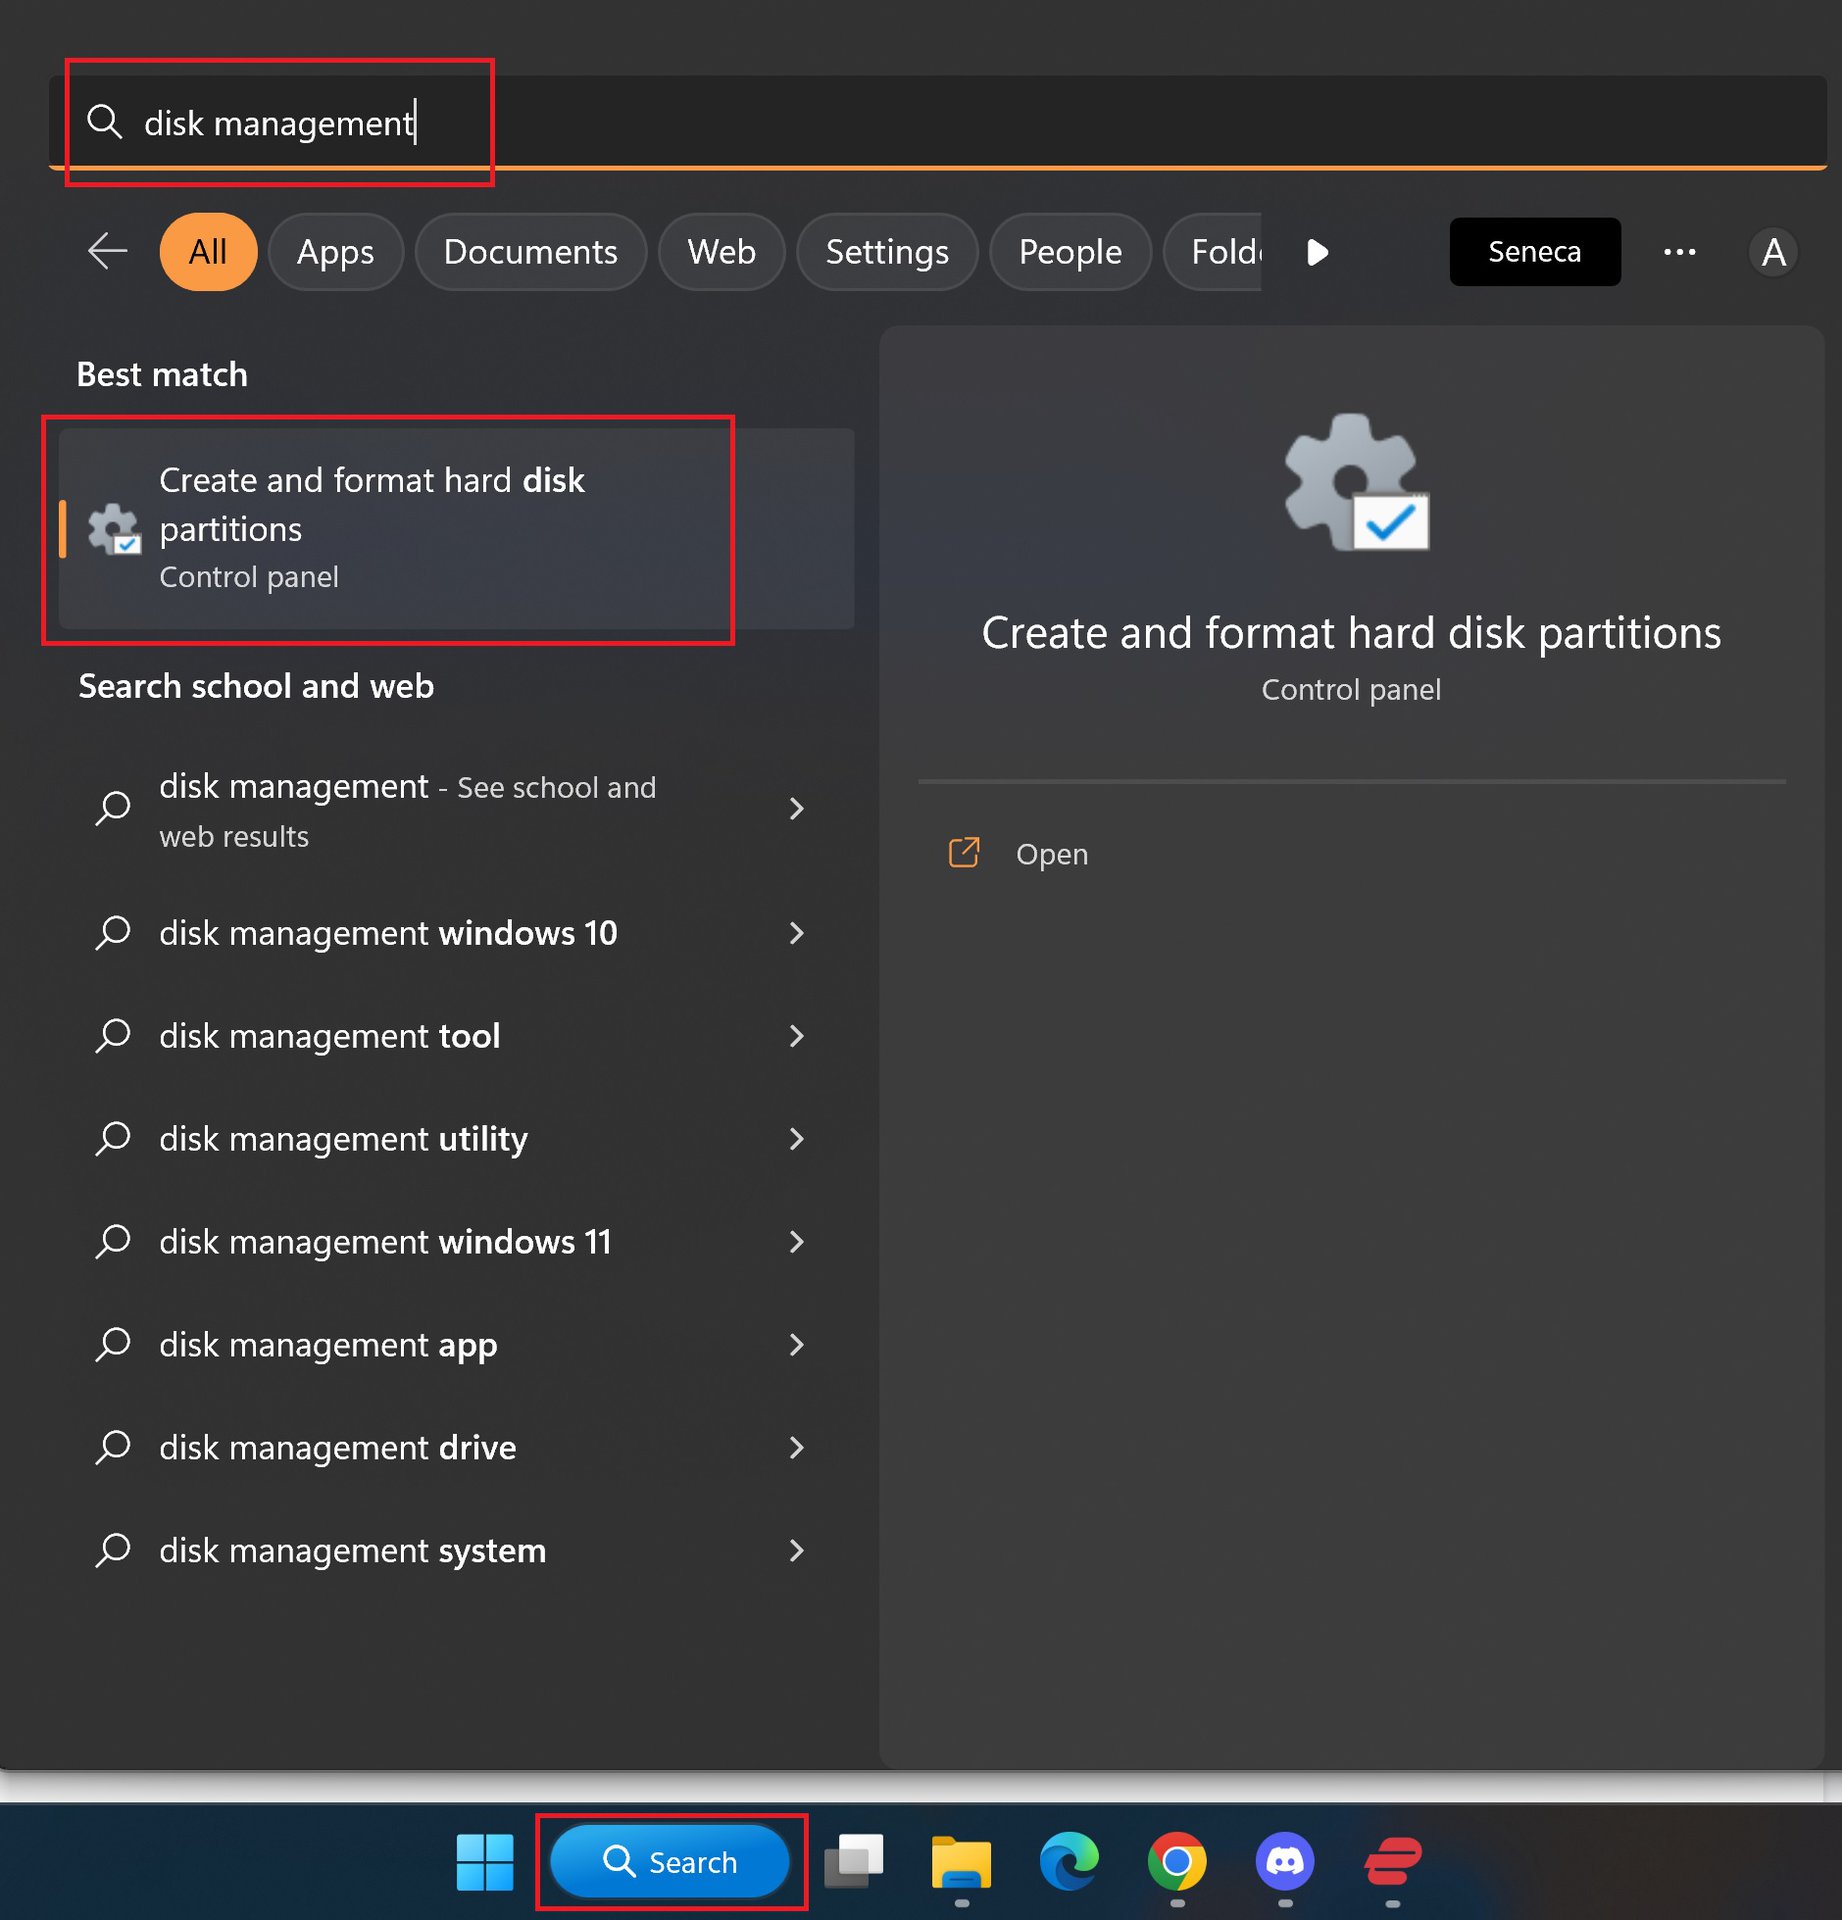
The easiest way to open Disk Management is to search for it. Type Disk management into the Windows Search bar (next to the Start button). Instead of saying Disk management, the search result will point to “Create and format hard disk partitions.” But it will open the correct tool. Click on the search result or Open (in the right-hand menu) to launch Disk management.
Open Disk management using the Power User menu
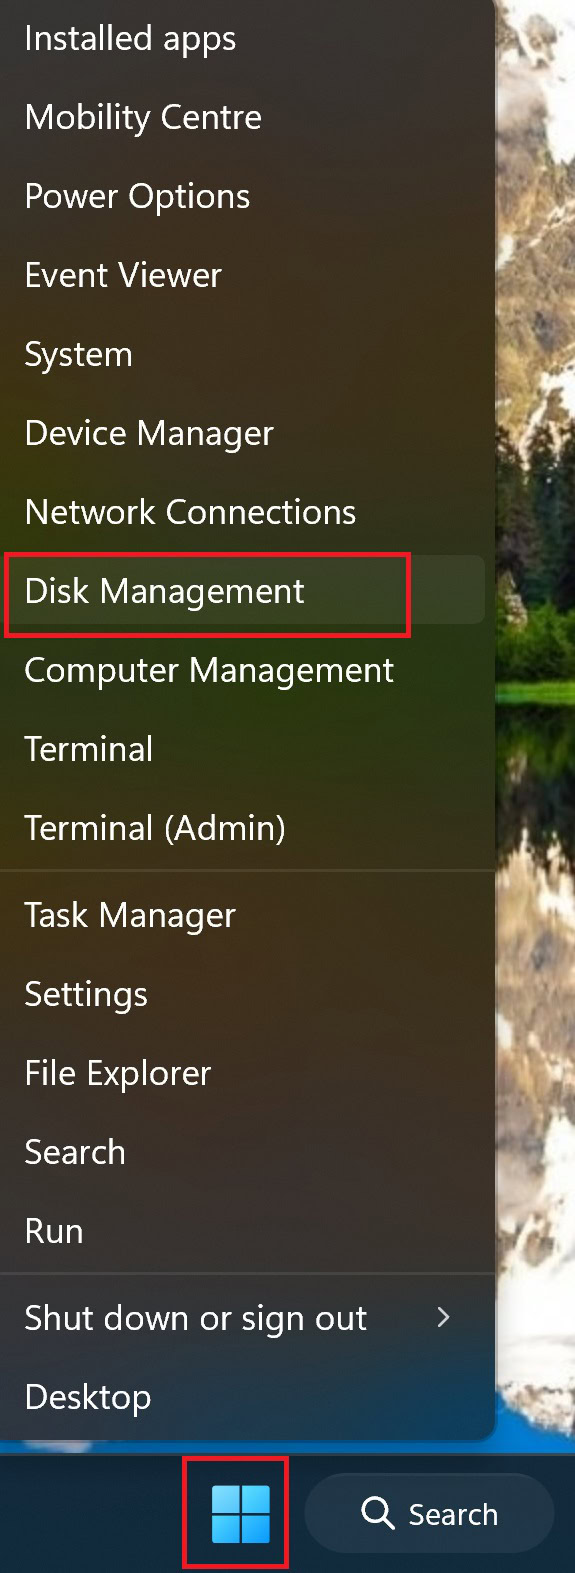
The Power User menu is a shortcut menu that provides quick access to essential Windows services, features, and settings, including Disk management. Right-click the Start button or use the Windows key + X shortcut to launch the Power User menu and click Disk Management to open the Windows tool.
Use the Run box
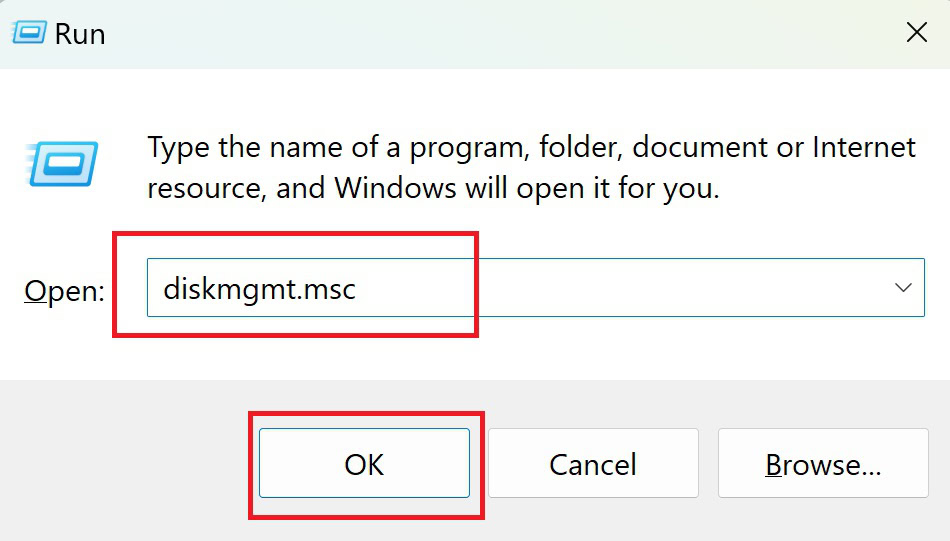
The Run box is a helpful utility to launch system services. Use the search bar and type Run, or use the Windows key + R shortcut to launch the Run box. Type diskmgmt.msc and press Enter (or click the OK button) to launch the tool.
Use the Computer Management tool
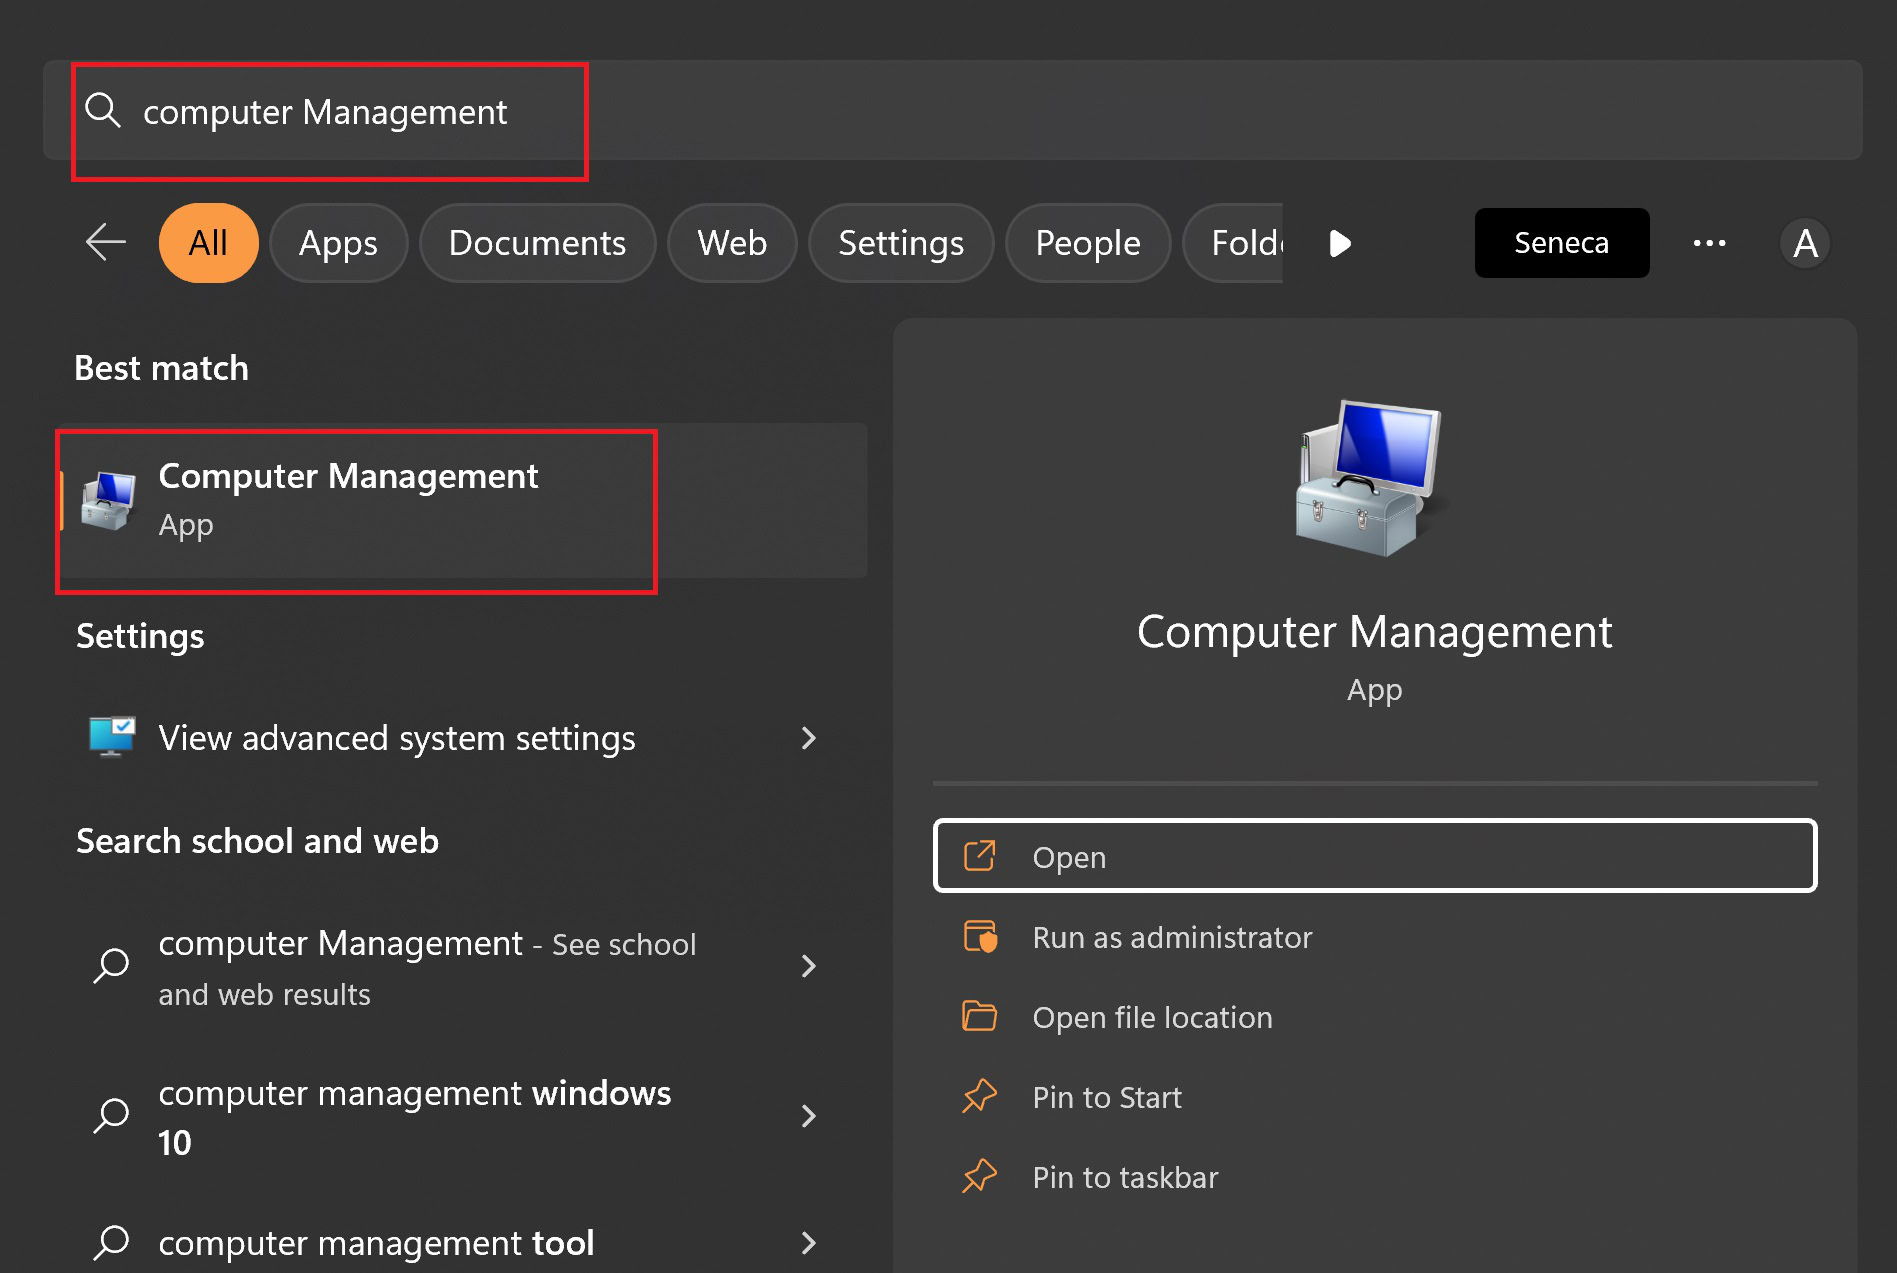
You can perform disk management functions using the Computer management tool. Search for Computer management and open the Windows application.
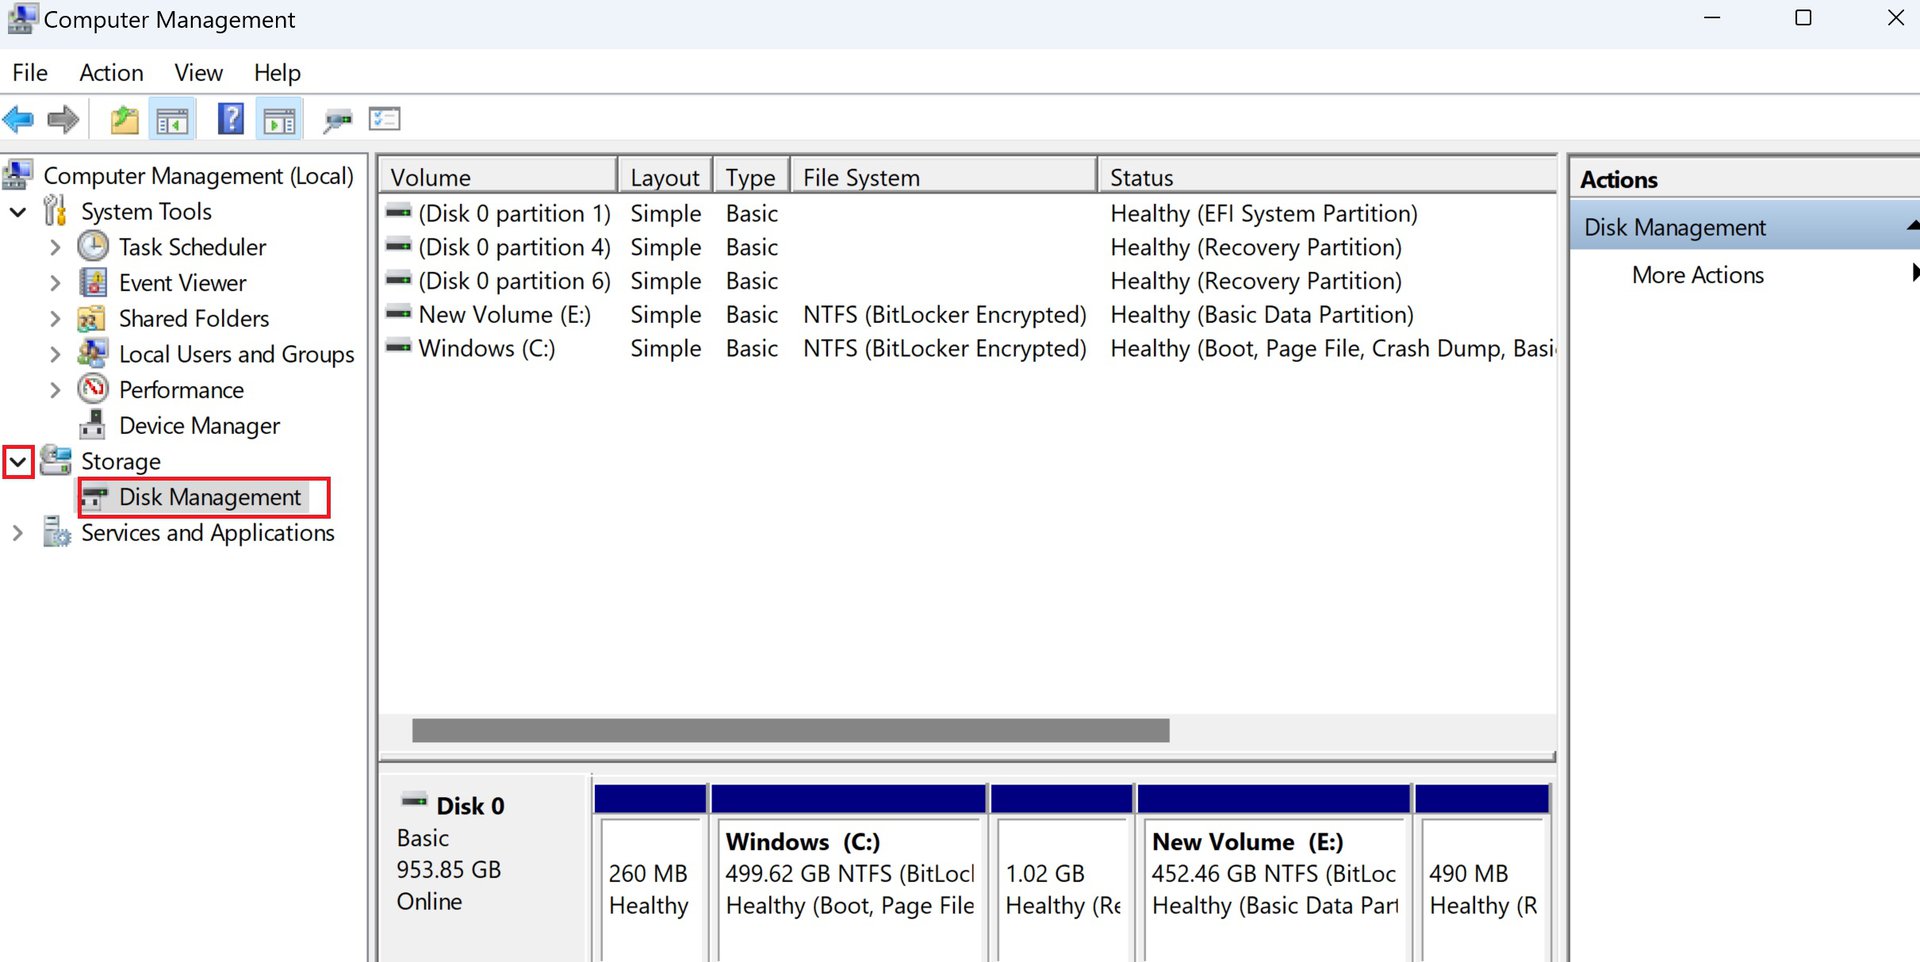
Click the right arrow next to Storage to expand the option, and click Disk Management to open it. You will get the same functionality through this app as you would by opening the Disk Management tool directly.
Open Disk Management using Windows File Explorer
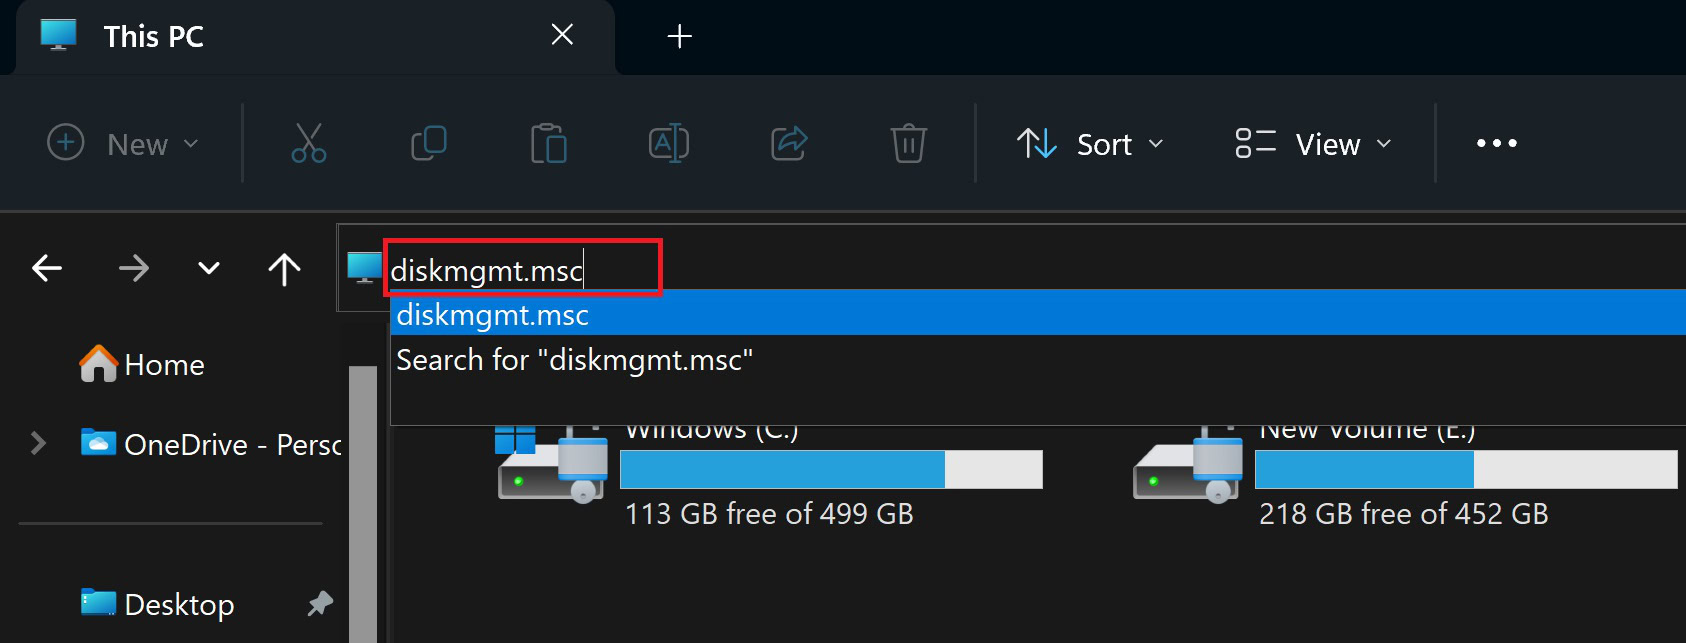
Open the Windows File Explorer by clicking the File icon in the taskbar or using the Windows key + E shortcut. Click on the address bar in File Explorer, type diskmgmt.msc, and press Enter to launch the tool.
Use Windows PowerShell or Command Prompt

You can also use Windows PowerShell or Command Prompt to open if you want to go old school. Open Command Prompt or PowerShell, type diskmgmt, and press Enter.
Perform Disk Management tasks through the Settings menu
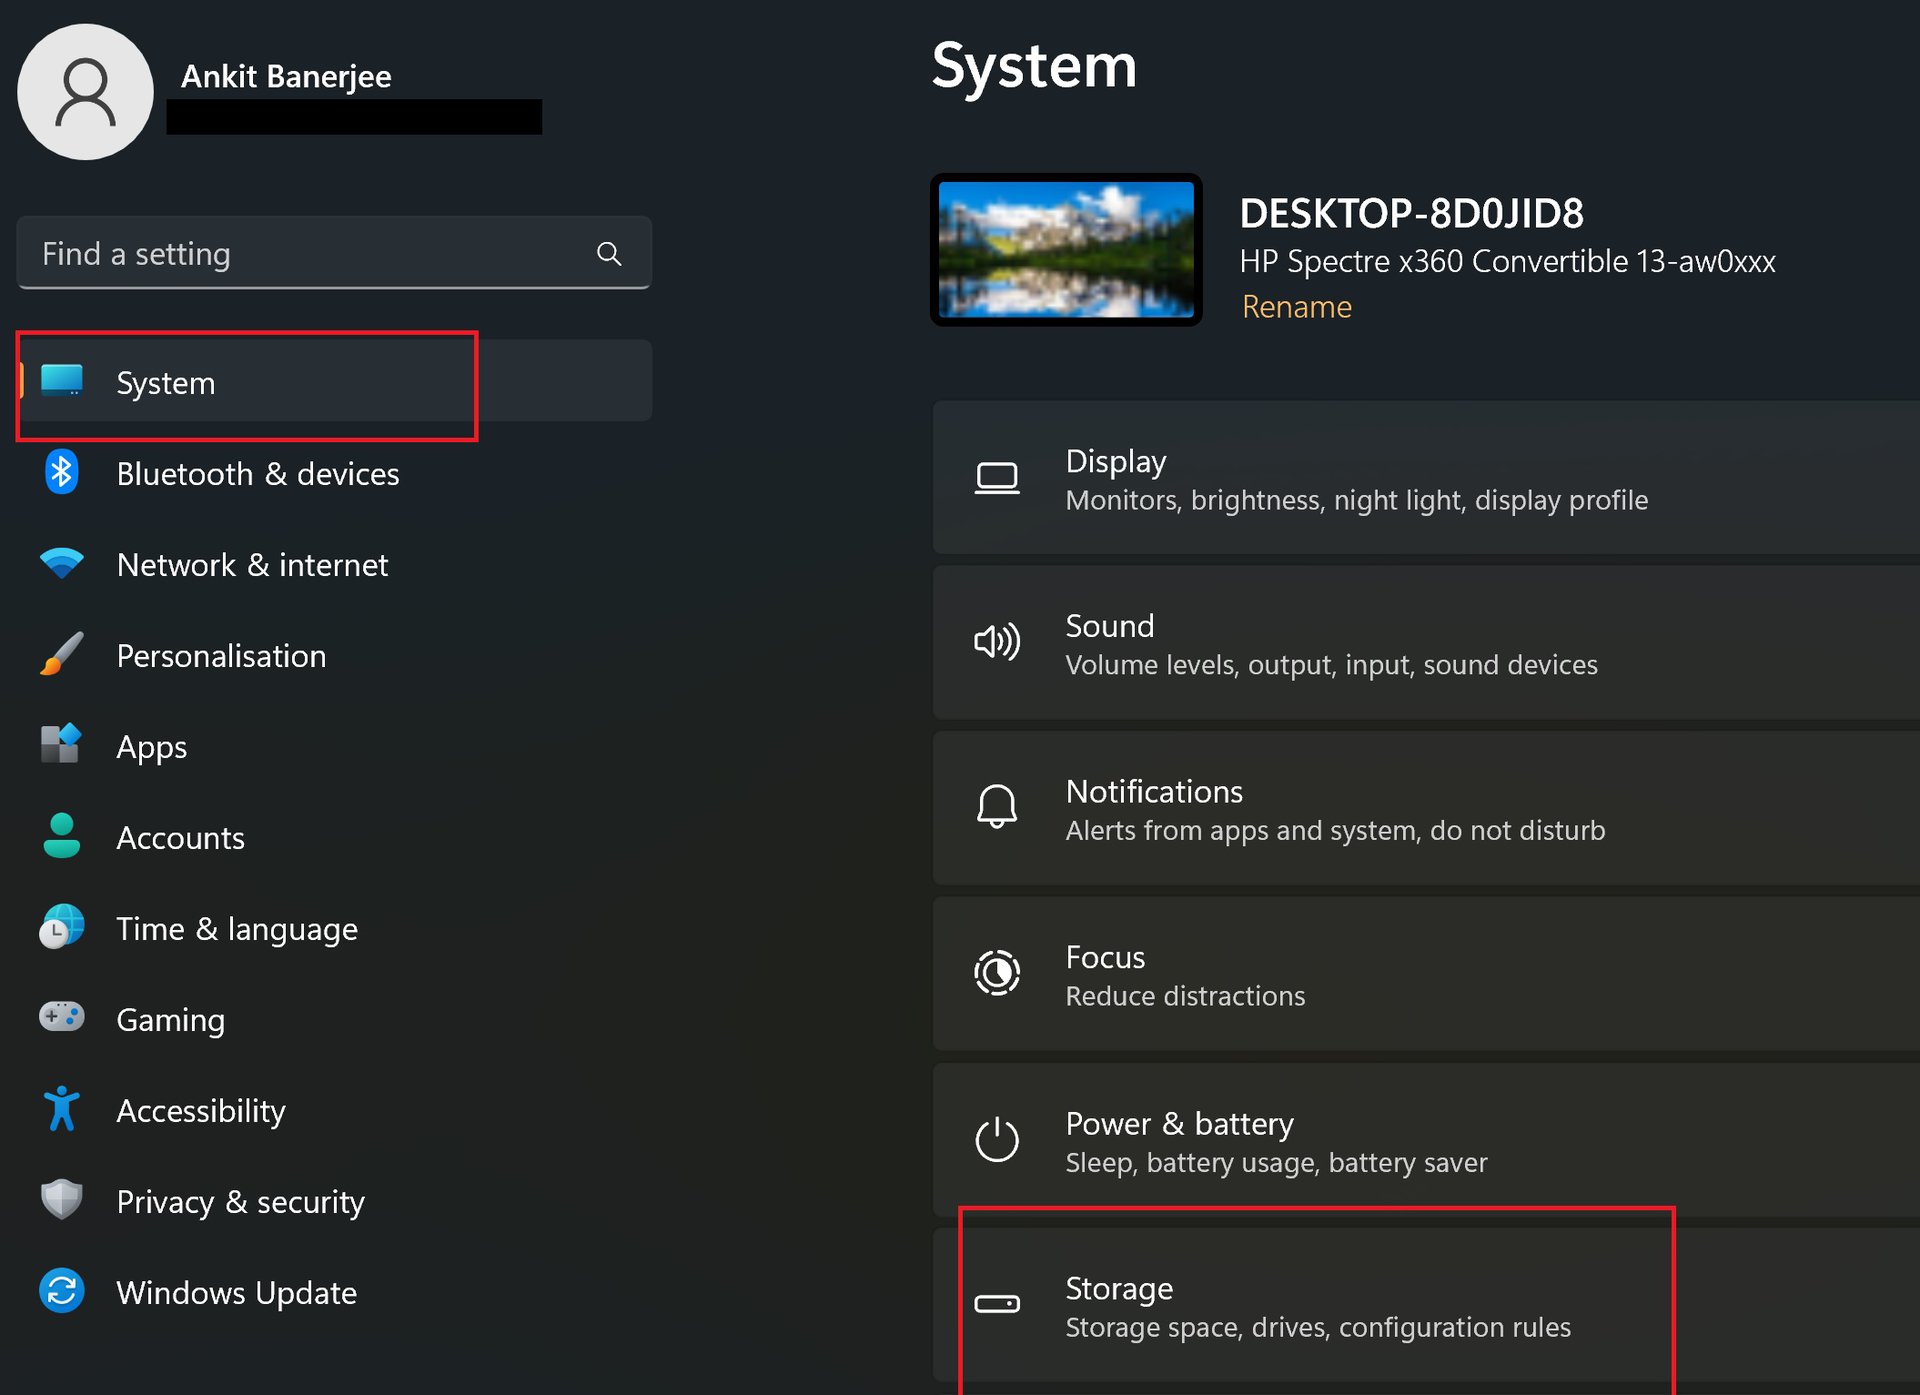
The Disk Management tool has remained the same for years, but there’s a way to perform the same functions with an easier-to-use interface via the Windows 11 Settings menu. Open the Settings menu and go to System > Storage.
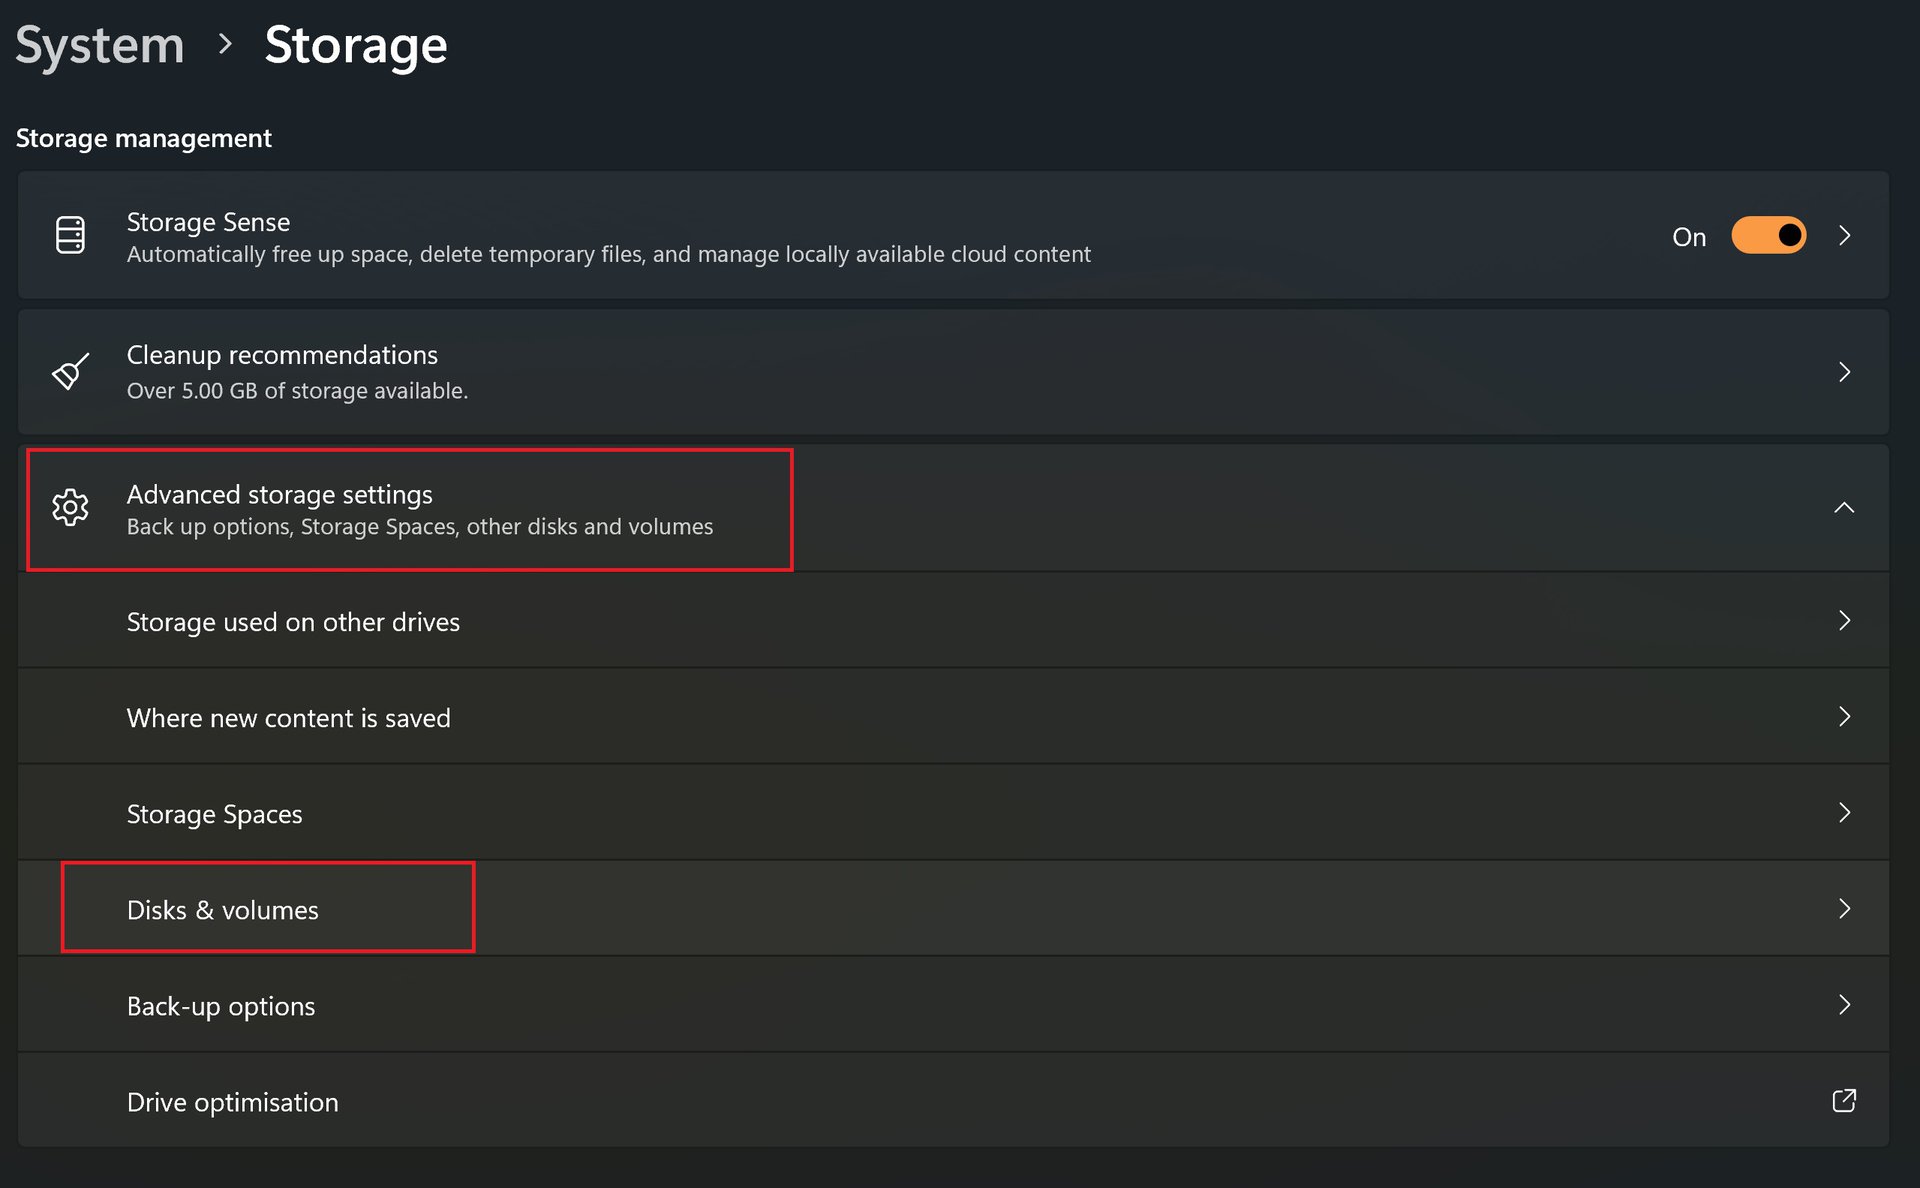
You will see a detailed breakdown of your storage use here and the option to free up some space automatically. Scroll down to the Storage management section and go to Advanced storage settings > Disks and volumes.
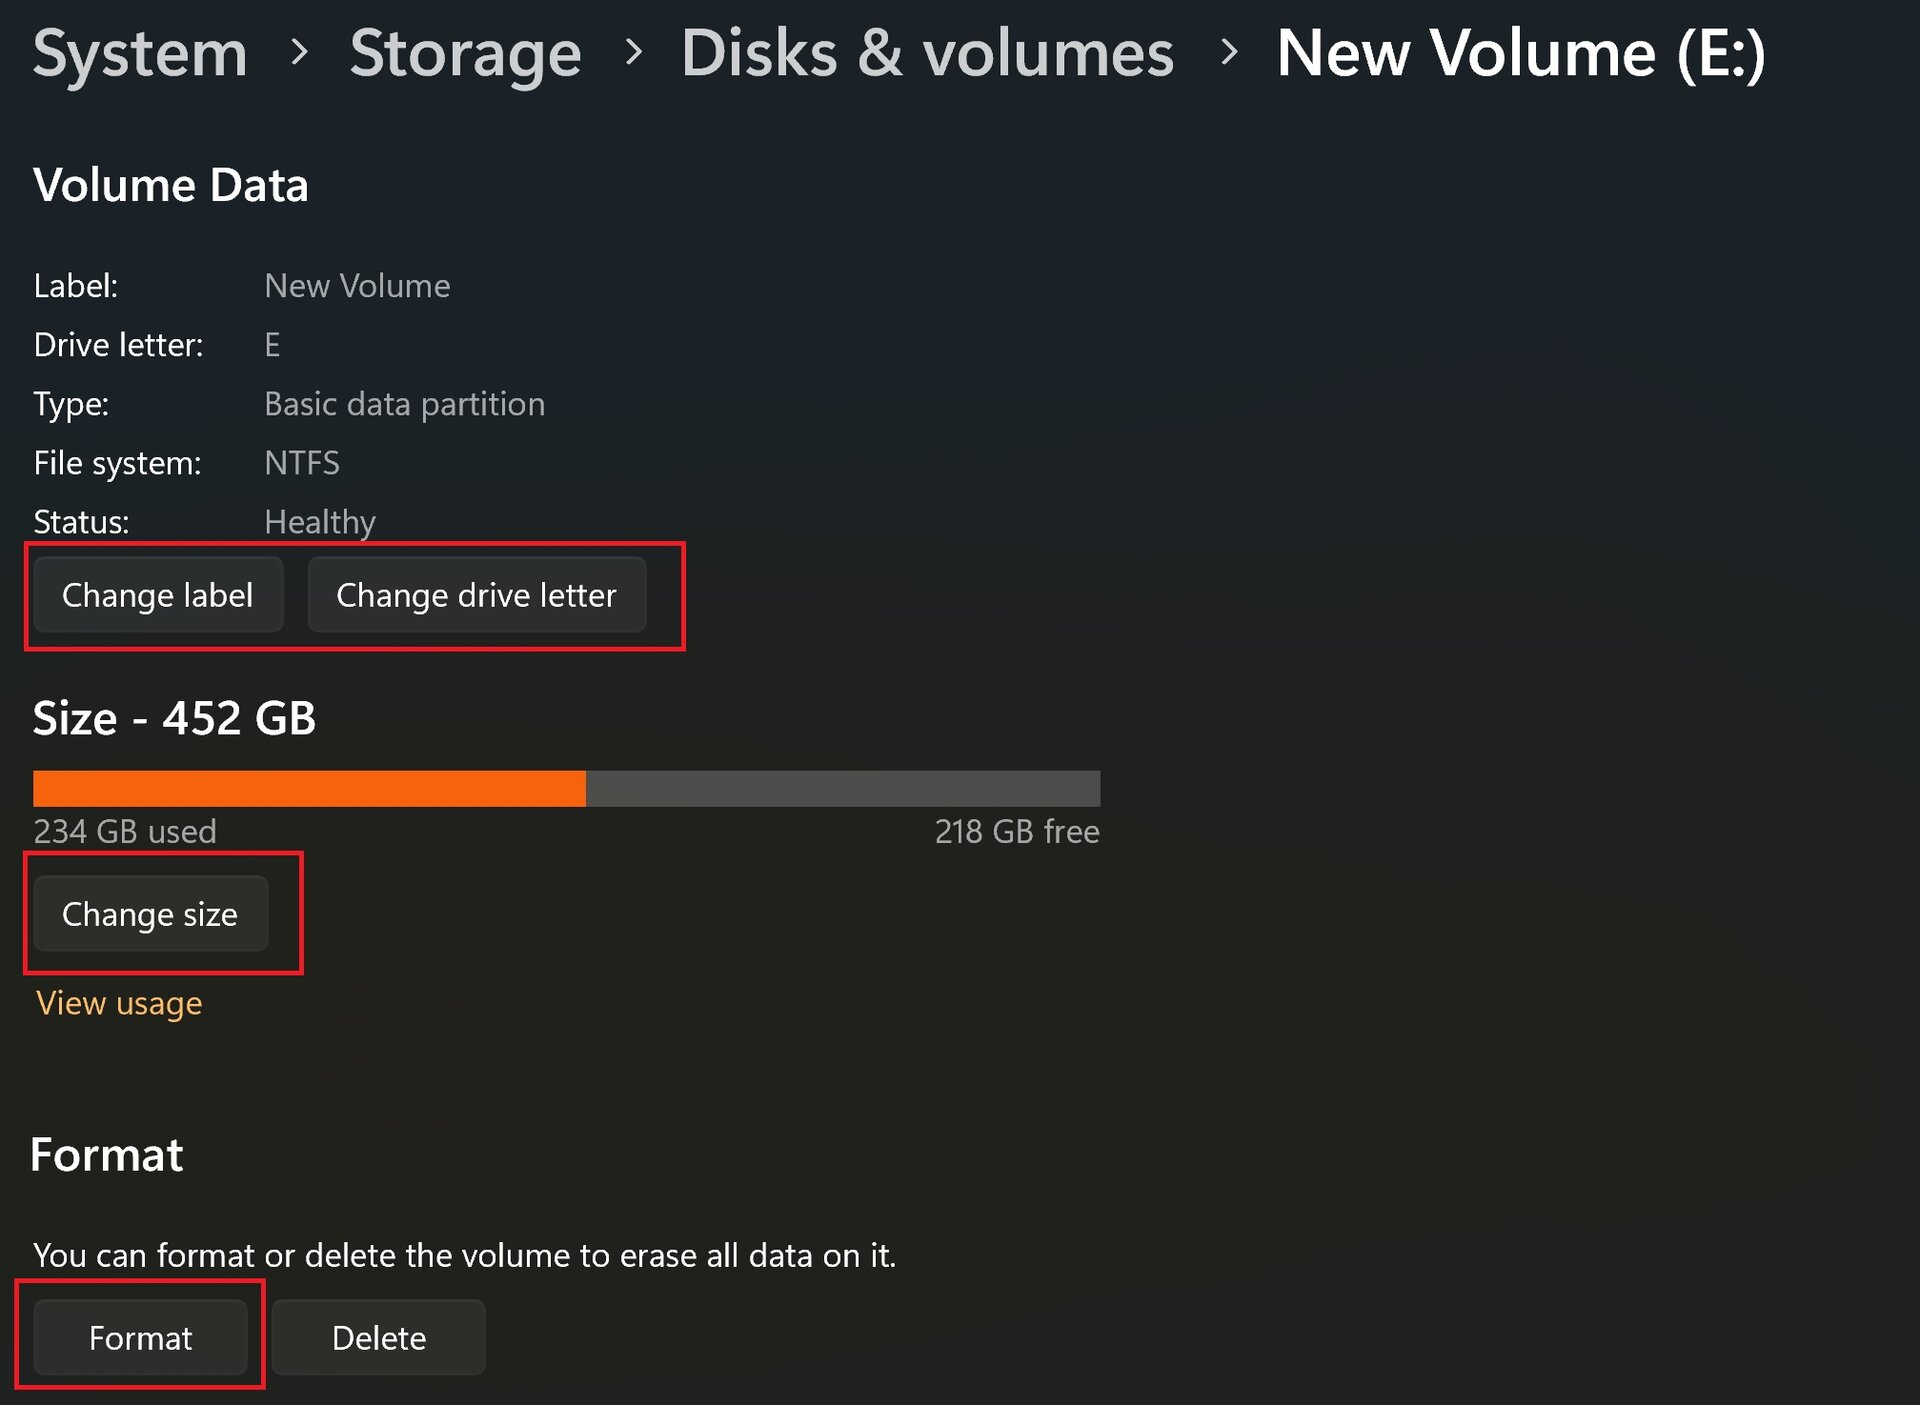
Click Properties next to an unpartitioned drive if you want to create new volumes or change the label, drive letter, and size of existing disk partitions.