Affiliate links on Android Authority may earn us a commission. Learn more.
How to record your screen on Windows 11
Windows 11 packs quite a few new features, but it’s still missing one important feature — a screen recorder. Windows 11 technically does not have a built-in screen recorder. However, there are a couple of ways to work around that inconvenience so you can capture your screen. It’s not too complicated, but you’ll need to follow some steps for the setup. Here’s how to record your screen on Windows 11.
Read more: How to install Windows 11
QUICK ANSWER
To record screen on Windows 11, you can use the Xbox Game Bar by pressing Windows key + Alt + R. You can also use Microsoft PowerPoint to record Windows 11 screen, or download and use OBS Studio if you want more control over the screen recording.
JUMP TO KEY SECTIONS
How to record your screen using the Xbox Game Bar
Windows 11 doesn’t have an in-built screen recorder, but there is one tucked into the Xbox Game Bar that comes preloaded. The one huge downside of this screen recorder is that it does not record the Windows desktop or File Explorer. You need to have a window active, or the recording does not start. It also ends if you switch to the File Explorer or the desktop. You can press Windows key + Alt + R to toggle the recorder on and off, or use the steps below.
Press Windows key + G at the same time to bring up the Xbox Game Bar overlay.
Click the Record button present in the Capture window in the upper left side of the screen.
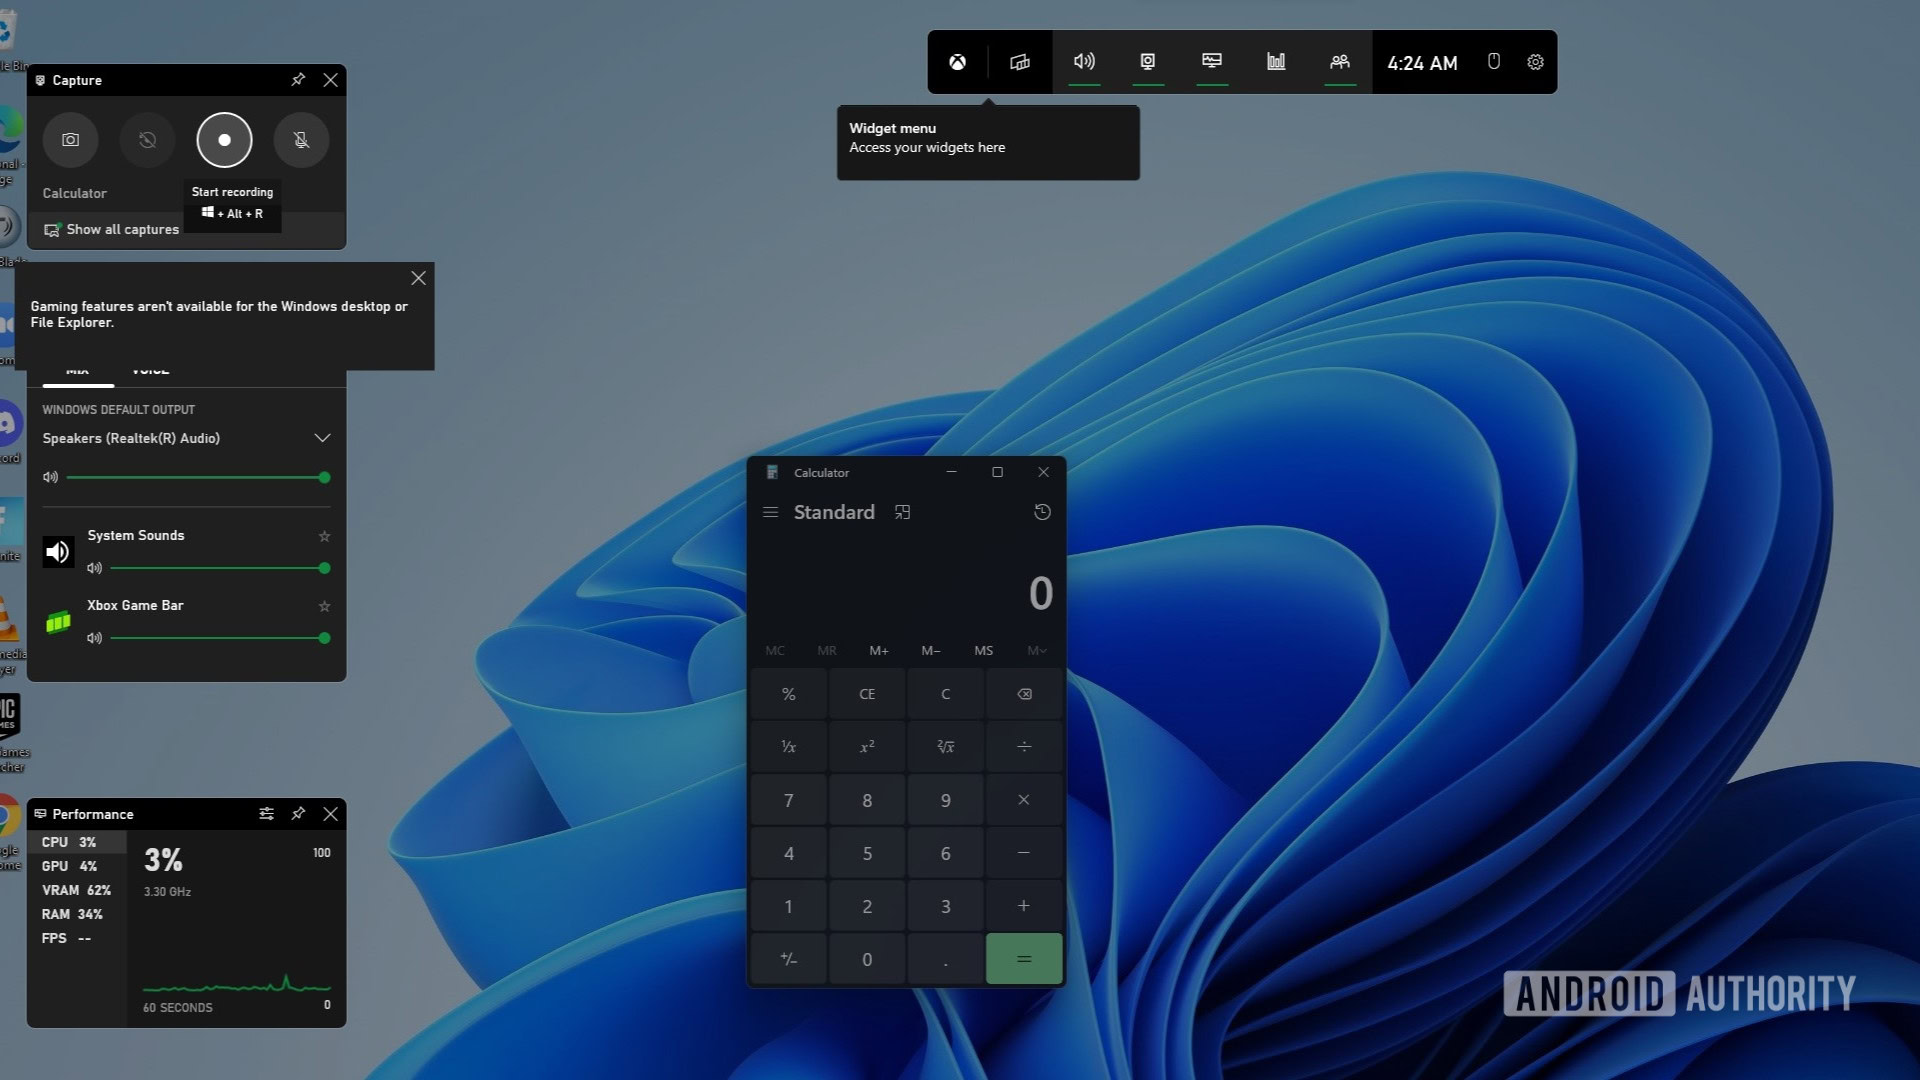
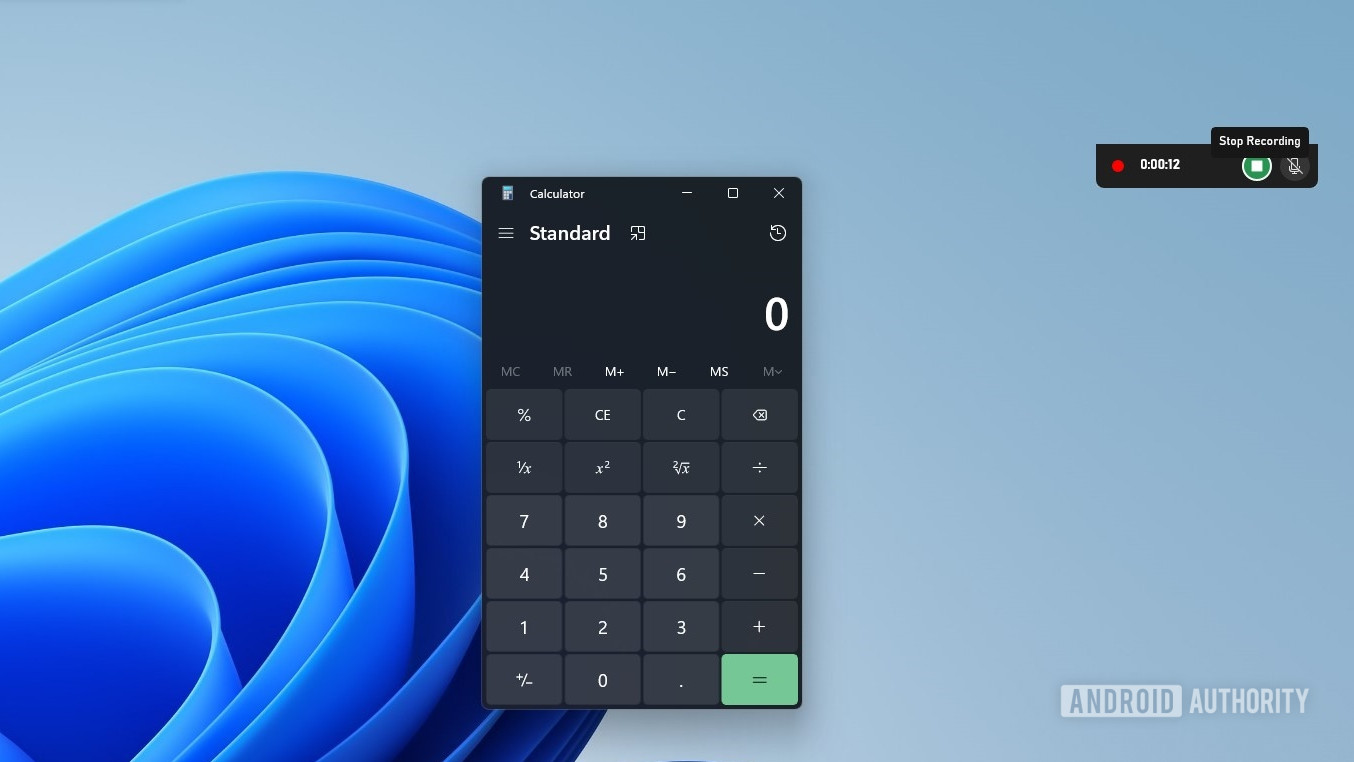
To stop the recording, click on the Stop recording button on the floating widget showing the recording progress.
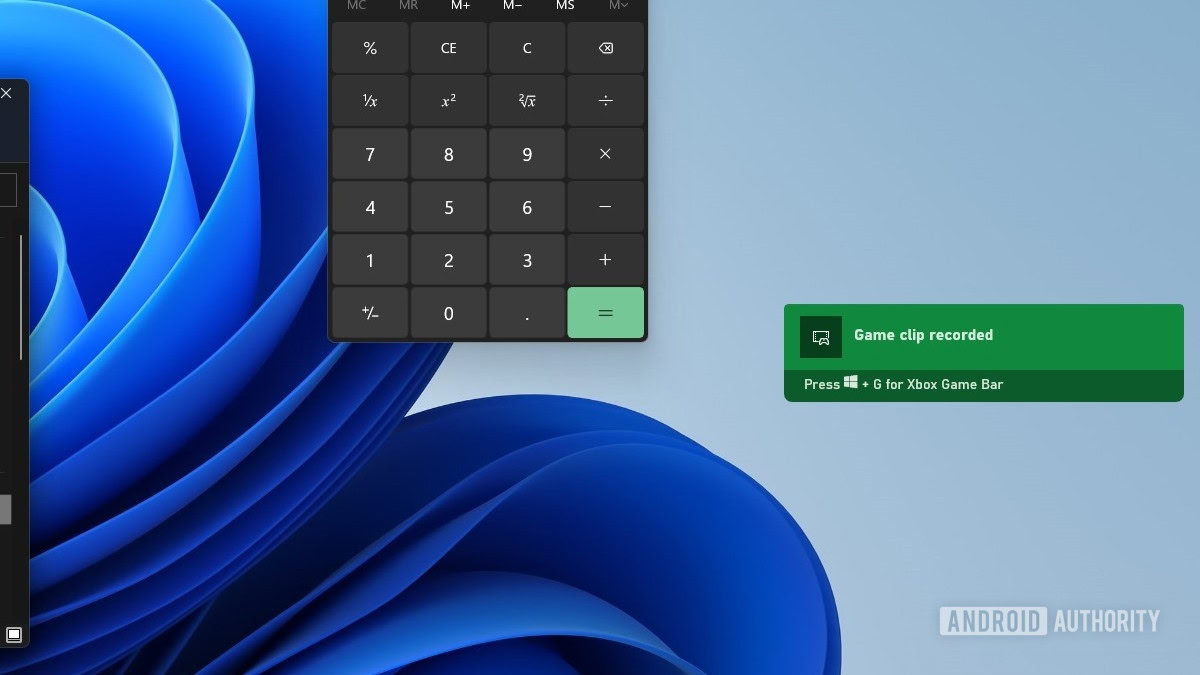
You will get an Xbox-styled notification saying Game clip recorded, confirming the screen recording was successful.
The screen recording clips captured by the Xbox Game Bar will automatically save the file to the capture folder. This is usually located at C Drive -> Users -> Your Username -> Videos -> Captures.
Also read: How to take a screenshot on Windows 11
Record your Windows 11 screen using Microsoft PowerPoint
For this one, you’ll need to have Microsoft Office installed on your PC. The slideshow app from Office, PowerPoint, can be used to record screen in Windows 11. Even though the main purpose of this method is to quickly add a screen recording to a slideshow, you can save it as a separate file as well, making for a viable screen recording method.
Launch Microsoft PowerPoint.
Open a new or existing file, and add or select a slide to add a screen recording to.
Click on the Insert tab of the menu ribbon found on the upper side of the screen.
In the Media section towards the end of the ribbon, and select Screen Recording.
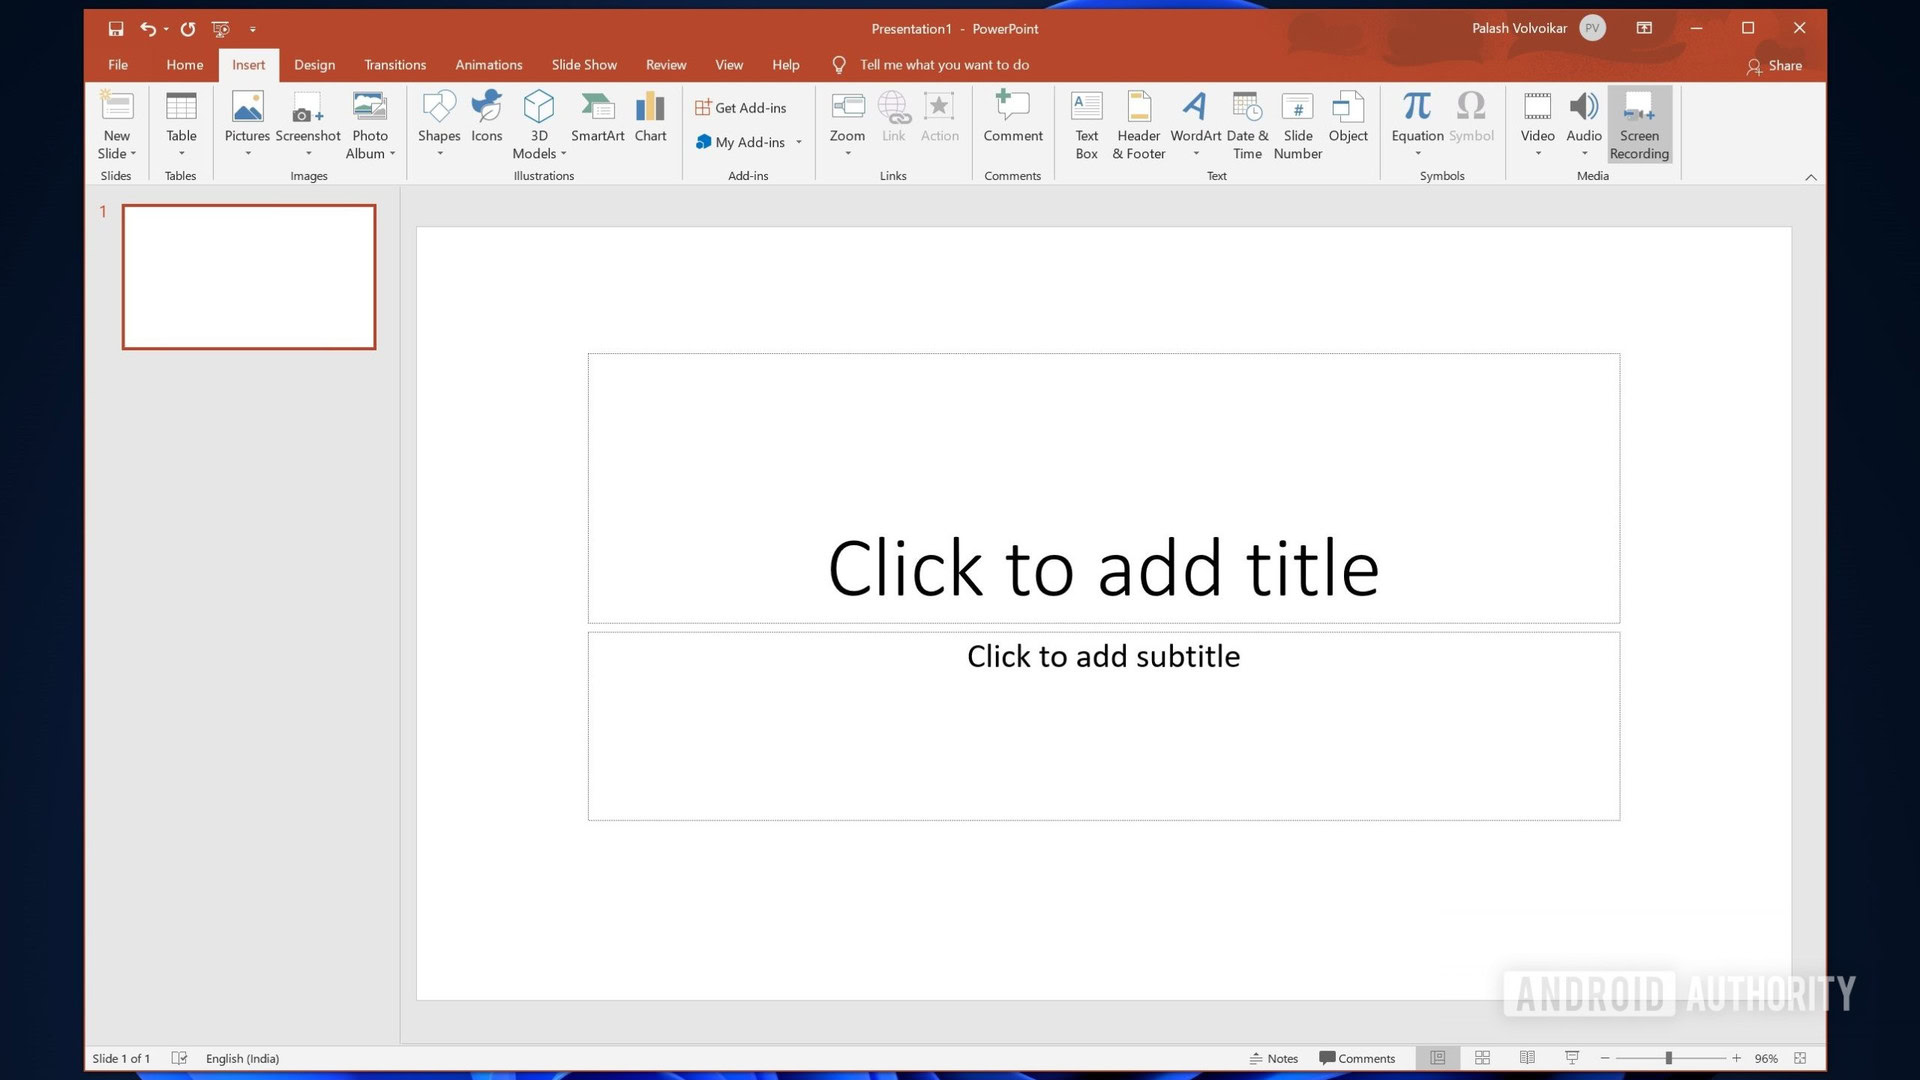
On the overlay that pops up, click on Audio and Record Pointer toggles to toggle them on/off as per your choice, and then click Select Area.
Use the select tool to select the area you want to record. If you want to record the entire screen, press Windows key + Shift + F.
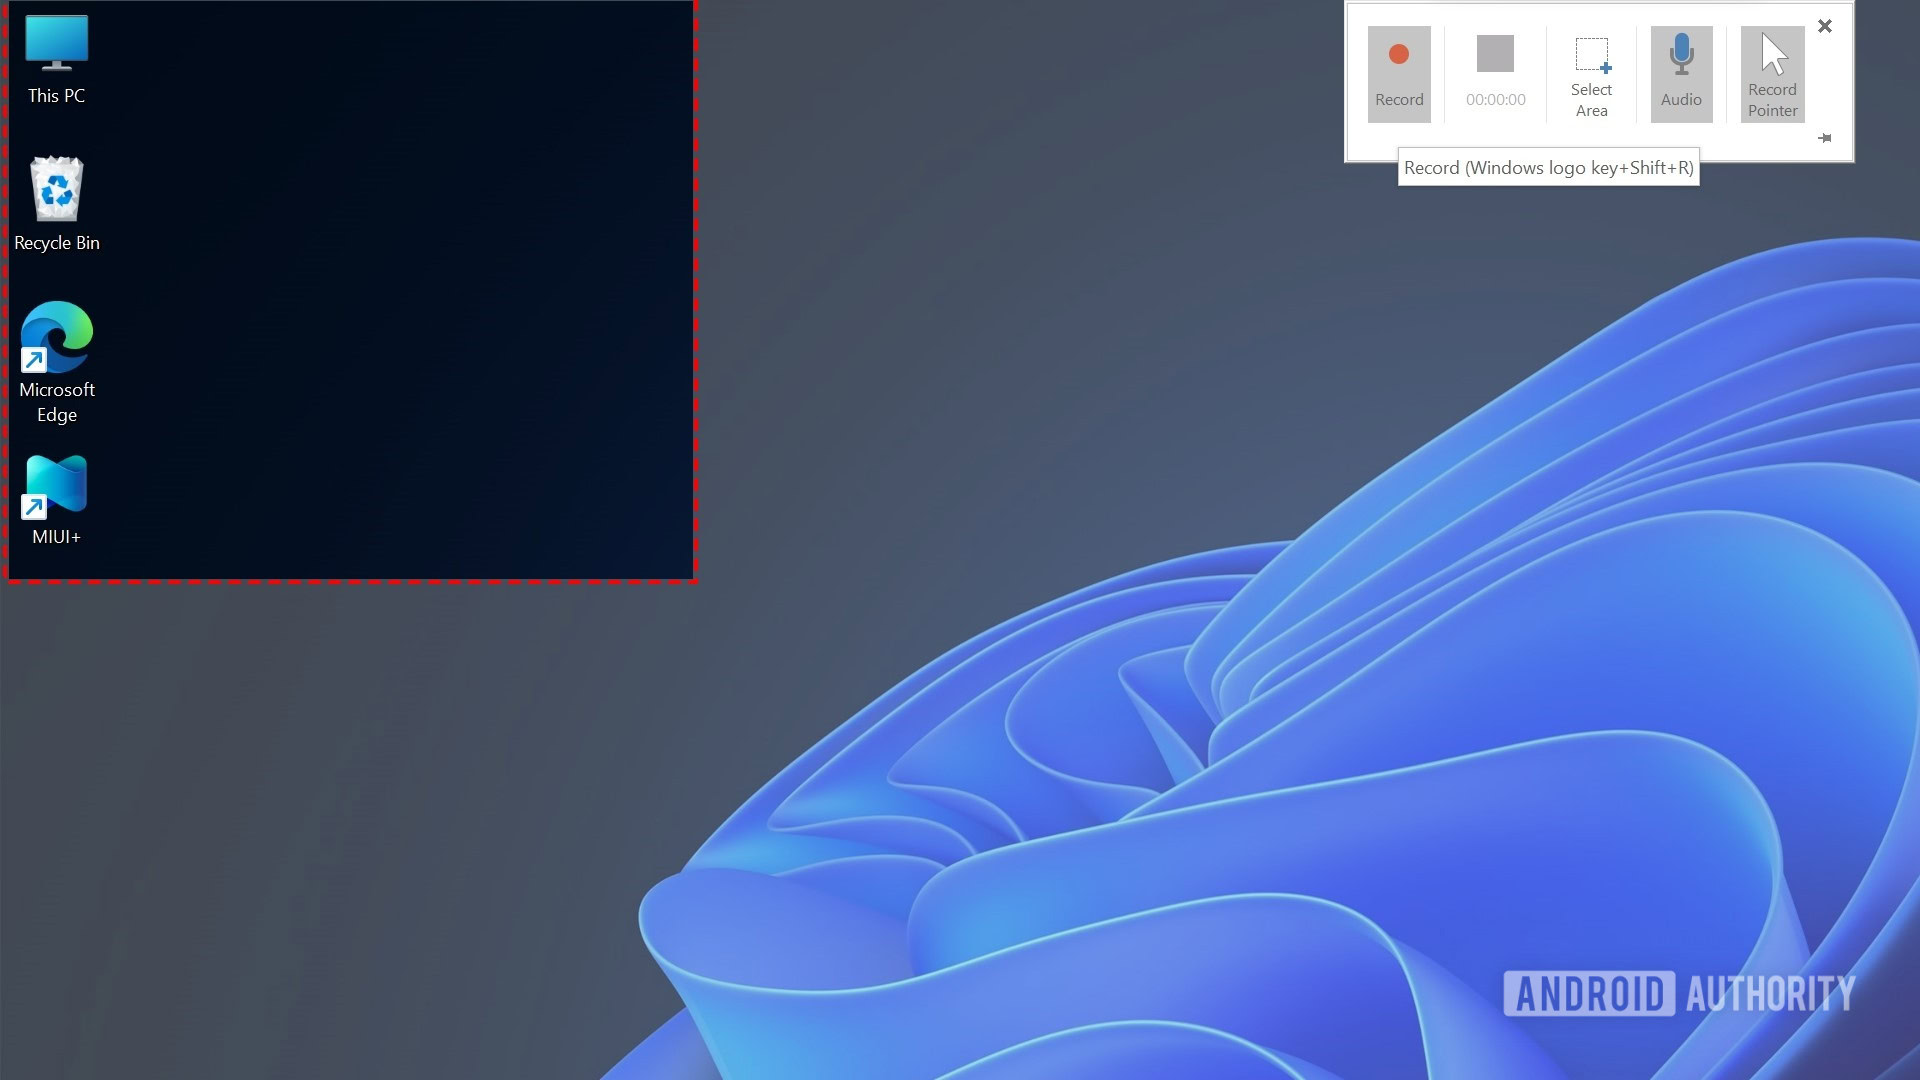
Click Record to start recording. Use the Stop button to stop the recording, or use Windows key + Shift + Q.
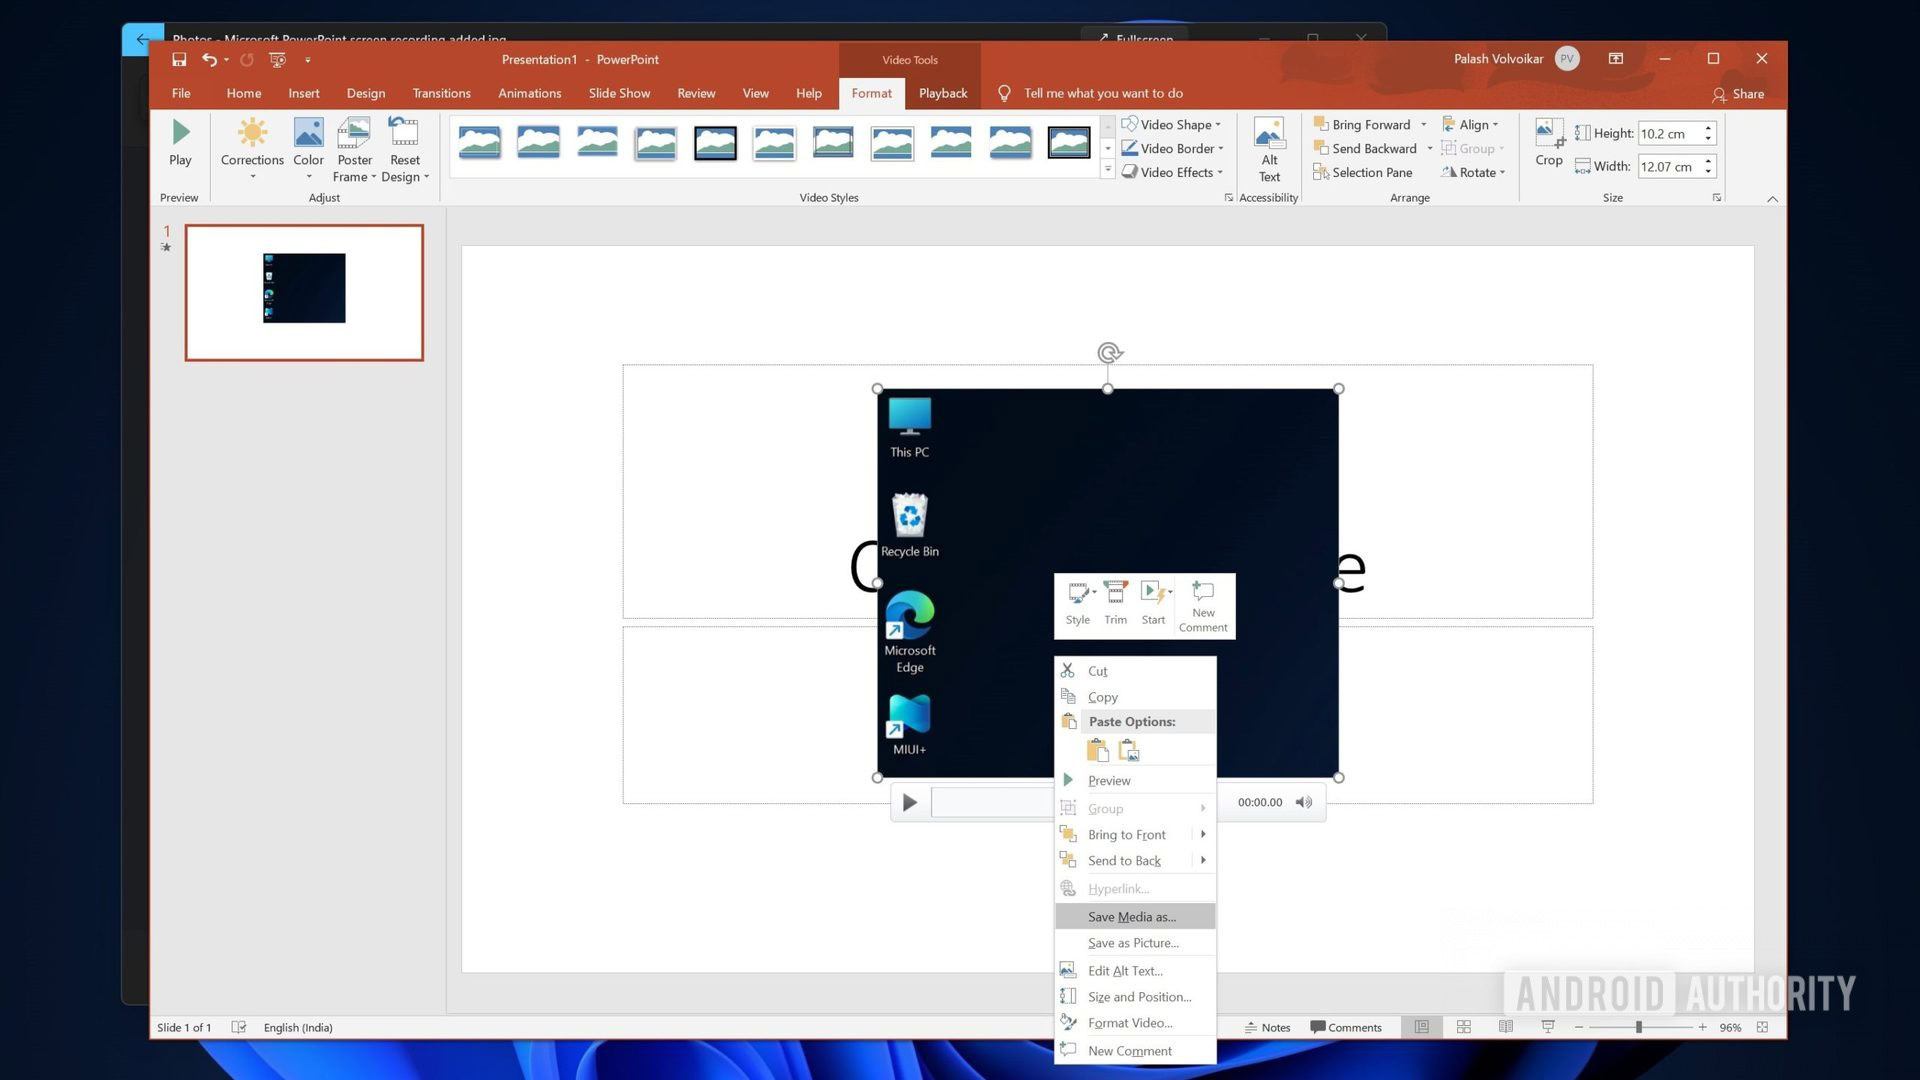
The video will be added to the slide. Right-click the added clip, and click Save Media as…. Name the file and click Save.
How to record your screen using OBS Studio
If you want to move out of Microsoft’s solutions, and go for a less complicated solution, OBS Studio is the way to go. It’s a widely used video recording, mixing, and streaming software that’s free and open source. Here’s how to record screen using OBS Studio.
Download OBS Studio, install it and launch it.
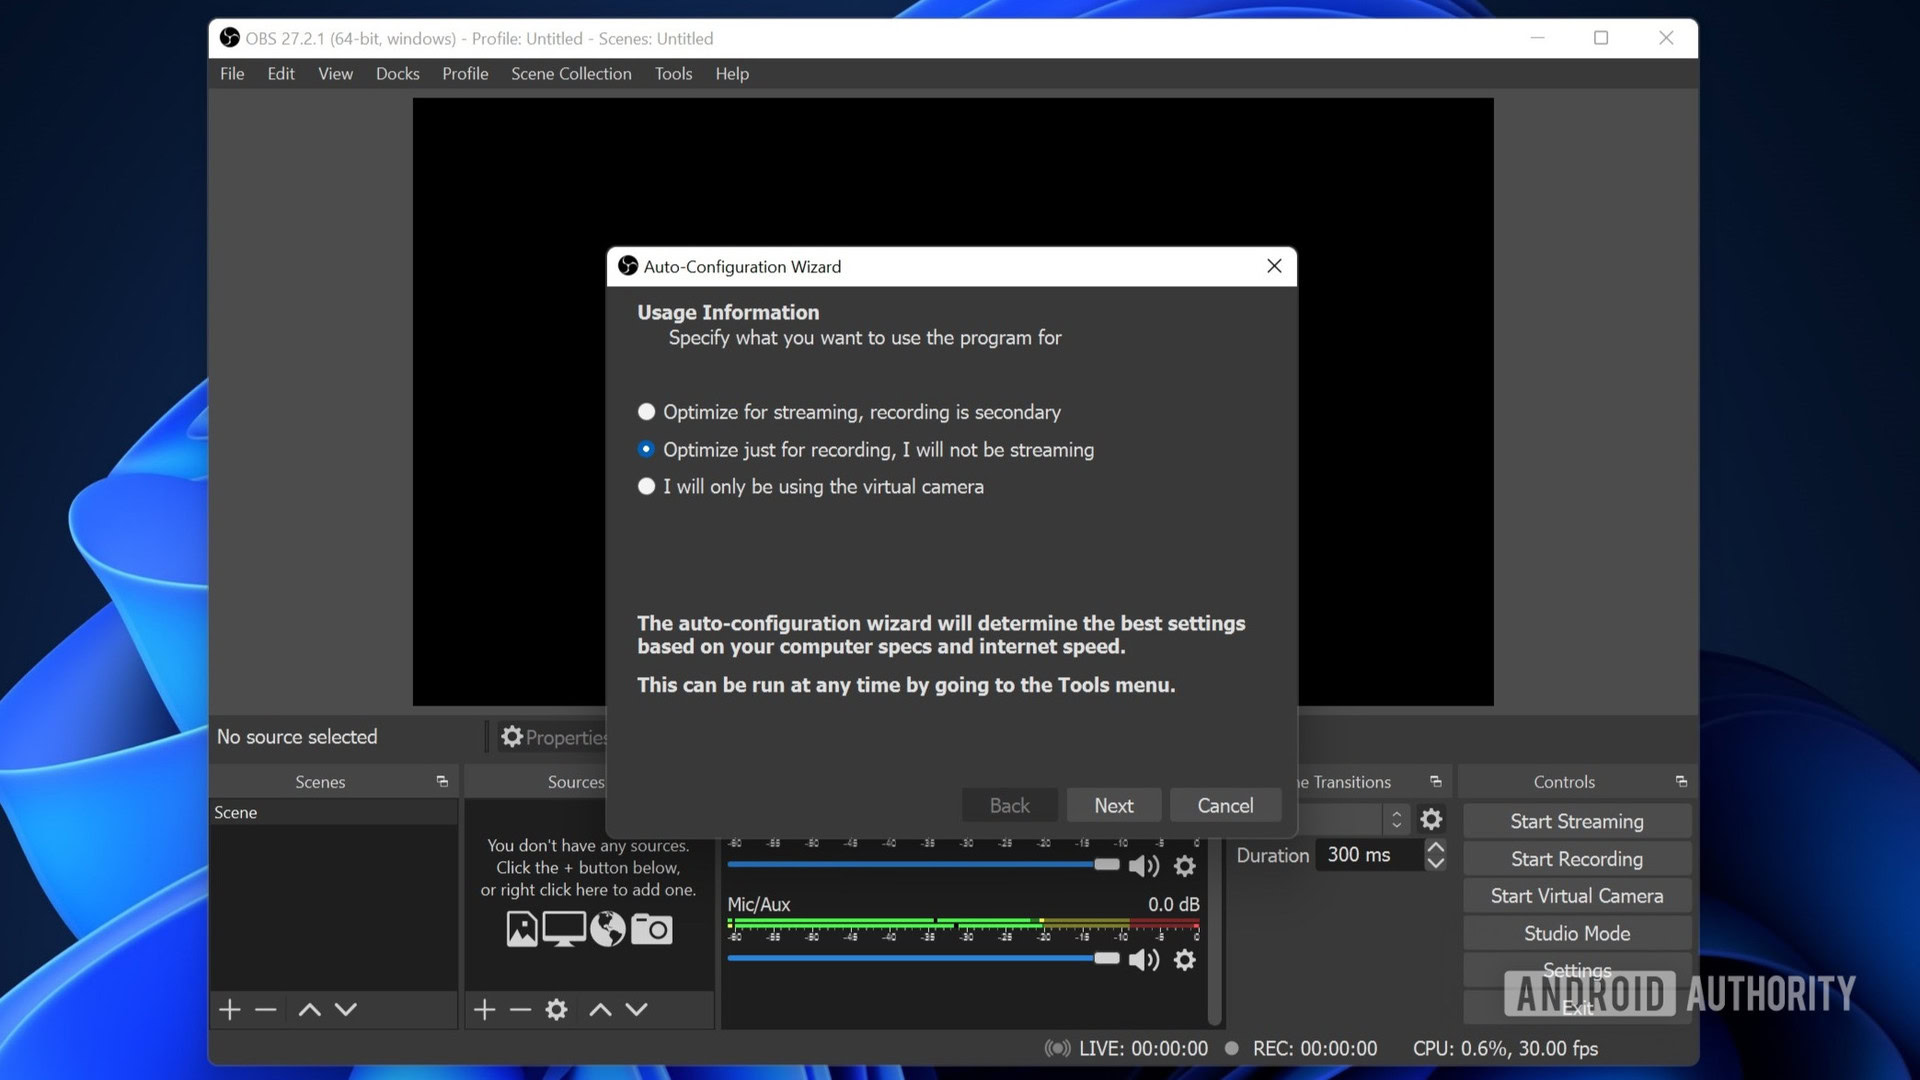
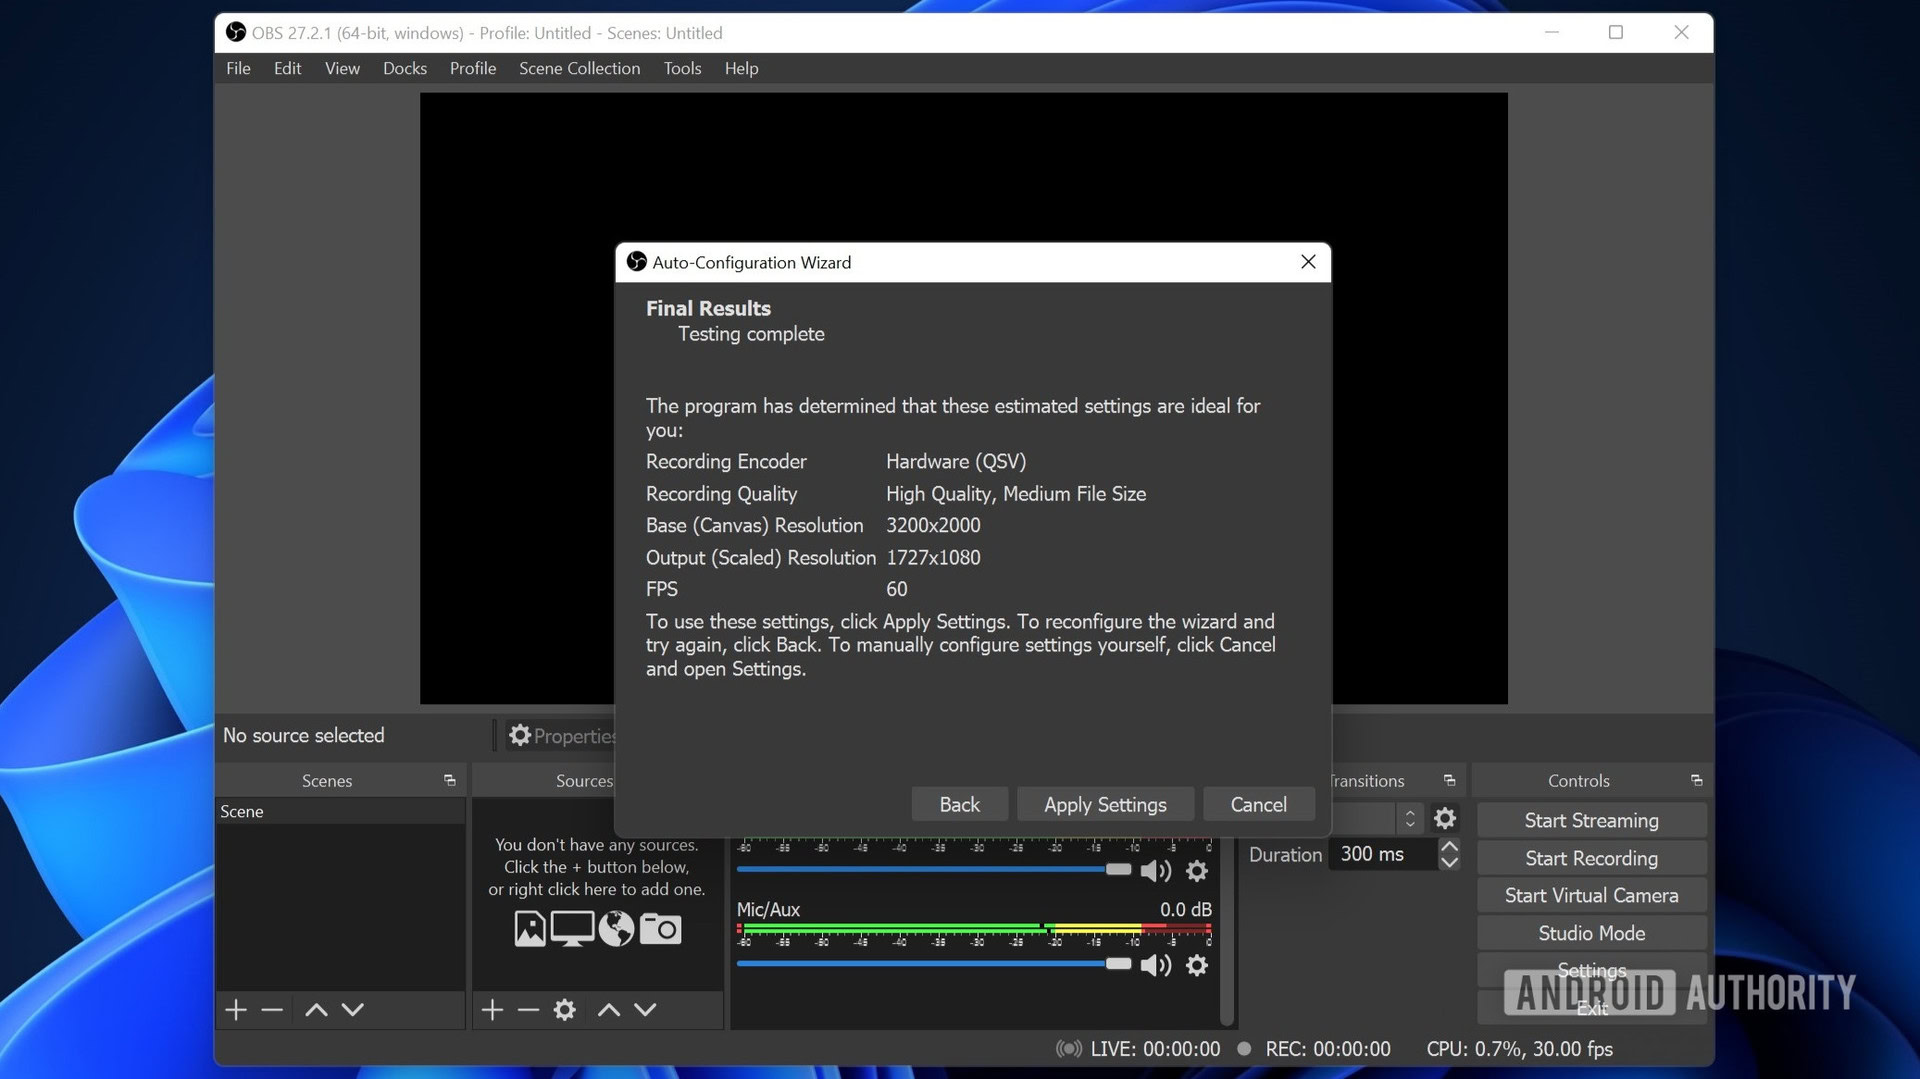
On the launch screen, select Optimize just for recording, I will not be streaming, and click Next.
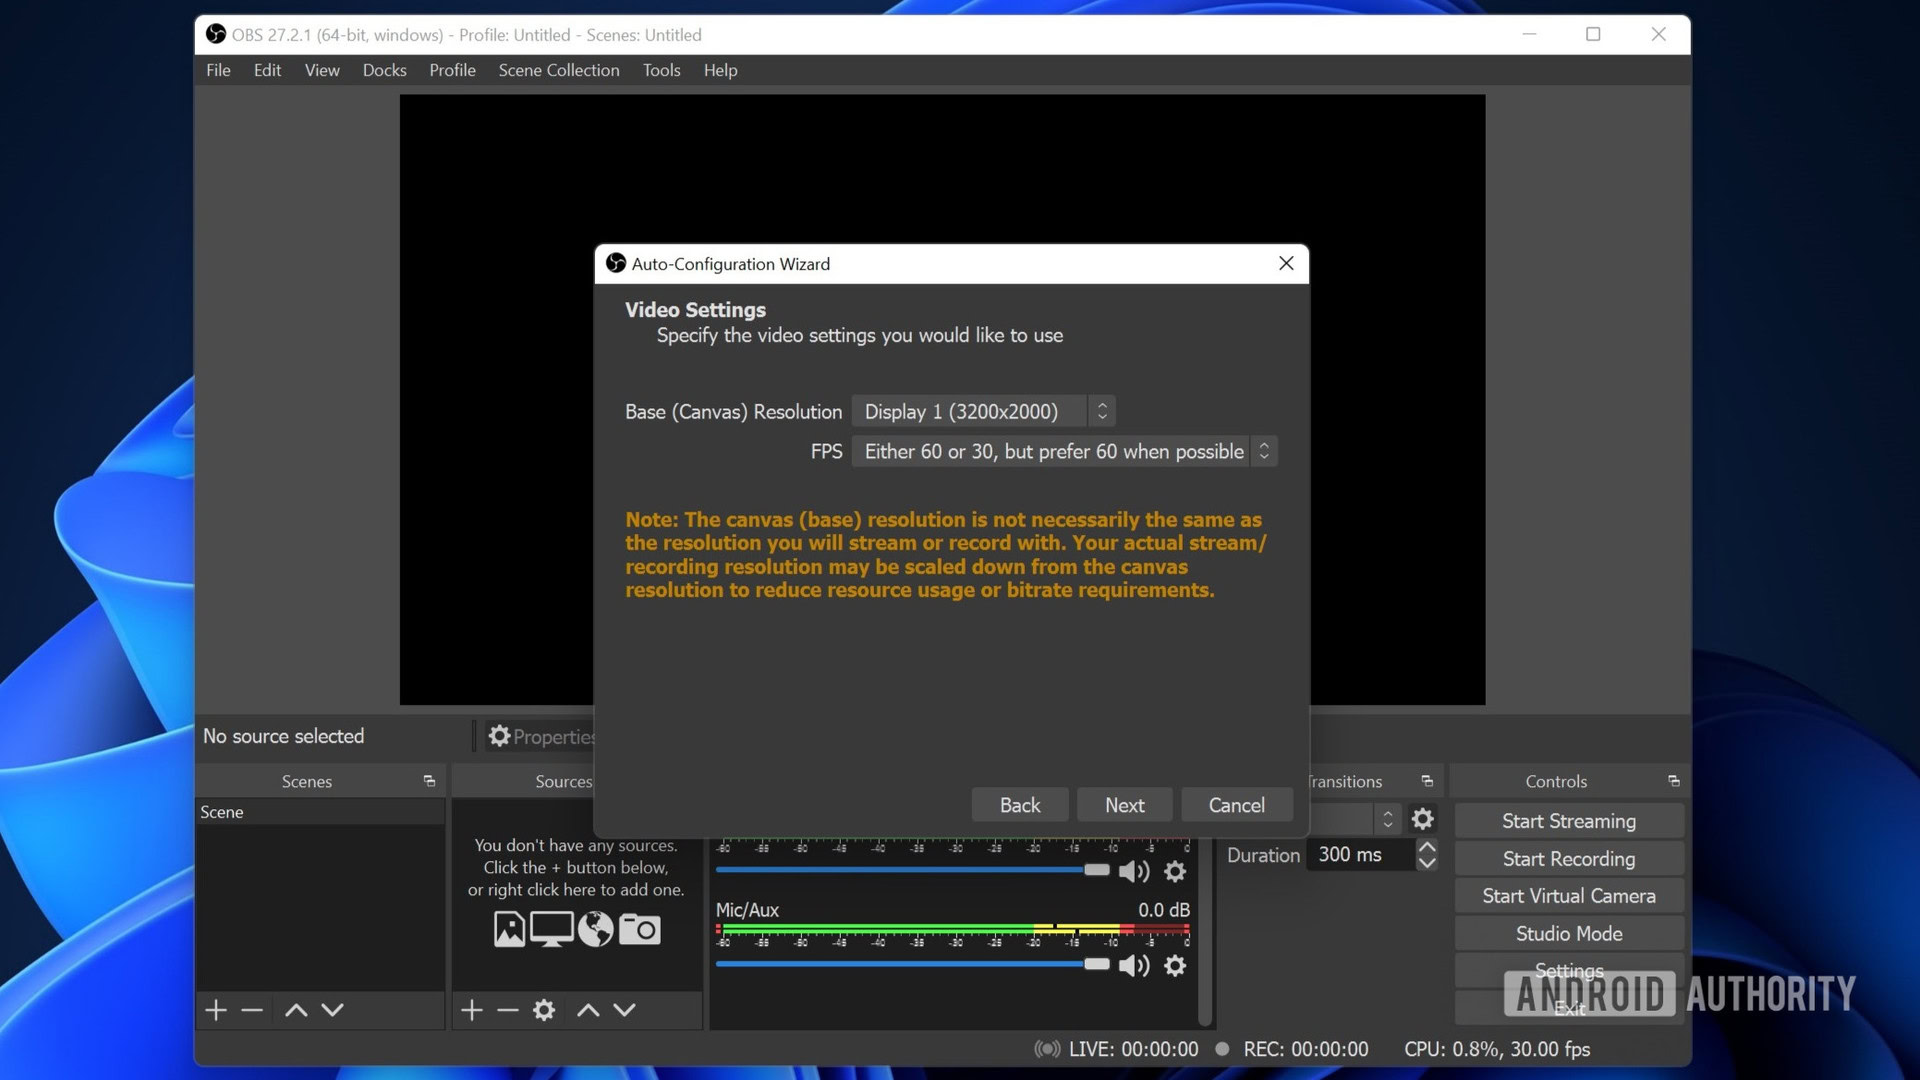
Select your preferred resolution and FPS, and click Next.
Confirm your settings, and click on Apply Settings.
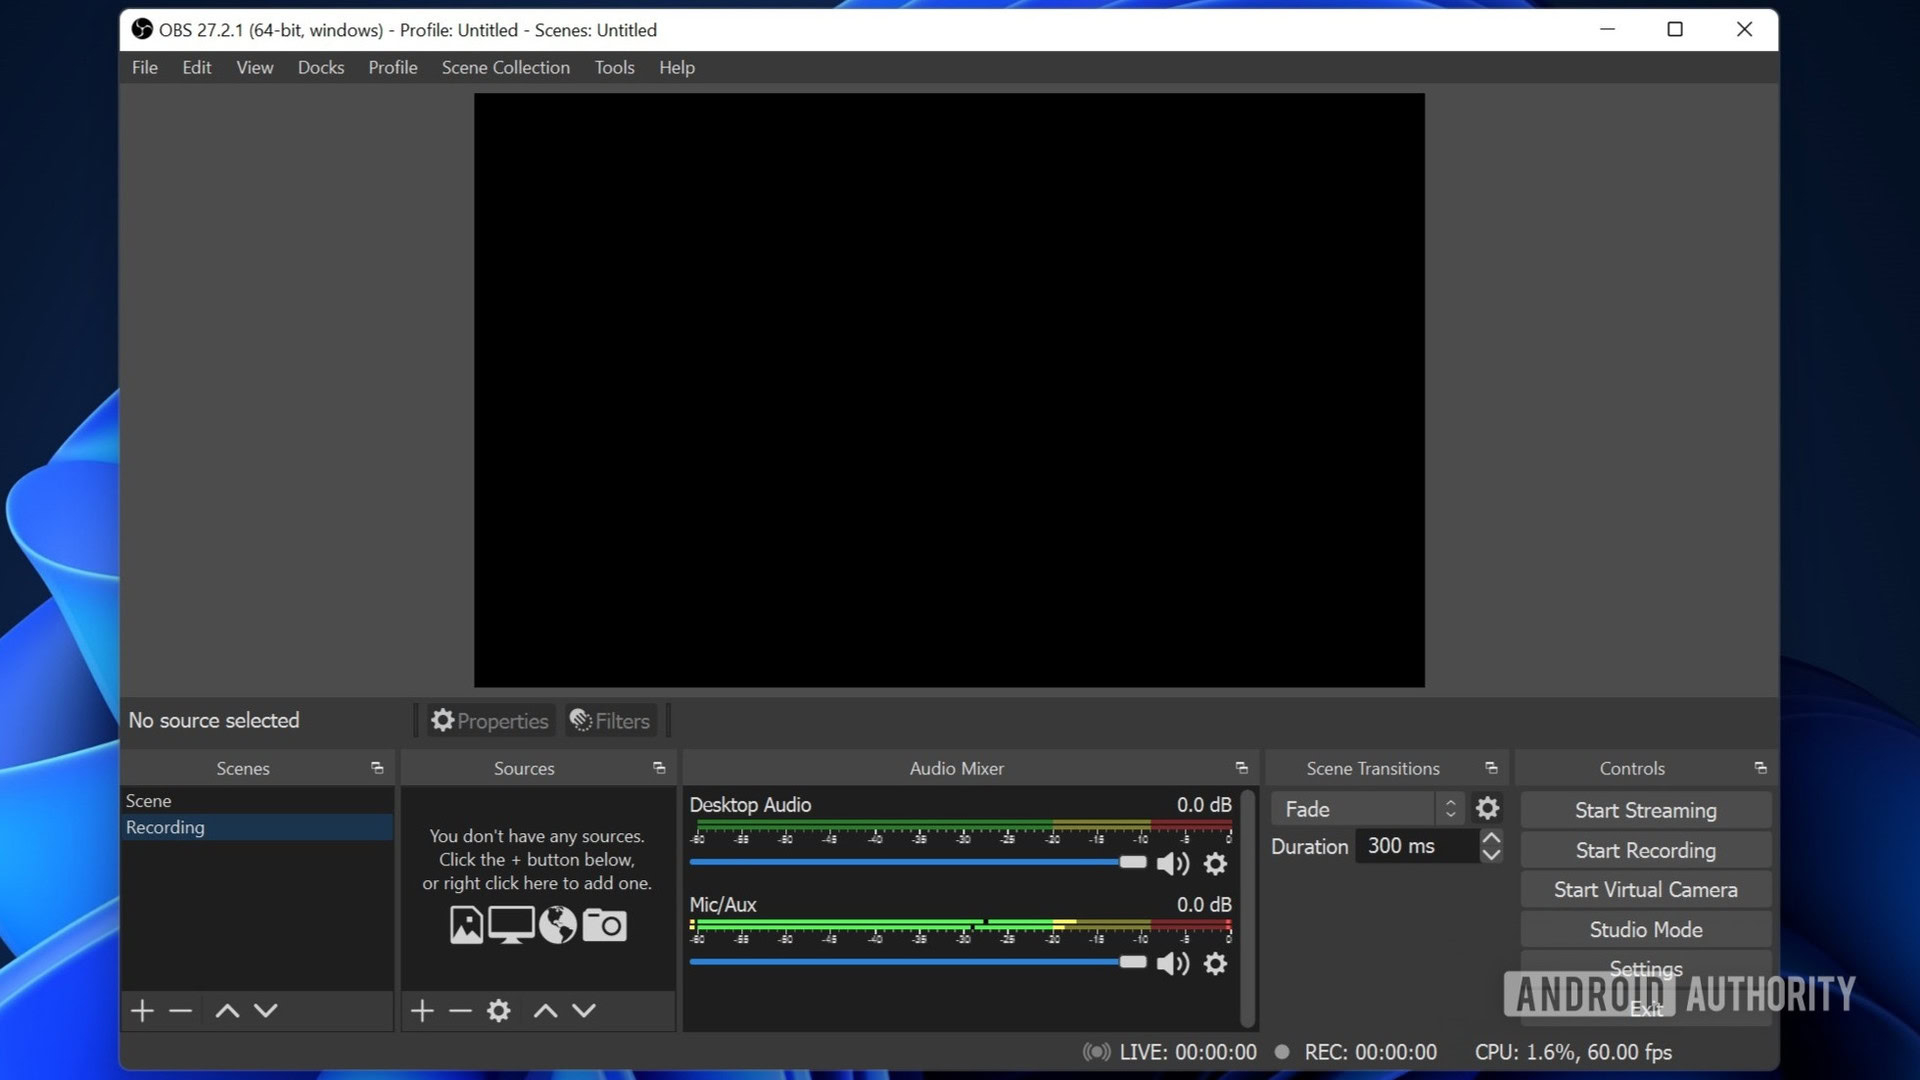
Add a scene using the plus (+) icon in the Scenes section in the bottom left corner. Name it, and click OK.
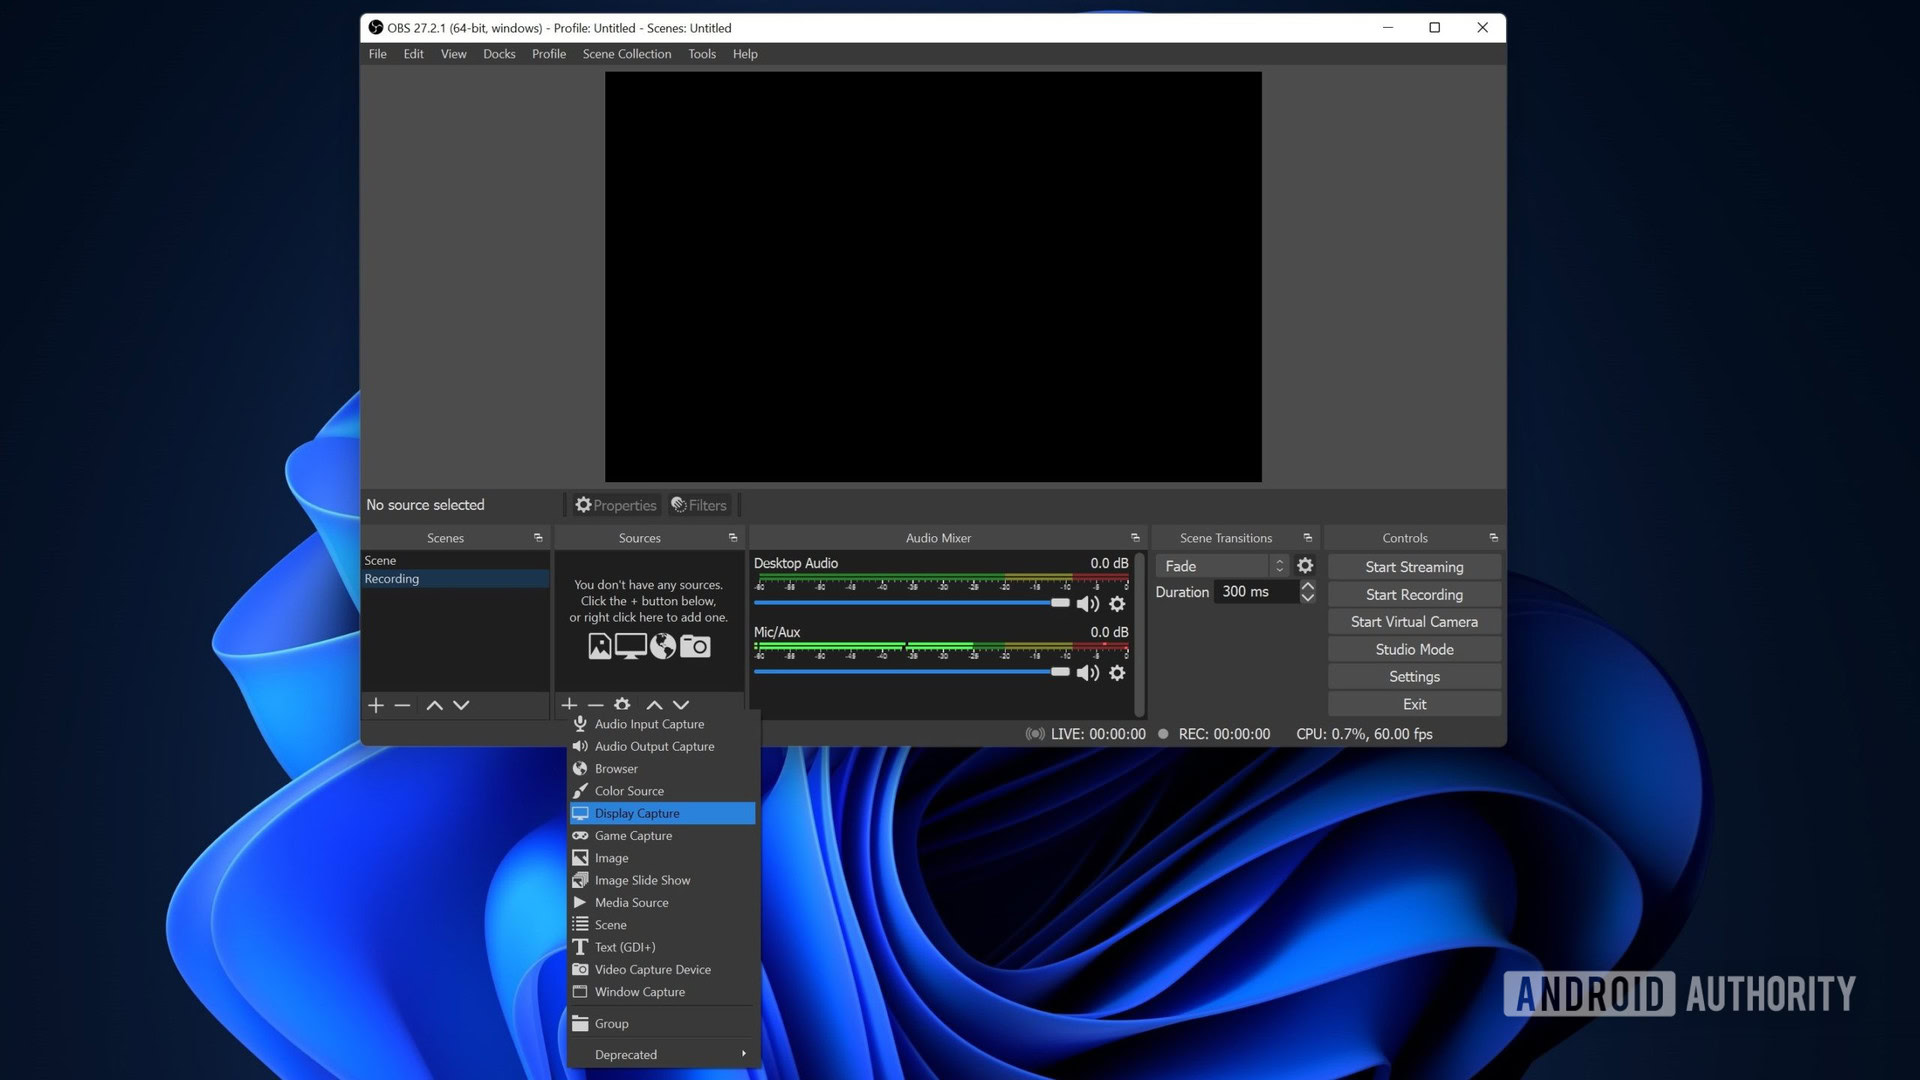
Click the plus (+) icon in the Sources section in the bottom left corner, and click on Display Capture. Name it, and click OK.
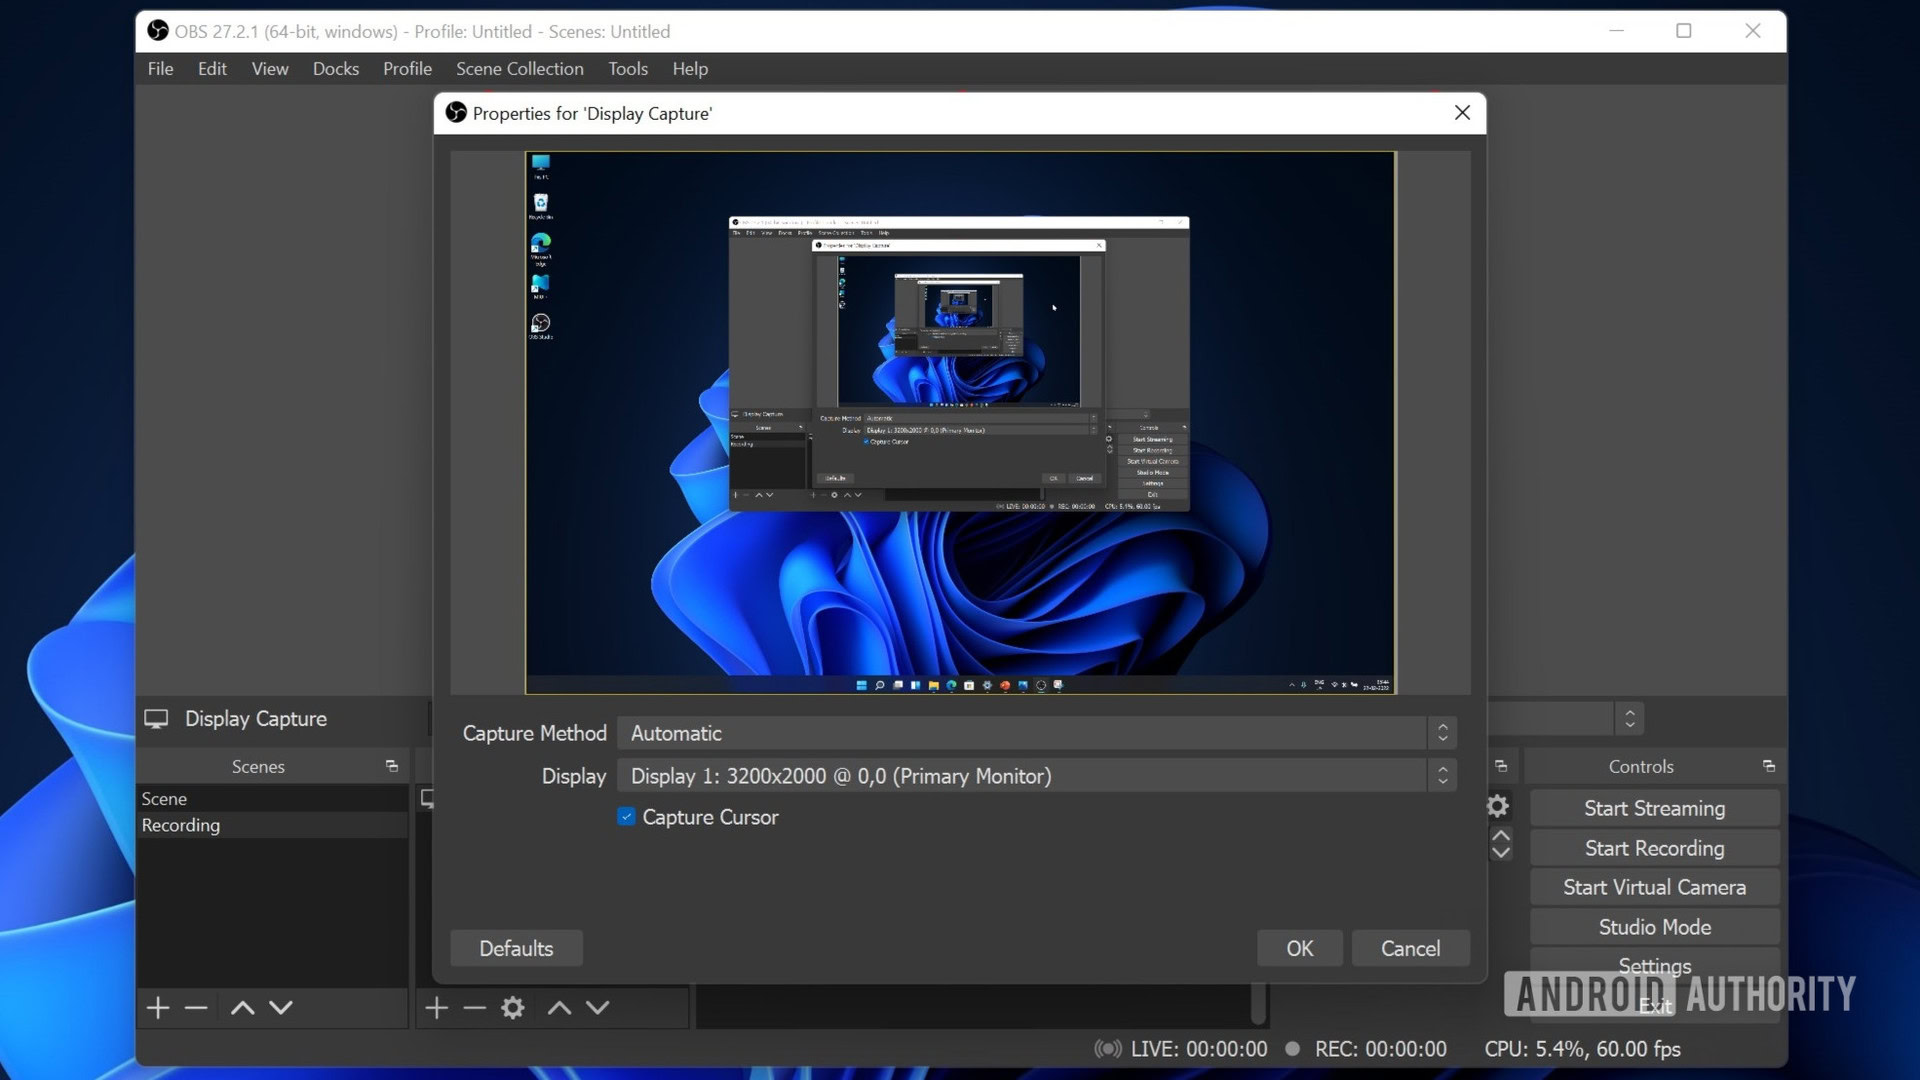
Select the display to record from the drop-down menu, and click OK.
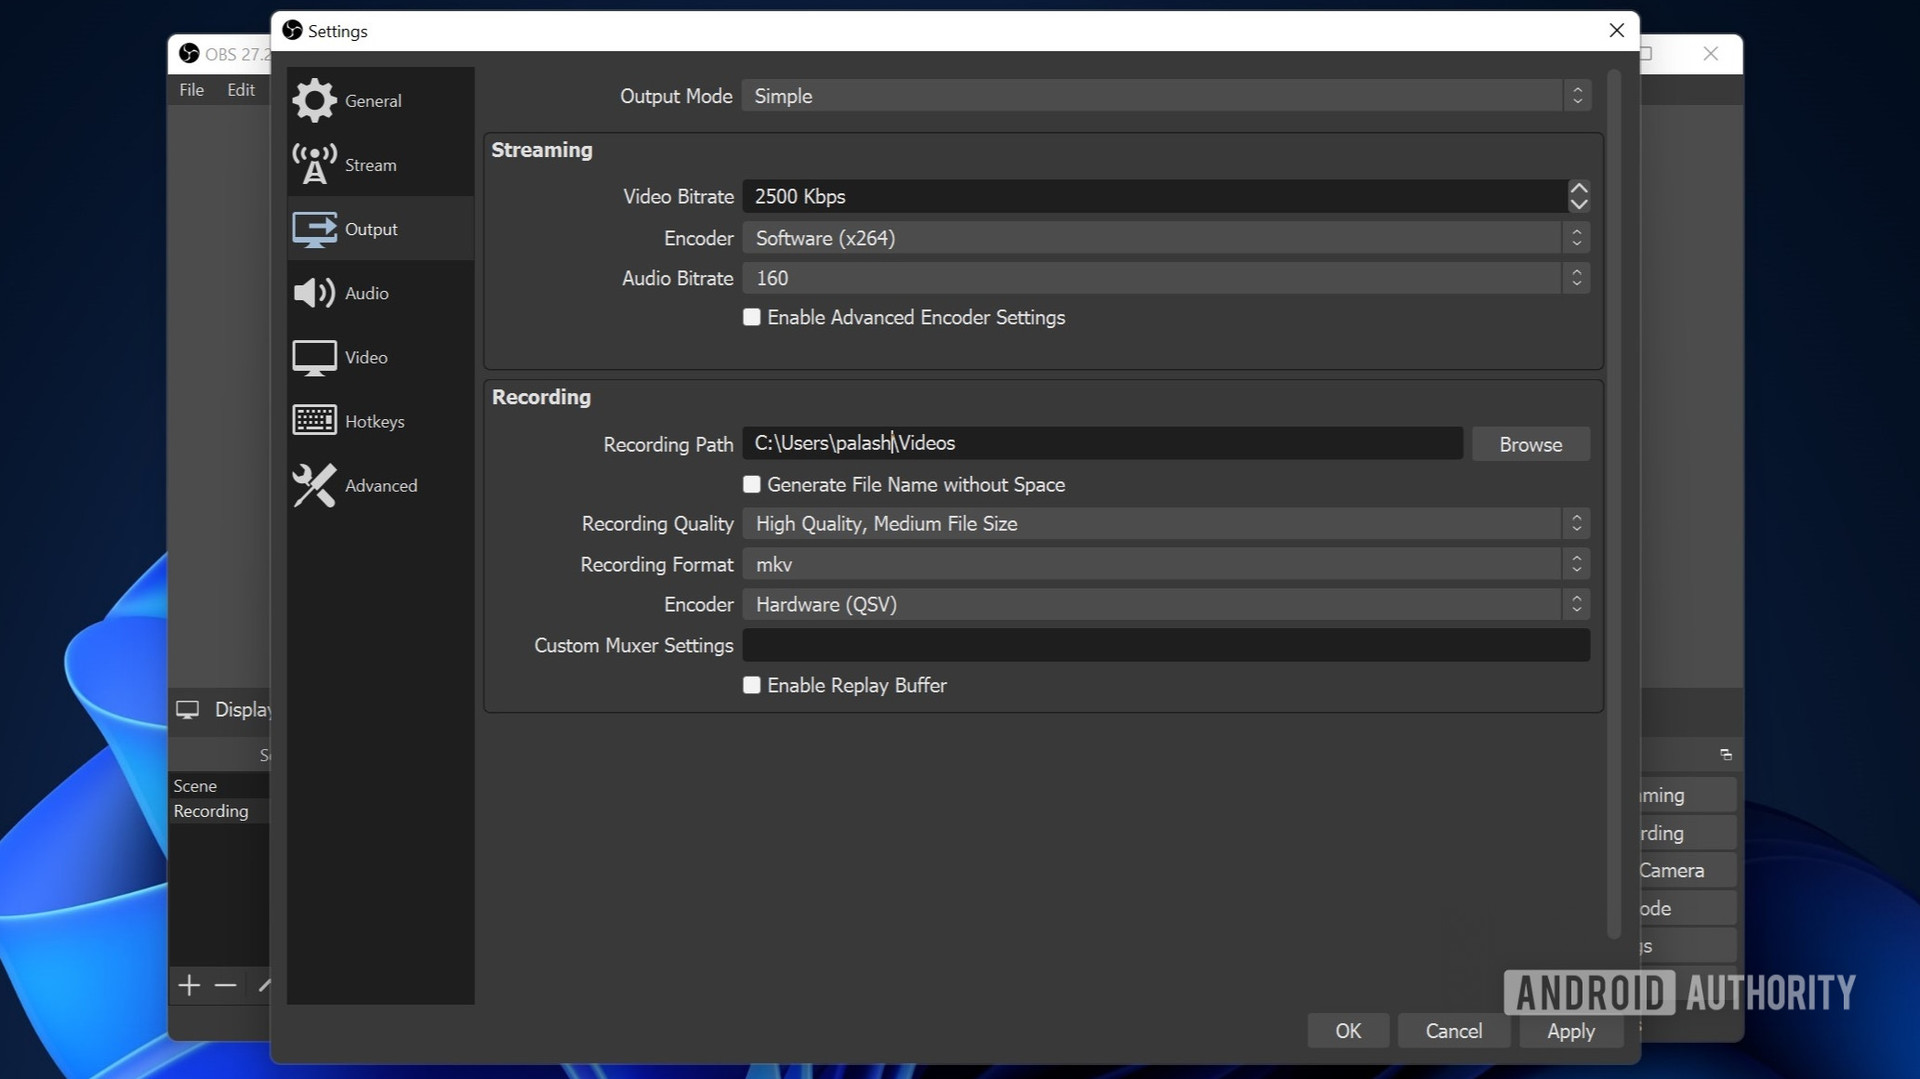
Click the Settings button located at the bottom right corner of the app.
Select Output from the left navigation pane. Make sure the settings and recording path are as per your preferences, and click OK.
Click on Start Recording button in the bottom right corner. Click Stop Recording when done.
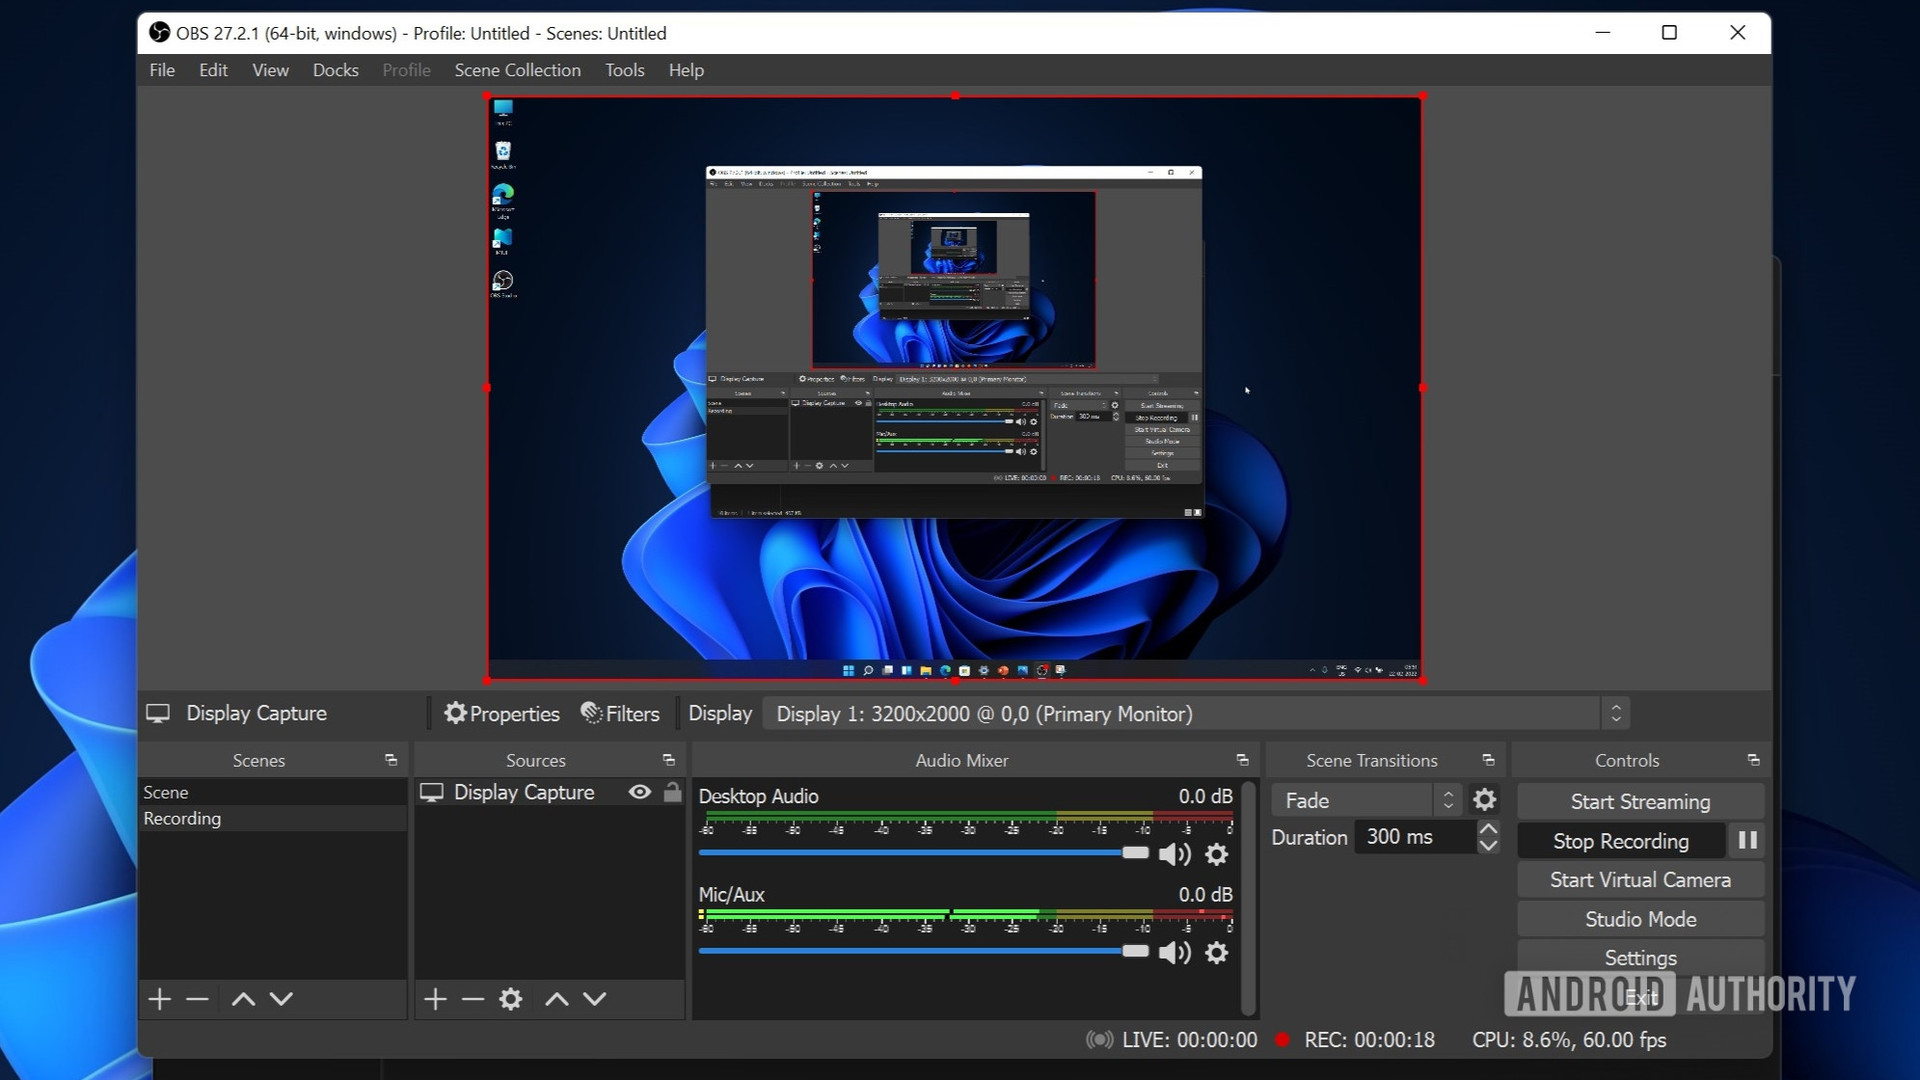
You can find your screen recording in the previously specified recording path. If the quality is not what you want, you can tweak the options in the settings to adjust it to your needs.
Read more: How to run Android apps on Windows 11