Affiliate links on Android Authority may earn us a commission. Learn more.
Android customization - remote camera trigger with Android
Published onFebruary 12, 2015
Last week on our Android customization series, we took a look at using voice commands to fire off the camera on your Android device. We then stepped it up a notch by using your Android Wear smartwatch to fire off that camera, using an app called Tasker Now.
This week, we would like to work with those that do not have an Android Wear powered smartwatch, instead, we’ll use another Android device, or a PC, to remotely fire that camera.
Before we get started


You will require two Android devices for this project to work, or an Android device and another phone, tablet or PC that can run Pushbullet or send SMS. Lastly, our approach today requires a data connection or otherwise connection to the internet or a cellular service to proceed.
A quick side note, we were corrected by reader MarcoS on the abilities of Tasker Now. We said that it only works as a Tasker Plugin, but it also operates as a Google Now extension (hence the name, Tasker Now.) Thanks MarcoS.
First things first, you will need to head back to last week’s Android customization post to create a Tasker Task that fires the camera on your Android device. Just build the “QualityPhoto” Task.
With the Camera Task in place, we will now build a Tasker Profile to fire off said camera action. Before we dive into Tasker again, you will need to make sure that Pushbullet is installed and granted permissions on your device. It’s a good think we recently looked at how to do that as well, check it out and head on back here to continue.
Create a new Tasker Profile, name it something appropriate, I’ll call mine “PushCamReceiver“.
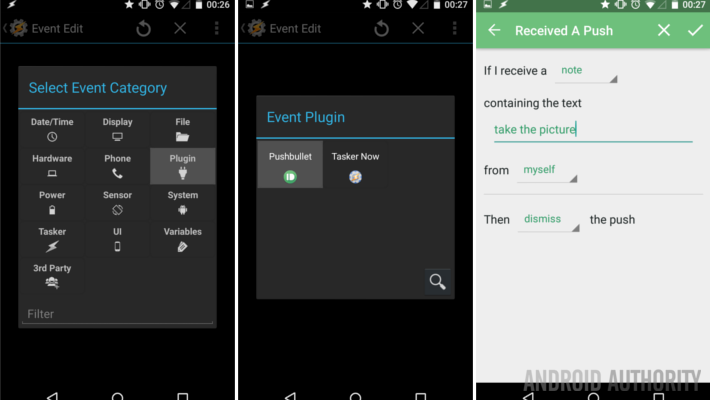
Select Event.
Select Plugin.
Select Pushbullet.
Tap the pencil icon to configure.
In the If I receive field, choose Note.
Enter your preferred text to trigger the action in the containing the text field. I’ll put “take the picture“. Please note, this is case sensitive, you will need to match it later.
Select From myself, unless you want to open this up to friends.
Then, I recommend choosing to dismiss the push.
Tap the Done button in the top right to save and exit the Pushbullet Plugin setup.
Tap the system Back button to save and exit the Profile.
Choose your camera Task, if you recall, I had named mine “QualityPhoto“.
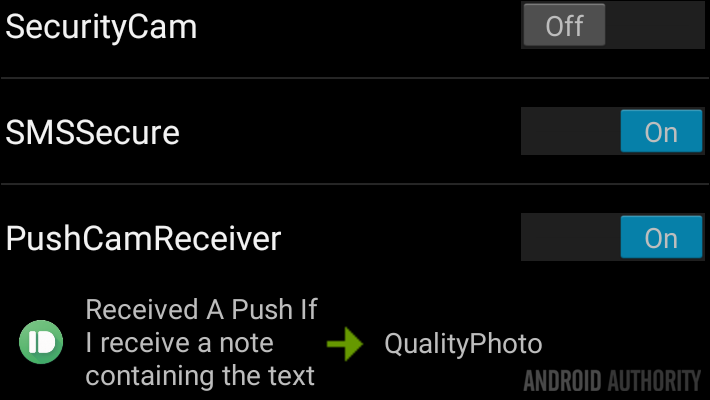
That was a lot of steps, but I hope you are pleasantly surprised that the hard part is over. You may exit Tasker and even turn off this Android device, we are done here, for now.
Now, we need to head to your other Android device, or other phone, tablet or PC on which Pushbullet is up and running. A PC is easy, there are extensions to browsers, but you can just use the web interface if you wish.
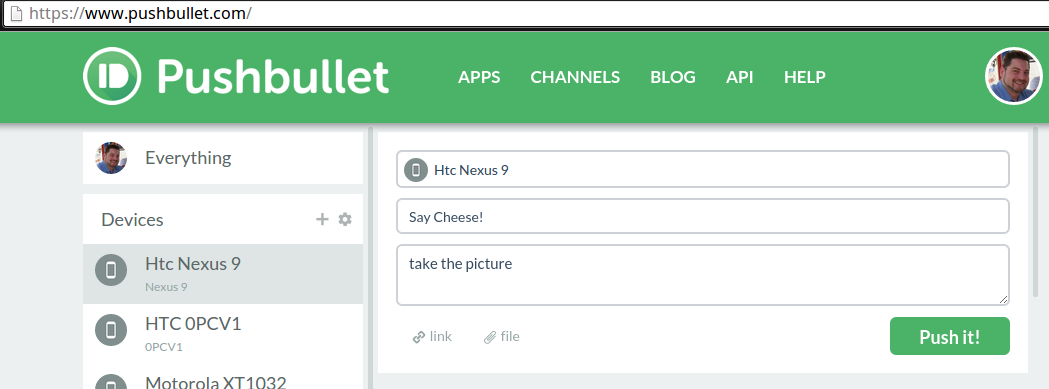
In Pushbullet on the other devices, simply send yourself a message. Remember, you want to send a Note with the text you established in the Tasker Profile configuration. Hit that send button, sit back and enjoy the magic.
Create a button to fire off the Pushbullet Note
The above was pretty slick, but a little inconvenient to do each time, especially if you are trying to use your Android device to take a group photo. Perhaps a single click button on your secondary Android device would speed things up?
On a secondary Android device, create a new Tasker Task, name it appropriately, how about “CameraPush“.
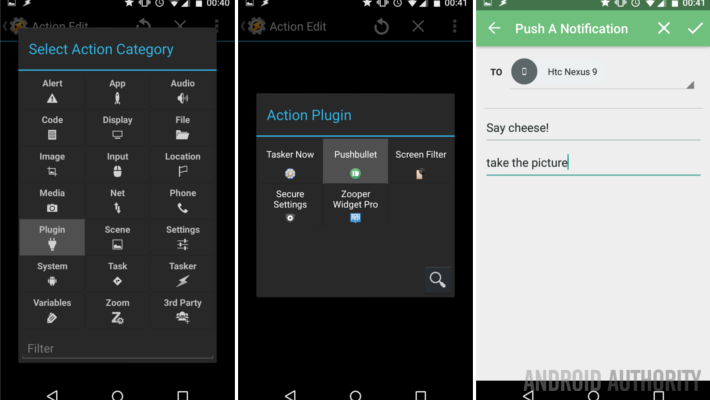
Tap the “+” button to add an action.
Choose Plugin.
Choose Pushbullet.
Tap the pencil icon to configure.
Choose the Pushbullet device that is houses your camera, that’s the one that you setup the “PushCamReceiver” Profile above.
Enter a title, whatever you want.
Now, enter the text that you assigned to trigger your camera. Once again, I had used the phrase “take the picture“. It is still case sensitive.
Tap the check mark in the top right to save, then tap the system Back button to save again and exit back to the Task screen.
Head to the bottom right corner and assign an icon to the Task.
Hit that system Back button again and again to save and exit right out of Tasker.
Now, how to trigger this new Tasker Task? Why, a widget, of course.
Create a Tasker Task widget
Find an empty space on your Homescreen and follow your device’s procedure to add a widget. That is likely going to be a long press on the location you want the widget, but you may need to head into your application drawer on your device.
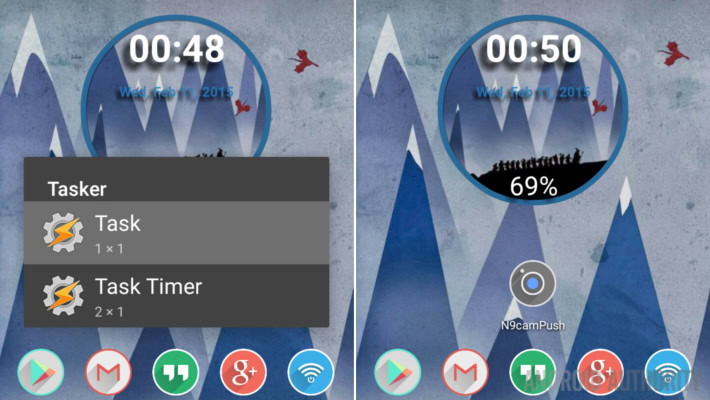
Once you are able to choose your widget, select the Tasker Task 1×1 widget.
Now, choose your Pushbullet Task as set above. I had named mine “CameraPush” (but I changed it to “N9camPush” as you see in the screenshot, I have more than one device I use this with.)
If you ignored me above and skipped placing an icon, you will need to do that now.
Tap the system Back button to save and exit.
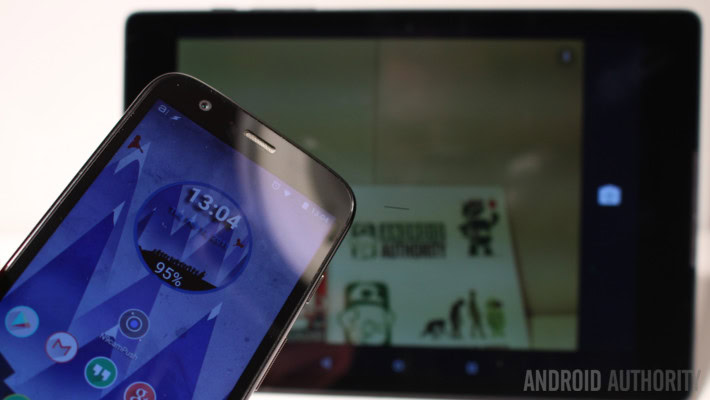
Great news, you did it! You now have a button on your Homescreen, and with one tap, your other device will take a photo.
Go ahead and give it a try.
You will find that it even works with the receiving device’s display turned off. No better way to save battery on a long photo shoot.
I don’t like Pushbullet, what else is there?
I want to just briefly touch on a few other approaches, as they are functional, but not very effective, especially if you do not have unlimited SMS on your cell plan.
The idea is straightforward, in place of Pushbullet, create a Tasker Profile that accepts incoming SMS messages, again looking for the keywords to trigger the camera. We basically did this same project as a security cam back in January, check it out for instruction on this one too. The steps are the same, just choose your new “QualityPhoto” Task in place of your old Security Cam Task.
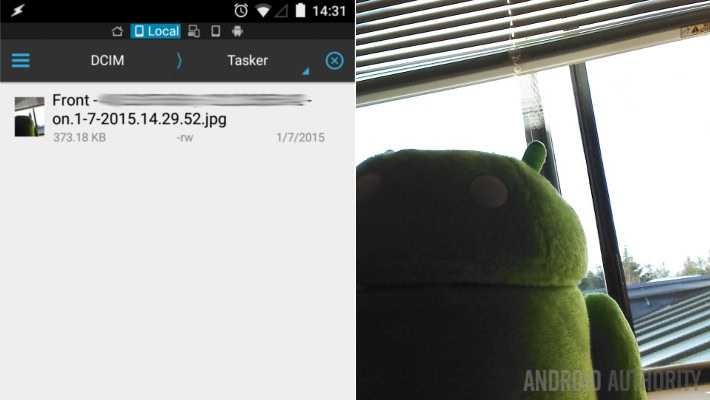
If you are thinking that SMS works, but isn’t the solution for you, you could try approaching this a few different ways. But the truth is, there is really nothing else that is easy to work with. For example, you could use Tasker with the FolderSync Plugin or a compatible to-do list app, creating a Task on one Android device that creates a to-do entry or small text file, waiting for either service to sync across devices to have the receiver device identify the list item or file and trigger the camera. If that sounds complicated and convoluted, that’s because it is.
What if I don’t have a data connection? I was afraid you might ask this, well, I certainly will not touch this today, but you could, theoretically, establish a trusted Bluetooth relationship between your devices. Upon receipt of a file transfer, for example, over Bluetooth, you could then have Tasker fire the camera. Once again, this is not ideal, and would require a folder watch in Tasker, but it would work. Head on down to the comments below if you have other suggestions, especially one that allows you to control Tasker over Bluetooth.
What’s next
Let’s see, you’ve now got Pushbullet on one device sending a Note over to the second device. The second device fires off the camera to take a photo. I hope you set the device up so that you didn’t just take a closeup photo of the surface that device is sitting on.
What about my WiFi equipped DLSR camera?
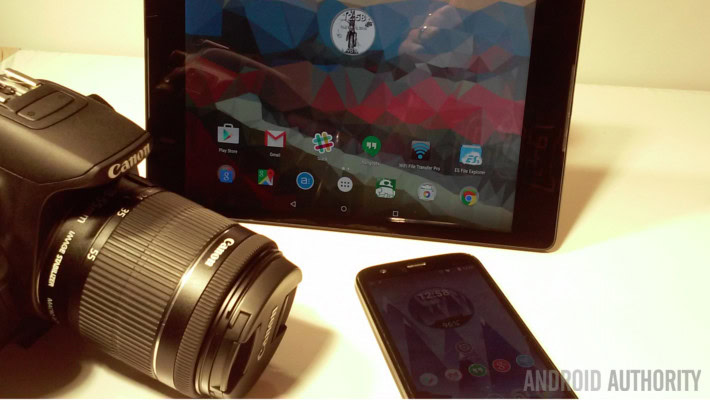
If you are one of the few that have such a device, there is a good chance that you already know of the accompanying Android apps available in the Google Play Store for most brands of DSLR cameras. For example, Canon has an app that will let you control most aspects of a few of their cameras. EOS Remote is free in the Google Play Store. As is Nikon’s WirelessMobileUtility, Panasonic’s LUMIX remote and more. Perform a quick search in the Play Store for your camera brand to see if something pops up.
Next week
After taking a single photo, remotely triggered by another Android device, in this week’s Android customization post, let’s dial things back a little, but still play with the camera. I want to use Tasker to take a succession of photos that can be turned into a timelapse animation. We won’t actually create an animation next week, our purpose is to learn the For Loop tools in Tasker, coding 101 stuff.
What do you say, will you try using your Android phone to remotely fire the camera on your Android tablet?