Affiliate links on Android Authority may earn us a commission. Learn more.
Rooting your phone? A few things to think about - Android customization
Published onDecember 17, 2015
Our Android customization series has, sometimes painstakingly, dedicated itself to non-root tools, tips and tricks to get the most out of your Android device. Today that changes. Last week we showed you how to replace a worn out USB port or headphone jack on a Nexus 7 tablet. That same tablet has now been rooted and we are ready to explore with you this new world of customization.
We will simply be working with a rooted device, we have not installed a custom ROM. We do not actually plan to change the installed OS at all, at least not for now.
Before we go too far, as far as the world of rooting your Android device goes, this is an article for beginner’s. Just a few tips and tricks to help you with the rooting process.
Heralding in a new age for Android customization, join us for a quick overview of root, and a few first things you might like to do once you’ve rooted.
Before we begin
The ability to obtain root access is different for most devices, and sometimes not even available, please check that your device has a known and stable root method before you proceed here today. You will be required to download and install an app on your device, a program on a connected PC or both.
We will be working with a Nexus device for our root projects moving forward, our 2012 Nexus 7 that we fixed last week. We rooted it using the Nexus Root Toolkit by WugFresh. This is an application that installs on a PC, then we simply connect our Nexus device via USB cable and follow the provided instructions. From there, we installed TWRP Recovery so that we could flash Xposed.
Today is all about sharing our experience with the root process, a few tips and tricks to help you get through it as best possible.
Disclaimer: Root is an advanced method within Android that gives you permissions to perform actions on your device that are not otherwise possible. These abilities allow you and your installed apps to perform actions on your device that can prove detrimental to your device. Please proceed with caution and understand that you are doing so at your own risk, we will not be held responsible if your device encounters issues. It is possible that you may brick your device, rendering it completely unusable, please be careful.
Also, unless your carrier/manufacturer states otherwise, rooting your device invalidates your warranty. You’ve been warned.
To learn how to root your device, check out some of our tutorials from days past, they are a little older, but the info remains true today:
Tips when rooting your device
If you’ve made it this far expecting to learn how to root your device, please hit those links above. We do not want to get caught up on the root process in this customization series, we just want to get on with using root to get the most out of our devices.
As I literally just rooted this Nexus 7, a few of the hiccups are fresh in my mind, just little things that I’m hoping will help you as you get started.
Bootloader, Root, Recovery, ROMs and more

OK, let’s start with some basic vocabulary. Please forgive me for this, I am about to explain some really advanced stuff in a really simple way, I may be technically inaccurate in these explanations, but only in the hopes of making it easier to understand.
Bootloader. In an attempt to keep this really simple, let’s call the Bootloader the BIOS of your Android device. If your Bootloader is locked, you will not be able to make any base level changes to your device. You’ll need to unlock your Bootloader before you can root your device, for example.
Root, as mentioned above, is simply the process of granting yourself elevated privileges on your Android device. If you are looking to delete some of those nasty bloatware apps that came pre-installed on your device, root is the permissions you need to make that happen.
Recovery, for our purposes, is a minimal operating system that can be run in place of your main operating system, for basic software management. Much like the BIOS on your computer, Recovery runs before the operating system boots up, but where the BIOS handles hardware, the Recovery on Android focuses on software. I guess it is more like the Install/Recovery screens you may have seen on your Windows machine when the operating system fails to load. Have I confused you yet? All you really need to know for today is that we used the TWRP Recovery and only for the purpose of creating a backup and flashing Xposed. More on that later.

ROMs, for the foreseeable future, we do not plan to handle ROMs in this series. A ROM is basically just another name for a new operating system for your Android device. You may have heard of CyanogenMod, Paranoid Android or the term AOSP. The former are completely different versions of Android, while AOSP is the pure, open source, Android experience that most ROMs are based off of.
These four terms should be enough to work from for now. Everything else we do will relate to working with or managing the above.
Back up
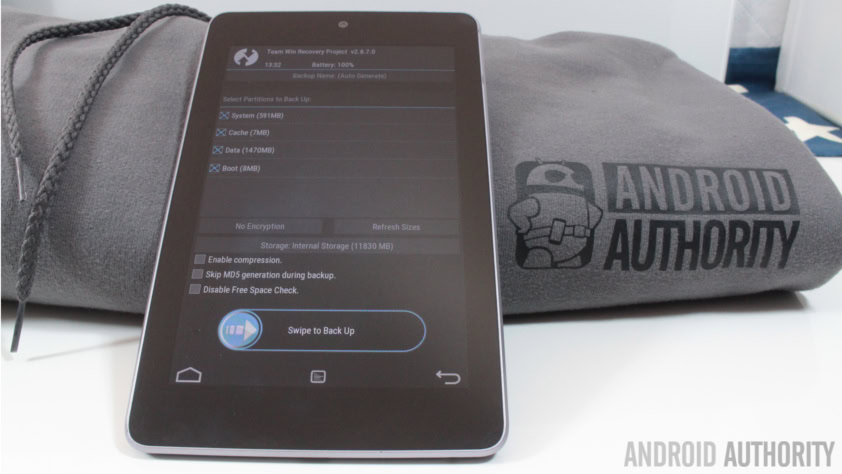
You are going to see these words over and over again, and for good reason. There are several levels of backup that you’ll be able to manage from here on, you can backup your data, including your photos, backup your apps, backup your system and more.
Before you root, your only real options are to backup your user data and your apps. We’ve talked about using apps like Helium to do this, but Nexus Root Toolkit can handle this as well.
Once rooted, you’ll be able to take more in-depth backups, including a full system backup. A popular service for backing up and restoring a full system is called Nandroid.
The key thing that you need to know for rooting is that unlocking your Bootloader performs a full system reset, wiping all of your apps and data. Back it all up and save those files off of the device for re-install later.
Unlock Bootloader

While Unlocking your Bootloader seems a simple thing, be sure to double check your warranty status before continuing, this is the piece that is against the rules for most manufacturers. From there, prepare for a full device wipe – this is done for security purposes, ensuring that no rogue apps already installed can take advantage of your newly opened security permissions.
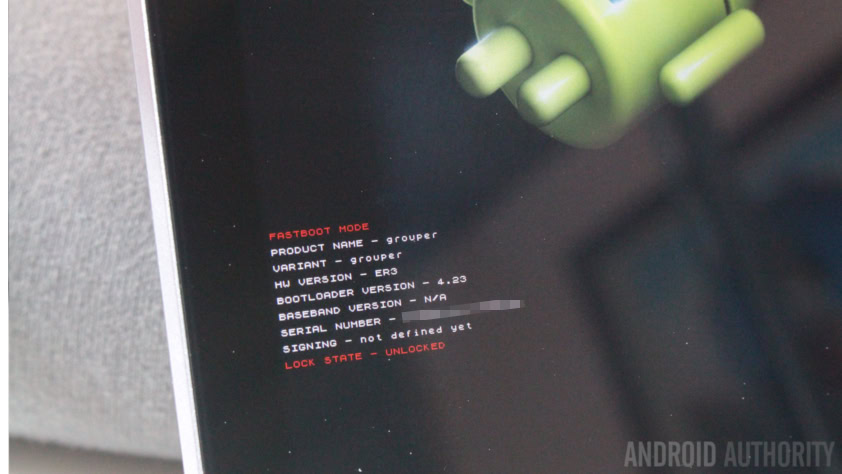
Once unlocked, most devices will show you an open padlock icon on the initial Android boot screen. You are now ready to dive in to the good stuff.
Root and Recovery
Unlocking your device can be a scary process, the screen flashes, your device reboots multiple times, funny stuff pops up on the display. Relax, if you’ve chosen a respected rooting tool with confirmation that your device is supported, this process very rarely goes wrong. However, do not mess around, if performed incorrectly, if you unplug the USB cable halfway through, for example, this can brick your device.
Before you root, consider what you are looking to accomplish by unleashing these new permissions. What I mean is, as I learned the hard way, are you rooting to wipe some nasty apps, or are you hoping to install Xposed or even a new ROM? If you would like to install Xposed, as I did, you are going to need to install a custom Recovery first.
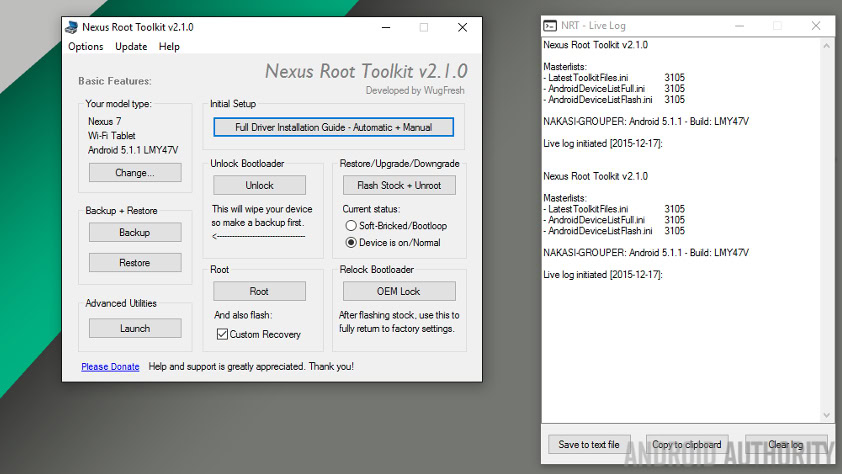
There is no harm in rooting and then coming back later to install a custom Recovery, in-fact, your tool may not even offer the option to do both. It simply saves you time and a few device reboots to do this all at the same time. Nexus Root Toolkit can install TWRP, CWM and more.
Storage space
Because Xposed is a fairly advanced framework that goes beyond any normal app functionality, it is now required to flash the framework to the device. Once the framework is installed, you can then install the normal Android app to continue.
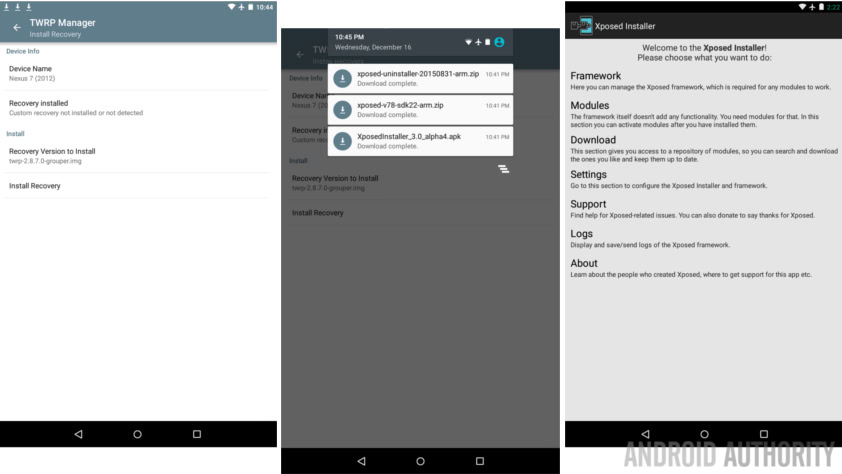
We’ll talk more about Xposed later, it is a very exciting tool for customization, for now, let’s talk about System space.
You may have noticed in the root process, or now here when trying to flash Xposed to your device, that the installs fail. One common reason for this failure is a shortage of storage space. Now, at this stage of the game we are not talking about the storage locations that you have seen in your system Settings or favorite file explorer app, we’re talking about a reserved partition for your actual system files.
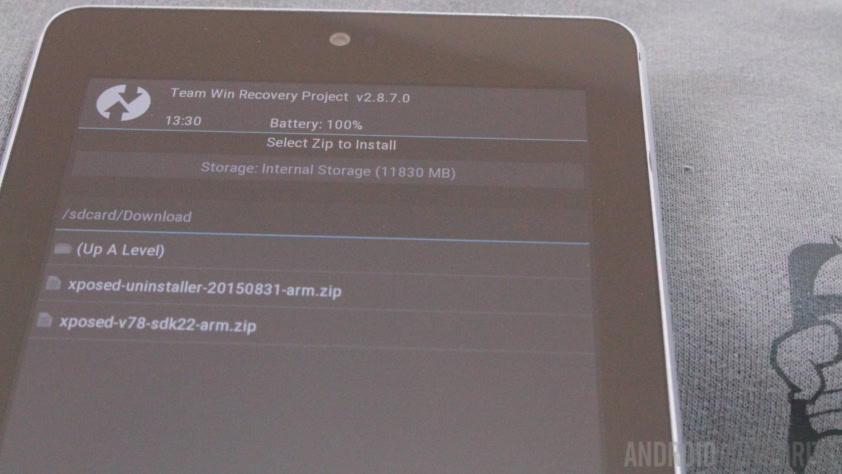
The easiest way to repair the System storage issue is to delete some apps. You’ll need a root file explorer, navigate to the files and kill ’em. If you are not sure what to get rid of, I recommend deleting apps that you can later install from the Google Play Store. For example, Google Sheets and Slides. I rarely use these apps on this device, they are fairly large files and I can always get them back later.
Anything funny going on? You backed up all those apps you deleted, right? Of course you did.
What’s next
I think that about covers the main tips and tricks from my most recent rooting experience. I have not used Xposed on Lollipop or Marshmallow yet, I hope you are ready to explore this great tool and all of the great modules as we go.
Resources:
Nexus Root Toolkit by WugFresh
TWRP (TeamWin) website
ClockWorkMod
Xposed Module Repository
Next week
I hope you found our tips useful today and I hope you are happily rooted and ready to roll. Next week is Christmas Eve, the week after that is New Years Eve. I’m still with you, watch out for some lazy holiday inspired Android customization projects for the next couple weeks. Then, in the new year, we will talk Xposed, maybe walk through the install in more detail, and get started with some cool modules.
What is your top pick for the first Xposed module a new user should install?