Affiliate links on Android Authority may earn us a commission. Learn more.
How to screen record on FaceTime with or without sound
Published onMarch 8, 2025
FaceTime video calls are often de facto between people with iPhones, iPads, or Mac computers, but the technology isn’t really built for recording. Apple likes to tout the platform’s end-to-end encryption, and there’s no way of hooking other apps into it. If you want to record a FaceTime call, you’ll have to use a shotgun approach that isn’t terribly pretty.
QUICK ANSWER
To record FaceTime calls:
- On an iPhone or iPad, open FaceTime, then head to Control Center and tap Screen Recording. To also capture audio, long-press on the Screen Record button to enable the Microphone.
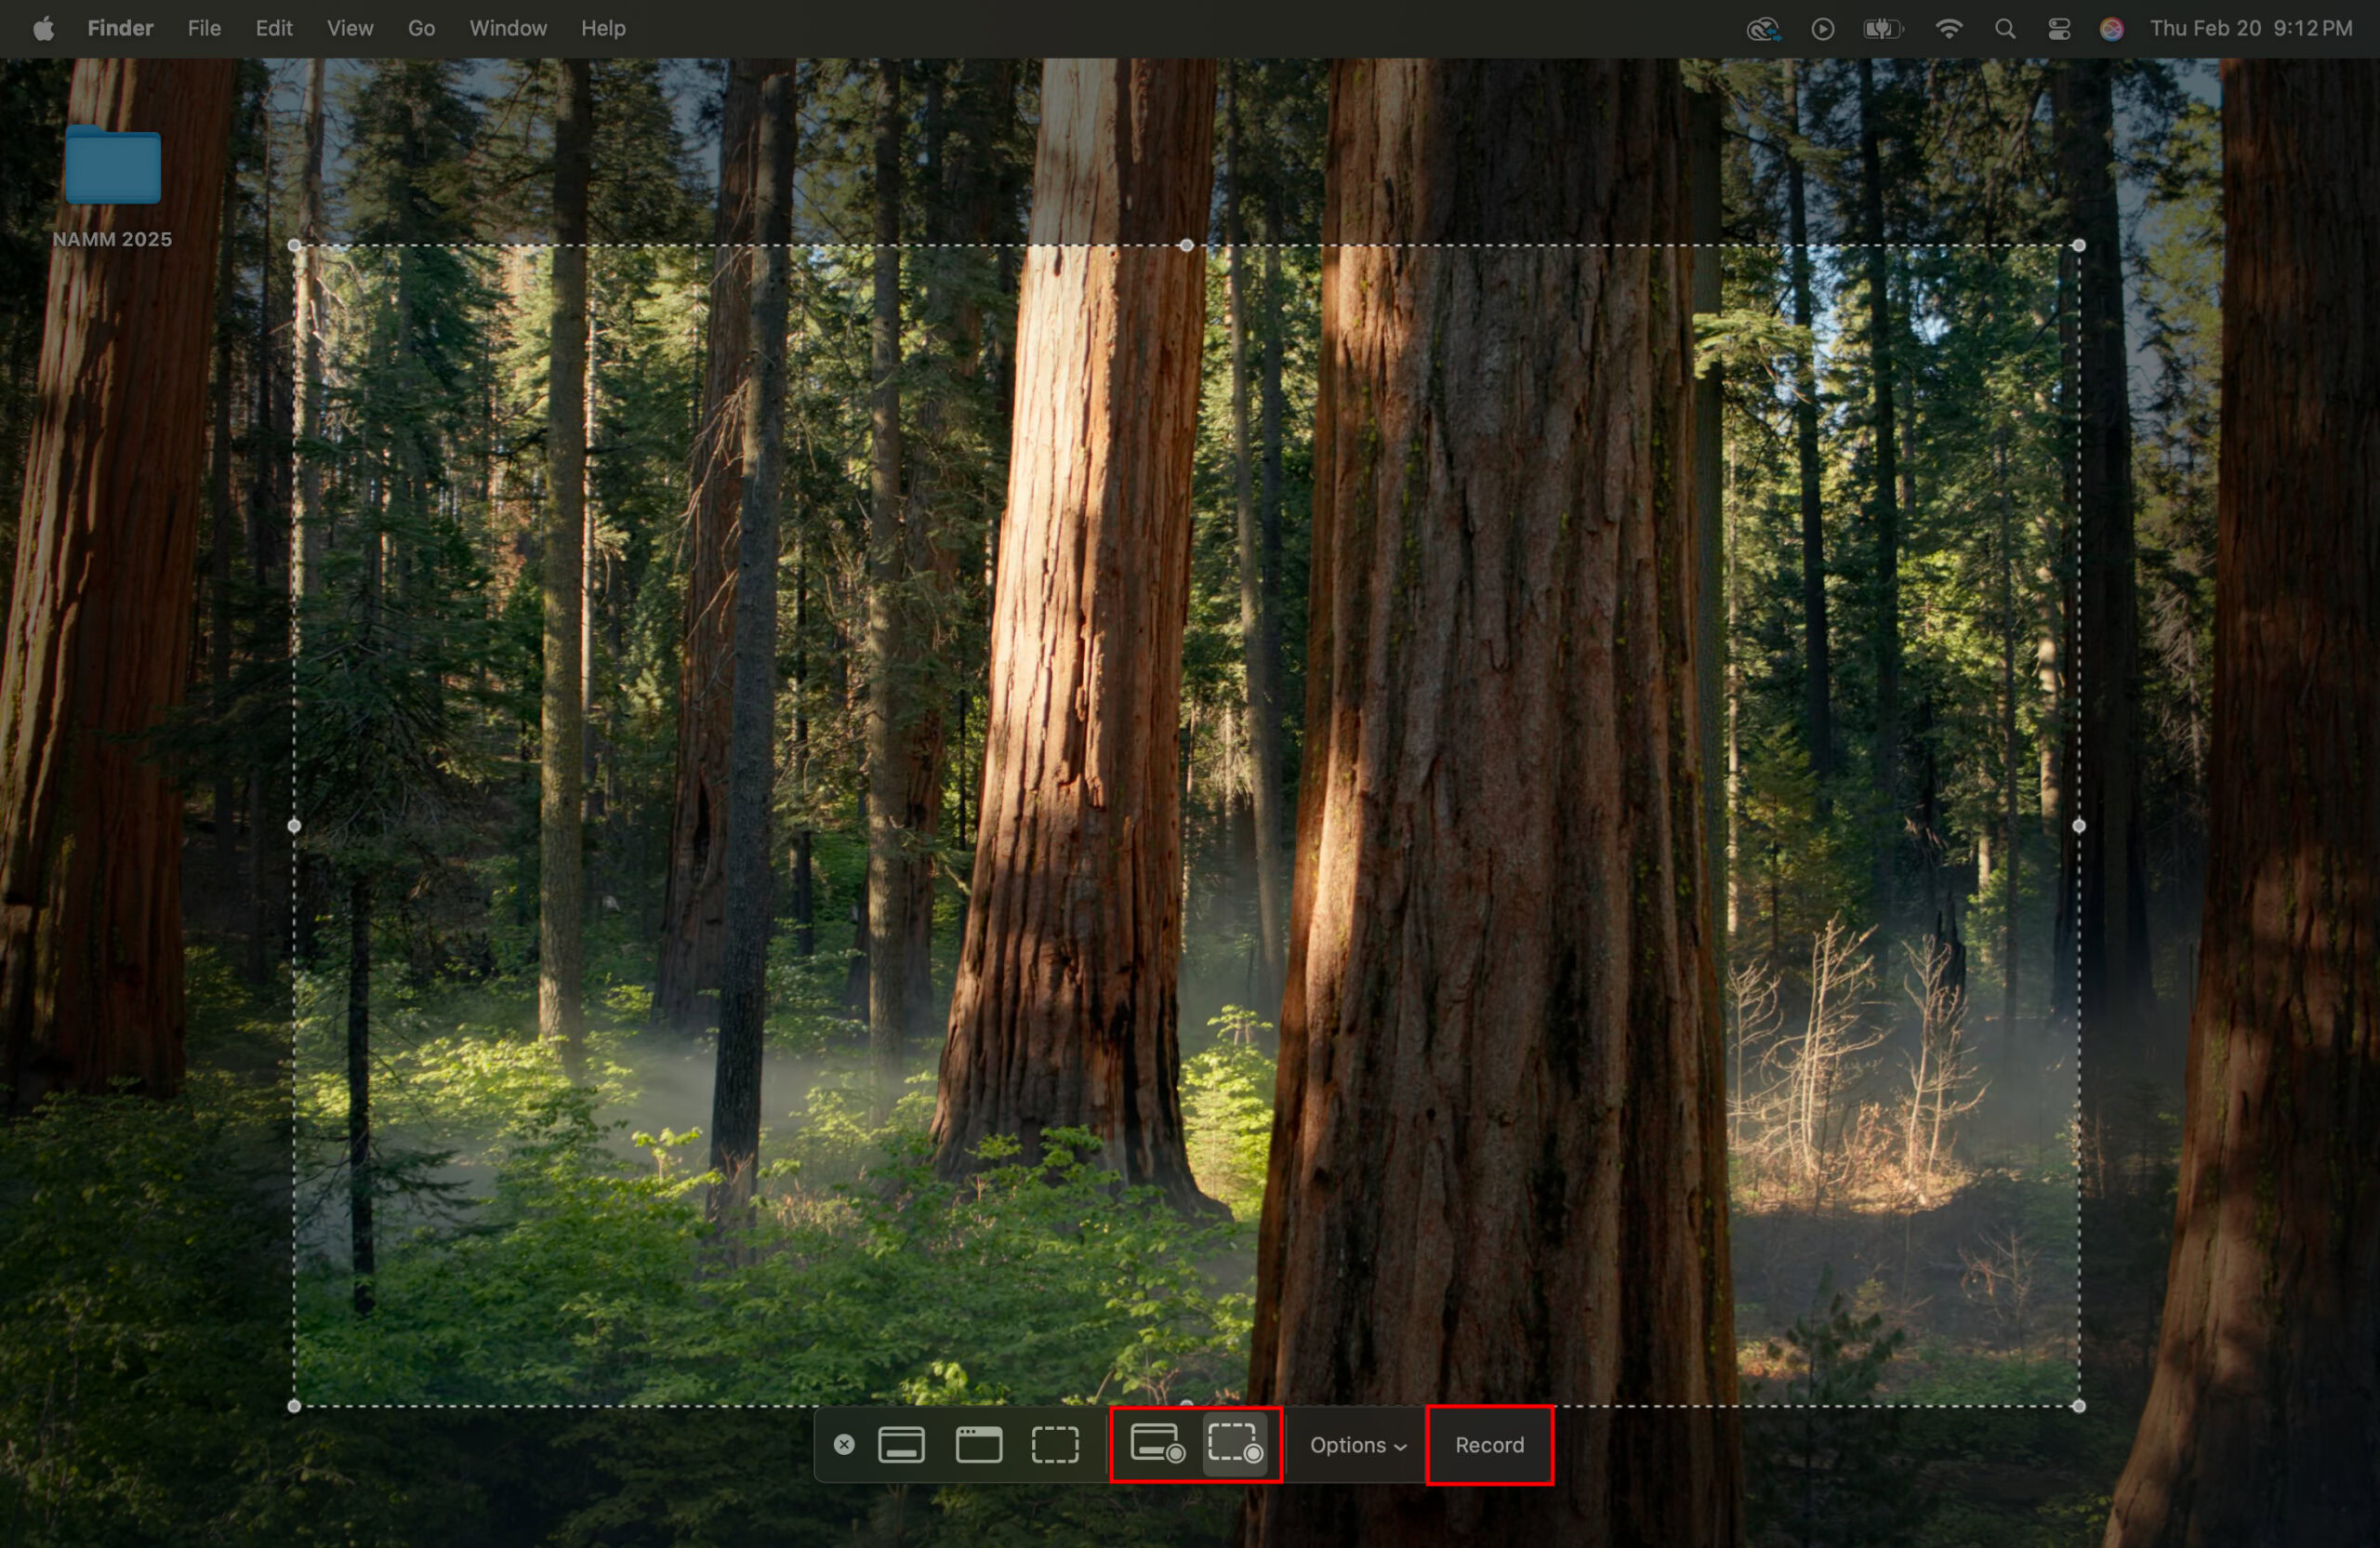
- On a Mac, open FaceTime, then tap the keyboard combination CMD + Shift + 5 to open screen recording options. Select the options you want, ensure your microphone is working, and click Record.
How to screen record on FaceTime, with or without sound
As this guide’s title suggests, to record a FaceTime call, you’ll need to use screen recording tools. Free options are built into Apple’s software, with precise instructions depending on your device.
How to record your screen on iPhone and iPad
The critical thing to remember when screen recording on an iPhone or iPad is that audio is muted by default. If you forget to enable it — which is very easy — you’ll end up with video, but no matching voices. This can be easily fixed, though. Let’s go through the steps together and show you the details along the way.
- Open the Control Center. This can be done by swiping down from the top-right corner of the screen.
- Here, you can select the Screen Recording option.
- If it isn’t there, press and hold on any empty space within the Control Center, select Add a Control, and select Screen Recording.
- This will begin recording your screen without audio. Go do whatever you want to record, such as a FaceTime call.
- When you’re done, return to the Control Center and press the same Screen Recording icon to end the recording.
- If you want audio, press and hold onto this Screen Recording icon.
- Then, press on Microphone to toggle it on.
- Now, you can hit Start Recording, and audio will be added to your clips.
We say screen recording is shotgun solution because as the above screenshot notes, everything is included, such as notifications and the user interface. It may be a good idea to enable Do Not Disturb (via Control Center) to avoid distractions or showing any private info.
How to record your screen on a Mac computer
You can also record anything on your Mac computer screen, including FaceTime calls.
- When you want to start recording, press CMD + Shift + 5 on your keyboard.
- You’ll see some settings at the bottom of the screen. Make your selections. You will get two options for screen video recording. One can record the full screen, while the other can record only a selected part of the screen. If you choose the latter, you’ll get a dotted, draggable window you need to resize.
- If you pick the video options, you should see a button that reads Record. Click on it. Unlike iOS, macOS records audio by default.
- A Stop icon will appear in the notification area, in the top-right corner. Click on it to stop recording.

FAQs
By default, iOS will store your screen recordings in the Photos app. If you’re using a Mac computer, these will go to the desktop by default.
No, the other person — or people — in a call aren’t informed when recording is in progress. In some parts of the world, not informing them may be illegal, so check your local laws. If it’s a friendly conversation, it’s simply polite to tell others anyway.