Affiliate links on Android Authority may earn us a commission. Learn more.
How to connect and set up Roku on your TV
Published onNovember 1, 2022
Roku’s streaming add-ons are a popular way of changing up the interface on a TV, since they’re simple, affordable, and offer all the media apps you could possibly want. That simplicity extends to connecting to your TV — here’s how to set up Roku for the first time.
QUICK ANSWER
To set up a Roku streaming device, first connect it to your TV via one of its HDMI ports, then to power (a wall outlet or one of your TV's USB ports, depending on the device). If you haven't already, switch your TV to the correct input, then insert batteries into your Roku remote or (if it's rechargeable) put your remote into pairing mode. You'll be greeted with the Roku setup interface, which will guide you through choosing a language, connecting to the internet, setting up a voice remote, and creating a Roku account.
How to set up Roku

The beginning point is getting everything physically connected. Details may vary based on your exact device, but the general process goes like this:
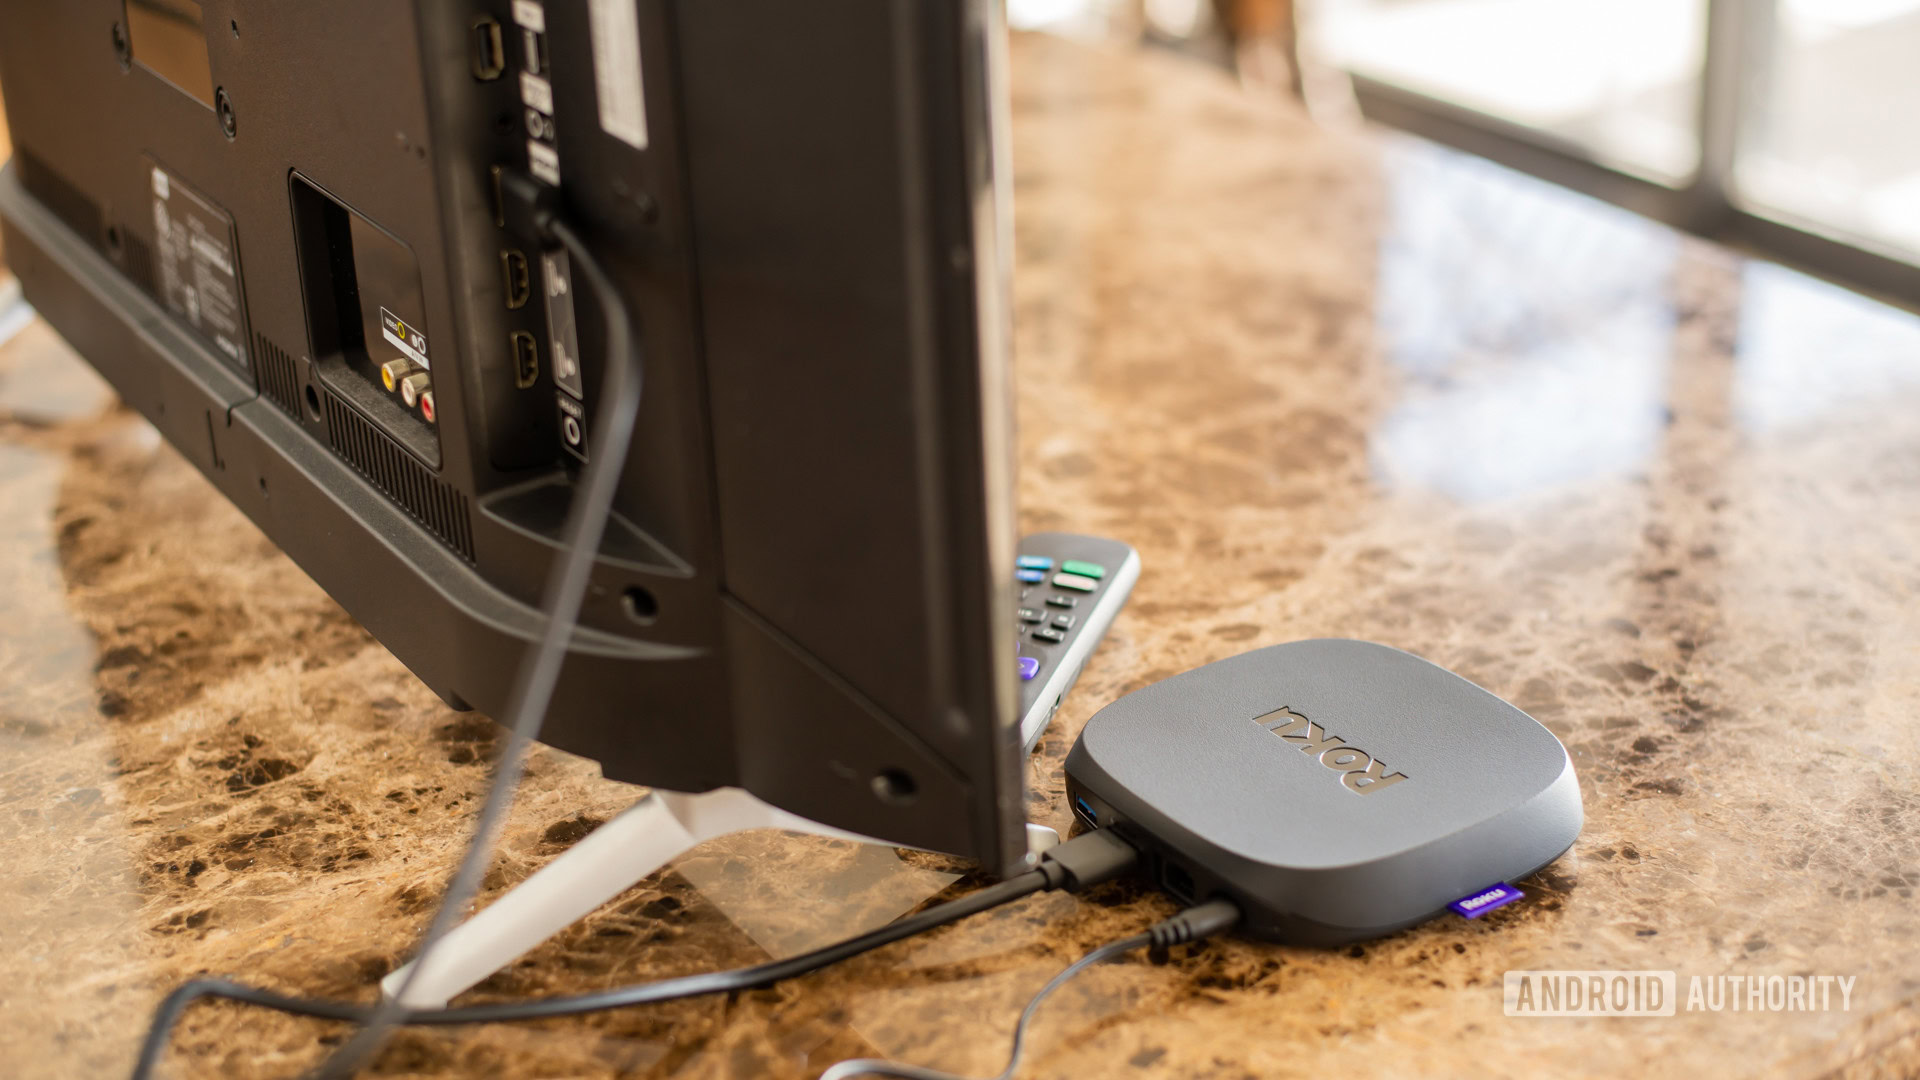
- Connect your Roku device to an HDMI port on your TV. Streaming Sticks can be plugged in directly, but otherwise you’ll need a dedicated HDMI cable. If your Streaming Stick doesn’t fit, Roku is willing to ship a free HDMI extender to help out. However your device connects to HDMI, be sure to choose a port that supports all its features, like HDR (more on this later).
- Plug your device into a power source using the supplied cable. A wall outlet is preferred, but Streaming Sticks can alternately use one of your TV’s USB ports so long as it’s powered.
- Turn on your TV, and switch it to the correct input. You’ll know everything is good so far if you see the Roku logo onscreen.
- Insert batteries into your Roku remote if you haven’t already done so. If you’ve got a remote with an internal rechargeable battery, like the Voice Remote Pro, hold the pairing button (on the back) for 5 seconds until the nearby status light turns green and begins flashing.
Software and internet setup
If you’re hooking up a Roku device for the first time, your TV should now be displaying a setup wizard, i.e., the software interface that will configure essential settings. Here’s what to expect:
- First, you’ll be asked to choose a language. Use your Roku remote to select one and hit the OK button.
- The next step involves connecting to the internet so your device can stream. There are two options: Wired involves connecting an Ethernet cable from your Roku to your Wi-Fi router, in which case you should do that first before going forward. Otherwise, select Wireless.
- For Wireless setup, choose your Wi-Fi network name from the displayed list, then enter your password using the onscreen keyboard. This network ID should be the same one your phone connects to, especially if you occasionally want to use the Roku mobile app instead of your remote. Try Scan again to see all networks if your Wi-Fi doesn’t show up immediately.
- Once you’re able to click Connect, your Roku device will connect to the internet, download the latest software update, then reboot to install it.
- Back in the setup process, choose Check remote settings to automatically configure a Roku remote for your TV’s power and volume settings.
- You’ll next be prompted to create or log into a Roku account. Assuming you’re creating one, you’ll need to enter a valid email address (no spoofs!) then switch your phone or a computer to open a link in an activation email. If you can’t find the message, it may have landed in a spam folder.
That’s it for the basics of how to set up Roku streamers. From here, you’ll want to select Streaming Channels to download apps, and Settings to change preferences, but your Roku device is officially up and running.
There’s one specific thing you should consider doing after the fact — go to Settings > Display type, and make sure your device is using the best resolution and HDR settings both it and your TV are capable of. If it’s not, you may have to try connecting to a different HDMI port, particularly since some TVs limit HDR (high dynamic range) to single HDMI inputs. Ideally you should use a port with HDMI 2.1 or better.
Frequently asked questions
You can’t, unfortunately, at least not when setting it up for the first time. The Roku app does offer remote control functions, but it can only detect and control devices on the same network — if you haven’t previously connected your device to your router (via Ethernet or Wi-Fi), the Roku app won’t be able to see it.
If a Roku device is already configured for wireless, though, you can use the Roku app to switch it to a new Wi-Fi network. Create a hotspot on your phone with the same name and password as your old network, and your streaming device should connect to your phone automatically. From there, use the app remote to navigate to Settings > Network > Set up connection and enter the new network info.
From the home screen, go to Settings > Remotes & devices > Remote. Pick your remote name, then Set up remote for TV control.
When it comes to performance, wired. Modern Ethernet cables are typically faster than Wi-Fi and more reliable, since signal interference is nigh-on impossible.
For convenience, though, many people stick to wireless. Stringing Ethernet cables throughout a home is usually impractical, and even when that is an option, you sometimes need a third-party adapter. Going wireless further means you can switch rooms on the fly.
