Affiliate links on Android Authority may earn us a commission. Learn more.
How to use SQLite for Android app development
Published onNovember 15, 2017

Sometimes, you need to store more complex data in your app than just simple key/value pairs saved with a text file or Shared Preferences. Databases are ideal for storing complex data structures and are particularly suited to storing records, where each block of data stored uses the same fields, formatted in the same manner. This works like a table or an Excel spreadsheet, and, like Excel, it allows for much more dynamic manipulation and logical organization of data. It’s thanks to databases that many machine-learning and big data applications are possible. Databases also make everyday tools like Facebook possible. As a result it’s a skill in high demand.
Programmers will eventually need to learn to use databases
This is why programmers will eventually need to learn to use databases. That way, your data will be organized and you’ll have no difficulty retrieving passwords, user data or whatever other information you need. And this also happens to be a great way to store data on an Android device as well. To do all this, we’ll be using SQLite.
Introducing SQLite
SQL databases are relational databases where data is stored in tables. The Structured Query Language (SQL) is the declarative language used to query those databases so that you can add, remove and edit data. For more on SQL itself, check out this article. SQLite is an implementation of a relational database, specifically aimed for embedded scenarios. It’s ideal for the likes of an Android app. The easiest way to imagine a relational database is to think of it as a series of tables.
What’s cool is SQLite doesn’t require a dedicated relational database management system (RDBMS)— it is used directly from your code, rather than via a server or external resource. Your data is saved into a file locally on your device, making it a powerful and surprisingly easy way to store persistent data on Android. SQLite is open-source, easy to use, portable, and highly cross-compatible.

There’s no need to install anything additional if you want to start using SQLite in Android Studio. Android provides the classes which you can use to handle your database. Android developers can use the SQLiteOpenHelper to use SQL commands. That’s what we’ll be looking at in this post.
In the next few sections, you’ll learn create a table this way and in the process, you’ll hopefully start to feel comfortable with SQLite, SQL, and databases in general.
Creating your first database
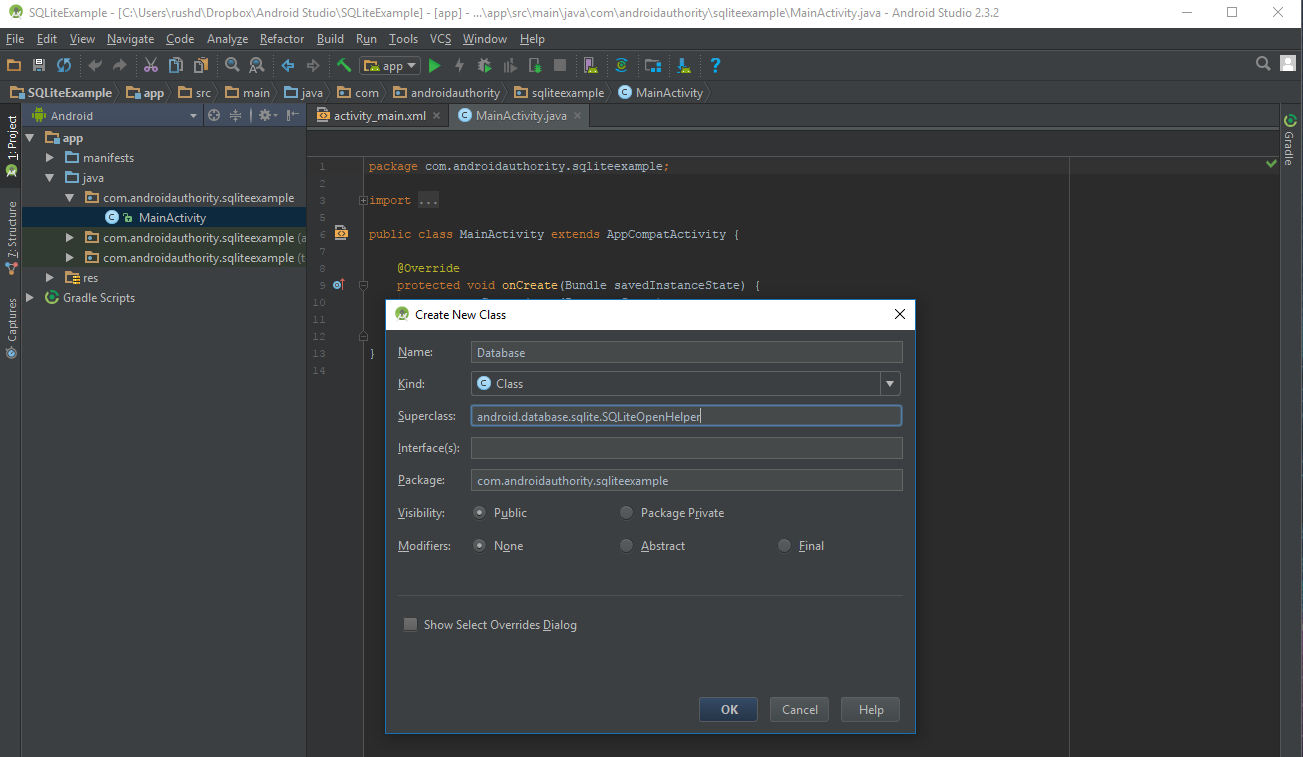
Start a new empty Android Studio project. Now create a new class by right-clicking the package on the left and choosing New > Java Class. I’ve called mine ‘Database’. We want to extend SQLiteOpenHelper class and so enter that as the superclass. To recap: this means we’re inheriting methods from that class, so our new class can act just like it.

Right now, your code will be underlined red because you need to implement the inherited methods and add the constructor.
The finished article should look like so:
package com.androidauthority.sqliteexample;

import android.content.Context;
import android.database.sqlite.SQLiteDatabase;
import android.database.sqlite.SQLiteOpenHelper;

public class Database extends SQLiteOpenHelper {
    public Database(Context context, String name, SQLiteDatabase.CursorFactory factory, int version) {
        super(context,name,factory, version);
    }

    @Override
    public void onCreate(SQLiteDatabase db) {
    }

    @Override
    public void onUpgrade (SQLiteDatabase db, int oldVersion, int newVersion) {
    }

}
The first thing to do is to simplify our constructor. Add these variables:
public static final int DATABASE_VERSION = 1;
public static final String DATABASE_NAME = "MyDatabase.db";
With that done, update your constructor like so:
public Database(Context context) {
     super(context,DATABASE_NAME,null, DATABASE_VERSION);
}
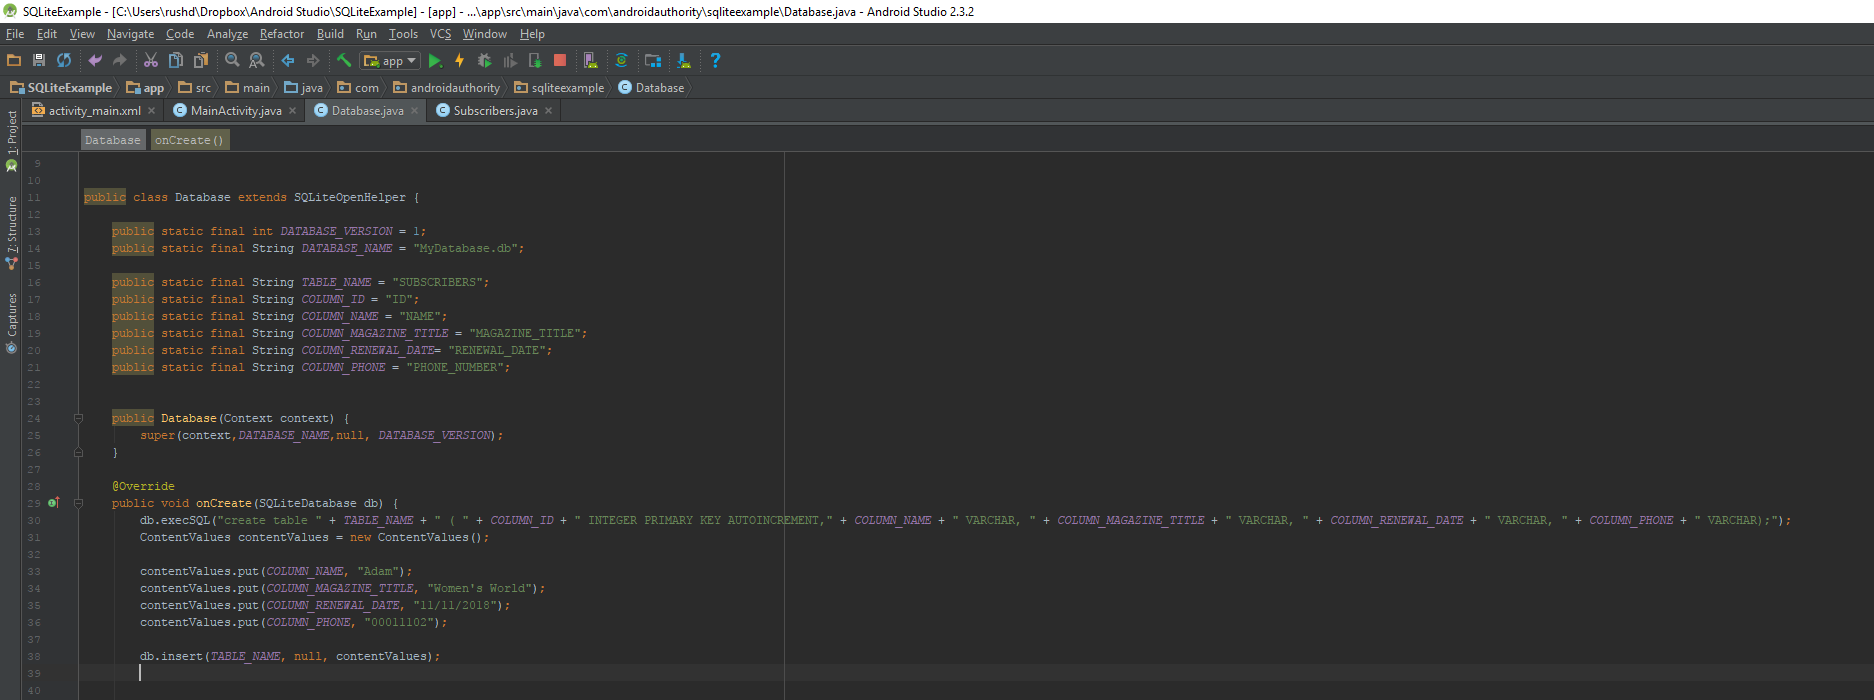
Break it down and you can see that we’re calling our database ‘MyDatabase.db’. Now, whenever we make a new Database object from this class, the constructor will build that database for us.
Creating tables
Now we’re ready to start populating it with some data! This data takes the form of a table and hopefully you’ll see why this is useful. What kind of thing might we use a database for in the real world? Well, how about CRM – customer relationship management? This is what big companies use to keep track of their customers’ details. It’s how they know to call us with special offers in which we may be interested. It’s how your magazine subscription always knows when it’s time for a renewal – that might be a good example to use.
In other words, we’re using our powers for evil.
To that end, we’re going to need some more variables so that we can build our table and start populating it with data. Logically, that might look something like this:
public static final String TABLE_NAME = "SUBSCRIBERS";
public static final String COLUMN_NAME = "NAME";
public static final String COLUMN_MAGAZINE_TITLE = "MAGAZINE_TITLE";
public static final String COLUMN_RENEWAL_DATE= "RENEWAL_DATE";
public static final String COLUMN_PHONE = "PHONE_NUMBER";
Now the publishers who we’re building our app for will be able to query when a certain use is due for a renewal and easily grab their phone number to give them a buzz.
Imagine trying to do this without SQL; you’d be forced to create multiple text files with different names for each user, or one text file with an index so you know which line to retrieve information from different text files. Then you’d have to delete and replace each entry manually with no way to check when things got out of sync. Searching for information by name would be a nightmare. You might end up using your own made-up shorthand. It would get very messy, very fast.
While it might be possible to avoid using tables with a little creativity— all this can be a little daunting at first— it is an invaluable skill to learn in the long run and will actually make your life a lot easier. It’s also pretty much required if you ever have dreams of becoming a ‘full stack’ developer or creating web apps.
SQL is pretty much required if you ever have dreams of becoming a ‘full stack developer' or creating web apps.
To build this table, we need to use execSQL. This lets us talk to our database and execute any SQL command that doesn’t return data. So it’s perfect for building our table to begin with. We’re going to use this in the onCreate() method, which will be called right away when our object is created.
@Override
public void onCreate(SQLiteDatabase db) {
    db.execSQL("create table " + TABLE_NAME + " ( " + COLUMN_NAME + " VARCHAR, "
                + COLUMN_MAGAZINE_TITLE + " VARCHAR, " + COLUMN_RENEWAL_DATE + " VARCHAR, "
                + COLUMN_PHONE + " VARCHAR);");
}
What’s happening here is we’re talking to our database and telling it to create a new table with a specific table name, which we’ve defined in our string.
If we break the rest of that long ugly string down, it actually contains a number of easy-to-understand SQL commands:
create table + TABLE_NAME(
      COLUMN_NAME + VARCHAR,
      COLUMN_MAGAZINE_TITLE + VARCHAR,
      COLUMN_RENEWAL_DATE + VARCHAR,
      COLUMN_PHONE + VARCHAR)
SQLite will also add another column implicitly called rowid, which acts as a kind of index for retrieving records and increases incrementally in value with each new entry. The first record will have the rowid ‘0’, the second will be ‘1’, and so on. We don’t need to add this ourselves but we can refer to it whenever we want. If we wanted to change the name of a column, we would manually create one with the variable INTEGER PRIMARY KEY . That way, we could turn our ‘rowid’ into ‘subscriber_id’ or something similar.
The rest of the columns are more straightforward. These are going to contain characters (VARCHAR) and they will each be named by the variables we created earlier. Here is a good resource where you can see the SQL syntax on its own for this command and many others.
If we break the string down, it actually contains a number of easy-to-understand SQL commands
The other method, onUpgrade, is required for when the database version is changed. This will drop or add tables to upgrade to the new schema version. Just populate it and don’t worry about it:
@Override
public void onUpgrade (SQLiteDatabase db, int oldVersion, int newVersion) {
     db.execSQL("DROP TABLE IF EXISTS " + TABLE_NAME);
     onCreate(db);
}
DROP TABLE is used to delete the existing data. Here we’re deleting the table if it already exists before rebuilding it. See the previous post for more.
If all that’s in place, you’ve built your first database. Well done!
In future, if we to refer to a database that was already created, then we would use getReadableDatabase() or getWriteableDatabase() to open the database ready for reading-from or writing-to.
Inserting data
To insert new data as a row, simply use db.insert(String table, String nullColumnHack, ContentValues). But what are ContentValues? This is a class used by Android that can store values to be resolved by the ContentResolver.

If we create a ContentValues object and fill it with our data, we can pass that to our database for assimilation. It looks like this:
contentValues.put(COLUMN_NAME, "Adam");
contentValues.put(COLUMN_MAGAZINE_TITLE, "Women's World");
contentValues.put(COLUMN_RENEWAL_DATE, "11/11/2018");
contentValues.put(COLUMN_PHONE, "00011102");

db.insert(TABLE_NAME, null, contentValues);
db.close();
Another option would be to use database.execSQL() and input the data manually:
db.execSQL("INSERT INTO " + TABLE_NAME + "(" + COLUMN_NAME + ","
           + COLUMN_MAGAZINE_TITLE + "," + COLUMN_RENEWAL_DATE + ","
           + COLUMN_PHONE + ") VALUES('Adam','Women's World','11/11/2018','00011102')");
db.close();
This does the exact same thing. Remember to always close the database when you’re finished with it. You weren’t brought up in a barn, were you?
Optional
Of course, to really use this database properly, we would probably want to populate our columns using objects. We could use the following class to add new subscribers to our list:
public class SubscriberModel {
     private String ID, name, magazine, renewal, phone;

     public String getID() {
         return ID;
     }
     public String getName() {
         return name;
     }
     public String getRenewal() {
         return renewal;
     }
     public String getMagazine() {
         return magazine;
     }
     public String getPhone() {
         return phone;
     }
     public void setName(String name) {
         this.name = name;
     }
     public void setMagazine(String magazine) {
         this.magazine = magazine;
     }
     public void setRenewal(String renewal) {
         this.renewal = renewal;
     }
     public void setPhone(String phone) {
         this.phone = phone;
     }
}
Then we could easily build as many new subscribers as we liked and take the variables from there. Better yet, we can also retrieve data from our database this way to build new objects.
For instance, we might use something like the following to read through a list of clients and then populate an array list using those objects. This uses a ‘cursor’, which you’ll learn about in the next section.
public ArrayList<Subscribers> getAllRecords() {
    SQLiteDatabase db = this.getReadableDatabase();
    Cursor cursor = db.query(TABLE_NAME, null, null, null, null, null, null);
    ArrayList<Subscribers> subs = new ArrayList<>();
    Subscribers subscribers;
    if (cursor.getCount() > 0) {
        for (int i = 0; i < cursor.getCount(); i++) {
            cursor.moveToNext();
            subscribers = new Subscribers();
            subscribers.setName(cursor.getString(1));
            subscribers.setMagazine(cursor.getString(2));
            subs.add(subscribers);
        }
    }
    cursor.close();
    db.close();
    return subs;
}
Retrieving data and using cursors
We’ve written an awful lot of code so far without testing anything, which always gets me a little bit itchy.
Problem is, there’s not much to see here at the moment. To test if this is working, we need to query and return some of the data we’ve inserted. To do that we need to use a cursor. Cursors allow the manipulation of whole results sets and let us process our rows sequentially. This is handy if you ever want to perform some kind of algorithm on a row-by-row basis. You’ll see what I mean.
First, we need to create our cursor, which we will do with query. Which looks like this:
Cursor cursor = db.query(TABLE_NAME, null, null, null, null, null, null);We could then use this to create an ArrayList or pull out individual bits of data.

By creating a little method like this:
public String returnName() {
    SQLiteDatabase db = this.getReadableDatabase();
    Cursor cursor = db.query(TABLE_NAME, null, null, null, null, null, null);
    cursor.moveToFirst();
    return cursor.getString(1);
}
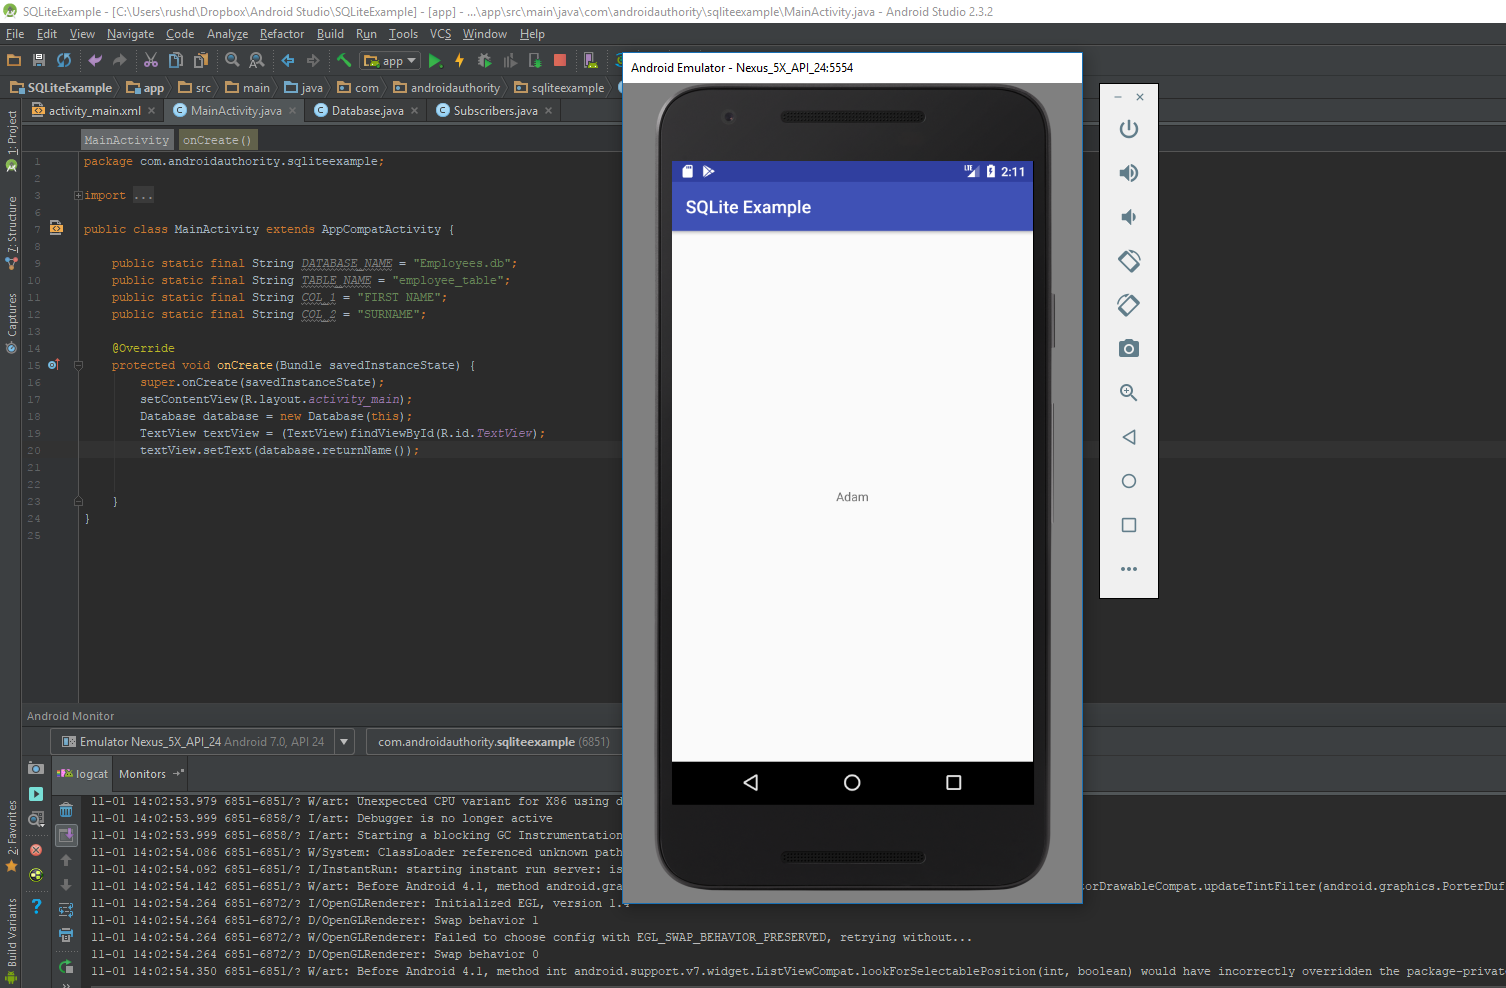
Then we could access that from our MainActivity.java and show it on a TextView, like so:
Database database = new Database(this);
TextView textView = (TextView)findViewById(R.id.TextView);
textView.setText(database.returnName());
I had to create a TextView with the ID ‘TextView’. This should display the name ‘Adam’ on the screen seeing as the cursor has been moved to the first entry and is grabbing a string from position 1 – which is where we put the name (ID is 0).

If we were using this for real, we would probably use a “for” loop and use that to grab data from every entry. For example:
for (int i = 0; i < cursor.getCount(); i++) {
     cursor.moveToNext();
     //Get useful data such as names of people who need to renew here
}
Likewise, we might read our database this way and then use those strings to build objects for each subscriber.
Closing comments
Other useful things we can do include updating rows with database.update and deleting records with database.delete. With a bit of organization, you can start handling your data in a logical and intuitive manner and open up lots of opportunities for powerful apps in the future.
you’ve created a whole world of opportunities for your programming career
Few things are as valuable as data. Now that you know a way to handle larger datasets logically and keep them stored for future reference, you’ve created a whole world of opportunities for your programming career.