Affiliate links on Android Authority may earn us a commission. Learn more.
How to take a snapshot in VLC player and where to find them
Published onMarch 24, 2024
Is there a frame of a film you want to extract as a picture? Then VLC is the right tool for the job. VLC has an inbuilt option called snapshots, which lets you export your favourite parts of a video as images with just the click of a button. You can also use VLC to rotate or cut videos. Here’s how to take a snapshot in the VCL Media Player and choose where to save them.
QUICK ANSWER
To take a snapshot in the VCL player, press Shift + S on Windows or Command + Alt + S on macOS. To find your VCL snapshots, navigate to C:\My Documents\My Pictures on Windows or Desktop/ on Mac.
KEY SECTIONS
How to take a snapshot in VLC player and where to find them on Windows
How to take a snapshot in the VLC player
- Open a video file in VLC and pause the video on the frame you want to capture.
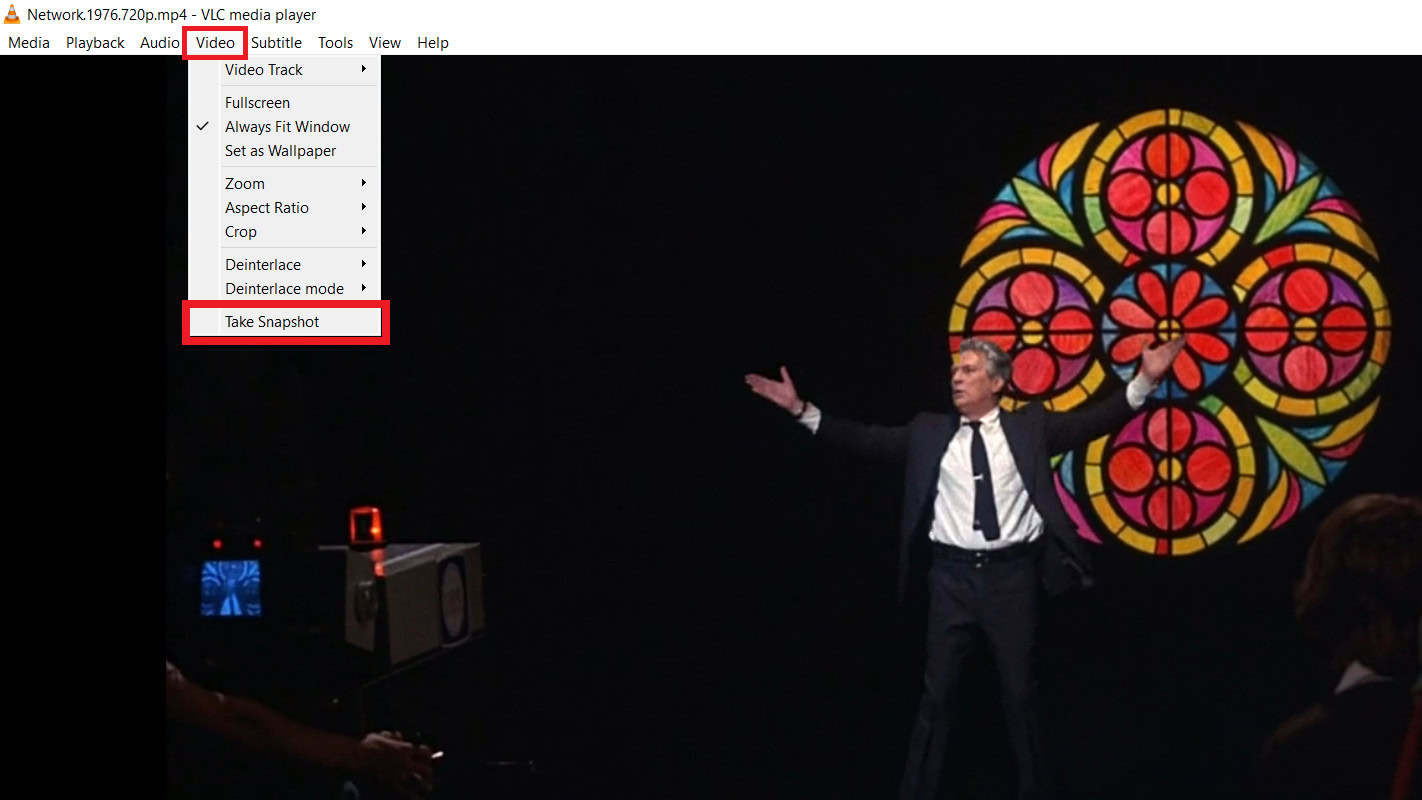
- Then, select Video > Take Snapshot from the top menu.

- Alternatively, you can use the keyboard shortcut Shift + S on Windows.
You’ll know that the Snapshot was successful when you see a thumbnail of the photo at the top of the player, along with its saved file location and file name. The white text will fade away quickly.
Where does the VLC player save snapshots on Windows?
Snapshot files automatically save to the default location of your operating system. For Windows, this will be C:\My Documents\My Pictures.
If you want to change the file format or location where VLC saves your screenshots:
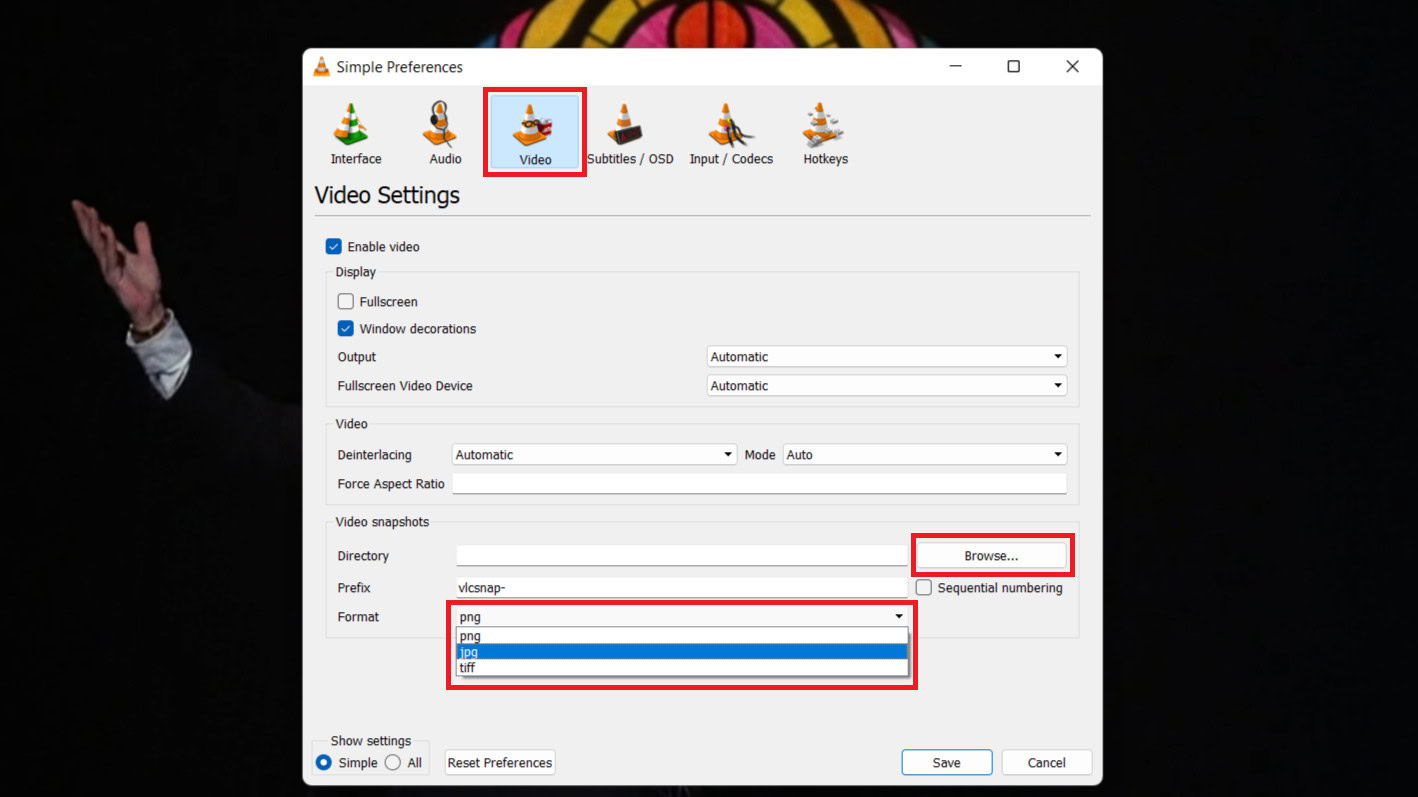
- Select Tools > Preferences from the VLC Media Player.

- In the Simple Preferences window, select Video.
- Click Browse beside Directory to choose where to save your video snapshots.

You can also change the Prefix file name to make finding your images in your folder easier or change the Format you save your snapshots between png, jpg, and tiff.
How to take a snapshot in VLC player and where to find them on MacOS.
How to take a snapshot in the VLC player on MacOS
There are two ways to take a snapshot of a video frame while using VLC media player on macOS:
Using the keyboard shortcut:
- Open your video file in VLC.
- Pause the video at the frame you want to capture.
- Press Command (⌘) + Option (⌥) + S on your keyboard.
Using the menu option:
- Open your video file in VLC.
- Pause the video at the frame you want to capture.
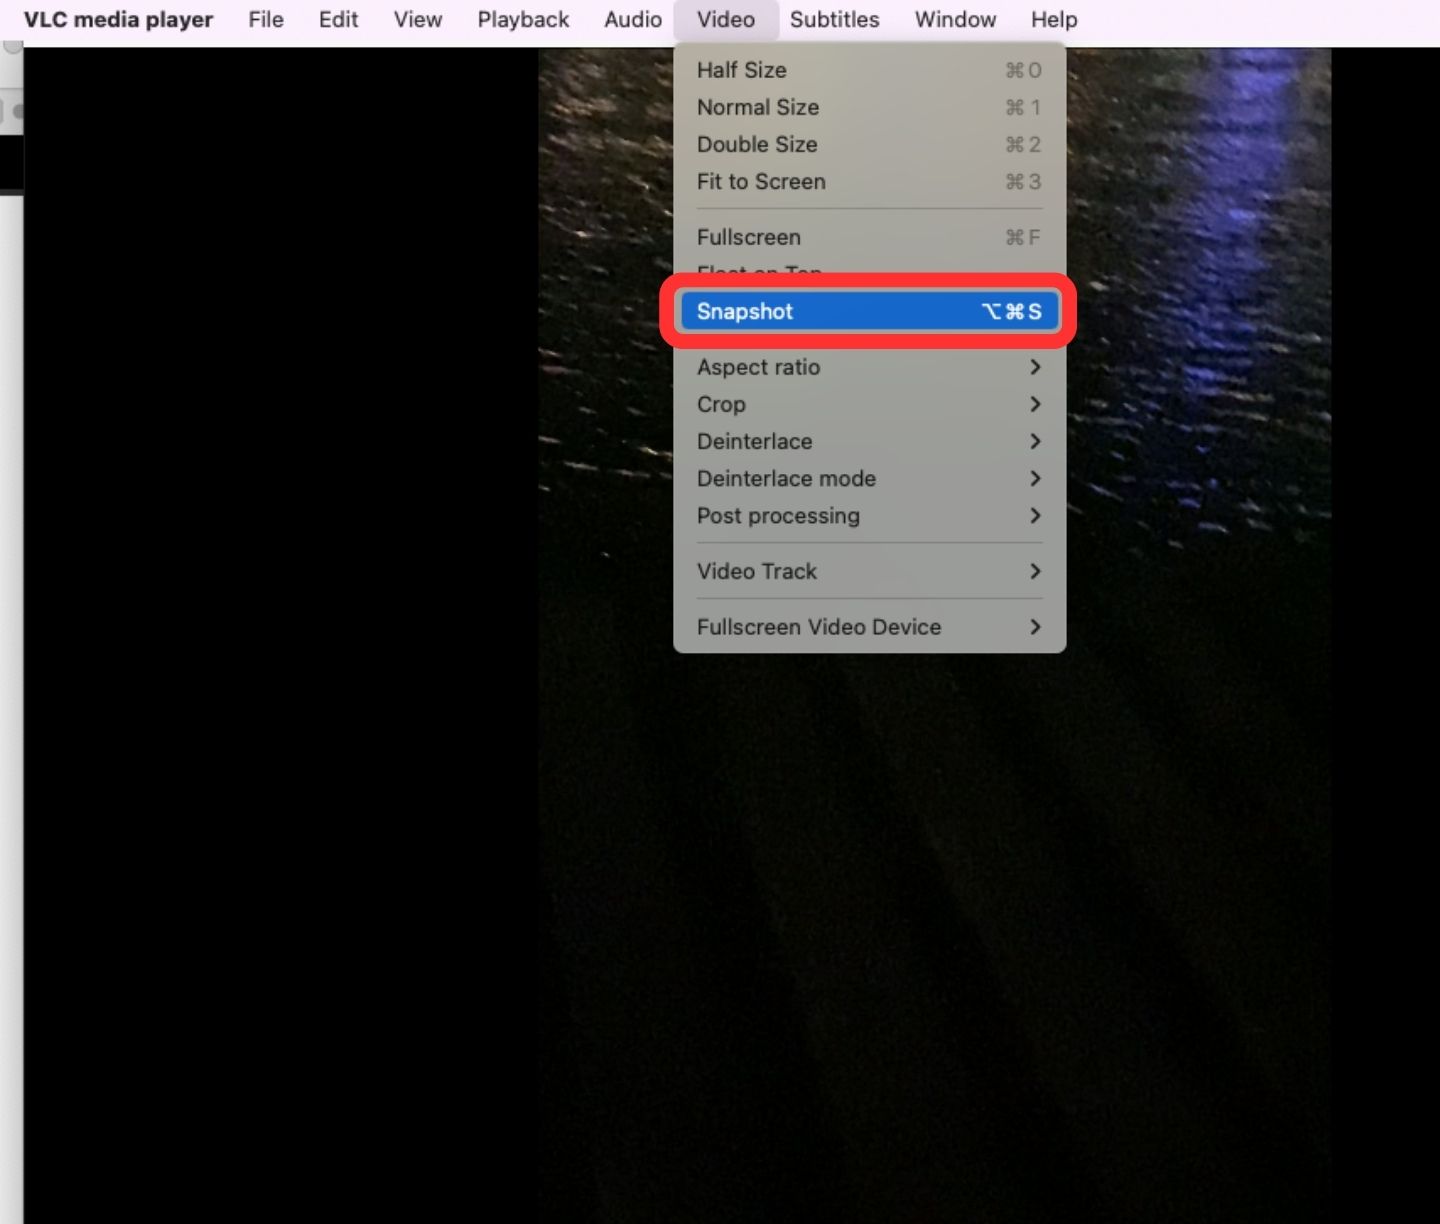
- Click on the Video menu in the top menu bar.
- Select Snapshot from the dropdown menu.

After taking a snapshot:
- A brief notification will appear at the top of the player window showing the saved snapshot location and filename.
- By default, VLC saves snapshots on your Desktop. You can change this location in the VLC preferences (see below).
Where does the VLC player save snapshots
Changing the snapshot location:
- Open VLC.
- Click on VLC media player in the top menu bar (or Command (⌘) ,).
- Select Preferences.
- Go to the Video tab.
- Under the Video snapshots section, click the Browse button.
- Choose the new folder where you want to save your snapshots.
- Click Save.
FAQs
On Windows, you can find your saved snapshots in C:\My Documents\My Pictures. For macOS, you can find your saved snapshots on Desktop/.
To extract stills from a video in VLC:
- Open the video in VLC.
- Pause at the frame you want to capture.
- Click on Video in the menu, then Take Snapshot.
VLC media library is stored in the following locations:
- Windows: %APPDATA%\vlc\ml.xspf
- macOS: ~/Library/Application Support/org.videolan.vlc/ml.xspf
- Linux: ~/.local/share/vlc/ml.xspf
VLC snapshots are saved in the PNG format by default.
A snapshot is an image file that captures a single frame or moment in time, typically in formats like PNG, JPEG, or BMP.
To save a VLC screenshot as a JPEG:
- Go to Tools > Preferences in VLC.
- Choose Video from the left side.
- In the Video snapshots section, change the Format to jpg.
- Click Save and restart VLC. Snapshots will now be saved as JPEGs.