Affiliate links on Android Authority may earn us a commission. Learn more.
Android customization - Write and scan NFC Tags using Trigger
July 17, 2014
Luckily, we’ve already discussed what NFC is and what NFC Tags are and how they work. Let’s now build on that and put the power of NFC tags into your hands using an app named Trigger.
Trigger is designed to take NFC Tags to the next level. Instead of writing standard information to the tags to be read by any NFC app and device, Trigger writes short code that, upon reading the tag, is interpreted into nearly any action on your device that you can imagine.
Trigger is capable of performing many actions that users of Tasker may be familiar with, in-fact, should you not desire to re-create many of your tasks, you can use Trigger to fire a Tasker Task. That’s right, instead of creating Tasker Profiles, you can use a NFC Tag to fire your Tasker Tasks, check back next week to see how that is done.
Before we get started

Let’s keep this super simple, we want to see the process without getting caught up in the details, so, let’s set this up so your NFC Tag turns your display brightness down and turns off your ringer. A simple bed time mode.

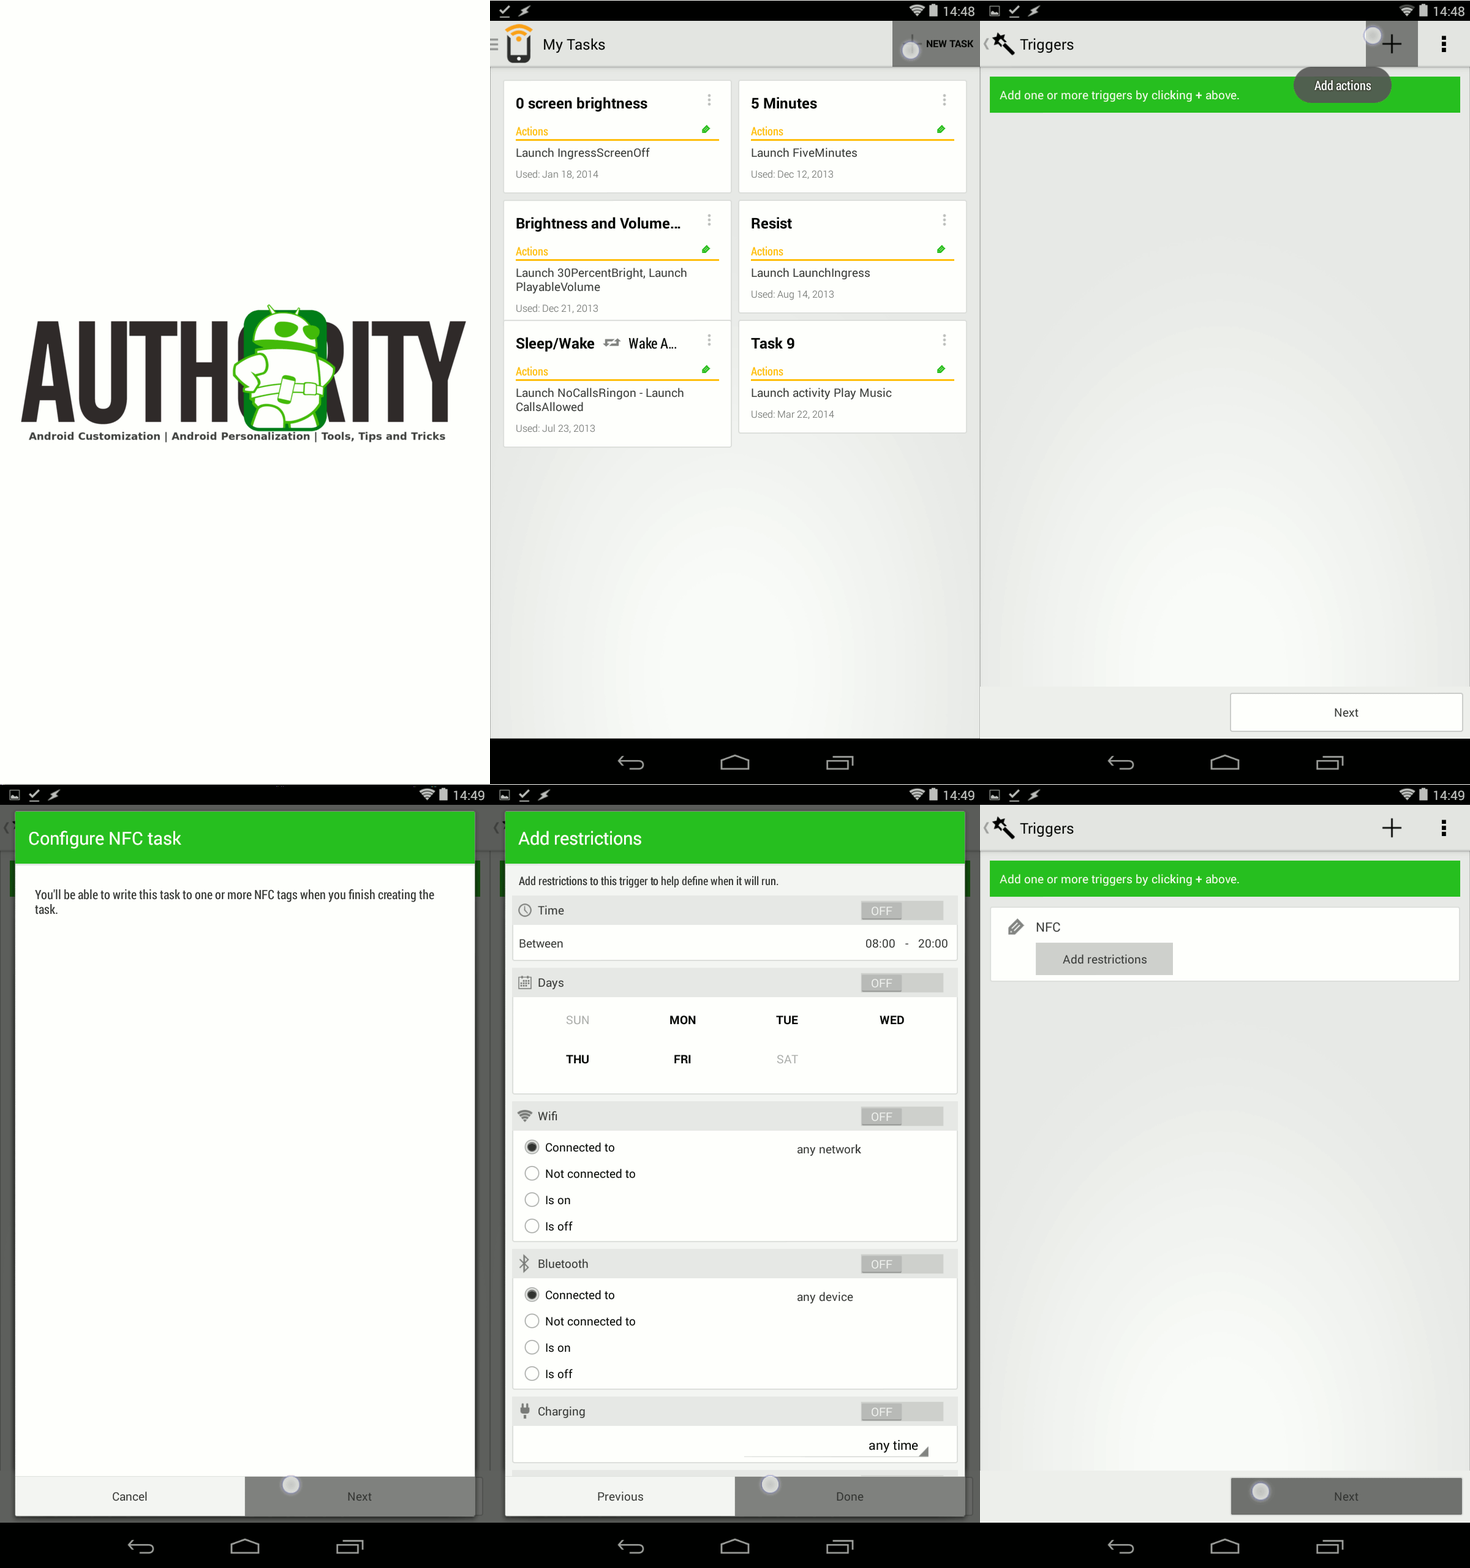
Head on into Trigger, navigate to the My Tasks section and click the “+ New Task” button in the top right to get started.
First, we setup the Triggers for our actions. Go ahead and tap the “+” button in the top right.
We will discuss the other options later, for now, tap NFC to continue.
Tap Next.
Add restrictions. I always recommend playing with options, so feel free to apply any restrictions you deem fit for your needs. For our purposes, we do not want any restrictions, so simply tap Done to continue.
You can also add multiple Triggers, so that the NFC Tag only works if your device is connected to a specific WiFi network, for example. Here again, let’s keep it simple and not add additional Triggers.
Tap Next.

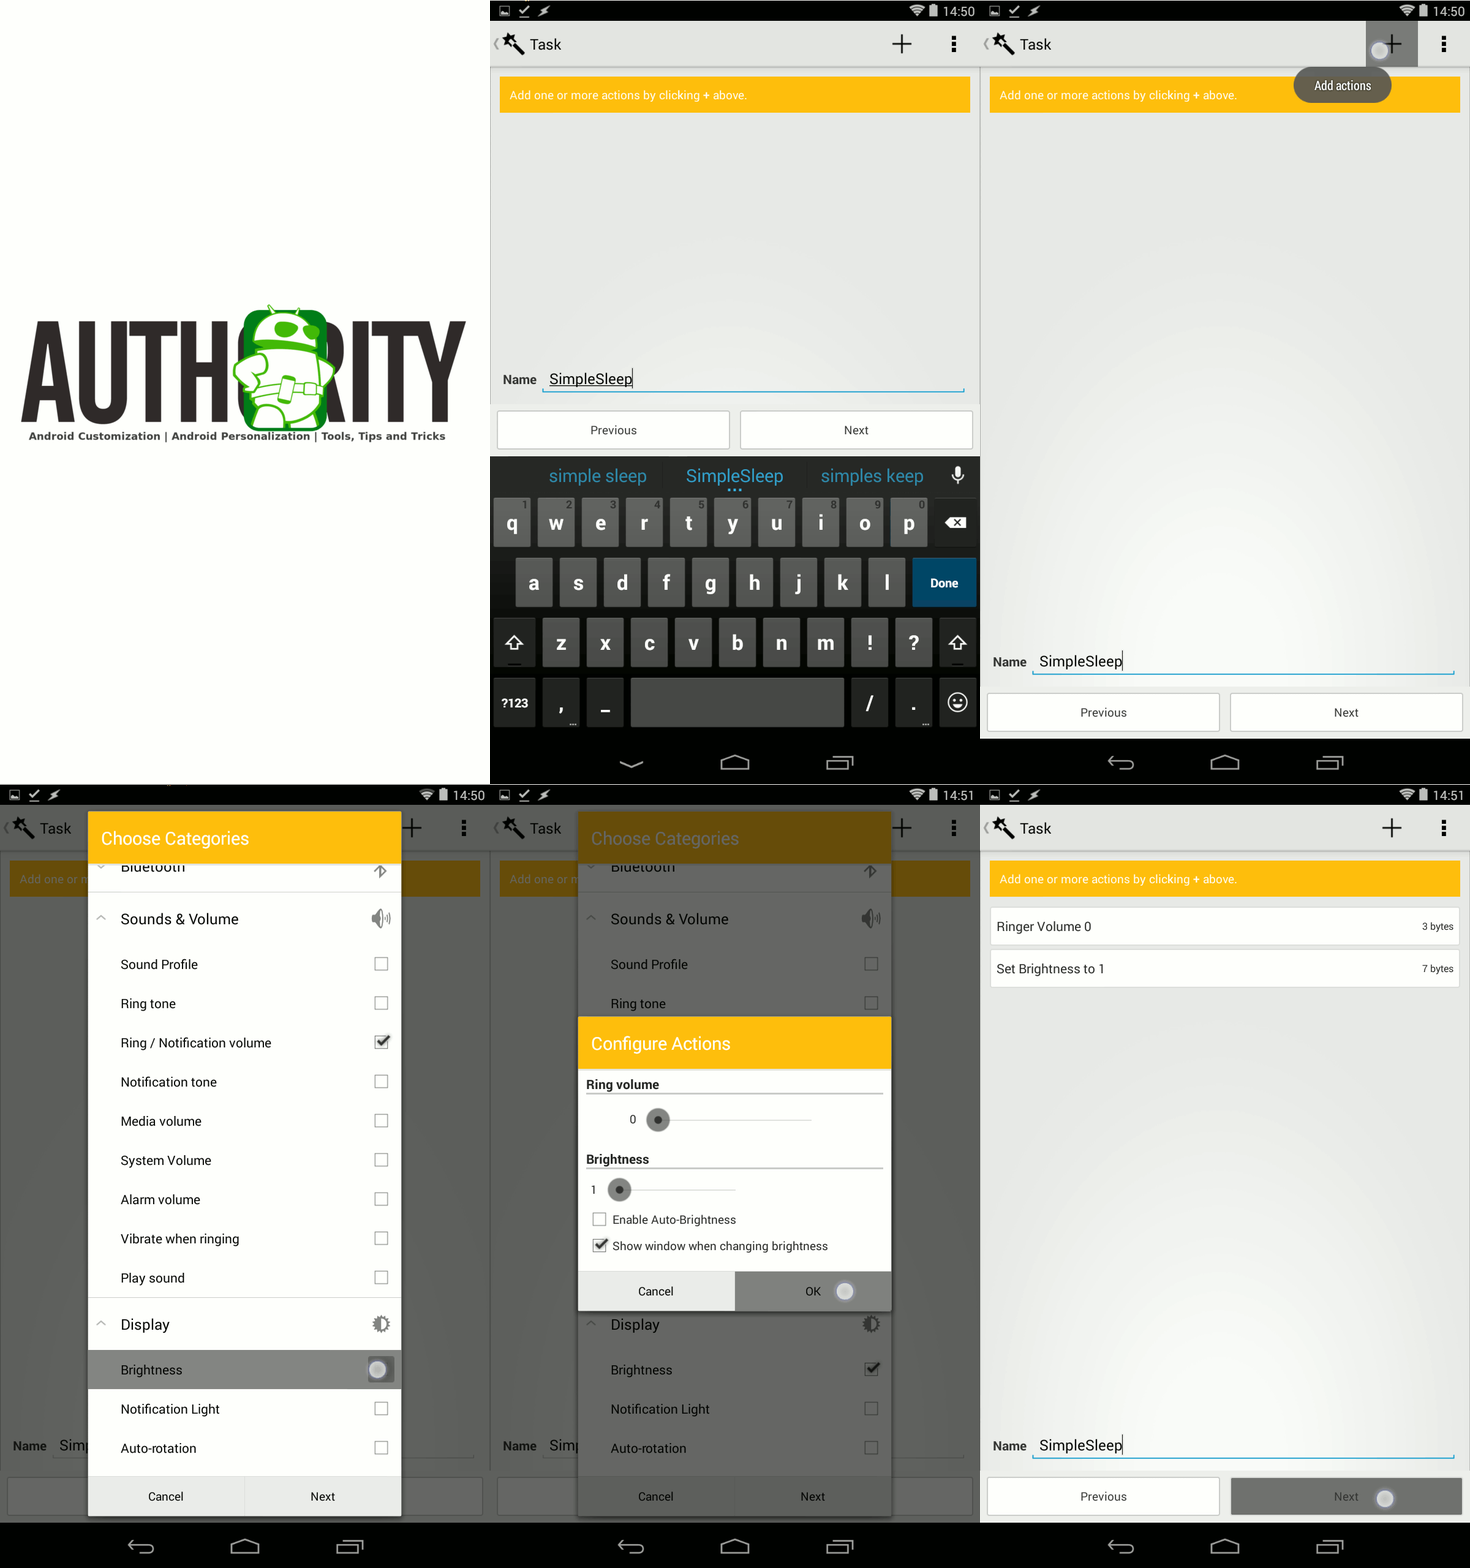
At the bottom, rename your Task Uniquely and concisely. I will call mine “SimpleSleep.”
Tap the “+” button in the top right corner to add your Tasks.
From the long list of available categories, tap Sound & Volume.
Tap Ring / Notification volume.
You can either now tap Sound & Volume again to close the category, or just leave it and move on.
Tap Display.
Tap Brightness.
You’ve now selected which settings to configure, tap Next to set values for them.
Adjust Ring Volume to your desired value, I will choose 0.
Adjust your Display Brightness setting, once again, I will choose 1. Please be aware of how our device brightness values operate, some devices have a completely black screen at value 0.
Tap OK to confirm settings.
Review your Tasks, add more if you so choose, then hit Next to continue.

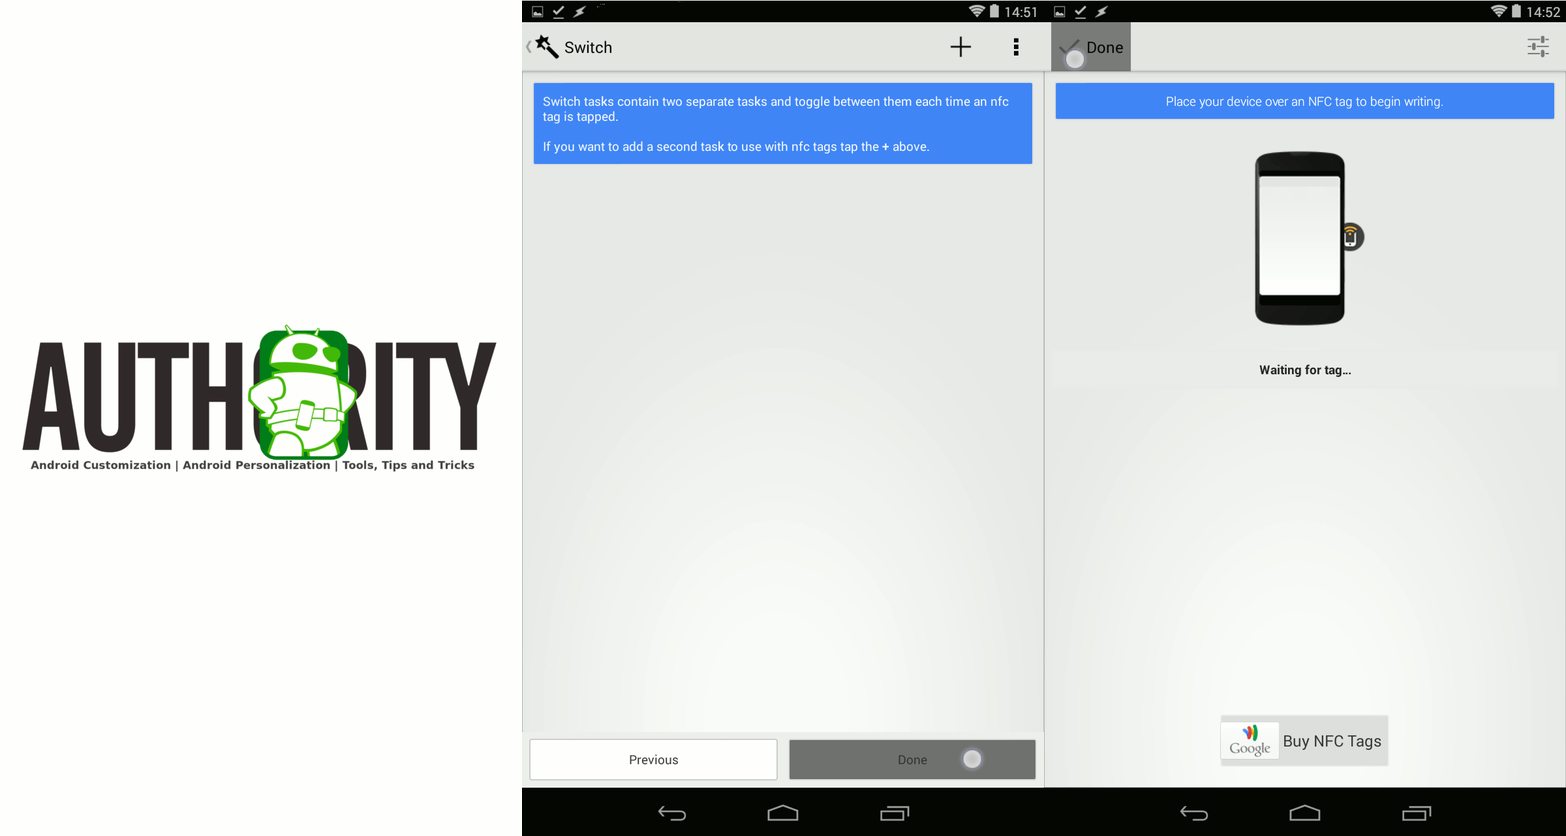
Trigger will now show you the Switch Tasks section. As it states, if you create Tasks here then your NFC Tag will toggle between firing your above Tasks and the ones you assign here. This is great if you want to use the same NFC Tag to toggle on and off certain settings. We’re going to skip this option today as well.
Tap Done.
Now for the scary part, take your NFC Tag and place it against your device. You will hear a confirmation sound that your NFC Tag has been written to. Feel free to write as many tags as you wish by tapping them one at a time against your device. Okay, not that scary.
Tap Done to complete.
There you have it. You have successfully written to your own NFC Tag so that it fires a custom task on your device.
Some things to be aware of
Trigger writes custom code to your tags that require not only the app to remain installed on your device(s), but for the Tasks to be created and active in the app. The folks behind Trigger have another app called NFC Writer that can write tags to be read by any NFC enabled device. The advantage is that Trigger code is much shorter than traditional NFC language, allowing you to put many commands onto a single tag.
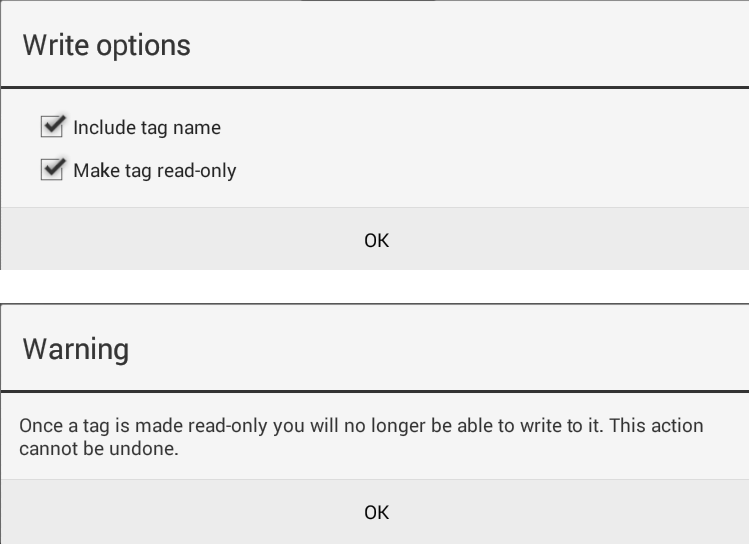
We did not write-protect the tags today, you can re-write to the tags if needed. This is not recommended, but I can confirm that a tag I have now written to several times over a span of a year is still working fine. This also means that others can write to your tags, which can be a security concern. Simply tap the Settings icon in the top write corner of the tag writing screen and select ‘Make tag read-only’ to change this.

What’s next
I am sure you noticed that there are tons of options within Trigger to create many Tasks using various Triggers. My advice is to think about your normal daily routine, what actions do you take on device throughout your day that would be best handled using NFC? From there, think about groups of actions that you always perform at the same time, our example today dimmed the display and silenced the ringer, it could have also silenced the notification volume and turned up the alarm volume. All of that and more with a single tap of an NFC Tag.
Next Week
We kept it pretty simple today. Sure, there are a lot of steps to perform a simple Task in Trigger, so we’ll keep it simple again next week and use Trigger to fire up a Tasker Task, this way, you can re-use some of the Tasker projects we’ve already worked through. I’m all about re-purposing projects and code where possible, and avoiding duplicating tasks.
That’s how easy it can be to write your own NFC Tags using Trigger. What do you think, can NFC Tags automate anything significant in your Android world?
Thank you for being part of our community. Read our Comment Policy before posting.