Affiliate links on Android Authority may earn us a commission. Learn more.
Universal Control: how to use it with a Mac and iPad
Published onJanuary 12, 2023
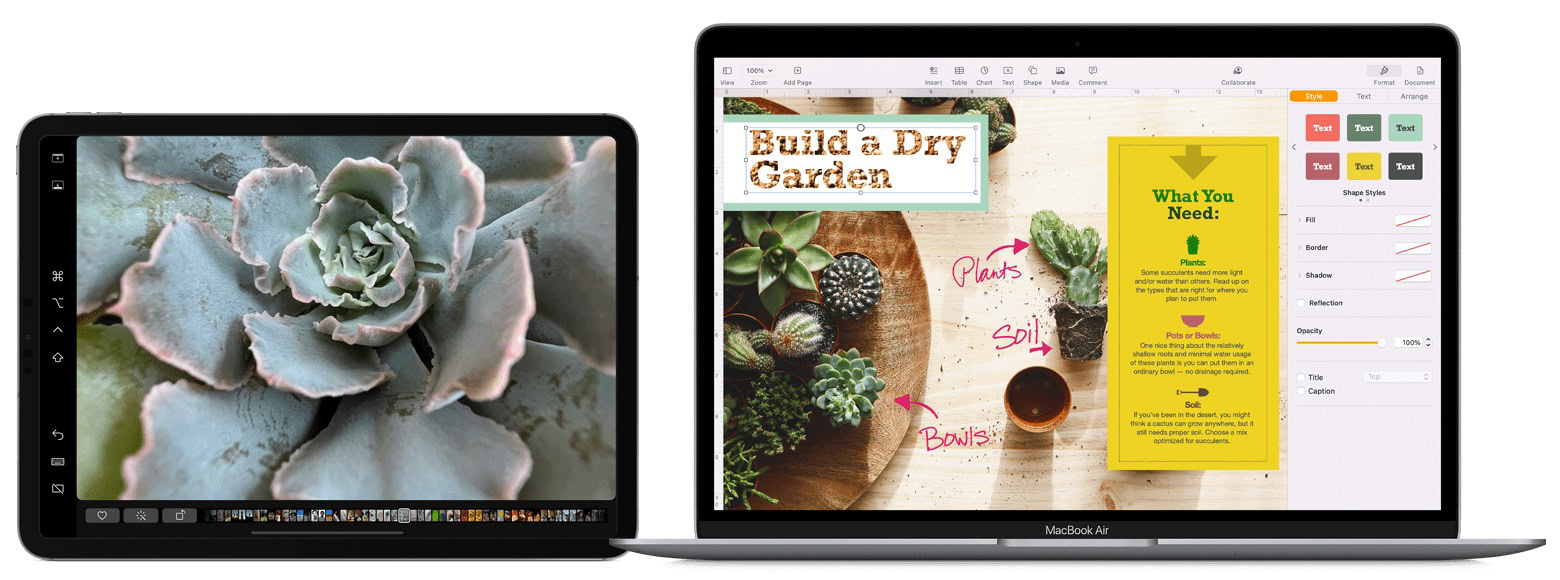
We all like to have multiple monitors on our desks — some people see it as bragging rights if they have more monitors than anybody else in the neighborhood. If you are on a laptop or tablet, multiple monitors are possible with an HDMI cable, but Apple has come up with a more smooth and more seamless way of doing it. All you need to do is line up your Macs and iPads next to one another, and Universal Control will enable you to use the same keyboard, mouse, or trackpad to move between devices. You can even use the same clipboard to copy and paste. It’s like…..magic.
Read more: What is iPadOS? Everything you need to know
QUICK ANSWER
To enable Universal Control, open System Settings on the Mac and go to Displays. Click the Advanced button at the bottom. The first section of the new box is called Link to Mac or iPad. Enable the first two settings — the third setting about automatically reconnecting is optional. On the iPad, go to Settings > General > AirPlay & Handoff. Enable Cursor and Keyboard.
JUMP TO KEY SECTIONS
What is Universal Control?
Usually, when you want to connect two devices or monitors together, you need to use an HDMI cable. In the case of Apple devices connecting to non-Apple devices, this also involves buying an expensive adapter for the HDMI cable socket. But Apple has developed a feature called Universal Control, which removes the need for an HDMI cable at all if you’re only using Apple devices.
Once set up, and assuming your devices are compatible, you can use the keyboard, mouse, and keyboard from your main device and move them between screens on the other devices. You can also copy something on the main device’s clipboard and paste it on one of the connected device’s screens. It’s basically multiple monitors without any cables.
But what are the requirements for using Universal Control? Let’s first check to ensure that your Mac and iPad are compatible.
macOS Monterey 12.4 or later
- MacBook introduced in 2016 or later.
- MacBook Pro introduced in 2016 or later.
- MacBook Air introduced in 2018 or later.
- Mac mini introduced in 2018 or later.
- iMac introduced in 2017 or later, or iMac (Retina 5K, 27-inch, Late 2015).
- iMac Pro.
- Mac Pro introduced in 2019 or later.
- Mac Studio.
iPadOS 15.4 or later
Other Universal Control requirements
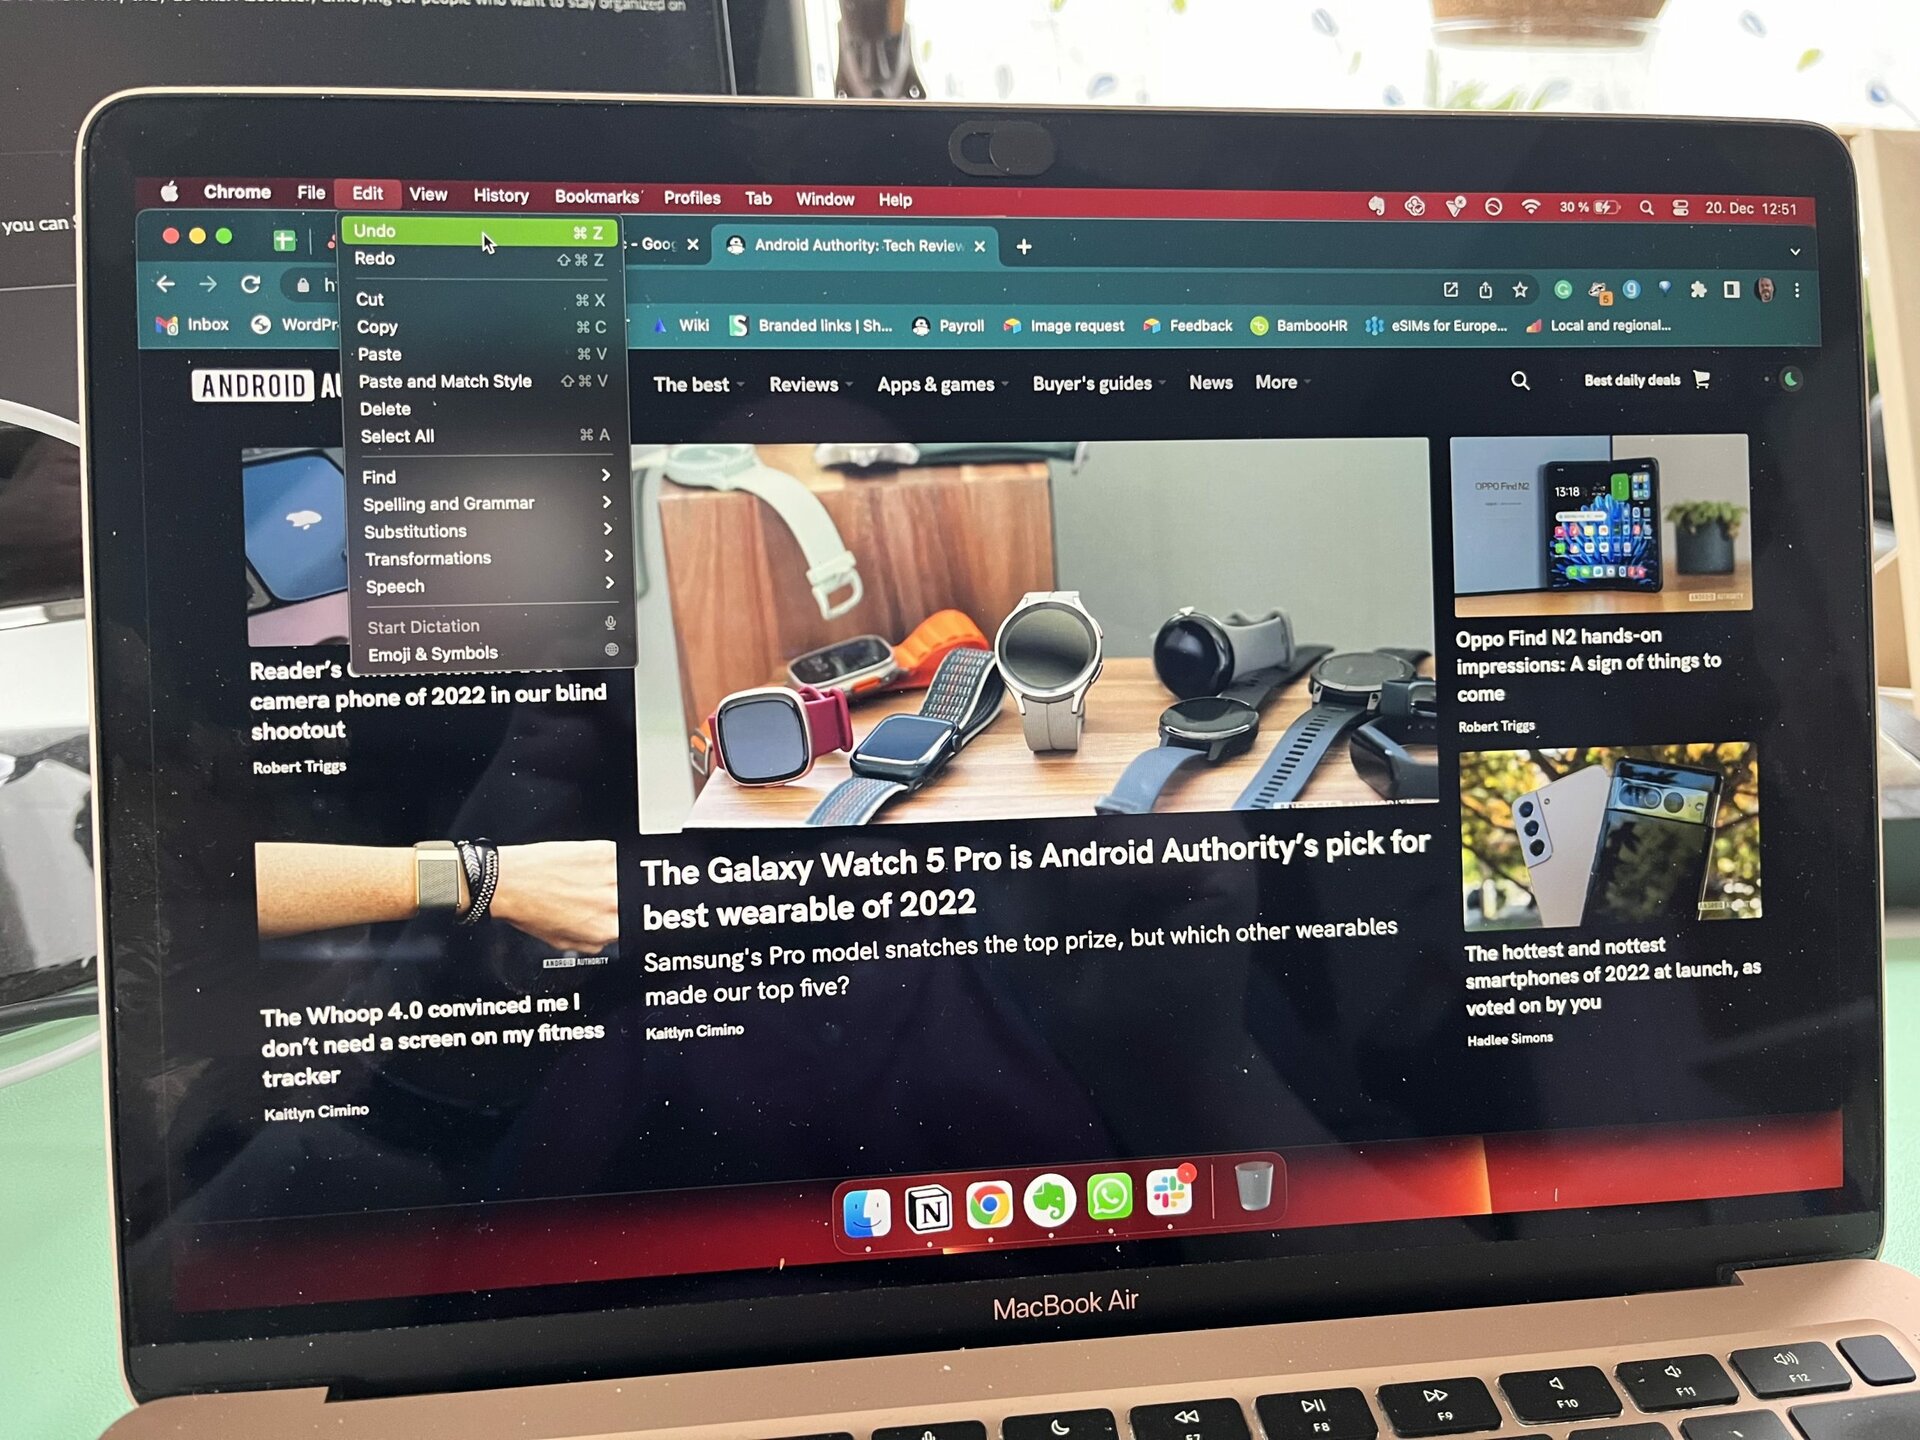
- Each device must be signed in with the same Apple ID using two-factor authentication.
- Each device must be within 10 meters (30 feet) of each other and have Bluetooth, Wi-Fi, and Handoff turned on.
- Your iPad must not share its cellular connection with a hotspot, and your Mac must not share its internet connection (sharing its Ethernet connection with other computers on your local network.)
How to use a Mac and iPad at the same time
If you have verified that your Mac and iPad are compatible with Universal Control, let’s now move on to setting it up. Then we will go step-by-step through how to get started with this amazing feature.
Setting up Universal Control with iPad
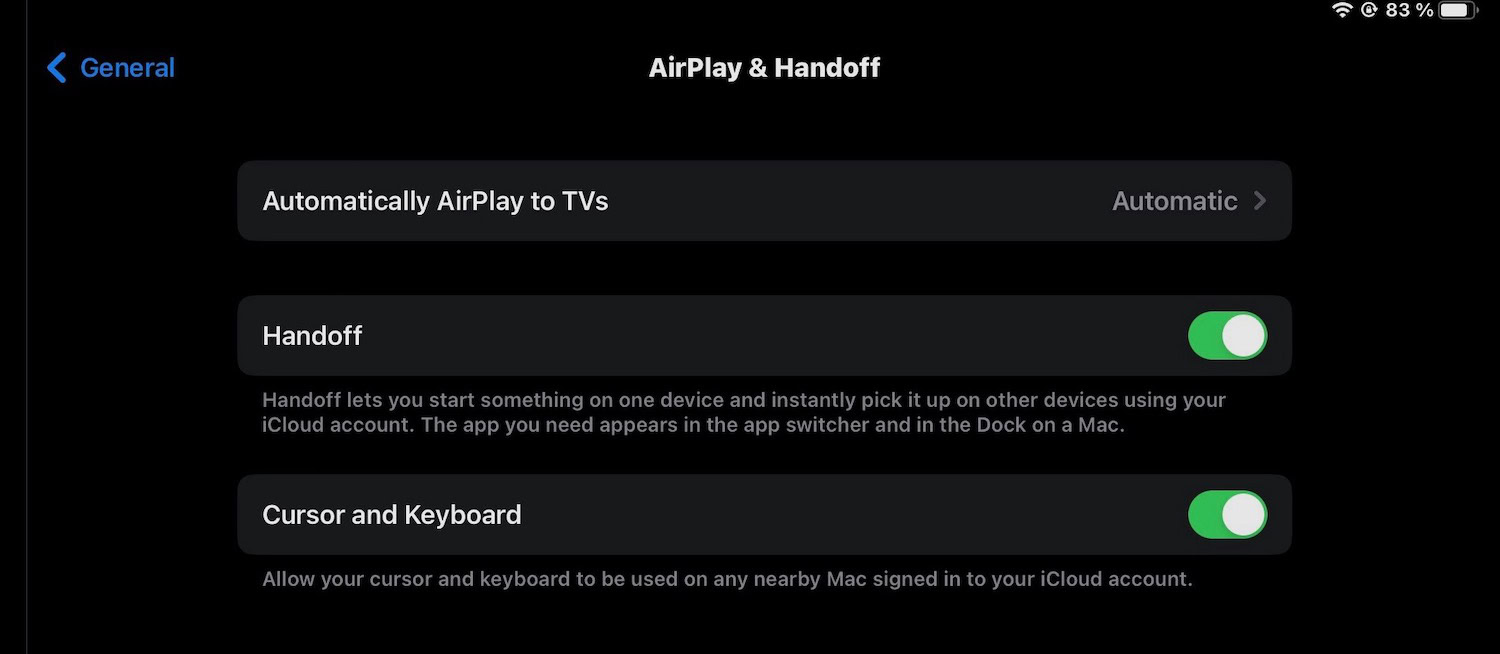
It’s a simple setup process on an iPad. Just go to Settings > General > AirPlay & Handoff. Toggle on Cursor and Keyboard. That’s it.
Setting up Universal Control on Mac
On the Mac, go to System Settings > Displays and scroll down to the bottom of the box. Click Advanced.
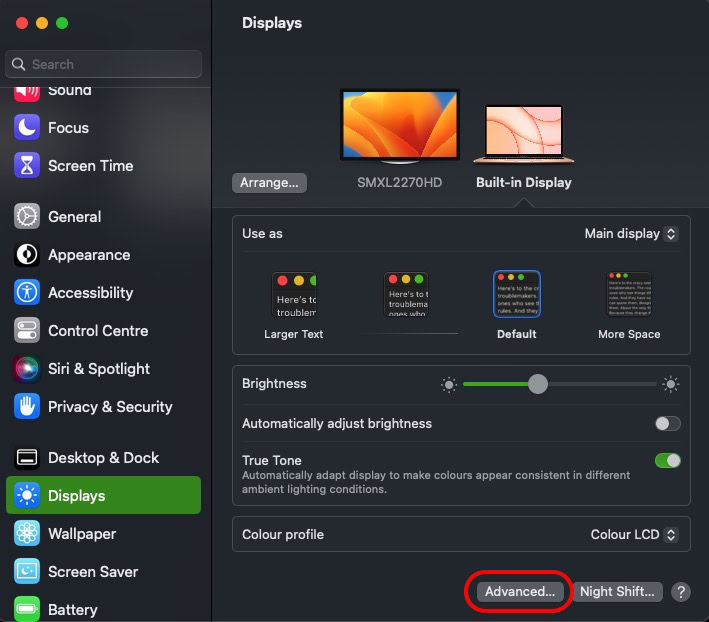
In the Link to Mac or iPad section, make sure at least that the first two options are toggled on. The third option about automatic reconnection is purely optional.
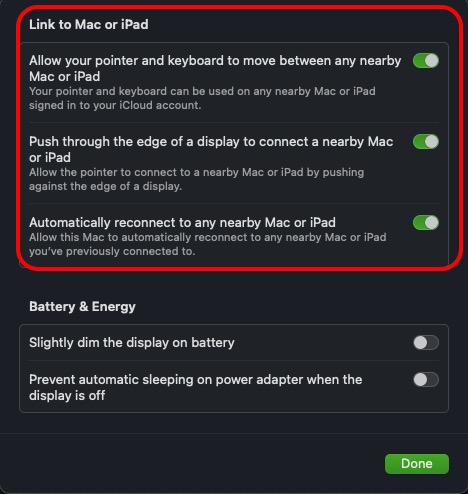
Rearranging the display order (optional)
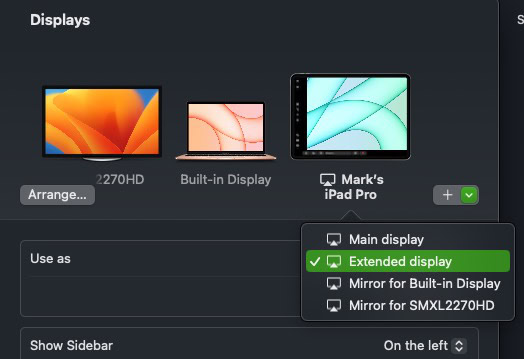
Back in the Displays section, it’s time to add the iPad to the display order. Ensure the iPad is unlocked (otherwise, the Mac won’t detect it.) Then click the + icon in the menu and select your iPad.
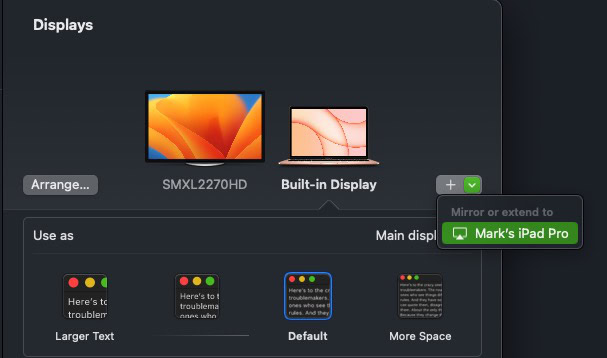
You may initially have a couple of connection timeout problems. If you do, make sure you don’t have any VPNs on and turn off any resource-hogging apps that may be slowing down your Mac and iPad. Eventually, the iPad will connect and appear in your Mac displays list. While it’s connected, it will be a Mac monitor.
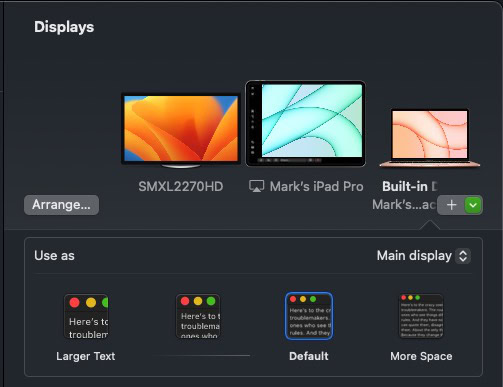
The whole point, though, of arranging your displays is to know in which direction to move your mouse or trackpad if you want to go to that screen. So if you have your iPad sitting on your right, it makes sense to move the iPad to the right in the Displays section.
So, click the Arrange button and drag each monitor to where you want it to be, relative to how they are situated on your desk.
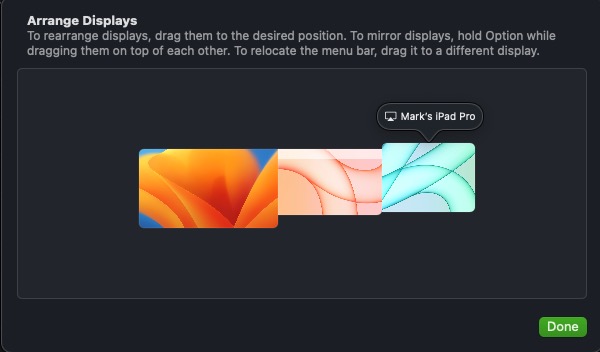
Once that’s done:
- Click the iPad icon.
- Drop down the menu under Use as.
- Choose how you want to use the iPad. It can be your main display, an extended display, or it can mirror your Mac or other connected monitors and devices.
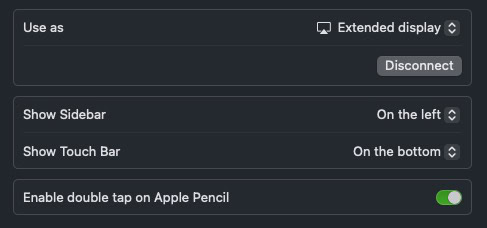
There are also a few other options which you can choose from.
Get started using Universal Control
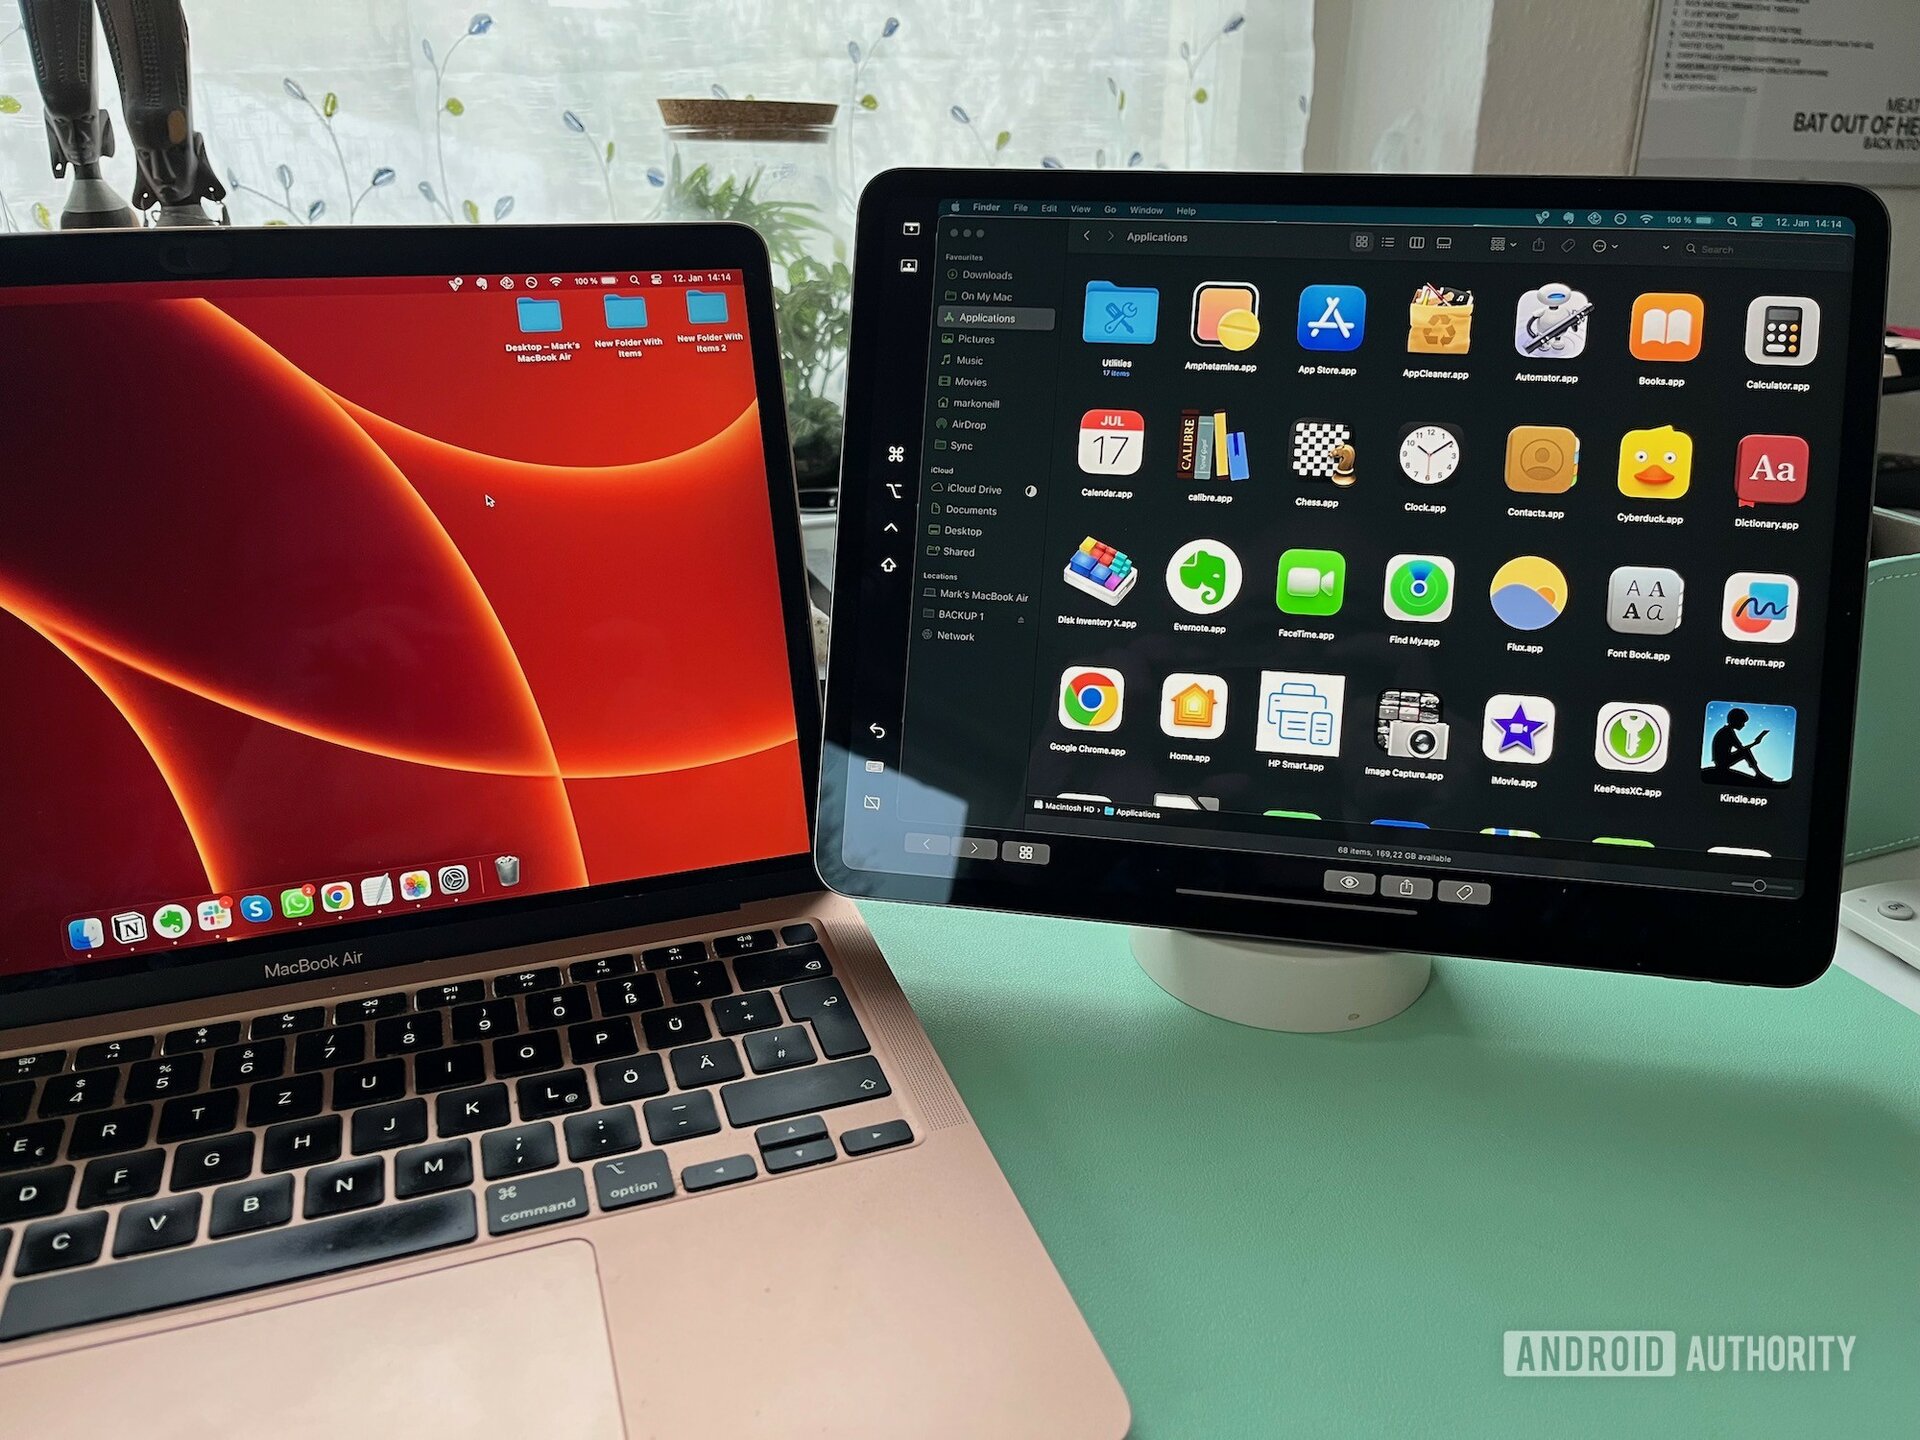
Using Universal Control, from this point, is very straightforward.
- Put your devices near each other and make sure that they’re awake and unlocked.
- Use your mouse or trackpad to move the pointer past the edge of your screen in the direction of the iPad or other Mac.
- As you move the pointer past the edge of the screen, it will appear on the other device’s screen. You can now click and open programs, open documents (and start typing with the main device’s keyboard), paste from the main device’s clipboard, drag and drop files between screens, and more.
- When you want to stop using Universal Control, go back to the Displays section on the main device, drop down the menu for the connected device, and click Disconnect.
Universal Control with Sidecar
Another option to consider is Sidecar. Sidecar lets you use a single iPad as a secondary display for your Mac. You can either mirror the content from your Mac’s display or turn it into a secondary display for extra Mac screen real estate. You can use the iPad touchscreen with Sidecar, whereas with Universal Control, the touch controls are disabled.
This is a bit of an older option, so if you have an older Mac, this might be better for you. Here are the compatibility specs.
macOS Catalina or later
- MacBook Pro introduced in 2016 or later.
- MacBook introduced in 2016 or later.
- MacBook Air introduced in 2018 or later.
- iMac introduced in 2017 or later.
- iMac (Retina 5K, 27-inch, Late 2015).
- iMac Pro Mac mini introduced in 2018 or later.
- Mac Pro introduced in 2019.
- Mac Studio.
iPadOS 13 or later
- iPad Pro (all models).
- iPad (6th generation) or later.
- iPad mini (5th generation) or later.
- iPad Air (3rd generation) or later.
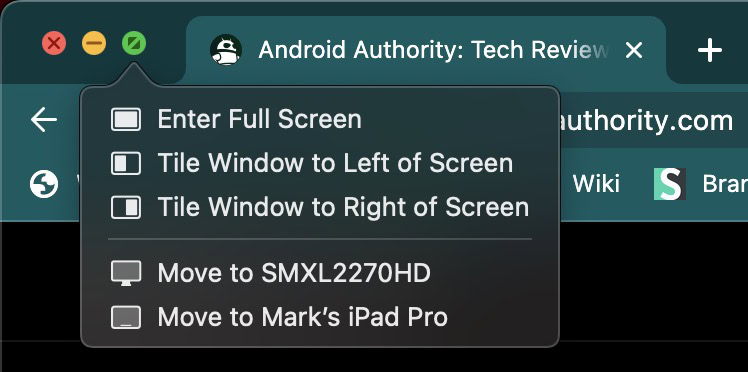
After unlocking your iPad, you can move windows and apps over by mousing over the green circle at the corner. When the menu comes up, select your iPad from the list. The window will now appear on your iPad screen.
FAQs
Universal Control is compatible with Macs that have Apple silicon chips and Macs with Intel chips, as long as macOS Monterey 12.3 is supported.
On all the devices you want to use Universal Control with, make sure Bluetooth, Wi-Fi, and Handoff are enabled. Also, on the Mac, go to System Settings > General > AirDrop & Handoff, and toggle on Allow Handoff between this Mac and your iCloud devices.
No, the only iOS device it works with is the iPad. Universal Control needs the iPadOS system to work.

